This week is all about three 3D design and scan objects in 3D and use 3D printers available in the lab to print suitable scheme. 3D scanning, modeling and printing is a very involved process and alot of technical comprehension of printing process and material is required to design a plausible solution.
As highlighted in Prof. Niel's Lecture there exist about 10 different ways to scan objects and similarly 10 of different ways to print objects in 3D. But as the professor said that each process has its own pros and cons.
The objects of this week as follows:
- Test the capabilities of different printers ( hole sizes, fine details, overhangs, bridges )
- Scanning a 3D object and printing it (making a 3d printer for extra credit)
- Design of 3D objects (which can not be made subtractively) and printing it.
Test of 3D Printer Capabilities
The test objects available on the doc manual of the FAB LAB Barcelona website Assignments.
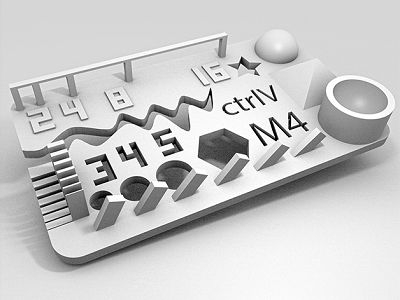
We printed some samples of Reprap printer Priusa i3 as well as Ultimaker 2. Here is the detailed documentation of our findings.
Some Observations:
- Print quality is inversely proportional to nozzle diameter, with small nozzle diameter e.g. 0.3 mm one can print with accurate details however this comes at the cost of print time. With large nozzles its possible to print faster however details may not reflect.
- The extruder temperature is also a sensitive parameter for PLA the temperature should be between 195 - 210. Higher extrusion temperature provides good material adhision (thus strong print) however hot plastic does not give a good layered output. On the contrary printing with lower extruder temperature give better layered surface however the output is brittle.
- Printing at higher speeds also degrades the output. The time quality trade-off.
- Increasing layer hieght more than 0.2 mm would also yield in poor quality results. Again a time quality trade-off.
In short doing a good 3D print requires good comprehension of the printer setup, the print material and tinkering with the all of the parameters.
Scanning 3D object and printing
In our lab. we have atleast four (4) 3D scanning capabilities are possible
- X Box 360 Kinetic.
- Pneumatic Sensor Based Roland MDX-20.
- Milk Scan.
- Scan through gray scale image.
I have concerned myself with the first two schemes due to time limitations.
X Box 360 Kinetic
This was an interesting task for me. As I am completely new to this field I was really excited to find that Xbox 360 kinect module can be used to obtain a 3D scan of any object. So the first thing I wanted to do was a scan of myself and do a sculpture. It turned out that to utlized kinect module we need specialized software like Skanect (which inturn require Kinect Windows SDK, OpenNI) to run on a windows PC.
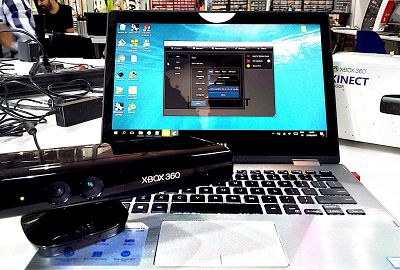

Setup was straight forward after a couple of plug-unplug and reboots I was able to get the Skanect up and running. The software is pretty illustratious and easy to use, just by moving the object (myself) arround the axis slowly it is possible to obtain the plausible 3D scan. However from our experience we realized that a mere 360 turn is not enough for a print ready stl file rather extra care is required to ensure that there are no holes in the scanned object.
Piezo Sensor Scan
Piezo Sensor scan is a different type of scanning process ideally suitable for scanning surfaces and textures. The scanning machine available is Roland MDX-20. A good tutorial on how to operate this machine is available on youtube.
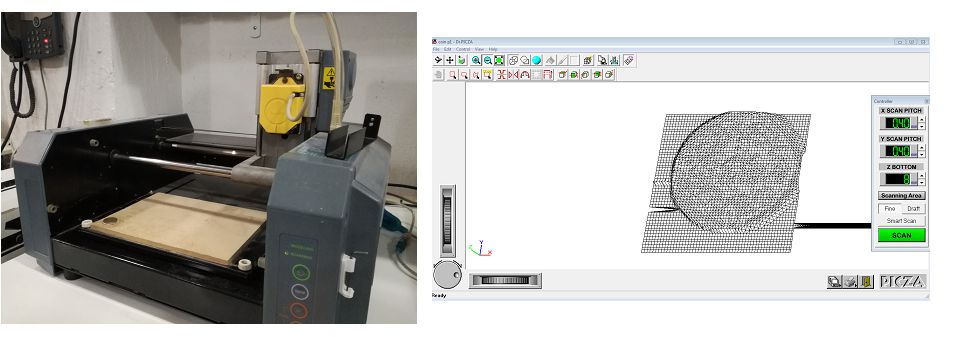
The upside of this machine is that it can scan upto a resolution of a hundredth (1/100) of a mm. However the downside is that to scan at such a resolution a simple object like a coin can take in excess of 8 hours (not very fruitful). For my coin I had set the resolution of 0.4 mm and the results were quite useless.
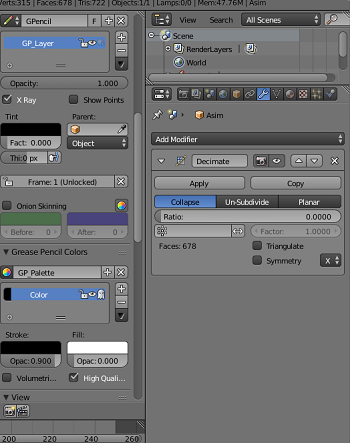
Post Processing (Mesh Analysis)
Thanks to a detailed and exhaustive tutorial (given by Viktor) on Blender and Cura, I was able to identify several short-commings in my 3D scan.
Blender is free and opensource software used for animation design and 3D modelling. Viktor taught us to use several of Blender tools to process the .stl tiles. I used modifier like remesh and decimator to fill the present holes and reduce facets (obviously at the expanse of reduced quality), however this also reduces the size of .stl files and consequently the print time.

Source: Solidworks Support Forum.
The figure illustrates the degradation in quality as a function of number of meshes. It is evident that reduction of facets does effect the print quality.
Thanks to informative lecture of viktor I was able to use decimate, remesh and smooth commands to reduce the number of faces down to just 5000 faces.

Once the design is confirmed as solid it can be exported in stl format for further processing and printing.
Putting object to 3D Printer
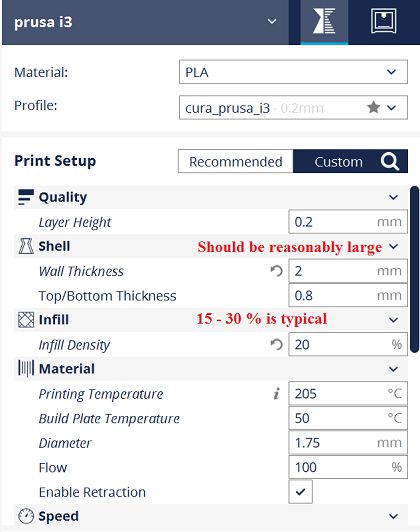
Cura is a free and open source software used to prepare G-code allowing enduser to configure unlimited paramters to custumize as per the requirement of the machine, material and design at hand.
From the conversation of Viktor I realized that Cura can control the speed of head as it travels through the shell and through the infill. The extent to which the material is heated can change the complexion of the material. Extruding hot PLA would yield shiny finish while cold (I mean less hot) extrusion would yield into a dull finish.
I also realized that through careful design of the objects the need for scaffolding support can be minimized and this support should be used as a last option because it incurs excessive material consumption and leave an untidy look in the end.
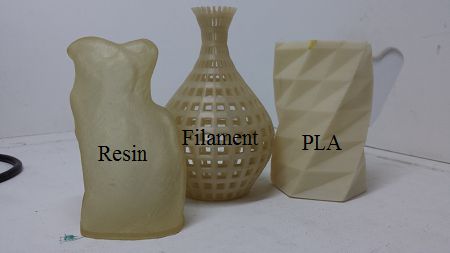
I was very curious about the types of material and their storage requirements. I came to know that materials like ABS, PLA and HIPS are uncomplicated and easy to use and store however Nylon requires special boxs for storage and require techniques for utilization. The 3 different types of material I could find in our lab were PLA, Filament and Resin. I took a picture for my record
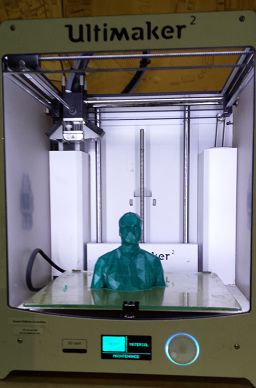
One of the most interesting feature of the Cura setup is that based on the selected settings it calculates the exact amount of time and material to be consumed, based on this information Michel loaded up the PLA and we left for the weekend letting printer do its thing. On Monday we found this sculpture :)
3D Non-Subtractive Design
This probably is the most challenging part of the assignment for me as I know nothing about the 3D design and I have no clue which software should I stick to as each 3D design software looks like a medusa to me. Finally I decided to start working with Fusion 360 primarily because of its user friendly interface and abundant youtube support. Fusion 360 (although it supports parametric design) is not the same breed at solidworks.
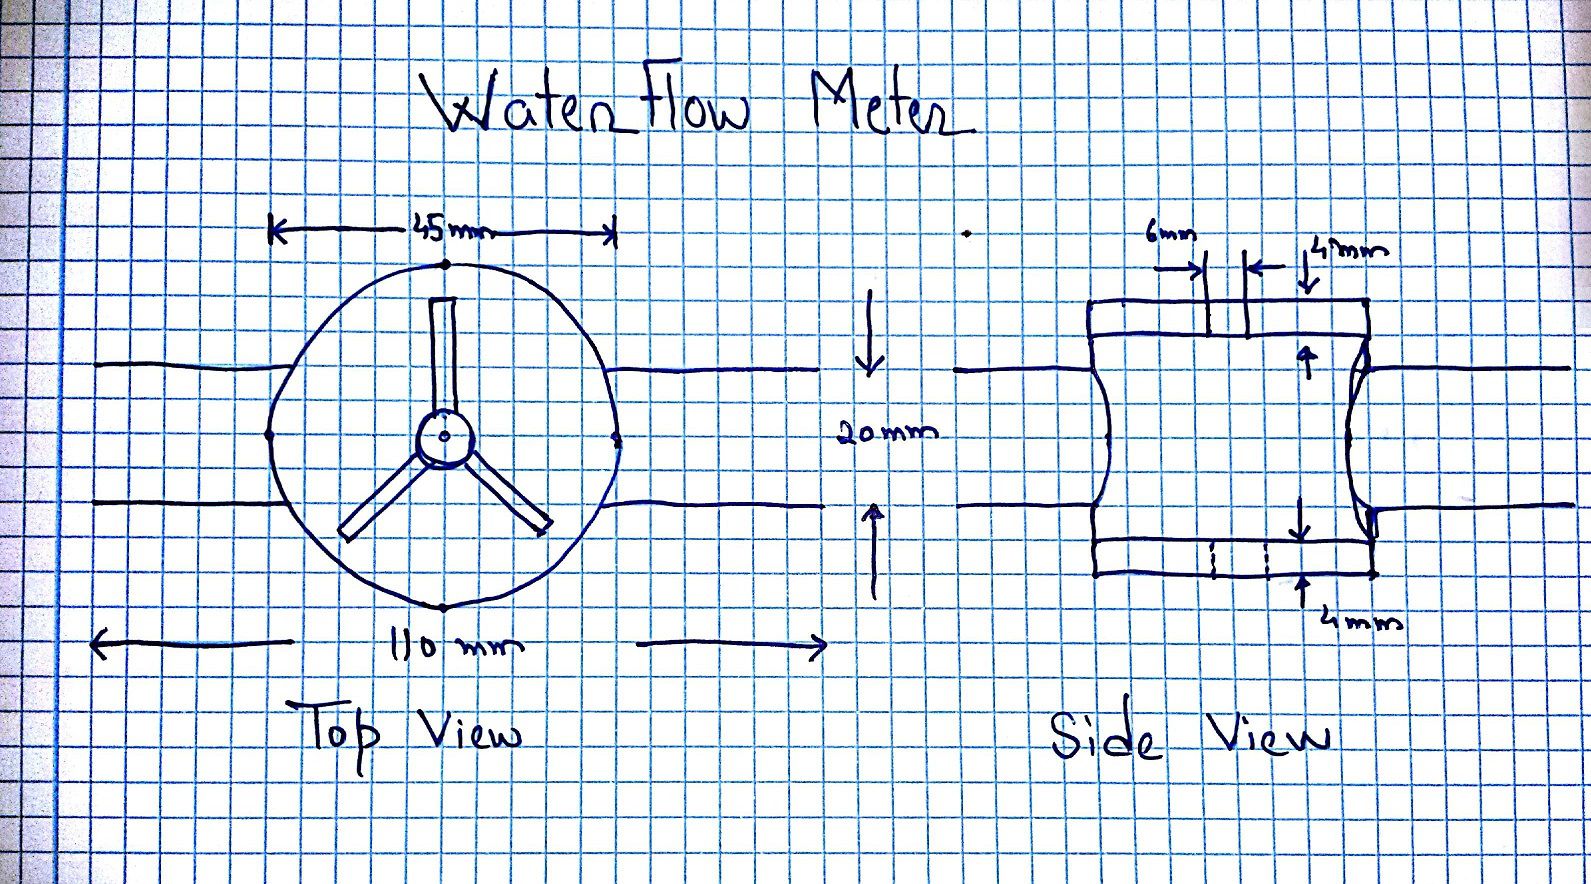
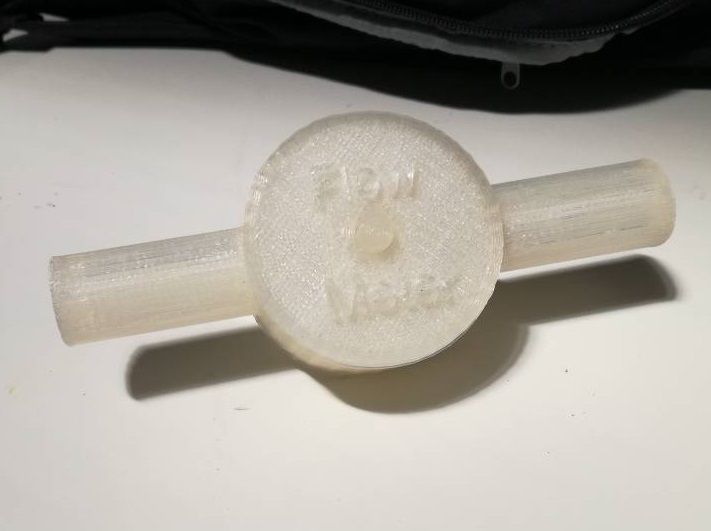
For my 3D design project I wanted make a water flow sensor the idea is illustrated in the figure below. Since I have never made a mechanical design to meet any technical specifications I had to make and then remake the same design for about a dozen times for one reason or the other.
After alot experimentation and thanks to the video tutorials by NYC CNC, I was able to get the hang of fusion 360. After slow but steady progress I was able to design the model as per specifications.
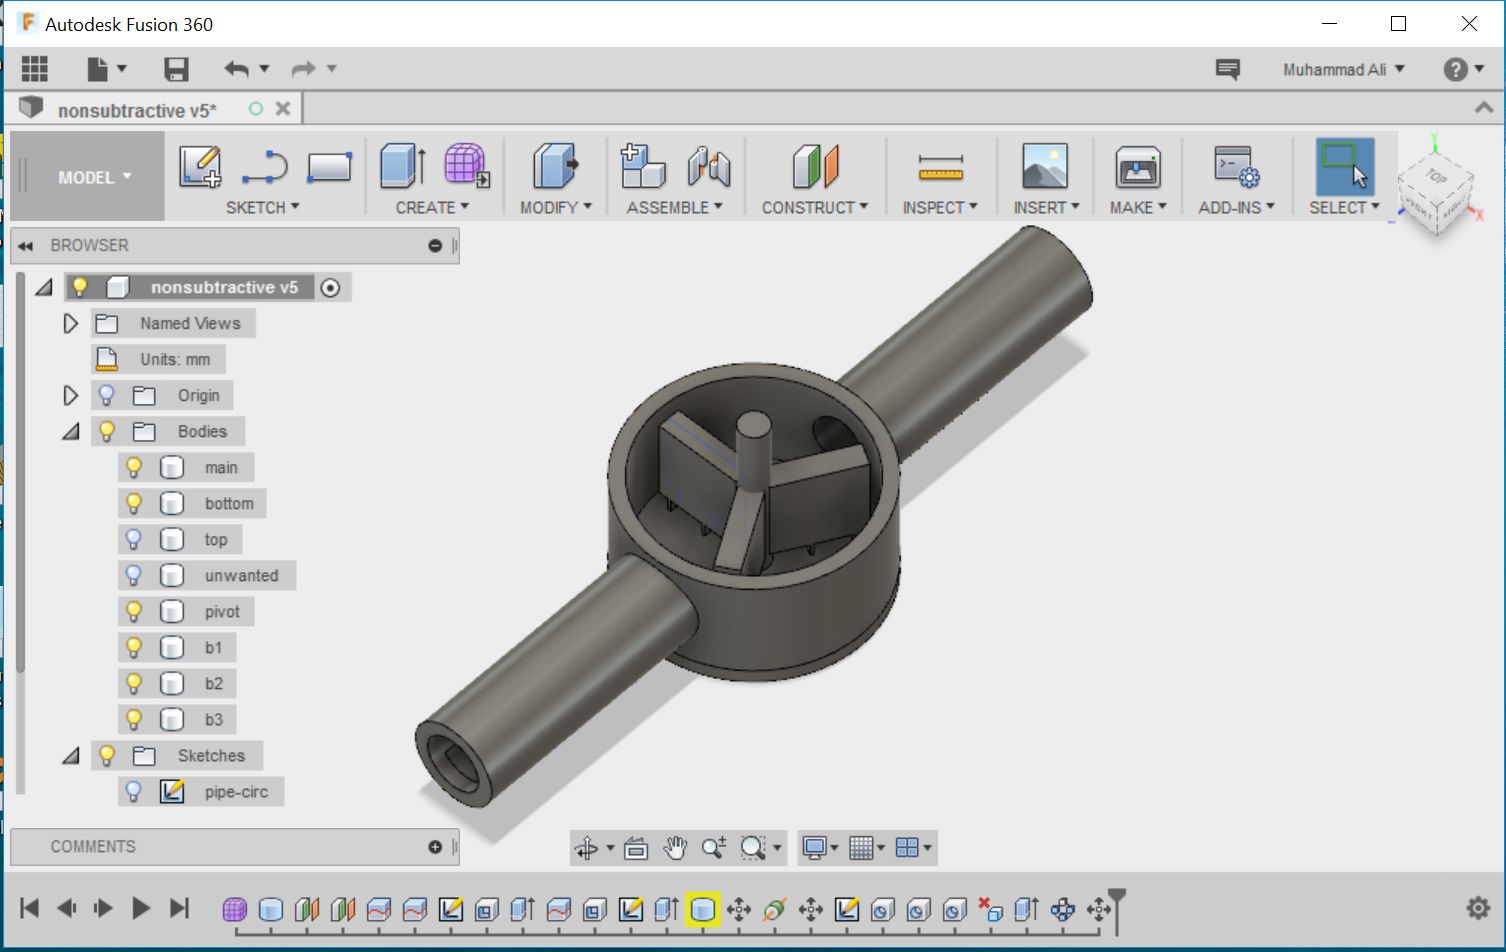
Feature like create form , modify and construct allow design and manipulation of objects on the go. However clear understanding of entities like sketch , bodies , components is essential to make things work. Another aspect of paramount importance is the comprehension and ability to work with dimensions.
Engraving/Embossing text on the object is also a very tedious process (atleast for me). You have to create a sketch and put text using text tool and split the projection surface using the text and extrude the split surface as we would normally extrude anything.

The finalized design file
Exporting to STL format
To export the mesh for printing the make menu offers possibility to export the design directly to cura-software.
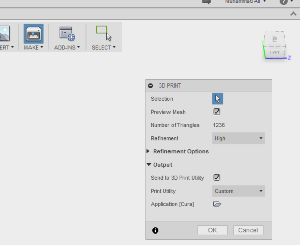
Strangely though the software seems to limit the number of bodies which can be exported simultaneously to cura. The way to get around this problem (as suggested by friends at Fab Lab BCN) is to group the necessary bodies into a component.
Prepaing G-code with Cura
Once the .stl file is ready it is time to prepare the instructions which machine can understand and execute. There exist numerous softwares to this end but I have used Cura for that matter. Cura is freely available software developed by Ultimakers and its also access to numerous print options which enchance the overall print quality .
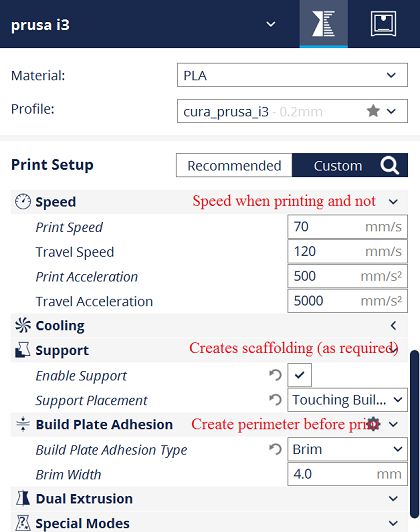
Running through the print strategy is a very useful way to find out possible points of failure and ratify them before even printing.
Due to the structure of the model it required some scaffolding (around the pipes) and I tuned the parameters accordingly.
It turns out the 3D printing process is very fragile and sensitive, there can be a number of reasons for failure such as filament getting stuck on the roll, or in the extruder the material not sticking on the bed due to lack of heat etc etc.
I uploaded the code to a Reprap printer in our lab for an over night print. And the next morning I found these results.
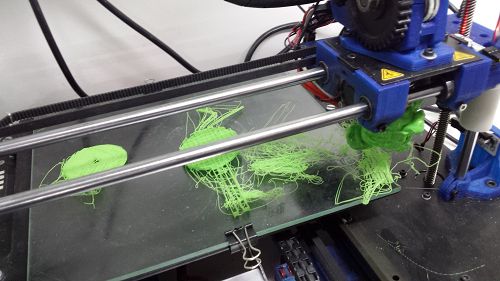
The second attempt on this assignment brought fruitful results.
Learning Outcomes
- The existing numerous 3D design techniques and no clear winner. All technique are far from perfect; every technique has its own strengths and shortcommings.
- Printing a 3D require careful attention to details (such as Bed/Head temperature, infill ratio, shell thickness support). Through careful configuration it is possible to print steep curves and better print quality.
- There exist a number of 3D parametric design softwares (namely Solidworks ,Fusion 360, Rhino with Grasshopper, Antimony),each software has its own way of doing things. Honestly none of the software is walk in the park.
Downloads
Autodesk Fusion 360 files here.find all source files here.

This work is licensed under a Creative Commons Attribution-ShareAlike 4.0 International License
Copyright © 2017 Muhammad Asim Ali
This work is licensed under a Creative Commons Attribution-ShareAlike 4.0 International License
Copyright © 2017 Muhammad Asim Ali