Muhammad Asim Samejo
Interface and Application Design
This week is about designing applications and interfaces. The assignment task is to:
- write an application that interfaces with an input and/or output device that you made, comparing as many tool options as possible
Thus far in this course we have been writing snippets of code which are typically embedded in control doing different operations and/or communicating with PC or other micro-controllers. In this assignment our objective was to design application and/or interface which allows us to interact with the micro-controller boards thus sending in control instructions and receive status. For this assignment I had plenty of options such as Python, Javascript, Processing, MIT APP Inventor just to name a few. I took this as an opportunity to dip my toes into mobile app development. I don't have any prior experience in app development and last week we had a quick take tutorial from our instructor Xavi about MIT App Inventor and I thought may be its a good opportunity to learn this frame work which is not the conventional programming enviroment. For this assignment I planned to interface my final project board to a mobile device over bluetooth interface and control different features through an mobile app. The graphical illustration of the implementation is illustrated below:
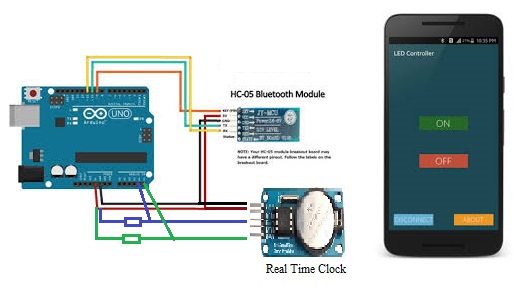
The idea: is to design a small mobile app which can communicate with a micro-controller over blue-tooth interface and retrieve time information form the RTC (attached to micro-controller) and update the time using current time information from mobile phone. The application can also control IO pins of the micro-controller.
Working with MIT APP Inventor 2
This was quite a unusual experience for me. Since this is unconventional platform to work with.
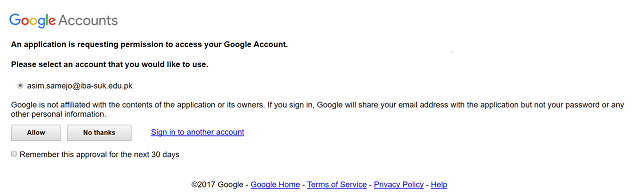
The platform is available online and one needs to use a google account to start working.
Once there you are faced with a development environment which allows you to develope the GUI interface of the platform.

The variety of tools such as connectivity, sensors audio visual feature can be incorporated as simply as a drag and drop.
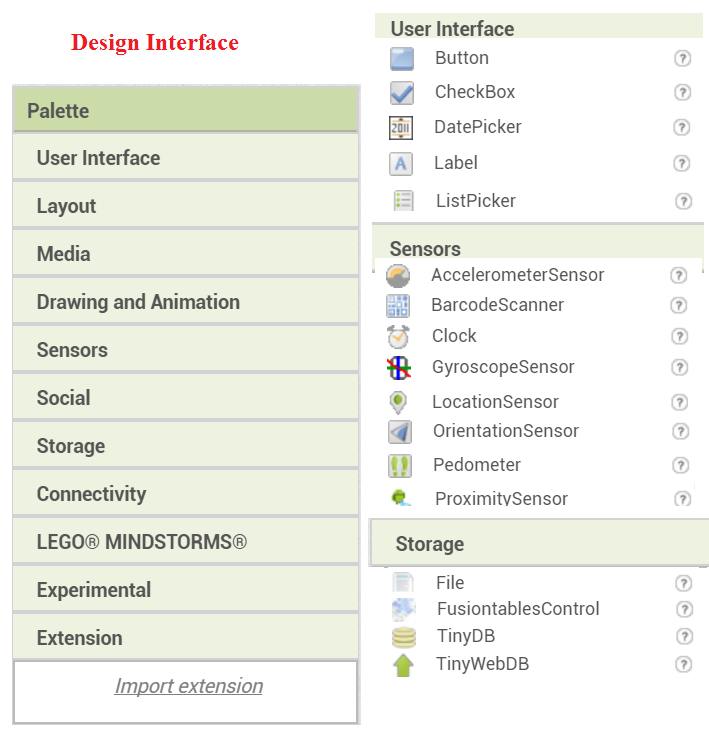
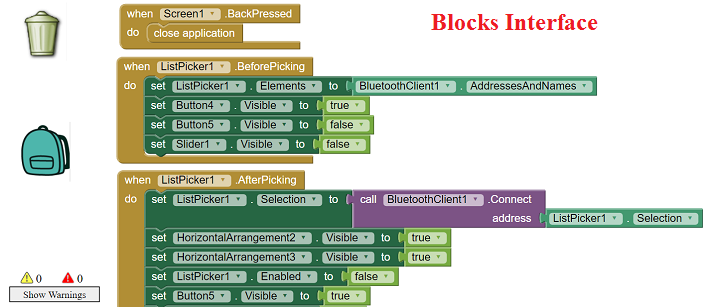
Once all the require button, labels, dials, systems features like clolks, connectivity modules are setup you are ready to switch to the blocks mode and start designing workflow of your app.
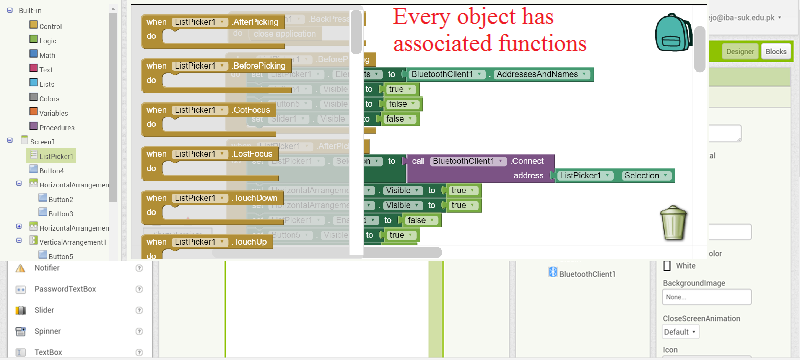
There are numerous functionalities available for each object that you have placed in your GUI interface. By creating event driven work flow we can make complex designs.
If there are error in the program errors and warnings showup at the bottom
 . Although the explanation of these errors could have been better.
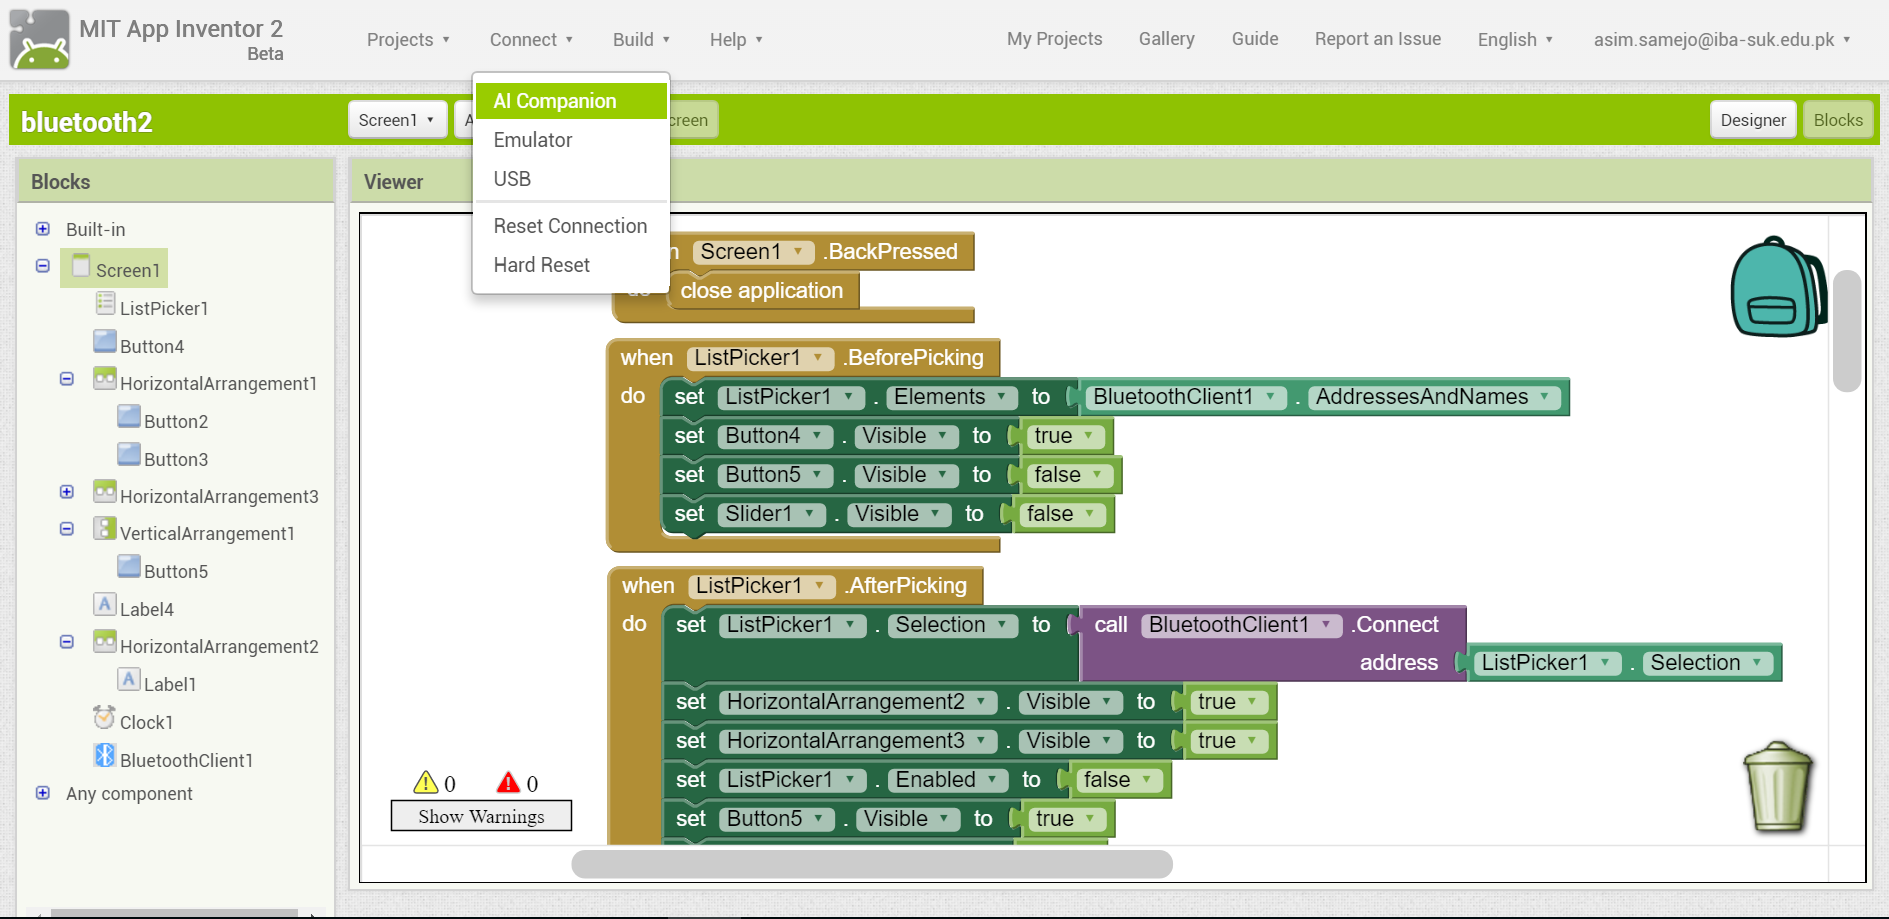
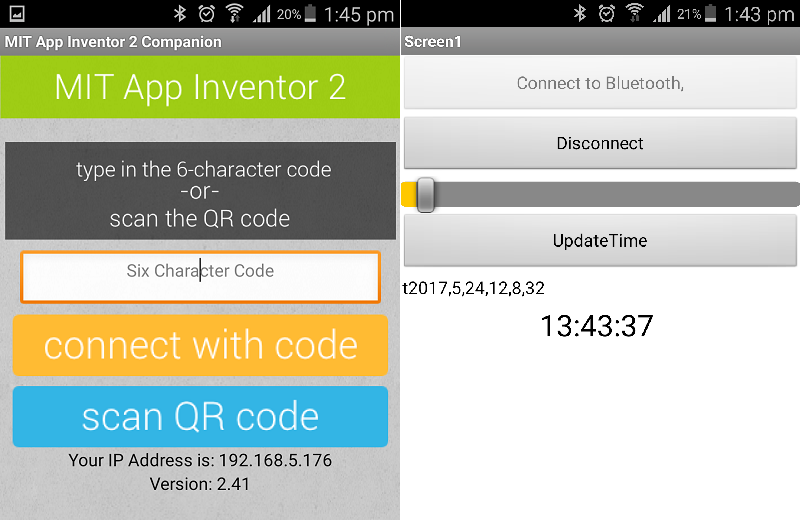
 Once the code is ready it can be uploaded to the mobile phone for a real-time test. Click on Connect menu and then AI Companion.
You will recieve the QR code of your application which may be used to load your app to the mobile phone.
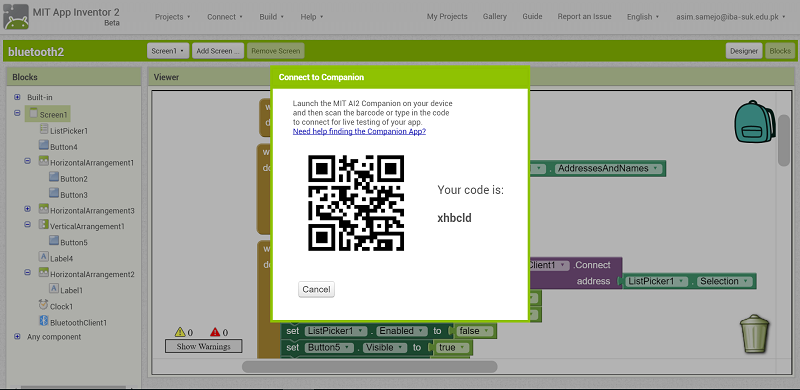
To retrieve the code on mobile phone we have to run the app inventor application and scann the QR-code from the desktop.
I must say that although interface of App inventor is ridiculasly simple, yet there are several instances where arrangment of blocks was not obvious to me. I found this detailed reference manual of MIT APP Inventor 2 links here and here particularly very useful.
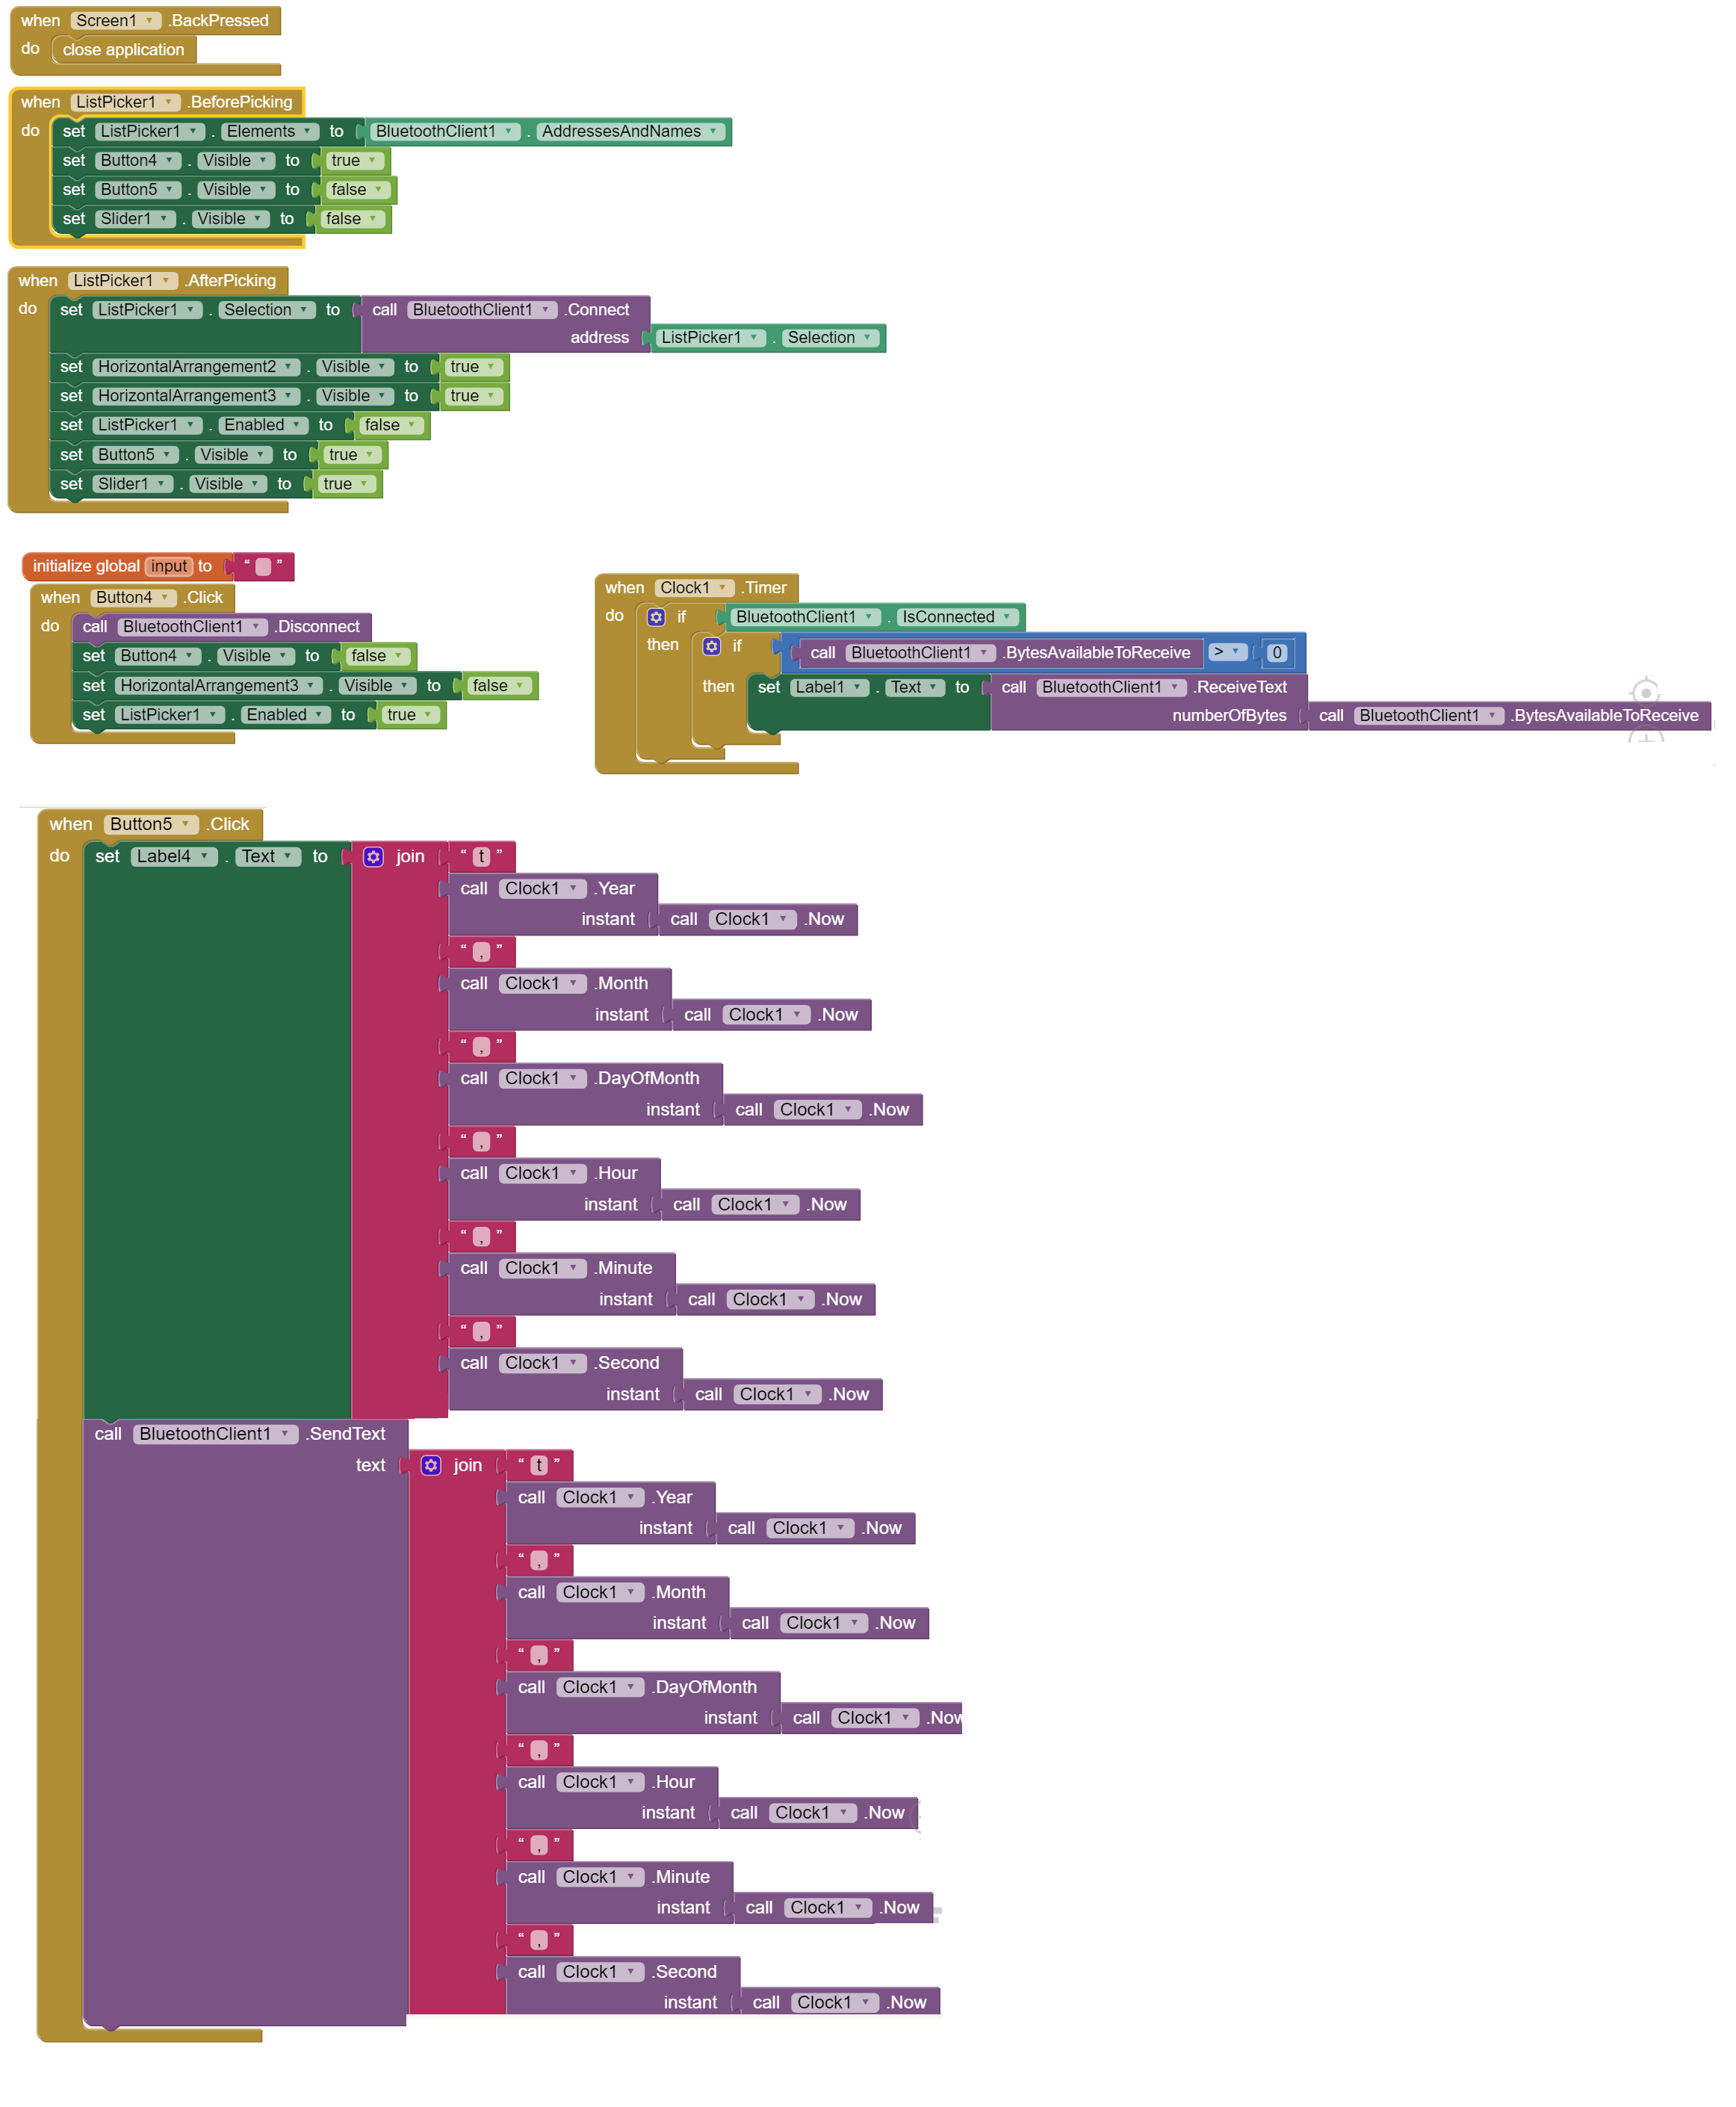
This complete code diagram created with App inventor
Note:Its is really important that the android device and PC should be located on the same WIFI network.
The Arduino Setup
In arduino I have created a simple set up which is interfaced to a bluetooth module over serial port and connected to a RTC over I2C port. For my final project I have LEDs connected to PWM pins which I would like to control in real-time to create "special effects" without having to physically program them regularly. I would also like to retrieve the clock information from Arduino board and pass it the updated time from my mobile if I need to. For this application I created a simple Arduino code which recieves data over serial port and parse it to retrieve instructions. The arduino code is pasted below:
/*Simple Code which transmits real time clock to mobile phone and recieve instructions from

serial port to update time from mobile app and change the intensity of the LEDs in run-time.

*/

#include <Wire.h>

#include "RTClib.h"


RTC_DS1307 rtc;


//char data = 0;            //Variable for storing received data

void setup()

{

    Serial.begin(9600);   //Sets the baud for serial data transmission

    pinMode(13, OUTPUT);  //Sets digital pin 13 as output pin

    pinMode(3, OUTPUT);  //Sets analog (pwn) pin 3 as output pin

  if (! rtc.begin()) {

    Serial.println("Couldn't find RTC");

   // while (1);

  }


}

String inputString = "";    // string to hold input

void loop()

{

   DateTime now = rtc.now();


while (Serial.available()) {

    // get the new byte:

    char inChar = (char)Serial.read();

    // add it to the inputString:

    inputString += inChar;

  }


 if (inputString.charAt(0)=='w'){

inputString.remove(0,1);

analogWrite(3,inputString.toInt());

inputString="";

  }


 if (inputString.charAt(0)=='p'){

//inputString.remove(0,1);

analogWrite(3,0);

inputString="";

}


if(inputString.charAt(0)=='t'){

inputString.remove(0,1);

int commaIndex = inputString.indexOf(',');//  Search for the next comma just after the first

int secondCommaIndex = inputString.indexOf(',', commaIndex + 1);

int thirdCommaIndex = inputString.indexOf(',',secondCommaIndex + 1);//  Search for the next comma just after the first

int fourthCommaIndex = inputString.indexOf(',', thirdCommaIndex + 1);

int fifthCommaIndex = inputString.indexOf(',', fourthCommaIndex+1);//  Search for the next comma just after the first

/* parse the time information required to update function*/

String yer = inputString.substring(0, commaIndex);

String mon = inputString.substring(commaIndex + 1, secondCommaIndex);

String dys = inputString.substring(secondCommaIndex + 1, thirdCommaIndex); // To the end of the string

String hrs = inputString.substring(thirdCommaIndex + 1,fourthCommaIndex); // To the end of the string

String mis = inputString.substring(fourthCommaIndex + 1,fifthCommaIndex); // To the end of the string

String sec = inputString.substring(fifthCommaIndex + 1); // To the end of the string

Serial.println();Serial.println();

Serial.println(yer); Serial.println(mon);  Serial.println(dys); Serial.println(hrs);  Serial.println(mis); Serial.println(sec);

rtc.adjust(DateTime(yer.toInt(), mon.toInt(),dys.toInt(), hrs.toInt(), mis.toInt(), sec.toInt()));

inputString="";

}


Serial.print(now.hour());Serial.print(":");

Serial.print(now.minute());Serial.print(":");

Serial.println(now.second());

delay(1000);

}
Demo
Learning Outcomes
- This week has been a very informative and fruitful. I came accross several software such as Unity, Blender, Python, Processing and MIT App inventor. Every software is powerful and feature rich in its own special ways. These software provide features such as access to real-time data from micro-contoller system.
- App Inventor tool although offers basic (yet capable) environment to design and simulate mobile applications in an integrated environment.
- For a robust application it is absolutely important to be able to review modify parameters in runtime without having physical access. Bluetooth and/or WiFi protocol can provide interfaces to this end.
Downloads
find all source files here.

This work is licensed under a Creative Commons Attribution-ShareAlike 4.0 International License
Copyright © 2017 Muhammad Asim Ali
This work is licensed under a Creative Commons Attribution-ShareAlike 4.0 International License
Copyright © 2017 Muhammad Asim Ali