MOLDING AND CASTING
This week is all about Molding and Casting. Actually this thing I have never done before, I went through this process first time. I m really thankful to my instructors for thr proper guidlines regarding this assignment.
Assignment of this week
- Design a 3D mold, machine it and cast parts from it
Learning Outcomes
- Design appropriate objects within the limitations of 3 axis machining.
- Demonstrate workflows used in mold design, construction and casting.
I started with the study of mold types at first stage and I came to know that there two basic classes of mold i.e one is one sided mold and other is double sided mold, both are shown in the images below.
Single sided Mold
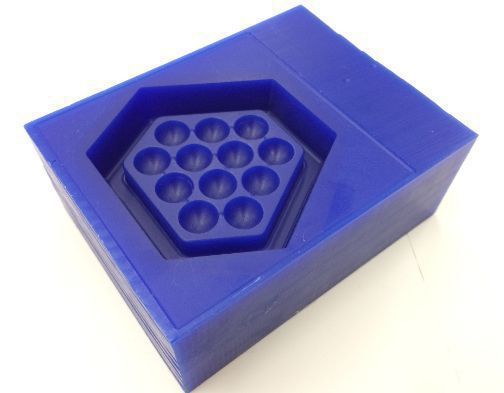
Single sided mold is one which can rotate upto 180 degrees of the object to show complete object
Double sided Mold
Double sided mold is one which rotates 360 degrees of the object to show complete object
I m distrubing the explanation of complete assignments into following steps
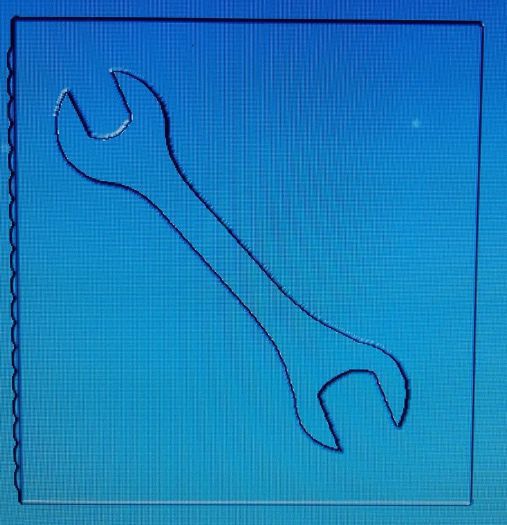
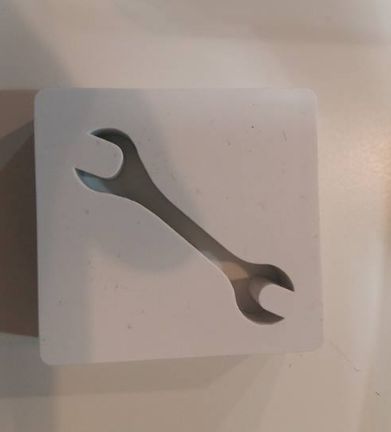
Step#1: To develop the idea for the molding
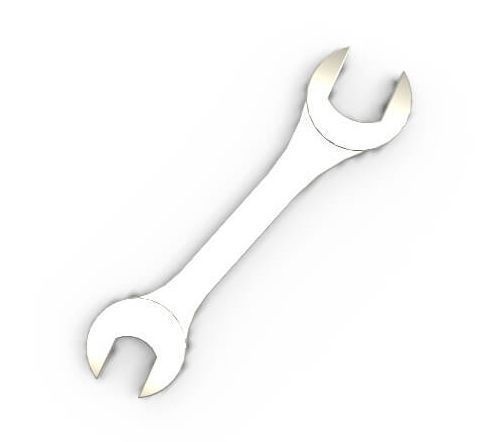
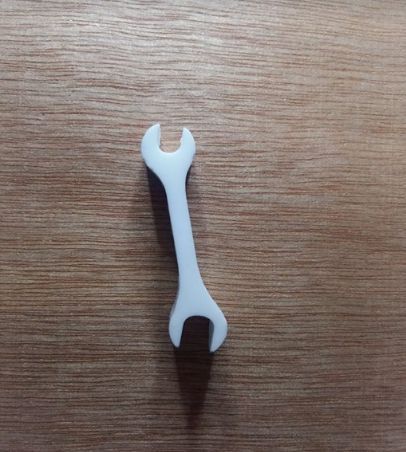
I decided to mold a simple wrench as shown in the image below
Designing 3D model of the object
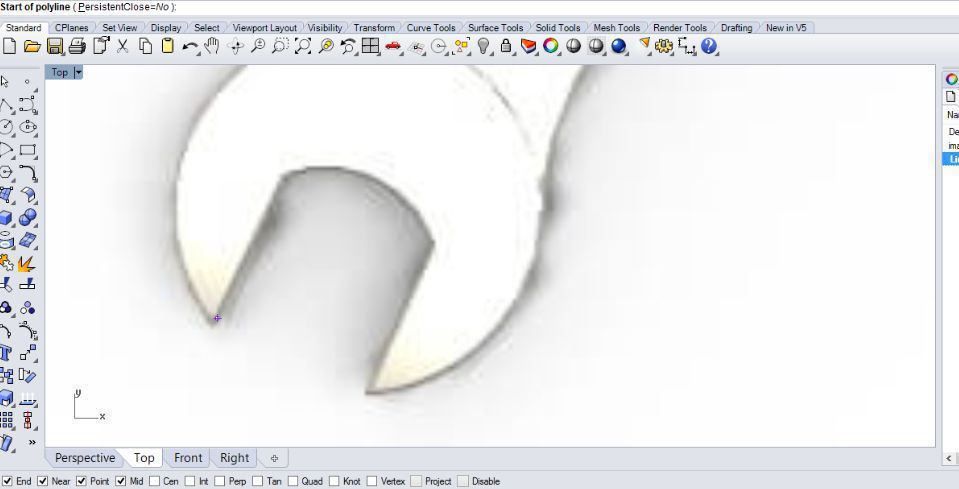
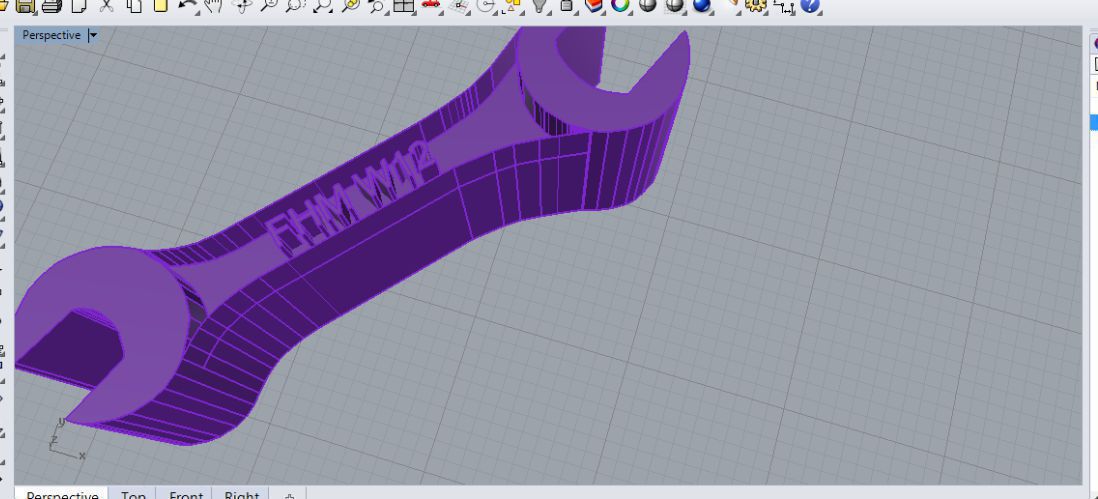
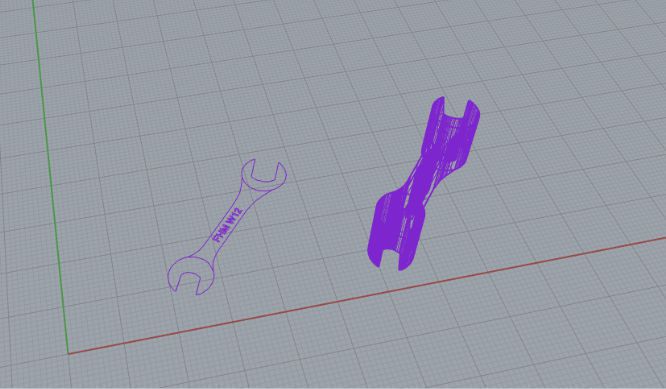
I used rhino software to design this object for that I import the 2D image into rhino and following the line command I drew the boundaries of the wrench and then explode that object upto 10 mm distance in z-axis. some snapshots are shown below
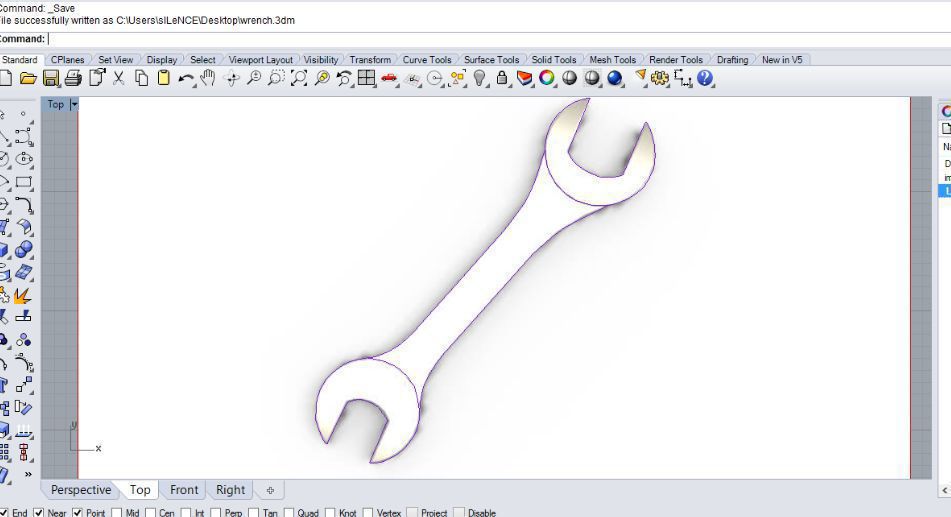
Here are the 3D model design snaps

At this stage I tried to add some text on the body of the object
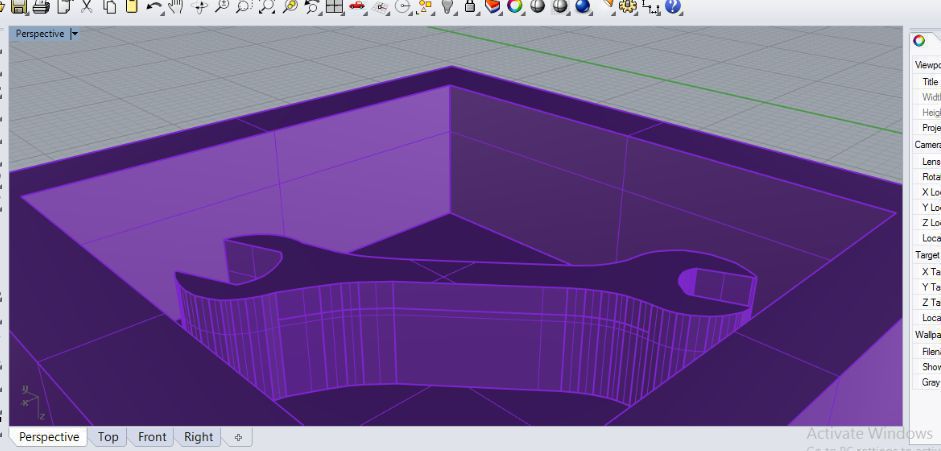
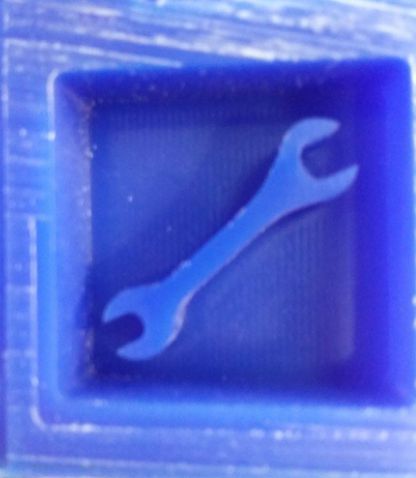
Now I tried to develop the mold of the object so I develop a square box of 5cm by 5cm by 20mm and performed the subtraction over the object, the resultant mold I got as follows.
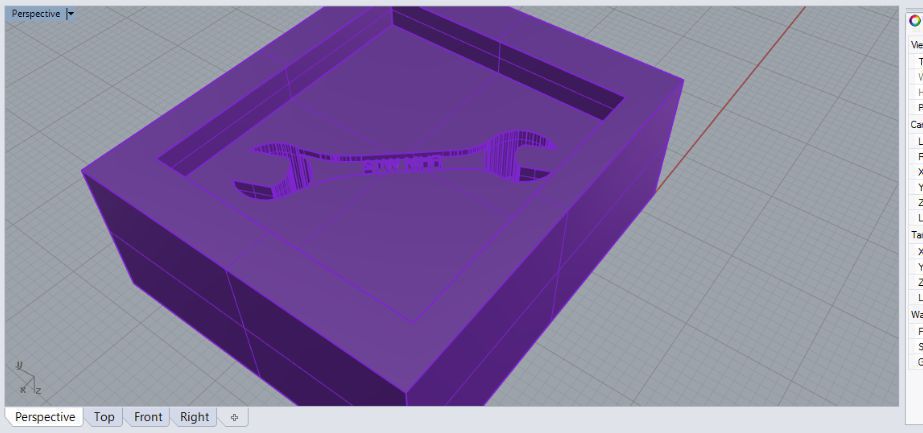
After looking at my design I realized that I have not created the mold but I have made some pockets inside and it looks like casting the object so after concerning and discussing with my instructors I made few changes in my design and finally got the following mold design for my object and finally it was now ready for the milling
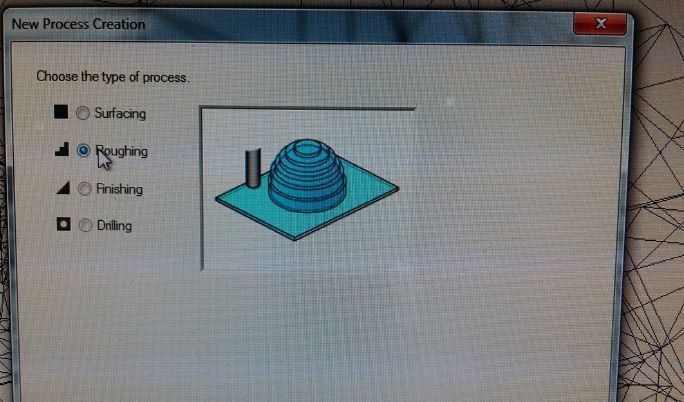
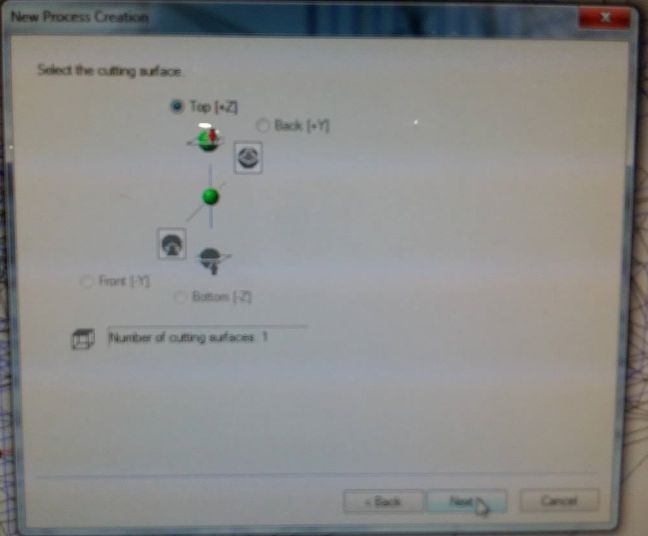
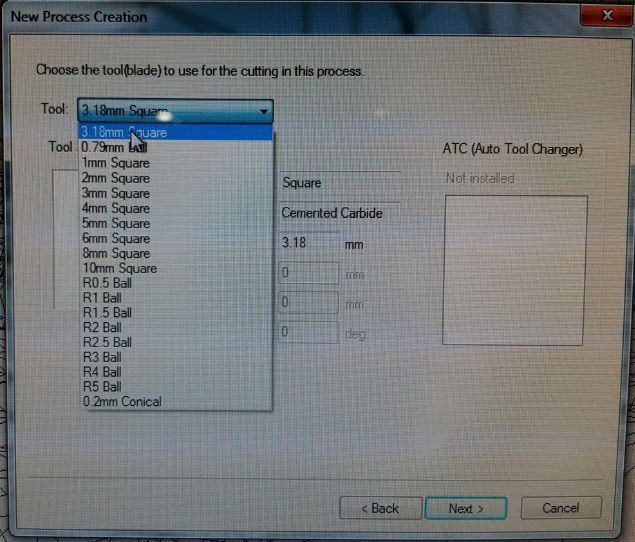
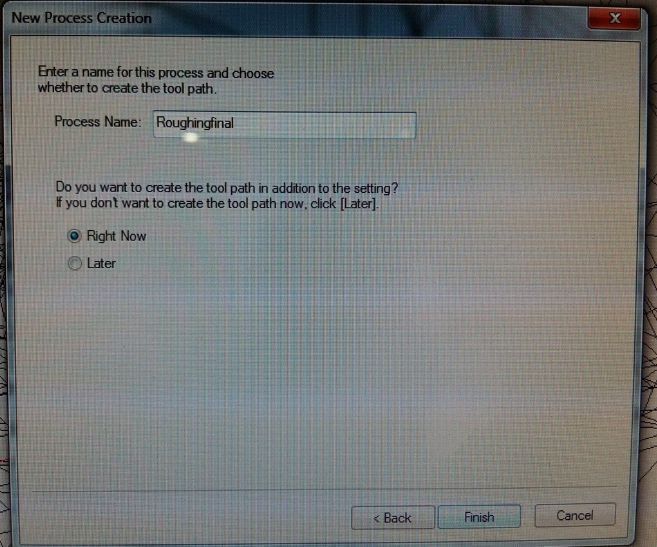
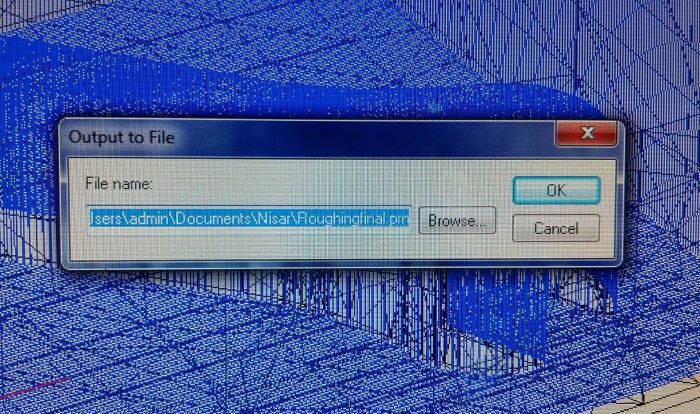
Step#2: Generating .prn files using Modela player
- Generating roughing file
1. opening the .stl file in Modela
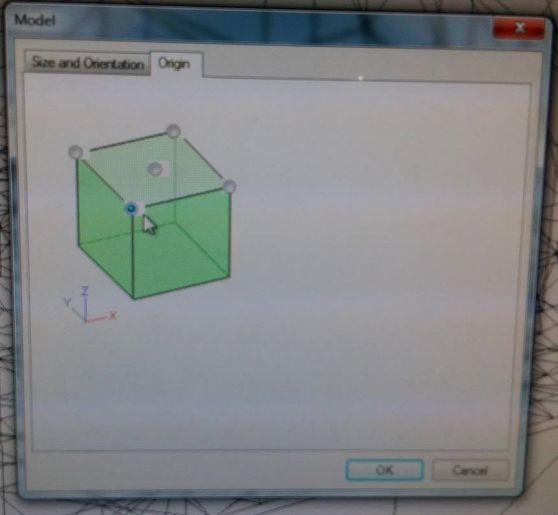
2. Selecting the origin
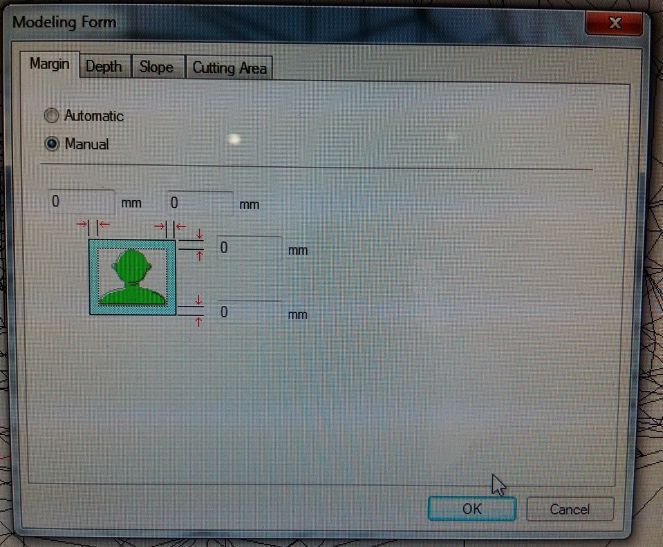
3. Putting on manual
4. Selecting Roughing
5. Selecting +Z at top
6. Selecting tool 3.18 mm square
7. Adjusting the boundries
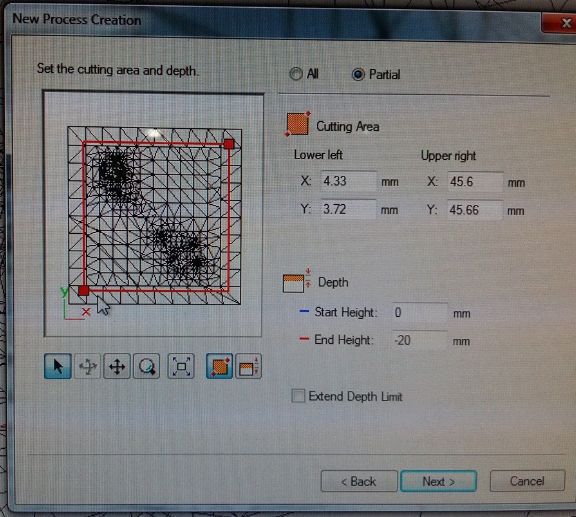
8. Put scan line just on X
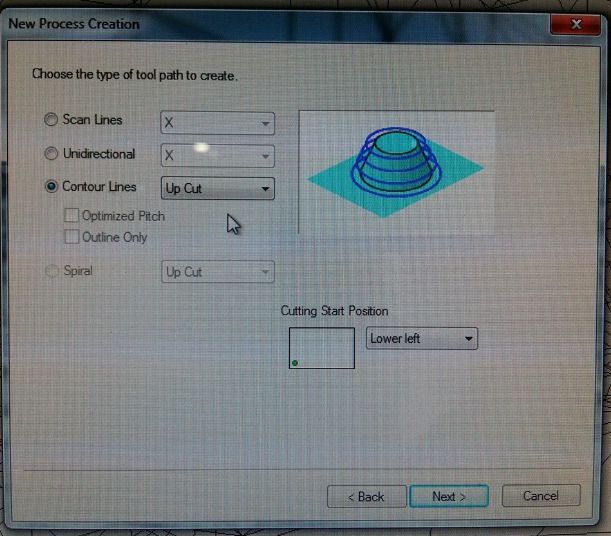
9. Speed limit upto 24mm/sec
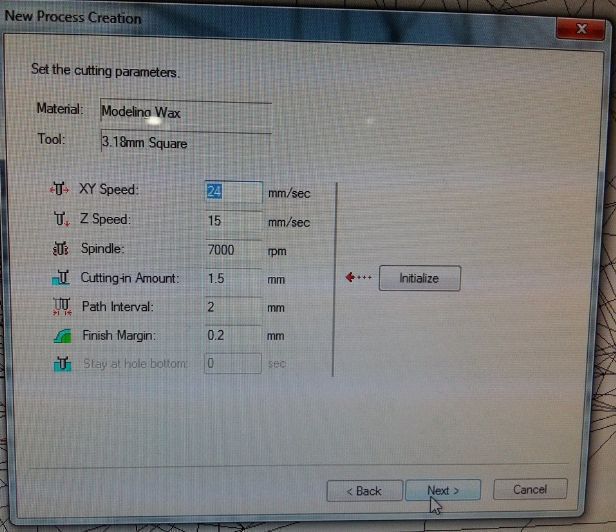
10. Naming the file
Repeat all the steps for generating Finishing file by making small changes in steps 6, 8 and 9. Select the tool measurement 0.79 and put X+Y in scan line in step 8 and reduce the speed limit upto 14mm/sec in step 9
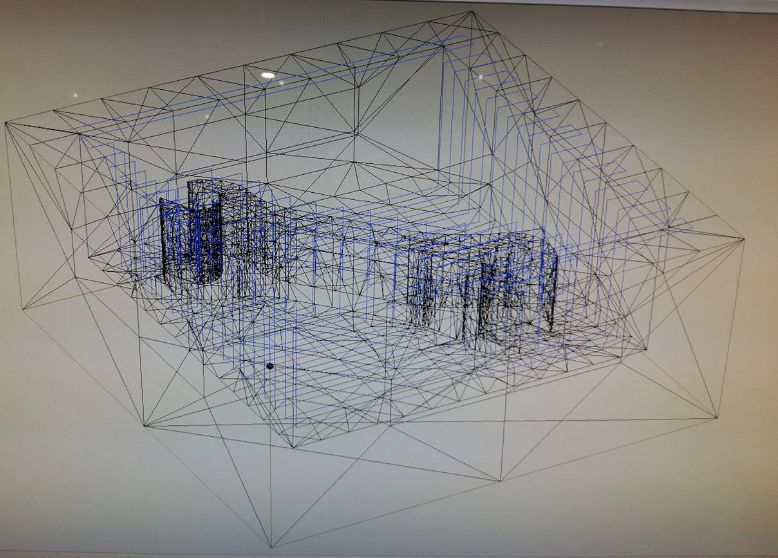
Roughing
Finishing

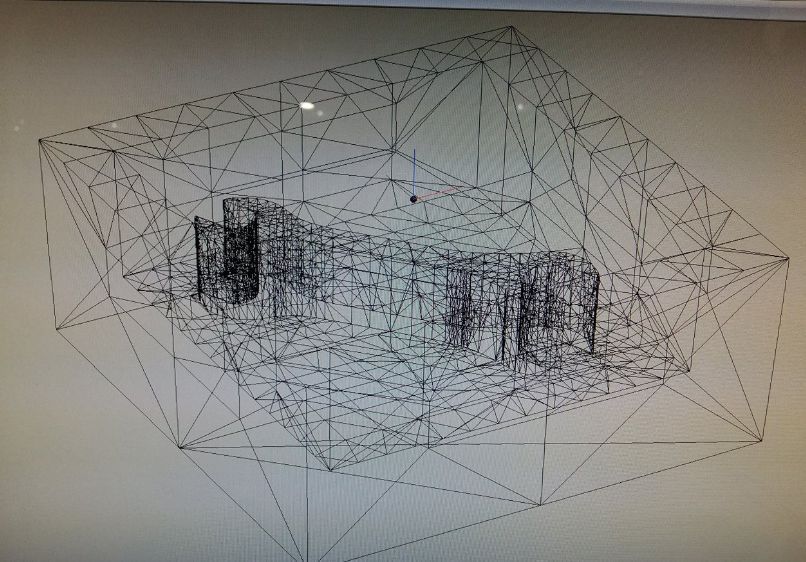
Finally simulating the files and exporting them as .prn files
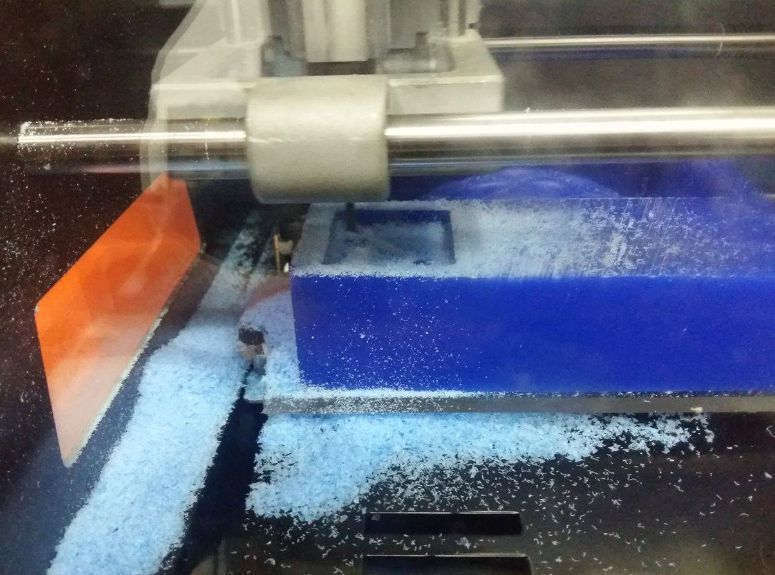
Step#3 Milling
For milling I was available the brick of wax and roland milling machine and the tools for roughing and finishing.
Step#4 Molding
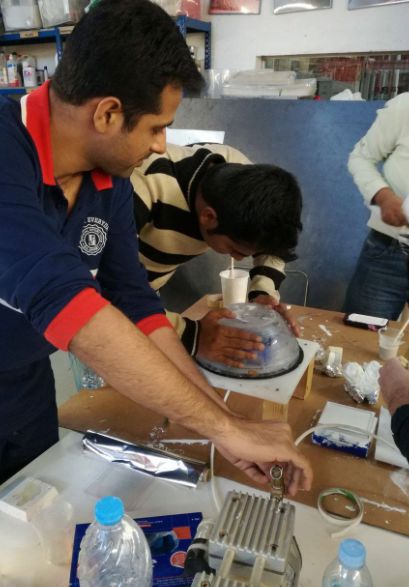
Now its time for molding the milled model for that a platform was ready in laser cutting room as per the instructions of our instructors this process has be accomplished jointly therefore me and my collegue nisar together went through process we first prepared the silicon material composite of silicon and catalyst with the proportion of 3 grams of catalyst with 25 grams of silicon. as my mold was not to big it was small in dimensions so I needed that much amount of material to fill in the mold.
After preparing the material I filled that in the model as shown in the image below.
After filling the material I obsereved some bubbles on the surface of the material so I was instructed to get rid of them in this case I used a sucker to suck up and down the material through air pressure as shown below in the images. this was little tough to do this alone there I accompaied with nisar to finish this
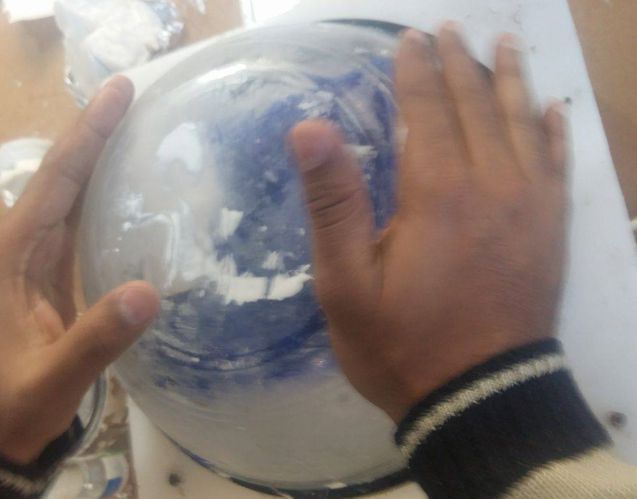
Finally I could not remove all the bubbles but reduced them upto maximum extent
Now I was supposed to wait at least 4 to 5 hours so that material become solidified. I m remaining with my final step that is casting I will upload very soon the casting part of this assignment as i m getting my mold ready
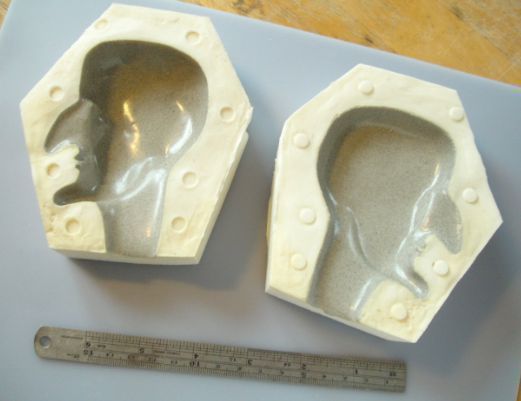
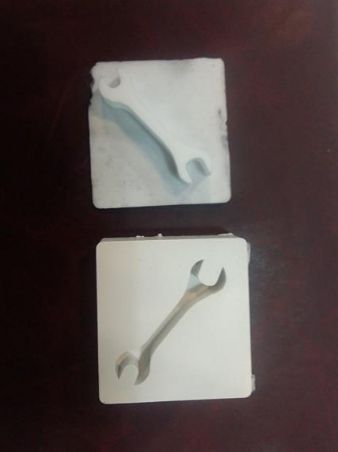
After the estimated time of solidification of mold I took out the mold and got following beautiful shape
Step#5 Casting
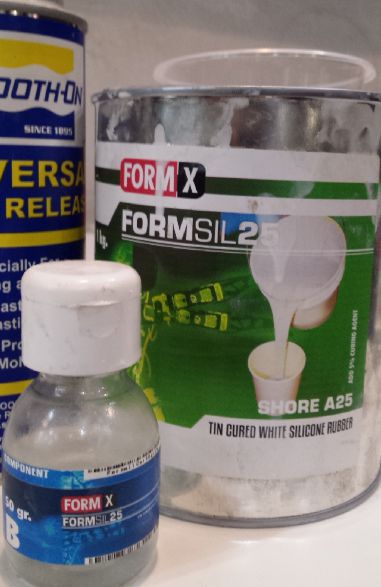
Casting is the manufacturing process in which a liquid material is usually poured into a mold, which contains a hollow cavity of the desired shape and then allowed to solidify. The solidified part is called casting. now this production of casting is the final step of this assignment. In this regard we were available with different types of liquid materials and after concerning my instructors I chose following materials for the casting my mold.
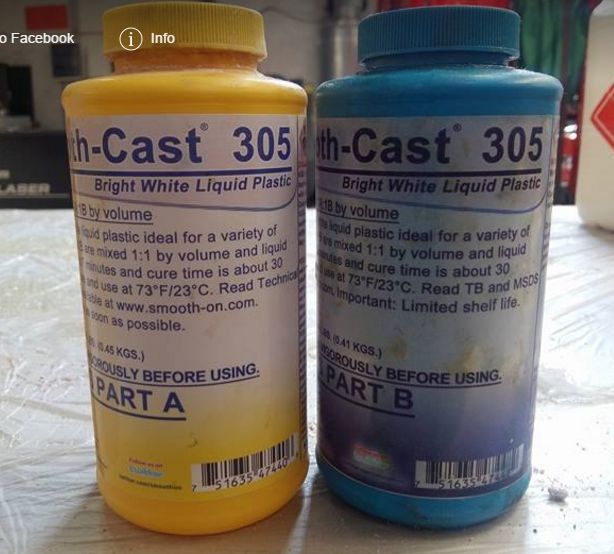
First of all I went through the technical description of both the materials and confirmed the exact proportion of mixing both materials to get proper casting of mold. I took out certain amount as it was almost 50 percent of each material to be dilute to make one liquid material for casting

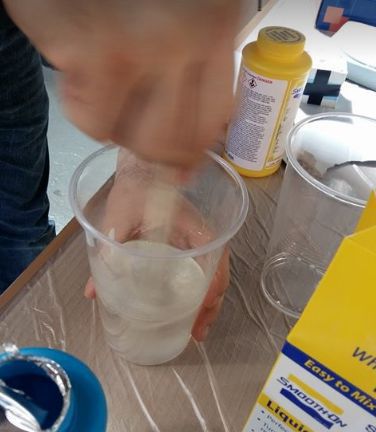
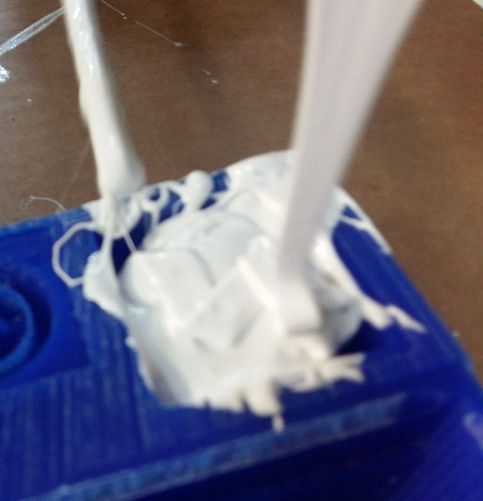
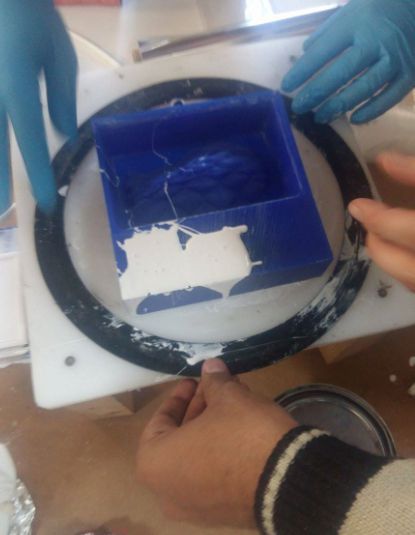
After mixing the materials I poured that solution deep into my mold and put that in vacuum machine for a while to take out the bubbles if present inside the filled material.
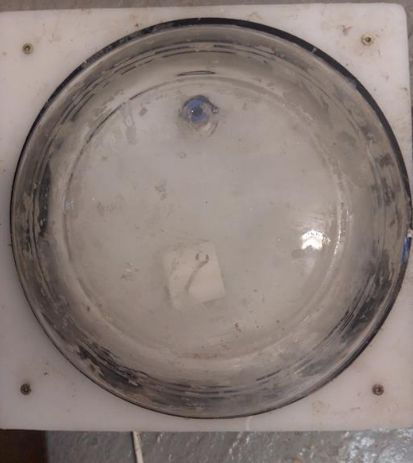
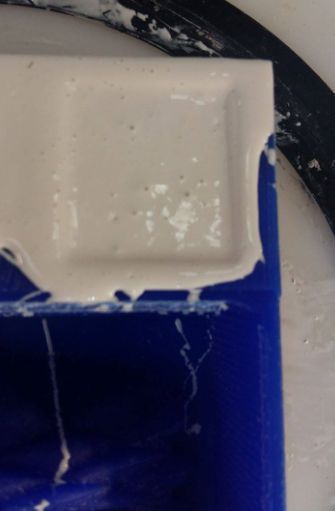
After that I left the casting for 4 to 5 hours for solidification
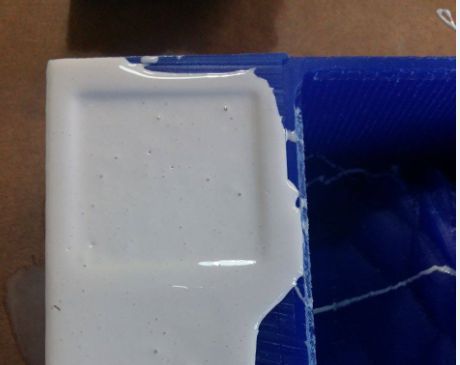
Finally as I took out I got this beautiful casting of my mold
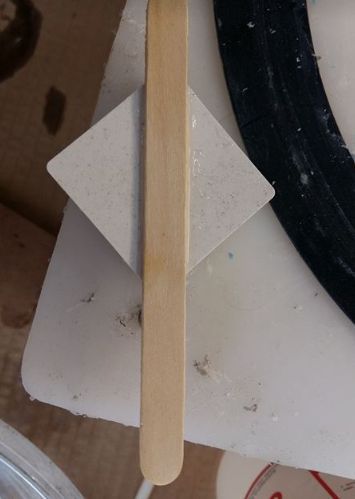
I gave finishing to casted material using cutter and found finally the following caste
Download Useful files here