
Assignment:
- group project: test the design rules for your printer
- Design and 3D print an object (small, few cm) that could not be made subtractively.
- 3D scan an object (and optionally print it) (extra credit: make your own scanner).
Testing the design rules for our printers
We've downloaded a standard test on Thingiverse and printed one. We discussed several points to look for when printing and how to solve some of the problems.
This is the test list and what we can conclude from it. This file is downloaded from HERE
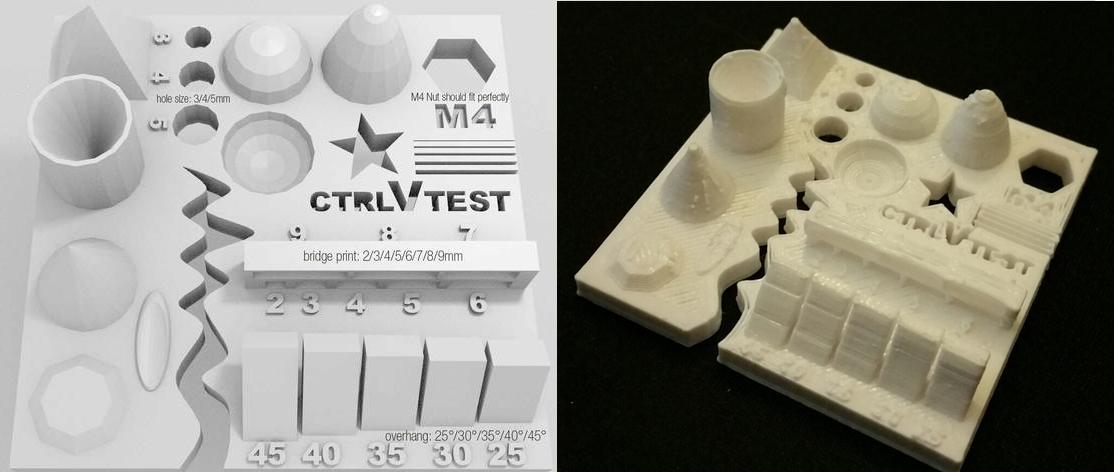
Parameters to check:
- Size: the object is 4 x 50 x 50 mm (baseplate) — measure with a caliper
- Hole size: 3 holes (3/4/5mm) — measure with a caliper/drill
- Nut size: M4 nut should fit perfectly — insert an M4 nut; it should need a little pressure
- Fine details: pyramid, cone, all numbers — check if all things look nice and smooth
- Minimum distance between walls: 0.1/0.2/0.3/0.4/0.5 mm — depending on your nozzle size and slicer settings you will get different results
- Overhang: 25°/30°/35°/40°/45° — depending on printed material/cooling, these will not be as seen on the rendering provided
- Flatness: all flat areas — these should be flat with no gaps
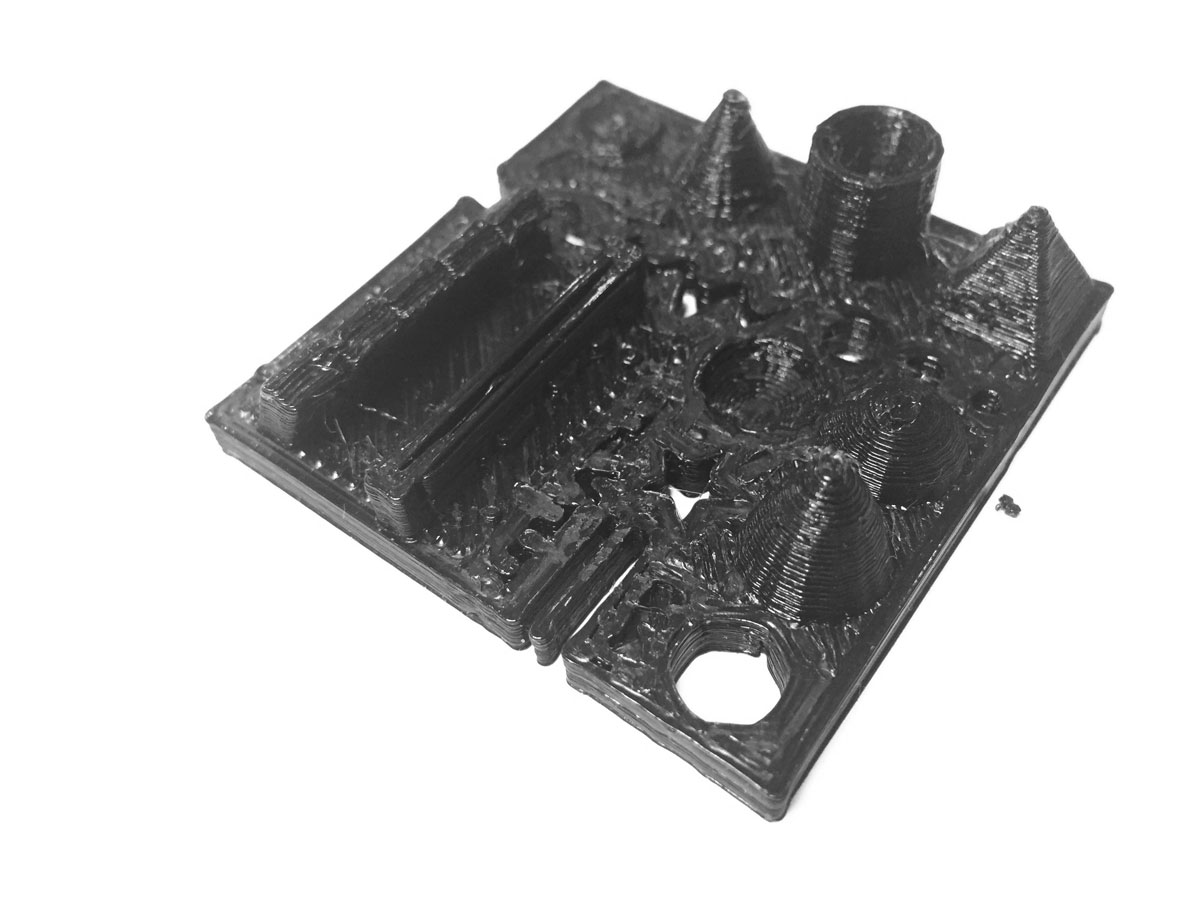
Test ReprRap printer with nozzel 0.6mm
Test Prusa i3 with Nozzel 0.3mm
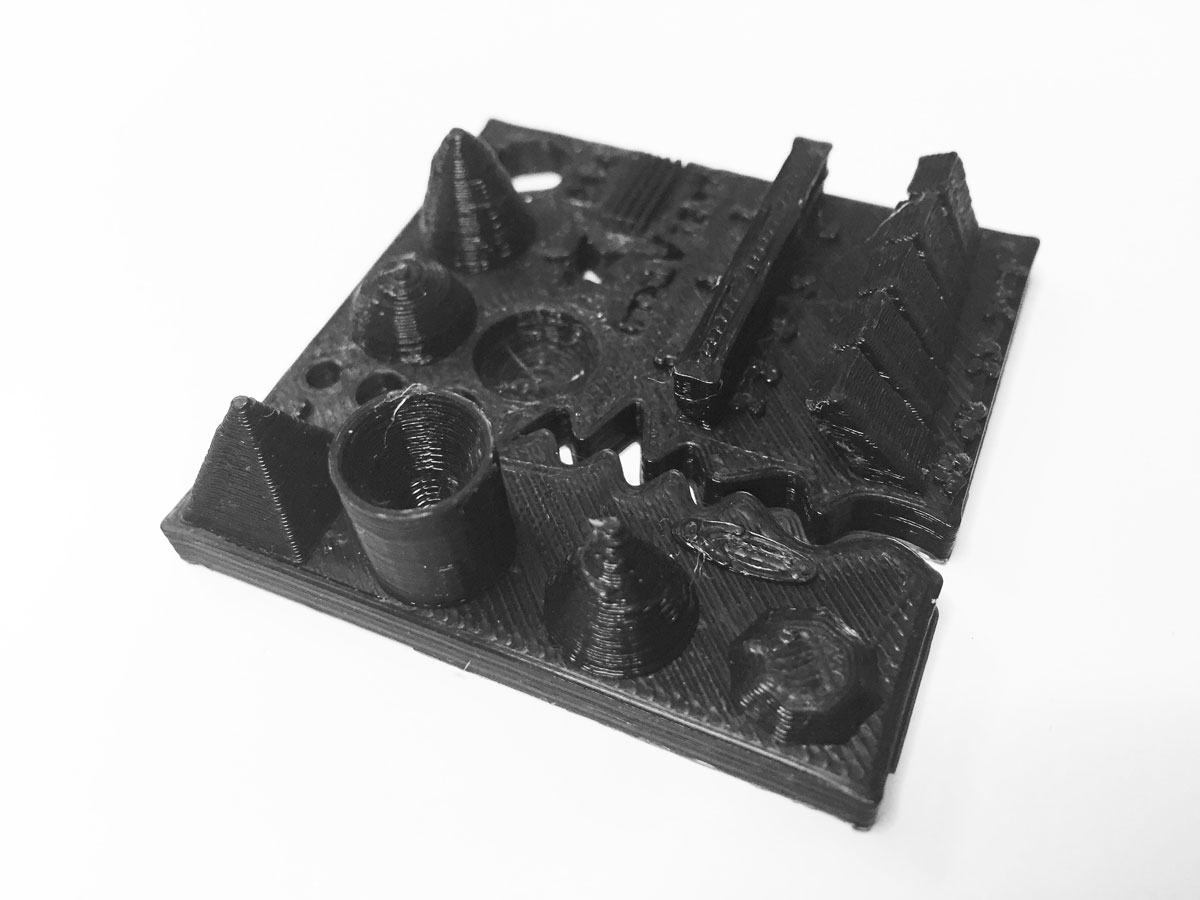
It seems like the printing quality of both the printer is same, but the print from prusa i3 is more near to the designed values and compare to ReprRap.
3D Printing:
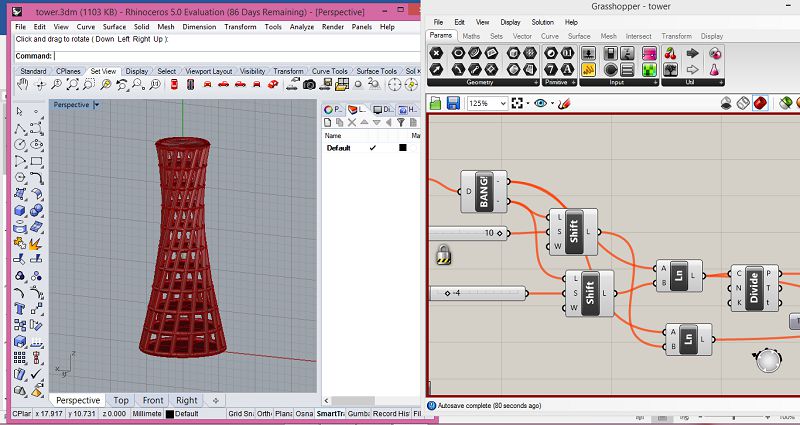
For me 3D object Designing and printing is really attractive task to do. For this I have decided design a non-subtractive object in Grasshopper. The first reason to choice this software is that we can design almost any object in it and can make its animation too. I have tried Fusion 360 but unable to understand it completely. Finally, I decided to use grasshopper for this assignment. I gone through many tutorials ( click here for tutorials ) of grasshopper from youtube.com and finally decided to design the object shown in figure given below.
Now the final step is to print the object, for that we need to export the . stl file to Cura. Few settings are required to print this object in Cura. Settings are shown in the following image.
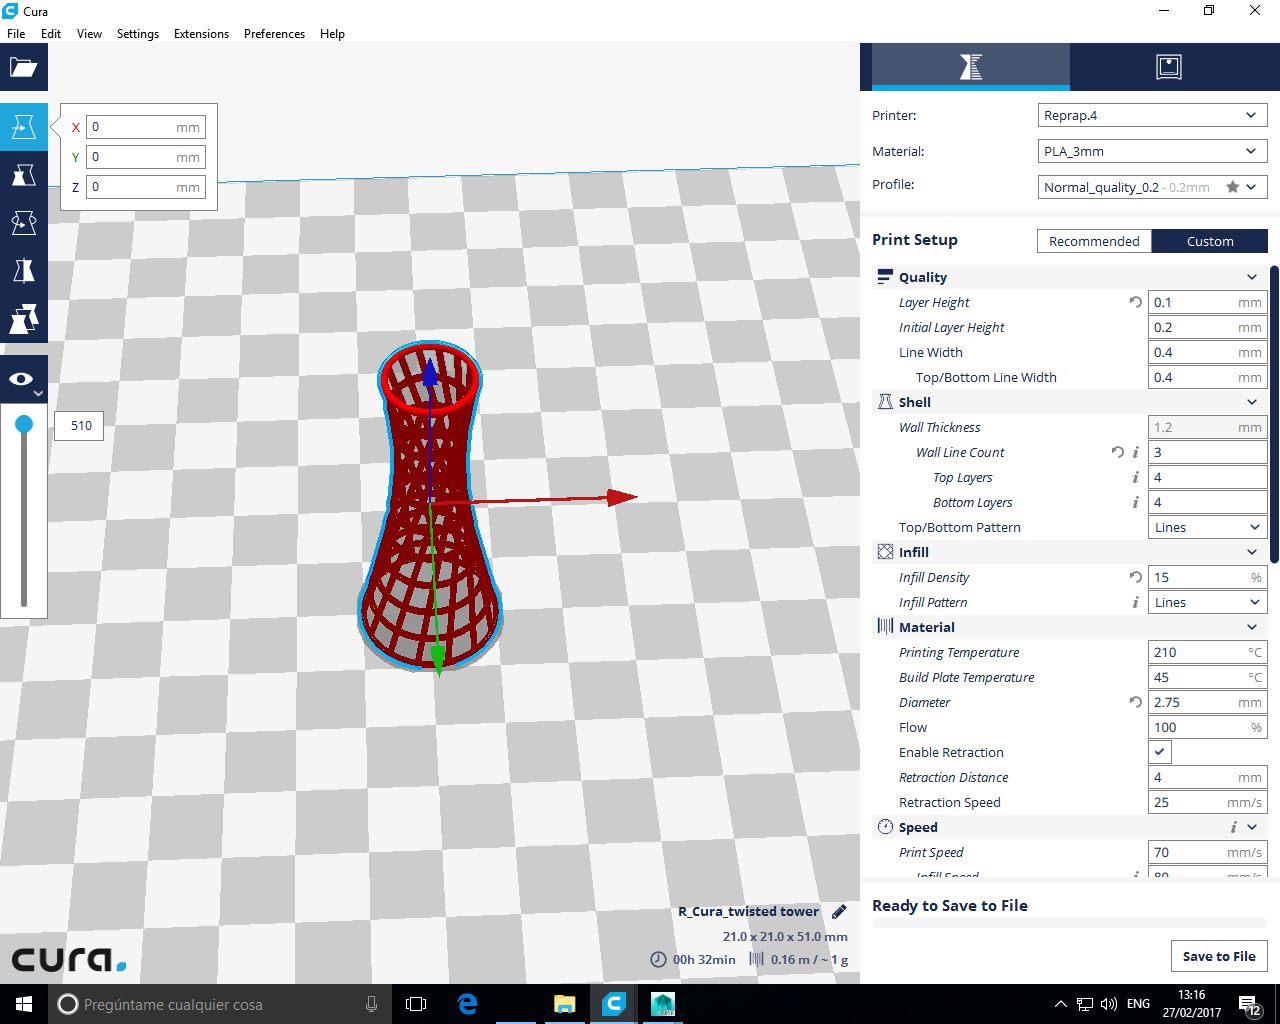
When first time I was trying to print the object, but I remain unsucessful because of the size of object, it was extremely small. After scaling it in Cura I tired again to print this object. Here are the few pictures of this process.
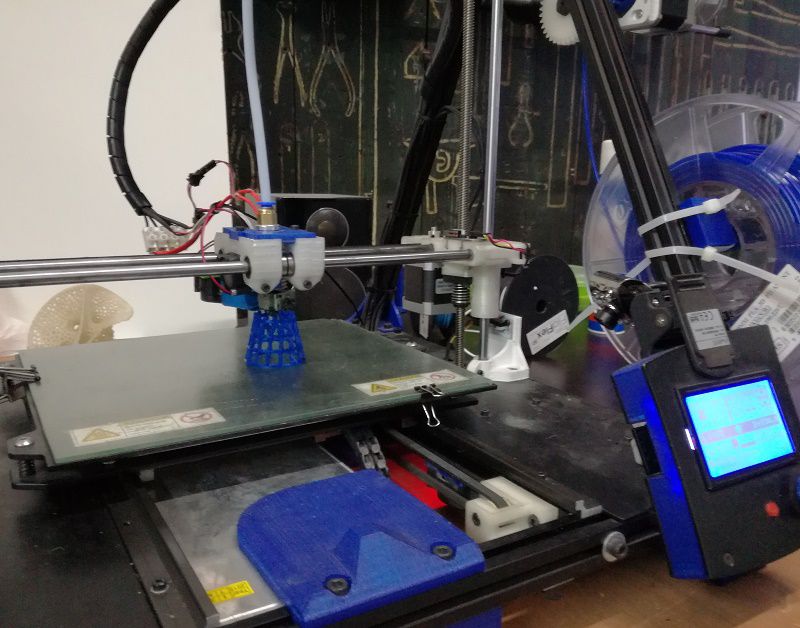
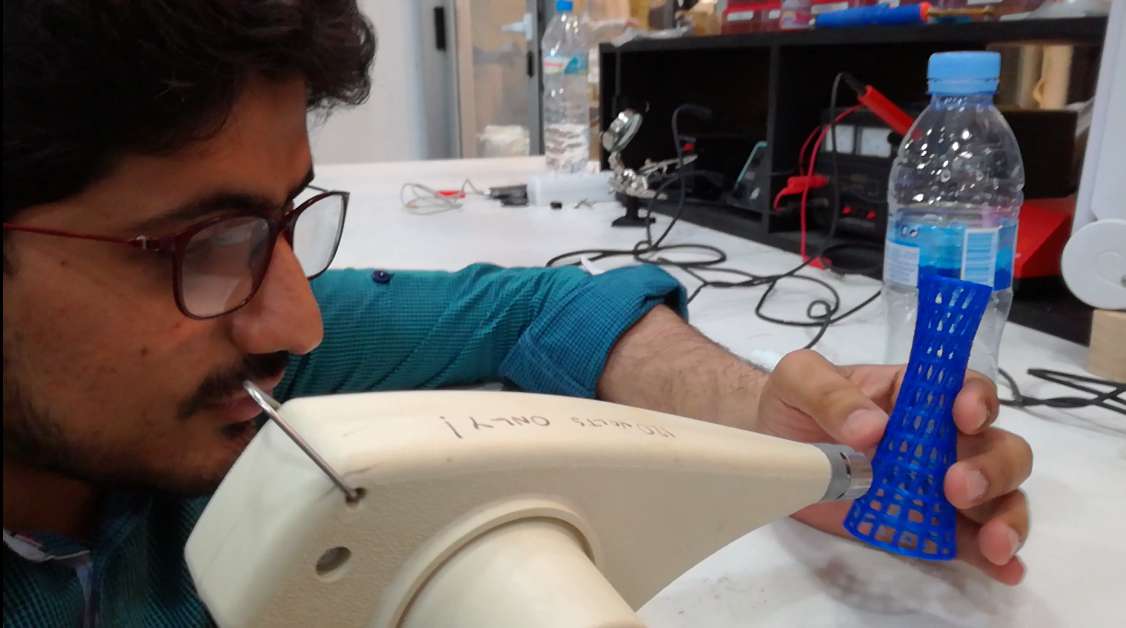
Finally, the object is ready, because of retraction there was some PLA at unwanted places of the model that is why I used hot gun to clean it
3D scanning:
For this task I want to do following three types of 3D scanning.
- Using ordinary images taken from cell phone.
- Pneumatic scanning using MDX-20.
- 3D scanning with Kinect.
1. Using Ordinary images.
During Demonstration of 3D Scanning Santi showed us a way to get 3D image of an object in Rhino using an ordinary image and one command. Basically in this method we use Heightfield command in Rhino. This command plot the image contract to height. Here are few pictures of this process.
First I have taken picture of apple using my phone and edited it in paint.
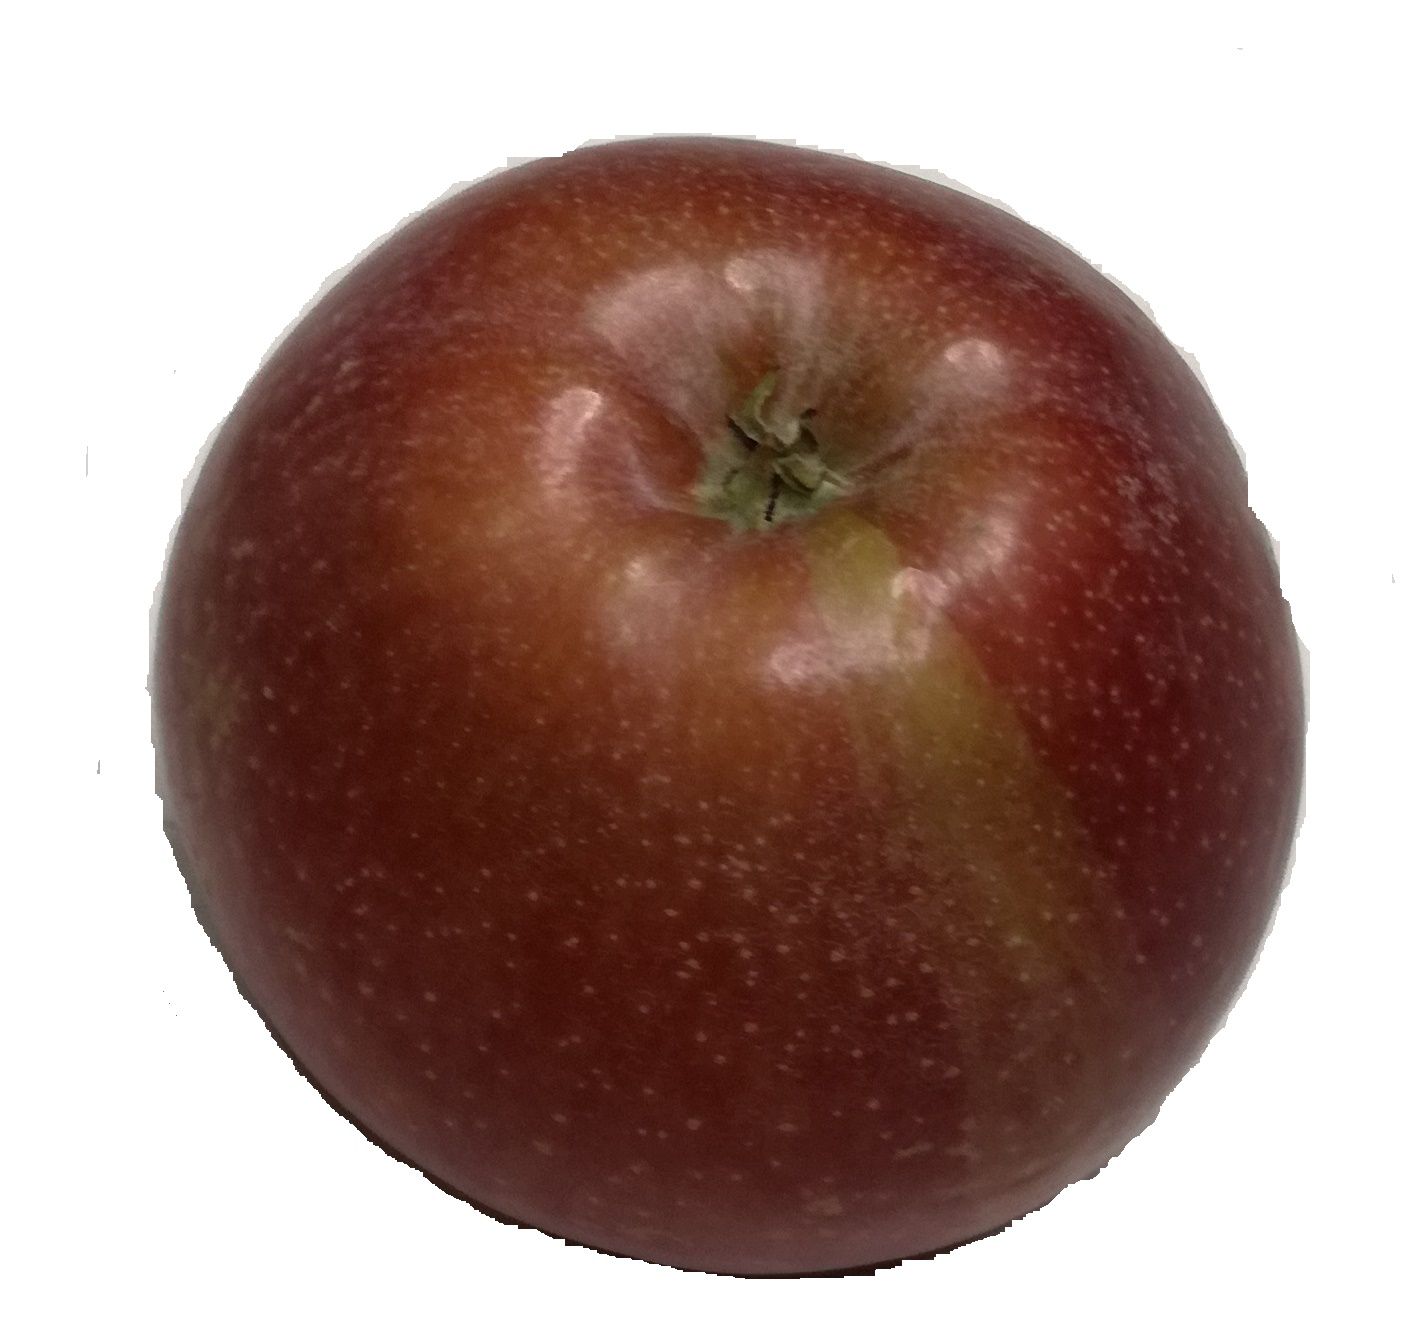
Then converted the orginal picture into black and white
Finally taken its 3D plot using Heightfield command in rhino 3D.
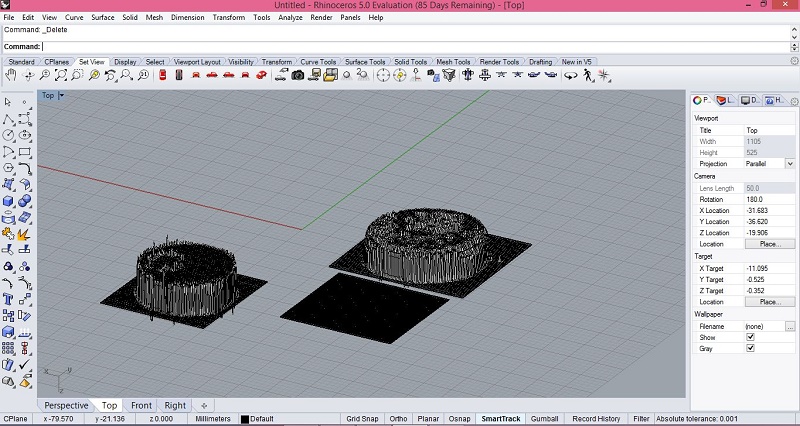
In the above snapshots there are three plots the one which is simple plan is basically the plot of a color images as the contract was not clear that’s why we do not have a good depth or height in this plot. The other two objects are the plot of black and white image of apple plotted at different resolutions. We can observe that the object with high resolution is more smooth than the other one. But because of the Sharpe edges and shine in original image there are few dents on the surface and the surface is like a single plan due to less contract in parts of the image
Observation:
What I observed during this scanning is that it is not a professional way to scan an object. But somehow it gives the concept of 3D scanning in very easy way. We can improve the results by doing some editing using Photoshop our any another tool like Paint etc. We need to apply two filers while editing the image first is to blur the image and second is to remove the background then finally convert the image to monochromatic image.
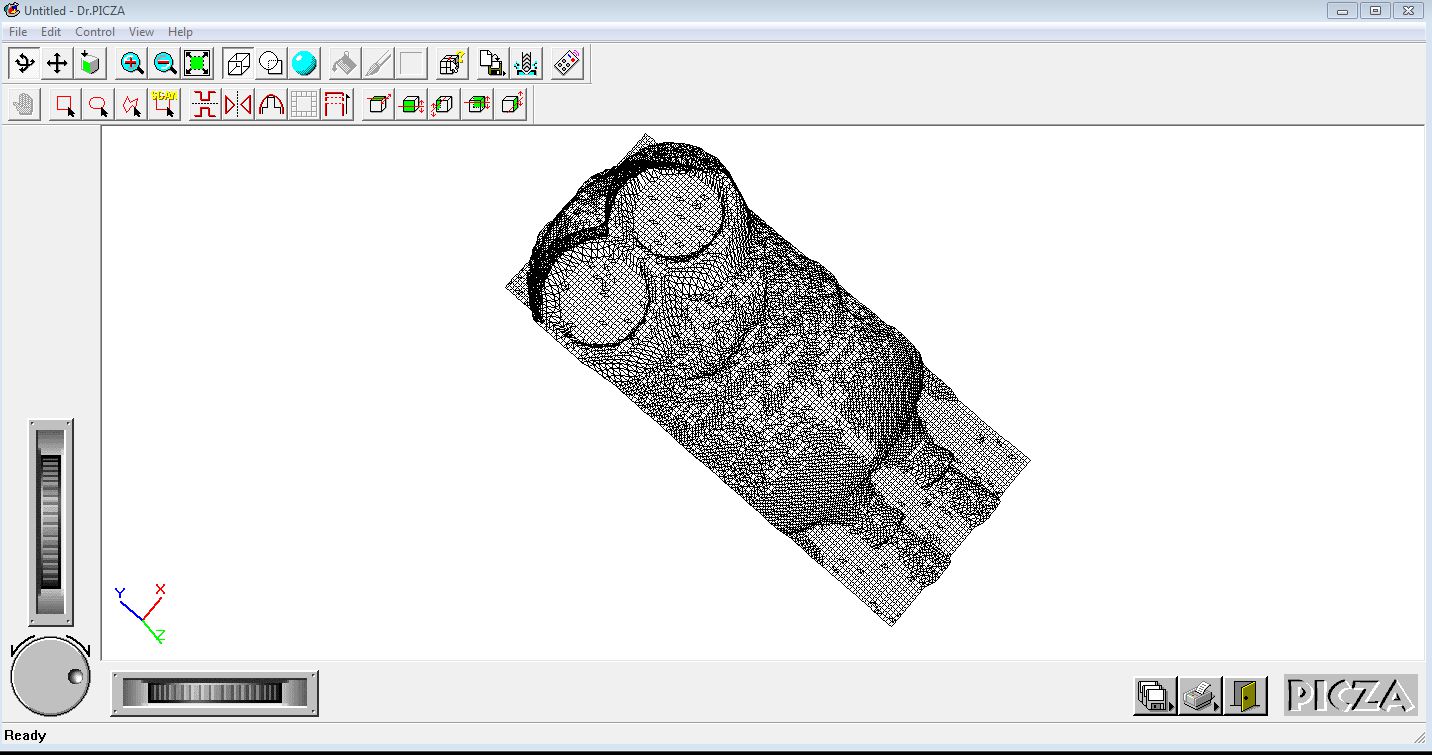
2. Pneumatic scanning using MDX-20.
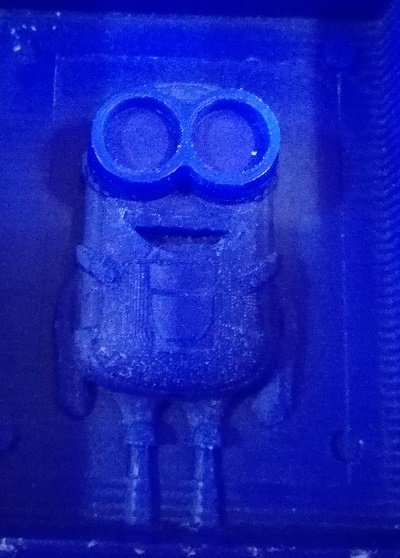
For this type of scanning I have found a really interesting object in lab. I decided to scan this object using MDX-20 because of its size. Here is the image of this object
MDX-20 took about 3 hours to scan this object. Following image shows the important scanning details and final scanning result.
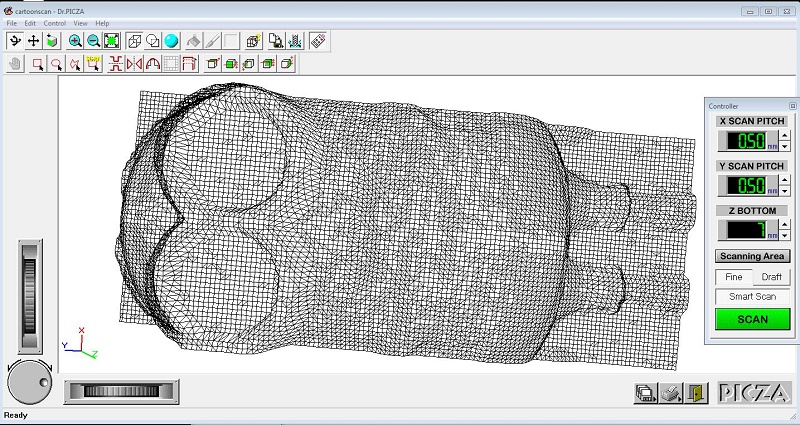
The final scanning result is really good in term of detail, but unfortunately I have missed the hands of this cartoon for scanning due to small scanning area. I have reduced the area because of time taking by the Scanner. Overall Pneumatic scanning is really good option for 3D scanning of small object.
Here is the another snapshot of final scan from another angle.
Observation:
I have observed from the above type of scanning that it is good for small objects, gives very good outputs with the resolution we need. But the disadvantage is that it takes huge amount of time to scan object and we cannot scan the large objects using this type of scanning or machine.
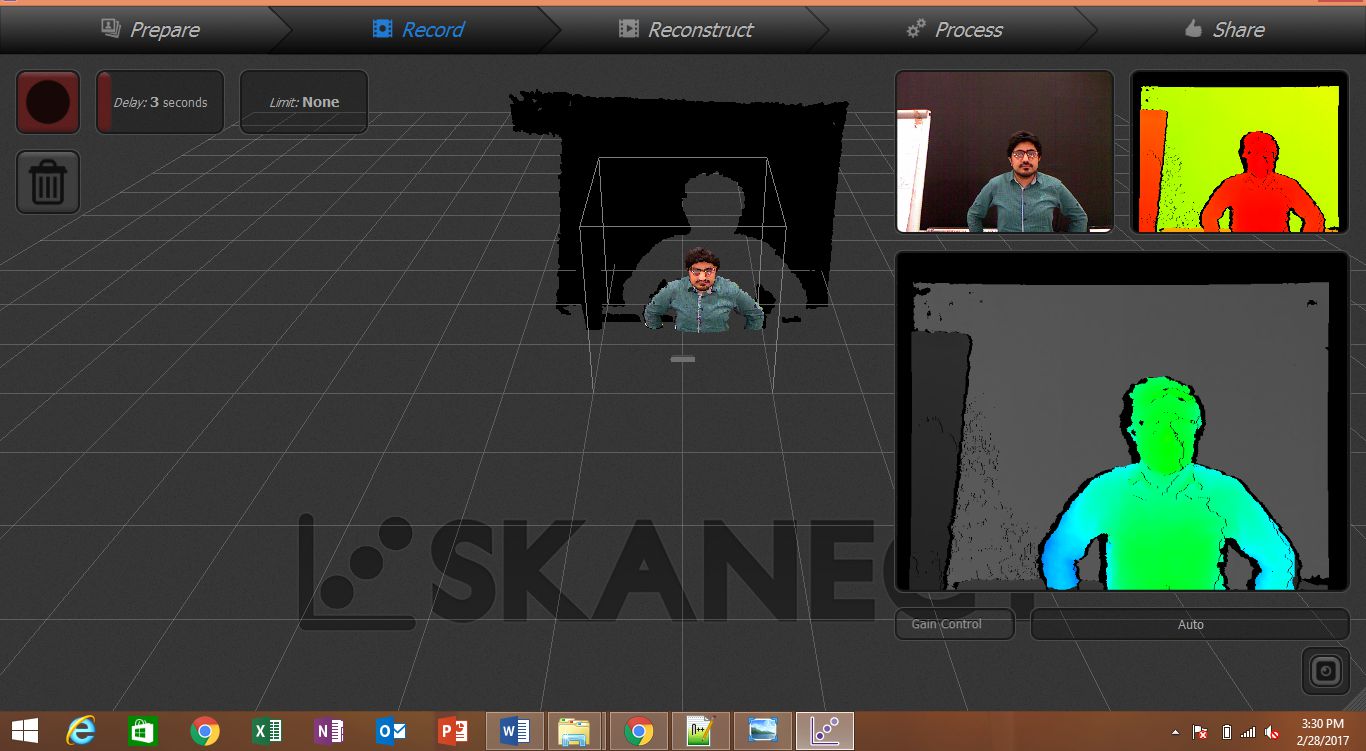
3. 3D scanning using Kinect.
3D scanning using Kinect is really an interesting part of this assignment, not only just interesting but fast also as compare to other methods.
First I downloaded skanect 1.8 and installed it in my PC and took scanning with Kinect. After Scanning .stl file was generated.
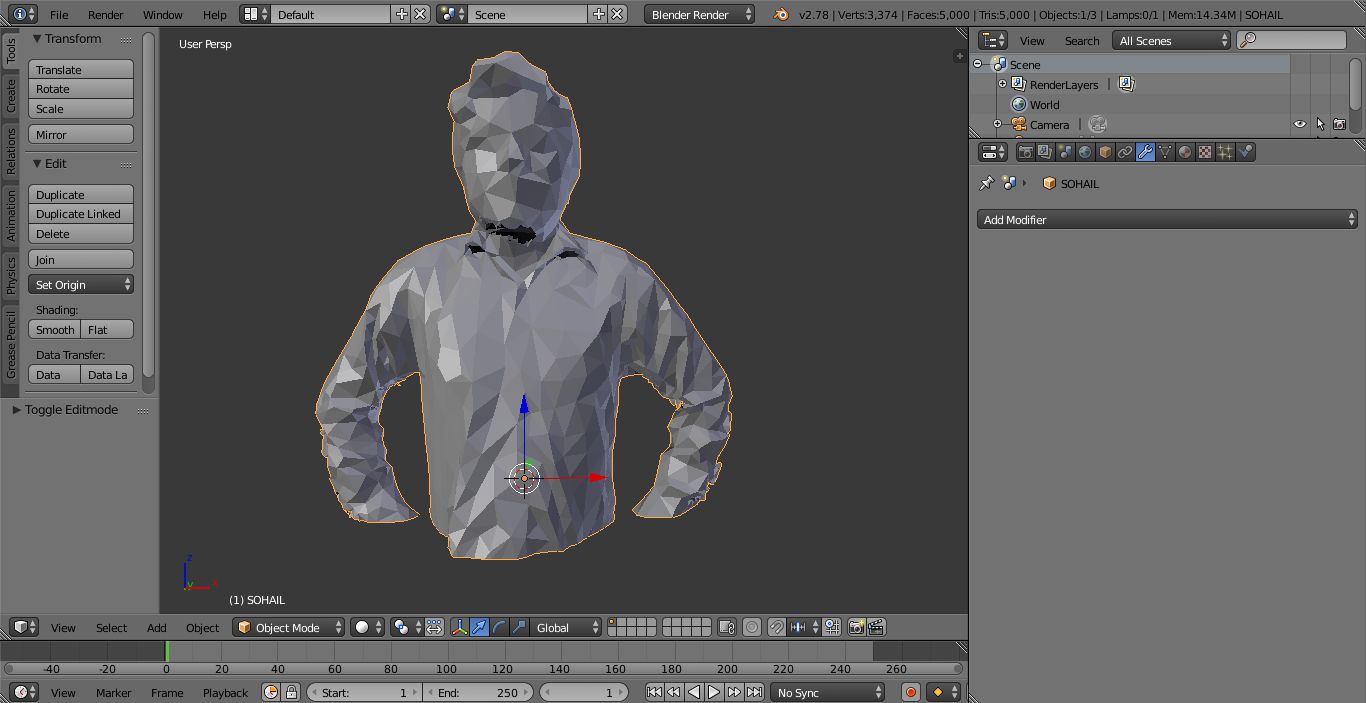
Now the the .stl file of 3D scan will be edited in Blender. In Blender I have reduced the faces of the file using decimate modifier and then exported to Autodesk Mashmixer to reduces the number of mashes and fill the holes in the model using edit, smooth and fill hole commands.
Here is the snapshot of this process.
Now the final step is to export the model to Cura for printing after some necessary settings.
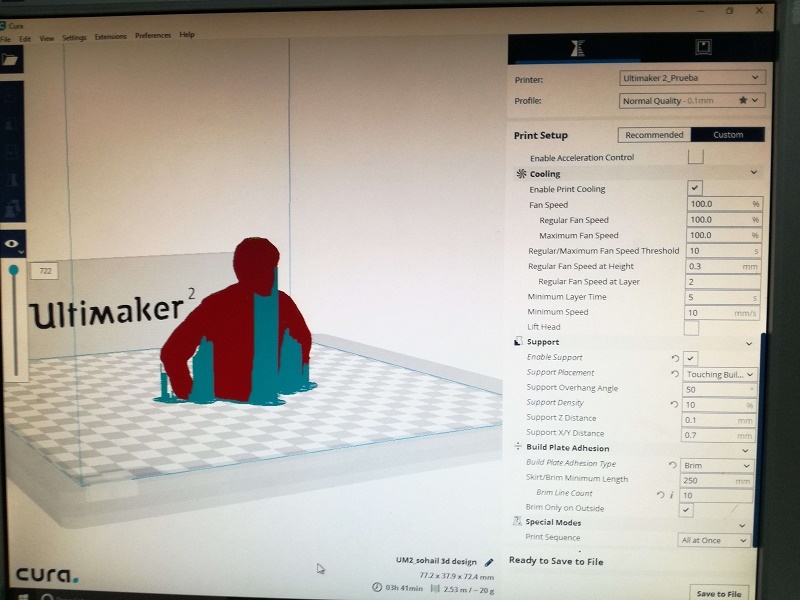
There are few parts of the model having angle more than 45 degrees, applied support on these parts of the model and generated GCODE file of the model for printing. After 3 hours and 40 minutes and using 20g of PLA finally I got the model. Here are the few images of the final model.
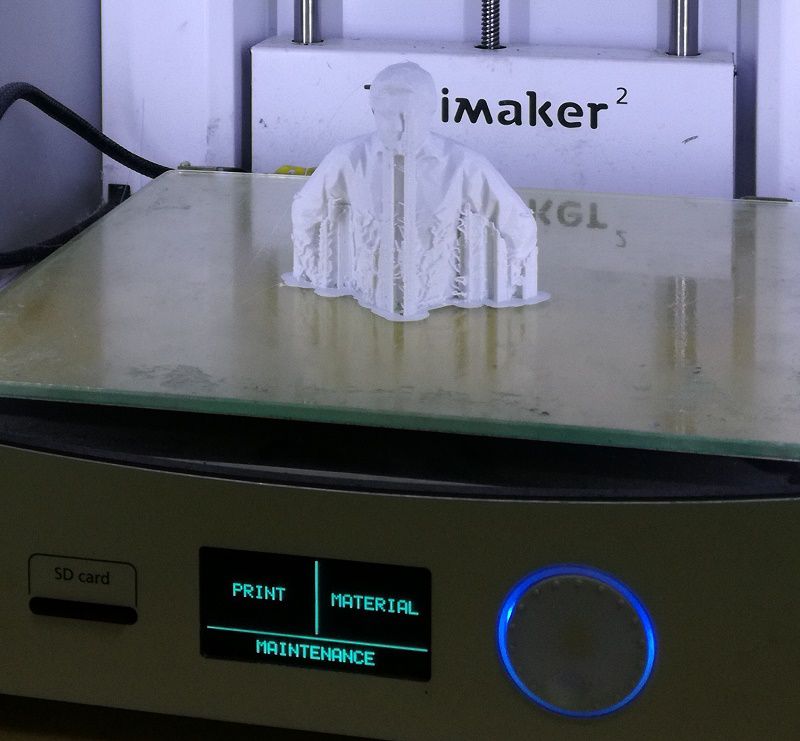
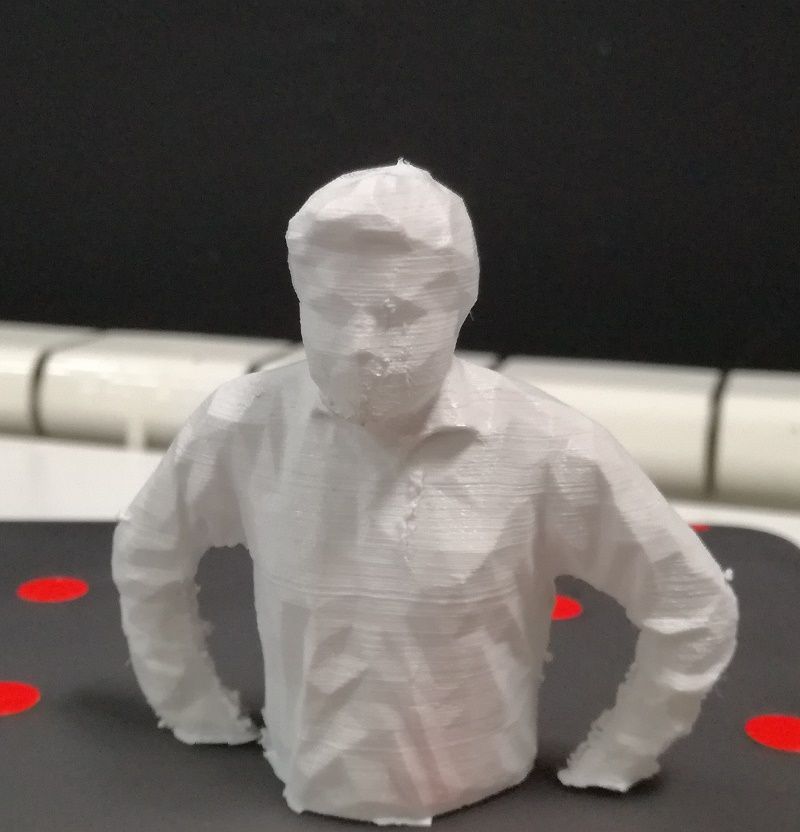
And here is the final clean model without support
Observation:
This type of scanning is really great when we are scanning large objects. It also scan with really good detail and its fast as well. But we need to scan it carefully, if something goes wrong during scanning then we need to compensate it in blender or in Meshmixer, if someone is not good in using these softwares like me then it will become a phthalic job to do.
Downloads.

This work is licensed under a Creative Commons Attribution-NonCommercial-ShareAlike 4.0 International License
.