
Assignment
- Make an in-circuit programmer by milling the PCB.
0. Introduction
The task of this week is one of most favorite task. It is also very usefull thing too, as in the world of digital electronics its nearly impossible of ignore the microcontrollers, throughout this course we will be dealing with AVR microcontrollers so this programmer will be really helpful. It program the AVR microcontrollers without removing it from the circuit. So lets start the task.
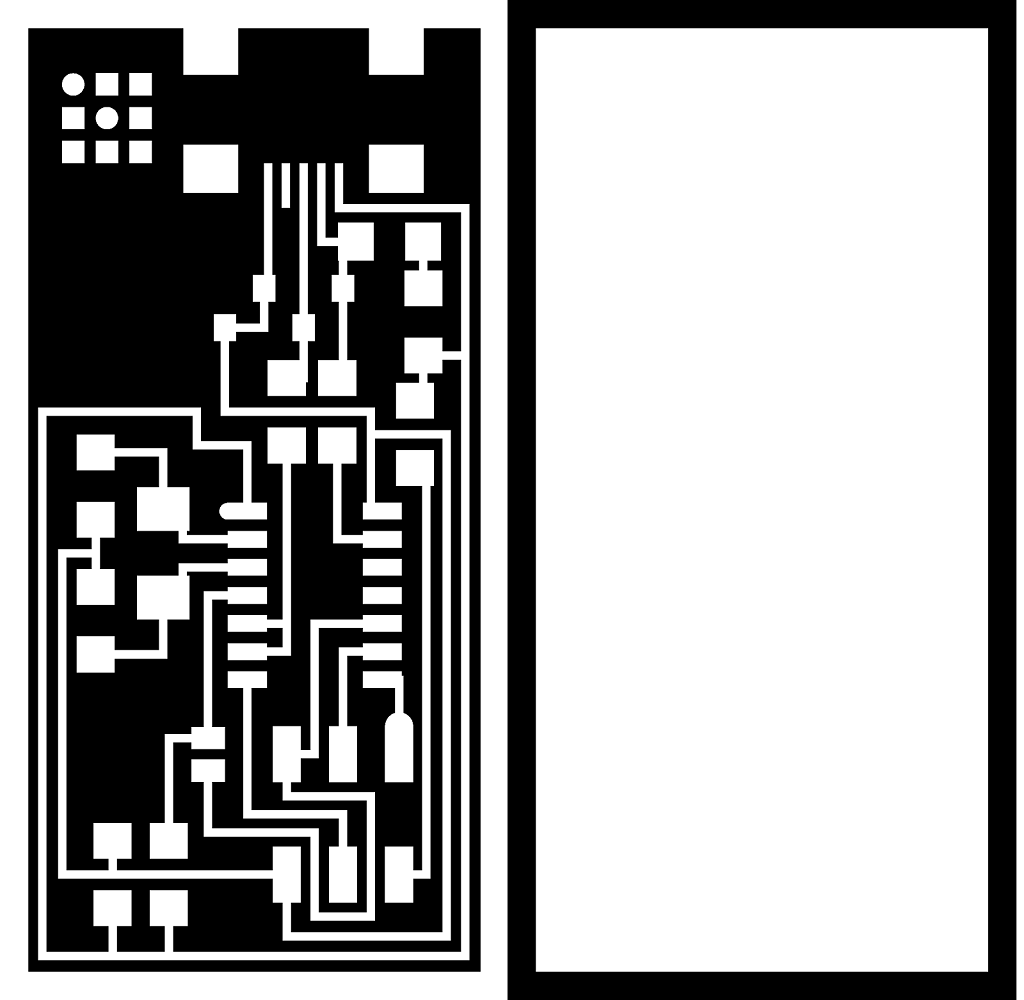
Here is our pcb layout of FabISP and its border for cutting.
1. Generate RML files
As we already have the PCB layout of ISP now its turn to Mill it, for milling we need RML files. we can generate this files using fabmodules.
There are few steps for generating RML files.
- Open the fabmodules.org
- Input the image, i.e png file of pcb layout of ISP shown above
- Select the machine, in our case it is Roland SRM-20.
- Now Select the tool size that is 1/64 for traces and 1/32 for cutting
- Now there are few details that we need to input, we can see those details from the images given below.
- Repeat the same process for border cutting png file as well
Two images given below shows the important parameters and process of RML file generation

Process
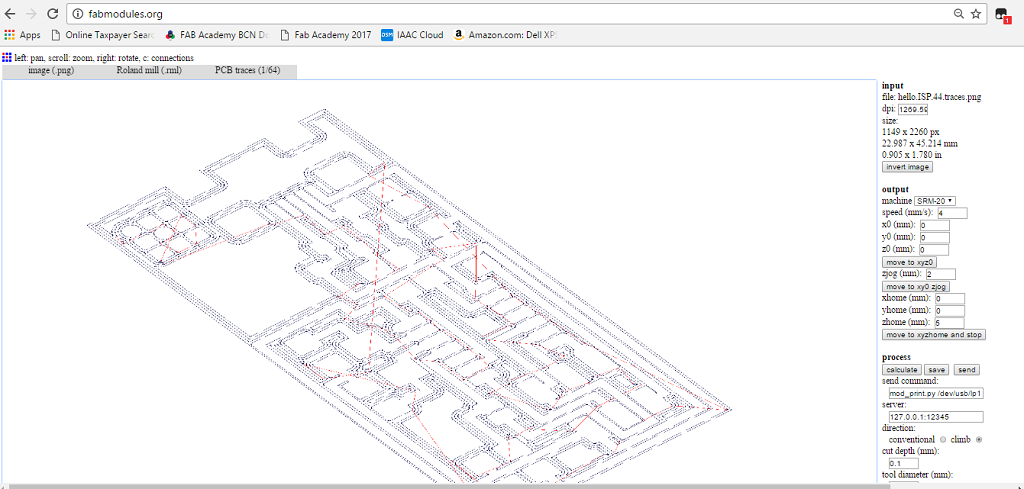
Traces
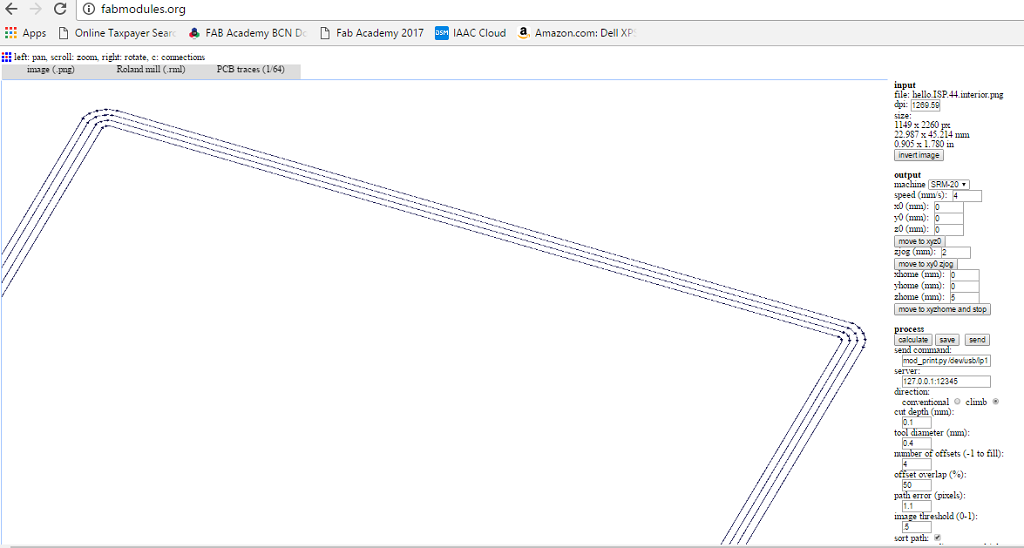
Cutting file
2. Milling
For Milling with Roland SRM-20 we are using VPanel software, it has a direct wired connection with the machine. Following image shows the GUI of this software.
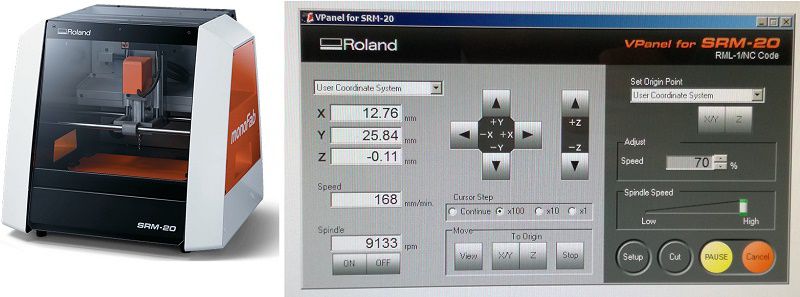
There are few steps to work with this machine, are given below
- Seleciton of the tool. For traces we will use 1/64 and for cutting we use 1/32
- Place the copper board in the machine, but make sure the board is straight. I checked it using scale.
- Power up the machine and open the VPanel software in PC. Sometimes we forget to power the machine and start working with the software which is absolutely useless.
- Set the XY axis with the button given in the GUI
- When you find the correct XY coordinates, save it by clicking the XY button given on upper right side of GUI
- Now Its turn to set the Z-axis. It is very important, otherwise there are many possible error may appares like your machine will start milling in air or it may print just top of the board in this case we will not get clear traces.
- After setting origin now load the file by clicking at the cut button on bottom right of GUI and load your RML file.
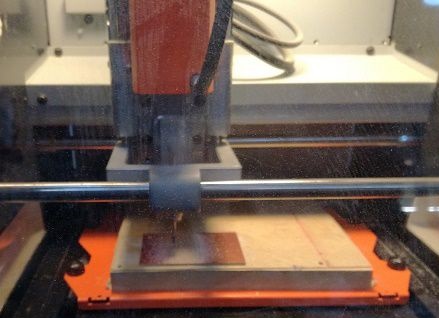
After doing all the above steps now machine start milling my fabISP circuit. :)
3. Soldering
The first step for soldering the circuit is to make a list of components and take the components from the lab. Before start soldering we need to konw the polarities of the components, easy way to do so is use google.:)
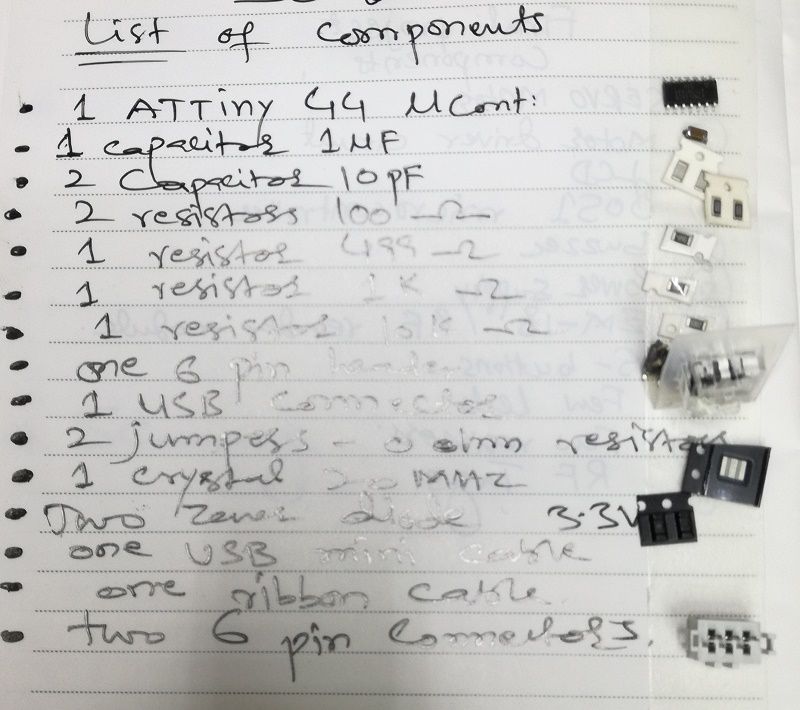
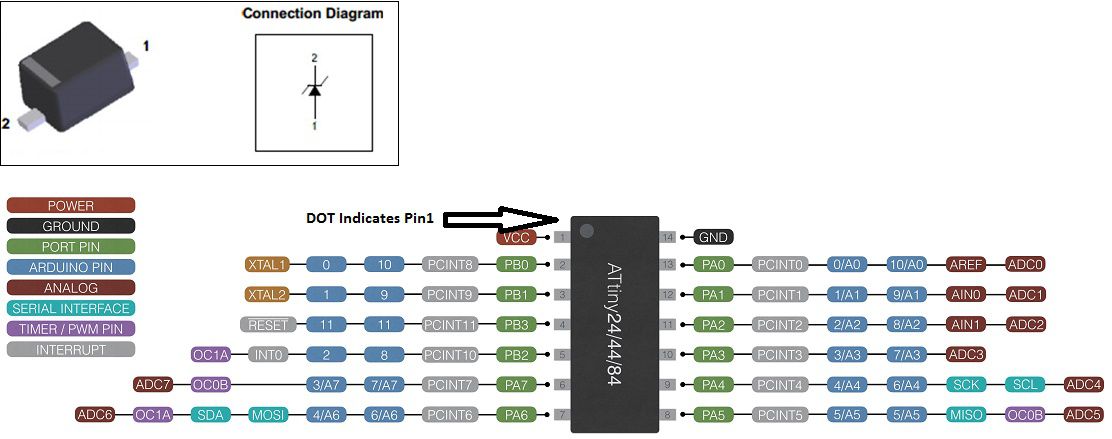
In our list of components there are two components we need to know there polarity to work with them. First is Attiny44 and zener doide.
There are some soldering tools I used to solder my FabISP
- Soldering Iron
- Soldering wire
- Soldering remover
- Tweezer
I found an interesting tutorial on youtube.com regarding soldering of SMD conponents.
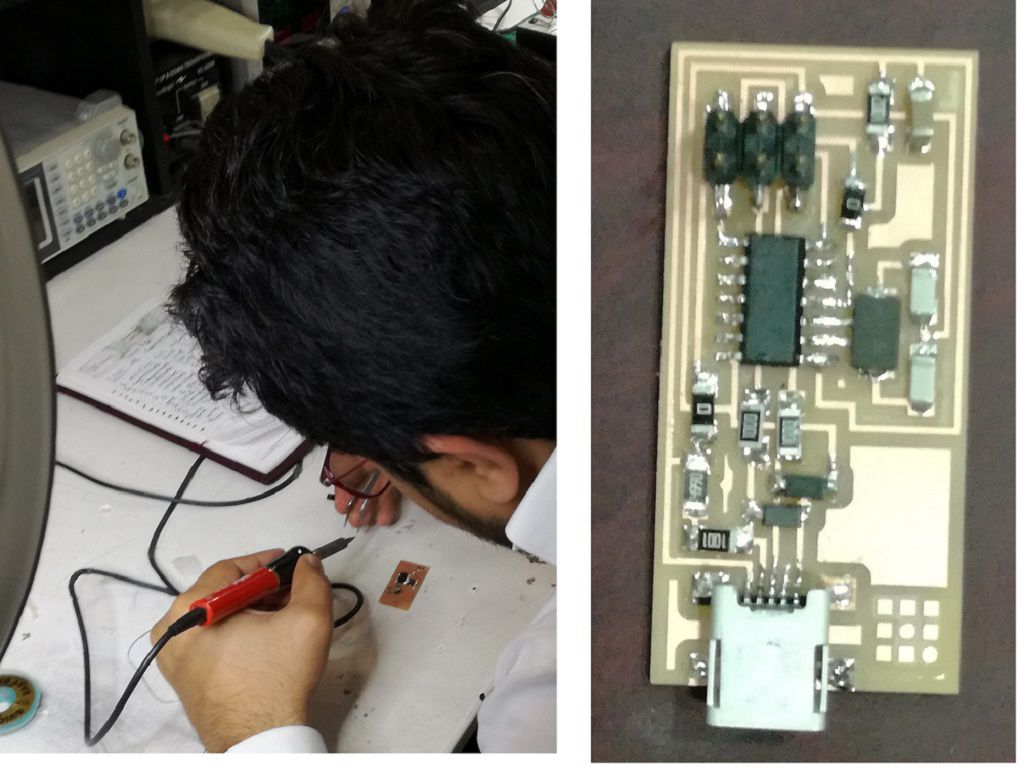
It took almost 2 hours to solder the ISP and finally it is ready. :)
4. Programming
I am using windows based computer that is why I tried to program my fabISP in windows. But unfortunately I was a getting an error at the every end but still I got my fabISP programmed in windows. becuase of that one error I also programmed my fabISP in Mac OS as well. I will explain both operation one by one.
4.1 In Windows 8.1 .
1. HERE is the best tutorial to program fabISP I followed all the step as it is.
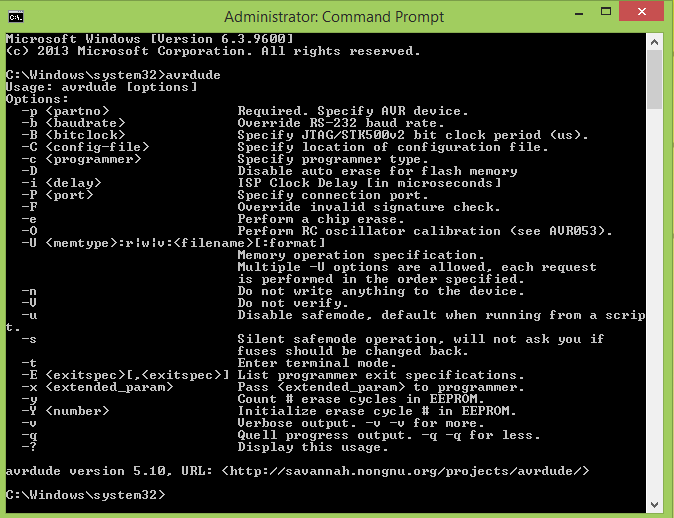
Note: make sure you have installed avrdude correctly which is described in the link given in step 1. you can check this writing "avrdude" in command prompt and you will get the response shown below.
2.The very first thing is that we need to download the drivers of programmer which you are using. I am using AVRISP mkII and drivers can be downloaded from HERE
3.The next step is to download fabISP firmware from HERE
Please note that the above two step (2nd and 3rd) are also shown in the link given in step 1, so if you have completely followed the tutorial link given in "step 1" that is enough and you are good to go to program you fabISP.
4.Now connect the your fabISP with programmer check the light of programmer if it is green than you are good to go.
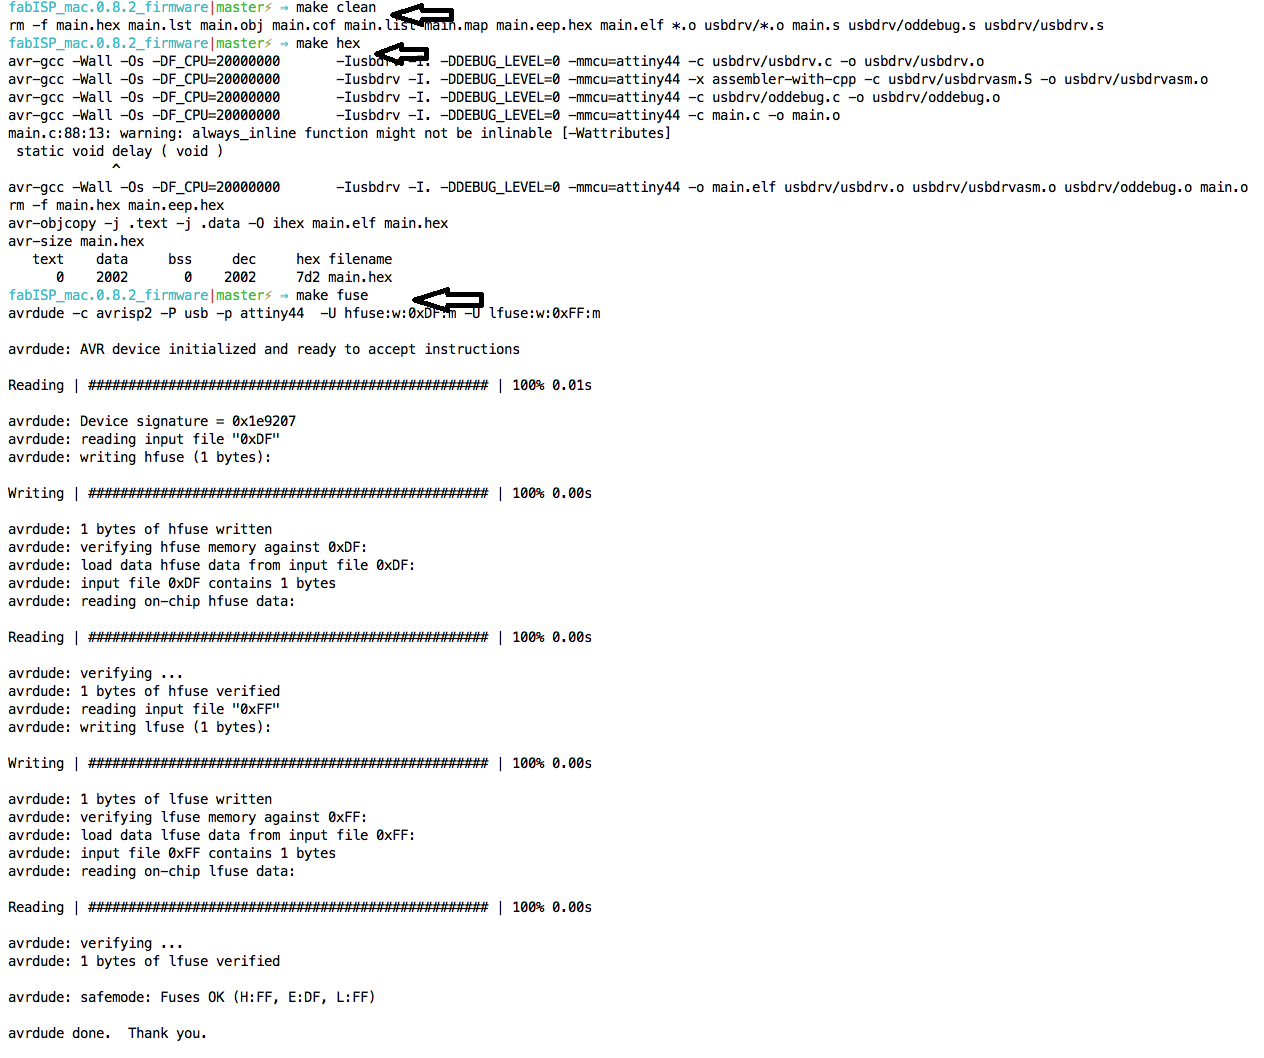
5.Now open Command prompt and access the location where you have downloaded the fabISP firmware and Run "make clean" and "make hex" as shown below. If you see the error in "make clean" ignore it and more on.

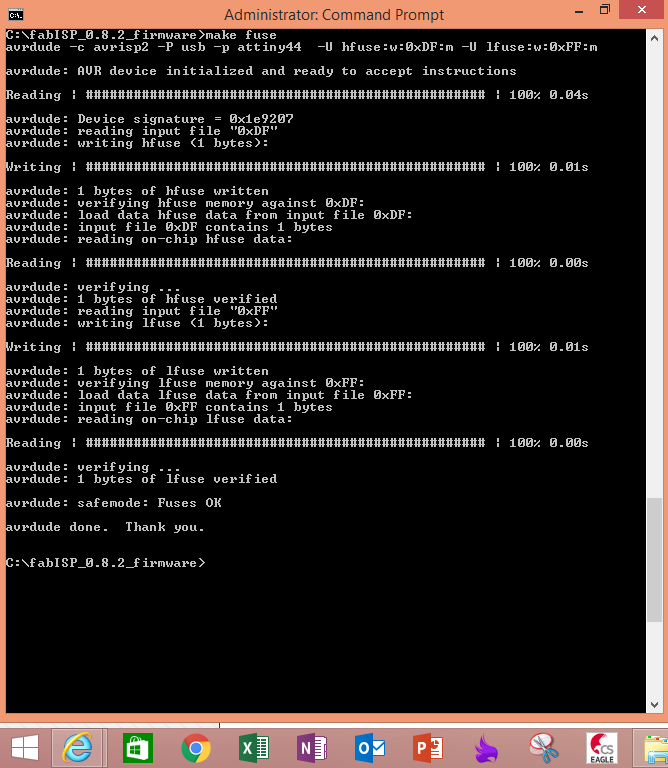
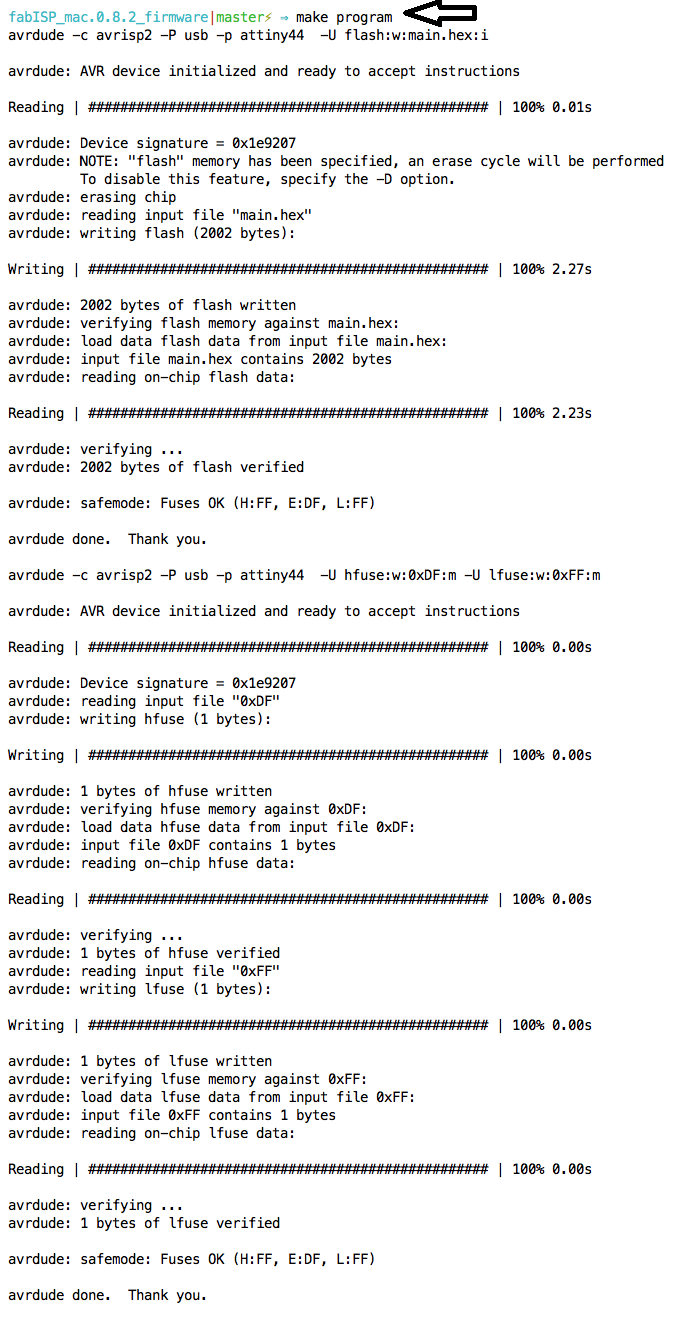
6.Please note that you must run Command Prompt as administrator. and now use "make fuse" and "make program" as shown below.
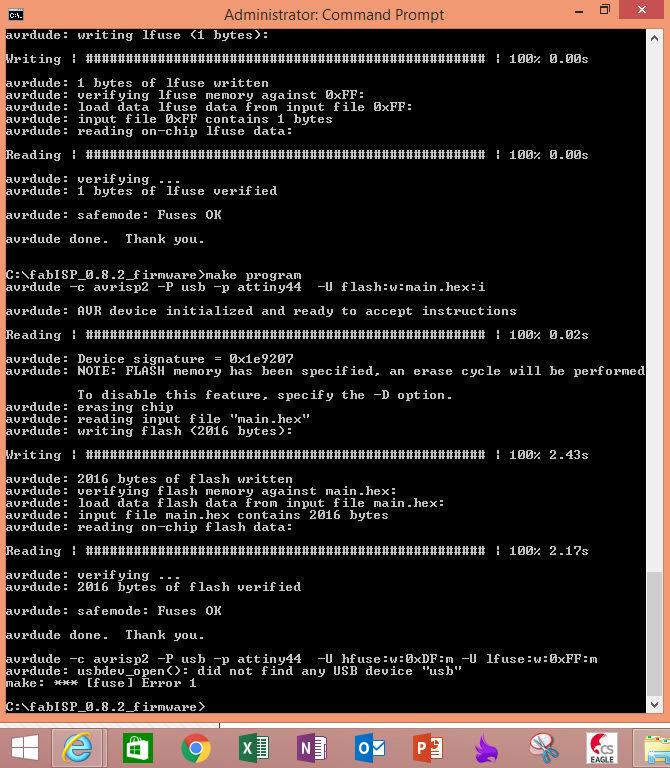
7. In the last line of the above image, we can see the error message that programmer is not found. although the fabISP is programmed and can be seen in the device manager of windows. but because of this error message I decided to program the fabISP with MacOS as well.
4.2 In Mac OS.
First thing is to install all the required softwares. For programming I found this tutorial very helpful
-
First think to download and install is Xcode from here
-
CrossPack for AVR is download from here
-
Final thing that we need to download FabISP firmware, it can be download from here
For programming fabISP I am using Labs computer here.
I followed this fab lab tutorial to program my fabISP.
After followoing the all above steps we need to open the terminal and use four commands 1.make clean 2.make hex 3.make fuse 4.make program and the response is given below.(Note: I am using AVR ISP mkII that is why I do not need to make changes in default hex file.)
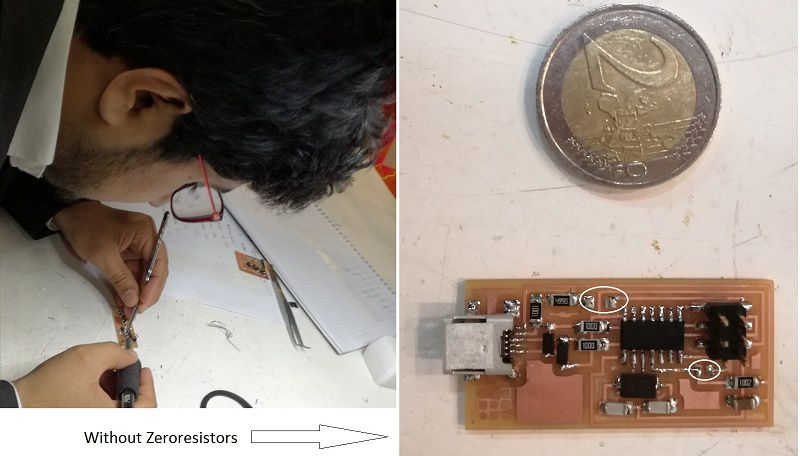
5. Removing Zero resistors (jumpers)
After Successful programming its turn to remove zero jumpers to make circuit as a programmer.
6. Installing the drivers.
Now we need to install the drivers for the programmer. We can download it from HERE
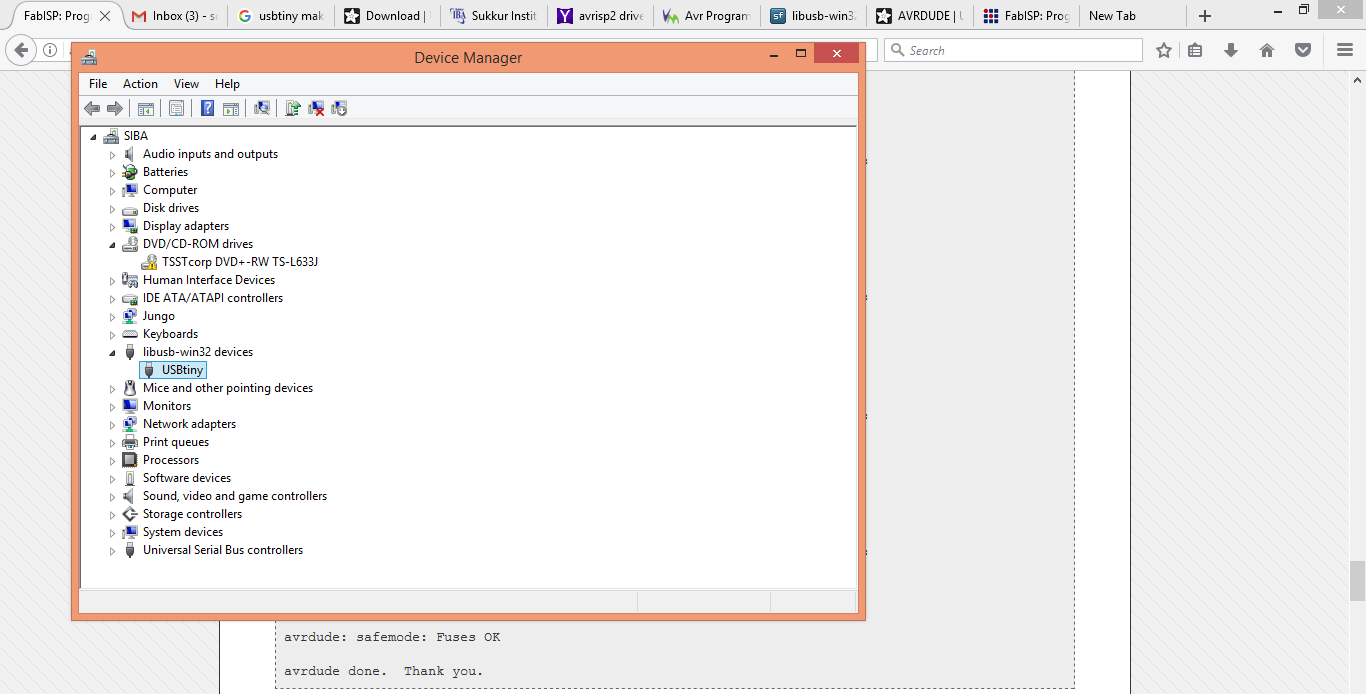
Now plug the programmer in PC and in device manager you see it there, as shown in the image below.

PNG and RML files related to this week can be download from here

This work is licensed under a Creative Commons Attribution-NonCommercial-ShareAlike 4.0 International License
.