04.- Electronics producion
Feb 15
Make an in-circuit programmer by milling the PCB, then optionally trying other processes.
-milling
-soldering
-programing
-Case
The FabISP is an in-system programmer for AVR microcontrollers, designed for production within a FabLab. It allows you to program the microcontrollers on other boards you make.
- Milling
- Soldering
- Programing
- Ubuntu
- Case
Milling
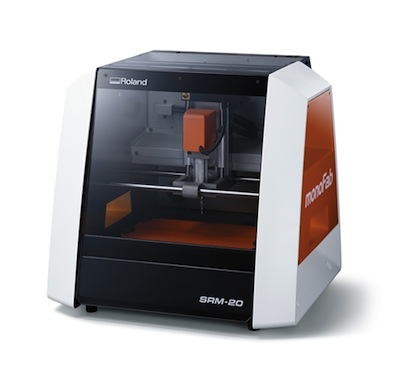
In this week we have learned how to cut pcb in Monofab SRM 20.
The genealogy of the FabISP design is interesting in its own right; Neil's FabISP is based on David Mellis's FabISP which is based on Limor's USBTinyISP which is based on Dick Streefland's USBTiny.
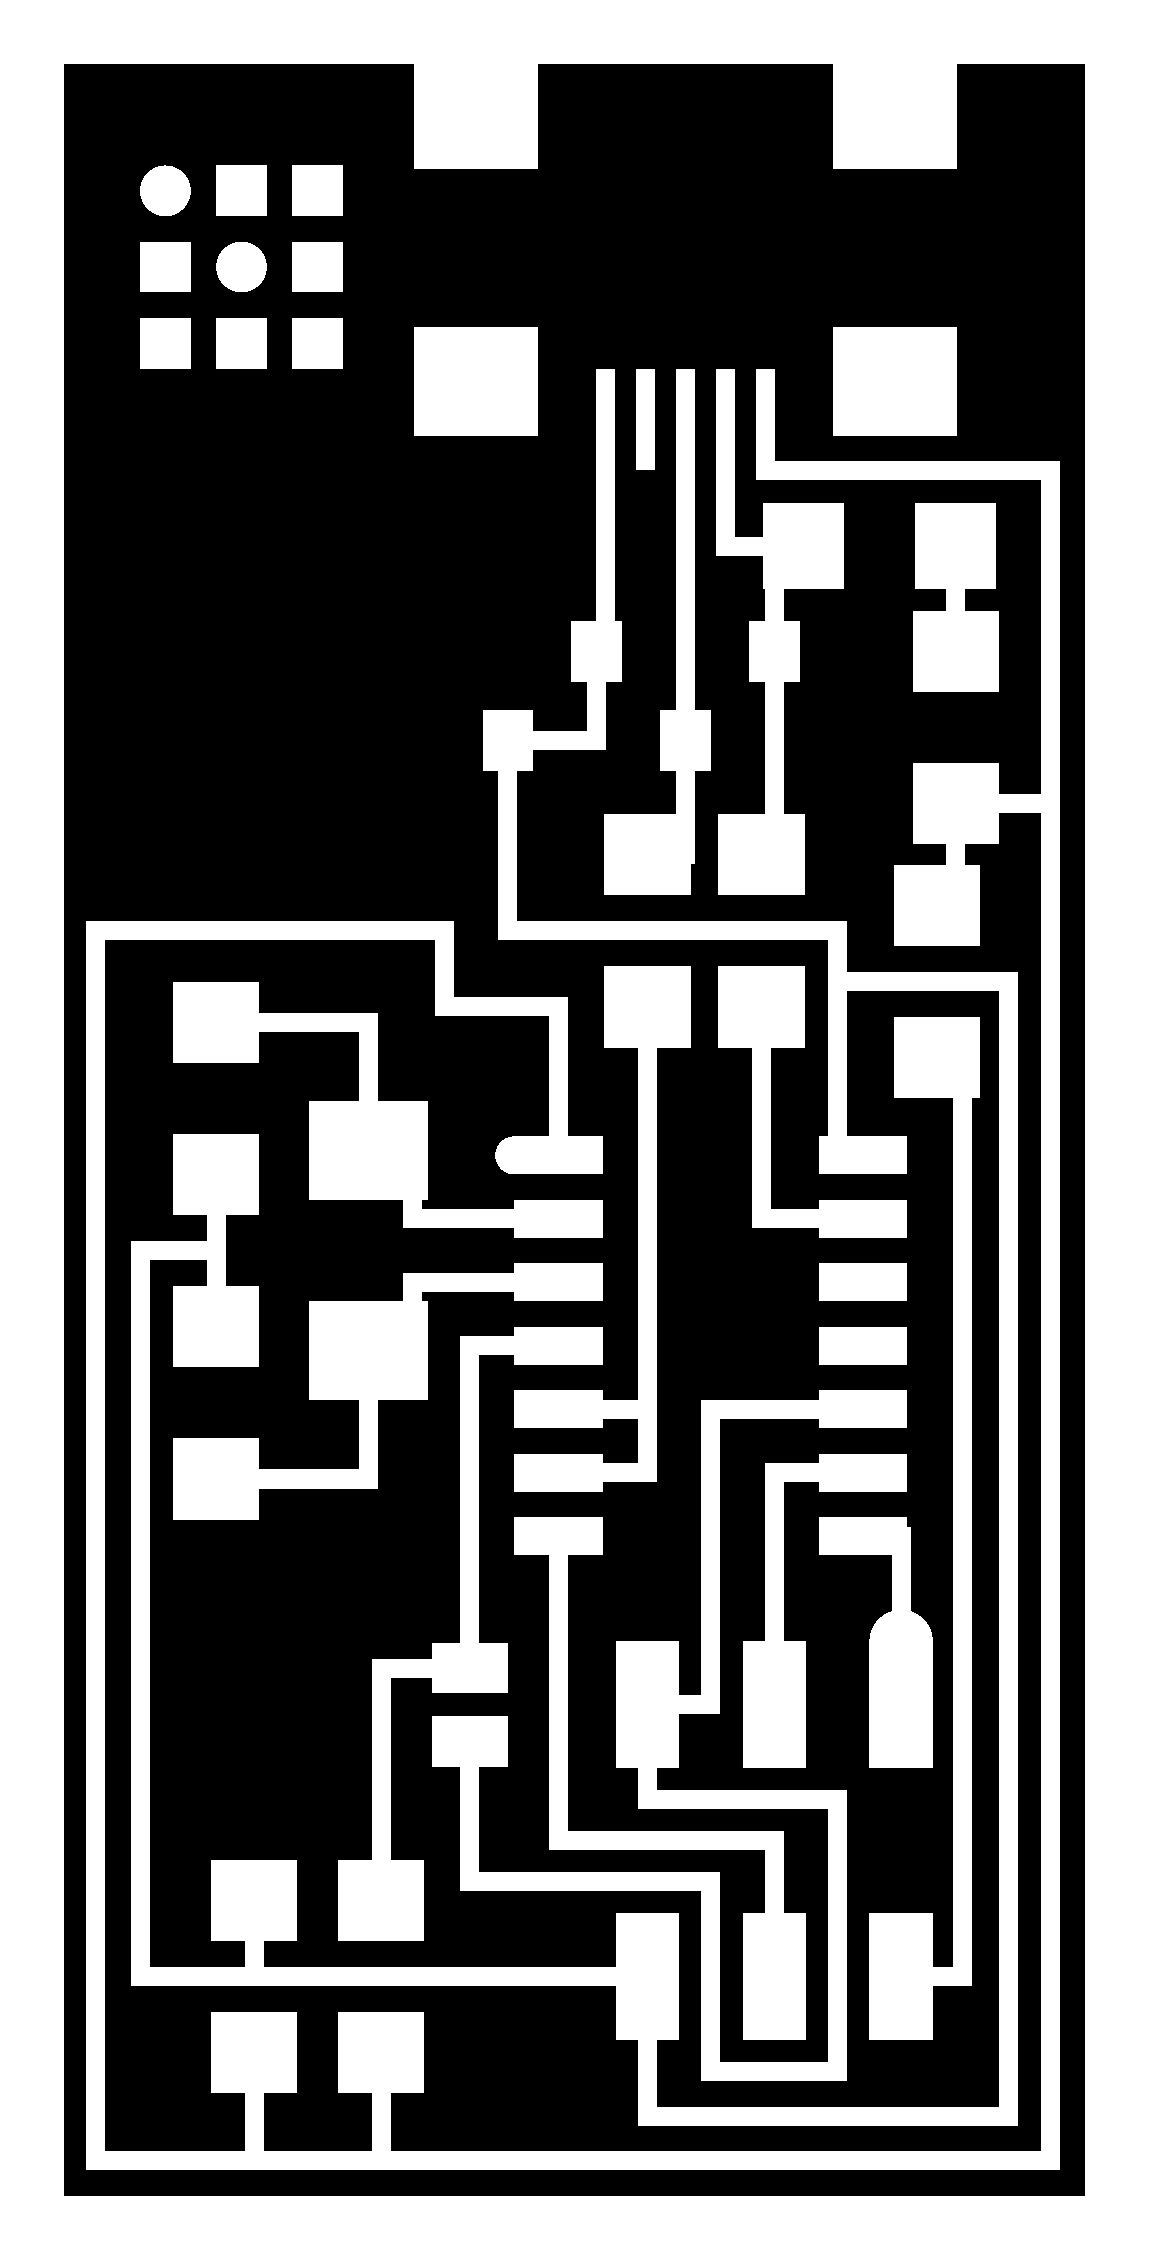
Download the PNG Board Files from The Fab Academy 2017 Schedule
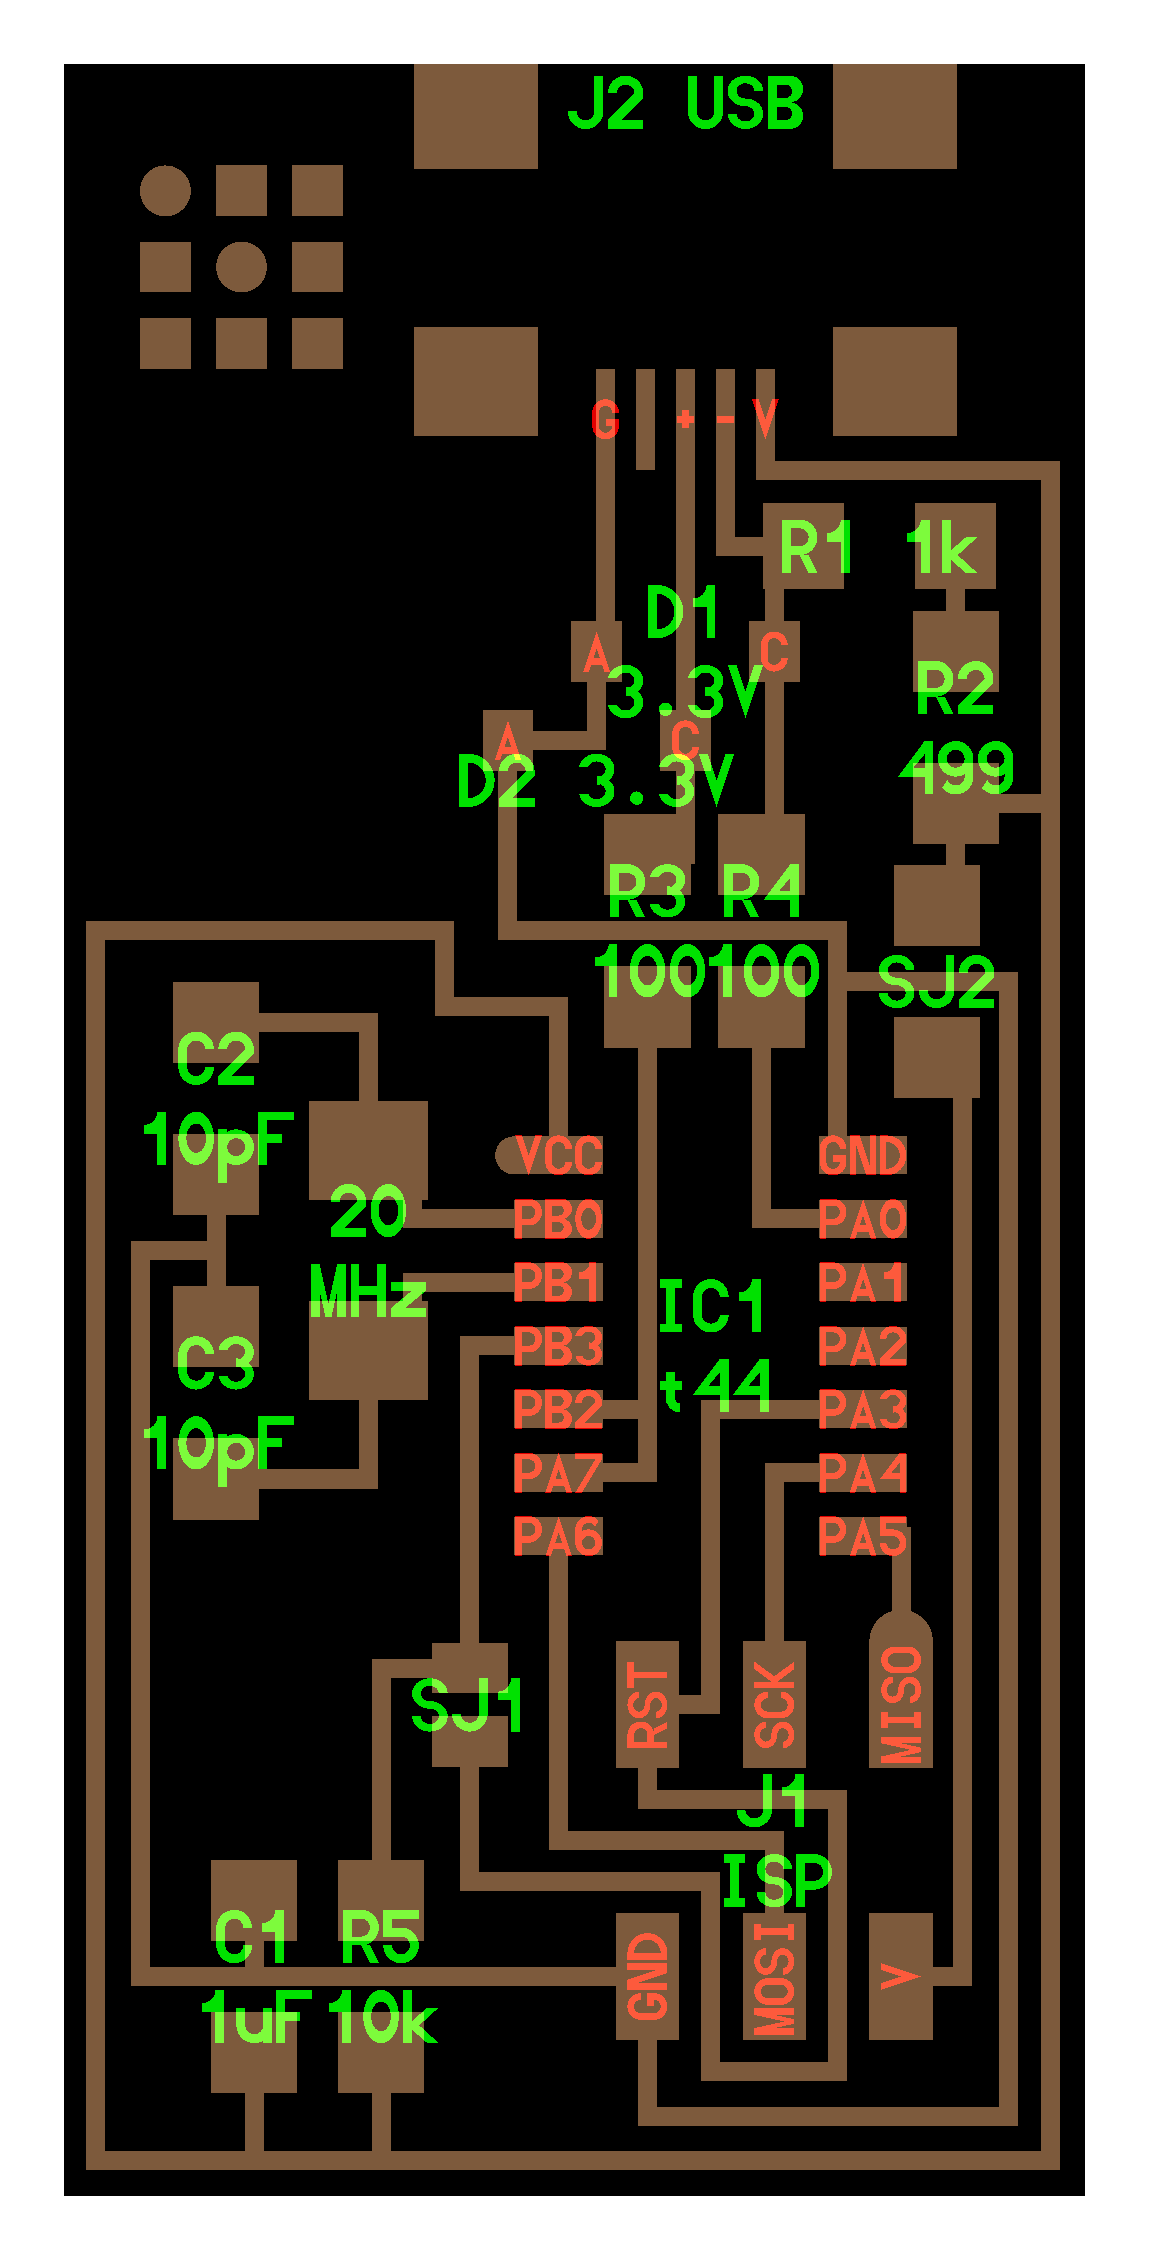

Fabmodules.org
Through fab modules that is an online software is generated the code for the machine to do the process.
In fabmodules is used images type png with 500 dpi
I made a video to show the steps to create the g-code.
Once the codes are made for the traces and for the border I will explain how to operate the machine.
1. - Clean the work surface with alcohol to be able to efficiently glue the pcb board.
2. - Make sure that the pcb is completely horizontal with a metal ruler, and glue it to the base with double-sided tape.
3. - Choose the appropriate milling bit (1/64 for traces and 1/32 for border) and fix it to the spindle with a 2mm allen wrench.
4. - Move the spindle to the position of x and y where we want the origin of coordinates. Click set origin x y.
5.- The z axes must be approached by the tool at 2 mm with the control panel, loosen the Allen wrench to drop the milling bit and re-tighten. Now the tool is in contact with the pcb and we can click set origin z.
6. - we are ready to execute the .rml file that we created in fabmodules by clicking cut and selecting that file.
7. - It is advisable to start with speed 30% and increase speed progressively. The milling bit are very delicate.
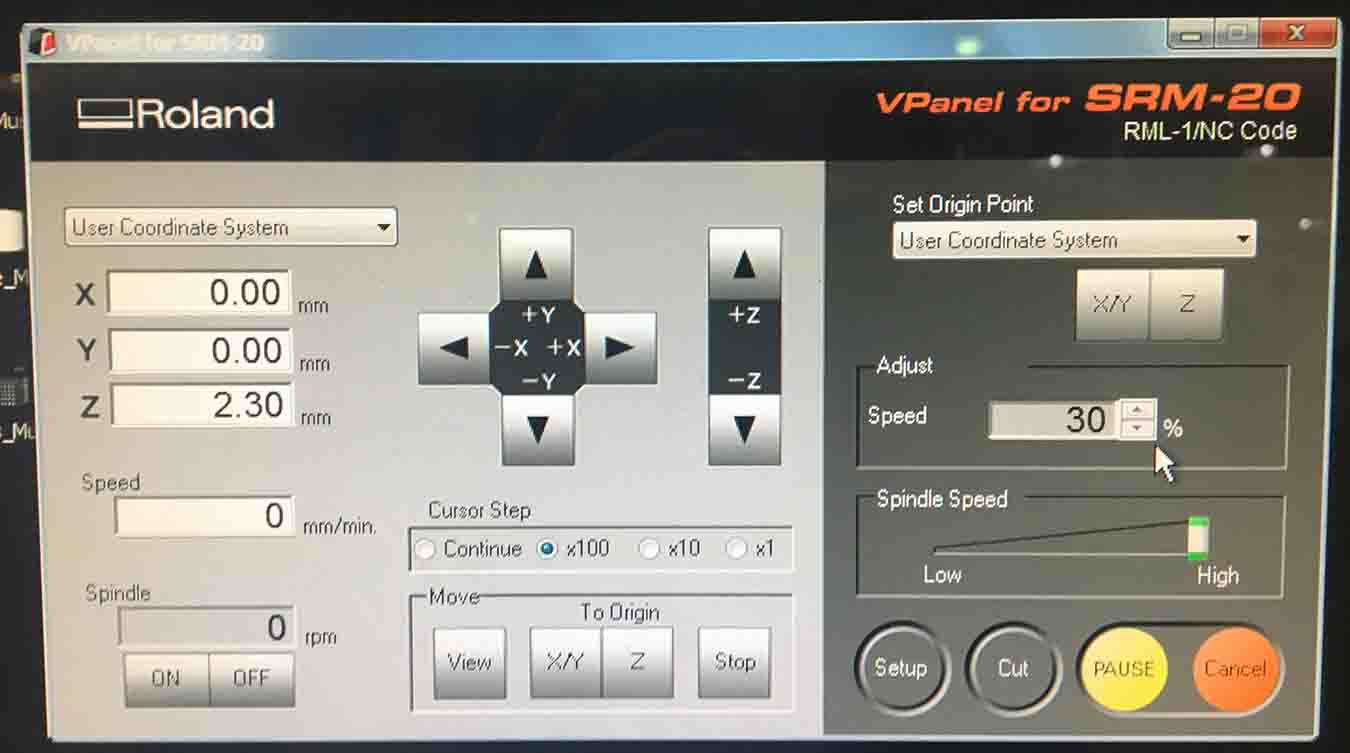
The machine is connected to a computer and controlled by this control panel.
Soldering
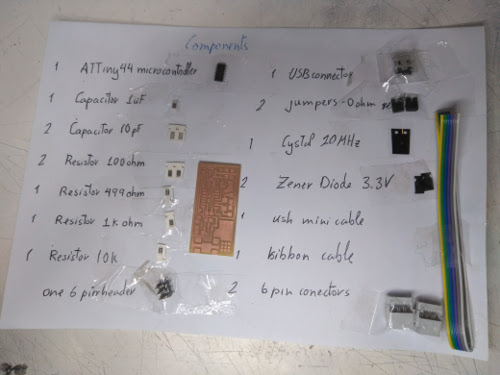
Components
To start welding it is advisable to have all the components at hand. Glue them with tape to a list I made by hand.
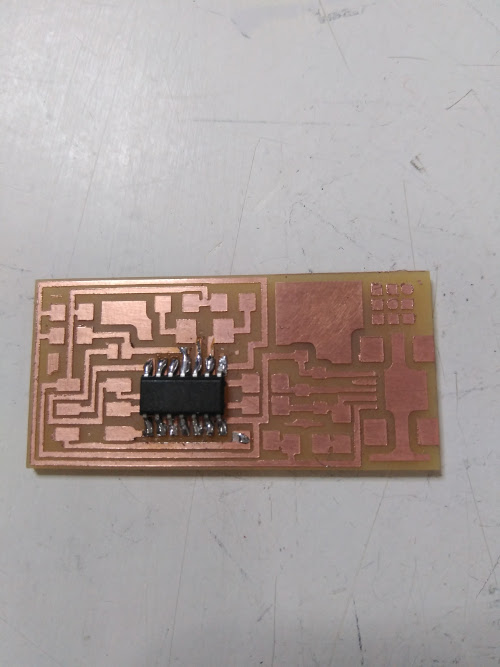
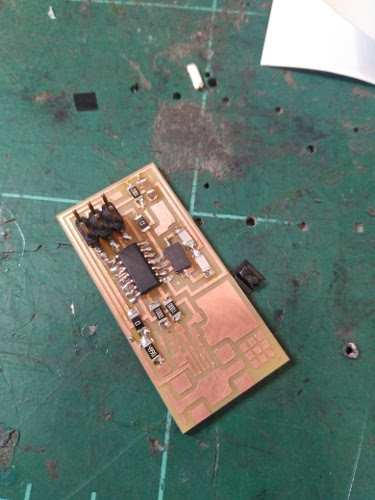
Soldering
Soldering at the beginning is difficult but over time you are getting fluent.
Tip: Put a drop of tin on one side, push the component slightly with a pair of tweezers while the soldering iron is supported on the copper where the tin is. The component is fixed to one of the sides, then the soldering iron is placed in the copper of the component pcb and the tin is applied in the space between the component and the soldering iron.
Programing
1_To program the FabISP, you first need to install the necessary software for your operating system and download the firmware.
2_Then you edit the Makefile
3_Set the fuses / program the board
4_Verify that the board is working properly
5_Then you need to open up the jumpers to make it a programmer.
Windows Software / Drivers Install

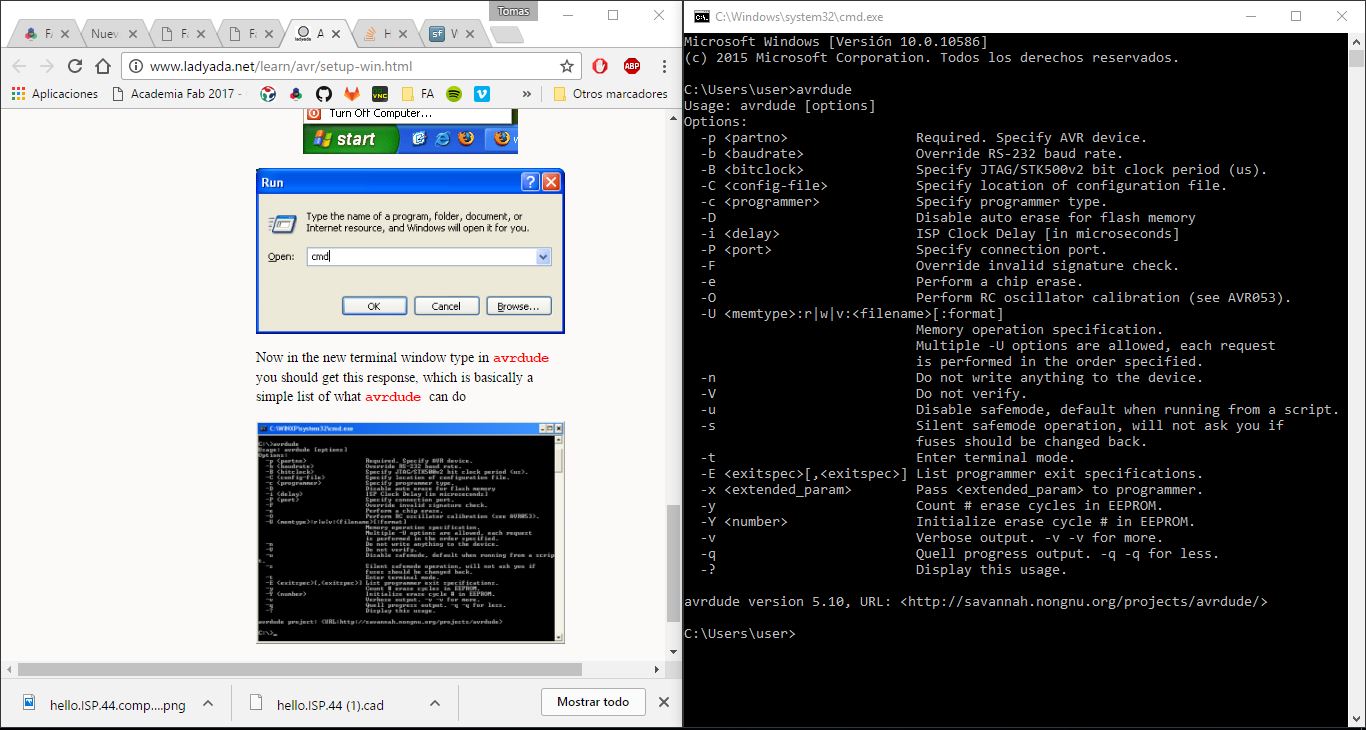
Get and install avrdude / GCC software and dependencies and drivers:
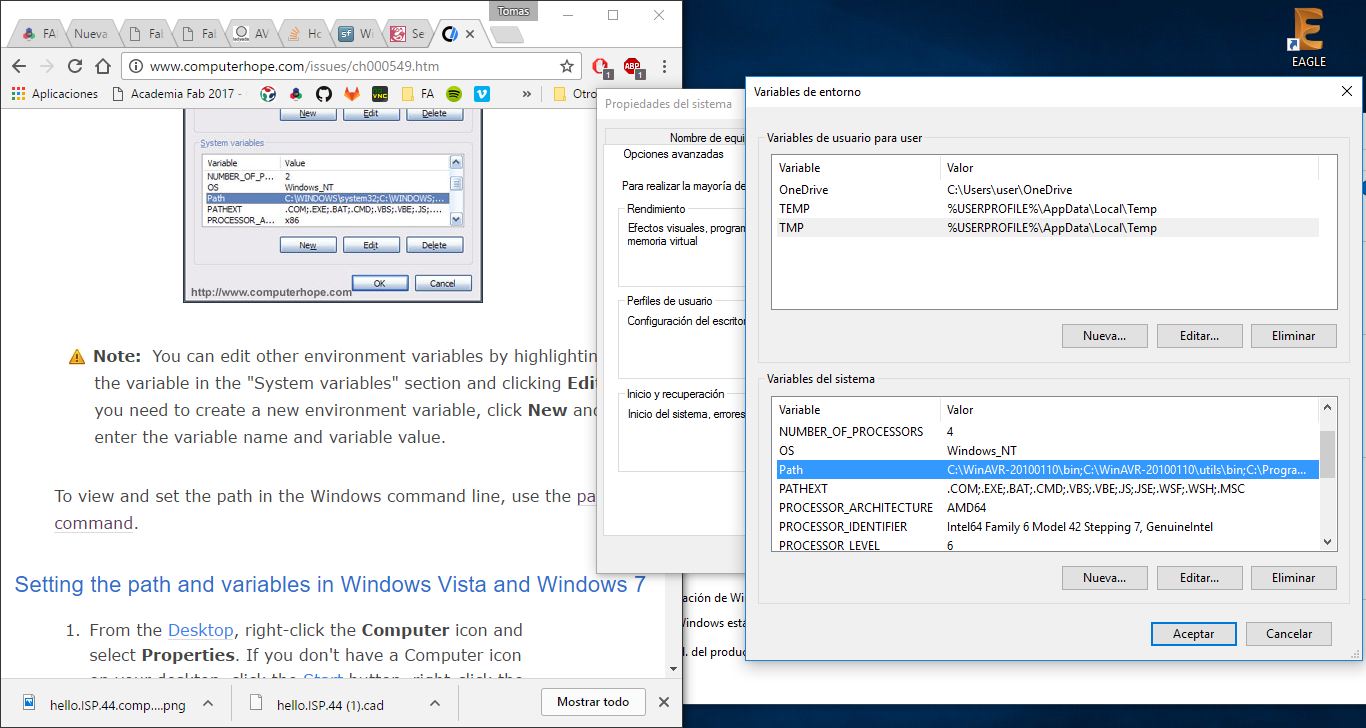
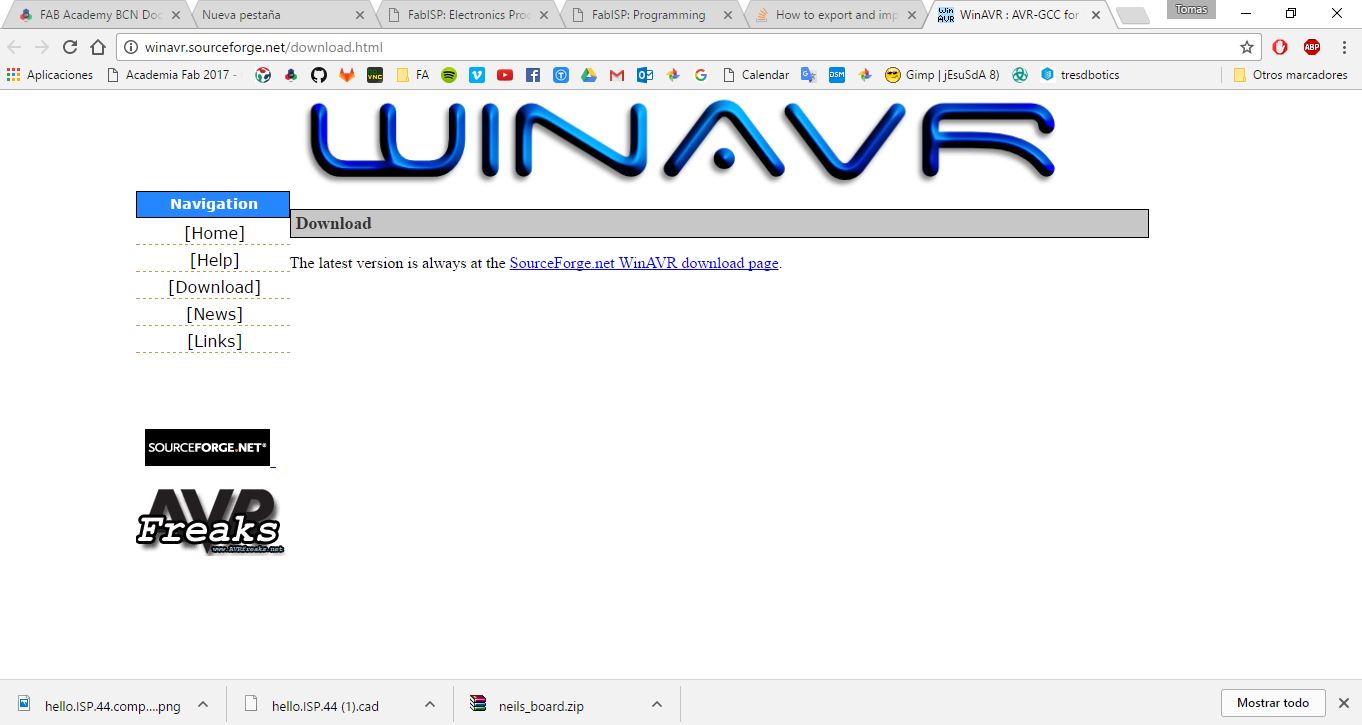
1.Warning, WinAVR is abandoned.
Installing it can destroy your systems path variable!
You can use the installer, but before you start, take note of your current system path.
C:\> SET >> allvariables.txt
2.Download and Install WinAVR - Has a (broken) installer.
- Here is a step-by-step set of instructions
copy those values
restore your old path
add the windavr path back to it
close any commandprompt window you may have open
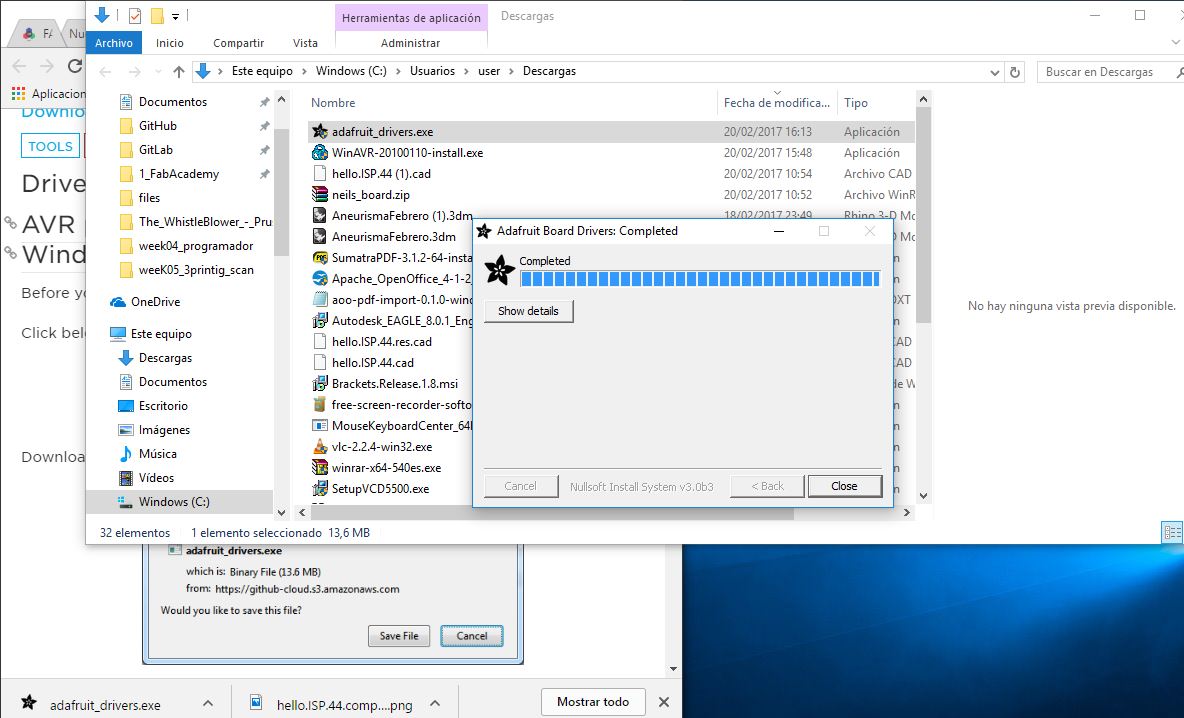
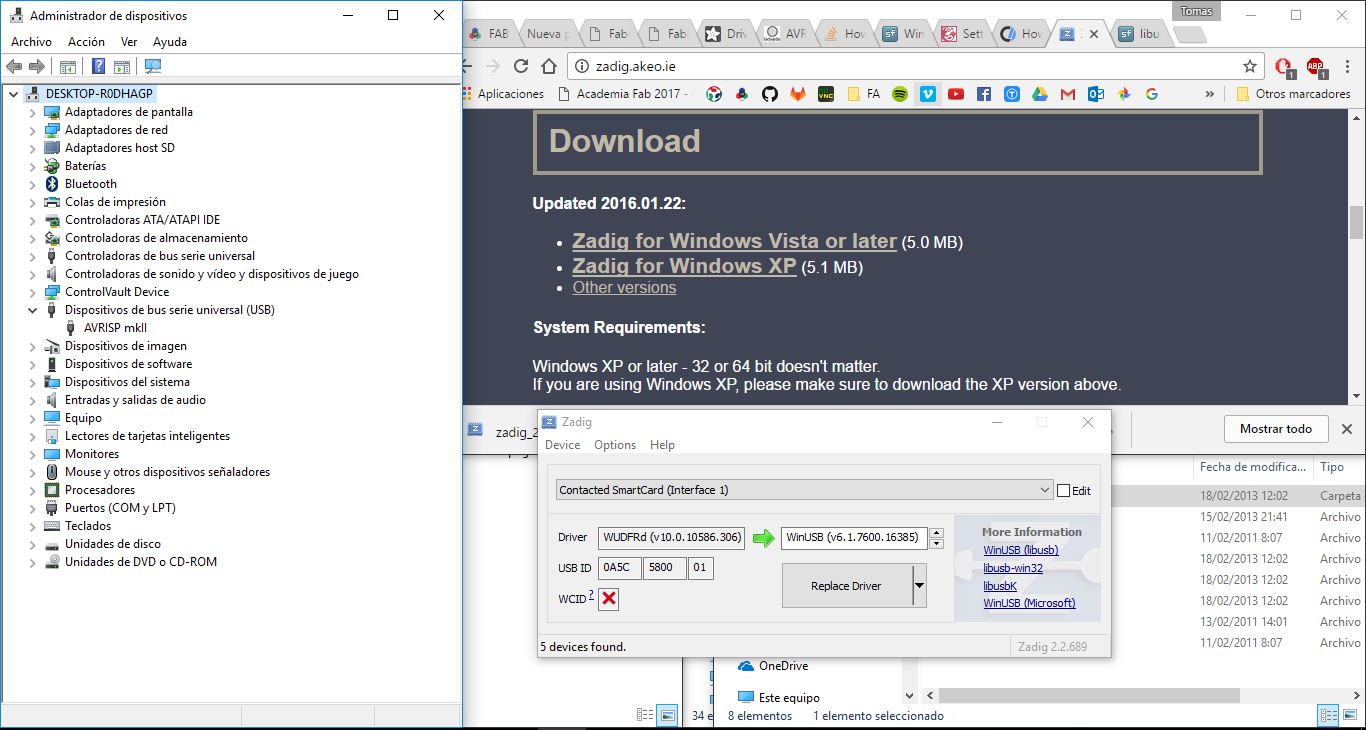
4.Download the drivers for your version of Windows
5.Download the FabISP Firmware
6.Plug in another FabISP or USBtiny programmer.
7.Install the drivers:
Go to the Start menu -> Control Panel -> Device Manager (or run "mmc devmgmt.msc")
Locate "FabISP" under "Other Devices"
Right click on the "FabISP"
Select "Update Driver Software.."
Select "Browse my computer"
Navigate to the drivers folder you downloaded at step 4 and click on the folder.
Hit "ok" to install the drivers for the USBtiny / FabISP
Then you edit the Makefile
my computers detects the fabISP
Lastly I removed the two jumpers so that the board could not be reprogrammed.
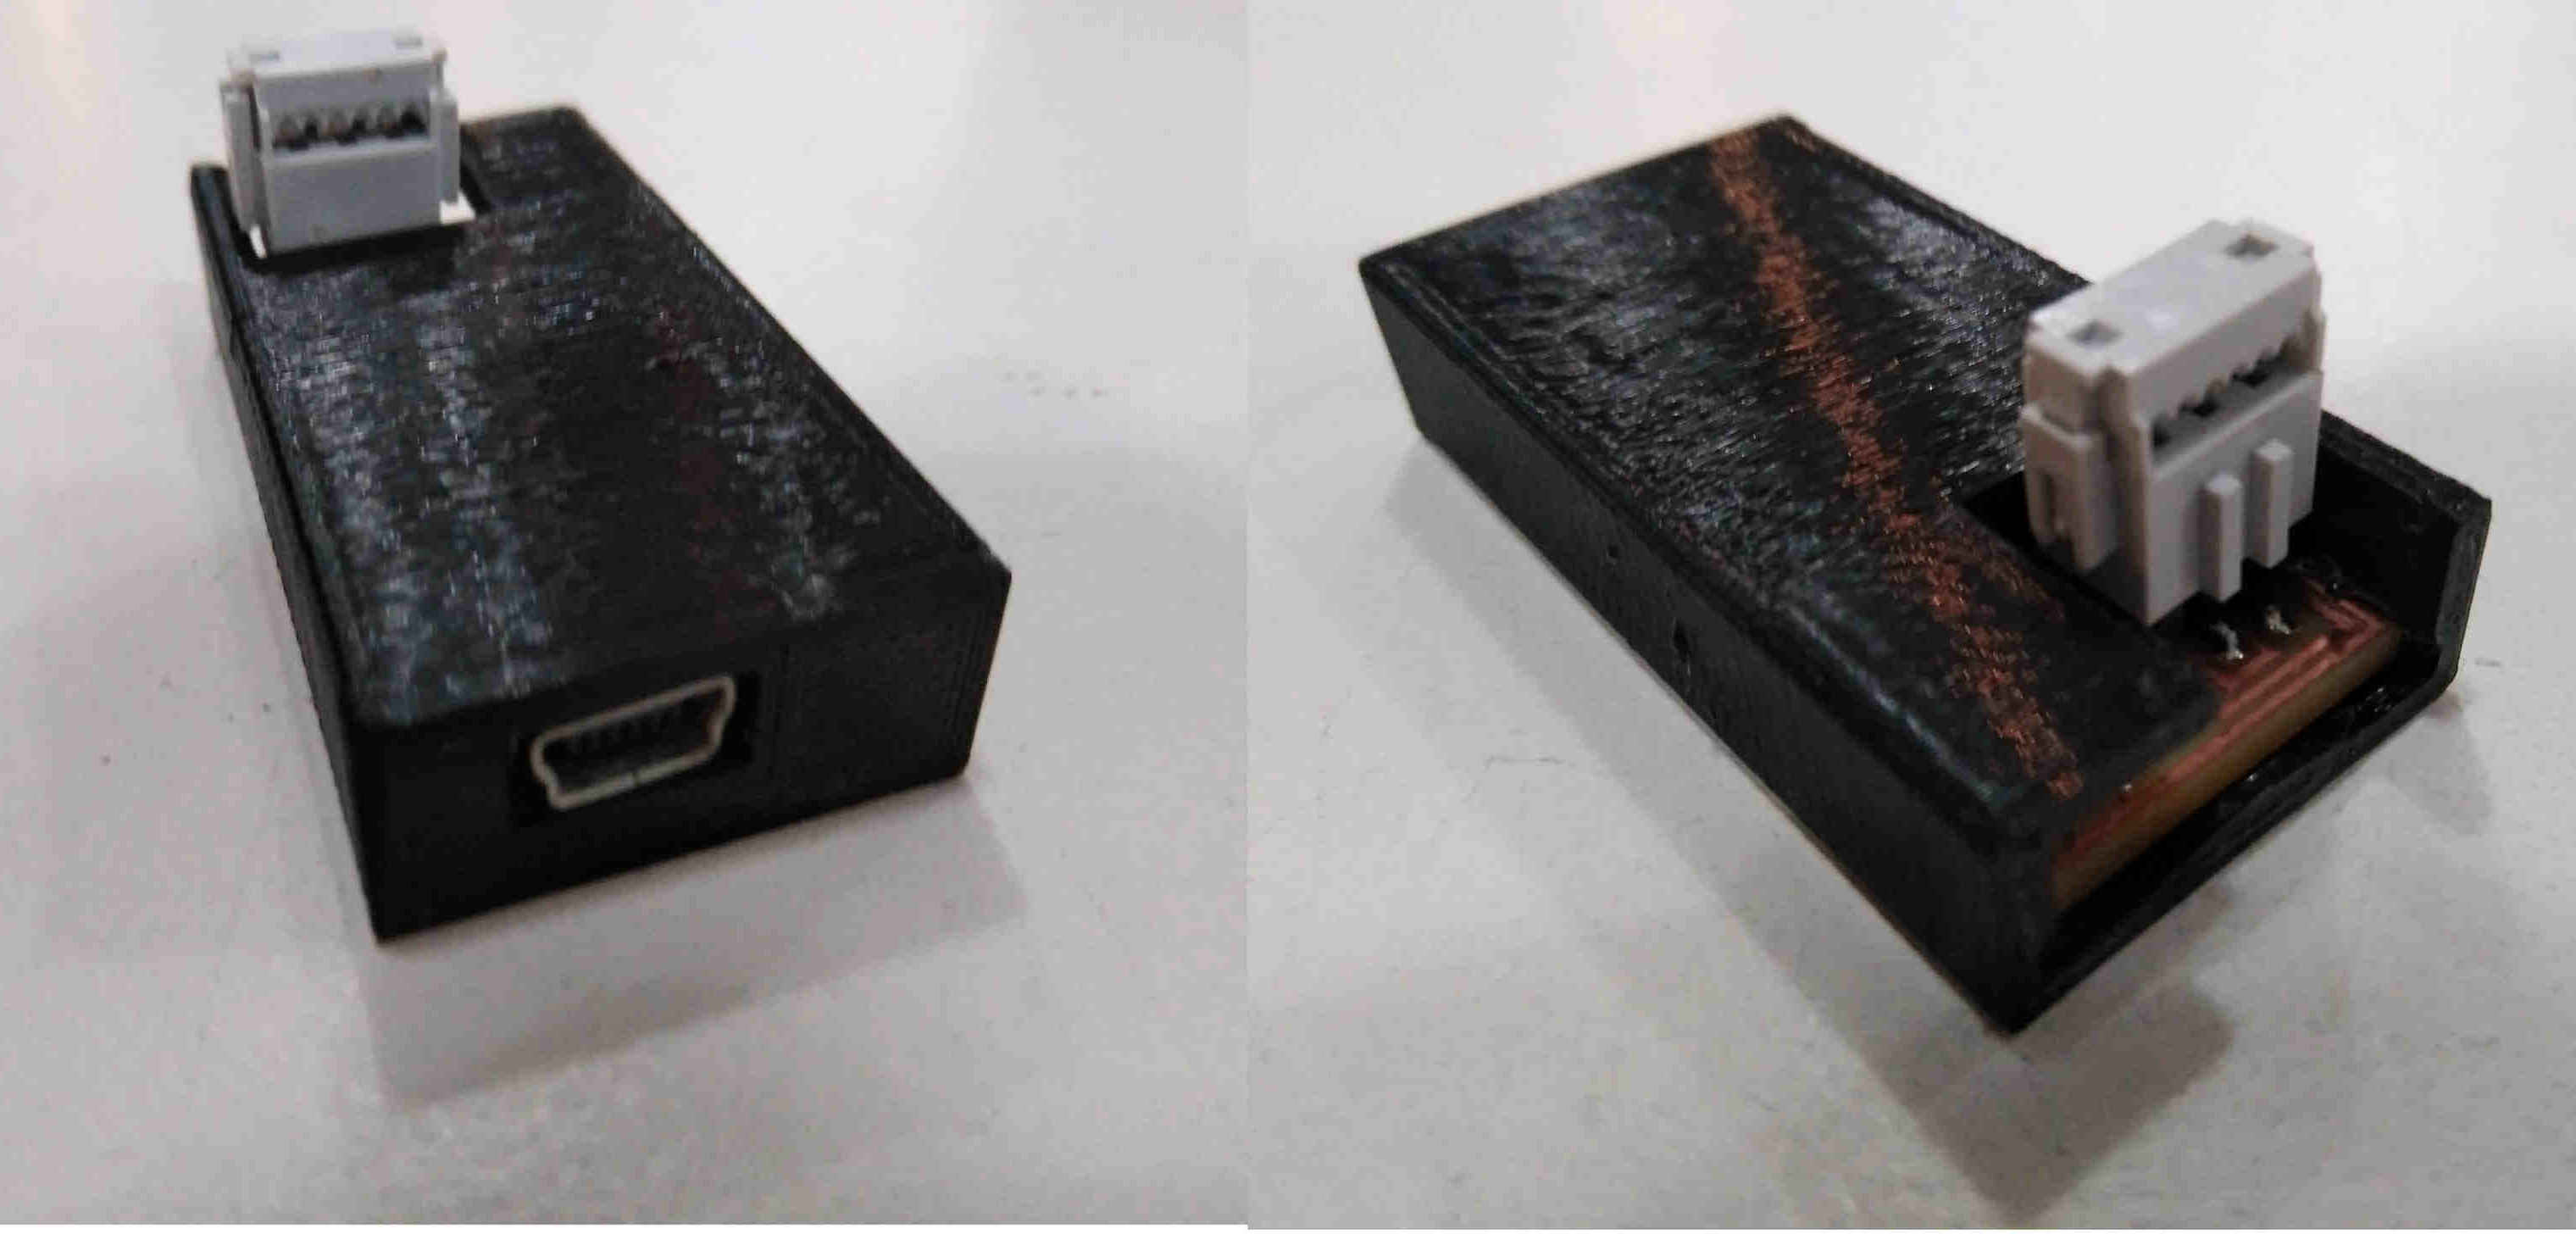
Case
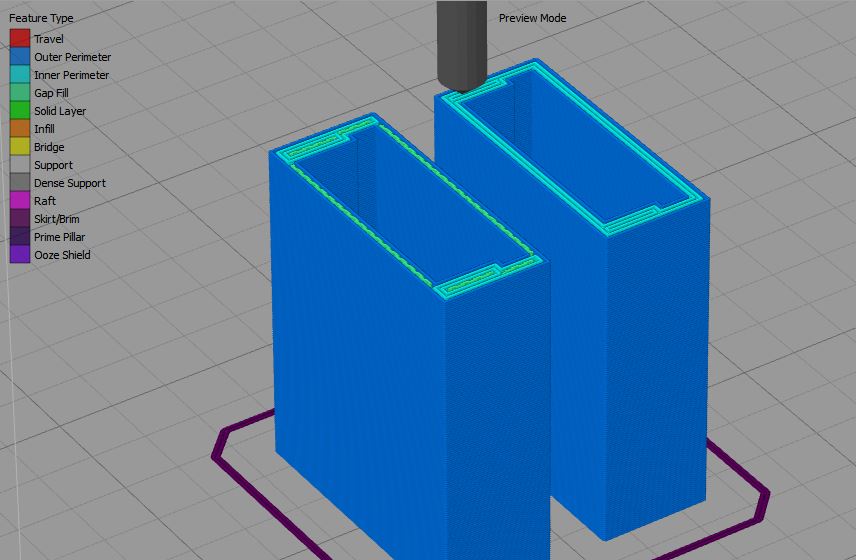
Upgrade 1 set
After FAB 13 I get interested linux, so I instaled Ubuntu in my labtop
The first time I programmed the fabisp I made it with the mac of Nico and I never run it on my computer although the computer detected it, besides do not document the programming well and I decided to try again installing the Ubuntu operating system as a partition.
Get Ubuntu with XFCE
On www.ubuntu.com/download/desktop web page there are two versions available Ubuntu 16.04.3 LTS and Ubuntu 17.04. I have decided to try the 16 because I think it can be more stable.
After putting the downloaded file on the flash drive, I reboot and follow the instructions of the guide but I can not progress, now I am waiting for help.
Create a bootable USB stick on Windows
After the error see FabOptimusrufus
programming_FabISP.html
1.- Install Necessary Software for AVR Programming:
Get and install avrdude / GCC software and dependencies:
Open Terminal and type:
sudo apt-get install flex byacc bison gcc libusb-dev avrdude
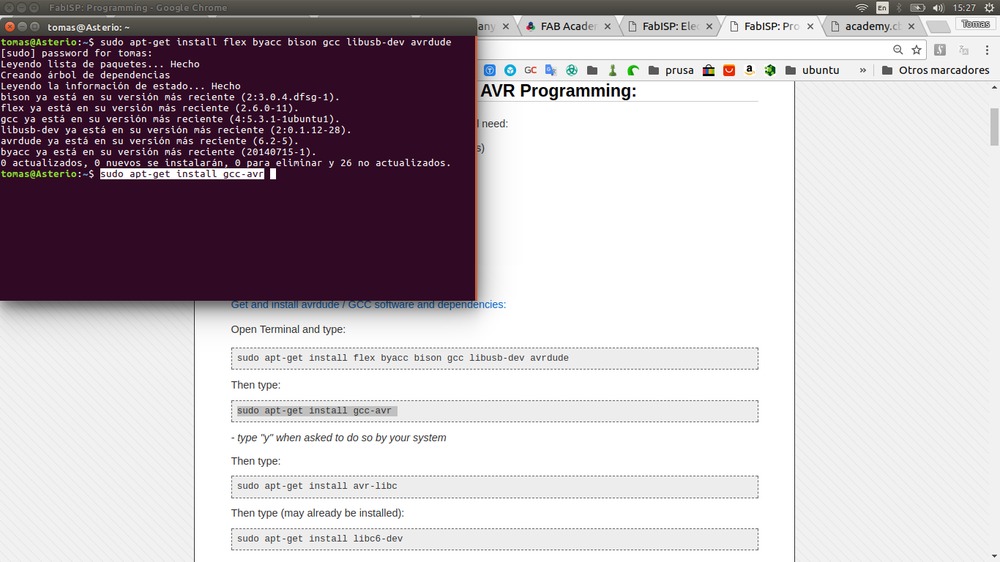
Then type:
sudo apt-get install gcc-avr
- type "y" when asked to do so by your system
Then type:
sudo apt-get install avr-libc
Then type (may already be installed):
sudo apt-get install libc6-dev
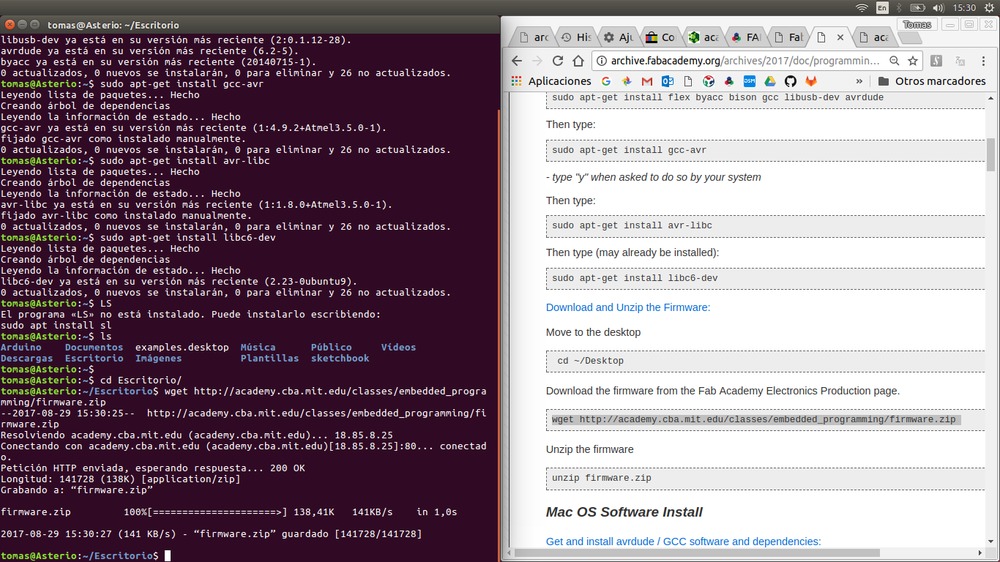
Download and Unzip the Firmware:
Move to the desktop
cd ~/Desktop
Download the firmware from the Fab Academy Electronics Production page.
wget http://academy.cba.mit.edu/classes/embedded_programming/firmware.zip
Unzip the firmware
unzip firmware.zip

2.- Edit the Makefile
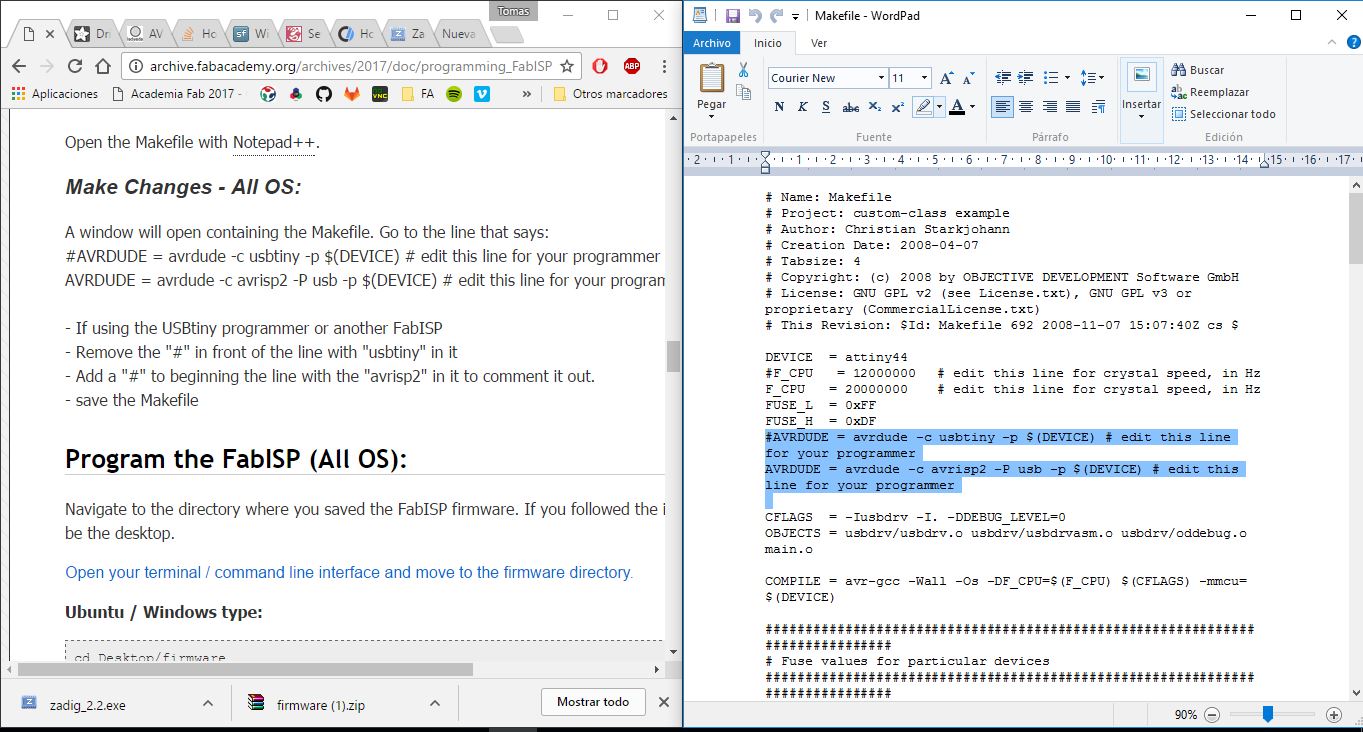
Make Changes - All OS:
A window will open containing the Makefile. Go to the line that says:
#AVRDUDE = avrdude -c usbtiny -p $(DEVICE) # edit this line for your programmer
AVRDUDE = avrdude -c avrisp2 -P usb -p $(DEVICE) # edit this line for your programmer

- If using the USBtiny programmer or another FabISP
- Remove the "#" in front of the line with "usbtiny" in it
- Add a "#" to beginning the line with the "avrisp2" in it to comment it out.
- save the Makefile
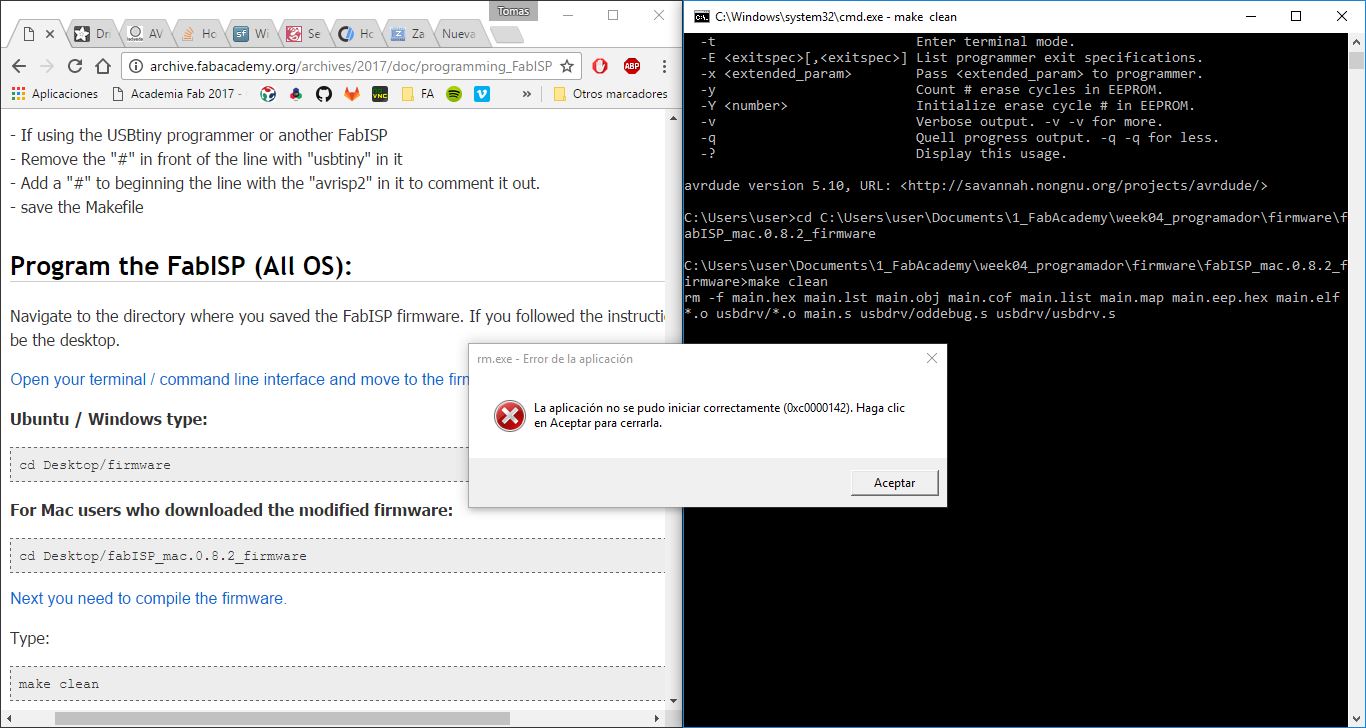
3.- Program the FabISP
Open your terminal / command line interface and move to the firmware directory. Ubuntu / Windows type: cd Desktop/firmware Ubuntu / Windows type: cd Desktop/firmware Next you need to compile the firmware. Type:
make clean
make hex
make fuse
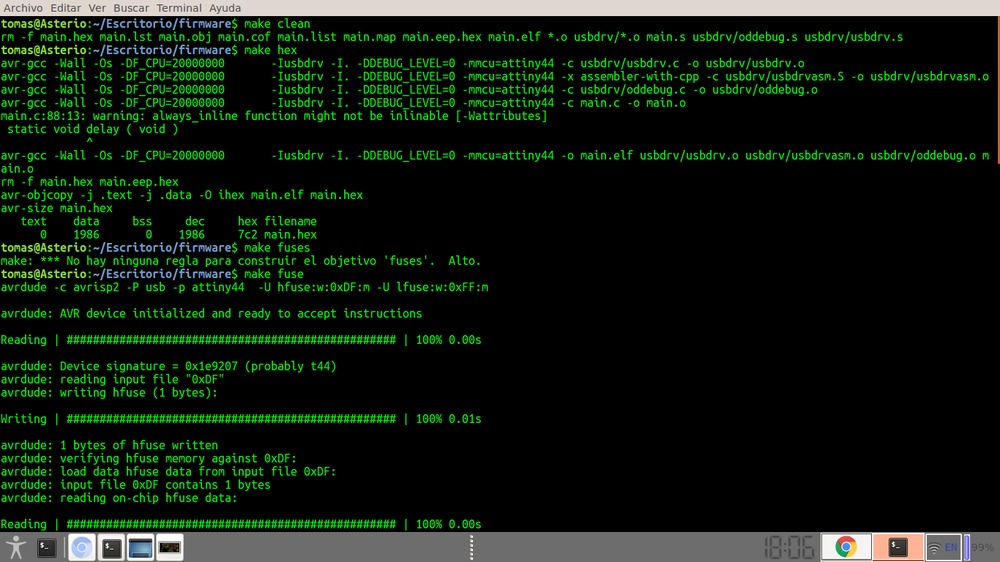
Then type:
make program
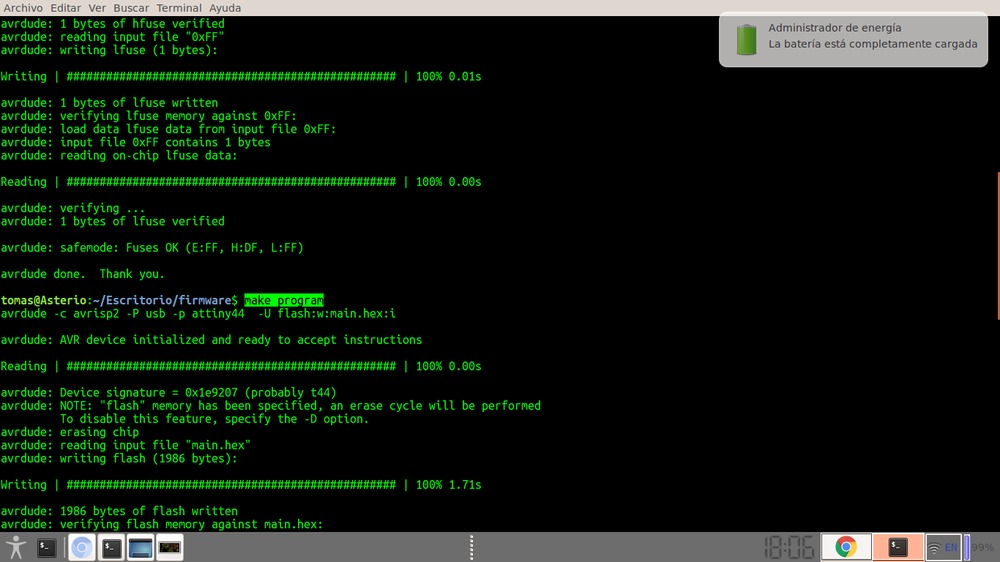
avrdude done. Thank you.
Wooo! Success!
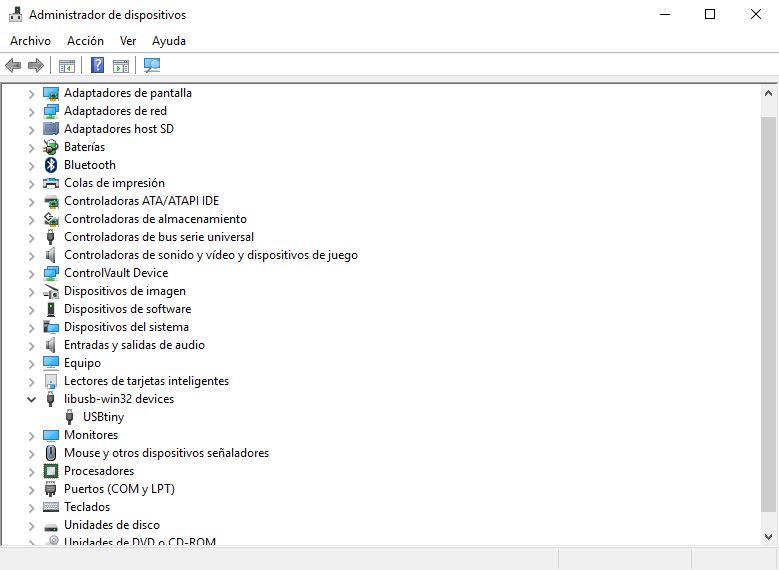
If your FabISP has been successfully programmed, you should see a list of the USB devices plugged into your computer. The FabISP will be listed in a line like the following:
lsusb
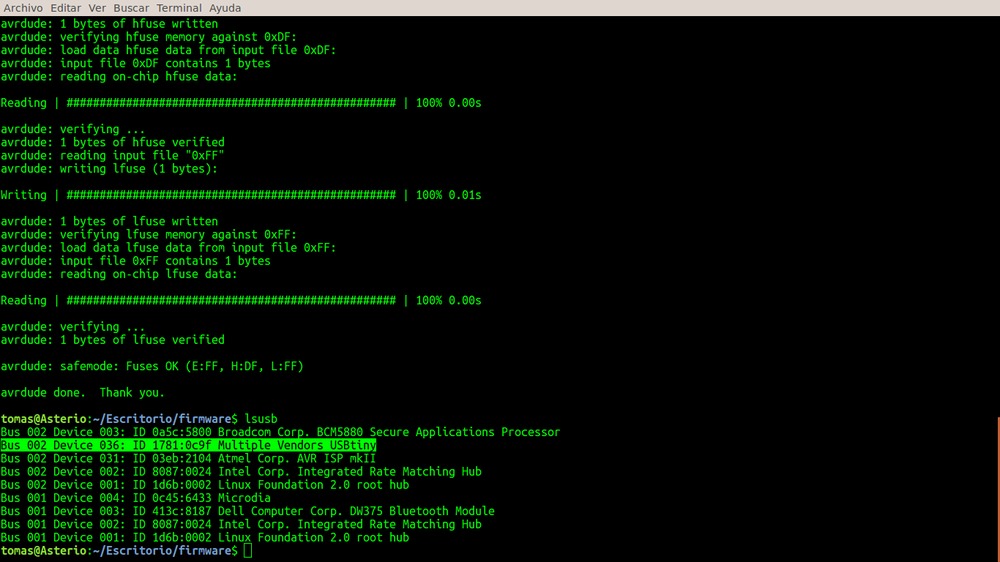
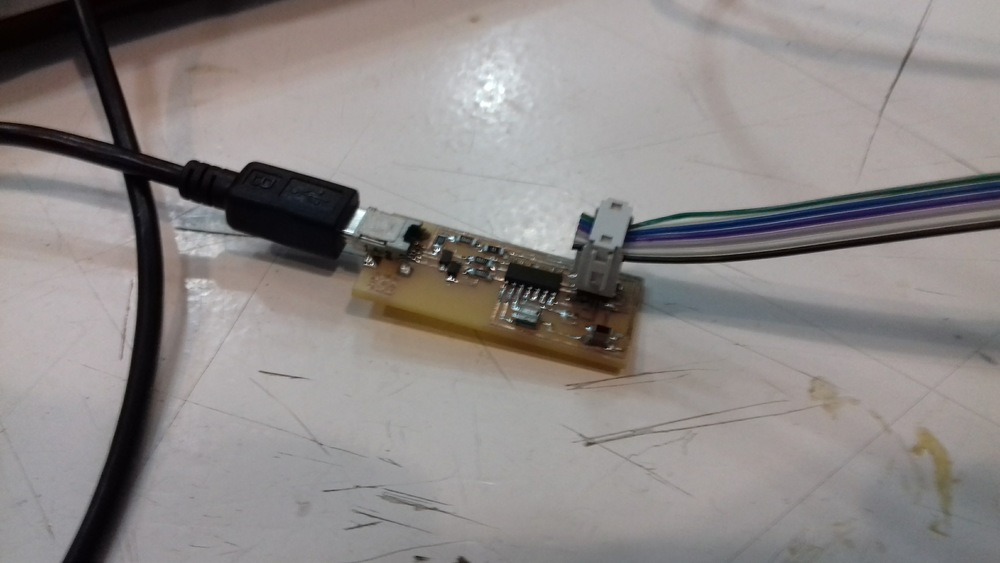
The FabISP is programed as a programer a my laptop detect it as:
Bus 002 Device 004: ID 1781:0c9f Multiple Vendors USBtiny
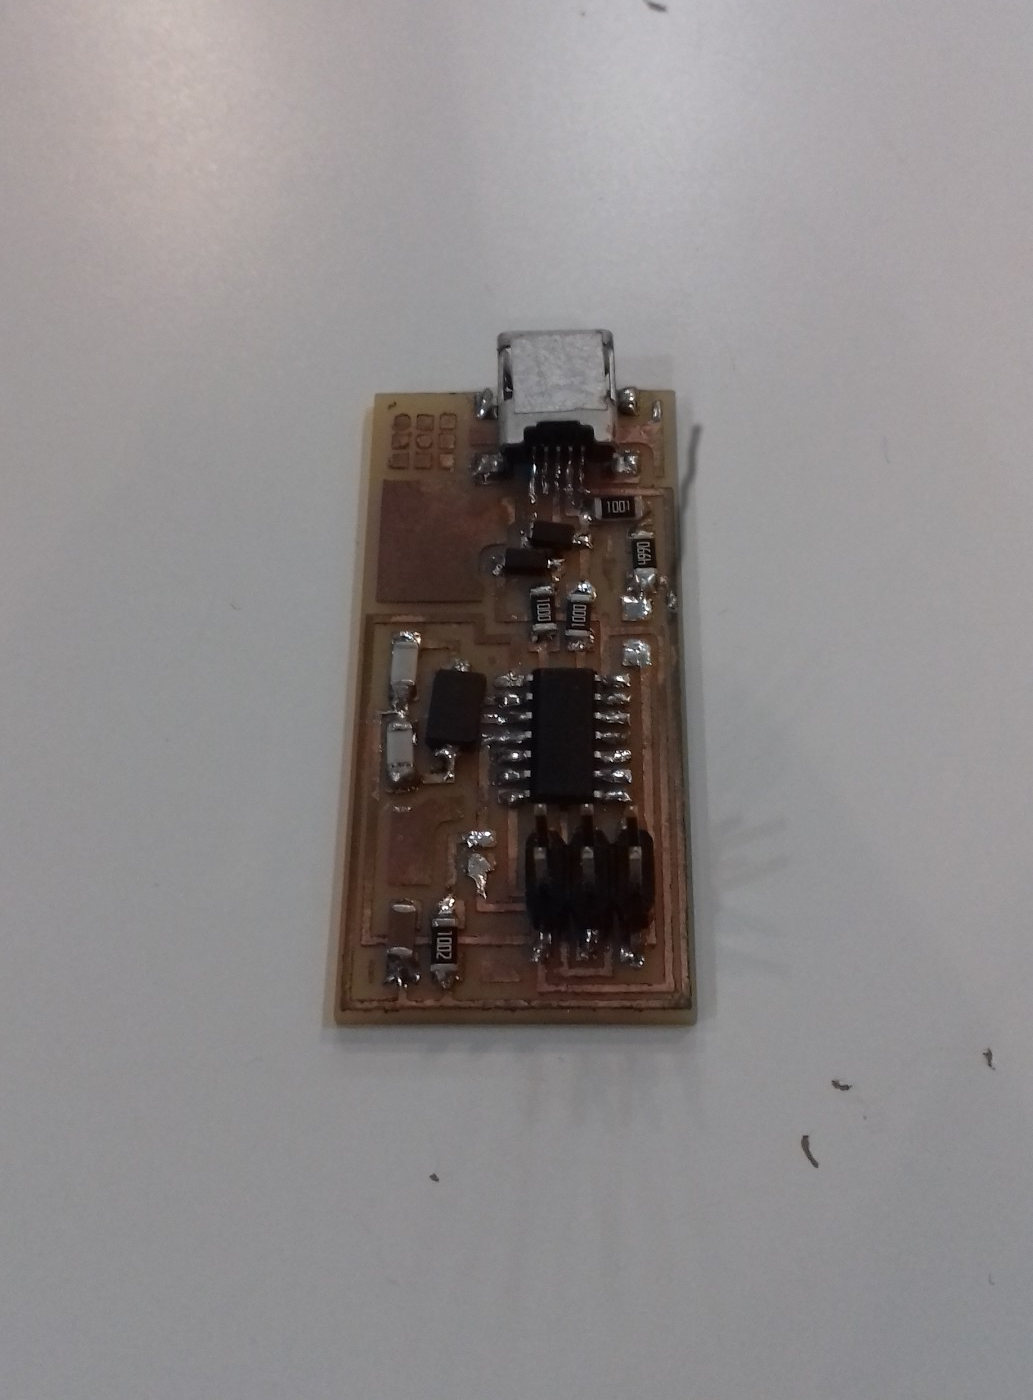
These are some pictures o my FabISP revuild
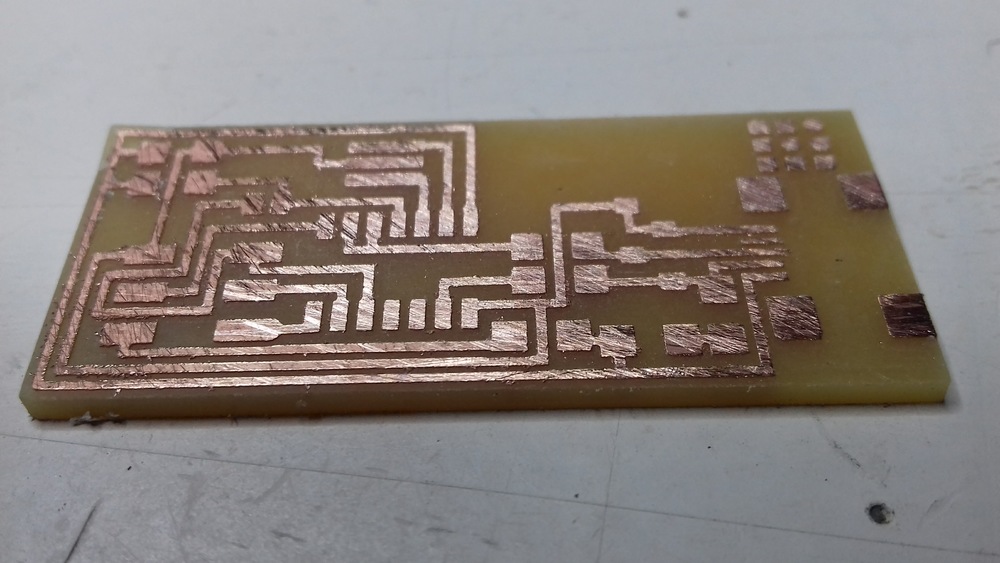
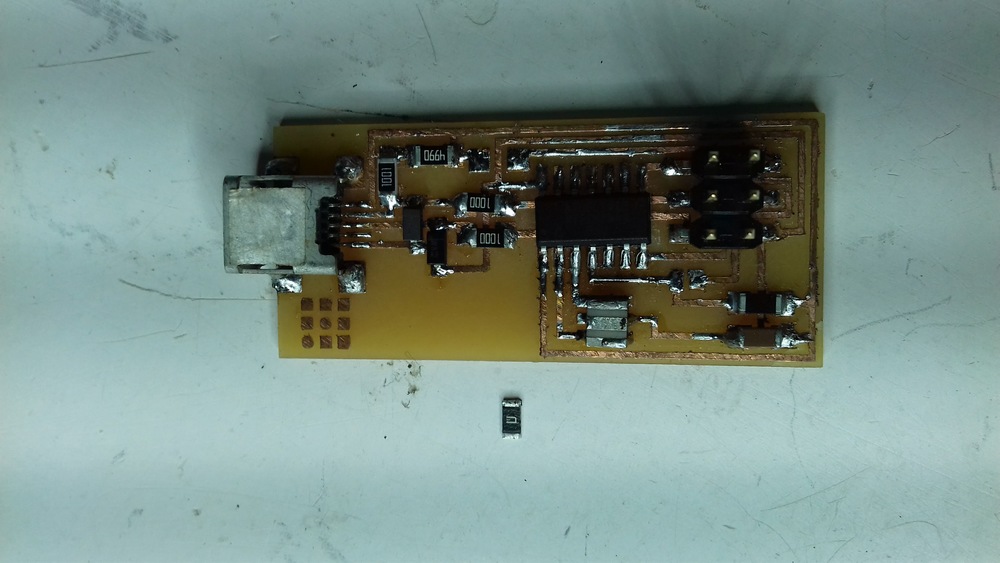
Last step is remove the two 0 resistance to use it.
