Assignment
Add an output device to a microcontroller board you've designed and program it to do something
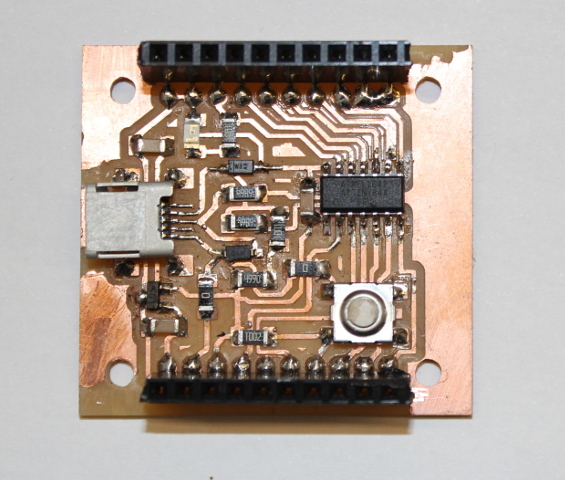
As part of another assigament (Week 8) design a board that could be used as an arduino, the idea is not to create a plate for each of the electronic assignaments, there are many boards that use arduino and mircroprocesarores as the Attiny85 / 44/84, in my case I have decided to buy an attiny 84, which is the same as 44 but has 8k of flash memory, allowing to add more lines of code by applying the programming capacity.
In the previous assignment I have also connected a servo motor, in this case I decided to try with an OLED display, since the 8k allowed me to program all the necessary code for it to work.
Schematic
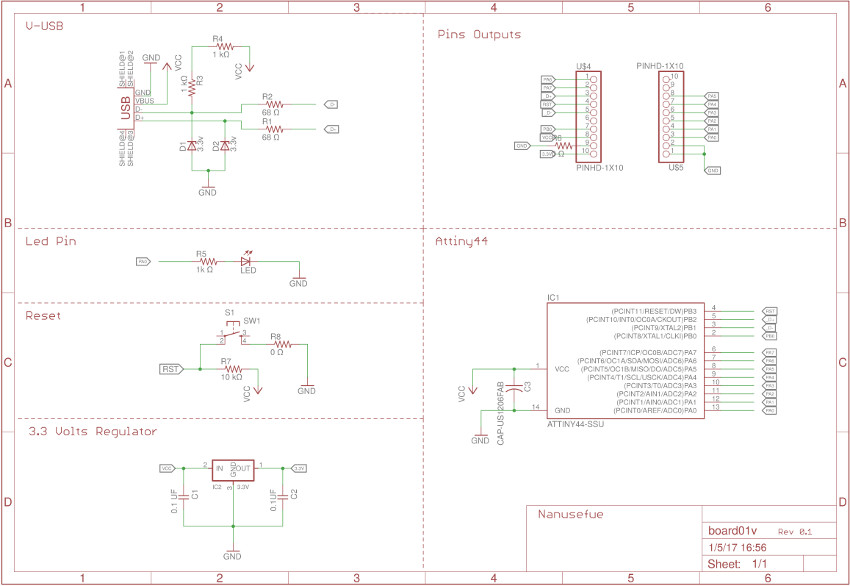
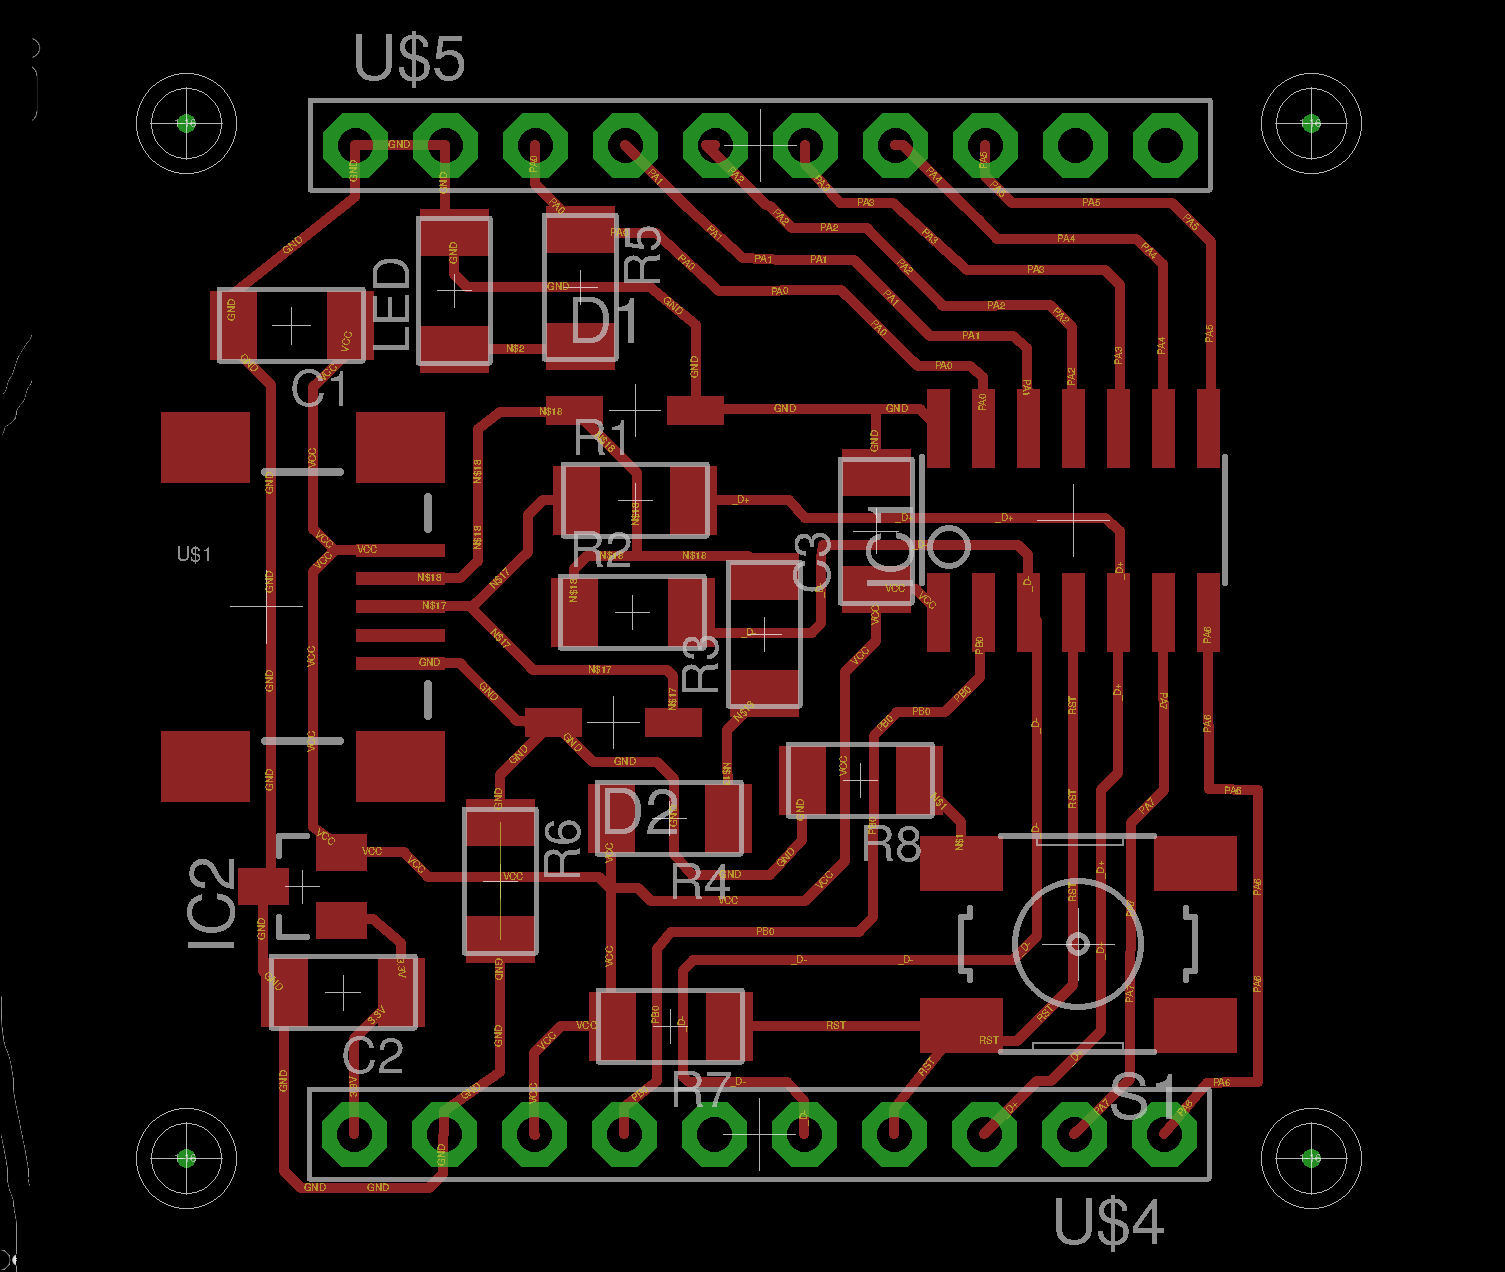
Eagle/PCB
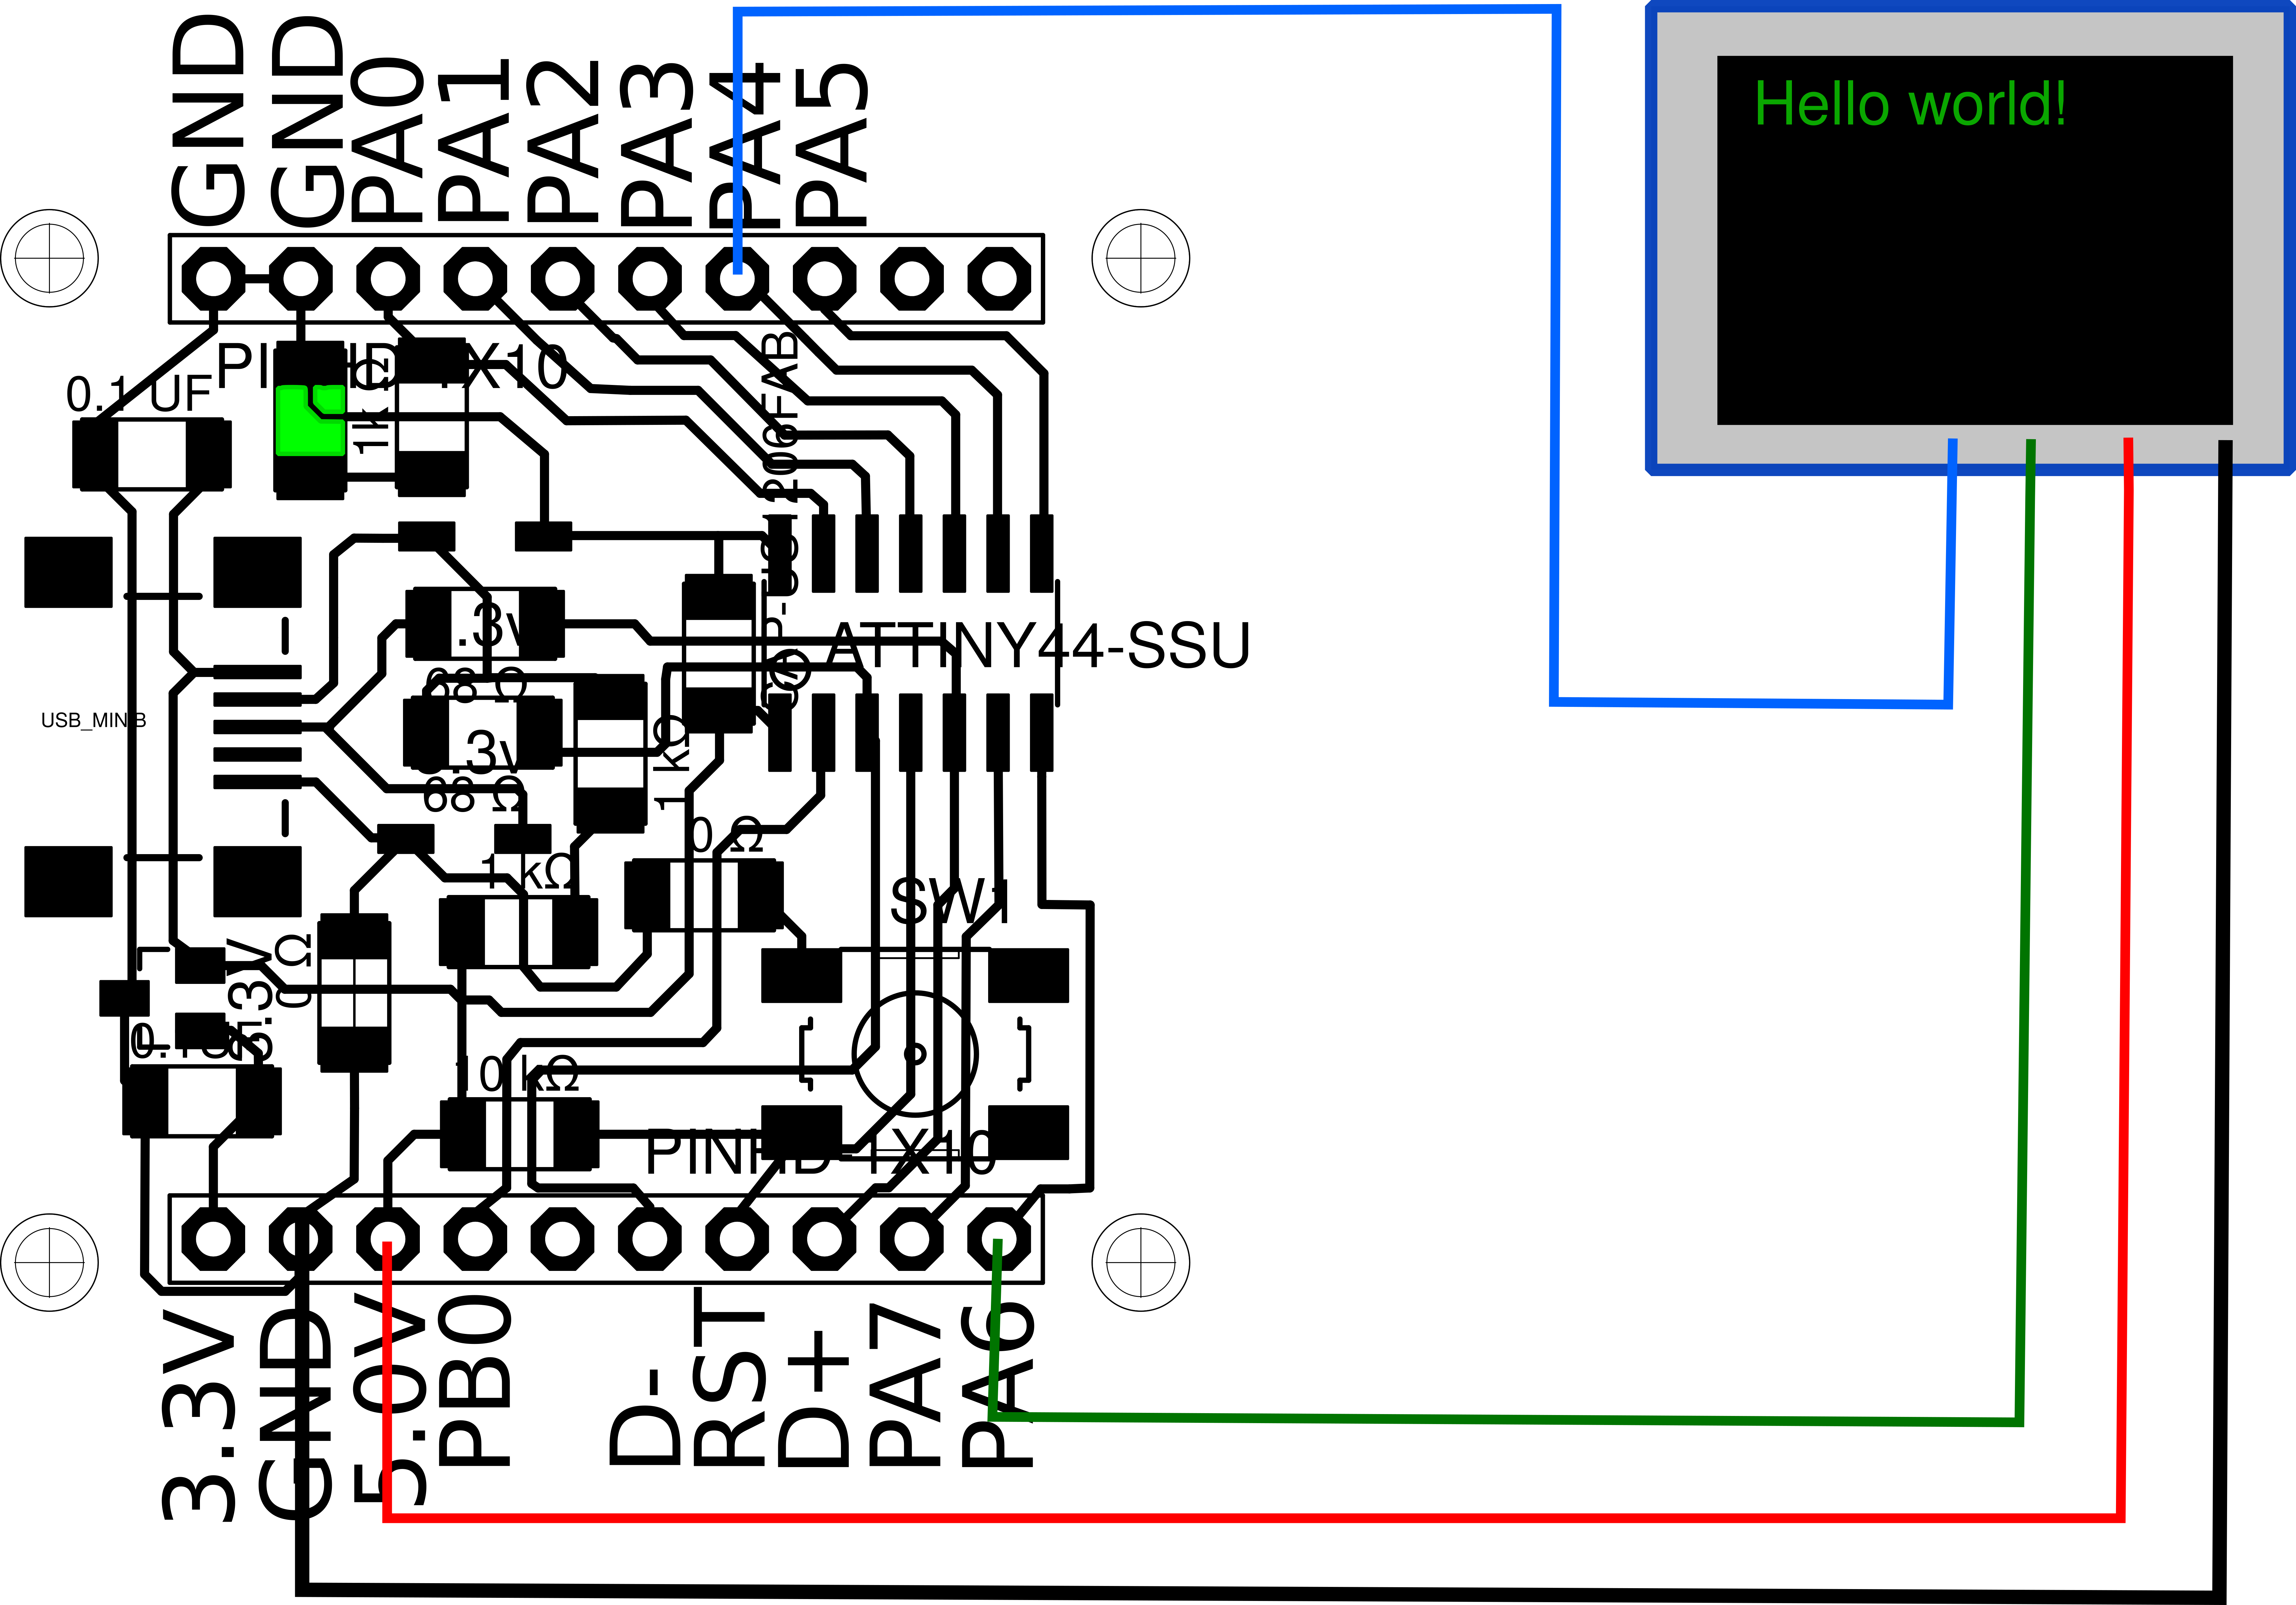
I2C Protocol
I2C requires a mere two wires, like asynchronous serial, but those two wires can support up to 1008 slave devices. Also, unlike SPI, I2C can support a multi-master system, allowing more than one master to communicate with all devices on the bus (although the master devices can’t talk to each other over the bus and must take turns using the bus lines).
Data rates fall between asynchronous serial and SPI; most I2C devices can communicate at 100kHz or 400kHz. There is some overhead with I2C; for every 8 bits of data to be sent, one extra bit of meta data must be transmitted.
The hardware required to implement I2C is more complex than SPI, but less than asynchronous serial. It can be fairly trivially implemented in software.

Adapt these SCA and SCL port and pin definition to your target.
- #define SDA 6 // SDA Port A, Pin 6
- #define SCL 4 // SCL Port A, Pin 4
- #define SDA_PORT PORTA // SDA Port A
- #define SCL_PORT PORTA // SCL Port A
1
2
3
4
5
6
7
8
9
10
11
12
13
14
15
16
17
18
19
20
21
22
23
24
25
26
27
28
29
30
31
32
#include <DigisparkOLED.h>
#include <Wire.h>
#include "img0_128x64c1.h"
#include "digistump_128x64c1.h"


void setup() {
  // put your setup code here, to run once:

  oled.begin();

}

void loop() {

  // put your main code here, to run repeatedly:
  oled.fill(0xFF); //fill screen with color
  delay(1000);
  oled.clear(); //all black
  delay(1000);
  //usage: oled.setCursor(X IN PIXELS, Y IN ROWS OF 8 PIXELS STARTING WITH 0);
  oled.setCursor(0, 0); //top left
  oled.setFont(FONT8X16);
  oled.println(F("FABACADENY 2017")); //wrap strings in F() to save RAM!
  oled.setFont(FONT6X8);
  oled.println(F("ESTEBAN OLED!"));
  oled.setCursor(0, 3); //two rows down because the 8x16 font takes two rows of 8
  oled.println(F("BCN")); //println will move the cursor 8 or 16 pixels down (based on the front) and back to X=0

  delay(1000);

}
Here a video of how the oled works after programming it, the plate is fed through the USB port.
