Composites
Week 14

composites
Tasks
read the material safety data sheet (MSDS) and technical data sheet (TDS) for the resins that you're using
design and fabricate a 3D mold (~ft2) and produce a fiber composite part in it
The mold
After watching Neil's lesson and i decided that i wanted to learn about the wood bending process using composites. I watched a few videos in youtube and watched some processes using, steam, water and other natural processes.
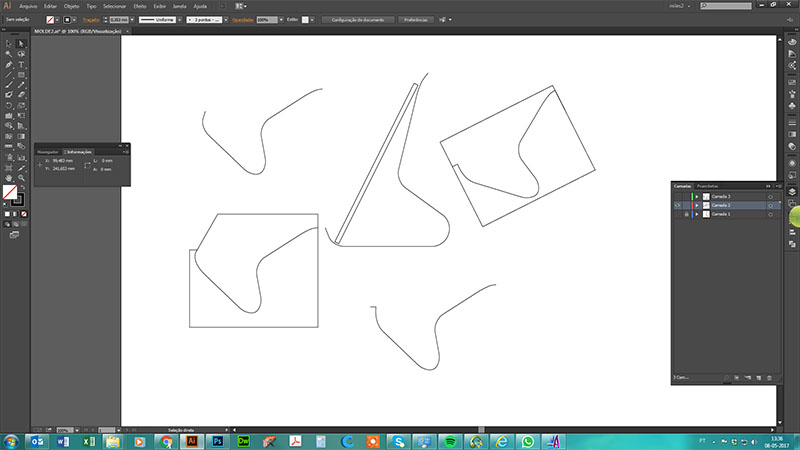
I defined that i wanted to make a phone stand made of bent wood. I started to draw in illustrator the shape of it, and thinking about a way to make the wood molds to insert the laminated wood composite. The vacuum pump was not an option for me, because i needed more preassure to bend the wood. For the molds, i used 4 glued layers of overlaped 18mm plywood. I made a few errors untill i got a good version of what i wanted. My first cam machining was mad through the vectors and the result was not what i expected
Designing the stand and defining the plywood mold
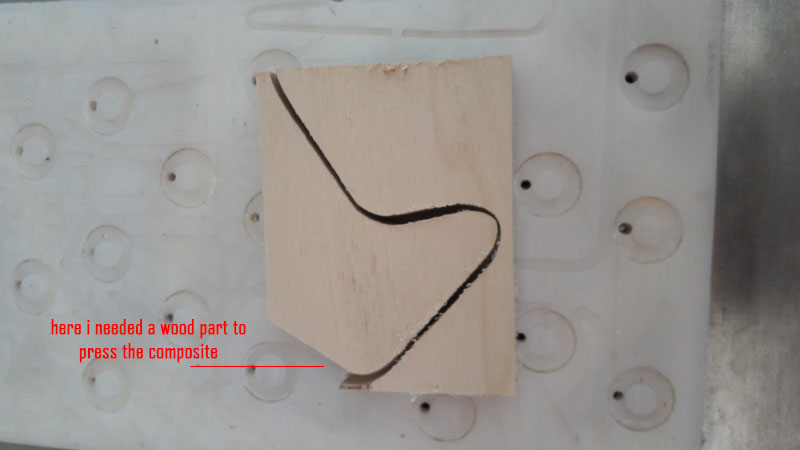
First mold
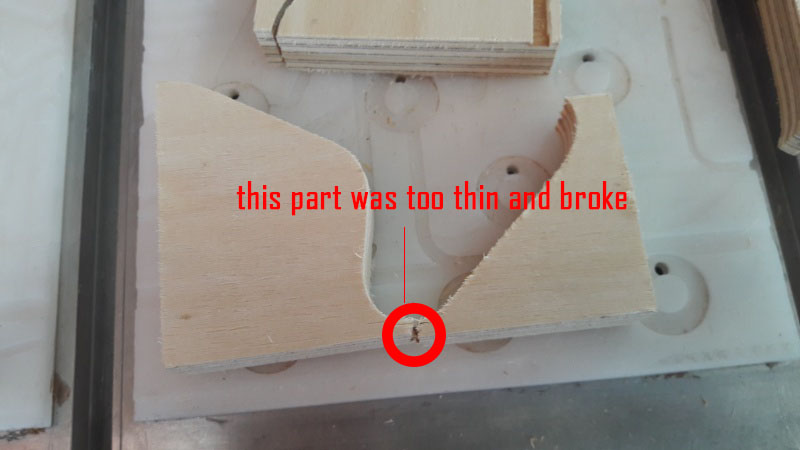
Second mold
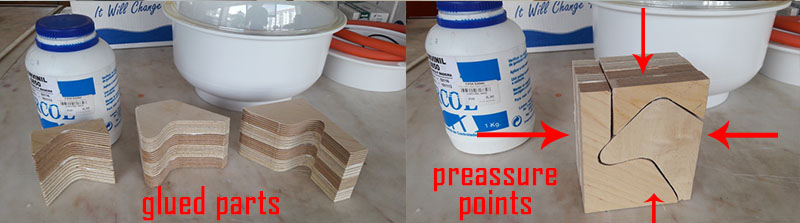
Final mold construction
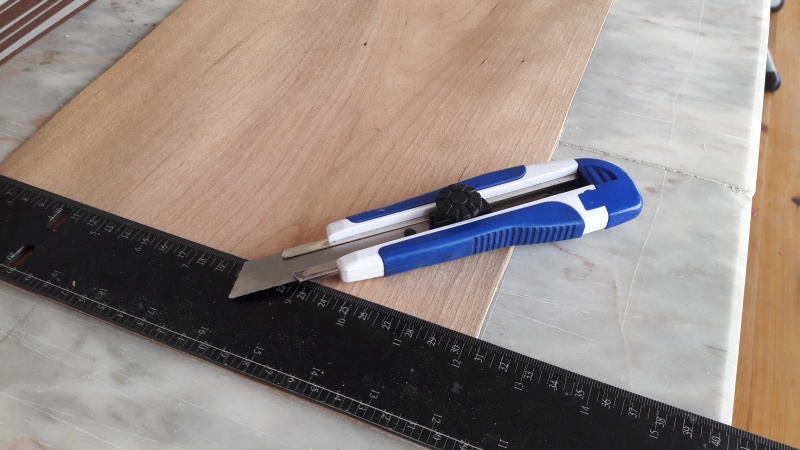
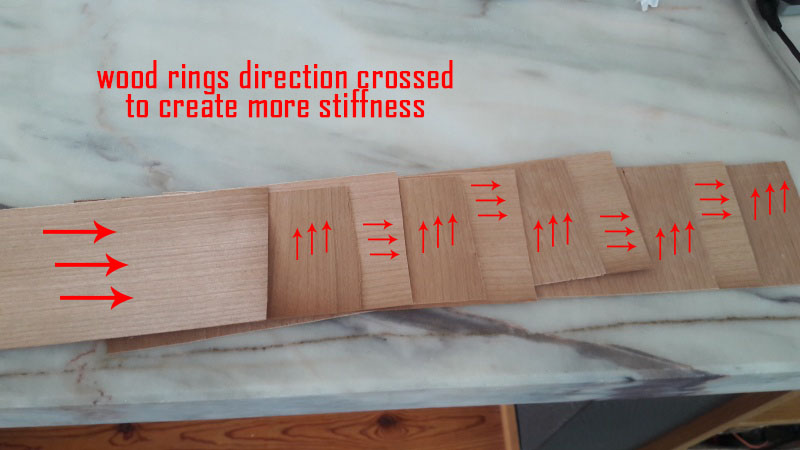
Next process was to find the wood material for the composite. I got cherry tree laminated wood sheets and cut them in order to cross the wood rings.
Laminated wood
sheets crossed order
The links of the sheet:
Hardener datasheet
Resin Datasheet
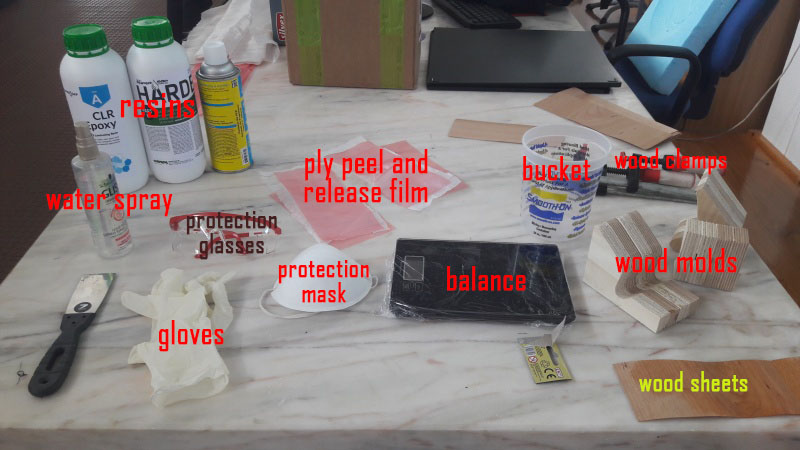
I used all the security and protection recomendations for the resins use and prepared my working table:
Prepared table with all the components
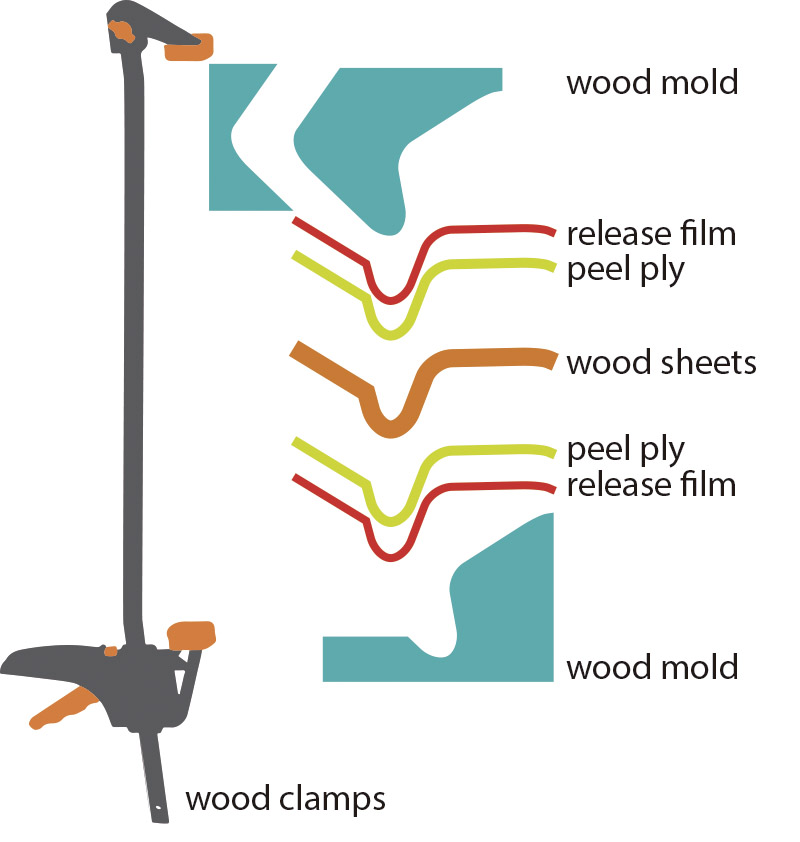
All the making process

Process Layer sequence
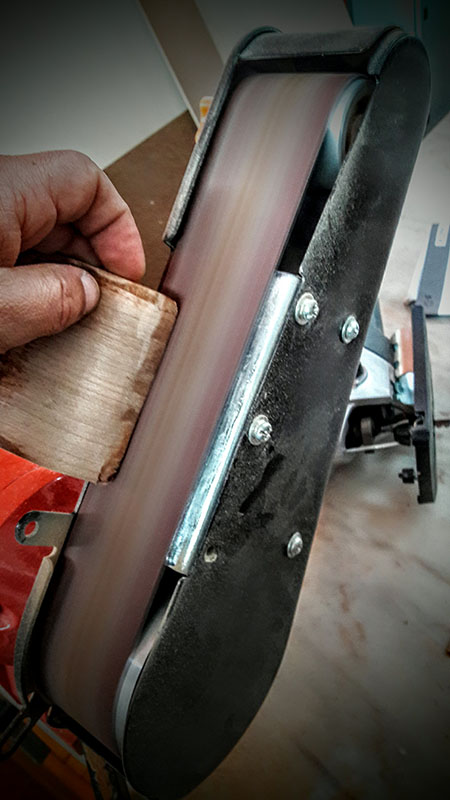
I had to wait 3 days for the recommended full cure process, and finally i got good results. I had to sand dust the corners and the margins of my mold to get better results and then brushed with Wood veneer
Sand dust machine
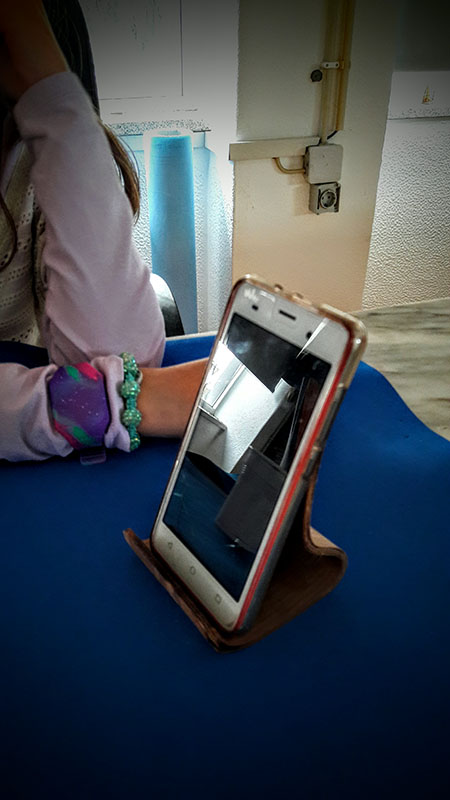
Final stand

it works
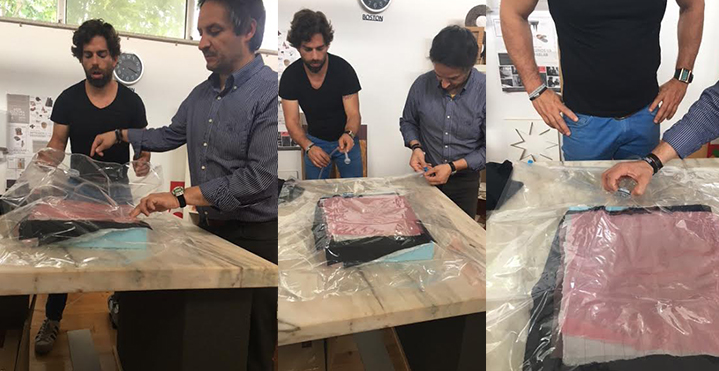
Helping my colleagues with vacuum bagging
Final Considerations:
References - Video tutorials,
Some fabacademy students sites
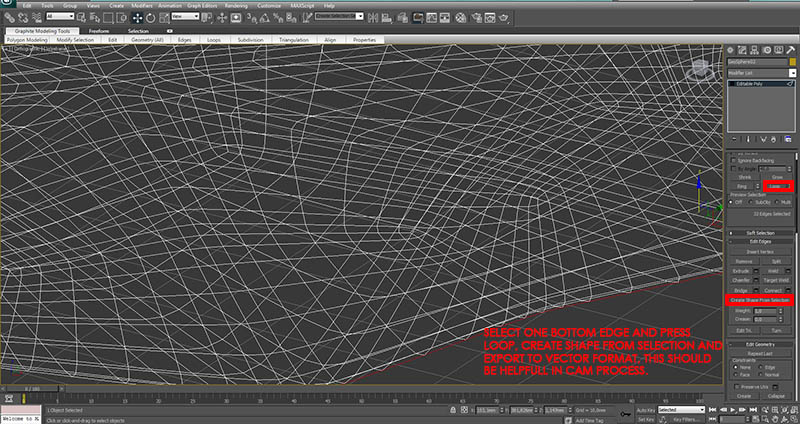
GCODE and vector mold
UPDATE 09-07-2017 - Molding with Vacuum bag
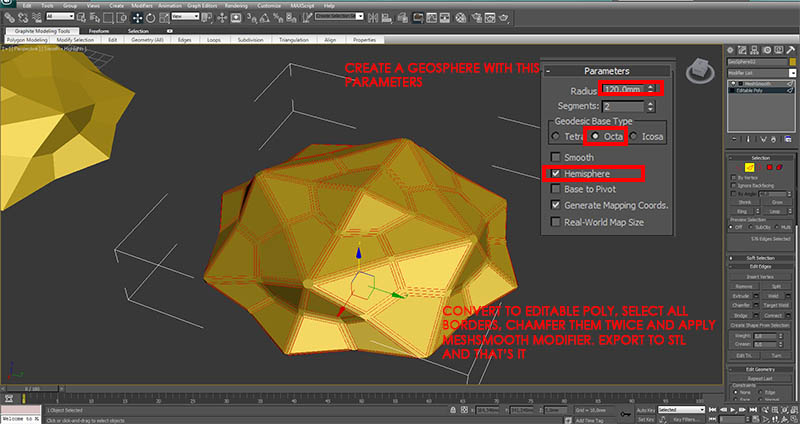
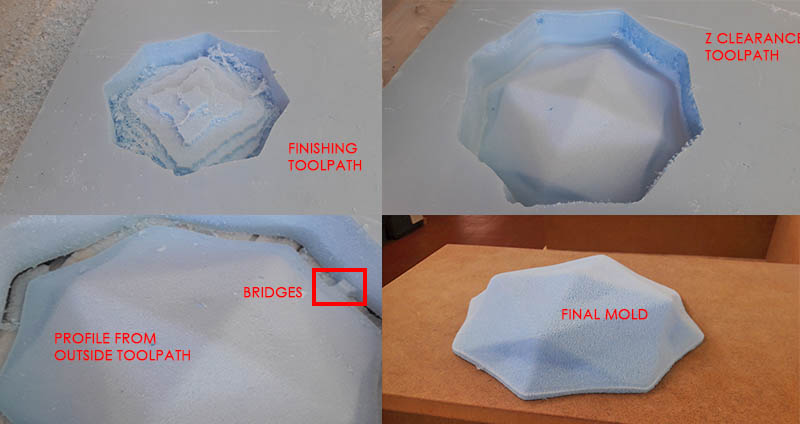
I was avdised by my global evaluator to work with vacuum bagging, and so i did. I started to model the mold to machine in 6cm roofmate on the CNC
MOLD 3D MODELLING
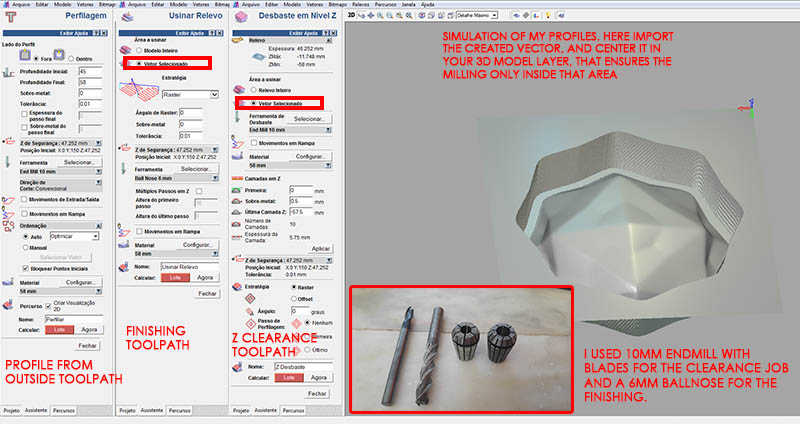
MOLD CAM processing and machining
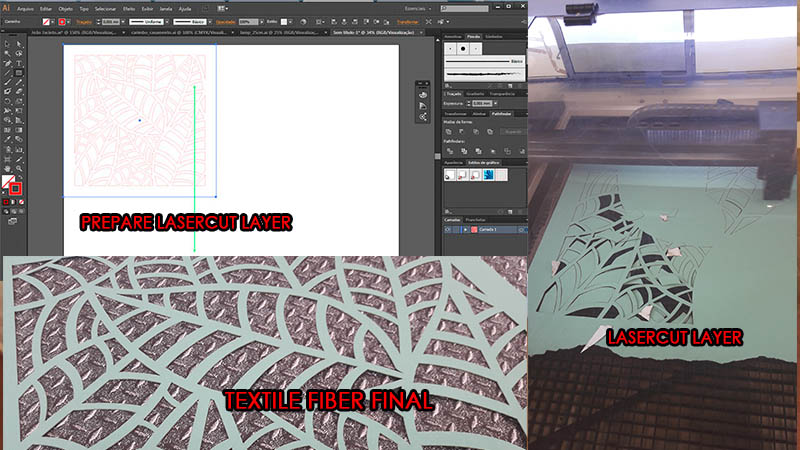
Preparing my fiber composite
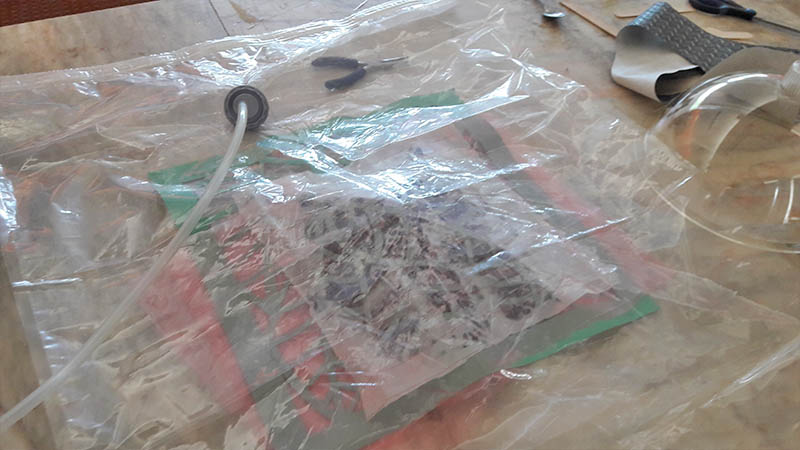
Next step is vacuum bagging. I prepared the resins again and the protection film layers (see above) and put them into the bag. Don't forget to use protection and safety gears (masks, gloves, etc..). with a brush and the prepared resin solution i started to glue my composite. I used more than the usual because my composite textile is very thin and i want to stay rigid.
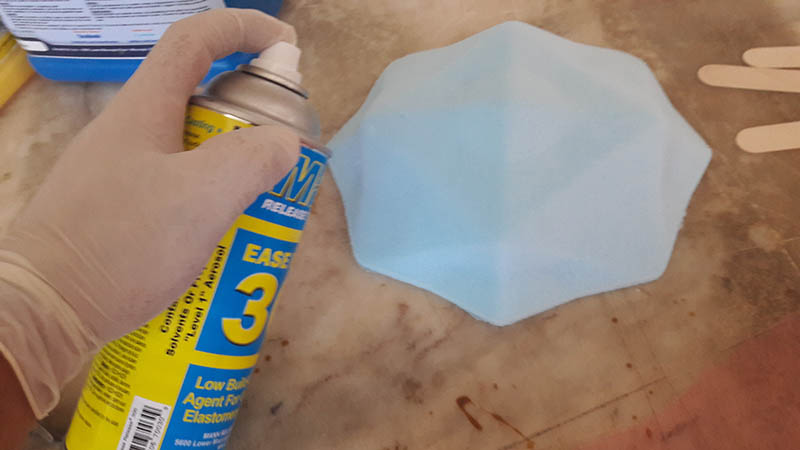
Spray release agent to your mold
Insert composite inside Vaccum bag
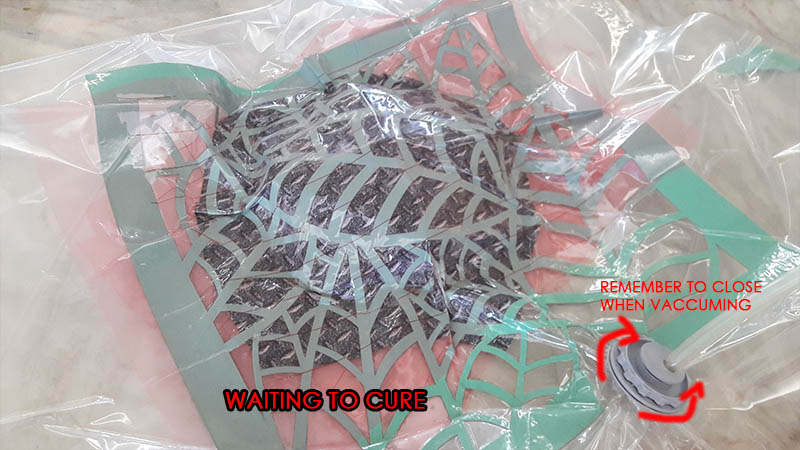
turn your vaccum pump on and let it work untill you reach a good air pressure.
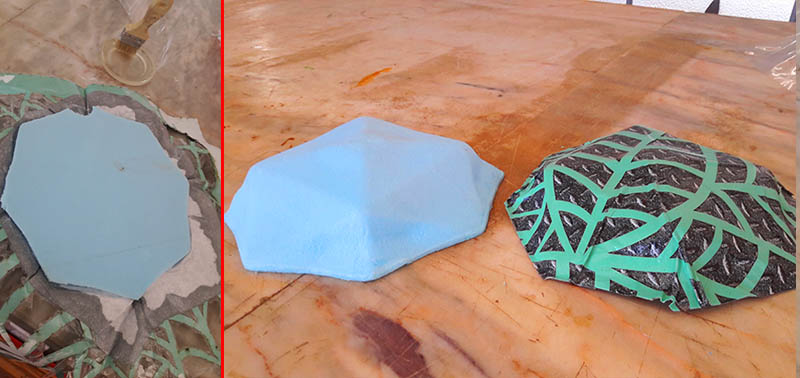
Cutting the borders and final result photos
FILES
SVG textile, Artcam file and stl model