First Post
Hello World !
This is an experimental website done with the help of Hexo.
Assignments
- Install Git.
- Learn to work with Git
- Clone the local repo.
- Make a website in HTML and push it.
- Start documentation.
- Make an initial sketch of the final project.
Installing Git
As I am using linux, Manjaro to be more speciifc, it comes with git pre-installed. So you just have to open up a terminal and just move to the required directory and type git and press enter to start one.
I also followed the instructions in here.
Learning Git
Most of the time I get the help from our remote instructor Francisco of Beachlab. I also make use of the Internet for solving my problems. My mates down here at the lab are also helpful. The essential commands for starting, updating and maintaining a git repo are
git clone "your_repository_link" :- this will clone or get a copy of the git repository.
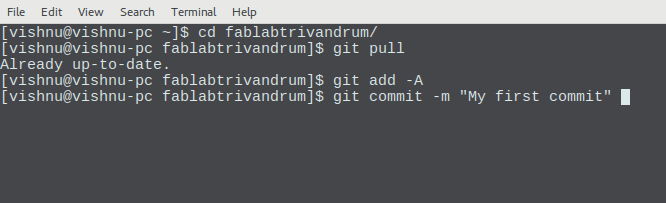
git pull:- this will update your repo if any changes where made to it by any other contributor. You must do it every time before making any changes to your local repo.
git add -A :- this will update the index using the current contents of the working tree.
git commit -m "fill in a description about the change you are committing" :- this is for committing all the changes you have made in the repo. It stores the current contents of the index in a new commit along with a log message from the user describing the changes. The descriptions are very important as these will be the easy reference in the future.
git push :- this is the opposite of git pull. It pushes all the changes you have made to the the refs. It updates remote refs using local refs, while sending objects necessary to complete the given refs.
Cloning the local repo
As said earlier to clone a repo use the command git clone 'repolink'. Then after there are two options of accessing it.
- Using username and password : which will be the ones of the repo owners. Each time when you try to push something username and password will be asked.
- Using SSH keys. Create an SSH key pair and then configure it properly as follows
1 | $ ssh-keygen -t rsa -b 4096 -C "your_email@example.com" # Creates a new ssh key, using the provided email as a label Generating public/private rsa key pair. |
When you’re prompted to “Enter a file in which to save the key,” press Enter. This accepts the default file location.
1 | Enter a file in which to save the key (/Users/you/.ssh/id_rsa): [Press enter] |
At the prompt, type a secure passphrase. This will be asked the next time you use the repo
1 | Enter passphrase (empty for no passphrase): [Type a passphrase] Enter same passphrase again: [Type passphrase again] |
Now you can add the keys to your system
1 | eval "$(ssh-agent -s)" # Ensure ssh-agent is enable ssh-add ~/.ssh/id_rsa # Add your SSH key to the ssh-agent |
also make sure to add the
The instructions for the same was also given by Fransisco.
Developing a website and pushing it
I have attended the Pre-FabAcademy and I have went through the pain of writing in HTML. You have to have mainly two things, the HTML code, and CSS for building a nice website. Thw HTML is the source of all the contents and functionality of the website while CSS is for the looks/styling.

I decided to try out something different this time like markdown for documentation. It is simple in the sense that it feels like normal writing with minimal syntax, also beautiful if we use a nice CSS layout.

I came across Hexo and decided to give it a try. It is a blogging framework using node.js, node.js is a JavaScript runtime built on Chrome’s V8 JavaScript engine.
For installing hexo and starting out execute the following commands in a terminal
1 | $ npm install hexo-cli -g $ hexo init blog $ cd blog $ npm install $ hexo server |
For more details you can look into this guide. Since I have no experience with node.js or any such buildtime environment I had to do some ground work to have it configured to my needs.
I also had to change the config.yml for having the right output. I commented out the root: option and had the url as url:/. Also mak sure that the relative link is set as true, relative_link: true as we need the links to be relative for proper offline functioning of the website. Most of the time the instructors will be evaluating our documentation offline, so if we don’t enable relative links our website will appear broken.
Documentation
I have started documenting my day to day fab academy activities and will be updating this website with them. As long as Franc is our remote instructor, we will be automatically up to date with documentation or else he will be pulling our ears !! :D
Sketch of the final project
Please take a look at the project page I have created here, or you can spot it in the Category bar. I will be maintaining a separate page for project alone. This would make it easy to update on the go rather than waiting till the end.