
Communicative with an input or output borad and design an GUI to display data from the microcontroller or controll te device through the microcontroller.
I began by going throught the tutorials on fabacademy archive.
First I tried setting-up serial communication with different approaches.
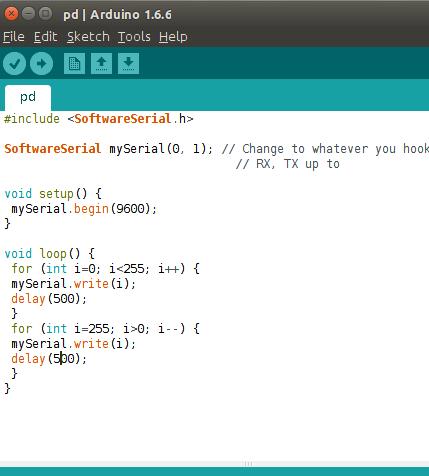
Pure Data
I implemented the example here
There were some changes required. The when you double click devices the devices connected are listed on the main window, you need to look for the one that corresponds to your device, Fabkit in my case and edit the code in the code editor to reflect the device id.
The arduino code has to be edited to change the delay to 500 milliseconds. It worked best for me with this.
The tutorial might be for a different version and the software updated. So there was some problem understanding how to run it. To run it essentially you have to set check the DSP, This outputs a sound with increasing pitch.
The code worked fine for me.
Download pd file
Arduino code
Impression
Pure data uses visual pragramming approach, aimed at creating music. The programming options seemed limited and lacked universal appeal.
Python
I had worked with python during the input devices weak. I took a closer look at the working of the code this time.
to start tinkering with python I highly recommend using jupyter/iphython.
installing jupyter.
apt-get install build-essential python3-dev

pip install jupyter
You can create new python notebook and start tinkering with python codes. To run a code you just have to enter the code in the cells and run them.
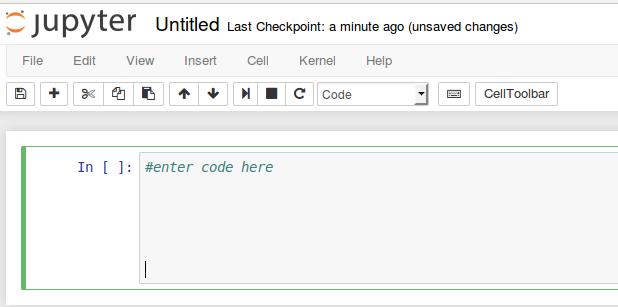
Jupyter doesnt run a regular python file but it is useful to render the file with good syntax and edit it.
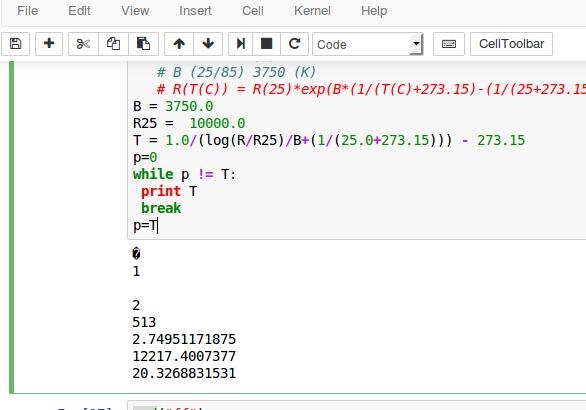
I modified Neil’s code to calculate temperature from temperature sensing board to run in the jupyter.
Output
Impressions
Python seemed like great high end programming language, But I’m not used that used to being carefull with the indentation which is critical in this case.
I had experience in building user interfaces using VB.Net in windows and I was searching for a similar workflow in linux too and using python. Wx seemed fine and I started with it.
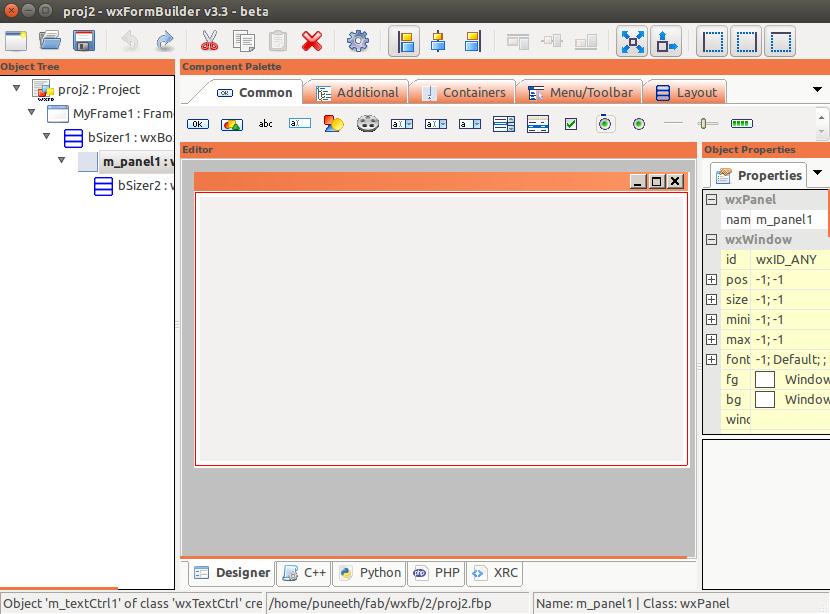
Wxformbuilder
Wxformbuilder helps us create forms and place elements. It is no where near as user friendly and proffessional as VB(Visual Basics). Its not a complete IDE.
I started gong through the video series here. Went through the first 4 videos. I realised that Jupyter doesnt recognise the wx module, I switched to Spyder as an IDE for Python development now. I also realised I hadnt installed wx yet.
I stopped the video series at the 4th video sincce I was running into some issues and the video is not that begineer friendly, it doesnt explain the codes but is useful to learn the process.
To install wx:
sudo apt-get install python-wxtoolsWx only generates the code for the elements, it has to be edited and needs to be launched by adding a few lines.
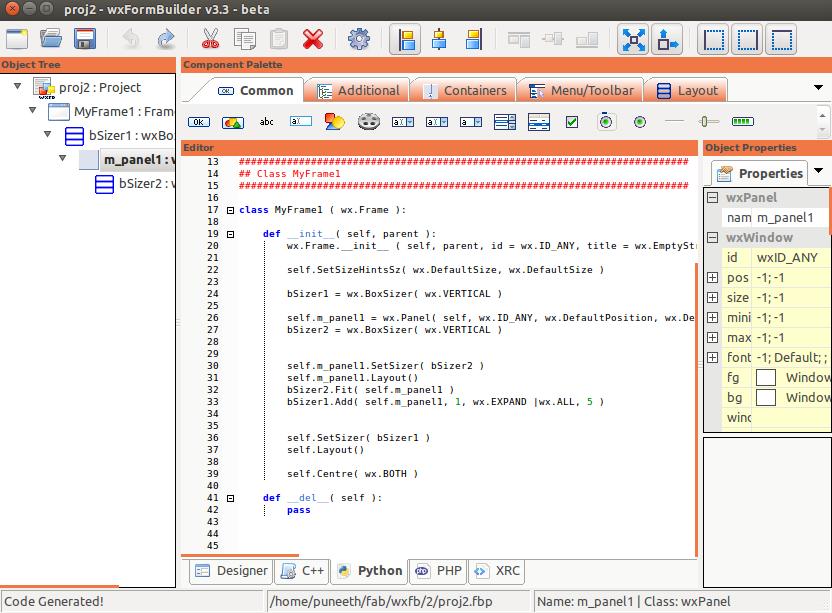
Wxformbuilder
You can either copy the code from the python tab or hit generate code to get a copy of it in the local drive.
Open this in spyder. As the video series suggested I replaced all the tab characters with 4 number of spaces.
The code shown in the video was not working, I tried to debug it. I tried to run the code here, which worked fine.
#!/usr/bin/python

# simple.py

import wx

app = wx.App()

frame = wx.Frame(None, -1, 'simple.py')
frame.Show()

app.MainLoop()
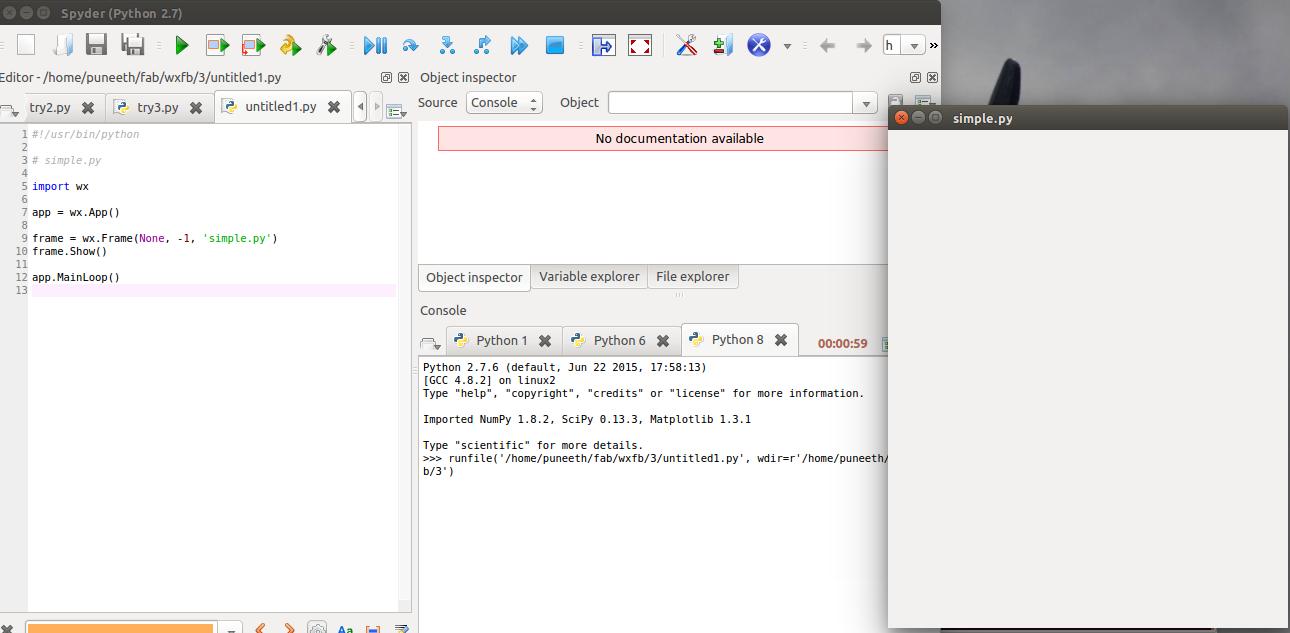
The idea was to infuse the wx created code into the working code in the above example. After tinkering around a bit I found a working combination.
Wxformbuilder generated form.

Note: In Spyder to run this code again and again you need to run them them in a new interpreter each time. This is a known issue when running wx and othe gui builders in ide’s.
Now that I found how to load an interface created by Wxformbuilder, i can move on to populate the form with elemennts such as buttons and text box and code for them.
I further added a label and a text box. I found no reason why these elements shouldnot be movable across the panel but thats how they excatly behaved, stuck like a nail. There were option in the element property in which you could specify position but the position didnt change even after trying a different value.
I went to the python code generated again copied it and added i to the already running code above. After the indentations were taken care of the gui finaly appeared.
I imported relevant headers, serial and numpy in the begining along with wx.
import wx
import serial
from numpy import log
I further add this code at the end.
if __name__ == '__main__':
    ser = serial.Serial("/dev/ttyUSB0",9600)
    app = wx.App()
    MyFrame(None, 'Serial data test')
    app.MainLoop()
This routine starts the serial comm and opens the window.
under “def idle(parent,canvas):”
I added Neil’s code to calculate the temperature from the input from the serial.
byte2 = 0
byte3 = 0
byte4 = 0
ser.flush()
while 1:
#
# find framing
#
byte1 = byte2
byte2 = byte3
byte3 = byte4
byte4 = ord(ser.read())
if ((byte1 == 1) & (byte2 == 2) & (byte3 == 3) & (byte4 == 4)):
break
low = ord(ser.read())
high = ord(ser.read())
value = 256*high + low
if (value > 511):
value -= 1024
V = 2.5 - value*5.0/(20.0*512.0)
R = 10000.0/(5.0/V-1.0)
# NHQ103B375R5
# R25 10000 (O)
# B (25/85) 3750 (K)
# R(T(C)) = R(25)*exp(B*(1/(T(C)+273.15)-(1/(25+273.15))))
B = 3750.0
R25 = 10000.0
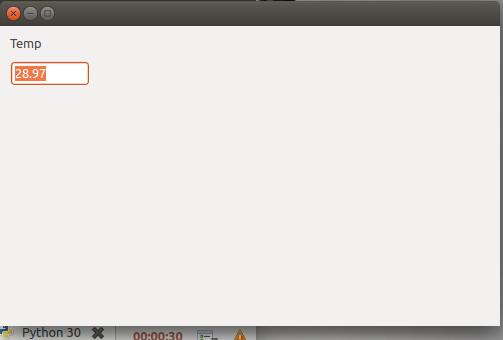
T = 1.0/(log(R/R25)/B+(1/(25.0+273.15))) - 273.15Edited the text window control to reflect it (added variable t where it was “wx.EmptyString” earlier )
self.m_textCtrl1 = wx.TextCtrl( self.m_panel1, wx.ID_ANY, T, wx.Point( -1,-1 ), wx.DefaultSize, 0 )For some reason the the spyder pops the window and closes it immediately.
Impressions
The wx or tkinter are not for the faint hearted. And need extensive research and tutorial for understanding how to get things working.
I hate python for indentation issues, it one of the most painful debugging issues, it doesnt allow to cant copy and paste code and forget about it and just run the thing.
I further explored Processing.
I first wrote a simple program to communicate with my network board to begin with. Learning from codes of Nisha, another fabbie from Trivandrum and sparfun resource here good for learning stuff about serial communication.
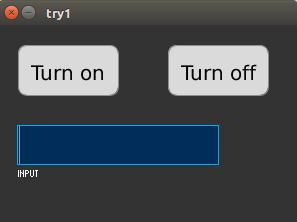
My program sends a node id to the board when buttons are pressed and receives its reply and displays in the print window.

Later I added A text box also, using the controlP5 library. Control p5 has to be downloaded from here, the installation is simple, you have to add the extracted folder in the folder of libraies in sktchbook folder of the processing. I needed a textbox so I just browsed through the controlP5 folder and found text field example and modified its code for my need.
Final gui
Download Gui files
Impressions
Switching from wx to processing was such a breather. Even though it can never replace the ignorance is bliss feeling of VB.net which I’am used to but right now I’m exploring ubuntu and other free alternatives
to.