
Make a 3D Scan model of an object. 3D Print an object. Test calibration of 3D printer
Easy, precise, cheap, colored-texture.
This technique requires 40-80 pictures from different angles, uses
exif
metadata to improve precision. The software processes all pictures removing background and finding similarities. Works better with stedy and textured objects.
Softwares:
-
123D catch
free, available also for Smartphone
-
Photoscan
(trial)
-
Open CV
(remove BG)
I tested 123D Catch taking 70 pictures of this Captain America with a Nikon D30:
In 123D Catch you can see the calculated position of the camera respect to the object:

I made also some tests with a smaller character trying with Macro lens but the result was very bad, I suppose due the fact that not all parts of the object are in focus with a macro lens.
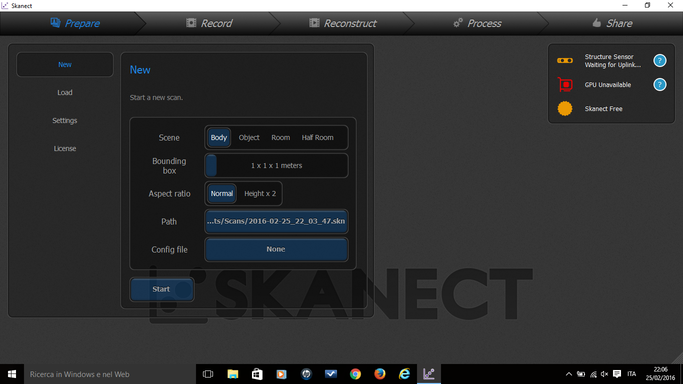
It is similar to photogrammetry but uses also pixel depth. Devices like Kinect are equipped with a webcam to take picture but also infrared emitter and receiver which give distance from the object (this works best for 1m tall things). I made a test with
Skanect
(trial available with limit on mesh triangles) and a Kinect of an XBox360.
First set the capture:
Then after a still object have been captured going around ith with the kinect, the software construct the 3D model.

It is possible to edit the mesh playing with the number of triangles, cutting plane, fill holes, etc..
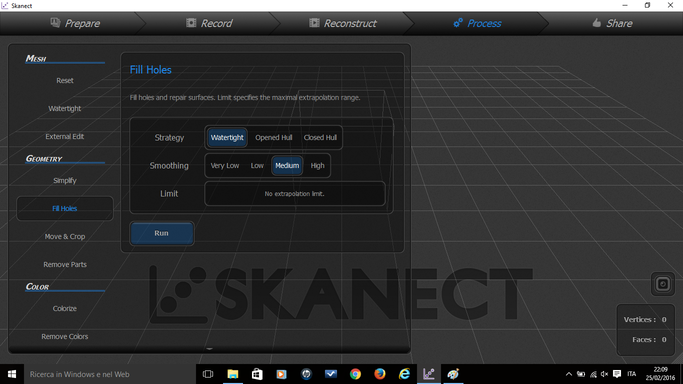
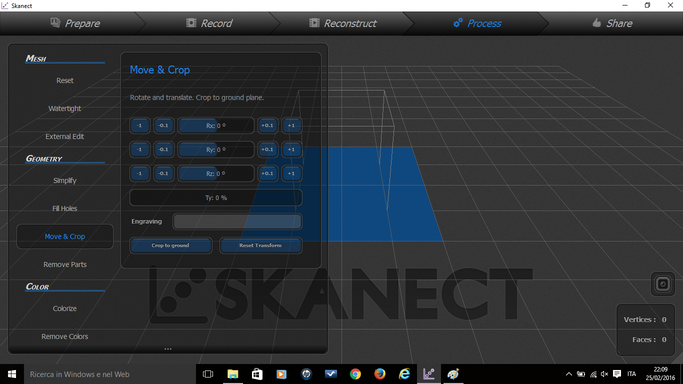
In the end it is possigle to export the model with (.obj) or without (.stl) the texture.

Then I edited this model with Meshmixer in order to make it printable. A big effort was required since there were many holes in the model generated by Scanekt.
Laser is also a very accurate technique, it can reach a resolution of 70k poligons per cm. We have also tested an open source Ciclop Laser scanner with Horus software. The object should not be reflective (it doesn’t matter if it is textured), lasers have to be aligned. Quality of scan also depend on illumination.


Other:
- Milk scanner: object with no overhand.make picture of slices of an object as if it is 3d printed
- Light stages: Switch on and of lights from different angles
Resources:
-
Build Your Own 3D Scanner: Optical Triangulation for Beginners
3D scan is just the first step of the process to create a usable 3D model of an object, some post processing is needed to fill holes and repair surfaces which have not been generated correctly. A sophisticated software with a big library of algorithms to edit meshes is Meshlab .
$ sudo add-apt-repository ppa:zarquon42/meshlab
$ sudo apt-get update
$ sudo apt-get install meshlab
$ sudo apt-get remove meshlab
I installed it but it ended up to be too complicated to use for the short time available so I skipped it for another Meshmixer which is free, easy and there are many practical tutorials available from Autodesk.
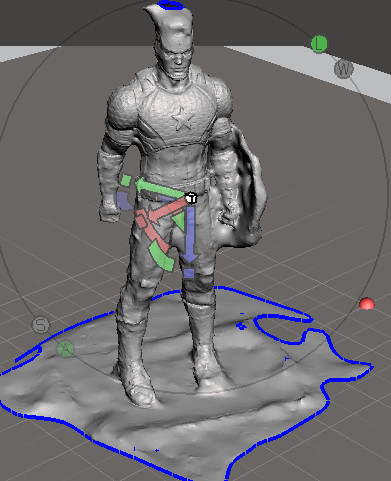


Capitan America
To test the capability of a 3D printer to make objects that have holes inside with other objects I designed a whistle with Rhino (thanks to the help of my classmate Mario).
Whistle.3dm

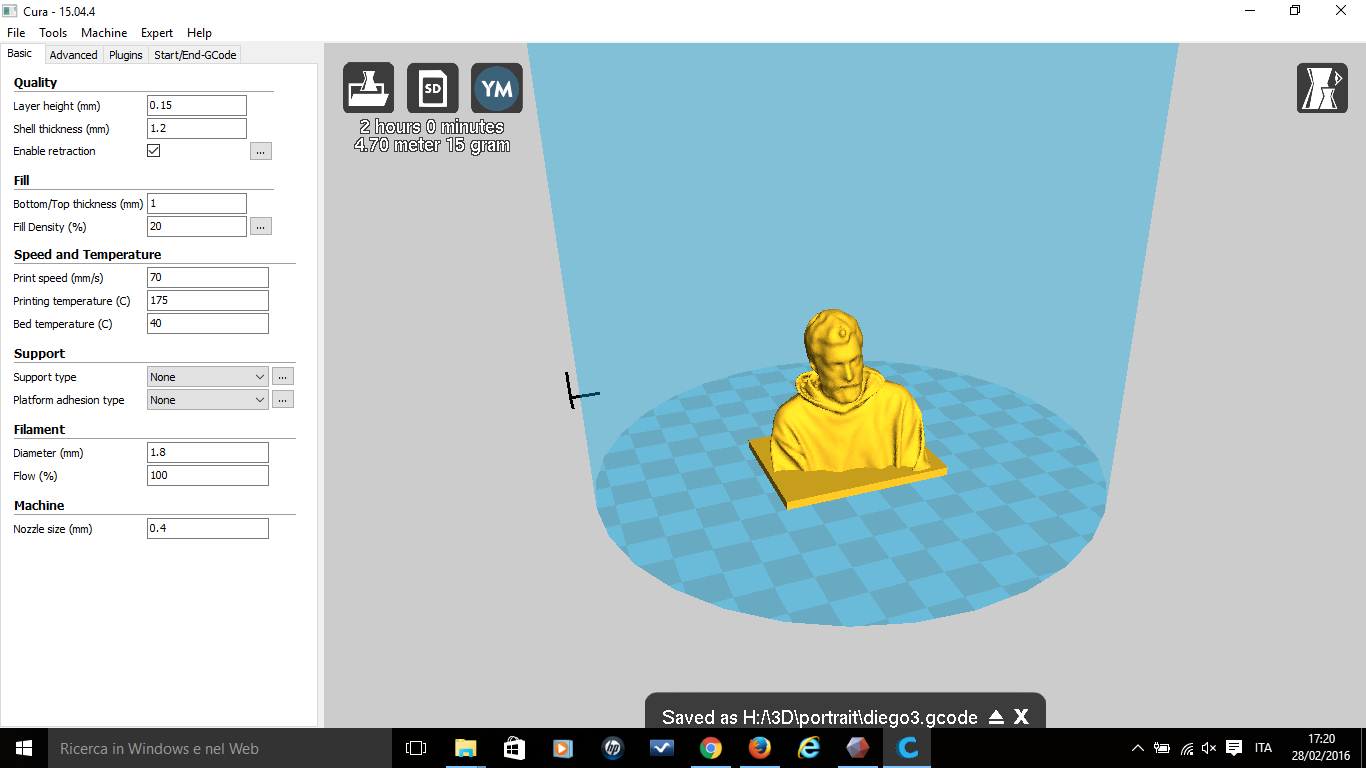
I printed my design with the Hackerbot using Cura with this configuration file:
Hackerbot_ABS.ini
The whistle wasn’t actually working but perfectly printed…

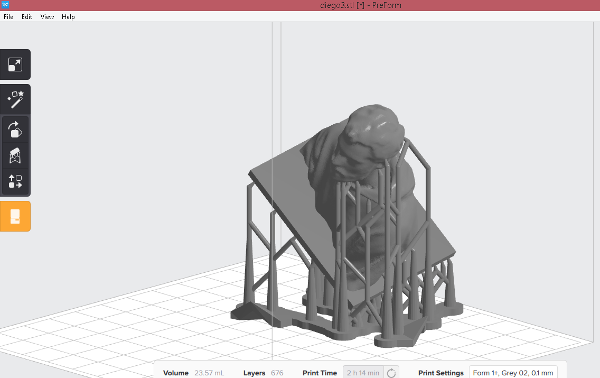
Using the mesh model generated with Kinect-Skanect and edited with Meshmixer (see above) I tested 3 printers that we have in Fab Lab Cascina
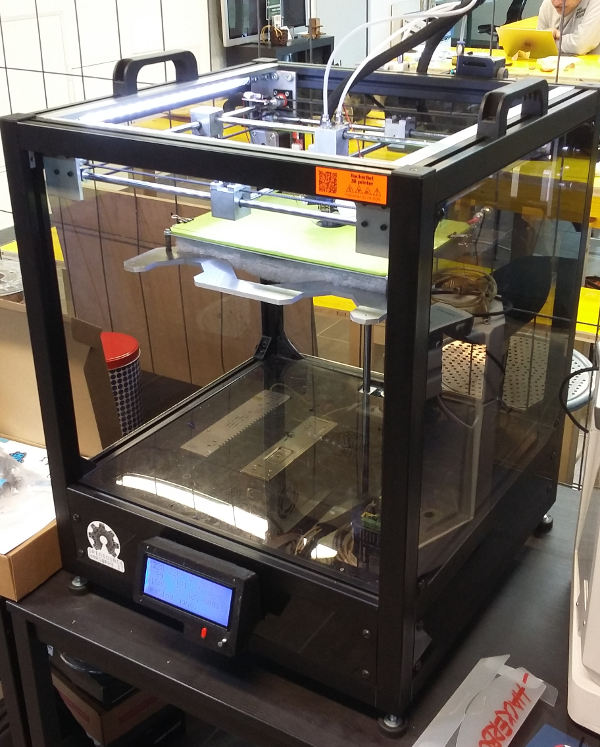
This amazing printer works in a radically different way from other extruder-based printer and so it is a totally different experience to print with it.
I used the proprietary software of the 3D printer. There are very few settings, a wizard automatically generate supports and position the object optimizing the use of the plate. To start the job just press the “print” button and the file will be sent to the machine like a common desktop printer.

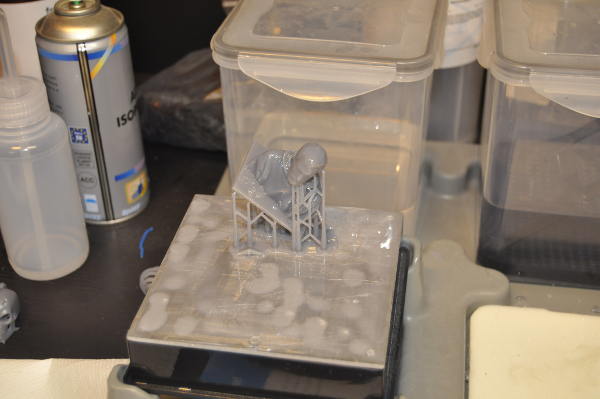
Before printing there are fer maintenance operations to be performed: fill the resin tank and remove material from the bottom of the tank in order to make the working plate as clean as possible.
After the 3D proces (which lasted 2 and half hours) there is on more hour to make the printed object dry. The cleaning process makes use of alcool. The object is stick to the plate you will need a knife and gloves to handle it.

From Wasp Projects. I used Cura with default parameters from
website
for PLA, see configuration file here:
Configurazioni_Delta 2040.ini
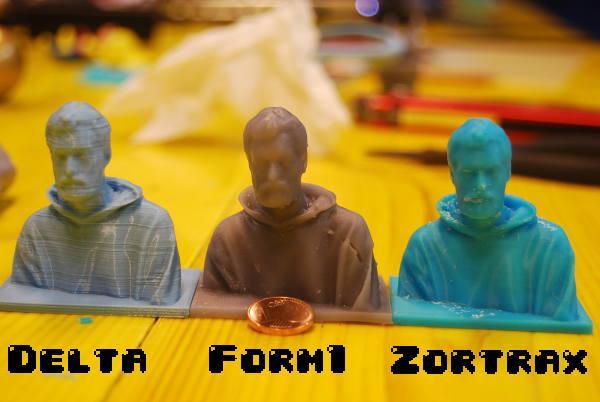
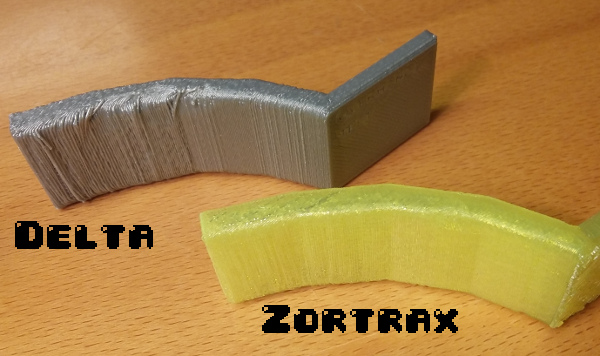
Print time was about 2 hour, this is a very fast printing machine despite the quality wasn’t a the same level of other two.
This 3D printer from Poland have its own software which requires an activation ID which is stick behind the printer.
On one hand it is quite easy to use, on the other hand it doesn not provide many options, for instance I wasn’t able to remove support material from my print. I used a PLA filament. This machine have a very good contact to the plate.


And here a comparison between 3 performed printing jobs.
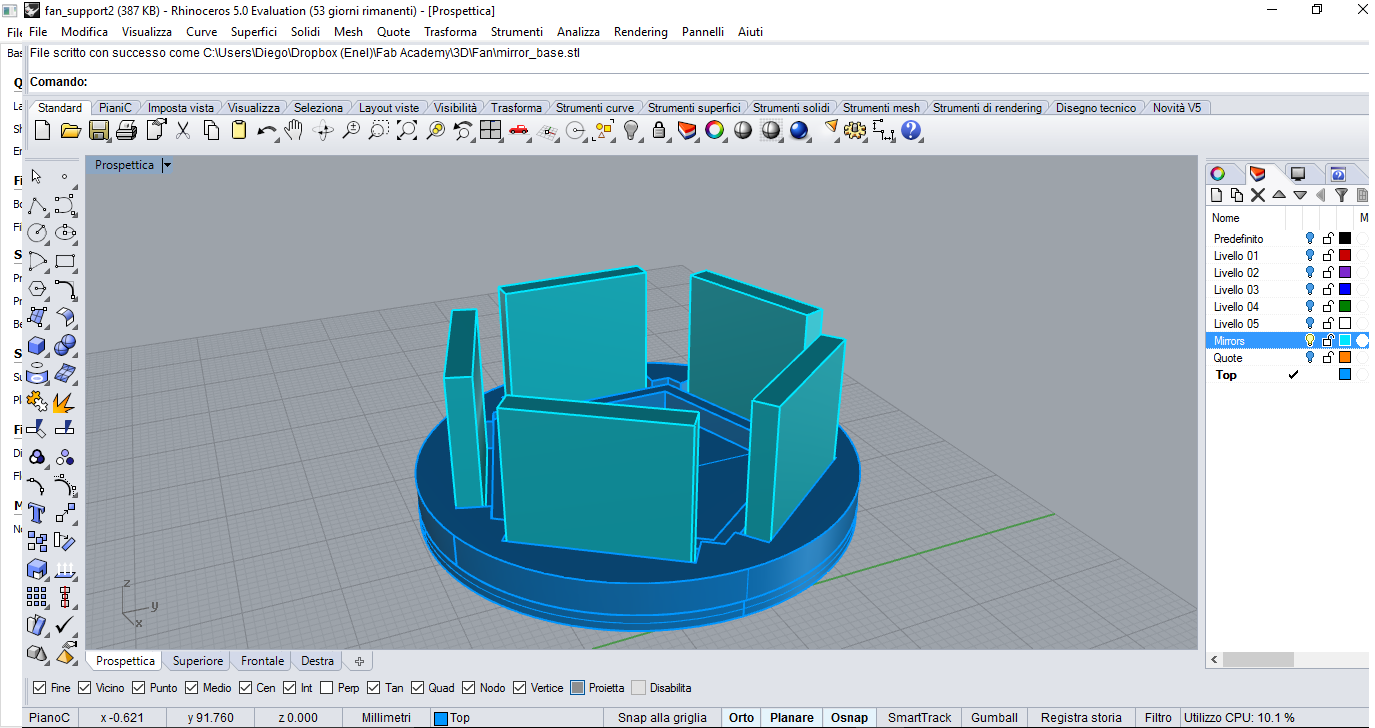
I started to make some sample for my final Project , my main concern is the spinning support of mirrors that should be attached to a fan (fan are cheap, provide tachimetric signal and go very fast). This is the Rhino model:
I used a Delta printer to make first samples since it is quite fast (and is one of the less used in the lab so it is frequent to find it free…).
This is the model in CURA:
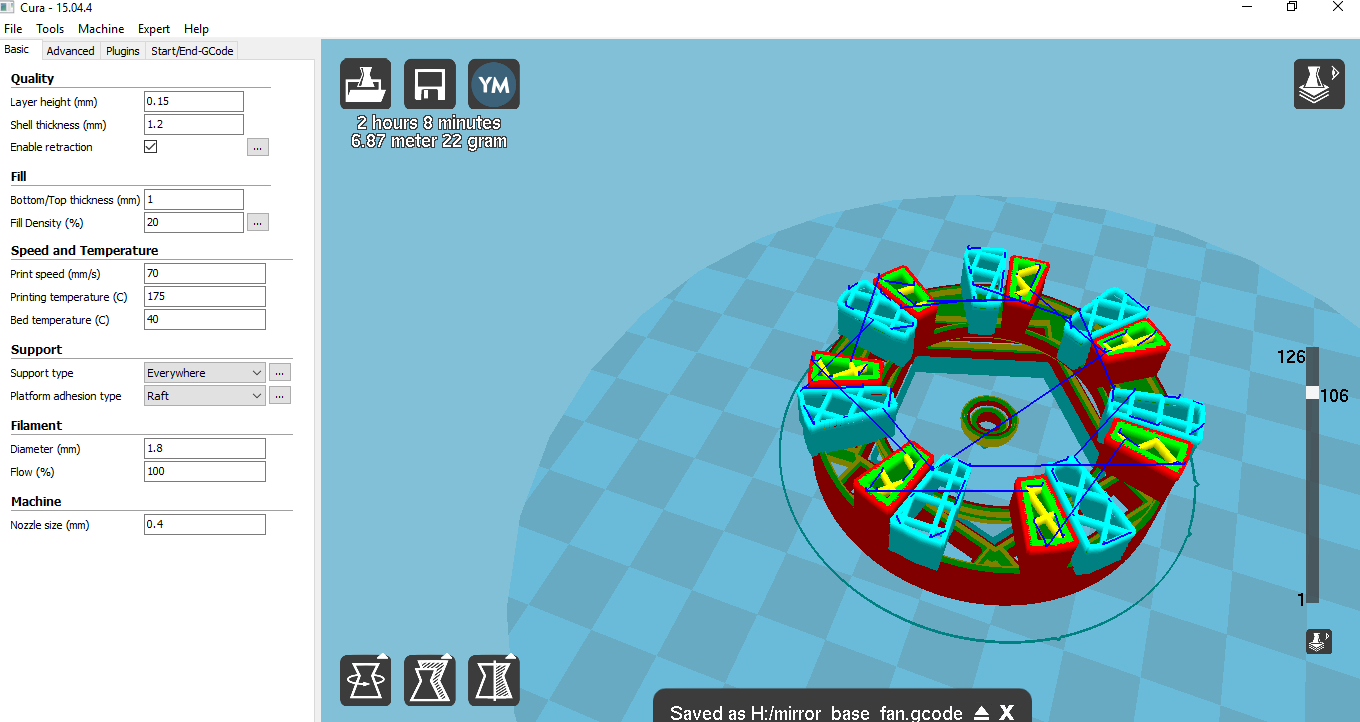
I had some problem removing support material, one of the fan connection teeth was broken doing that.

The first mirror support assembly I tried was made by two parts. A top and a bottom part, connected by a bolt (3 mm screw, 6 mm head, 5.5 mm hexagonal nut).


It was very annoiyng to place precisely mirrors in their pockets.
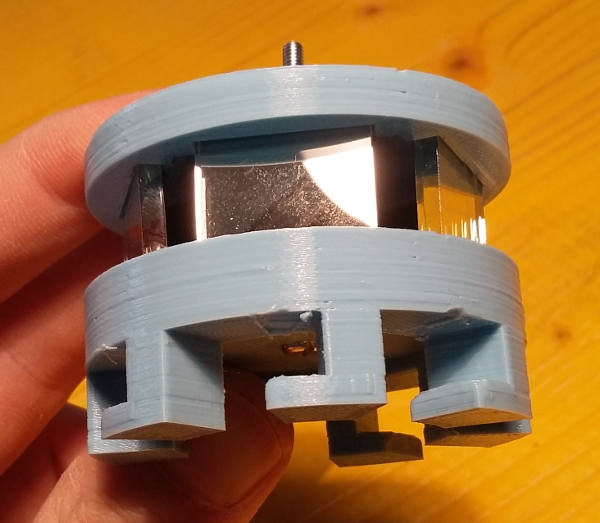
And finally join the assembly to the fan, the joint ended up to be very precise and tighth
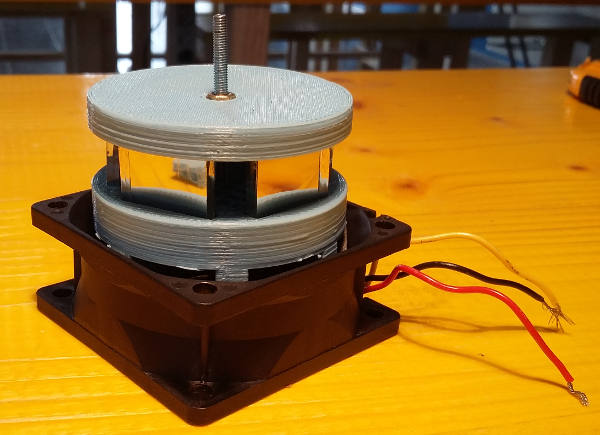
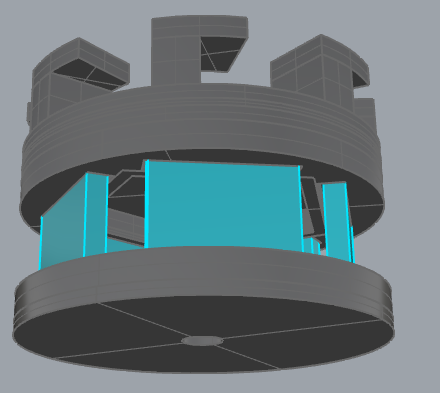
This assembly ended up to be too complex and also it mama a lot of vibrations. So I decided to try a simpler approach with only one piece (longer printing time respect first release.
This is the Rhino model:


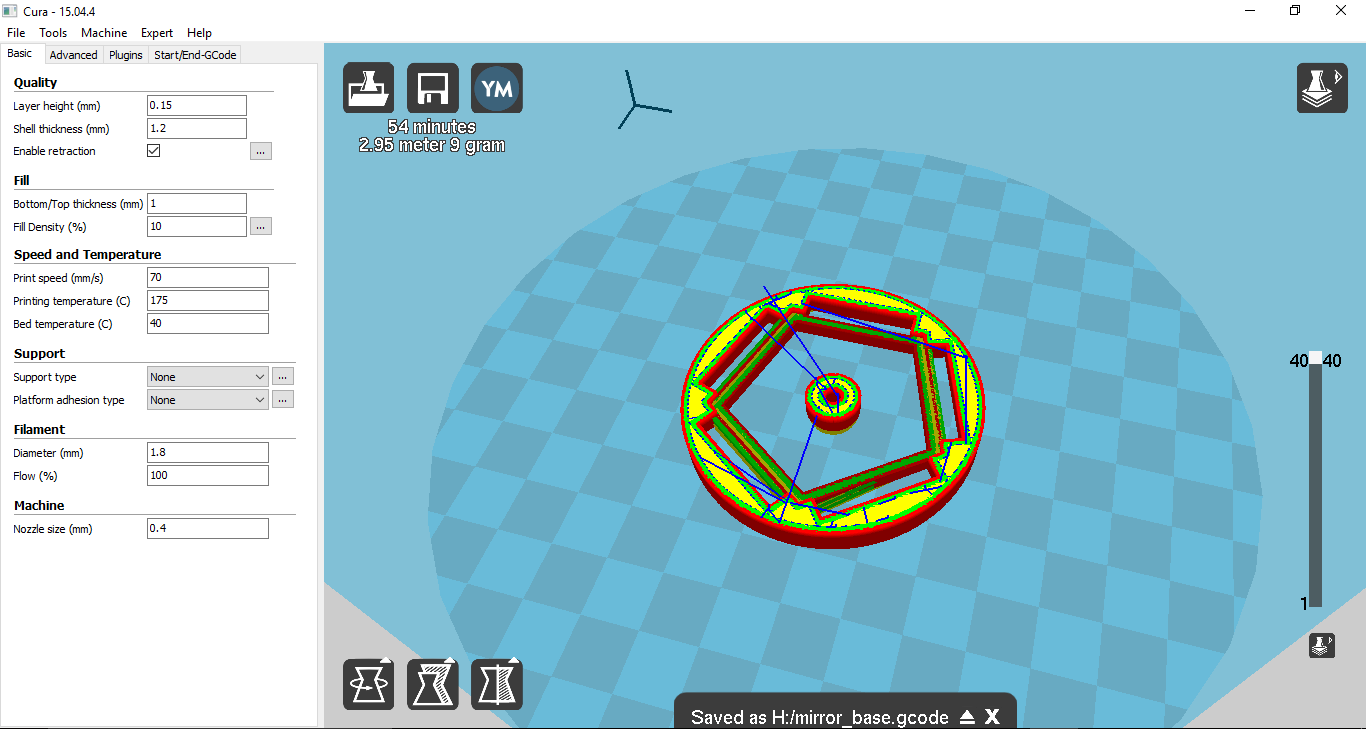
This time I used Makerbot:
I also printed a very simple support for mirrors, again with Delta. I chose Delta to go as fast as possible: speed 150% and a very low infill.
Measure design rules of printing machines in Fablab
We used test models from Thingiverse
Make: 2015 3D Printer Shoot Out Test Models by Make Magazine
Test your 3D printer! by CtrlV
The aim of the tests was to veryfy:
- Min wall tickeness
- Tolerances (too high temperature may cause close walls to glue)
- Support material
- Bridges (material retraction helps)
Real world printing may differ a lot from nominal printer specs due to material (PLA, ABS), temperature, extruding speed.
On Z axix the machine is much more precise than X and Y since the extruder flatten the material right after extruding it. For the same reason X and Y dimensions are usually bigger than design (infact the 1€ test is a very challangin one, none of our printers passed it)
For too low estrusion we will see like an extruded wire, when extruding too much we will se like waves of material on borders.
On Cura there is a big difference between 30% to 40% of infill which is calculated on total mass.
Ultimaker is a very fast printer (200 mm/sec) and can be used for fast prototyping and test samples before a final model is ready. Generally speaking to have better results it is suggested to run the job at 50% speed and increase/decrease the speed according to the final results starting from that value.
Overhang test is important to understand how much suport material a printer needs. Another solution could be to increase chilling (in this case there is the risk of not attached layers).
With ABS it is important to heat the plate, infact ABS needs to be hot to correctly sitck on layer on top of another. This is a problem for tall objects where the temperature tendts to decrease at higher layers (closed 3D Printer work better). For PLA the plate should not be hot, we use varnish spray. In both cases it is important to add material to the plate in order to increase contact and avoid bending.
First layer should not be too thin (0,3 is ok, 0,1 too less) because if the plate is not calibrated the extruder might touch the plate.
Layer height should be a multiple of the Z-axis step in order to avoid layers with different heights, see
Prusa calculator
.
retraction movimento senza stampare ritraendo materiale
Z hop is rarely used since it increases printing time. In case of many small objects it could worth. In other cases filament retraction before extruder movement should be enough.
Cura color legend (select the lauers with the slider bar on the right):
- green inner shell
- red outer shell
- yellow infill
- blue extruder movement
To increase printing speed also extruder temperature should be increased. it is a matter of balance betwee the flux of material and the generation of new liquid material (there is a little buffer inside the nozzle, a filament of size 1.6 mm goes trought a 0.4 hole).
Temperature:
PLA between 150 and 220 (it is a more fluid material)
ABS between 230-260 (it doesn’t burn)
Hackerbot_ABS.ini
Hackerbot_PLA.ini
Configurazioni_Delta 2040.ini
Whistle.3dm
fan_support3.3dm
fan_support4.3dm
laser support.3dm
laser_support2.3dm