Refer to week 9s' design, in this week, I design a small one. Trying to assemble a drawing machine. Because gestalt board didn't support bluetooth, I search the internet trying to find some open source alternatives hardware. In the end, I deside to use arduino board and cnc sheild. The controling code is modified from RAMPS. Use App Inventor to design the APP to transfer the drawing picture to the drawing machine. Because the ballscrew is only 300mm long. So I modify the design. Improve the structure by combine two 3mm plywood into 6mm thick. 延續week9,本周我設計一個縮小版滑軌模組,比前一版本結構更加緊湊。其模組周邊有許多預留固定孔位,可以組裝成不同形式之機構。我則是將之組合成畫圖機,另外配合藍芽與Android手機app,成為可以控制筆畫作圖的˙機器。因為原先控制板沒有藍芽通訊功能,因此尋找開源解決方案,最後改用Arduino 控制板,及cnc shield。達到藍芽連接及控制功能。MCU內程式參考RAMPS及APP則自行設計外觀及邏輯控制,搭配成能完整運作的機器。 因為螺桿只有約300mm,其行程只限於此。所以不需要多餘的滑桿,將原滑桿鋸成一半使用。木板使用3mm合板(plywood)雷射切割後再黏合成6mm厚度的木板。邊框留有卡榫以及螺絲孔,可強化結構。
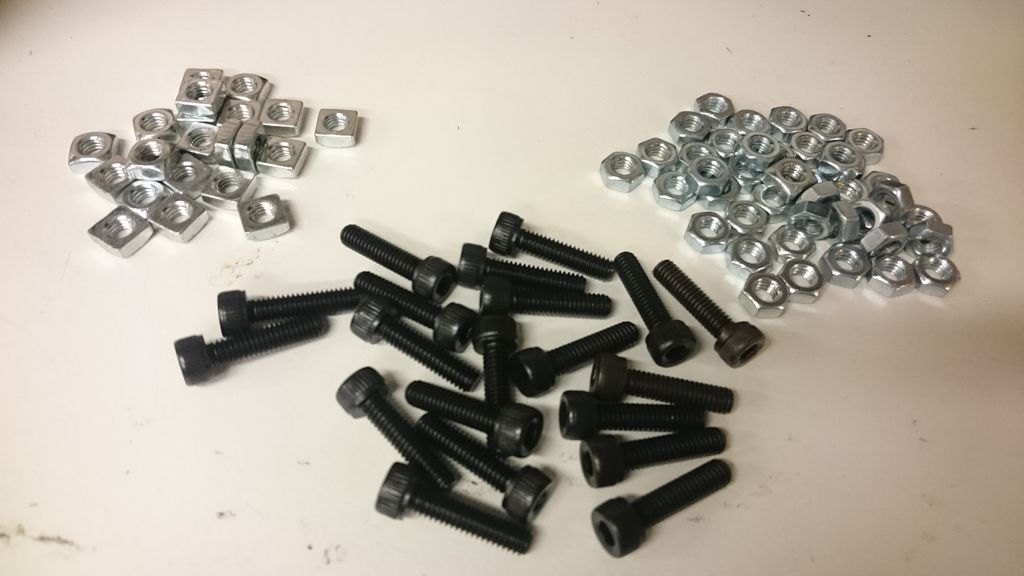
Laser cut it, and build up. I select the M4 screw. 使用M4螺絲與螺母。固定結構與鎖上螺母座。
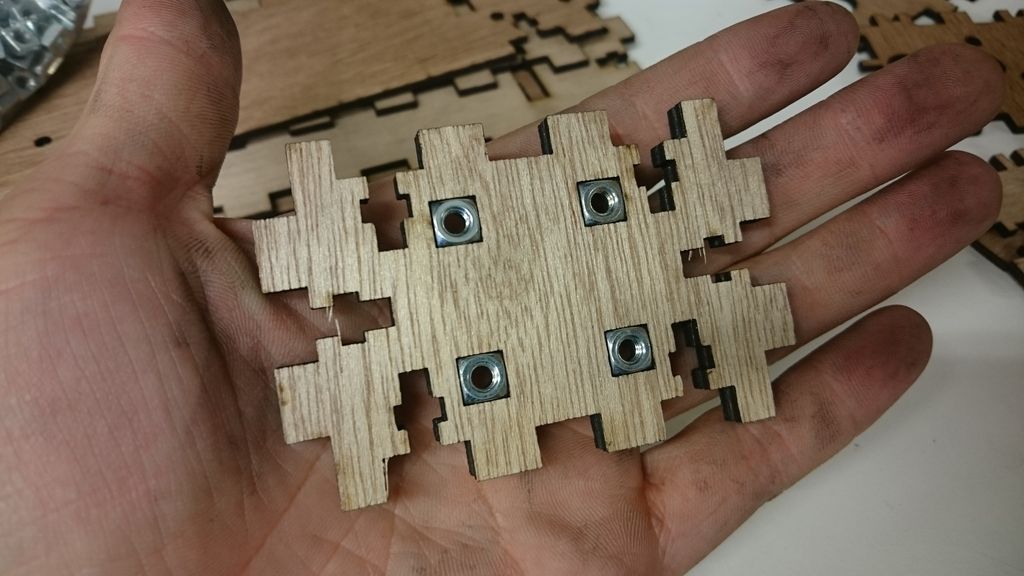
I put the screw nut into it. It's very convient to secure the screw, that I can connect other module very quick. 因使用兩層木板,因此滑塊可以預埋螺母,方便後續固定用途。可以連接其他滑塊模組,或設計其他模組工具,像是畫筆固定座、夾具、吸盤或其他具有功能的模組。
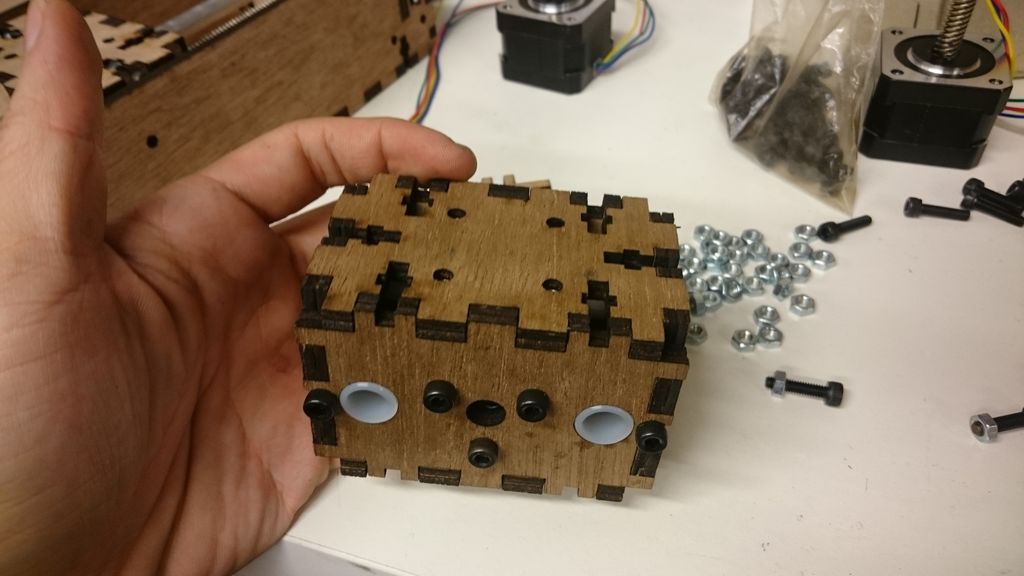
Finishing the assembly 完成滑軌模組組裝。
In this week, I choose 123D design to draw the pen holder and use 3D printer to print it. 使用123D設計畫筆夾具。並使用3D列印機列印出來。第一個可以使用螺絲固定筆;第二種是設計圓徑與筆管徑相等,可以直接卡住。
The first design can lock the pen by the srcew.
The second design can hold the pen directly.
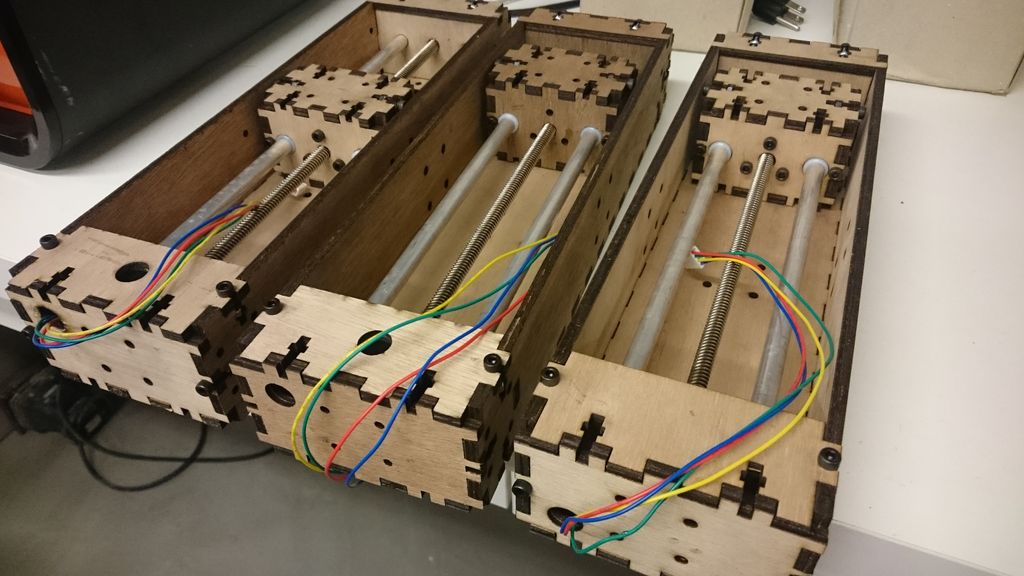
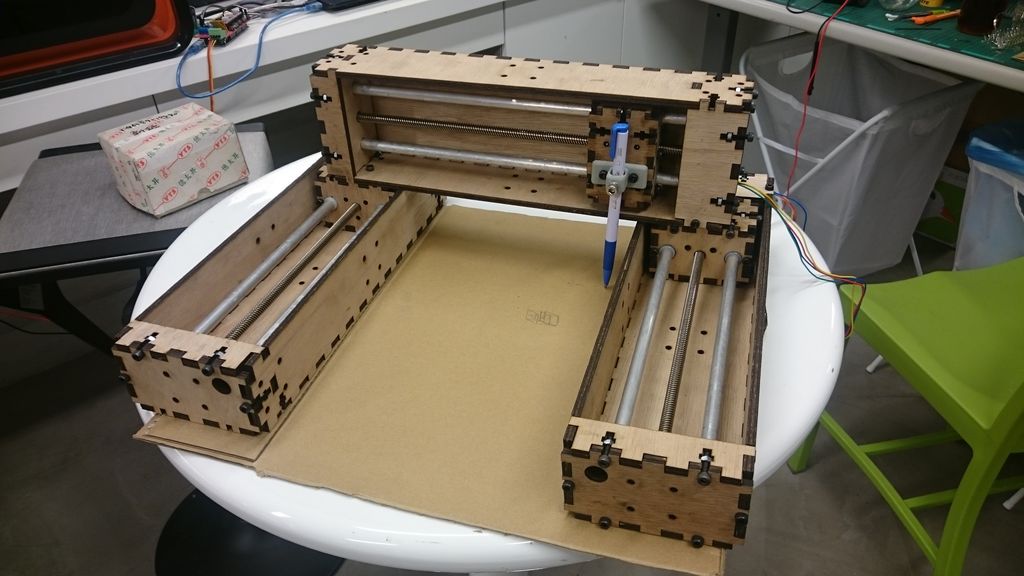
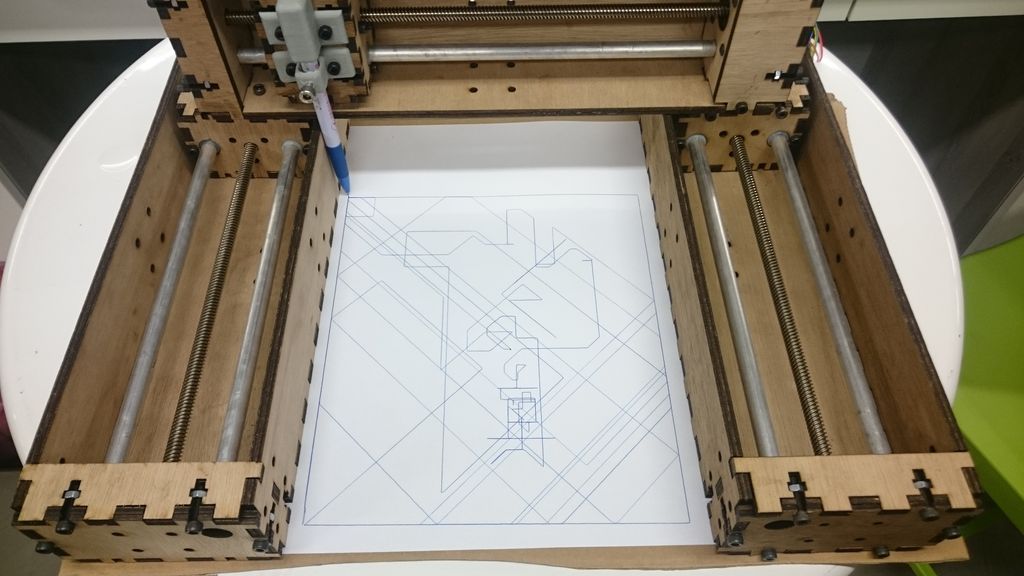
Assembling test. 組裝三座滑軌模組,固定畫筆及夾具。
Make a mobile application to conect device. MIT app inventor2 is a on-line service that is very easy to create Android APPs. Just drag&drop the conponents, then you can modified the font-size, background, alignment layout...etc. I pick the "Arrangement", "List Picker", "Button" to build the main user interface. Then, upload the logo image. Add "BluetoochClient connectivity" to communicate to the machine. Add "Clock Sensor" to calculate the distance. MIT app inventor2 是一個容易做出Android 智慧手機程式的雲端服務,透過介面設計,將所需功能、感測器等各種元件拉至畫框內,並進行布局排列、還可選擇字體大小、背景、對齊等功能。
Second part is coding. The coding interface is very easy to use. Like other programming flow. You need to set the environment, define all the variable, select the appropriate function to build the program logic, and connect it to the sensor. 第二部分則為app程式撰寫,程式語言使用各種功能方塊搭建而成。如通一般程式語言,先進行環境、各種參數宣告及設定,再進行函數功能設定,透過前面使用者介面或感測器作用後進行觸發,以下是我主要功能函式:
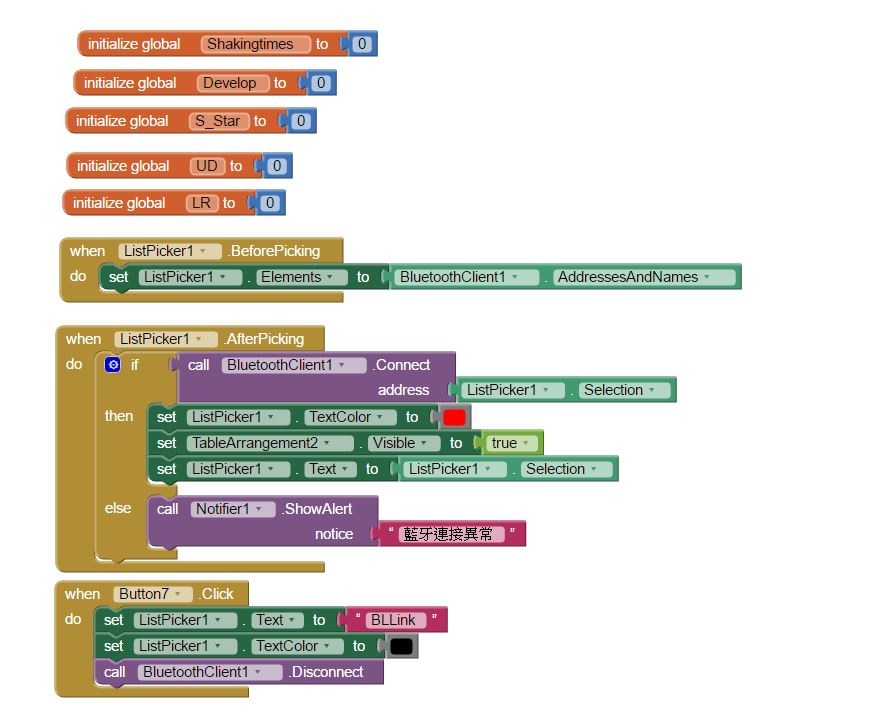
This is the main function. 設定環境及參數,連接及斷開藍芽功能。
Eight arrow: change the image when user push the button, talk to the MCU to move the pen-holder. 八個方向按鈕功能,按下時圖形更換,讓操作者有戶甕回饋感覺。同時發送資訊,通知MCU進行特定方向移動。
To control the MTM, I am trying to use Arduino IDE to develop the program. Configure the HC-05 Bluetooth module (ref. THIS document and THAT document)
Set the name, password and baud as follows: 我主要設定的是裝置名稱、密碼及鮑率,如下:
AT+NAME:HC-05 AT+PSWD:1234 AT+UART:38400,0,0
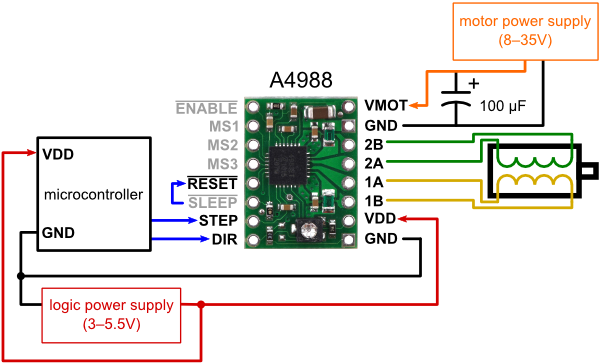
Refer to the RAMPS spec figure, modify the RAMPS sample code, mapping the RAMPS pin to A4988 step motor driver board. This machine will receive the drawing from the Android phone through the bluetooth wireless transfering, then draw it on the paper, just like the "3D papes" screensaver on the Windows XP. The code is attached underneath. 使用RAMPS 1.4 board,下方有電路圖。因腳位輸出有固定位置,所以參考RAMPS測試碼,進行改寫。依原電路設計所用之腳位進行輸出/輸入控制依據。RAMPS所用的步進馬達驅動器為A4988。同時考下圖進行接線及編寫程式。詳細程式檔案於頁面底部附檔文件。其一是使用收機透過藍芽畫圖;另一是隨機於滑軌極限值內隨機畫線做圖,如作業系統中的螢幕保護程式般的幾何線段,重複、簡單線條表現幾何美感。
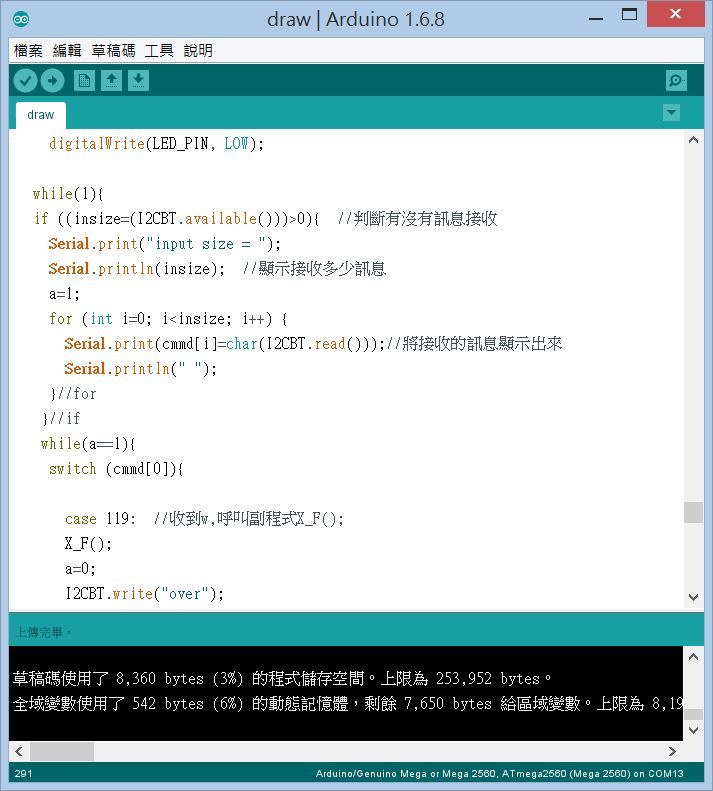
Program microcontroller to working by arduino IDE.
Sketch 1:
Sketch 2:
Connect the ISP and upload the code.
demo video 1:
Demo Video2:
Troubleshooting:
Consider the lenth of ballscrew, then, scale down the case. Our Laser cutter can make it smoothly. 縮小滑軌模組大小,完全使用到螺桿行程,外盒也可以使用完整雷射切割木板。
Althought Gestalt node is AVR series MCU, it does not support bluetooth module. So I use Arduino Mega 2560 & RAMPS module to drive the step motor. (Backup plan.) Gestalt node雖為AVR系列MCU,但未有預留可增加藍芽模組隻腳針,所以改成使用Arduino MEGA 2560 &RAMPS模組作為步進馬達控制。
Arduino mega 2560 has built-in support for serial communication. Ref. THIS. Choose the suitable pin. RAMPS模組已用掉了許多藍芽通訊的腳位,參考這篇尋找其他可用於藍芽通訊的空腳位。
The sliding track had no limit switch, so I add the limitation into the code. 滑軌模組中沒有設置極限,需在程式內設置極限值。但每次初始化開始時,畫筆需在所設置的原點,否則會撞到邊框。
Learning to control Bluetooth module is very interesting. 學習使用藍芽通訊模組。
Learning App inventor to design the App is very interesting, too. 學習使用MIT App Inventor 製作智慧手機程式。
The Fab Academy is a Digital Fabrication Program directed by Neil Gershenfeld of MIT's Center For Bits and Atoms and based on MIT's rapid prototyping course, MAS 863: How to Make (Almost) Anything. The Fab Academy began as an outreach project from the CBA, and has since spread to Fab Labsaround the world. The program provides advanced digital fabrication instruction for students through an unique, hands-on curriculum and access to technological tools and resources.
Fab Lab Tainan was founded at Dec. 2013 at Tainan, Taiwan. It is the first Fab Lab at Southern Taiwan. Supported by Tainan City Government, this Lab hope could open for local citizen. The background photo of web page is the roundabout in front of Tainan train station.
I'm Jia-Hao Chang from Fablab Tainan.I'm senior staff of Association of Digital Culture, Taiwan (ADCT).In this years, I have participated the project of digital curriculum.My career is to empower people employing digital manufacturing technology or tools toimprove their problem.


