Week 6 - Electronics Design
Tasks:
1. To redraw the echo hello-world board and incorporate a push-button and a LED (with current-limiting resistor).
2. To mill the PCB board, stuff the components and functionally test it out.
1. Redraw The Echo Hello-World Board and Incorporate A Push-button & LED
The original layout of Echo Hello-World board is provided as base reference from this link. EAGLE 7.5.0 is used to redraw the board.
The followings are steps involved.
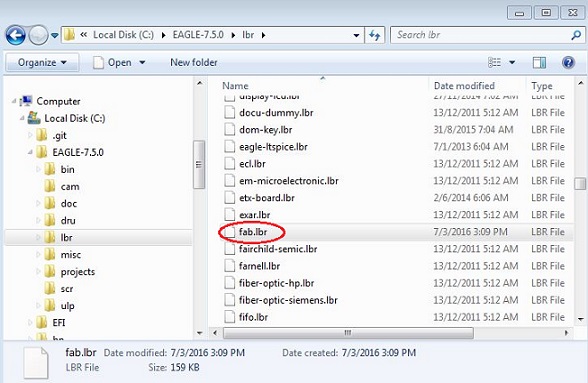
a) Download Fablab library and place it into the eagle library directory. The eagle library in this site is loaded at local disk C:\EAGLE-7.5.0\lbr as shown in the following image.
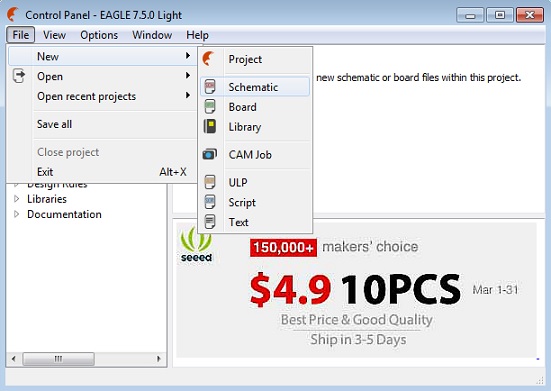
b) Launch EAGLE>Create new project>Start new Schematic.
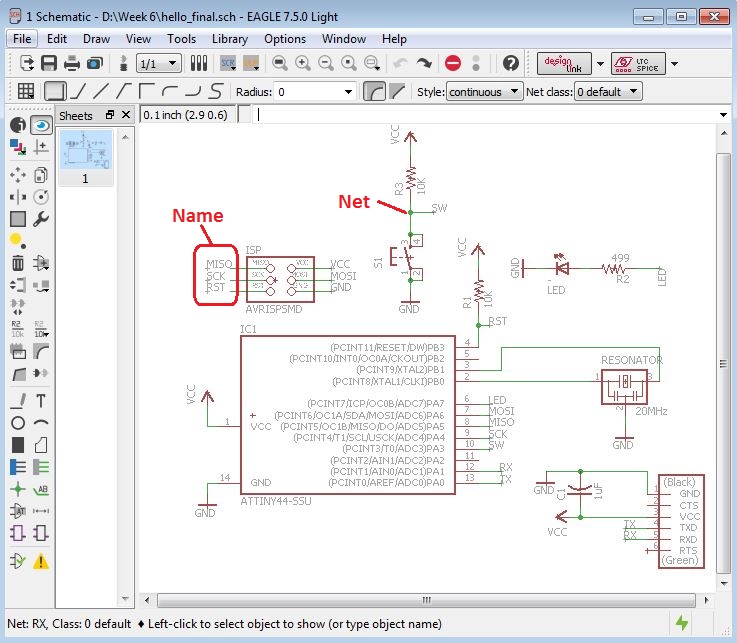
c) Call out all the intended components from the library. Place it inside the schematic window, connect them accordingly based on reference provided either using "Net" tool or "Name" tool.
NB: The name/label must be consistent when using "Name" tool to do connection.
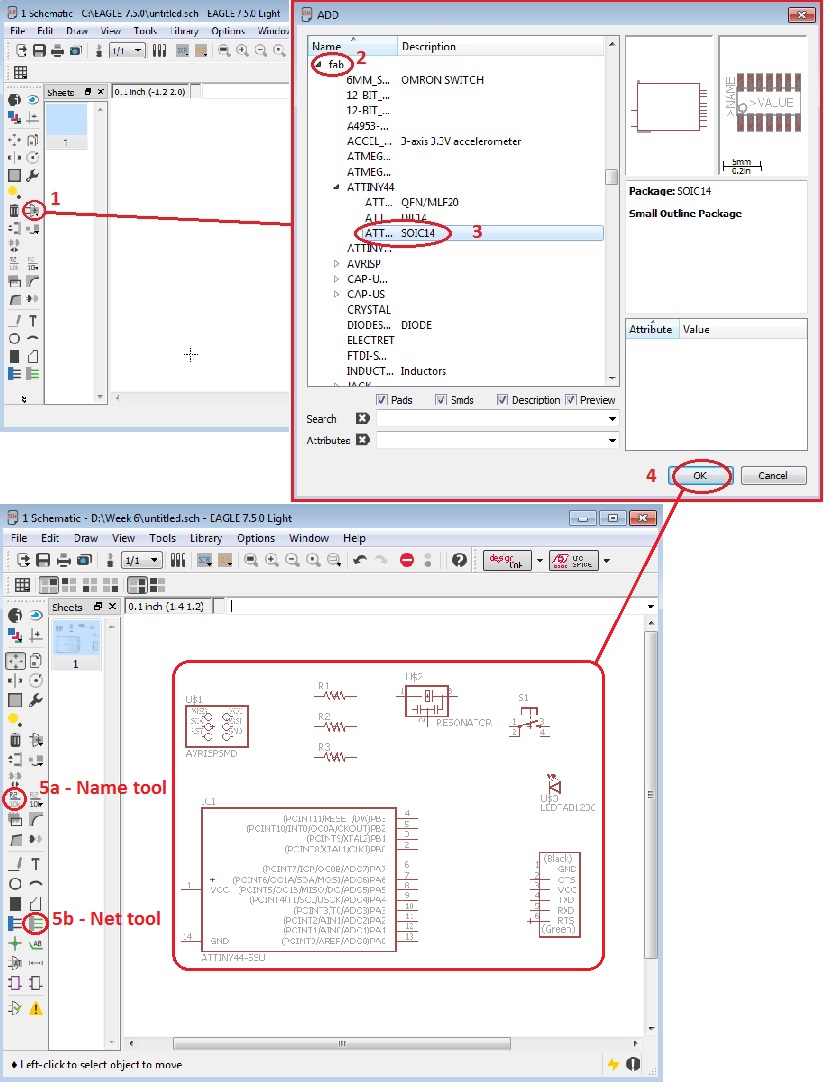
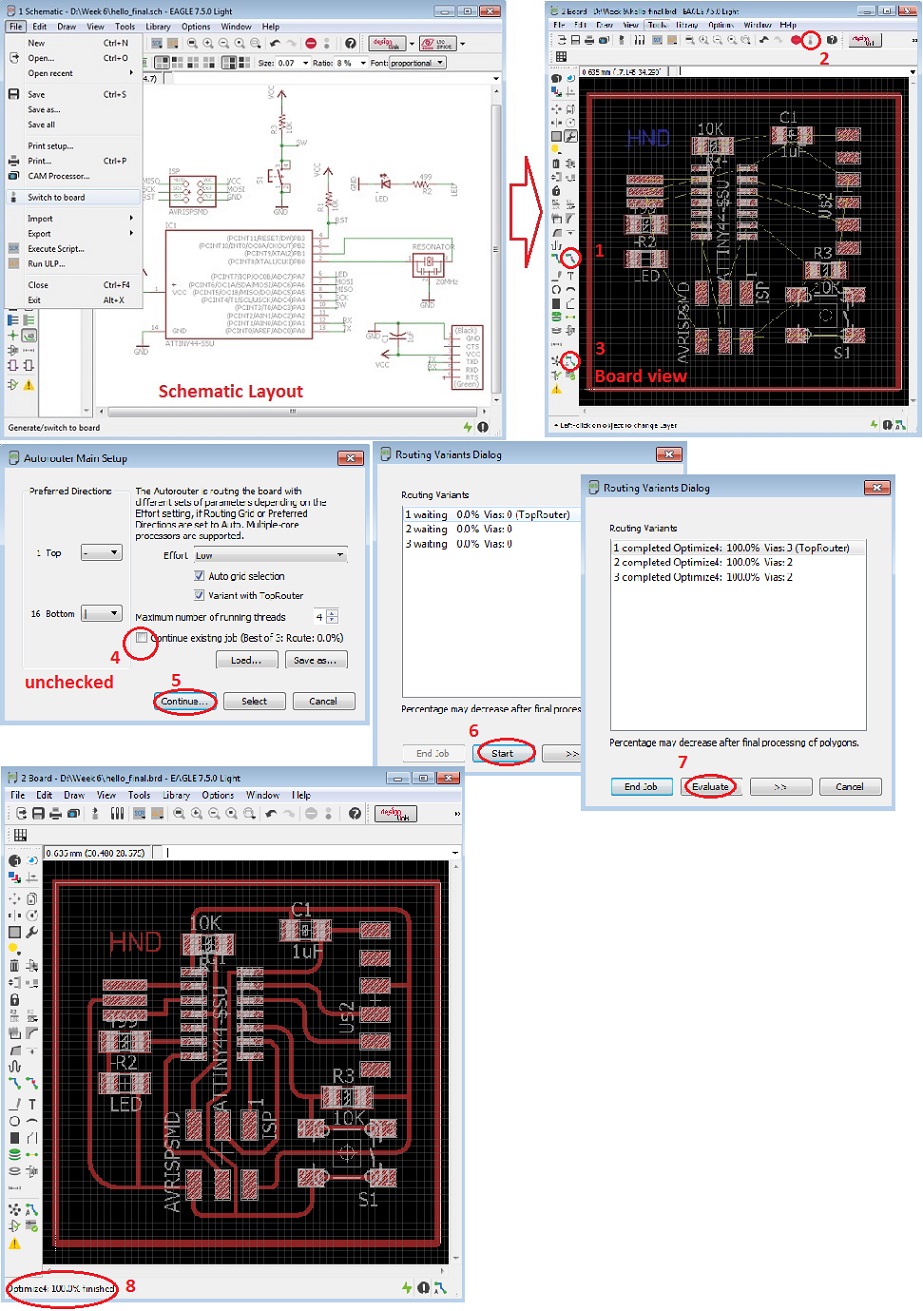
The final schematic layout should look similar to the following.
d) Switching over to Board view as shown. Within the board view, user may re-position the components, add labeling, add border/frame, do manual/automatic routing, etc.
PS: In this site, automatic routing is performed and followed by fine-tuning manually. To do automatic routing, the following step 1-7 are performed repeatedly until optimisation("8") is 100% (preferred). When done, user may tidy up/beautify the routing by adding corner rounds or/and angle.
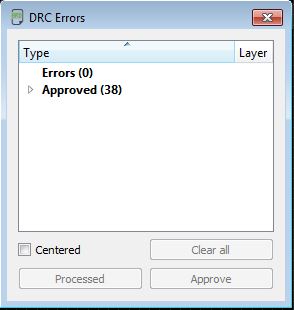
e)Perform a Design Rule Check (DRC) s a good habit to ensure the routing is acceptable. To activate, go to board window, click "Tools>DRC...>Check". The following window shows the error(s) if any. If there is error, user may take necessary correction or approve where appropriate/as intended by the design.
2. To mill the PCB board, stuff the components and functionally test it out.
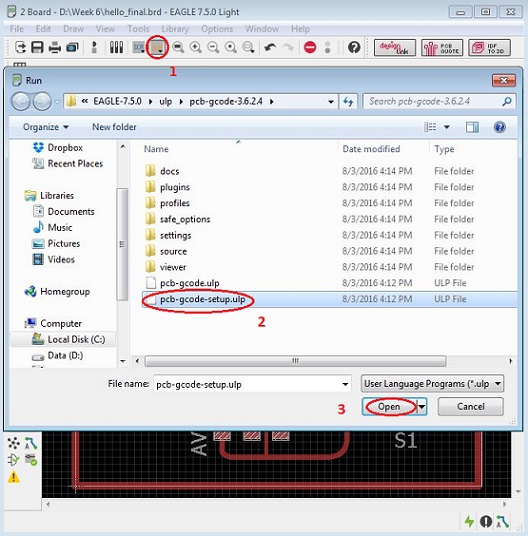
a) Download, unzip and place this pcb-gcode-setup.ulp at local disk C:\EAGLE-7.5.0\ulp\. Run ulp from the Eagle's board view.
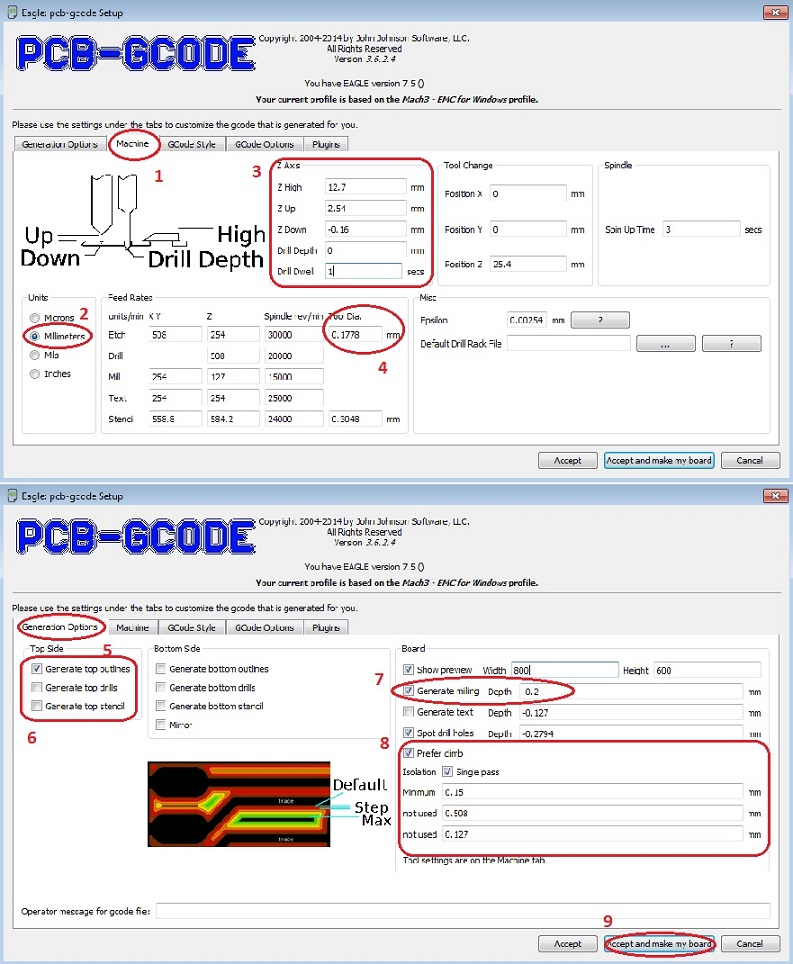
- 1. To switch to "Machine" tab.
2. To set unit into "Millimeters".
3. To set the Z-down (-ve value) cutting depth.
4. To set the cutter diameter. Since centre drill is used, the diameter is no longer important. Thus, it is estimated at 0.1778mm.
5. To switch to "Generation Options" tab.
6. To generate only top outlines since the board and stuff are surface mount type.
7. To set the milling depth. This shall be the similar as Z-down value.
8. To select "Climb" milling instead of "conventional"(if unchecked). And to decide if single pass or multi-pass is preferred in the board milling.
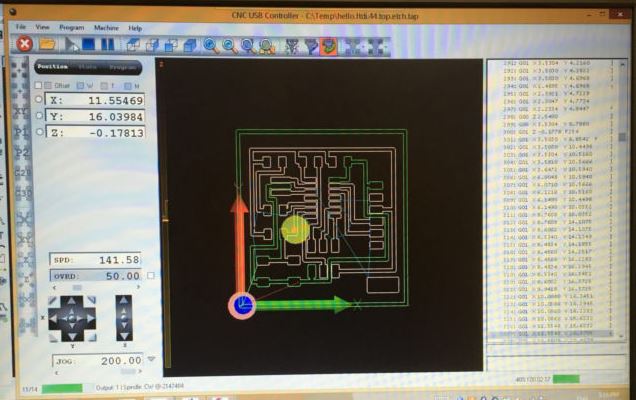
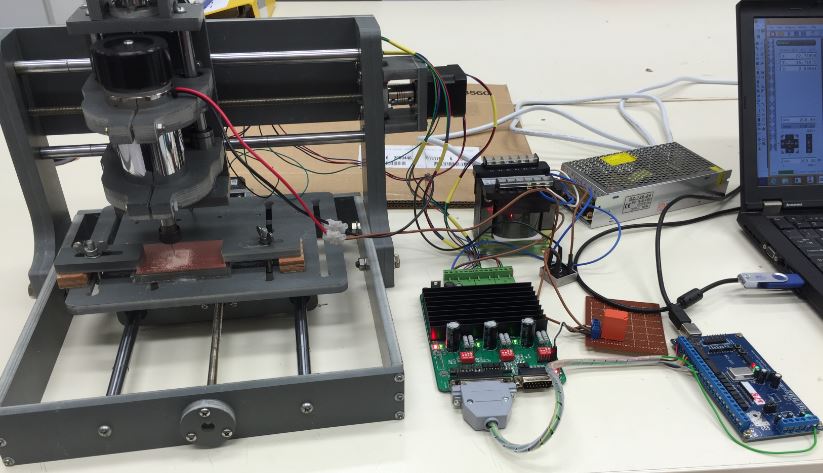
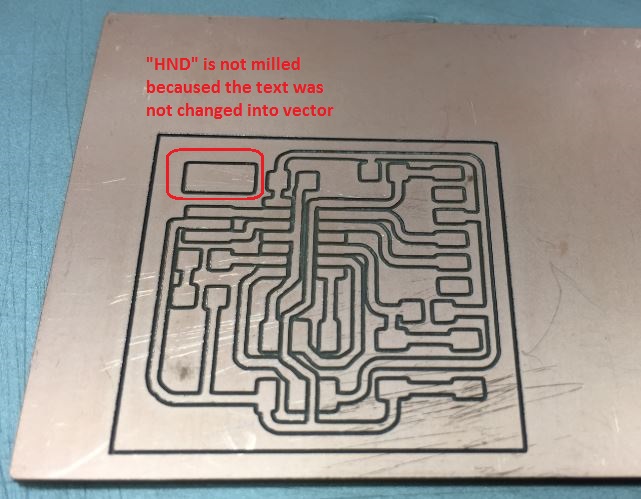
.tap file will be generated from pcb-gcode. This .tap file is loaded into the pcb milling machine. User must set the origin (XYZ 0) of the blank PCB board prior to PCB mill. Click "Cycle start/Play" when ready to begin the milling.
b) Stuff and solder the milled board.
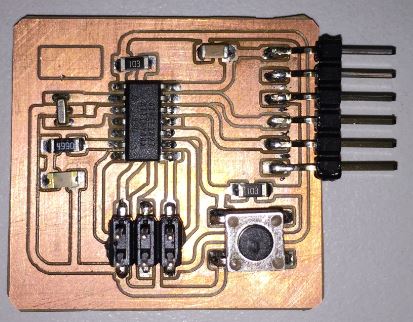
c) Test the milled board.
Click this link to read the testing of the milled board.