Making the tool for making "SU"
In my final project, I decided to make "The tool to make a bamboo blind (made of pieces of split bamboo or reeds tied together)" that capable of designing how to knit wraps when make a bamboo blind.
[1] Making "DIY Arduino" for tool control
First, I I tried to make DIY Arduino and used "Naninno" as reference.[Components]
- single sided PCB board (etch, mill or order) x1
- ATmega328P (28 pin DIL) x1
- IC socket 28 pin DIL (optional) x1
- 6×1 0.1” female pin header x1
- 8×1 0.1” female pin header x1
- 6×1 0.1” pin header (FTDI connector) x1
- 10k resistor (reset pull up – 1/4W) x1
- 1k resistor (power and pin 13 LED – 1/4W) x1
- Green 3mm LED (pin 13) x1
- Red 3mm LED (power) x1
- 16 MHz crystal (0.2” pitch) x1
- 18pF decoupling caps x1
- 6mm miniature switch (reset) x1
- 0.1uF decoupling cap 0.1/0.2”(aref and power) x1
- 1uF cap 0.1/0.2” (optional if power is good) x1
- Jumper wire
[Data]
png Data > nanino_trace_160601.png / nanino_cutout_160601.png / nanino_pads_160601.png Eagle Data > nanino_160531_3.sch / nanino_160531_3.brd
[Tool]
CNC milling machine > Roland MDX-20
[Process]
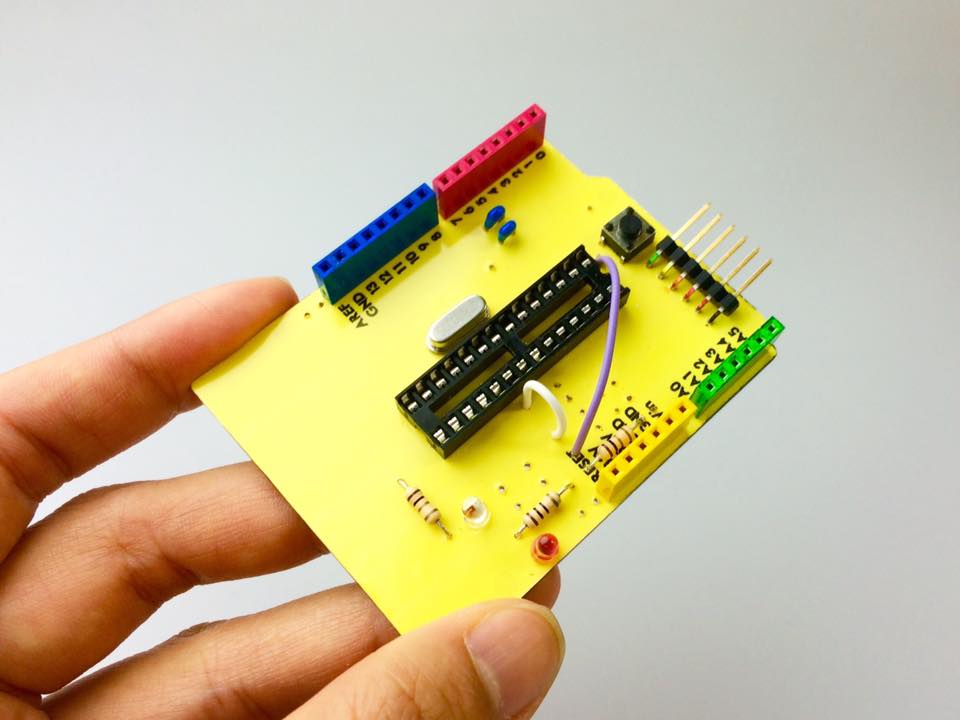
And I put a yellow seat on the back side of a board to make it pretty.
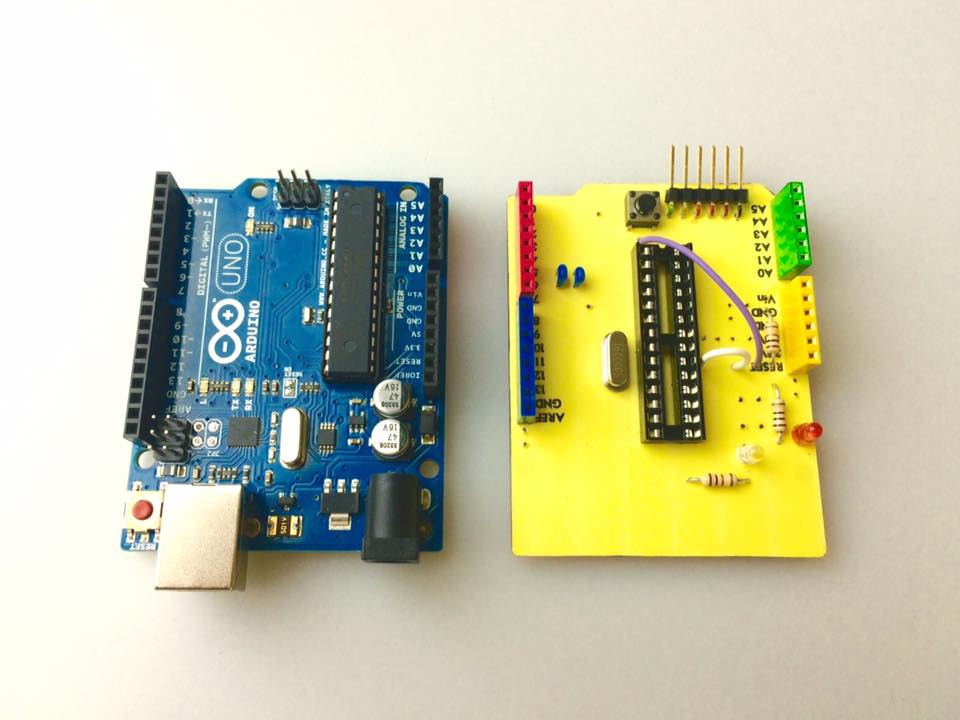
I call this "Kawaiino". I want to make various electrical device cute!
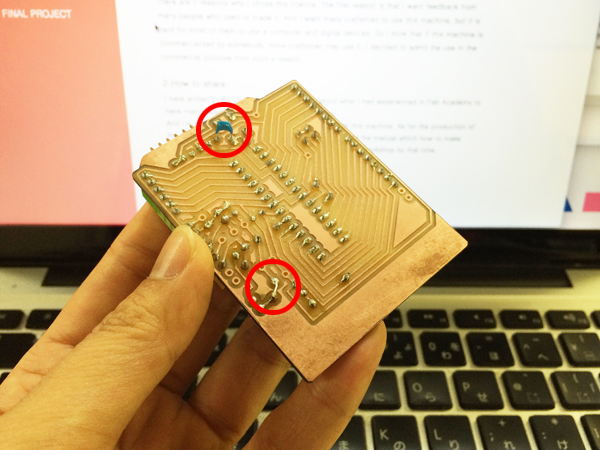
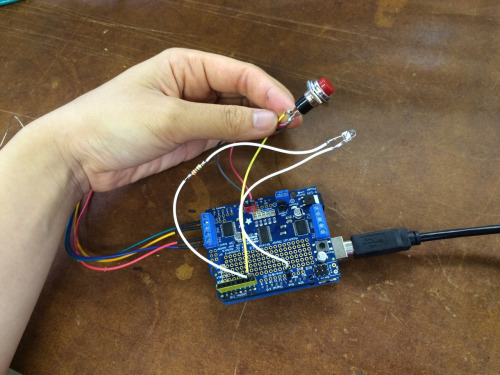
I used wrong resistor... So I changed them and added a jumper wire and a condensor. Then LED blinked!
[2] Writing a program for stepper motor control
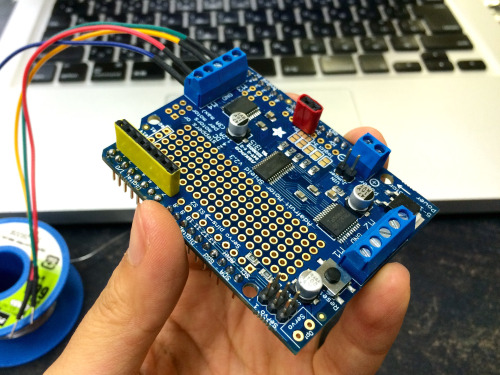
Because motion of "Kawaiino" was unstable, I used original Arduino at prototype.In addition, I used a motor shield of Adafruit for stepper motor control.
[Work flow plan]
(1) Design line of stitches / Processing
(2) Write codes for line's design / Processing
(3) Control the tool / Arduino
[Materials]
- Stepper motor x1
- Adafruit Motorshield kit x1
[Tools]
- Arduino
- Processing
[Process]
1. Writing a code of Arduino

At first、I wrote the program such as follows.
---
(1) Turn on (Initialization): Not move
(2) Push a button 1:50steps moves (backward)
(3) Push a button 2:50steps moves (forward) > Return to (1)
(4) If step(1) ~(3) are repeated three times, LED blinks 5 times.
(5) The number of times that pushed the button is reset. > Return to (1)
---
And, the number of times that pushed the button is displayed.
2. Writing a code of Processing
PC writes a code automatically when I choose a pattern.
I controled a tool by inserting the cord in a cord of Arduino.
Image Data > pattern.zip
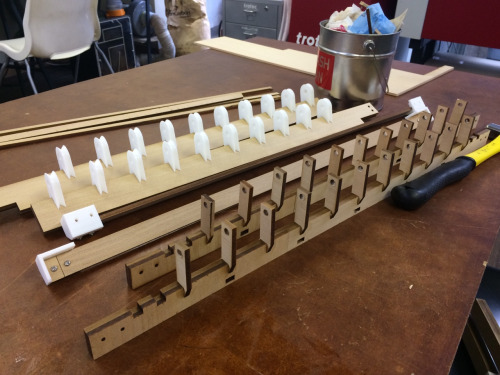
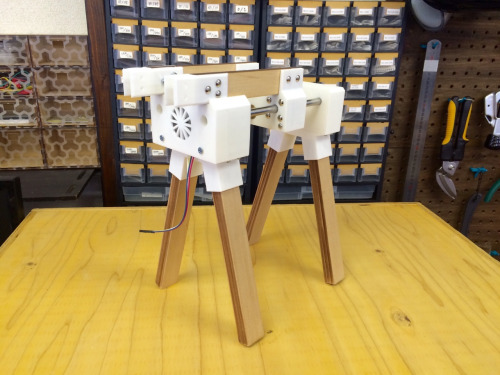
[3] Making a body of the tool
[Materials]- 300mmx600mmWood board x3
- 900mmxΦ6.0mm Metal piple x2
- Button x1
- Screws
[Tool]
- Software: Rhinoceros
- Laser cutting machine: trotted speedy 100 (Power: 41 / Speed: 0.8)
- 3D printing machine: Makerbot Replicator2
[Process]
1. Connecting devices
2. Designing

And I made main parts with wood board(Agathis/D:5.0mm) and PLA.
Rhinoceros Data > final_160619.3dm
3. Making a prototype
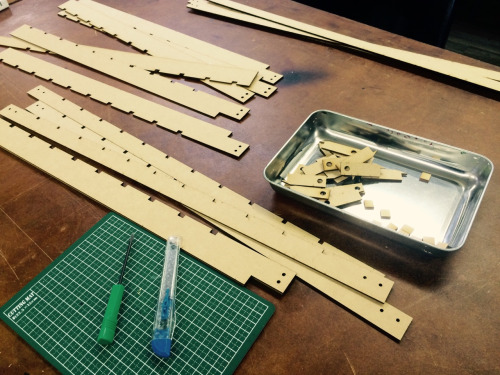
4. Cutting, Printing and Assembling


[4] Running
[How to use the tool]A window is displayed when you click "Run" in Processing.
Choose two patterns, and code are displayed at a serial monitor of Processing.
Copy this code and paste it between "From here" and "To here" of Arduino's code.
Program is sent to the tool when you click "Upload" in Arduino.
Push the button of the tool, and bobbins are moved by a stepper motor.
[How to make a bamboo blind]
Please refer to this for how to stitch.