Assignment 11
Задание 11
(2ND EVALUATION EDITION) In which I design a capacitive switch
В котором я чувствую магнитные поля и эпично даю пять

To design a capacitive sensor I first researched a library by Paul Badger and his vision of making a capacitive sensor. I tried it out using arduino and breadboard and was quite satisfied by the result.
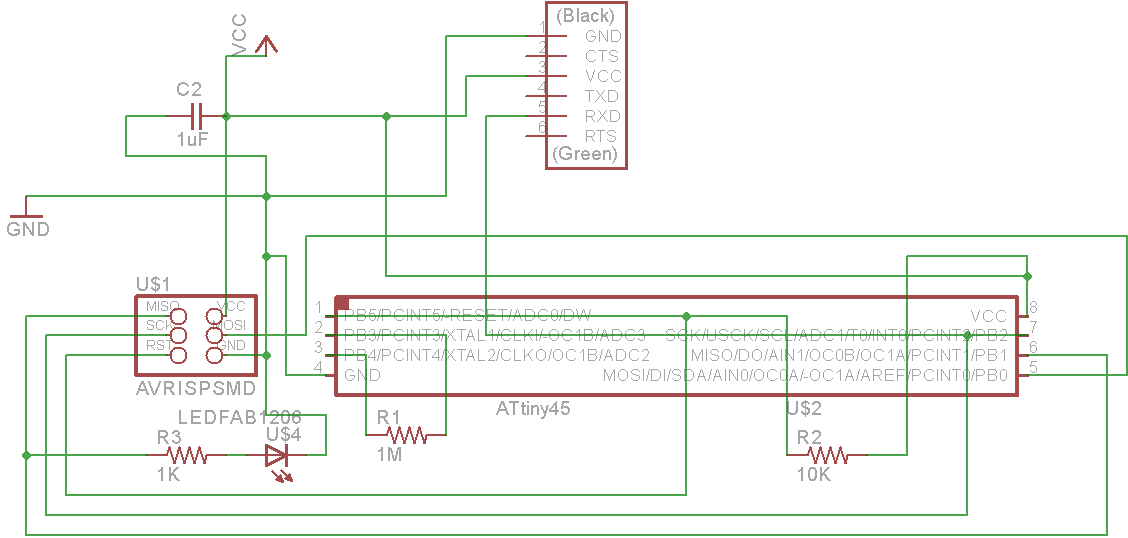
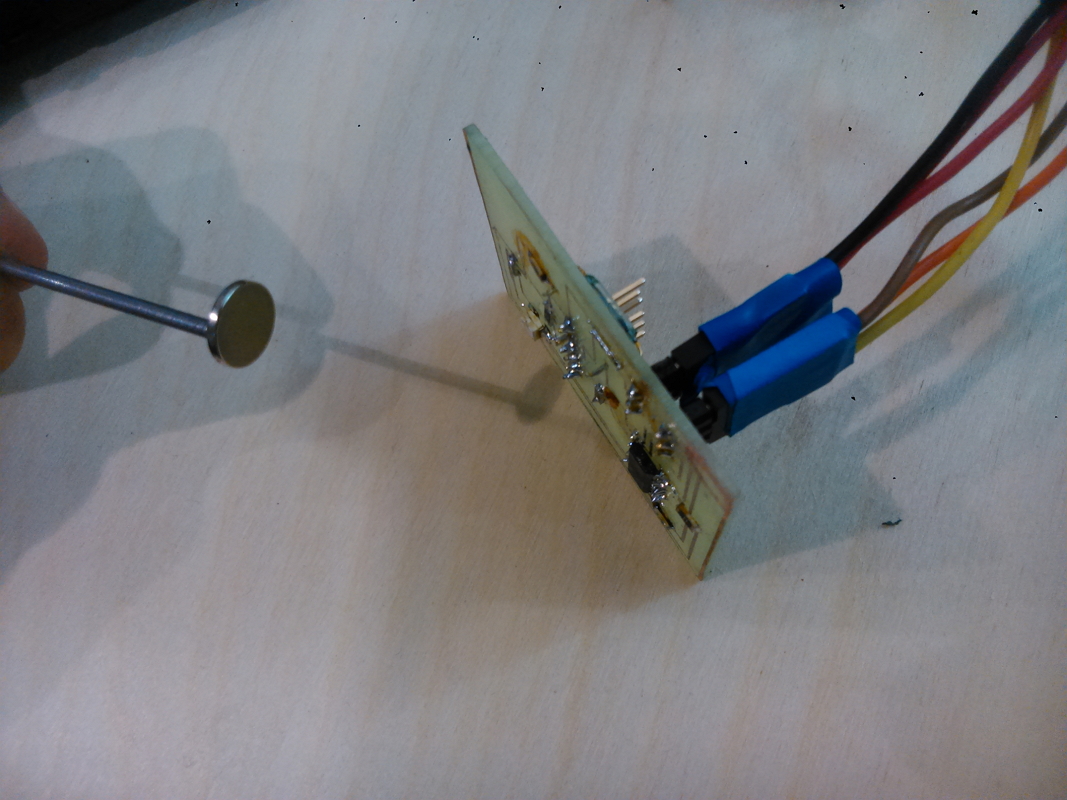
Schematics are based on Neil's touch response pcb with Attiny45 controller.
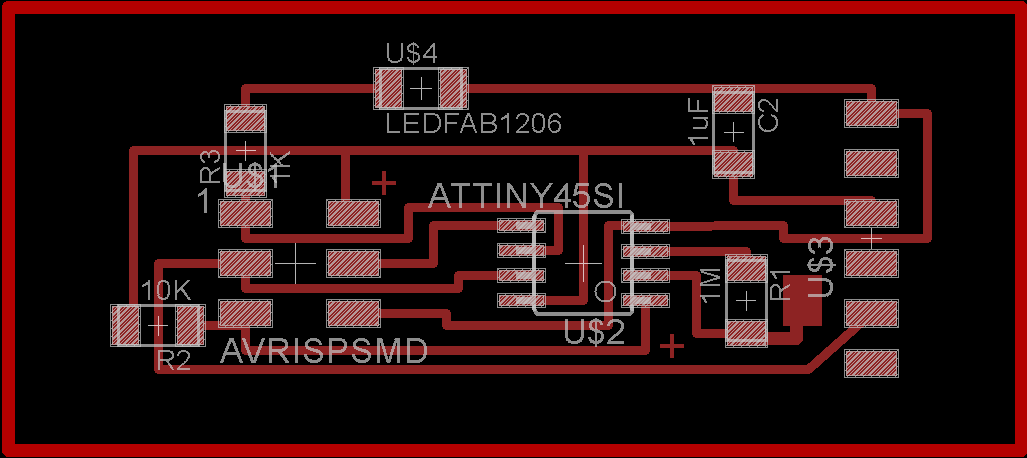
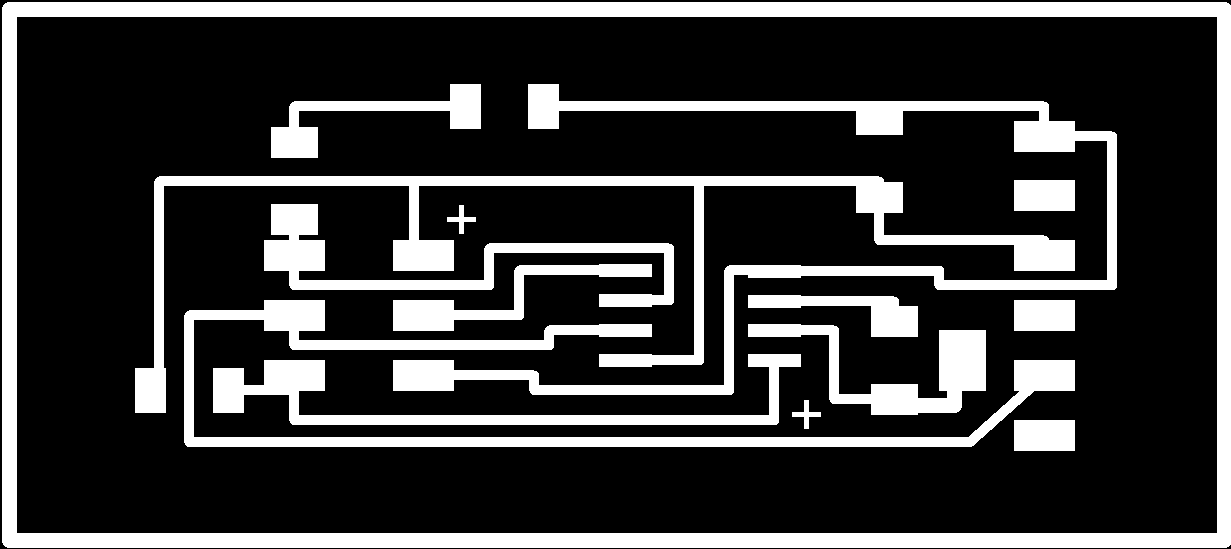
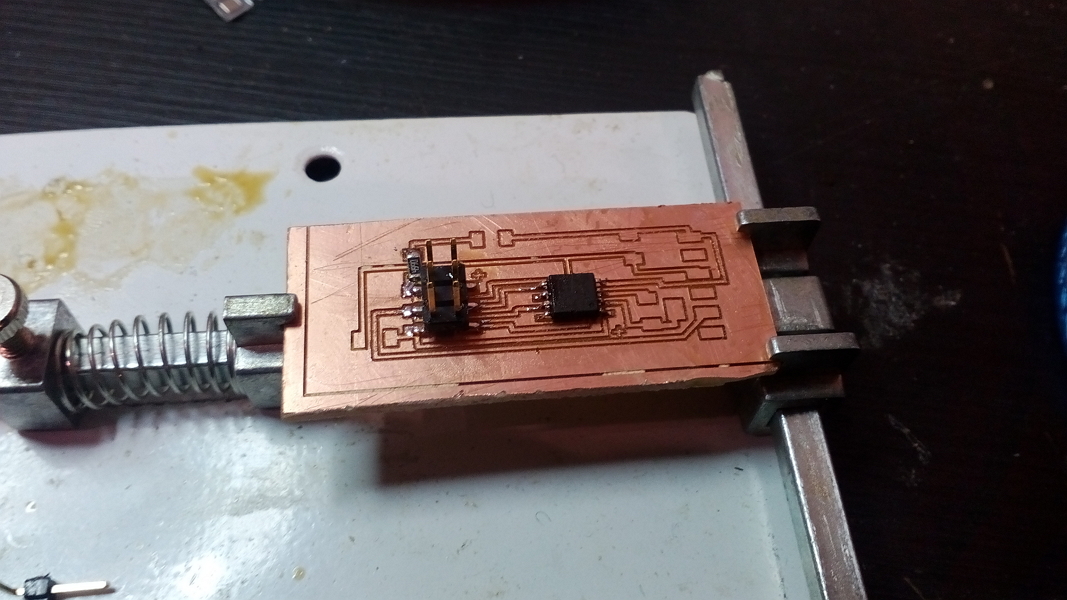
Those little pluses will mark top side of controller and vcc side on ISP port. The board was milled as in electronic production assignment: I uploaded .png in fabmodules, calculated task as g-codes (PCB traces (0.010) ), converted g-codes from inches to mm and milled my pcb on K2 milling machine

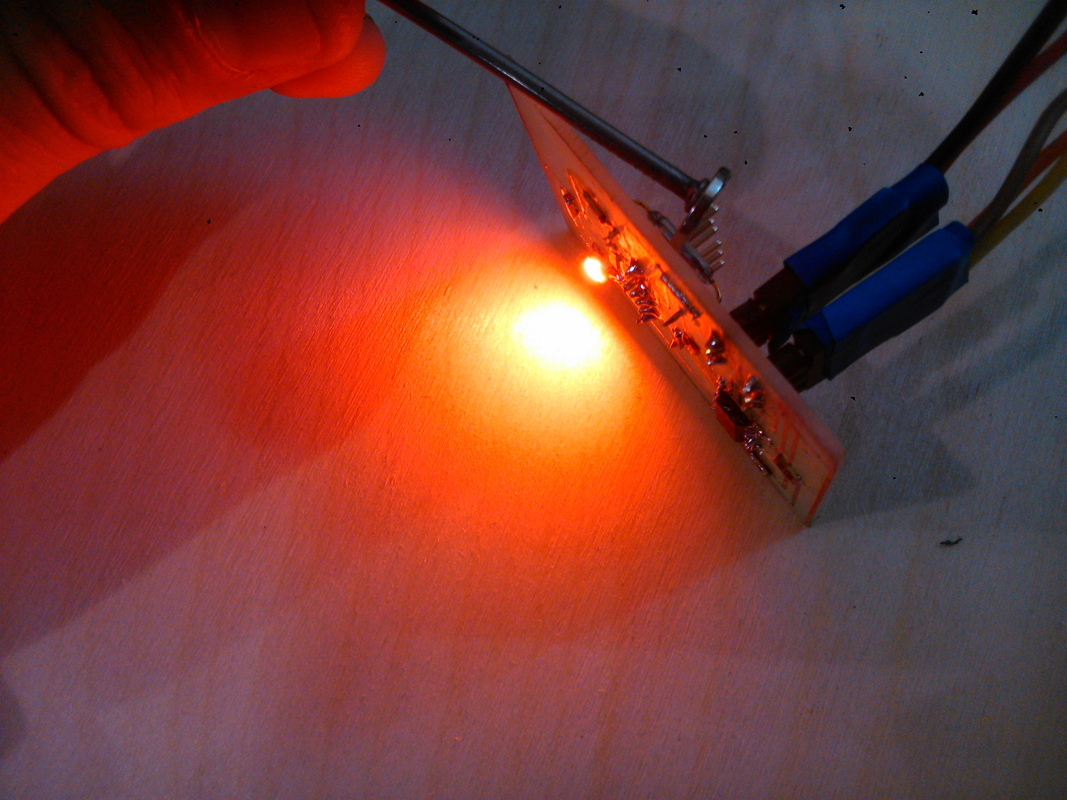
As I would need a switch for lights which will last for some time, I only have to detect the first touch and then wait for a while. But this causes bugs as when you keep your hand long enough for sensor to get used to it so it will not react unless you get your hand away and place it in sensor again and a bug when it doesn't react on a hand immediately.
    #include

CapacitiveSensor   cs_2_3 = CapacitiveSensor(2,3);        // 10M resistor between pins 4 & 2, pin 2 is sensor pin, add a wire and or foil if desired
long prev=0;

void setup()
{
   cs_2_3.set_CS_AutocaL_Millis(0xFFFFFFFF);     // turn off autocalibrate on channel 1 - just as an example

   pinMode(1, OUTPUT);
}

void loop()
{

    long start = millis();
    long total =  cs_2_3.capacitiveSensor(30);
    if (total>prev*3)
      {
  digitalWrite(1, HIGH);   // turn the LED on (HIGH is the voltage level)
  delay(1000);                       // wait for a second
  digitalWrite(1, LOW);    // turn the LED off by making the voltage LOW
      }
     else{
  digitalWrite(1, LOW);
      };

    prev=total;
    delay(10);

}
Capacitive sensor from Gleb Miroshnik on Vimeo.
Final thoughts
I could improve this sensor's code to make it react faster and keep lights turned on all the time there is a hand on it plus a little after you take the hand away but even in this state it could help me make my final project
Downloads
capacitive.rar (includes Eagle files, traces in 600dpi .png and a program sketch)
In which I sense magnetic feilds and do an epic high five
В котором я чувствую магнитные поля и эпично даю пять
Designing a pcb for this week
Читаю даташит для микроконтроконтроллера и нахожу ошибку
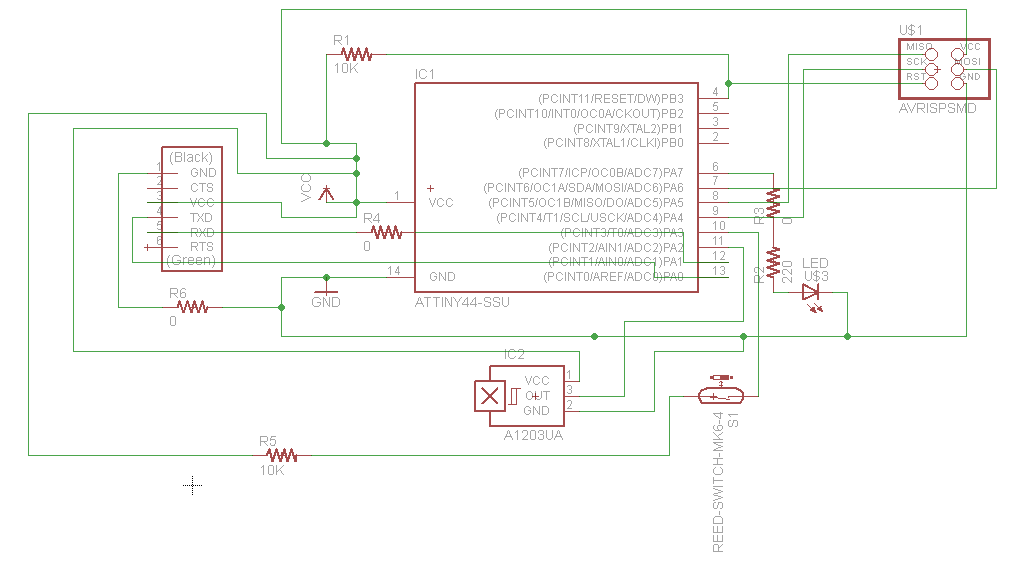
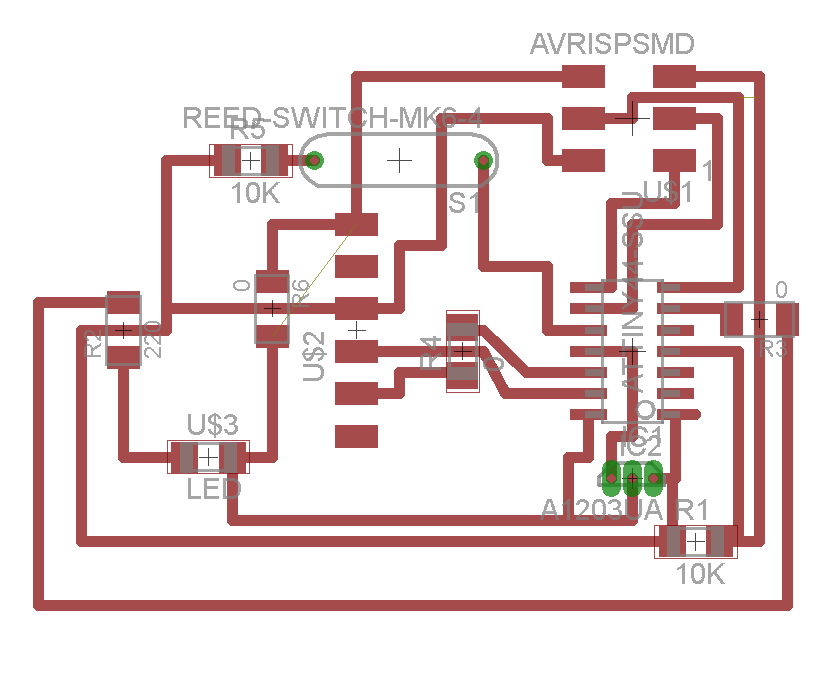
I've chosen two magnetic feild censor to explore this week: reed switch which is basically a button but for magnets and a hall effect censor. Why? Idk >:3 As I needed extra pins, I've made a scheme and pcb layout based on Attiny44 in Eagle using fab.lib I downloaded previously. Led is connected to pin7 of Attiny44; reed switch - to pin 2; signal from hall effect censor - to pin3. Download Eagle files

Making a hardware
I used Arduino environment to make a program for microcontroller and then I put hardware on a board by Arduino Uno as a programmer. First of all, I checked the board by uploading blink code and then I improved the code to light the LED when a magnet is nearby (reed switch is closed). I didn't manage to read signal from hall effect censor as I ran out of time and stuck with Serial. thing.
void setup() {

  // initialize digital pin 13 as an output.

  pinMode(7, OUTPUT);

  pinMode(2, INPUT);

  Serial.begin(9600);

}


// the loop function runs over and over again forever

void loop() {

int reed = 0;

int hall = 0;

  if (analogRead(2)>200) {digitalWrite(7,HIGH);};

  //digitalWrite(7, HIGH);   // turn the LED on (HIGH is the voltage level)

  //delay(1000);              // wait for a second

  //digitalWrite(7, LOW);    // turn the LED off by making the voltage LOW

  //delay(1000);              // wait for a second

  reed = analogRead(2);

  hall = analogRead(3);

  Serial.println(reed);

}
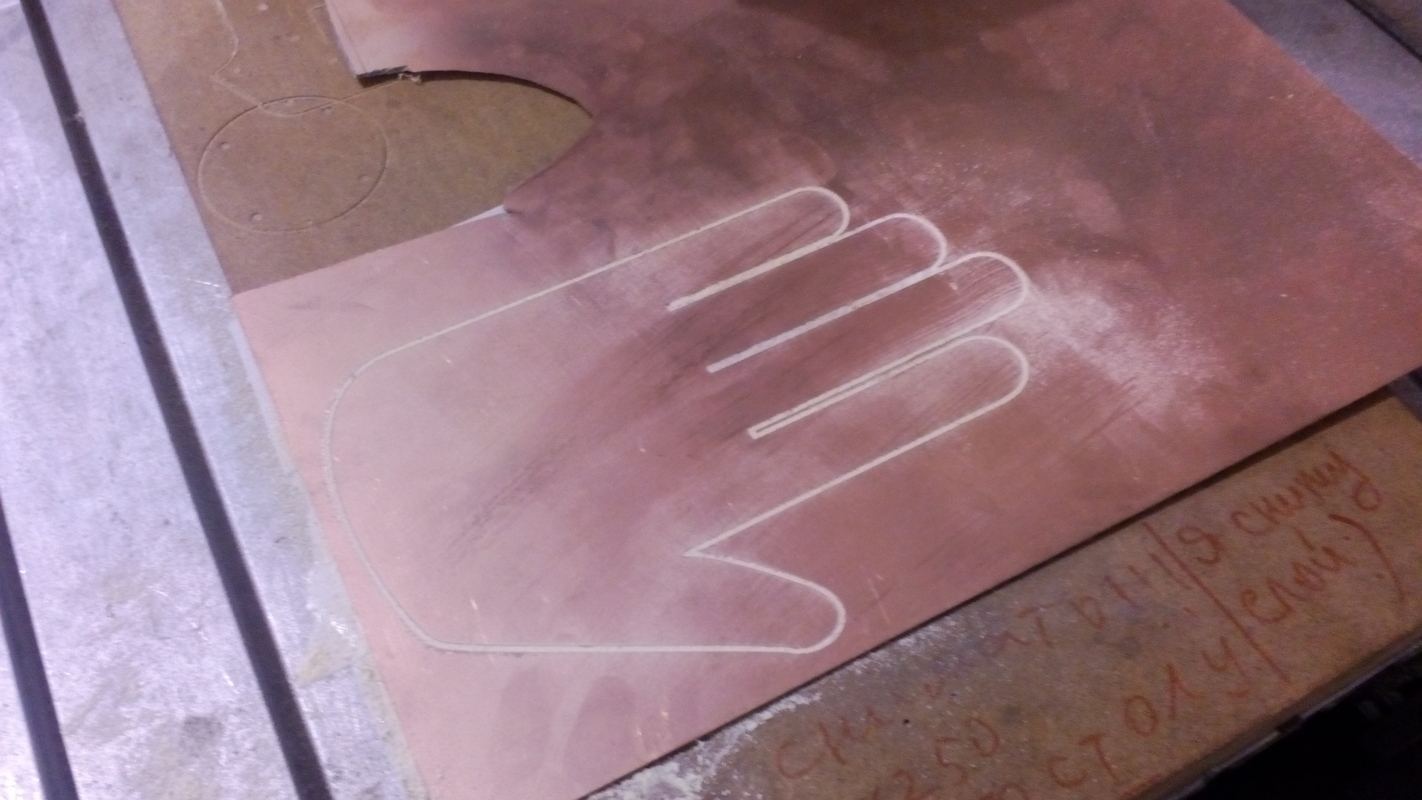
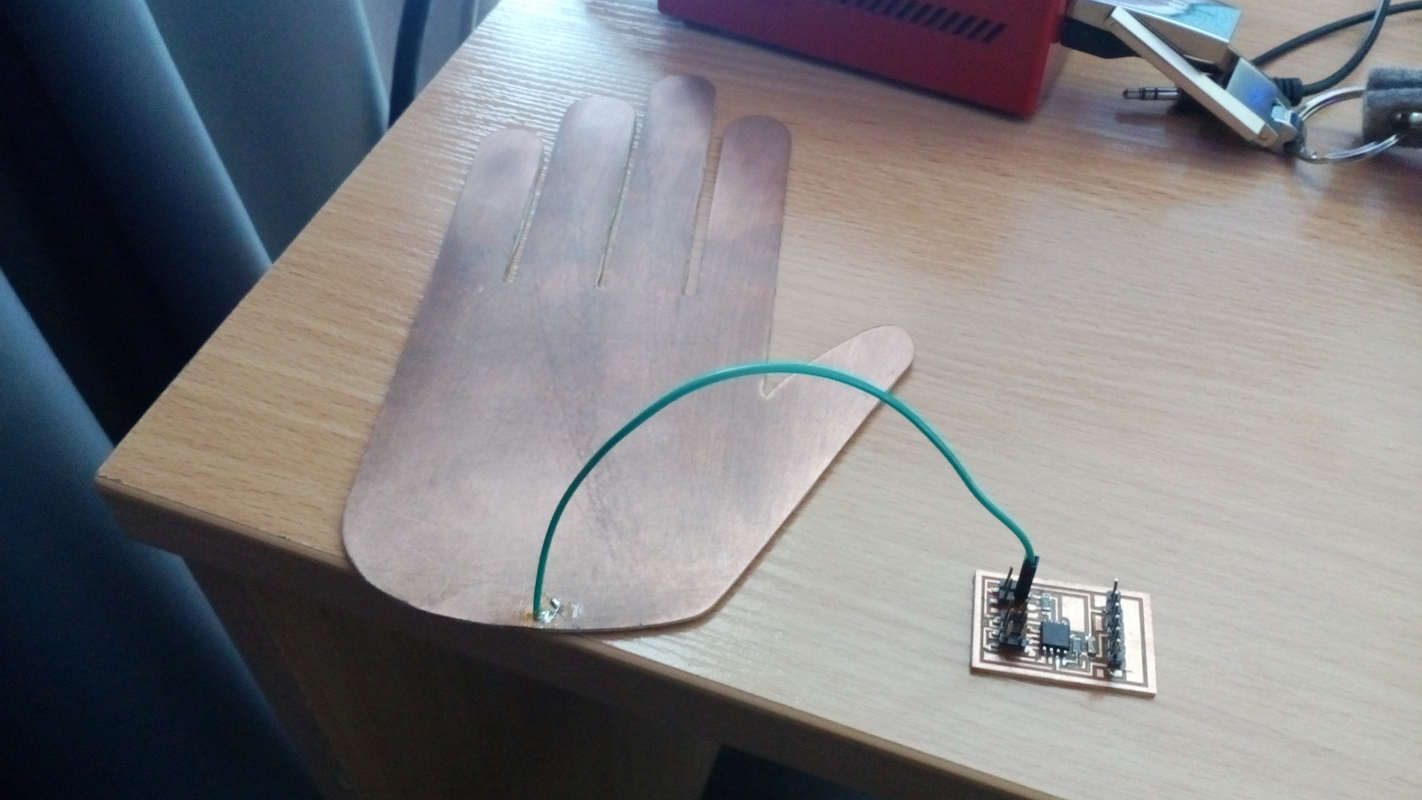
Capacitive high five
Later, when I decided what project would actually be my final project, I realized that I have to make a capacitive sensor, and what would represent touch better then a human arm? So, I've made Neil's touch response pcb with a hand made of textolite. To download the hand click here. To make a program I used SoftSerial library and CapacitiveSensor library for Arduino
  #include "SoftwareSerial.h"
#include "CapacitiveSensor.h"

const int SensorPin =  4;  // Pin4 receives signal
const int SignalPin =  3;  // Signal comes from pin3
int sensorValue = 0;

const int Rx = 2;
const int Tx = 1; // this pcb doesn't actually require Tx so I made it a random unattached port
SoftwareSerial mySerial(Rx, Tx);
CapacitiveSensor   cs_3_4 = CapacitiveSensor(3,4);
void setup() {
  pinMode(Rx, INPUT);
  pinMode(Tx, OUTPUT);
  mySerial.begin(9600); // send serial data at 9600 bits/sec
}

void loop(){

  sensorValue = cs_3_4.capacitiveSensor(30);
  mySerial.println(sensorValue);
  delay(500);
}