
The assignment for this week is to propose a final project that intergrates the range of units covered in Fab Academy this year.
I will explain the following:
The goal of my final project is to create a people counter for our school Fab Lab. I want the people counter to visually display the number of visitors to our lab on an LED display that will be hung over the door to the lab. The lab has one main door which allows for my people counter to capture the data of people entering and leaving the lab. The door is an oversize door that is 61 inches across. This presents a slight challenge as the door opening is larger than most sensors range. I also need for the display to count the number of people in the lab and keep a running total of the number of people inside. The challenge will be to count people only once and not when they are entering and exiting. I also need a way to write to memory in the event of a low voltage interruption so that I do not lose the total number of people who have entered.
To my knowledge, no one in FabAcademy has created my project. I know of several projects that have been tried similar to my project in terms of counting people of objects passing by but none in the FabAcademy in the same manner as I am trying. I have visited a few pages like this page.
I decided to start by trying a few sensors. I intially made a photoelectric light sensor for Input Week. I thought this would make a great sensor to use for my project. I had obtained a laser diode emitter and tried to get the range to work correctly but could never get the accurate range needed to create the break beam sensor using the inventory of parts. I also needed it to be reliable as this would be the main input that would be used repeatedly. I had issues with aiming the laser correctly on the small photoelectric light sensor and not having it deviate slightly from the light sensor. I could never come up with reliable build to be my main input sensor.
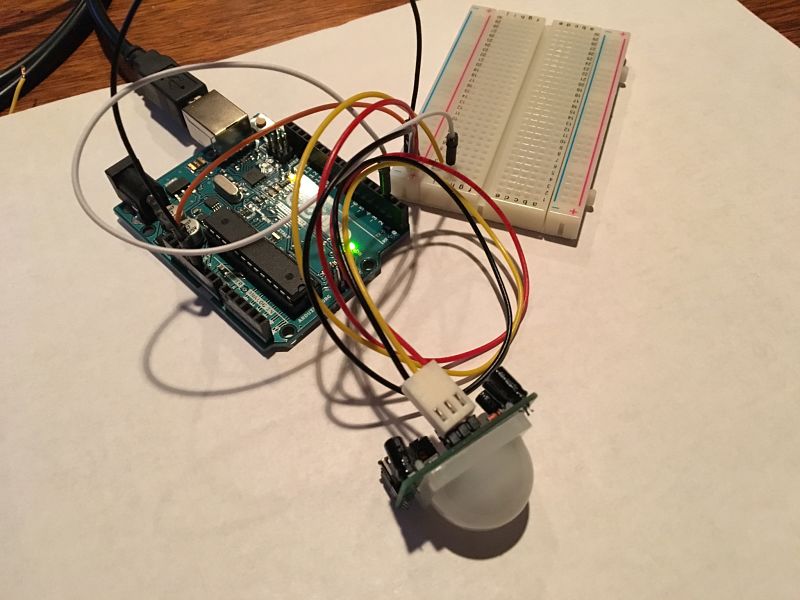
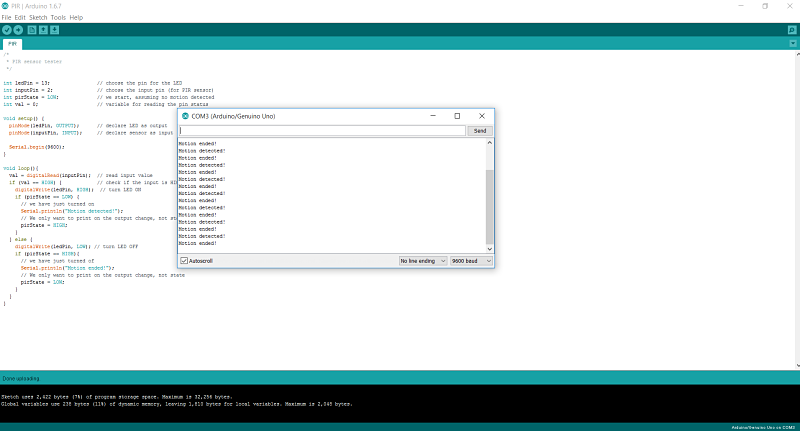
I purchased a PIR sensor for motion detection. I played with how it would work and found that it is not responsive enough to count the number of people entering a room accurately. If a group of people walk in, it would trigger them as one person instead of individually. I played with the sensitivity and time settings, but could not get the output to be what I needed.
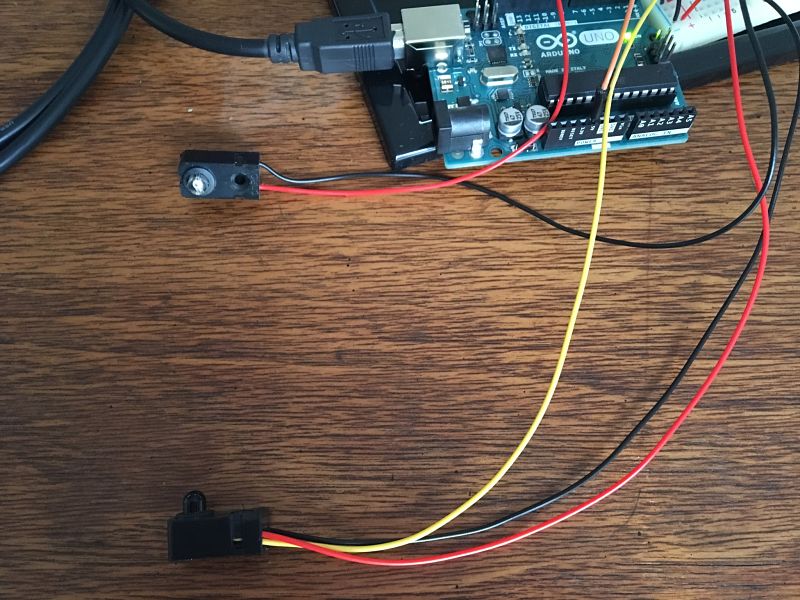
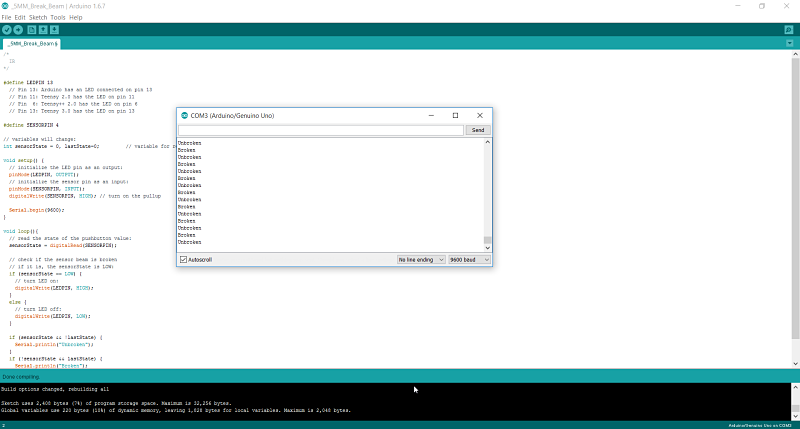
I then turned to an inexpensive 5MM IR break beam sensor. This worked and was triggered when the beam was broken, but the range was not far enough to span the 61 inch opening of the door. It struggled around 12 inches. I decided to look at more industrial sensors and outputs.
I then did a bunch of research and settled on an industrial Seco Larm E-931-S35RRQ relective sensor that had 35ft range. It was fairly cost effective at $48USD dollars to achieve the range I wanted with the reliability factor. I had hoped to create one but with the unreliablilty of the photoelectric light sensor and laser diode emitter, this part would have to do for the project.
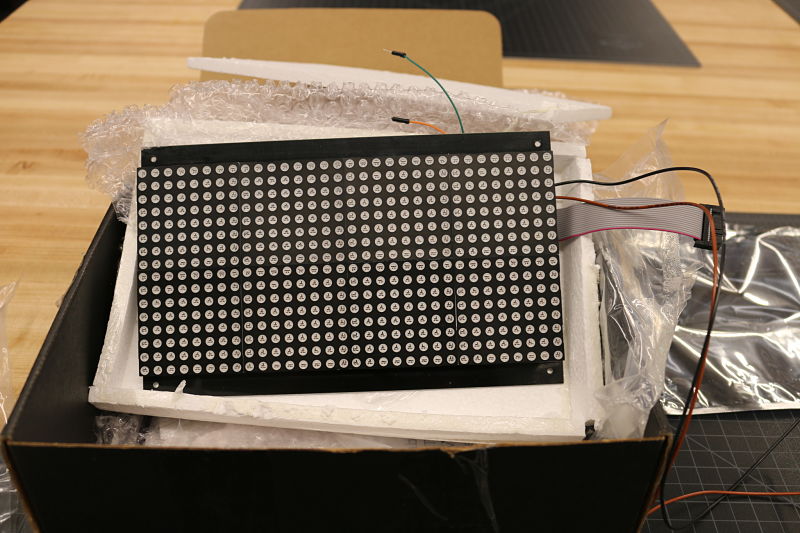
I looked at making the LED array from the Output week. I decided that for the maximum number of LED panels I would need to create the visual output and the cost factor alone, it would be easier to secure a preassembled LED panel for my main output. This was done by looking at several LED panels before finally deciding on using two chainable 32 x 16 red green dual color LED panels. I purchased them for $40USD. This was far more cost effective then making my own to achieve the size required for a sign above our entry door.
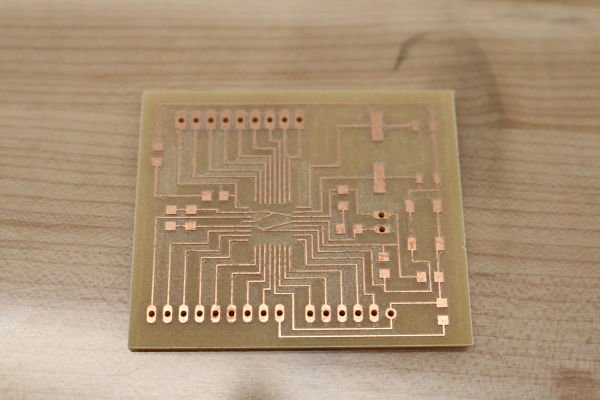
I did not want to use a purchased Arduino and create an shield for the Arduino. I wanted to manufacture my own Arduino based controller. I looked very closely at the Satshakit fabbable Arduino clone. I did go ahead and create a Satshakit board, but quickly realized that if I was to create my own shield, I wanted the pinouts to line up with the shield. I decided to use the Othermill I had purchased for our high school lab in place of the Modela to cut out their Arduino clone, Otherduino. I downloaded their files, just like I did with the Satshakit and milled the double-sided board. I know we prefer surface mount, but this will be through hole. I had some double-sided boards in my inventory and the milling process came out well. You can see in the photo on side of the board before I flipped it over to mill the back side and cut out the board.

I am making a steel enclosure using the plasma cutter for the sign. I will also make a acrylic enclosure for the two LED panels. I will make an Arduino clone. I will also
create and make a shield to go on top of my Arduio clone. I also plan and making a 3D printed box enclosure for both the Arduino clone and shield to be placed in the
back of main enclosure. I will also have to make my code to take the inputs and display the output to my sign to count people entering and exiting the lab.
I will use Computer Aided Design to create the files for the LED enclosure. I will use the Epilog Laser to cut out the acrylic enclosure. I will use Computer Controlled Cutting to cut out the doublesided FR1 board for the Arduino clone. To connect everything together I will use Electronic Production, Electronic Design, Embedded Programming, and Input and Output Devices. I will use Computer Aided Design and Computer Aided Manufacturing to create the plasma cut surround. I plan on using the 3D printing to create the shield and Arduino clone surround.
I need to create the enclosure and start the process of assembling the components. I will finish up creating the Arduino clone this week and start the process of creating the shield on Eagle. After I have it assembled I need to program it to use the input data to output to the LED screen. I will also start planning once the shield and clone are completed to create the 3D printed surround.
I still need to figure out if I need two sensors. If the first one is tripped before the second one it only counts as 1. As the person leaves and trips the second sensor before the first, it will not count them as they would be leaving the building. This would add slightly to the cost but be more functional and provide a better count.
I also need to figure out how I am going to use the 5V input of the LED and 10V of the sensor. I plan on using the shield to regulate the power requirments into the one power source for the people counter.
I am planning on workign on this each day until my scheduled presentation on June 20th. I just finished school and this allows for more time to concentrate on the final project. I am have been keeping up with the weekly assignments and now can focus on my final project. I want to complete the enclosure and close in on the schematic process by next week and finalize the shield by the following week. This would allow me one week to finalize everything and work on the code.
I should be evaluated on how my device works and the reliability of the device. I want to provide an easy device for other FabLabs to replicate if they want to make a people counter to total the number of people that have visited their labs.