| Home | | Weekly Assignments | | Final Project | | Photo Gallery |

Week 5: 3D Scanning and Printing
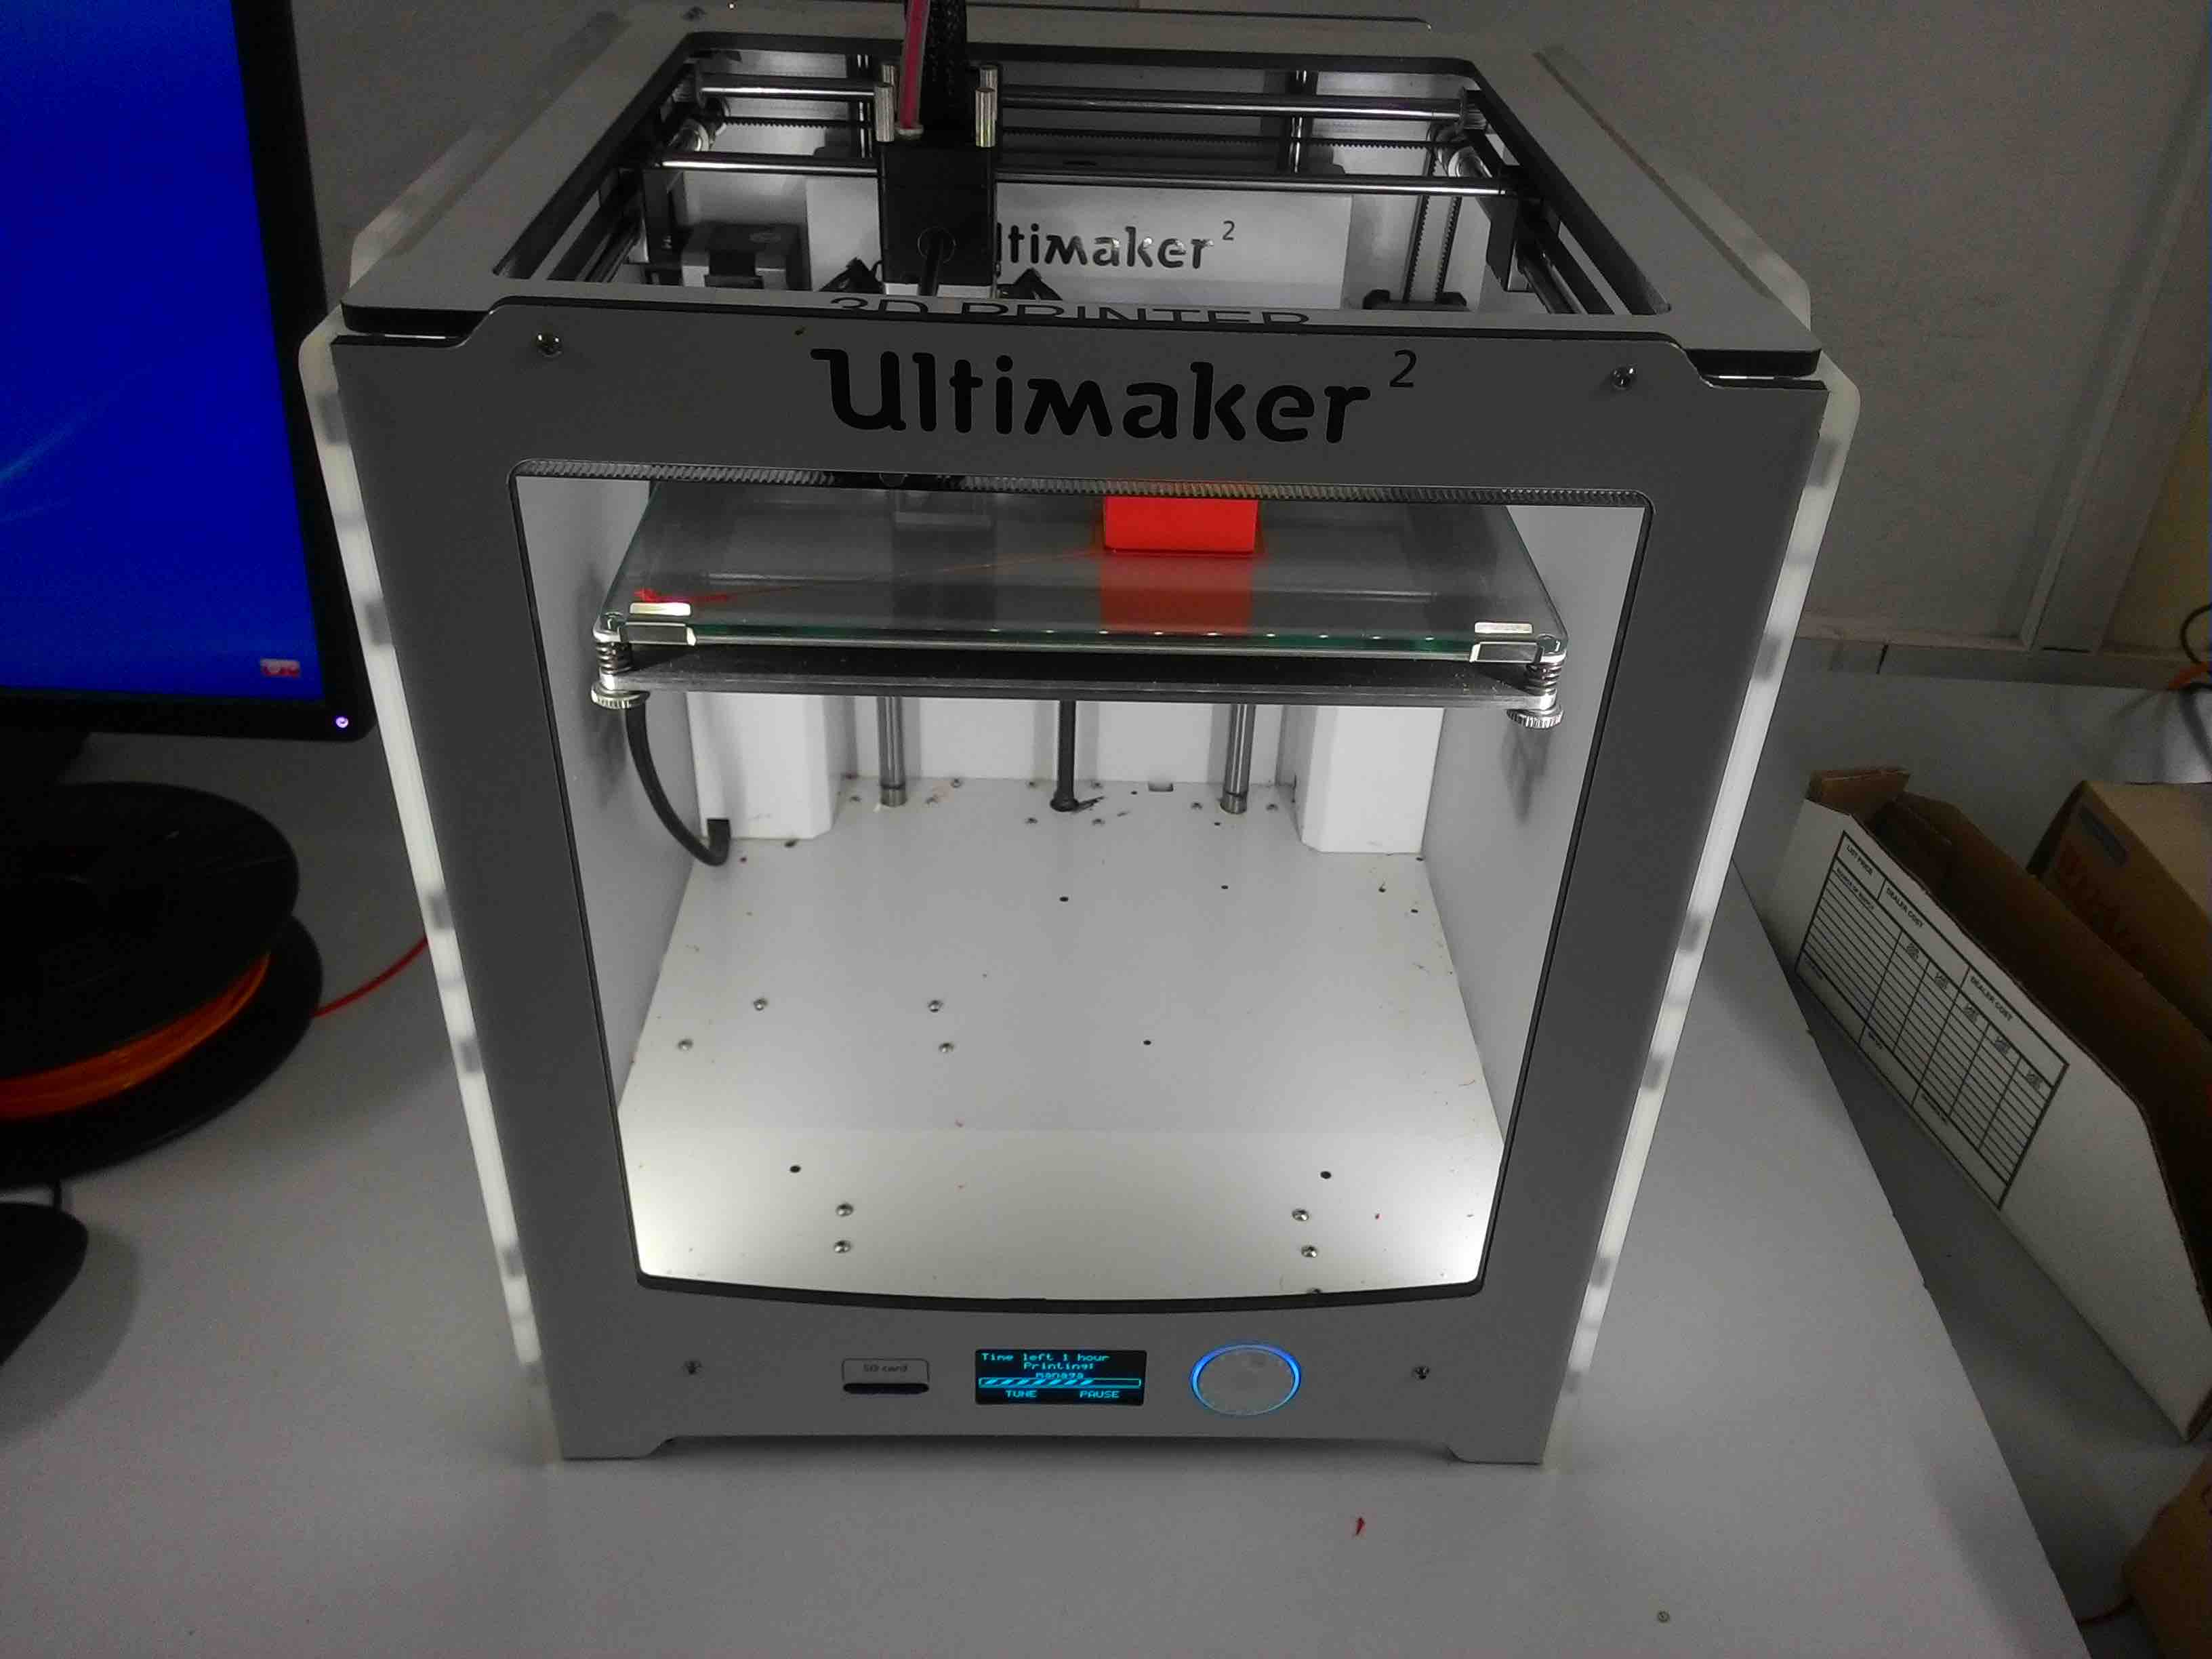
This week of Fab Academy focuses on 3D scanning and Printing. We have two 3D printers at FabLab Kochi, The Ultimaker 2 and Dimension SST 1200es and these are two of the most used devices here.
Two of the most commonly used 3D printing materials are PLA (Polylactic Acide) and ABS(Acrylonitrile Butadiene Styrene). Ultimaker 2 is capable of printing objects with PLA material and the Dimension SST 1200es 3D printer uses ABS as the model material and SST as support material.
Ultimaker 2
Layer resolution: up to 20 µm
Build volume: 23 cm × 22.5 cm × 20.5 cm
Position precision X Y Z: 12.5 µm × 12.5 µm × 5 µm
Print speed: 30–300 mm/s
Travel speed: 30–350 mm/s
Filament diameter: 2.85 mm
Nozzle diameter: 0.4 mm
Card support: Stand-alone SD-card printing
Feature: WiFi printing ready (future upgradeable)
Software: Cura - Official Ultimaker
Print technology: Fused filament fabrication (FFF)
Frame dimension X Y Z: 35.7 cm × 34.2 cm × 38.8 cm (no filament)
Frame dimension X Y Z: 49.2 cm × 34.2 cm × 55.8 cm (with filament)
Operation nozzle temperature: 180-260 °C
Operation heated bed temperature: 50-100 °C
AC input: 100-240 V/~4 A/50–60 Hz/221 watt max.
Power requirements: 24 V DC @ 9.2 A
Dimension SST 1200es

Model material: ABS plus in ivory, white, black, red, olive green, nectarine, fluorescent yellow, blue or gray
Support material: Soluble Support Technology (SST) or Breakaway Support Technology (BST)
Build size: 254 x 254 x 305 mm (10 x 10 x 12 in)
Layer thickness .254 mm (.010 in) or .330 mm (.013 in) of precisely deposited ABS plus model and support material
Workstation compatibility: Windows XP/Windows 7
Network connectivity: Ethernet TCP/IP 10/100Base-T
Size and weight: 33 x 29 x 45 in, 148 kg
Power requirements: 220–240 VAC 50/60 Hz
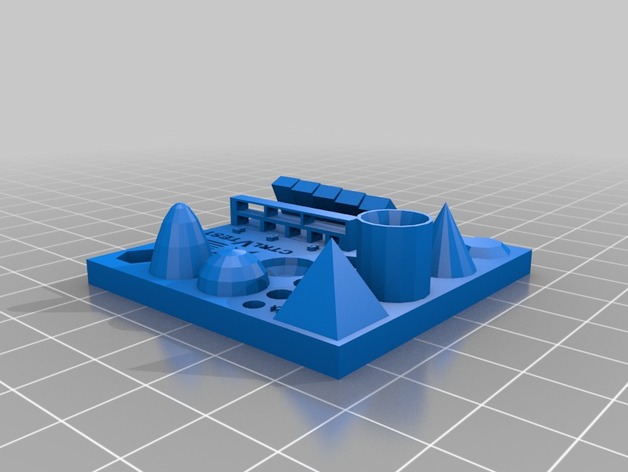
Assignment 1: Testing limits of 3D printer
The idea of completing this exercise is to check the capability of a 3D printers. I'm doing this assignment with Ultimaker 2 3D printer. To test the capability of Ultimaker 2, the following design was downloaded from thingverse.
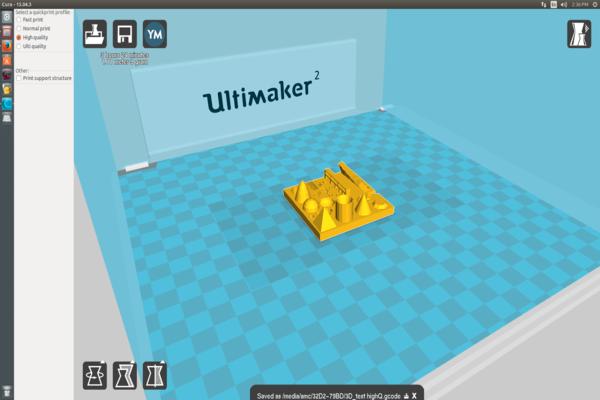
The stl file was opened with CURA. CURA is a 3D printing software that comes bundled with Ultimaker 2 3D printer. CURA gives you a plethora of options on how to print the part and also gives a visual preview of how the print would look like on a printer.
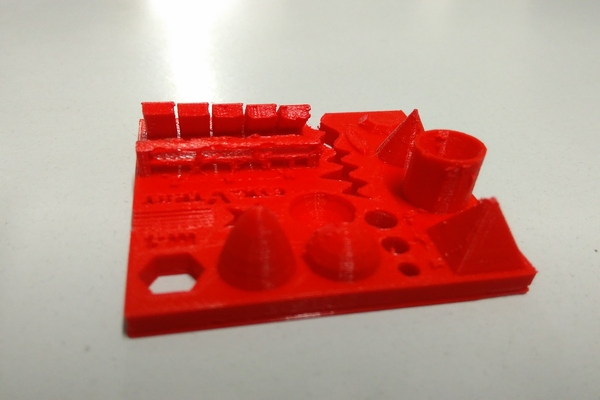
This design took around one hour to print and this is how it looks like. It came out pretty clean.
The following are the observations:
1. size: the object is 4x50x50mm (baseplate): Size is correct with only slight variation.
2. Hole size: 3 holes: Accurate
3. Nut size: M4 Nut should fit perfectly: Fits fine
4. Fine details: pyramide, cone, all numbers: Surface not smooth
5. Rounded print: wave, hemisphere: Slightly irreegular
6. Minimum distance between walls: 0.1/0.2/0.3/0.4/0.5mm Looks neat
7. Overhang: 25°/30°/35°/40°/45°: Not perfect at the top
9. Bridge print: 2/3/4/5/6/7/8/9mm: Looks neat
10.Surface: all the flat parts: Looks smooth as it should be
Assignment 2: 3D printing
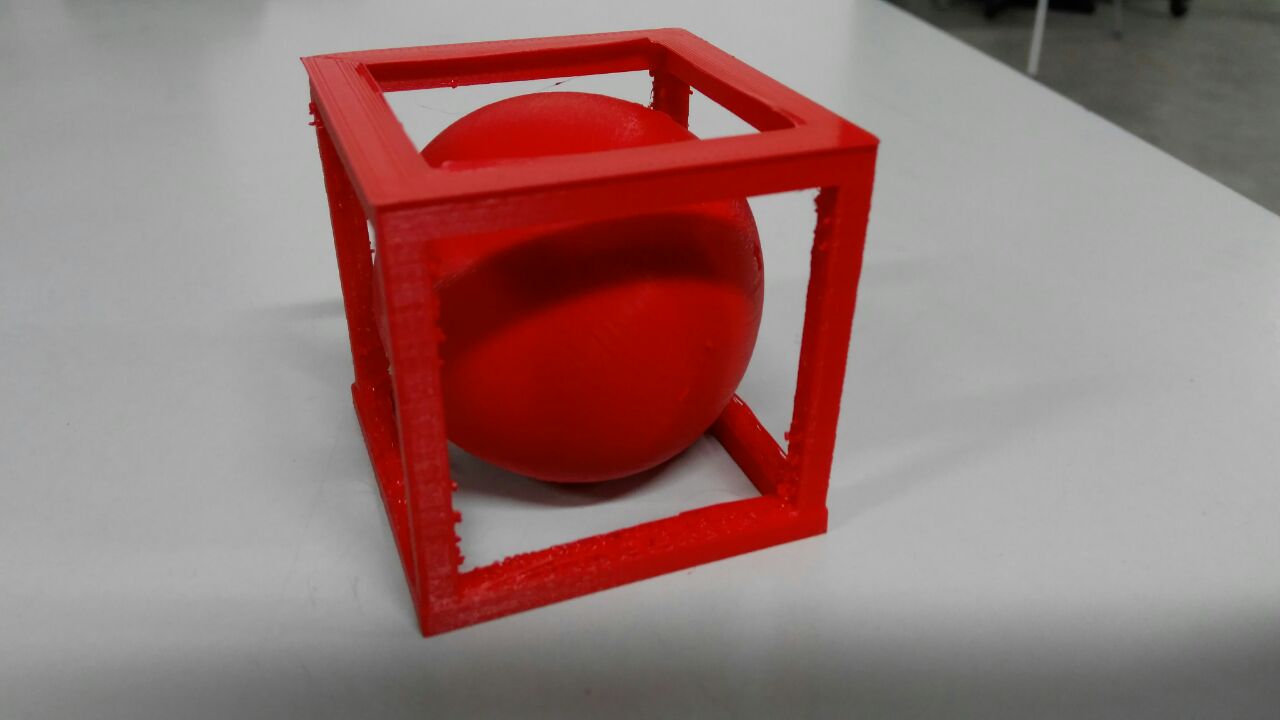
This week's assignment is to print a small object that cannot be made subtractively. I wanted to make something simple which cannot be made subtractively. I decided to make a sphere inside a square frame.
Played around with Autodesk Inventor 2016 till I reached this design. I felt this design is very simple and good enough to complete this assignment. I am hoping that the sphere inside will be trapped inside the frame and moving around.
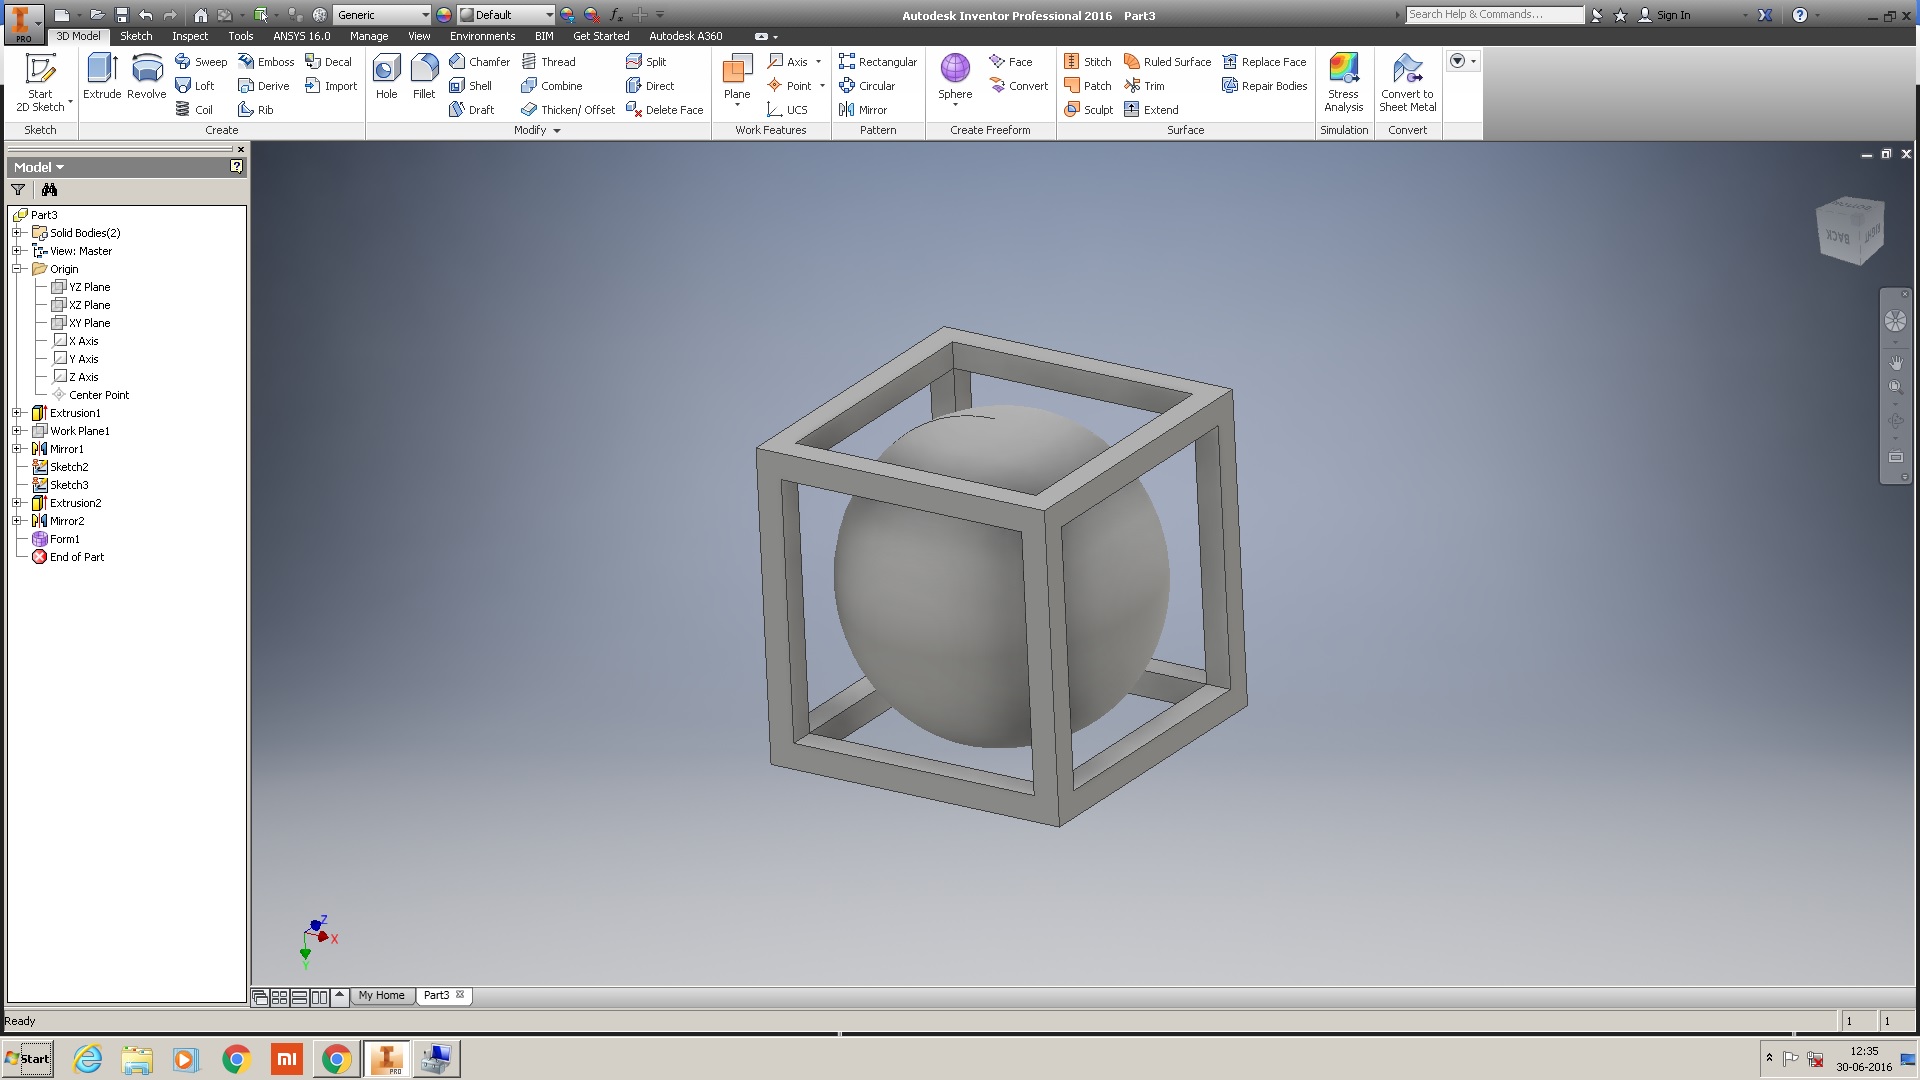
I drew 2d design and then extruded it to create a 3d object. Then I created three different planes, drew 2D design and extruded again to create the square frame.
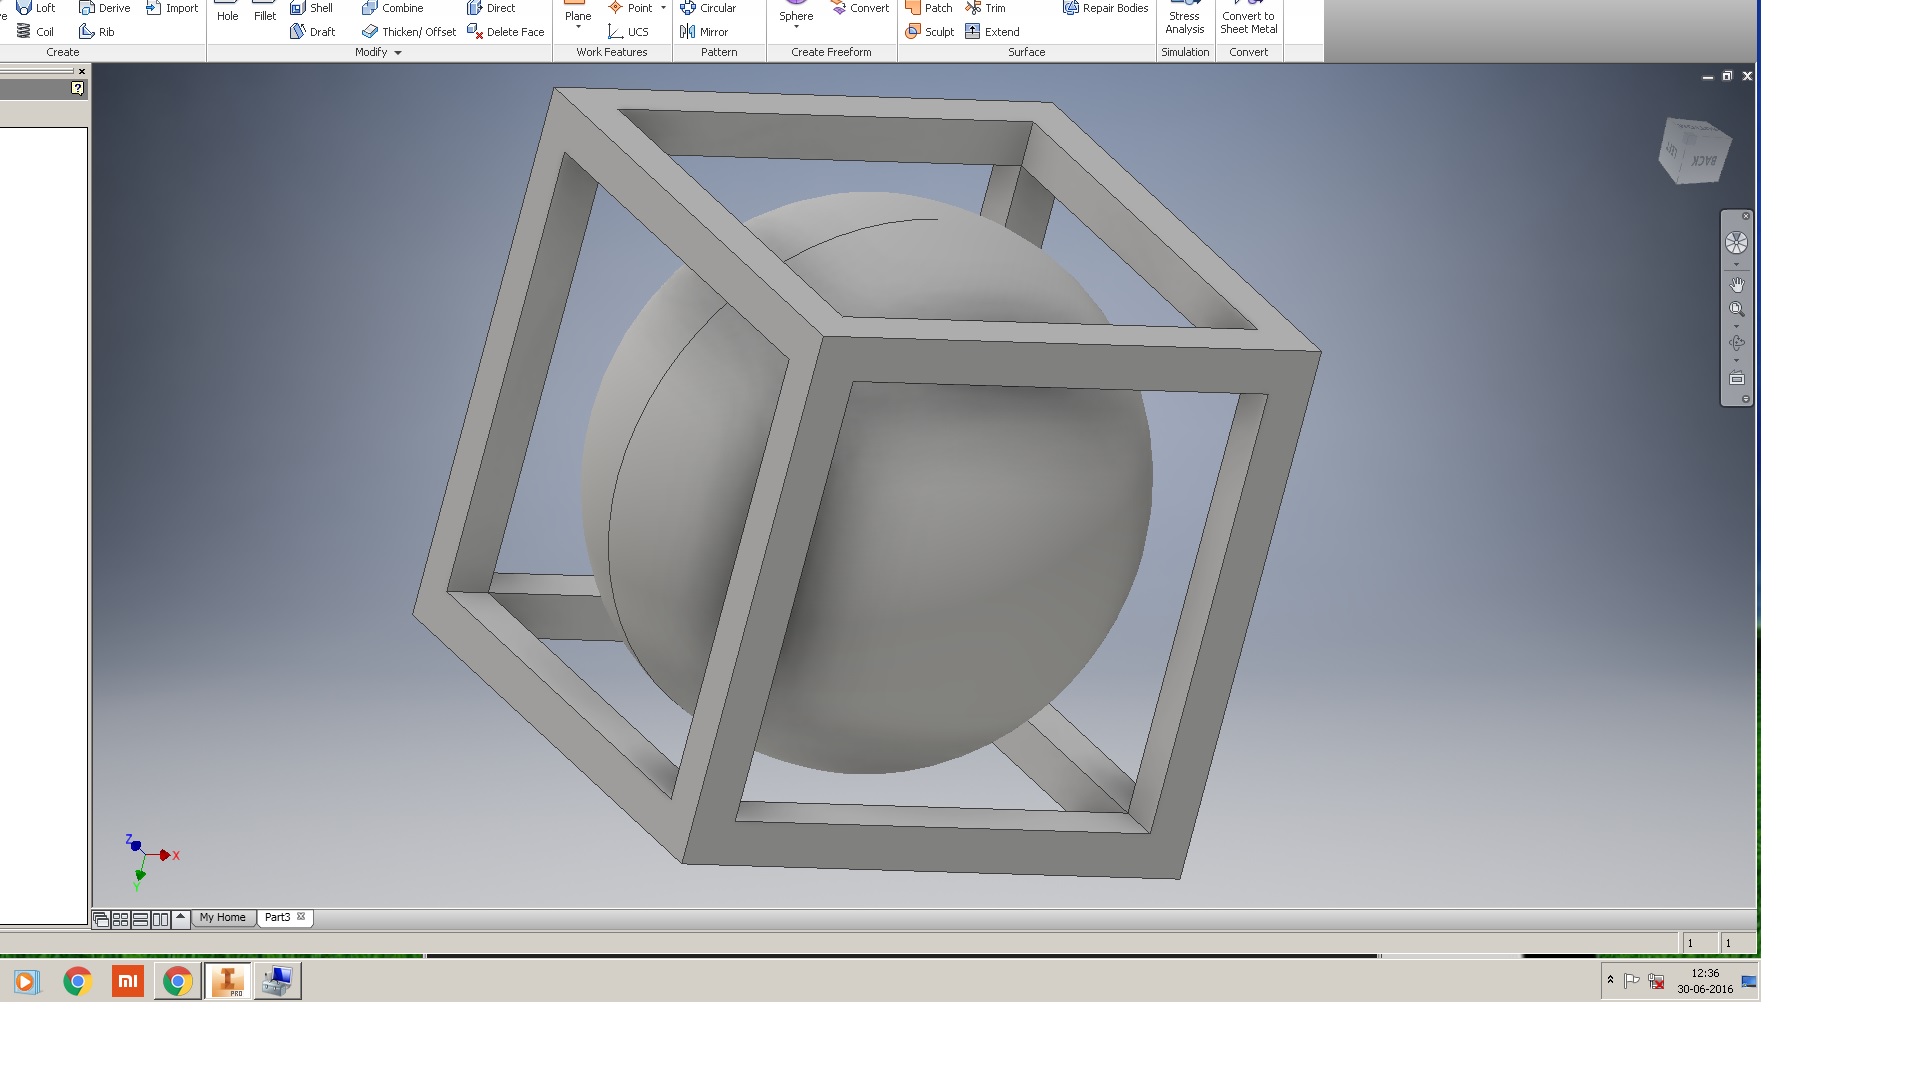
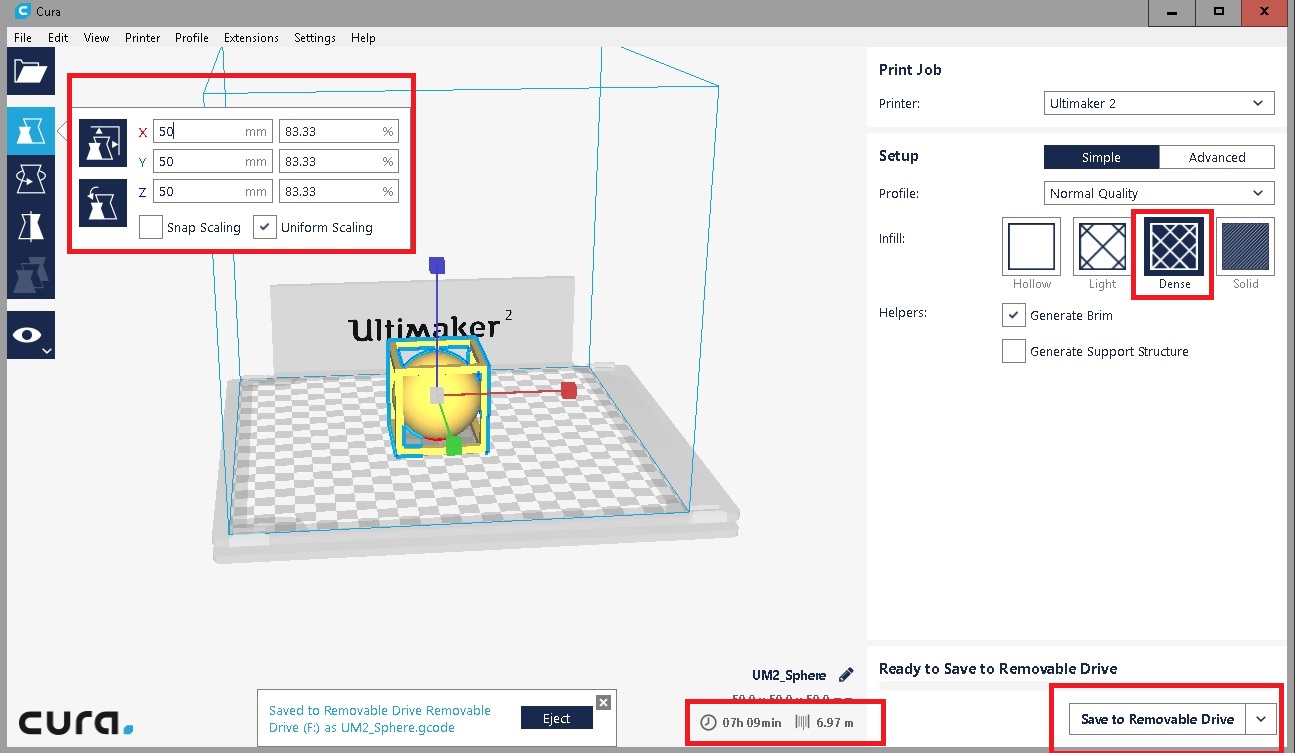
Finally I mirrored the three plane to get all six sides of the cube frame. Then I selected the center point and created a sphere inside. I saved the ipt file and then exported it in stl format from Autodesk Inventor
Sketchfab
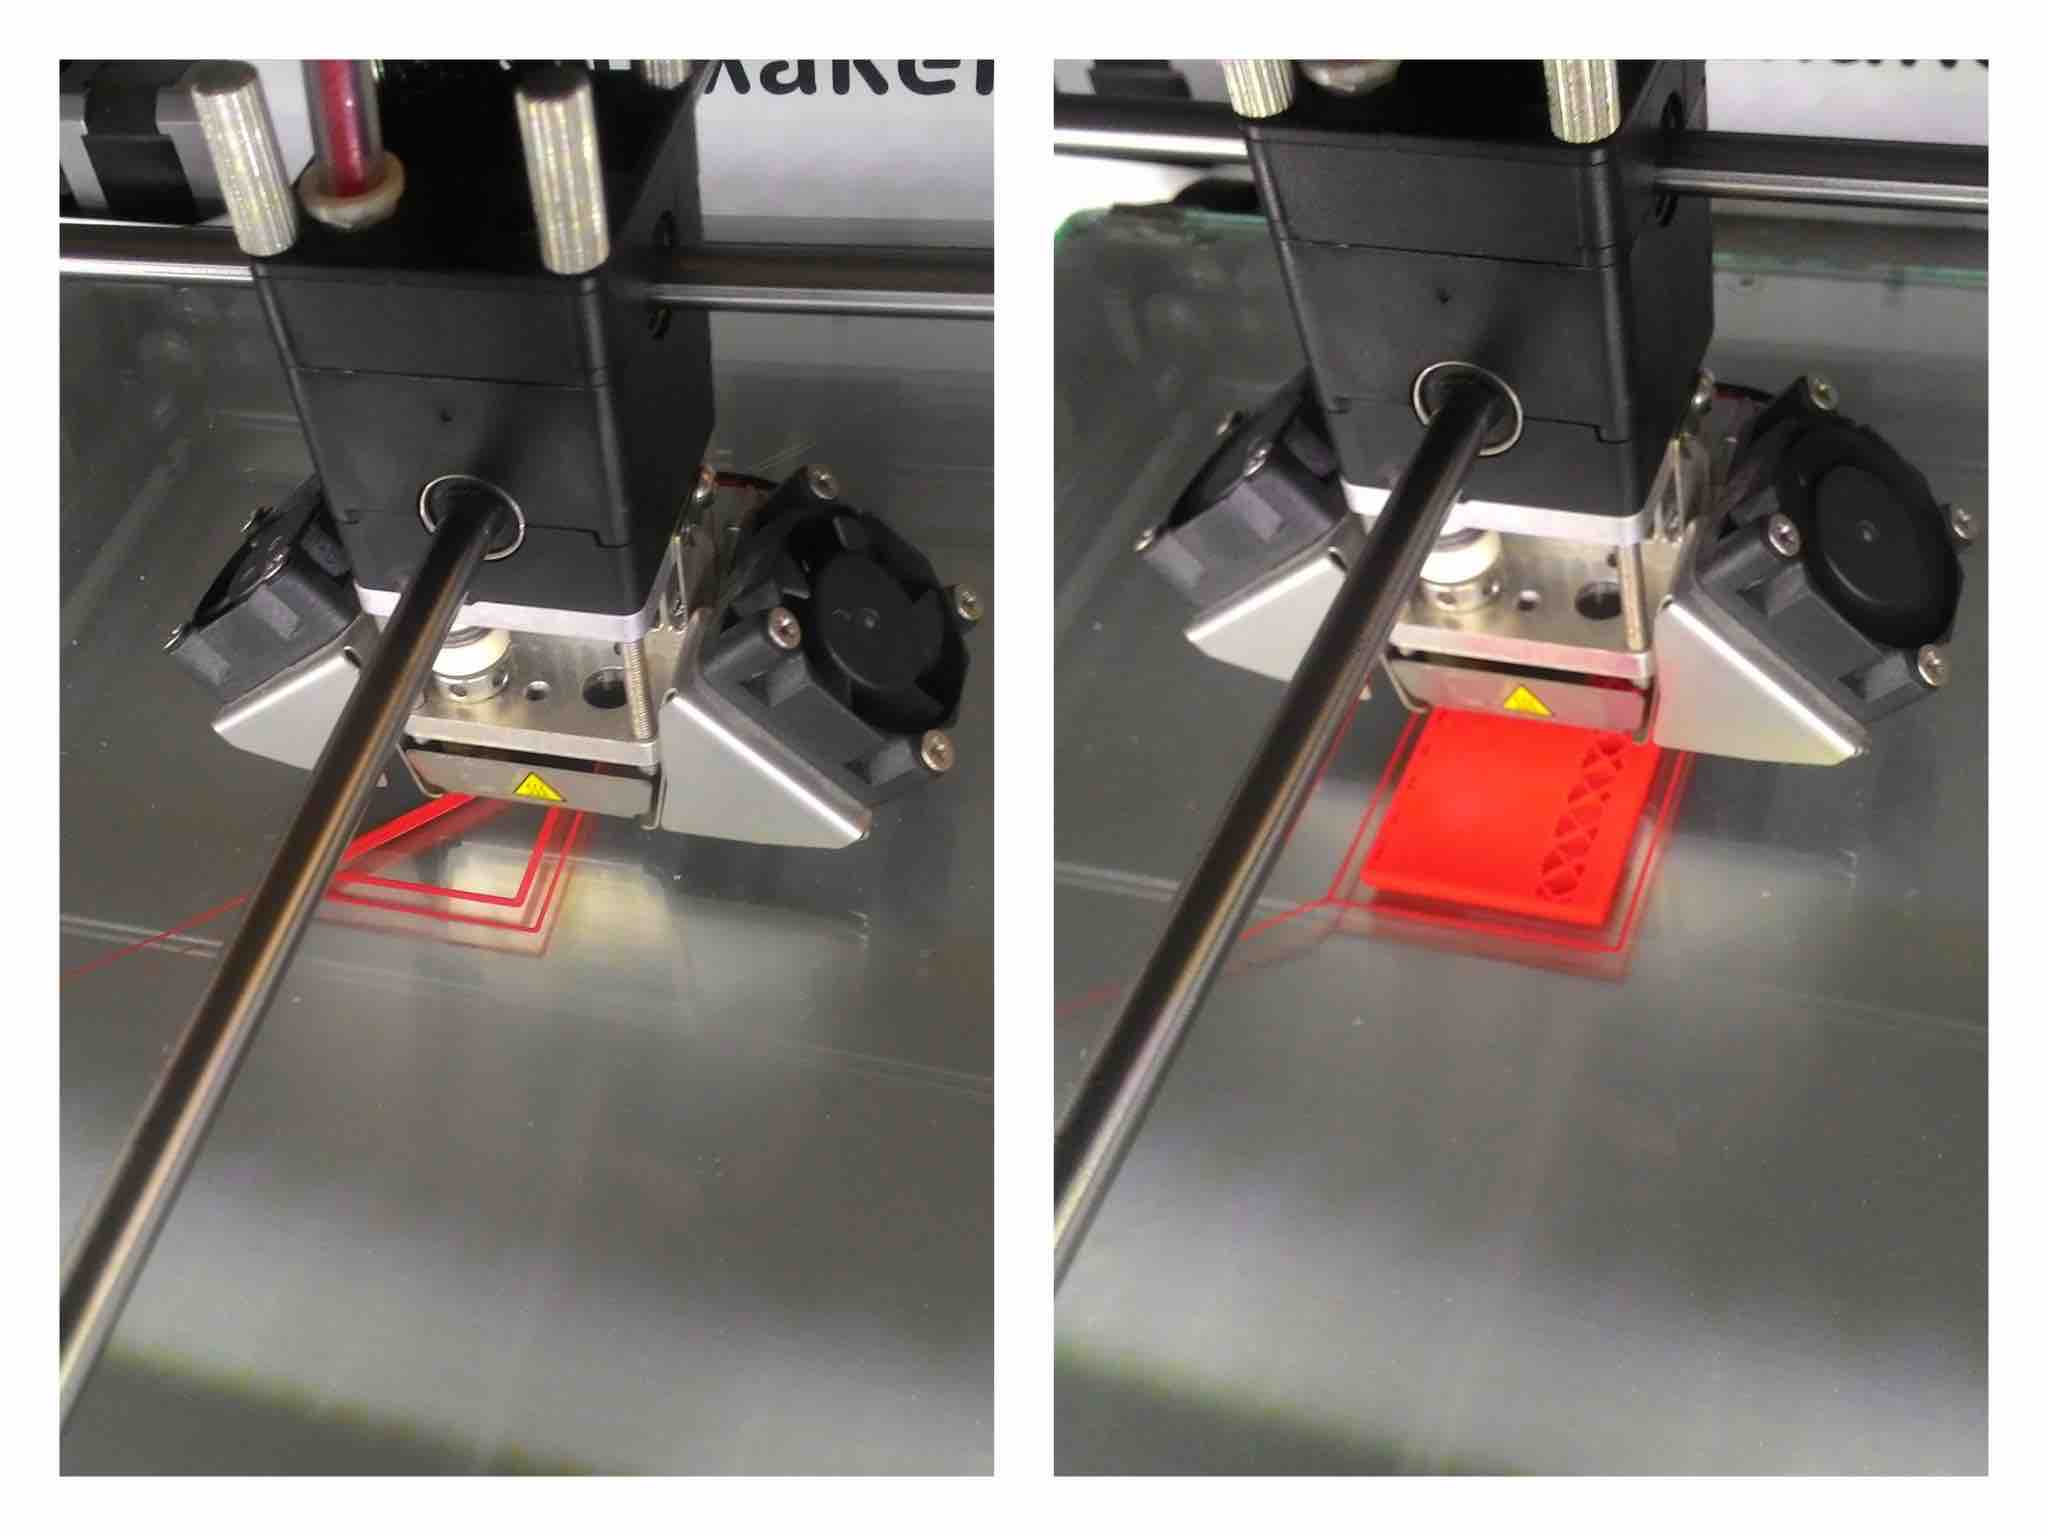
Then I used the CURA to convert stl into GCODE.I selected normal quality and infill as dense. I also scaled down the design to 50mm on each side. I exported the GCODE to the SD card and 3D printed the design in red PLA material in Ultimaker2 printer.
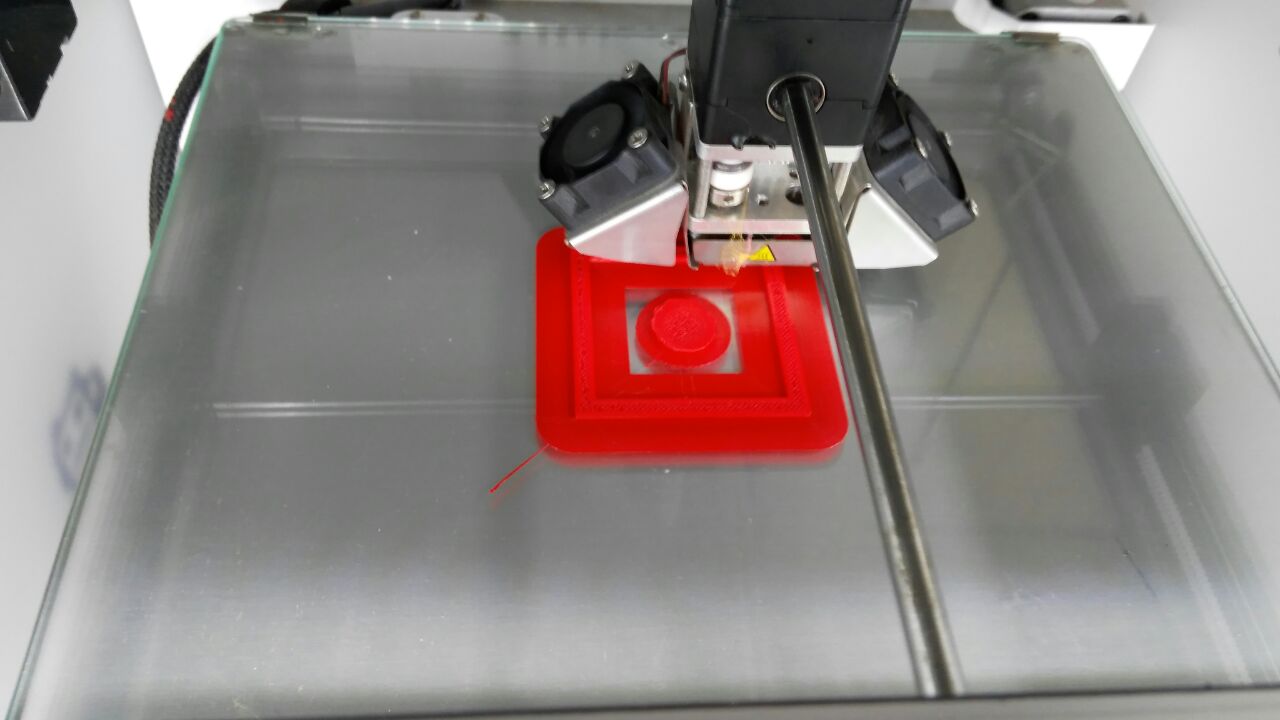
As I selected dense infill, It took almost 7 hours to completely print this design.
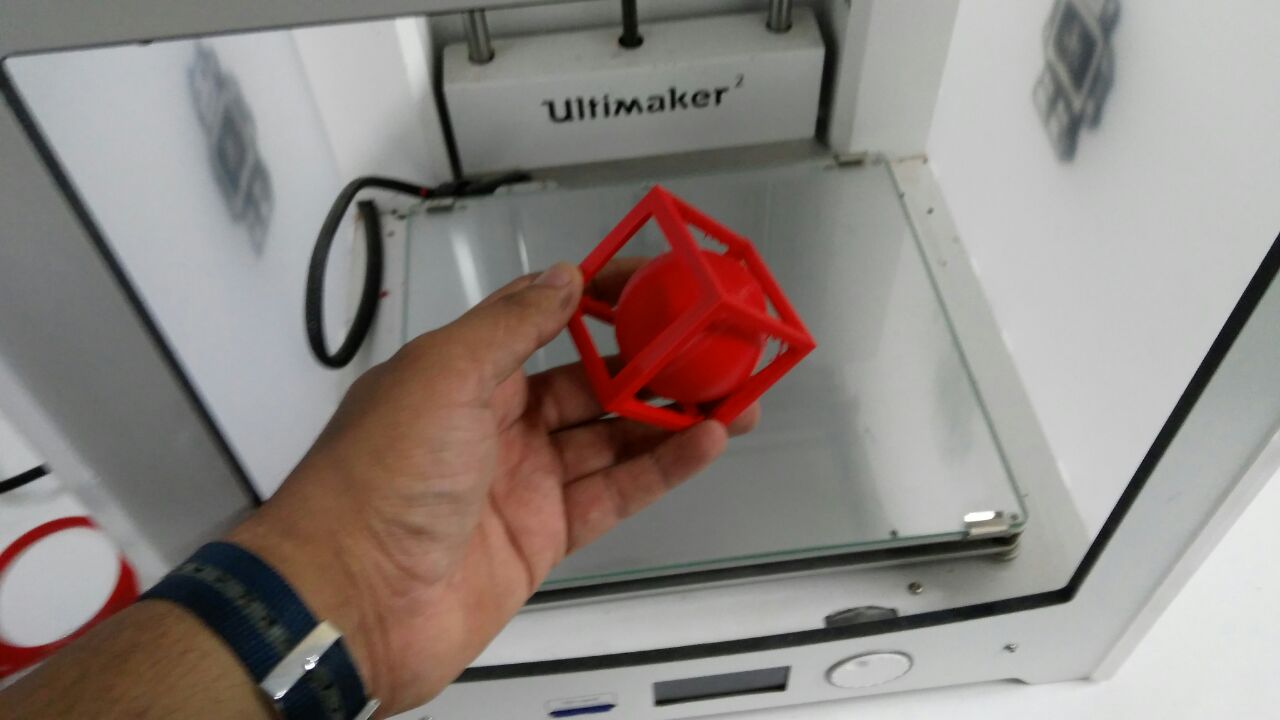
The 3D print came out fine. Now the sphere looks pretty nice and it moves around inside the frame.
Download files:
UM2_sphere.gcode
sphere.stl sphere.ipt
Additional stuff
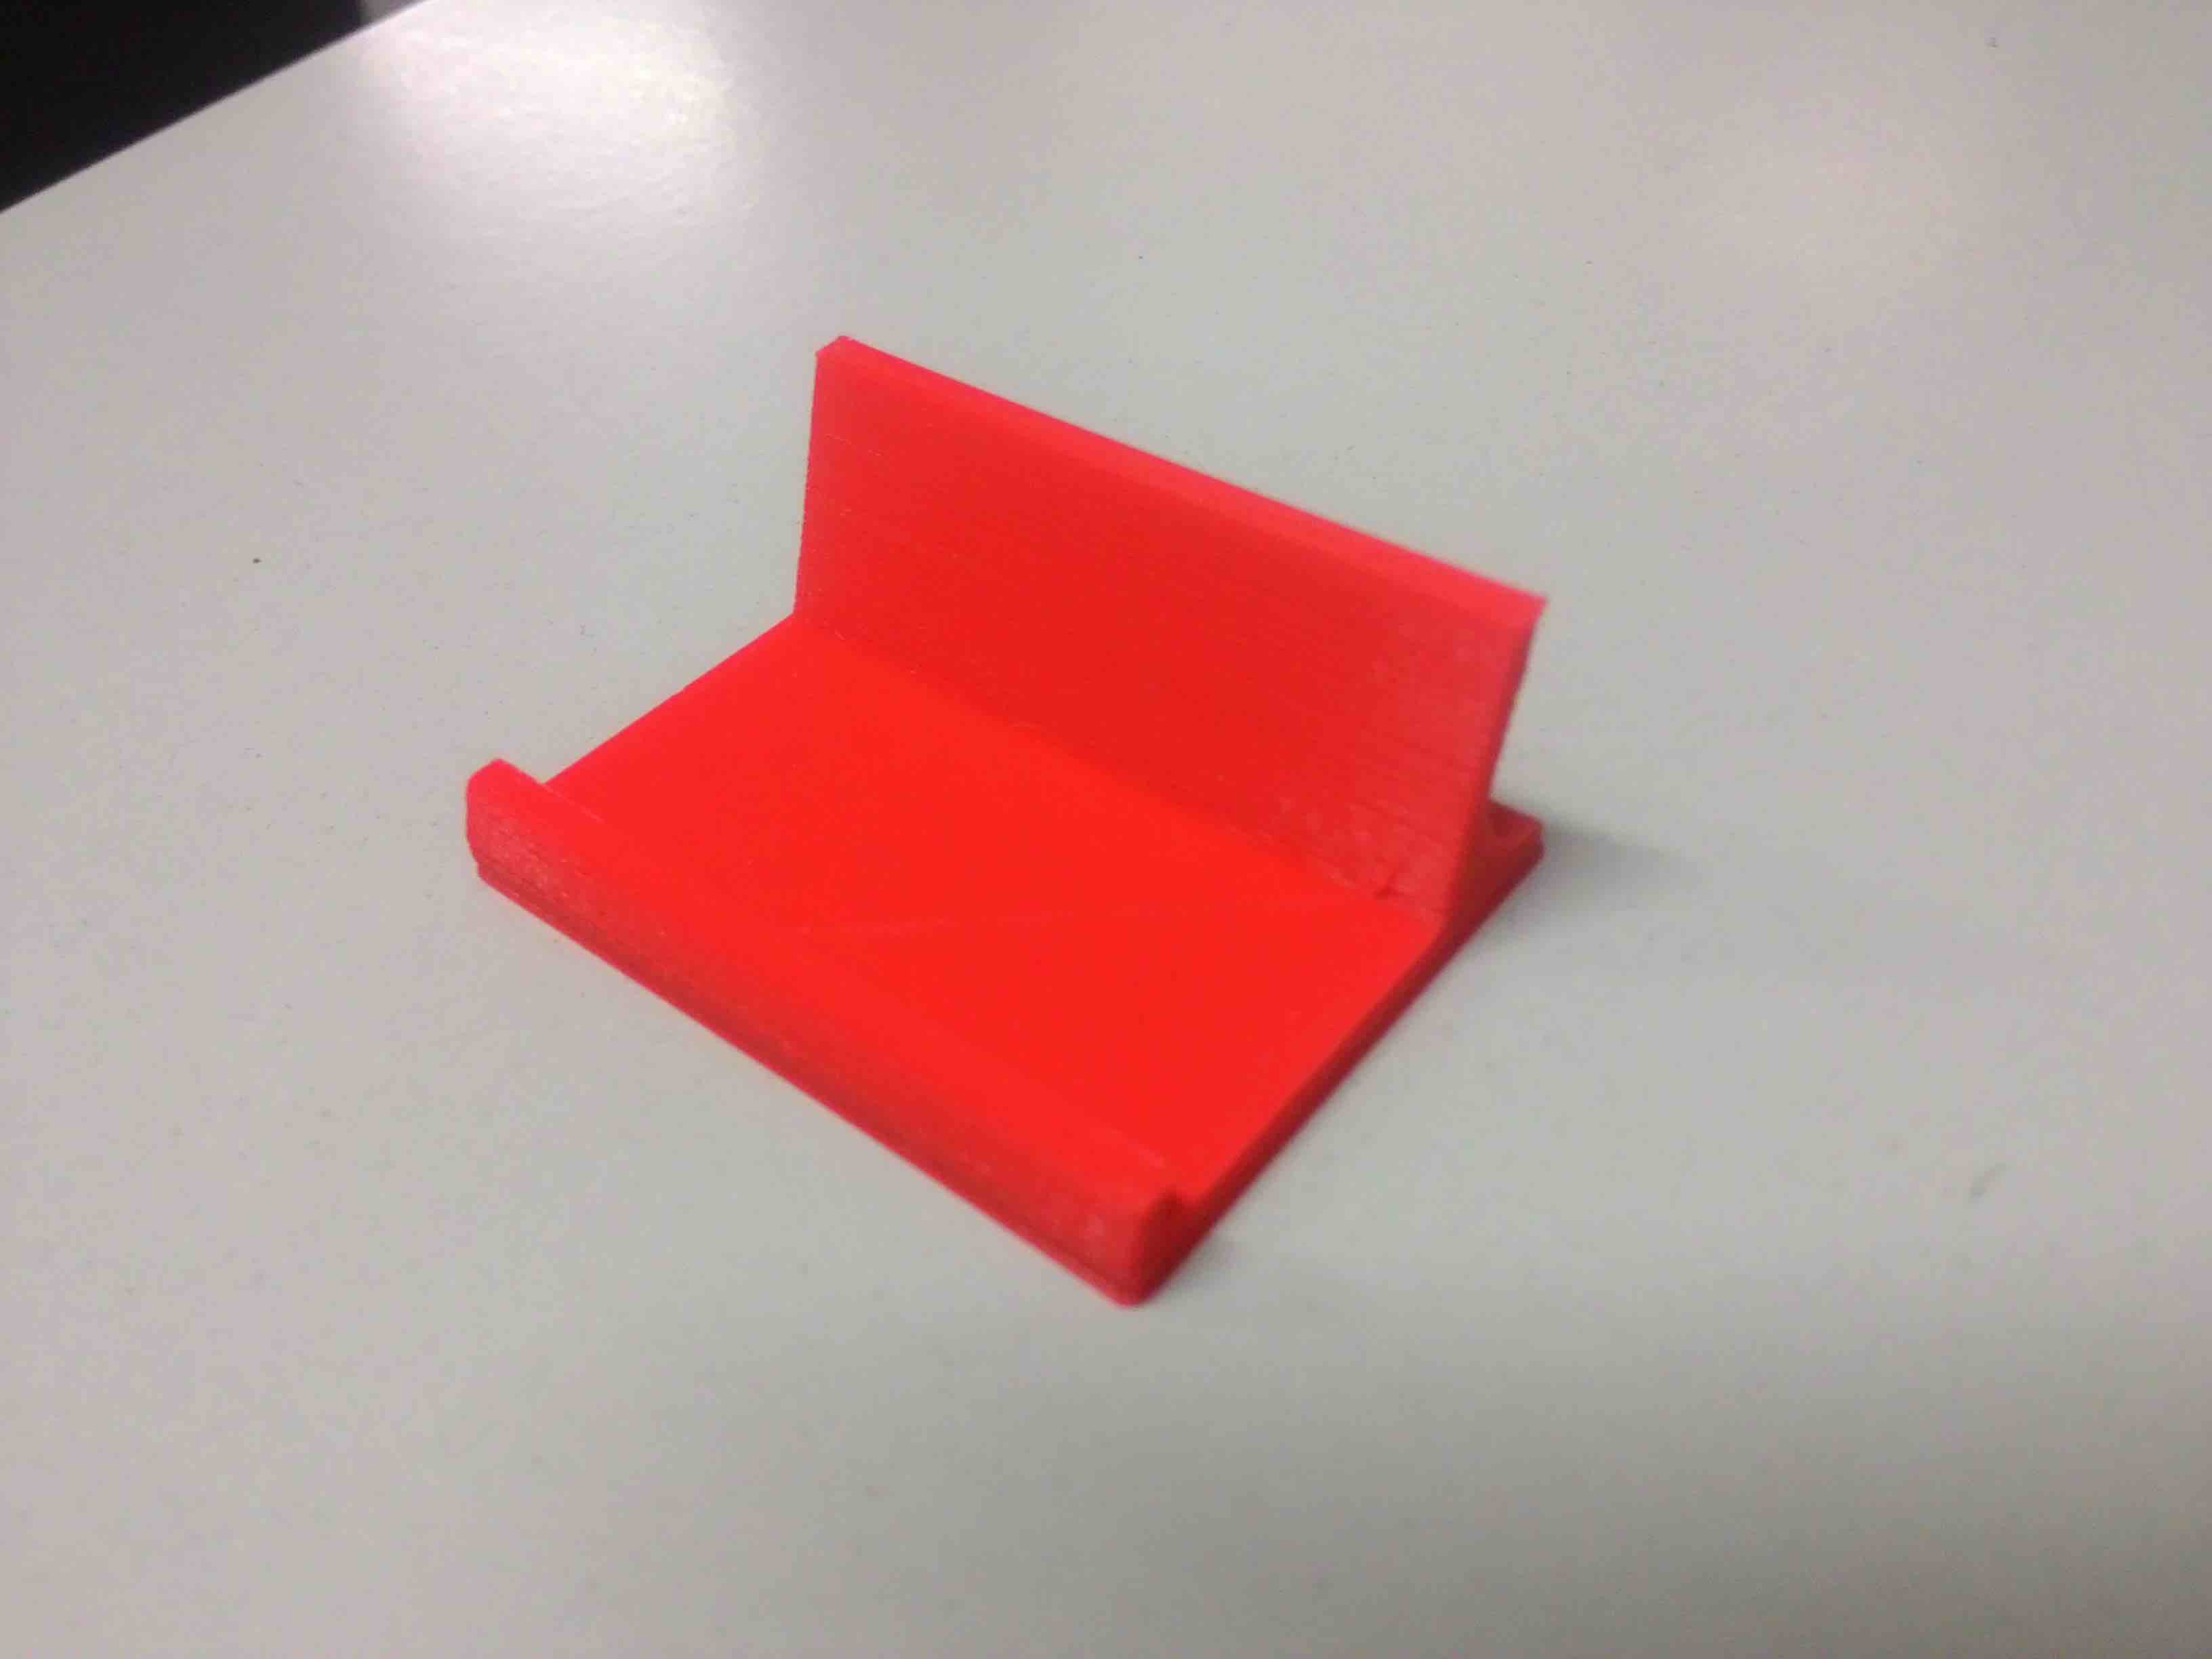
Designing and 3D printing a simple card holder for keeping visiting cards.
I used Rhinoceros to design my card holder. First I made a 2D side view using polyline tool. The
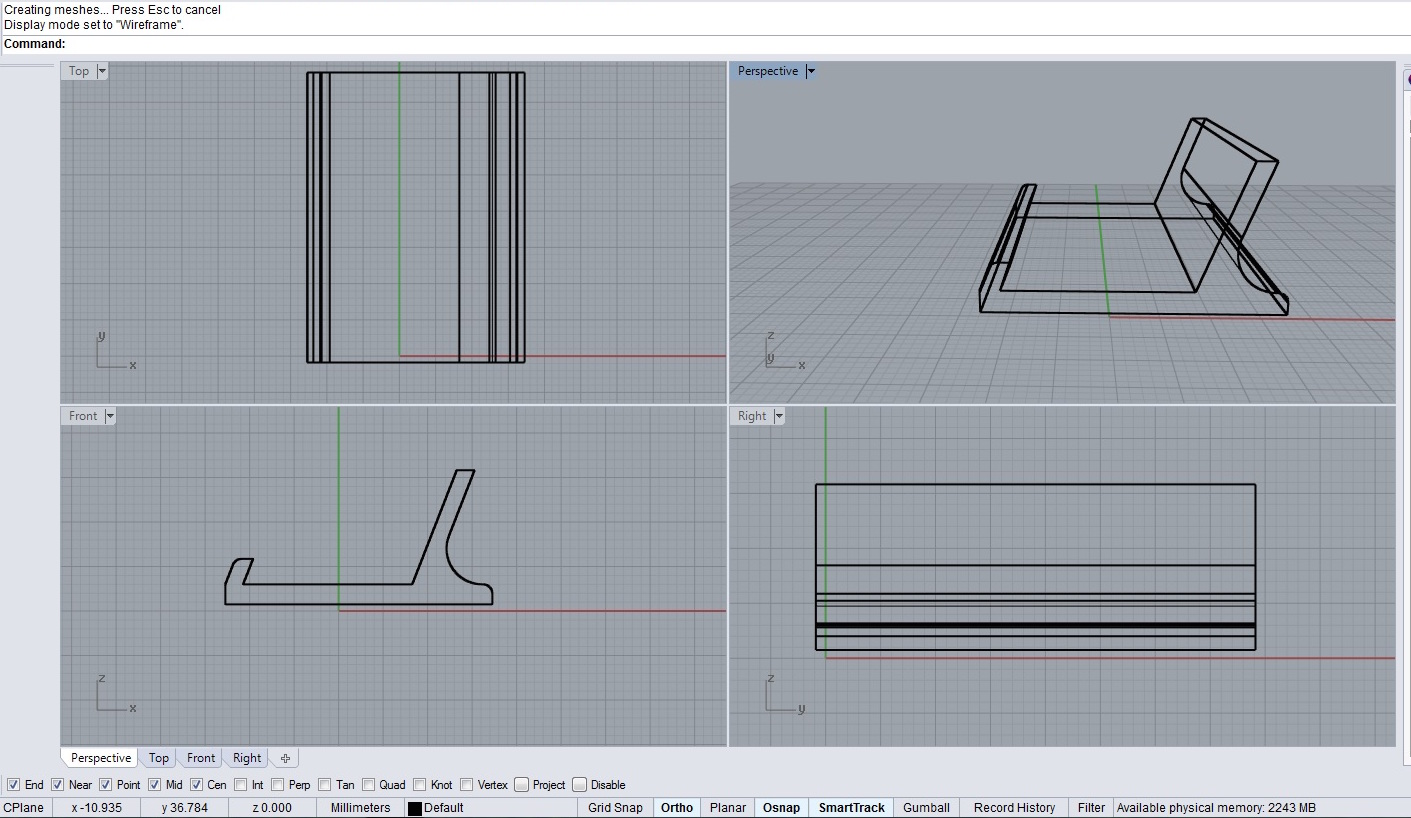
Then it was extruded 30mm to get the shape I wanted.
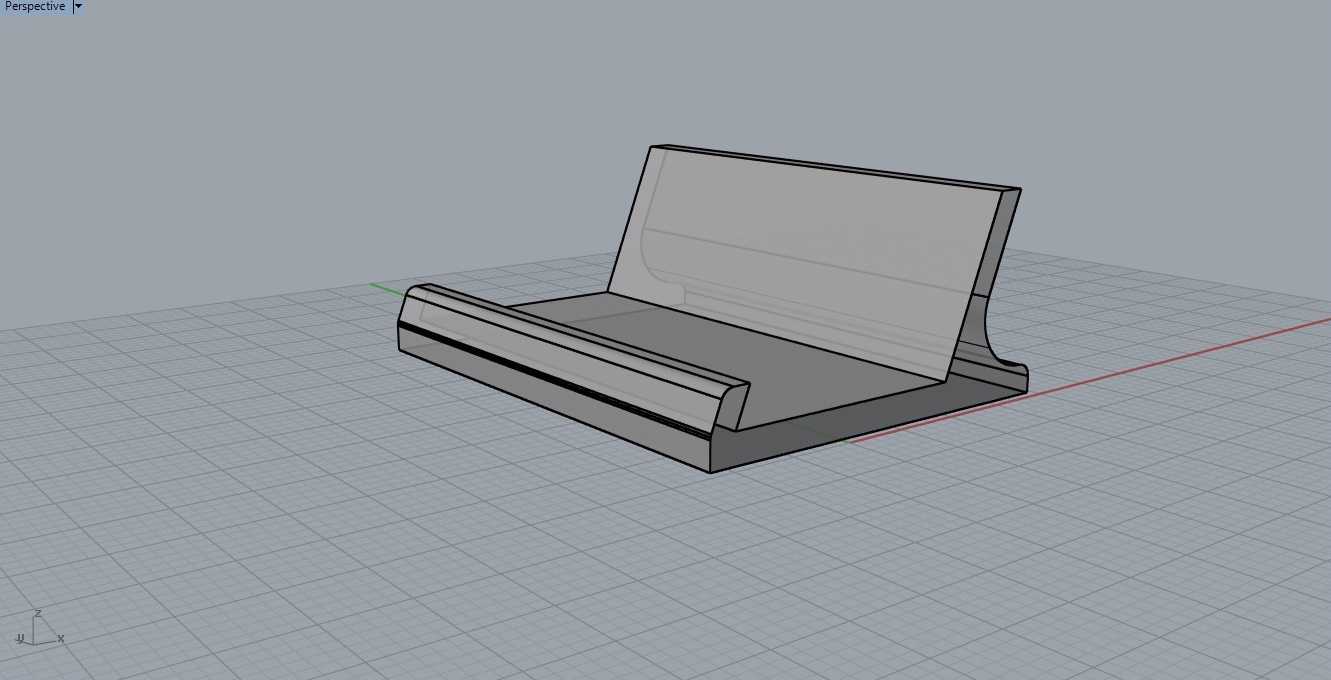
The .3dm file from Rhino was converted into GCODE using Cura and was fed to Ultimaker using SD card.
It took one 1 hour and 24 minutes to print a high quality version of my design on ultimaker 3D printer.
Download .3dm design file: phone stand.3dm
Download stl file: phone stand.stl
Assignment 3: 3D Scanning
The third assignment for this week to scan a 3D model using any of the 3D scanning devices available at FabLab. In Kochi FabLab, this assignment can be completed either with Rolan Modella, or with Microsoft Kinect. I'm doing this assignment with microsoft kinect.
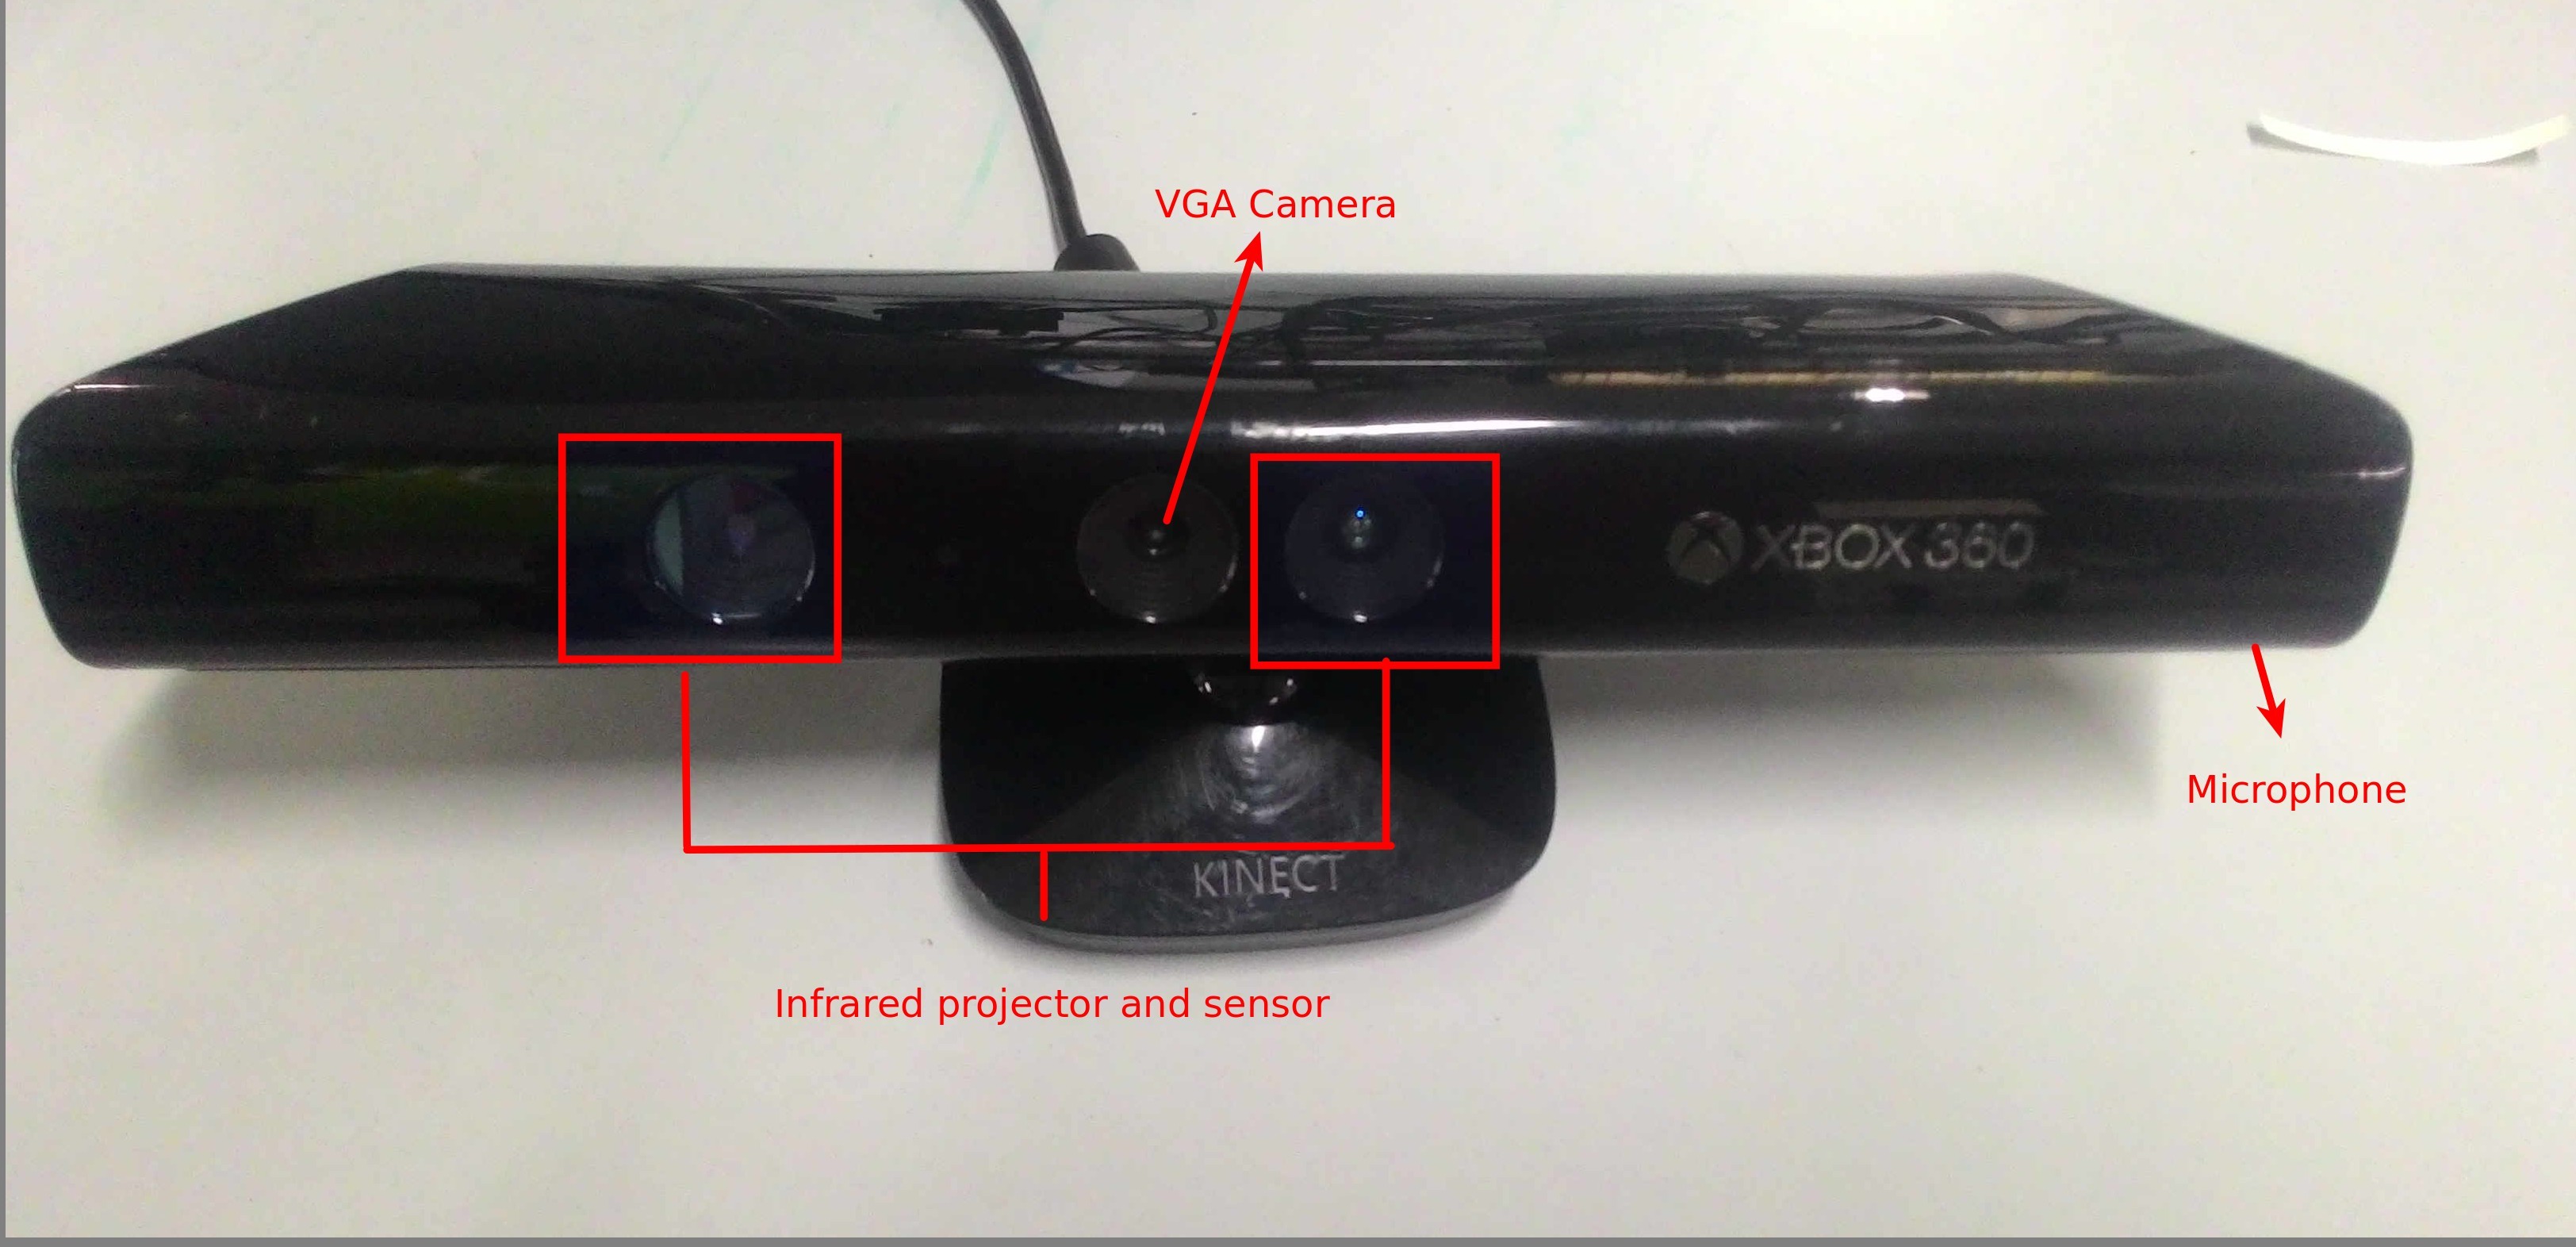
Kinect is a line of motion sensing device commonly used with Xbox and Xbox360 gaming consoles but it also comes handy as a 3D scanning device. For this assignment, I decided to be the subject.
I downloaded the free version of KScan 3D software from the web and connected Kinect with the system. I sat on a stool and set the mesh as 12. I turned around in front of the mirror exactly 12 times to complete a 360 degree rotaion. The following image shows the output I got.
The process is fairly simple and scanning my own image was a fun activity.
Download scanned stl file: dj.stl
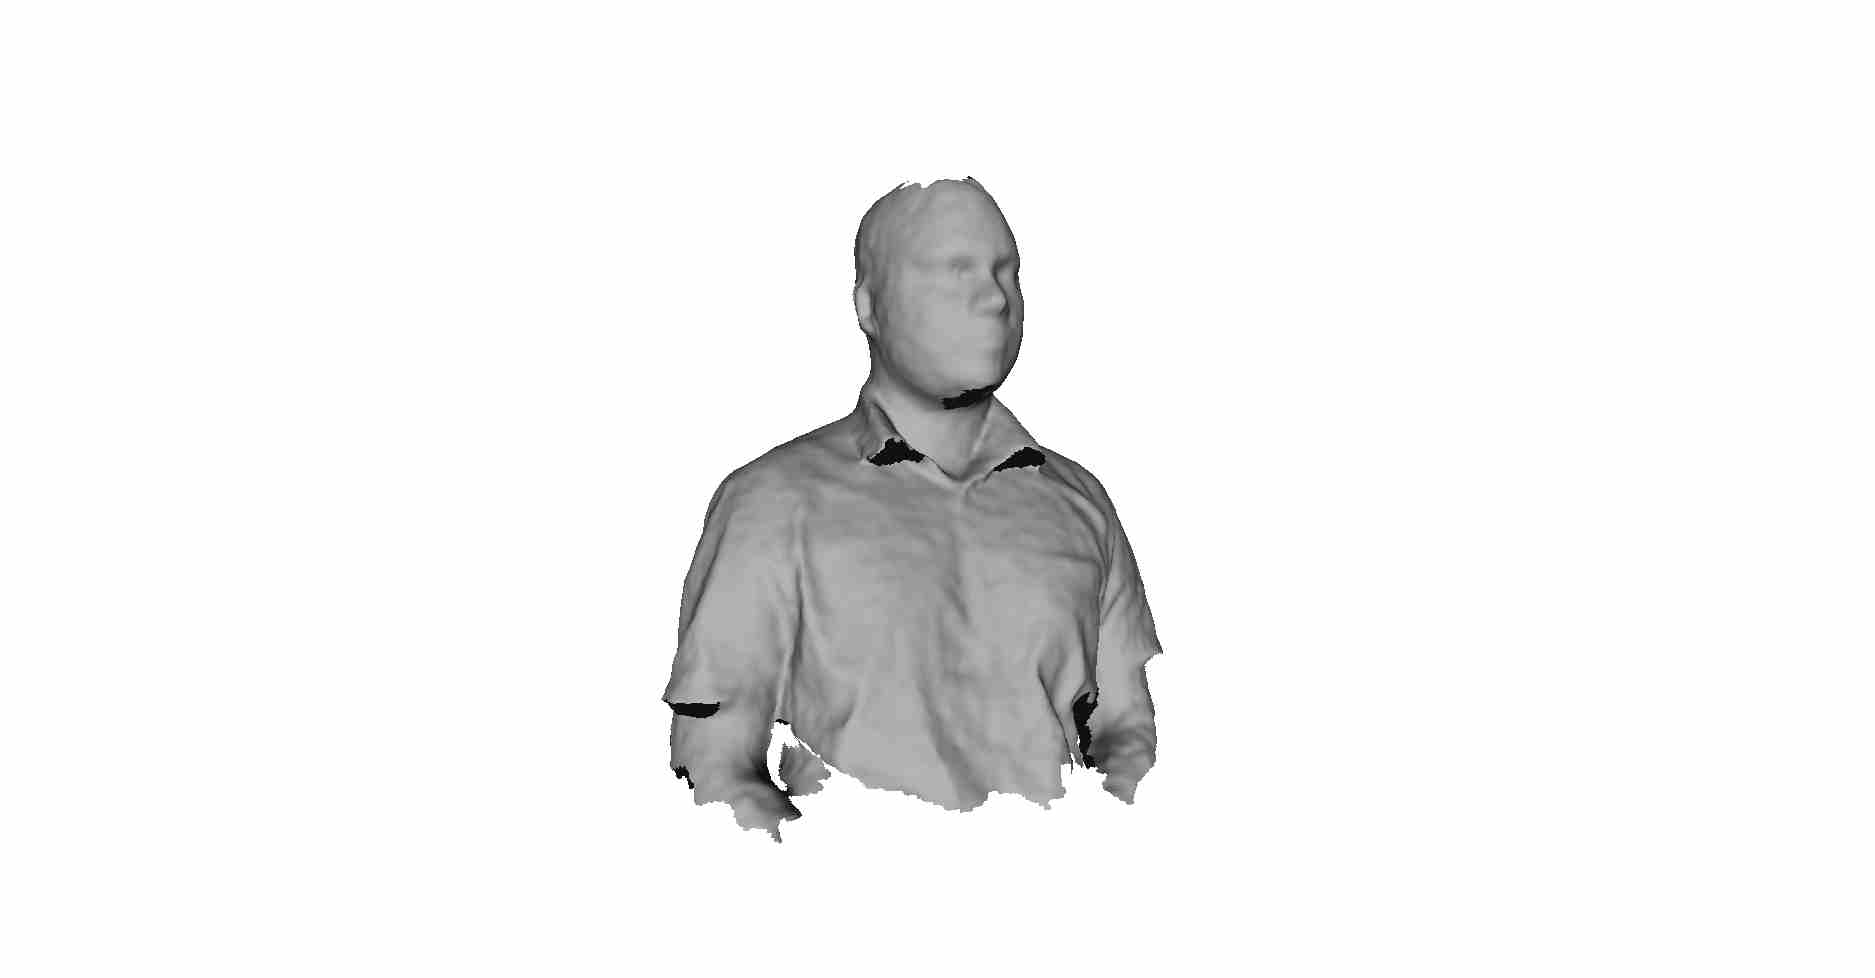
3D Scanning and printing my own figure
During the week 13 of Fab Academy, I decided to test another 3D scanning software 'Skanect' which works flawlessly with the Kinect sensor. This time also, I decided to scan myself and check how Sckanect performs with the kinect sensor.
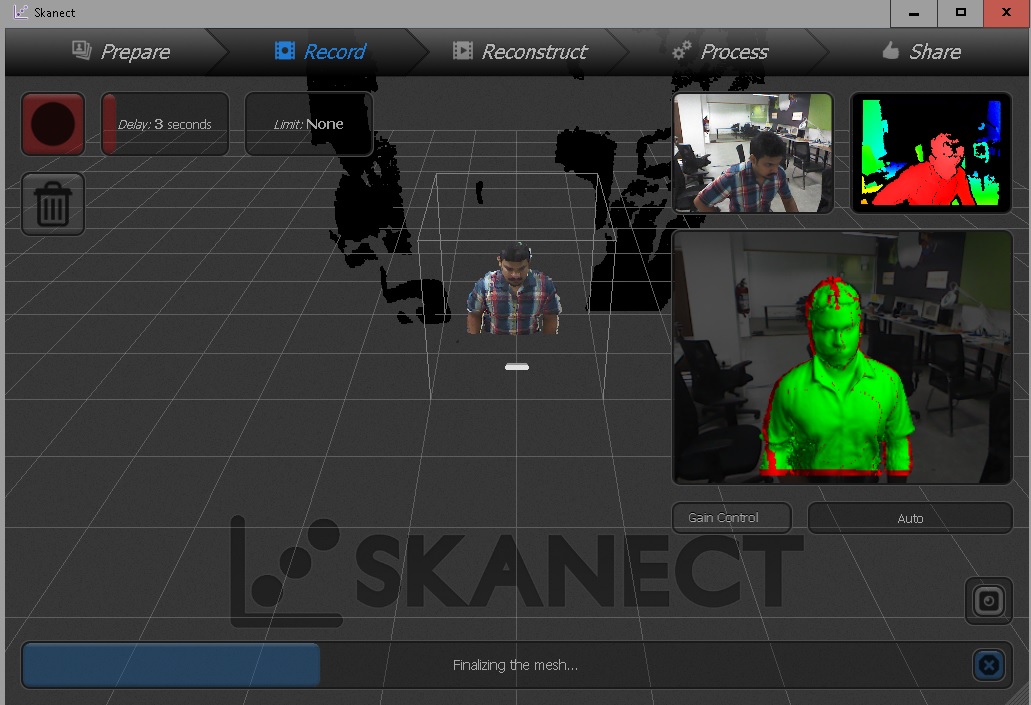
I set the delay as three second and sat on a revolving high chair. I completed a 360 degree rotation by rotating approximately 30 degree every 3 seconds.
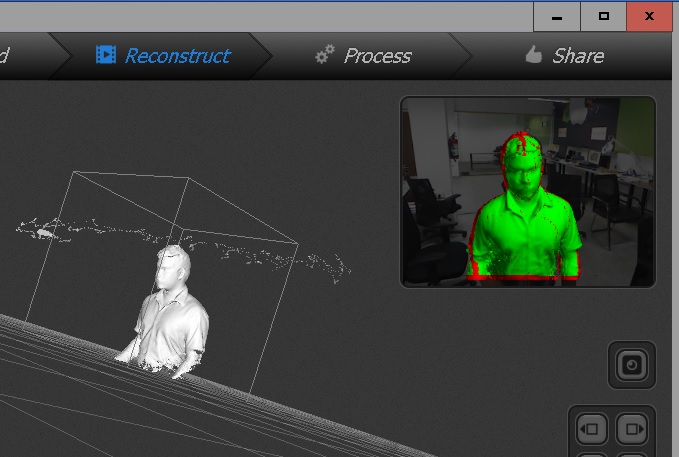
The kinect sensor was placed above the height of my head so as to avoid my head being hollow in the scanned model.
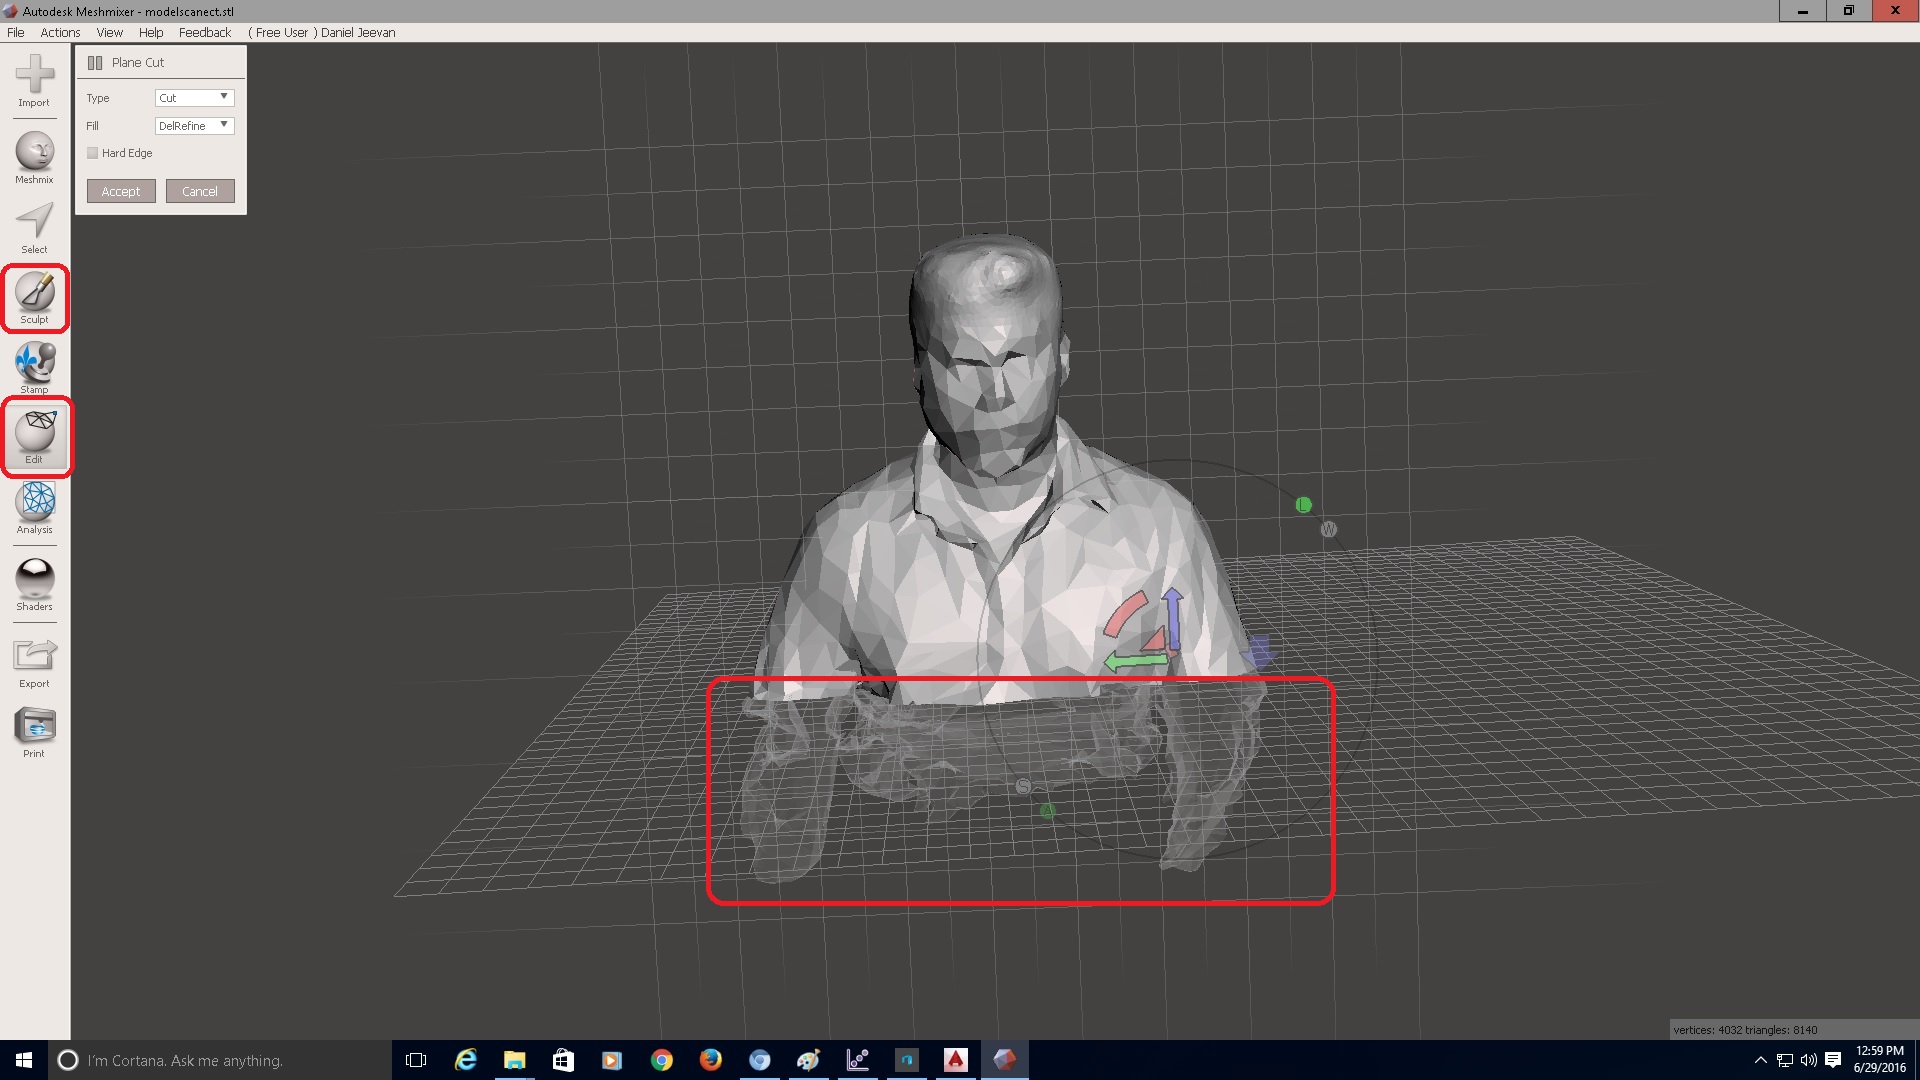
Once I got the stl from skanect, I opened the same with Autodesk Meshmixer and used the 'edit' and 'sculpt' tools to refine the model.
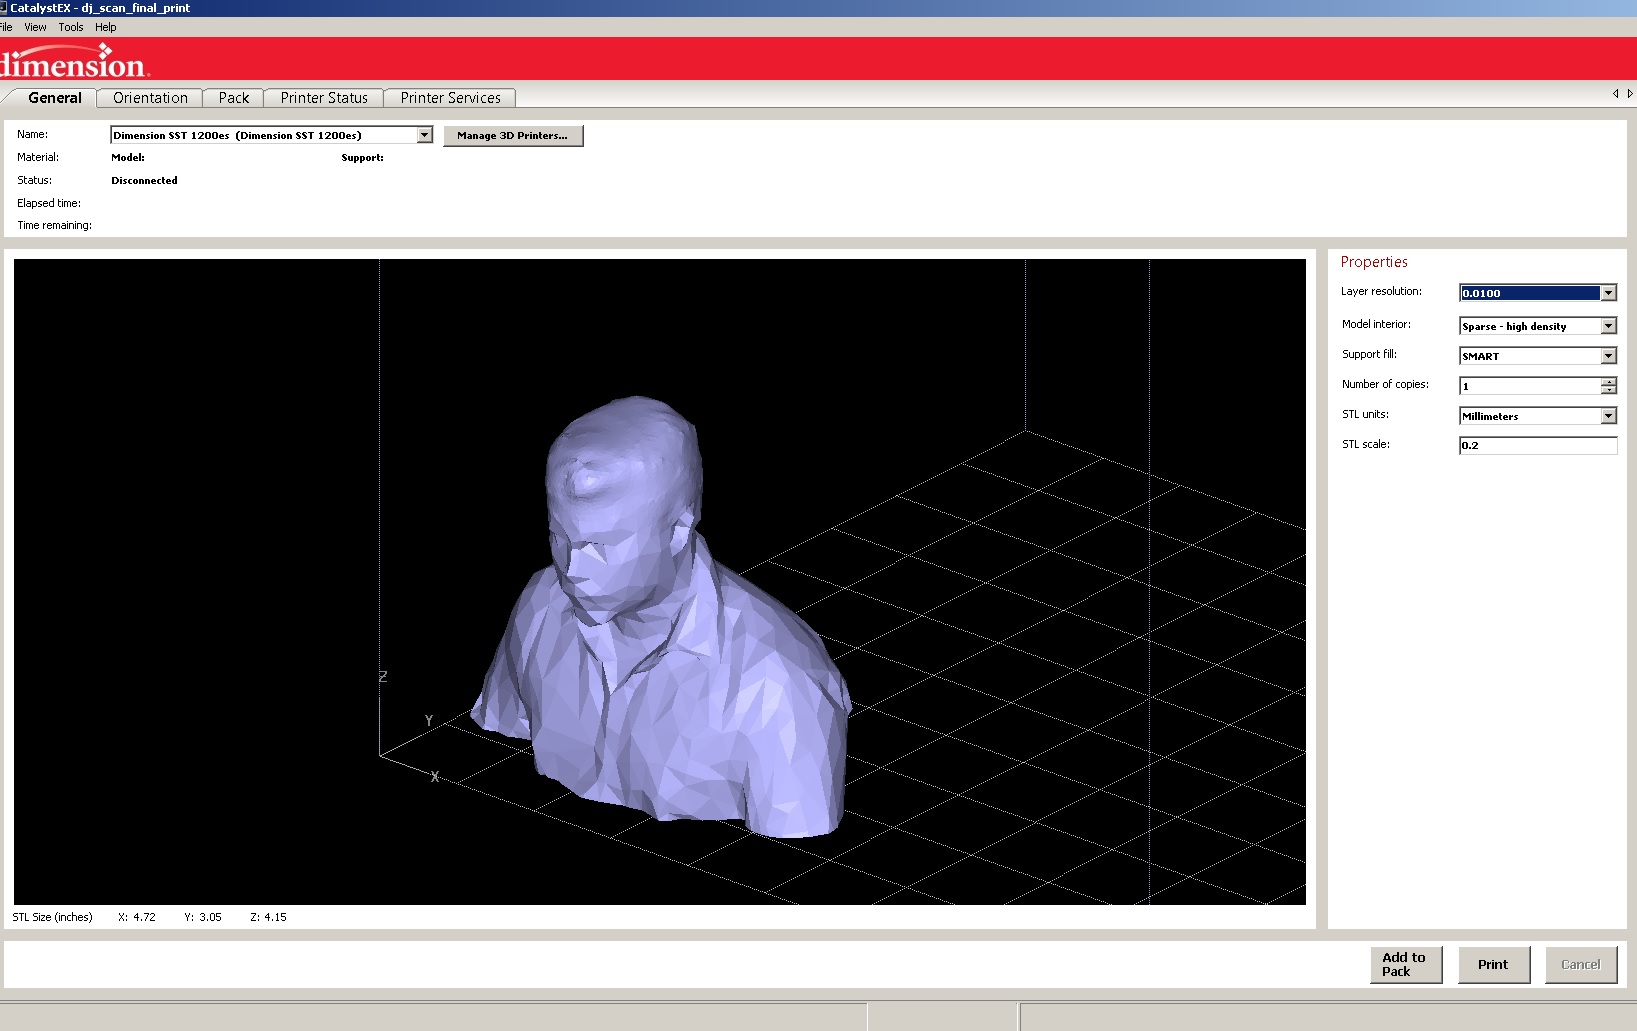
The refined model was exported as stl. Opened the .stl file in Catylyst software to be printed on Dimension elite 1200ss 3D printer. Set the model interior as high density and added pack.
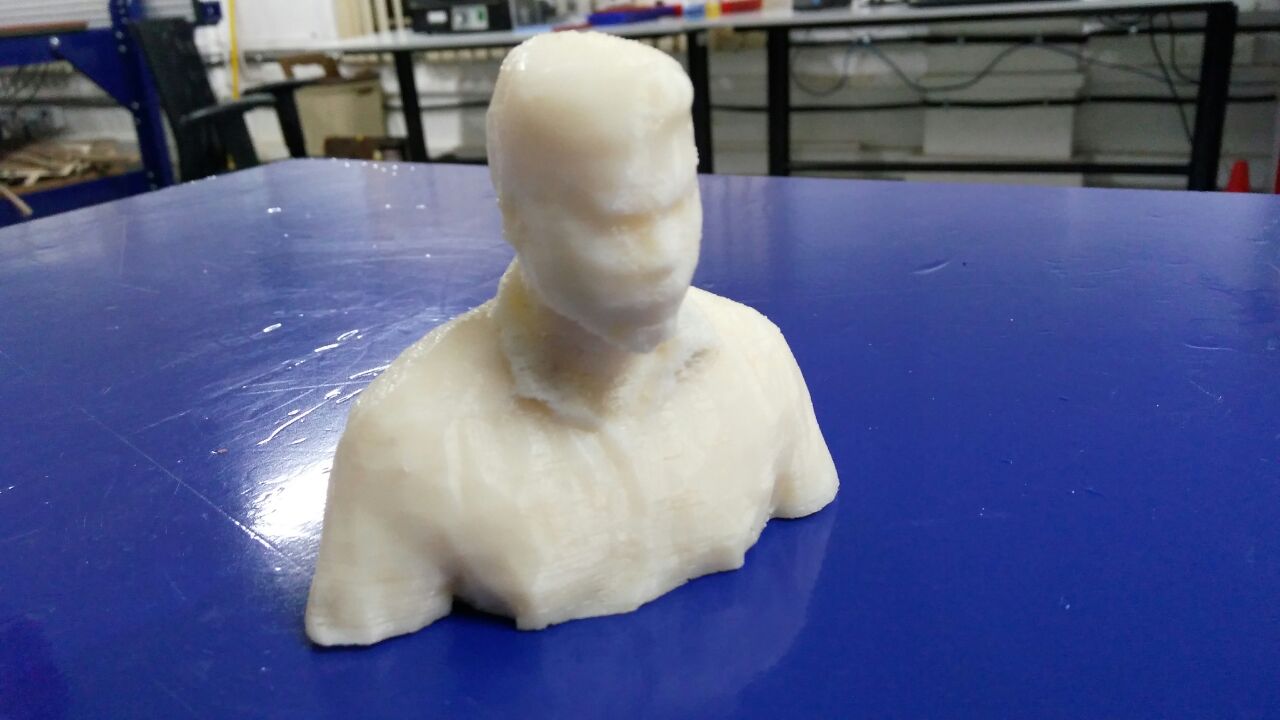
Final 3D printed model.
Scanned model file:
dj_scan_final_print.stl