| Home | | Weekly Assignments | | Final Project | | Photo Gallery |

Week 2 - Computer-aided design
1. Evaluating and selecting design software
2. Create 2D model of final project with Inkscape
3. 3D modelling with Rhinoceros
4. Create 3D model of final project using Antimony
1. Evaluating and selecting design software
I love to design and draw. This week, I will be evaulating a few design softwares and select one each for making 2D and 3D designs. Then, I am going to make a 2D and 3D design of my potential final project "Hello Mouse!"I could see a list of recommended design tools on Fab Academy website of raster and vector design. The difference between vector and raster graphics is that raster graphics are composed of pixels, while vector graphics are composed of paths. A raster graphic, such as a gif or jpeg, is an array of pixels of various colors, which together form an image.
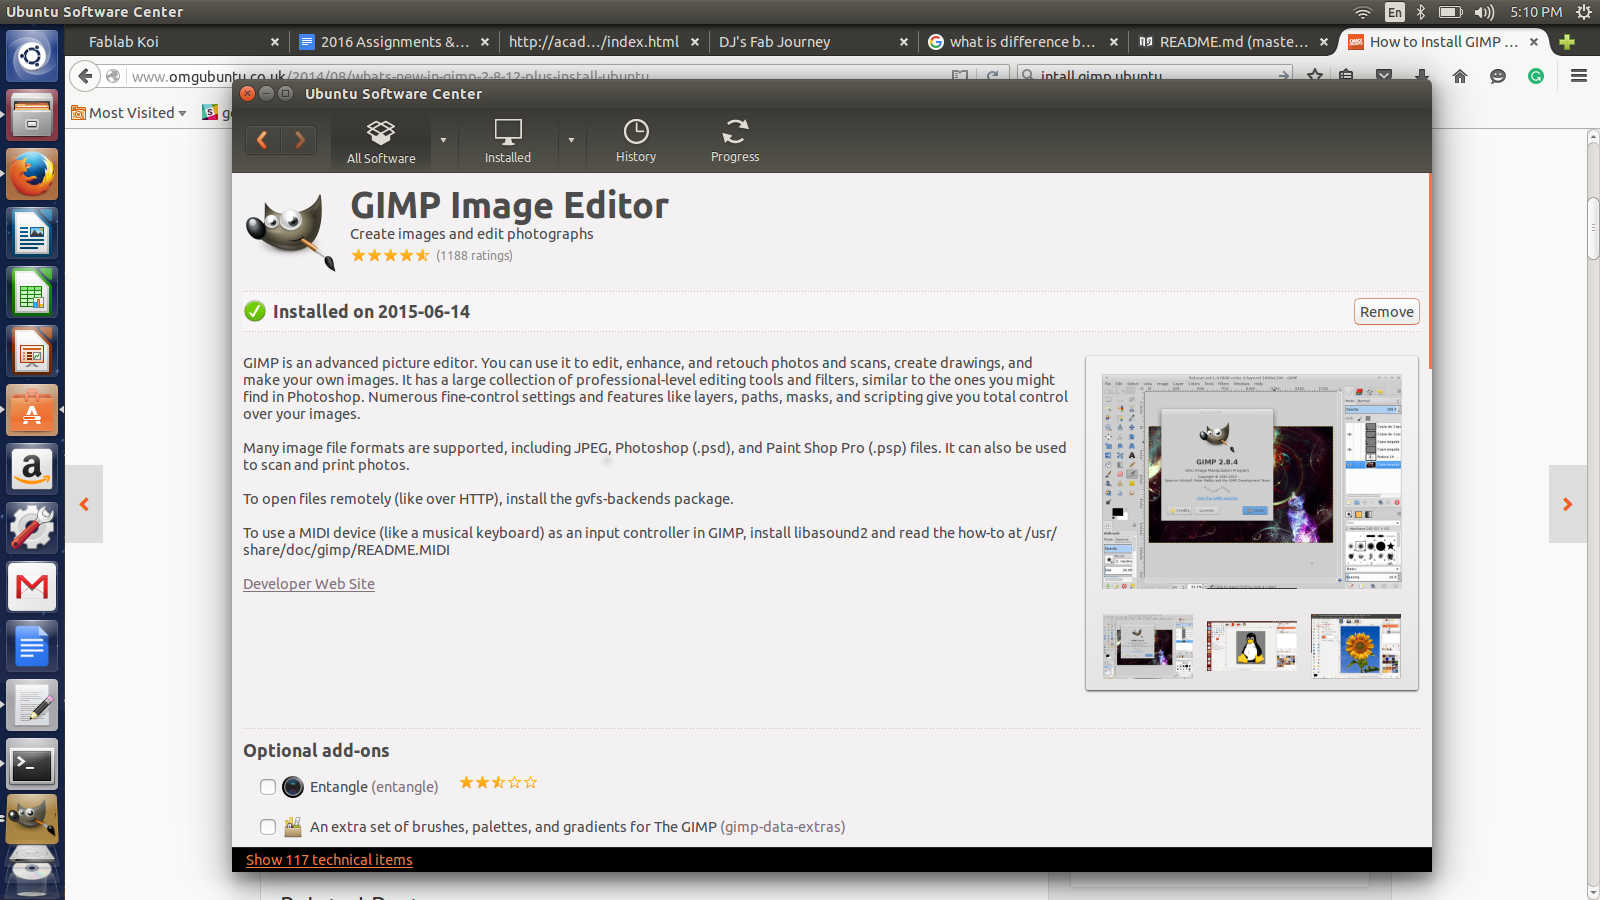
Many design tools are available for creating raster graphics. I am familiar with adobe photoshop and as I am using ubuntu, I decided to give GIMP a try. GIMP is a free multi-platform graphic design software. I have tried using GIMP previously and it is fairly easy to use.
I installed GIMP on my Ubuntu desktop by searching for gimp on Ubuntu Software center and clicking the install button.
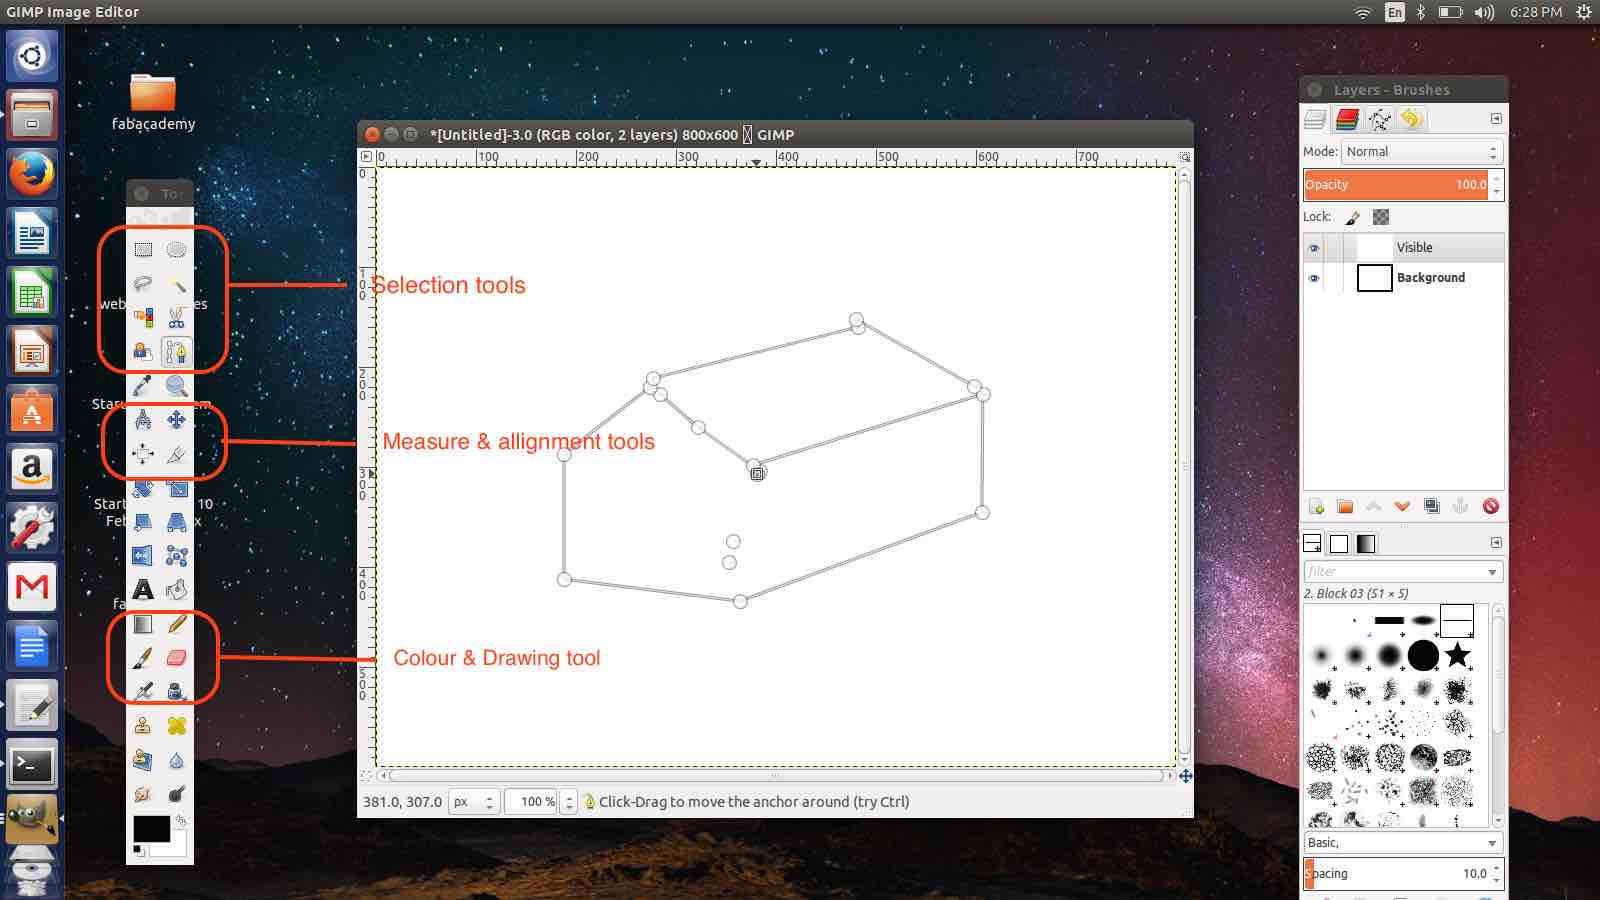
Tried using different tools available in GIMP. GIMP also has layers just like photoshop which makes it easier to create and edit images. The various tools in the toolbar are as follows
After trying GIMP, I moved to another design software that can be used for creating really good vector graphics. Inkscape is another free design tool. I decided to make the 2D drawing of my project in Inkscape. For designing 3D models, I had to choose between antimony and Rhinoceros. Antimony is a free design tool developed by Matt Keeter. 3D models can be made in a fun-way using graph
Rhinoceros is a CAD software used for quick prototyping. I decided to install the trial version of Rhinoceros and make my 3D model using Rhino.
Rhino can be downloaded from the following link.
https://www.rhino3d.com/download/
2. Create 2D model of final project with Inkscape
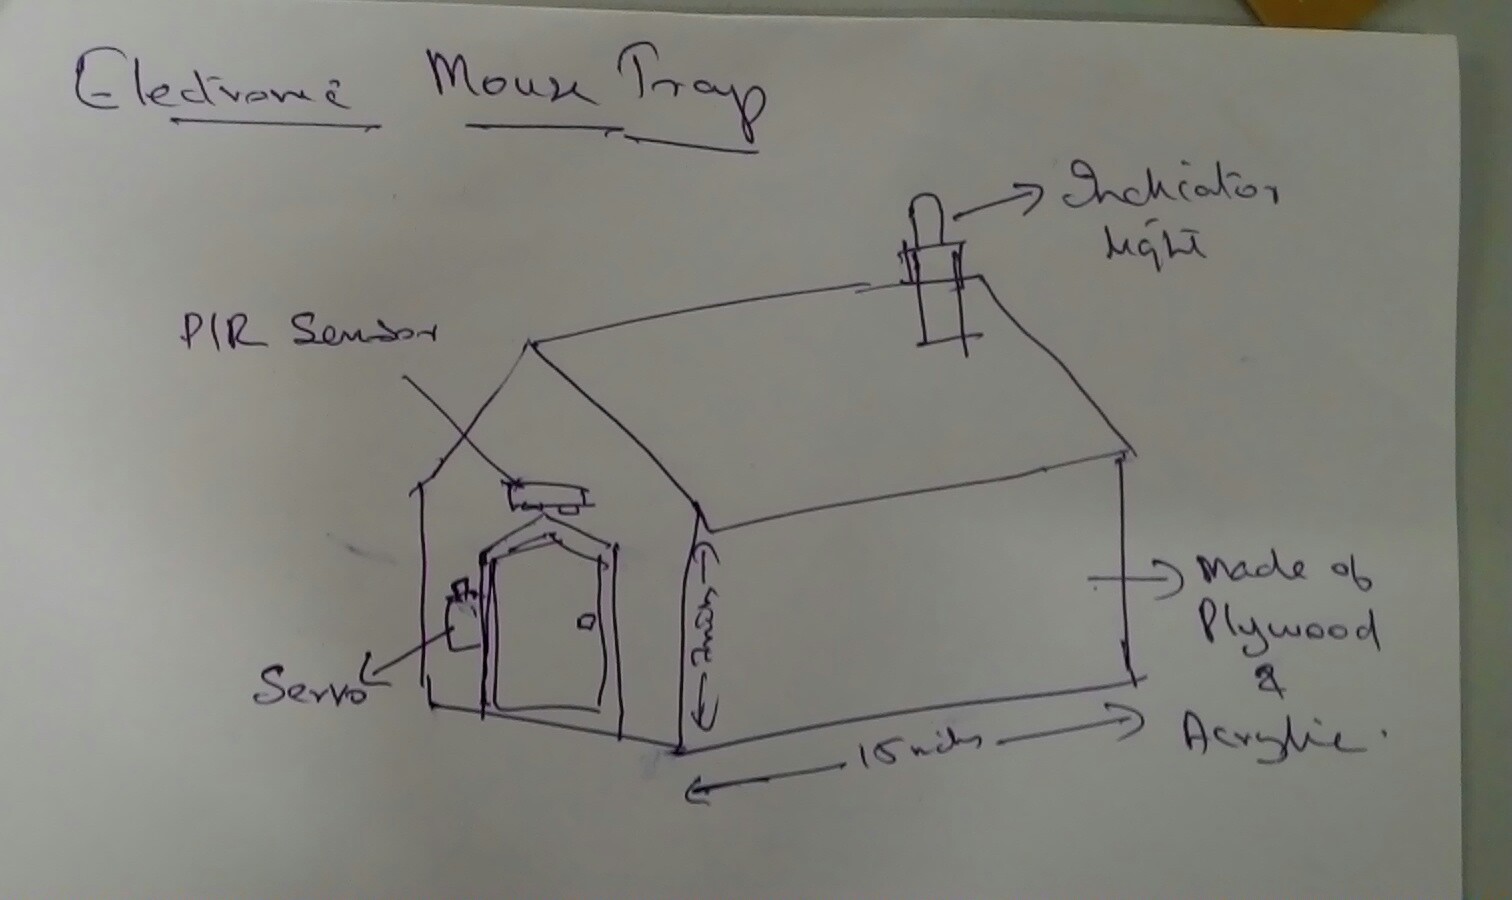
This week's assignment is to make a 2D and 3D model of a potential final project and here I am using Inkscape to make the 2D model. The idea is to re-create the drawing I made on paper using Inkscape. The following is the drawing I made for first week's assignment.
Inkscape needs to be installed from a PPA. To add PPA to my system, I used the following code I got from Inkscape website.
https://inkscape.org/en/download/linux/
sudo add-apt-repository ppa:inkscape.dev/stable Inkscape has the following set of tools in its toolbar. Its fairly easy to use.

- I used the path tool to create the outline
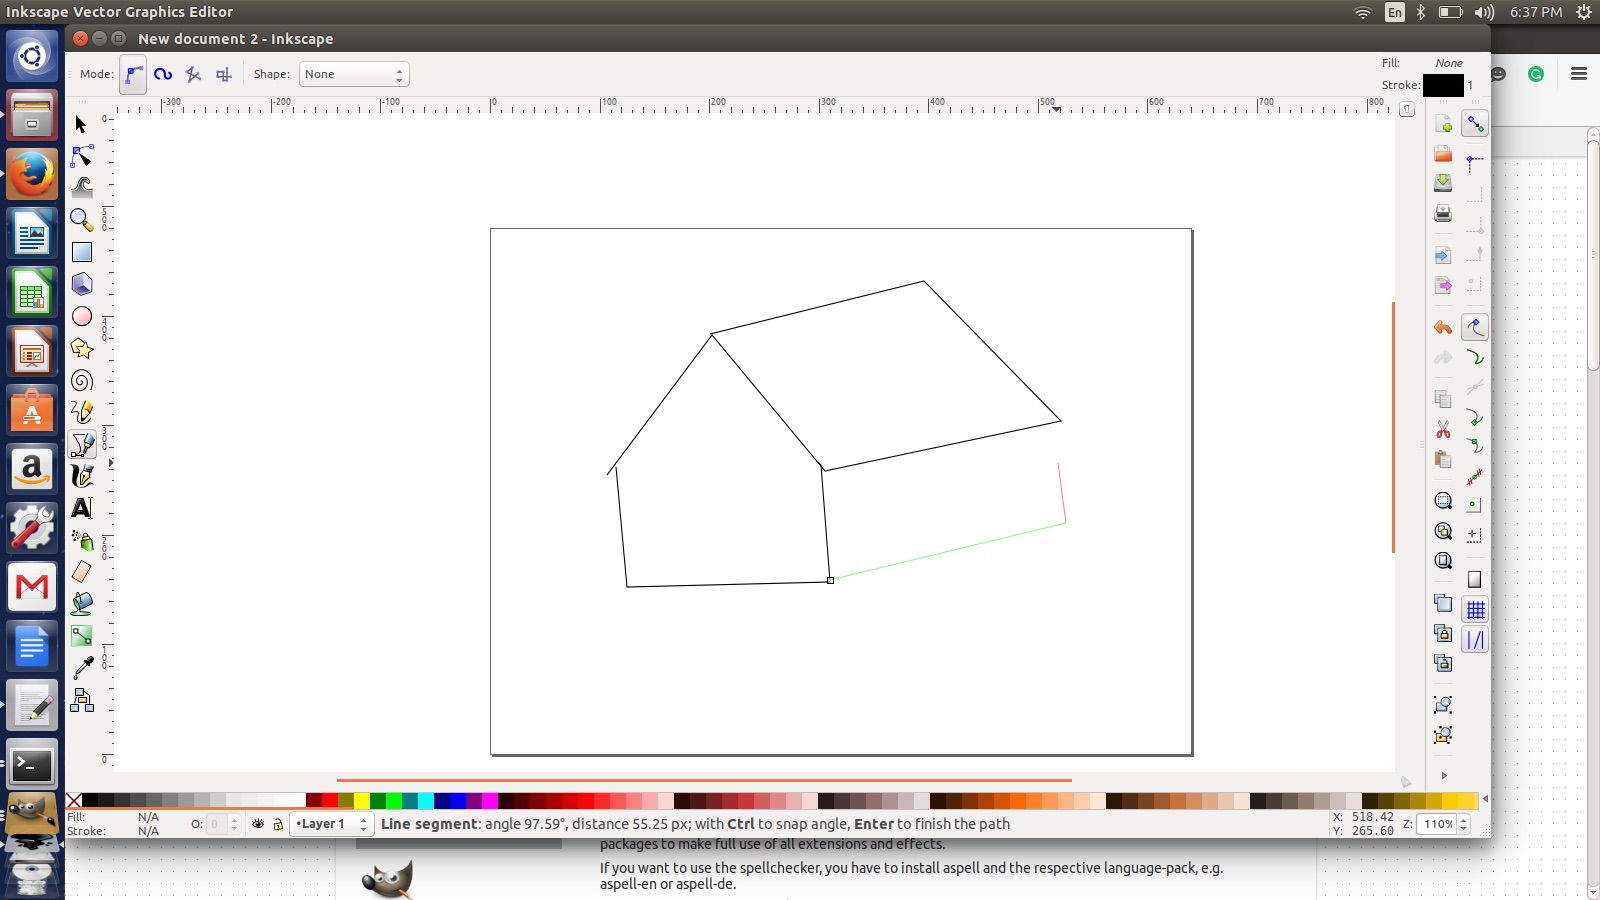
- I used the fill tool to add colour
- Then I used the text tool to add text to the drawing

Download the design file here : hellomouse.svg | hellomouse.png
3. 3D Modelling with Rhinoceros
Rhinoceros is a really cool 2D and 3D design software. Its used for CAD in quick prototyping, designing stuff for 3D printing etc.
The 2D and 3d designs created in this software can be used on a wide array of FabLab machines like from Vinyl cutter, Shopbot CNC router, Roland Modella milling machine, 3D printers etc.
I downloaded Rhino 5 from the link below and a signed up a the free trail. https://www.rhino3d.com/download/
Views in Rhinoceros
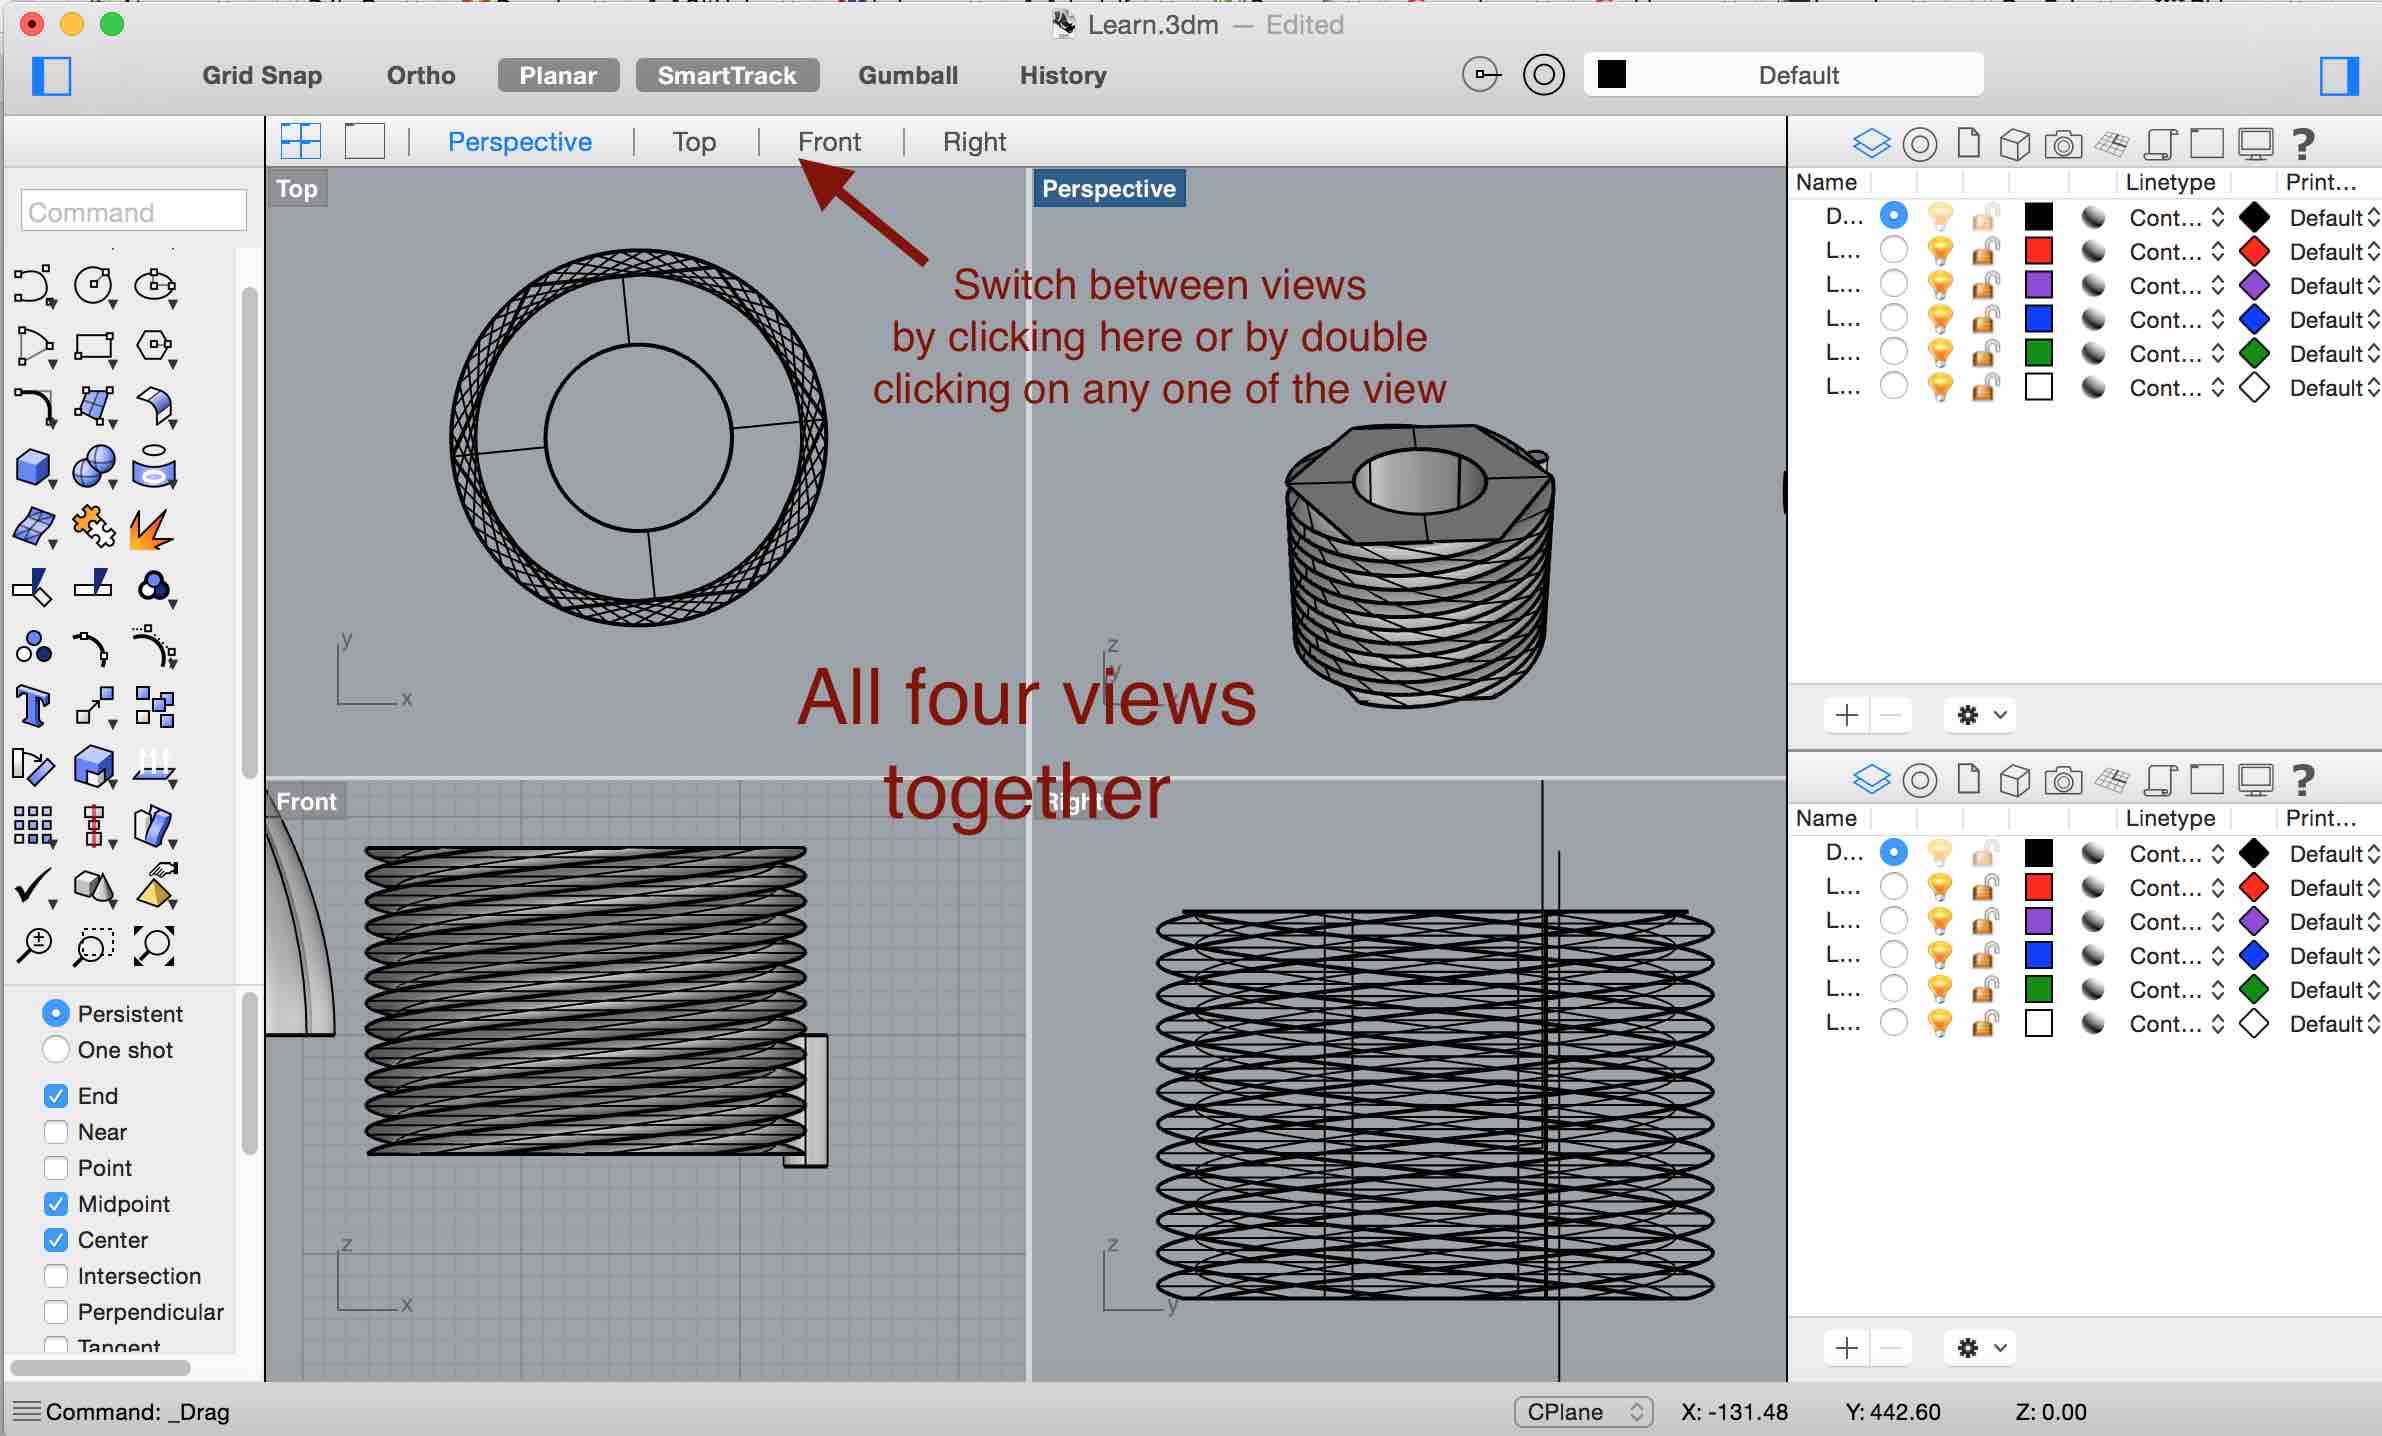
While designing, the design can be view in different angles. Top, Front, Right and perspective. All four views can be viewed together in a single window. Views can be swtiched by clicking on the options abobe. Rhino also enables to rotate, zoom and view the design in different angels using mouse click and drag and scroll wheel of the mouse.
Rhinoceros Toolbox
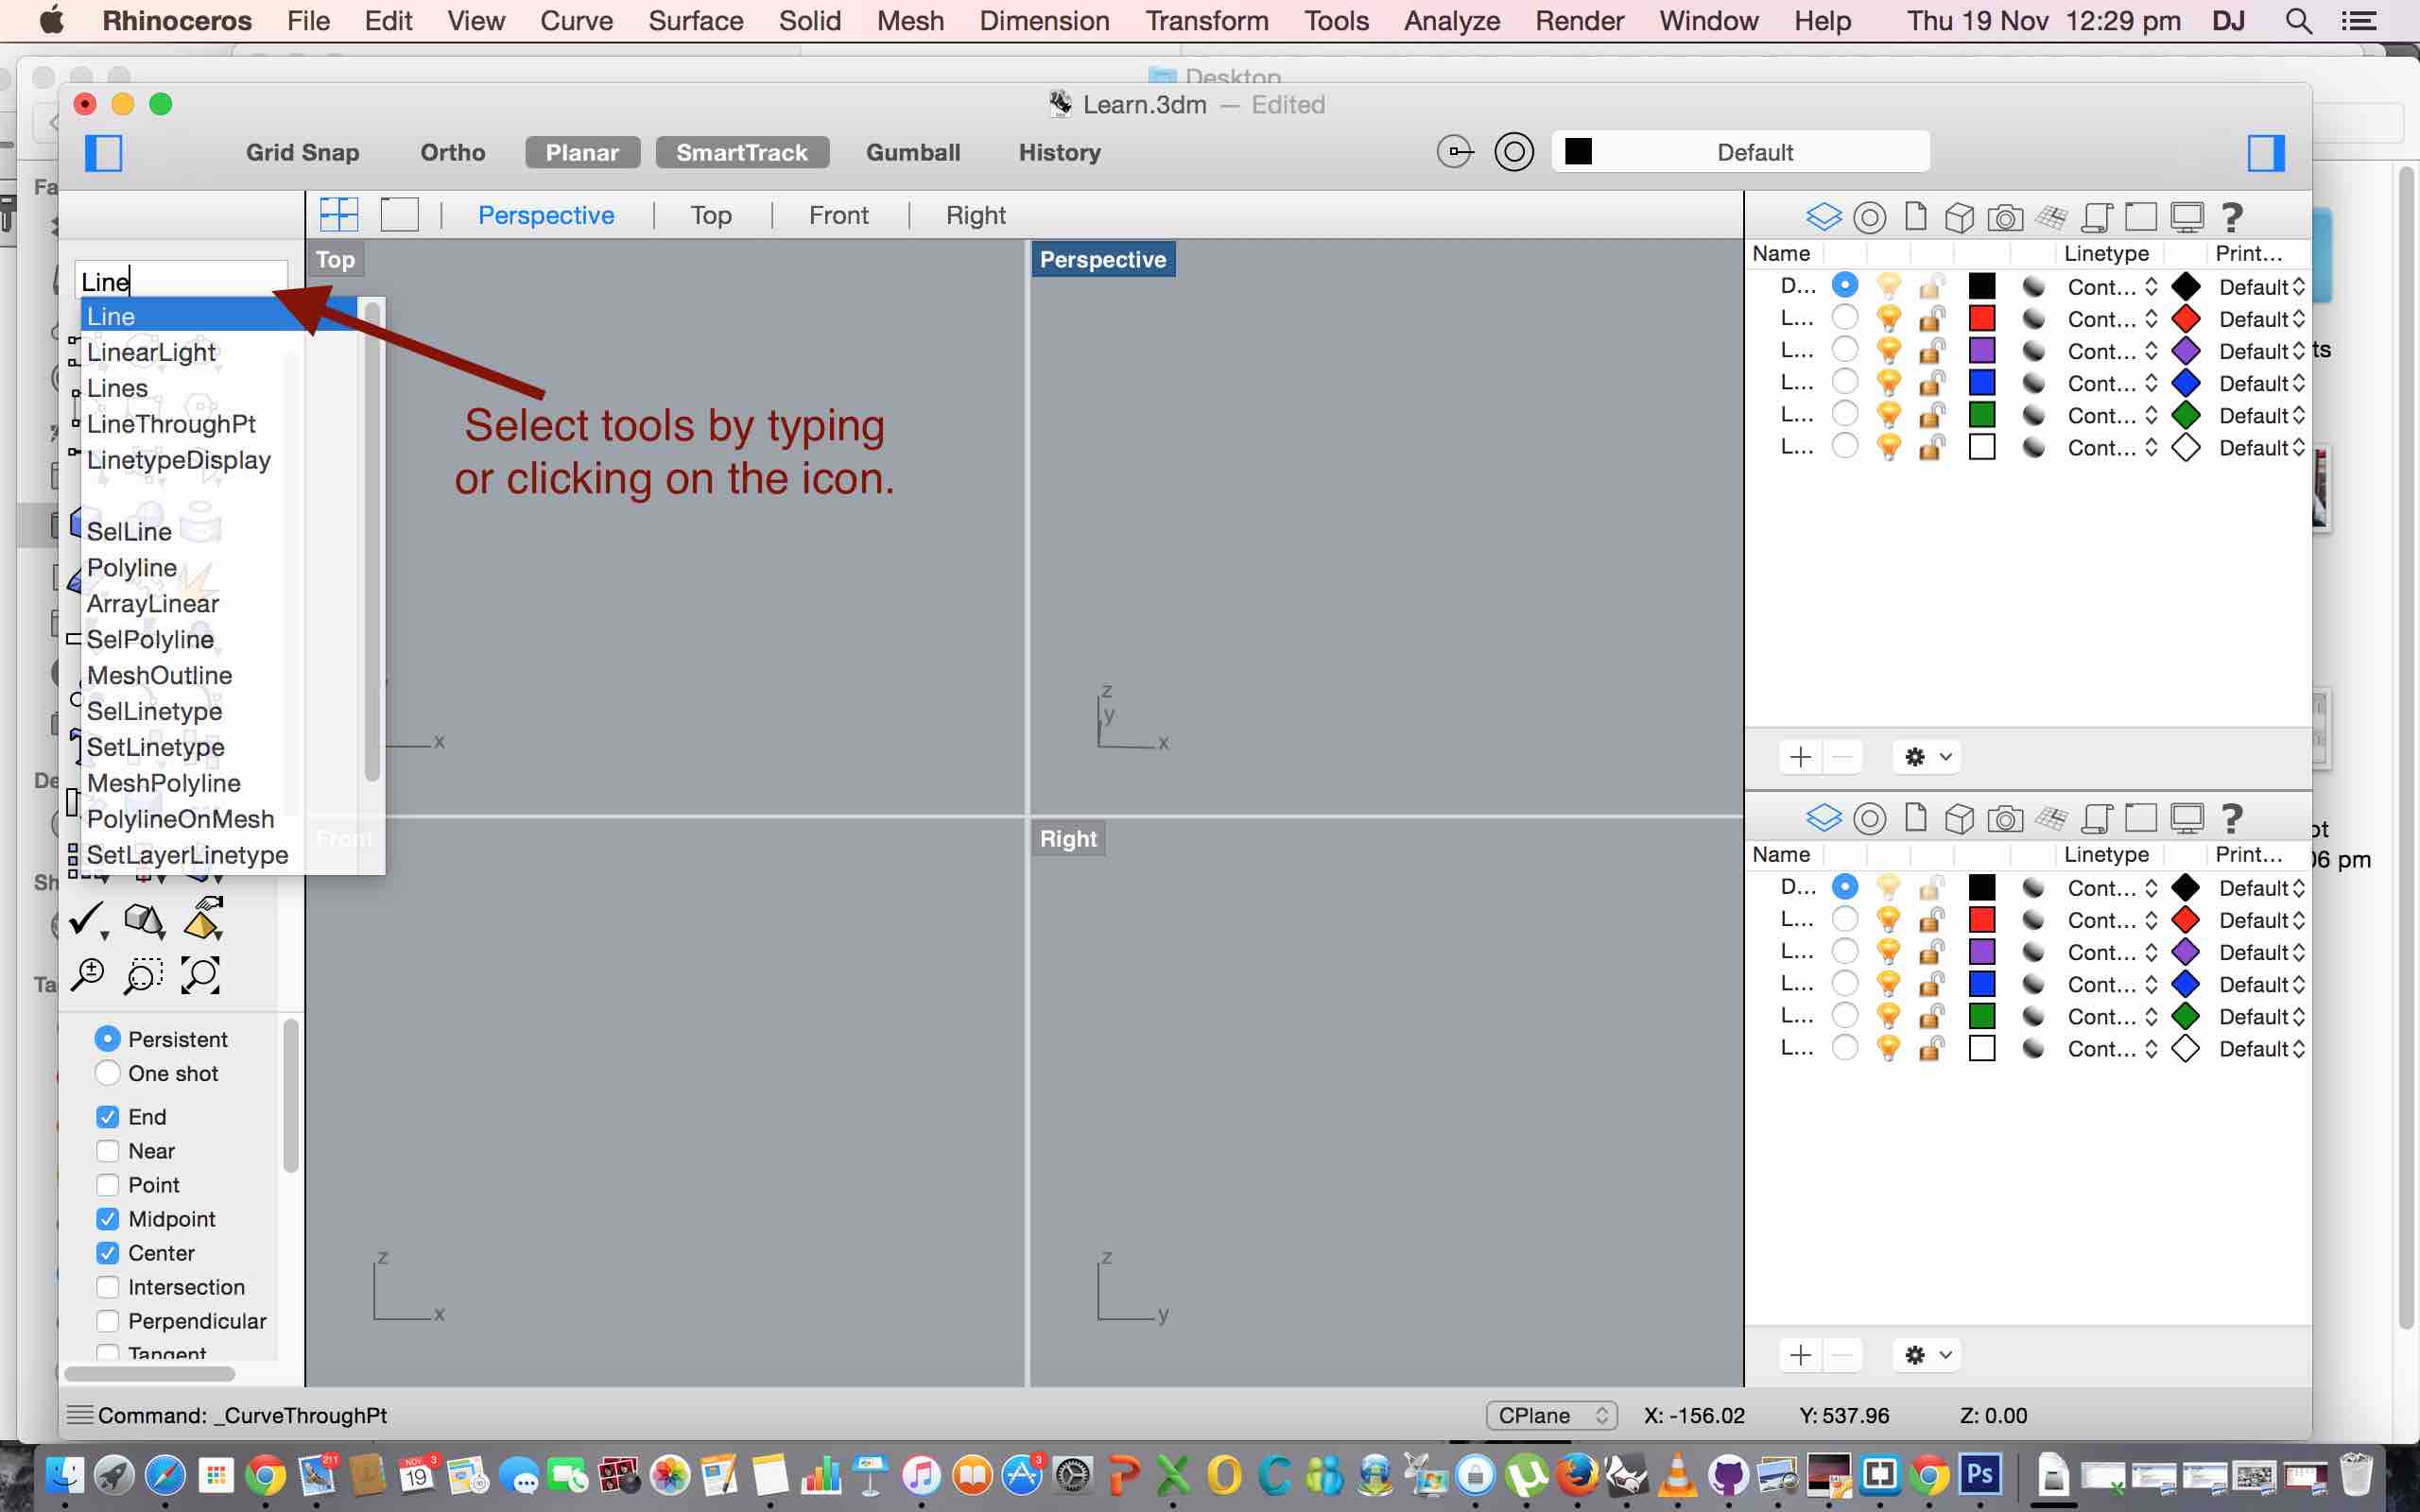
There are a wide array of tools for creating and editing designs. Tools can be selected by clicking on the tool box or by typing in the text box above the tool box.
2D drawing tools: Point, Line, Curve, Polyline, Circle, Ellipse, Arch, Rectangle, Polygon are all used to draw 2D drawings.
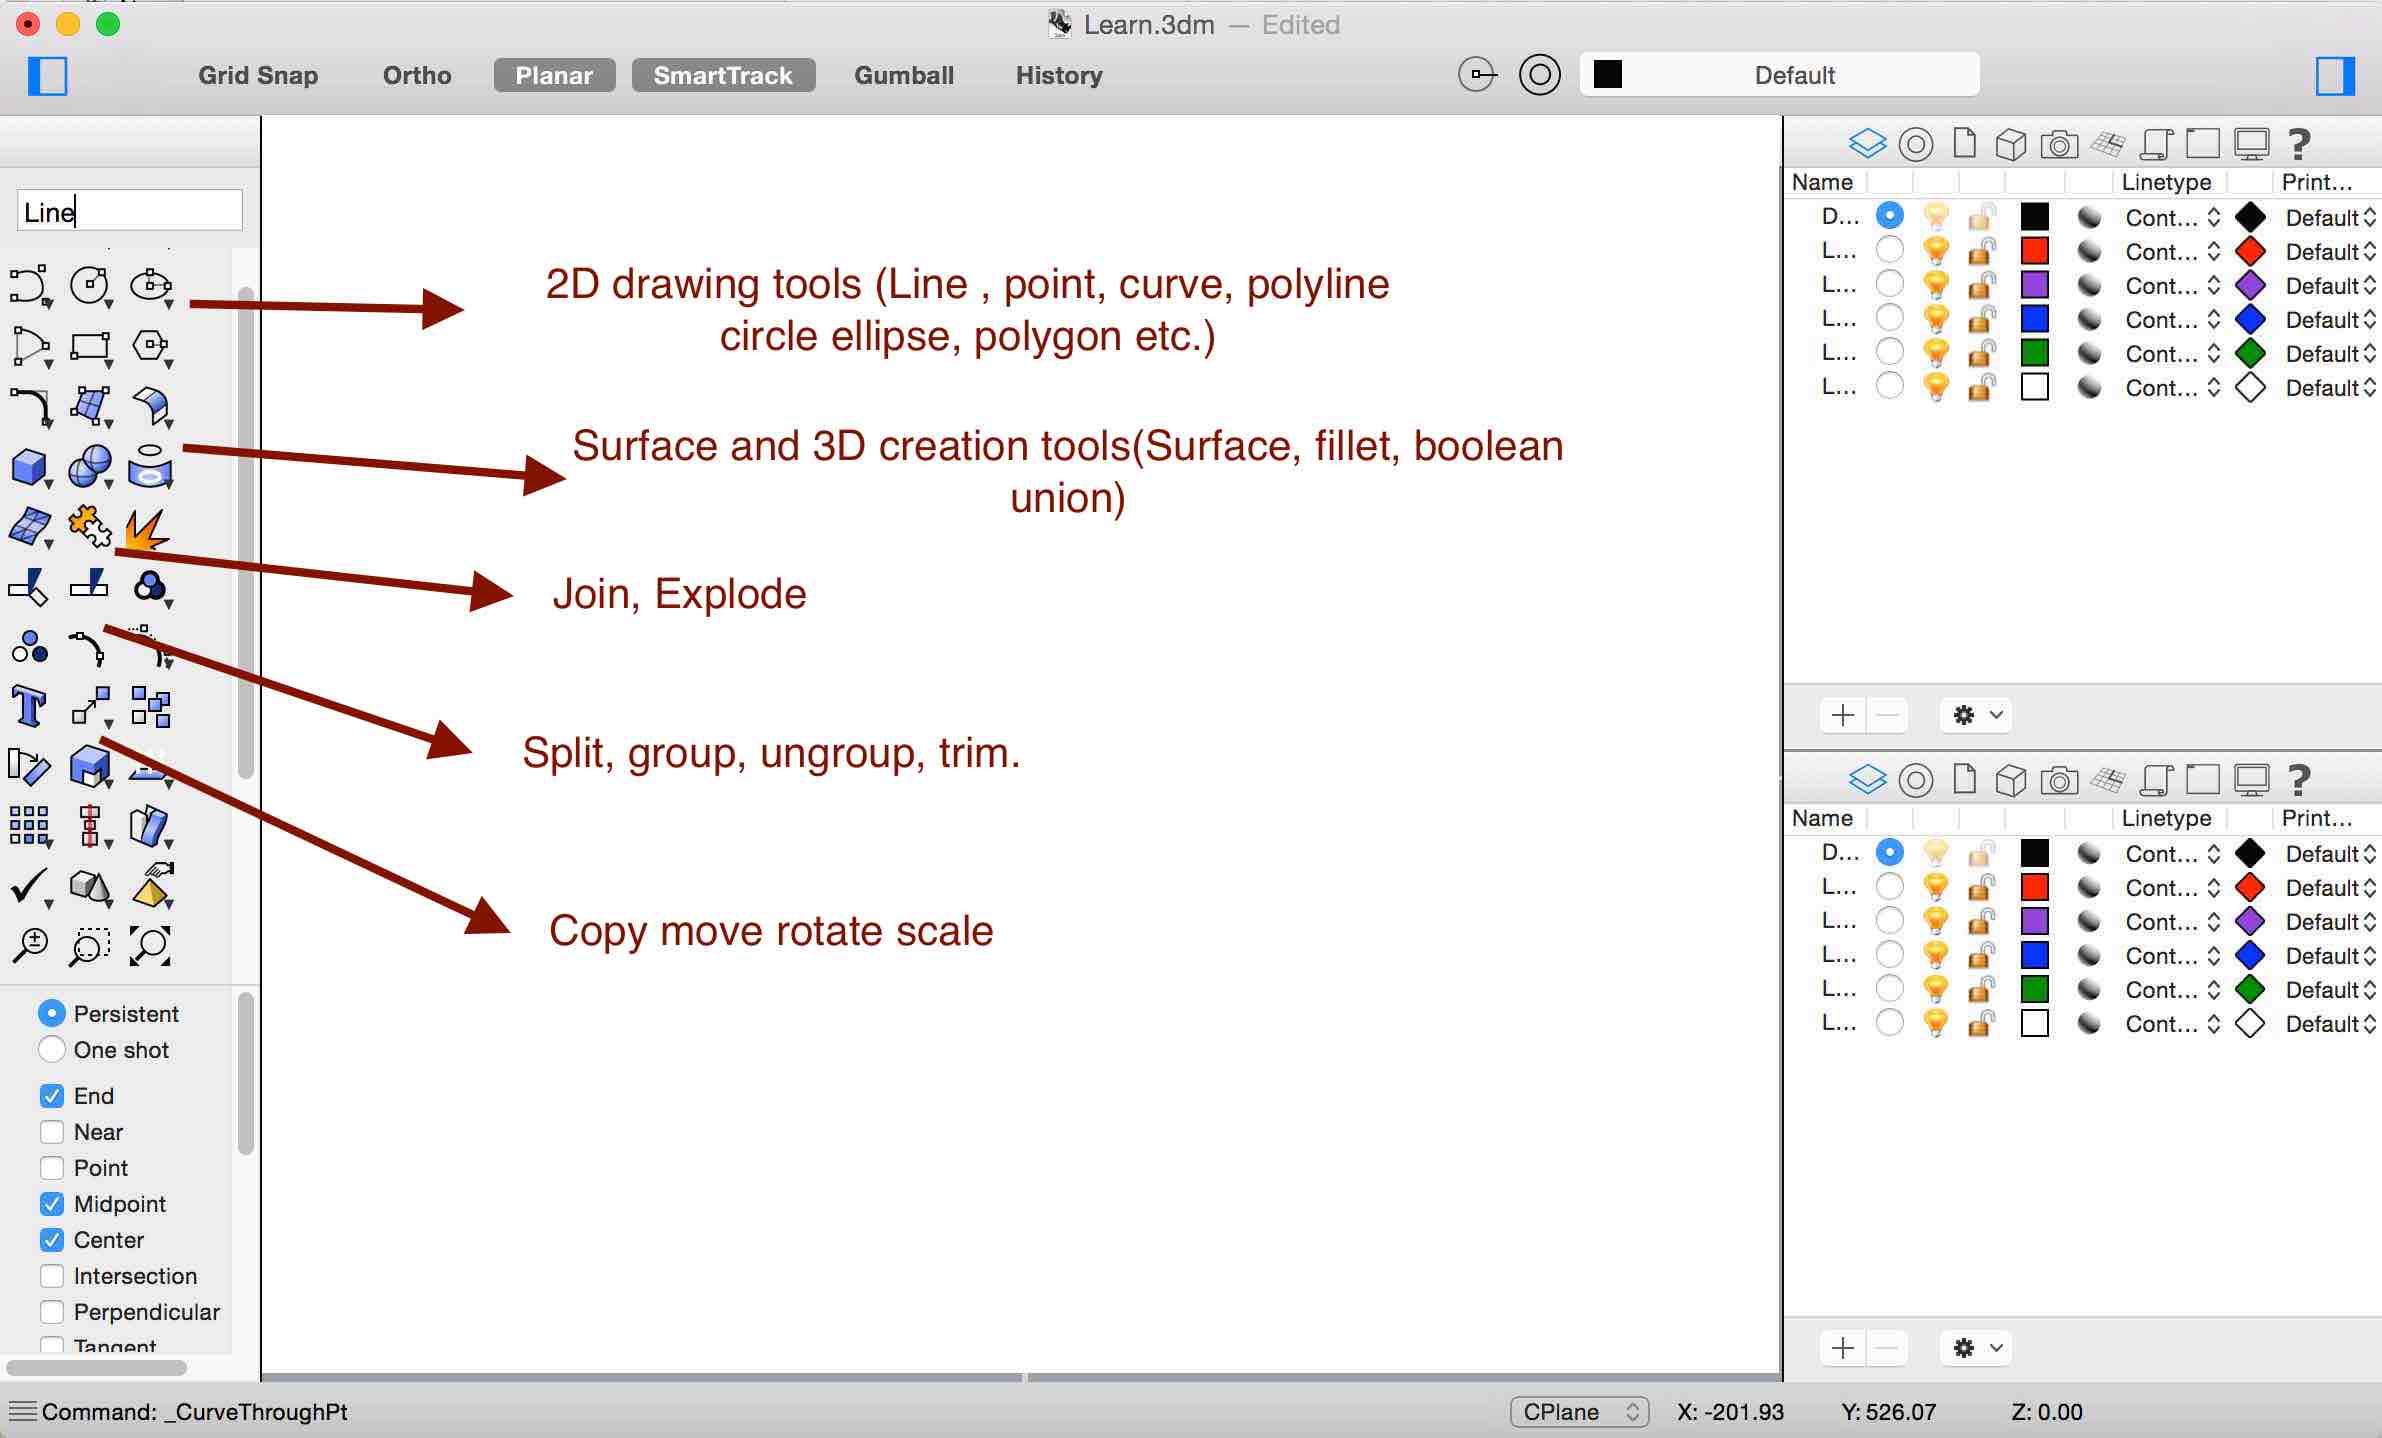
Surfaces and solid creation: Surfaces from points, curves, rectangular plane and also by sweeping 1 rail and sweeping 2 rails together. Box, cone, ellipsoid, tube, pyramid can be created using these tools
3. Create 3D model of final project using Antimony
Antimony is CAD software developd by Matt Keeter for making 3D design. This the one of the most interesting and simple software I learned using the PreFab course.

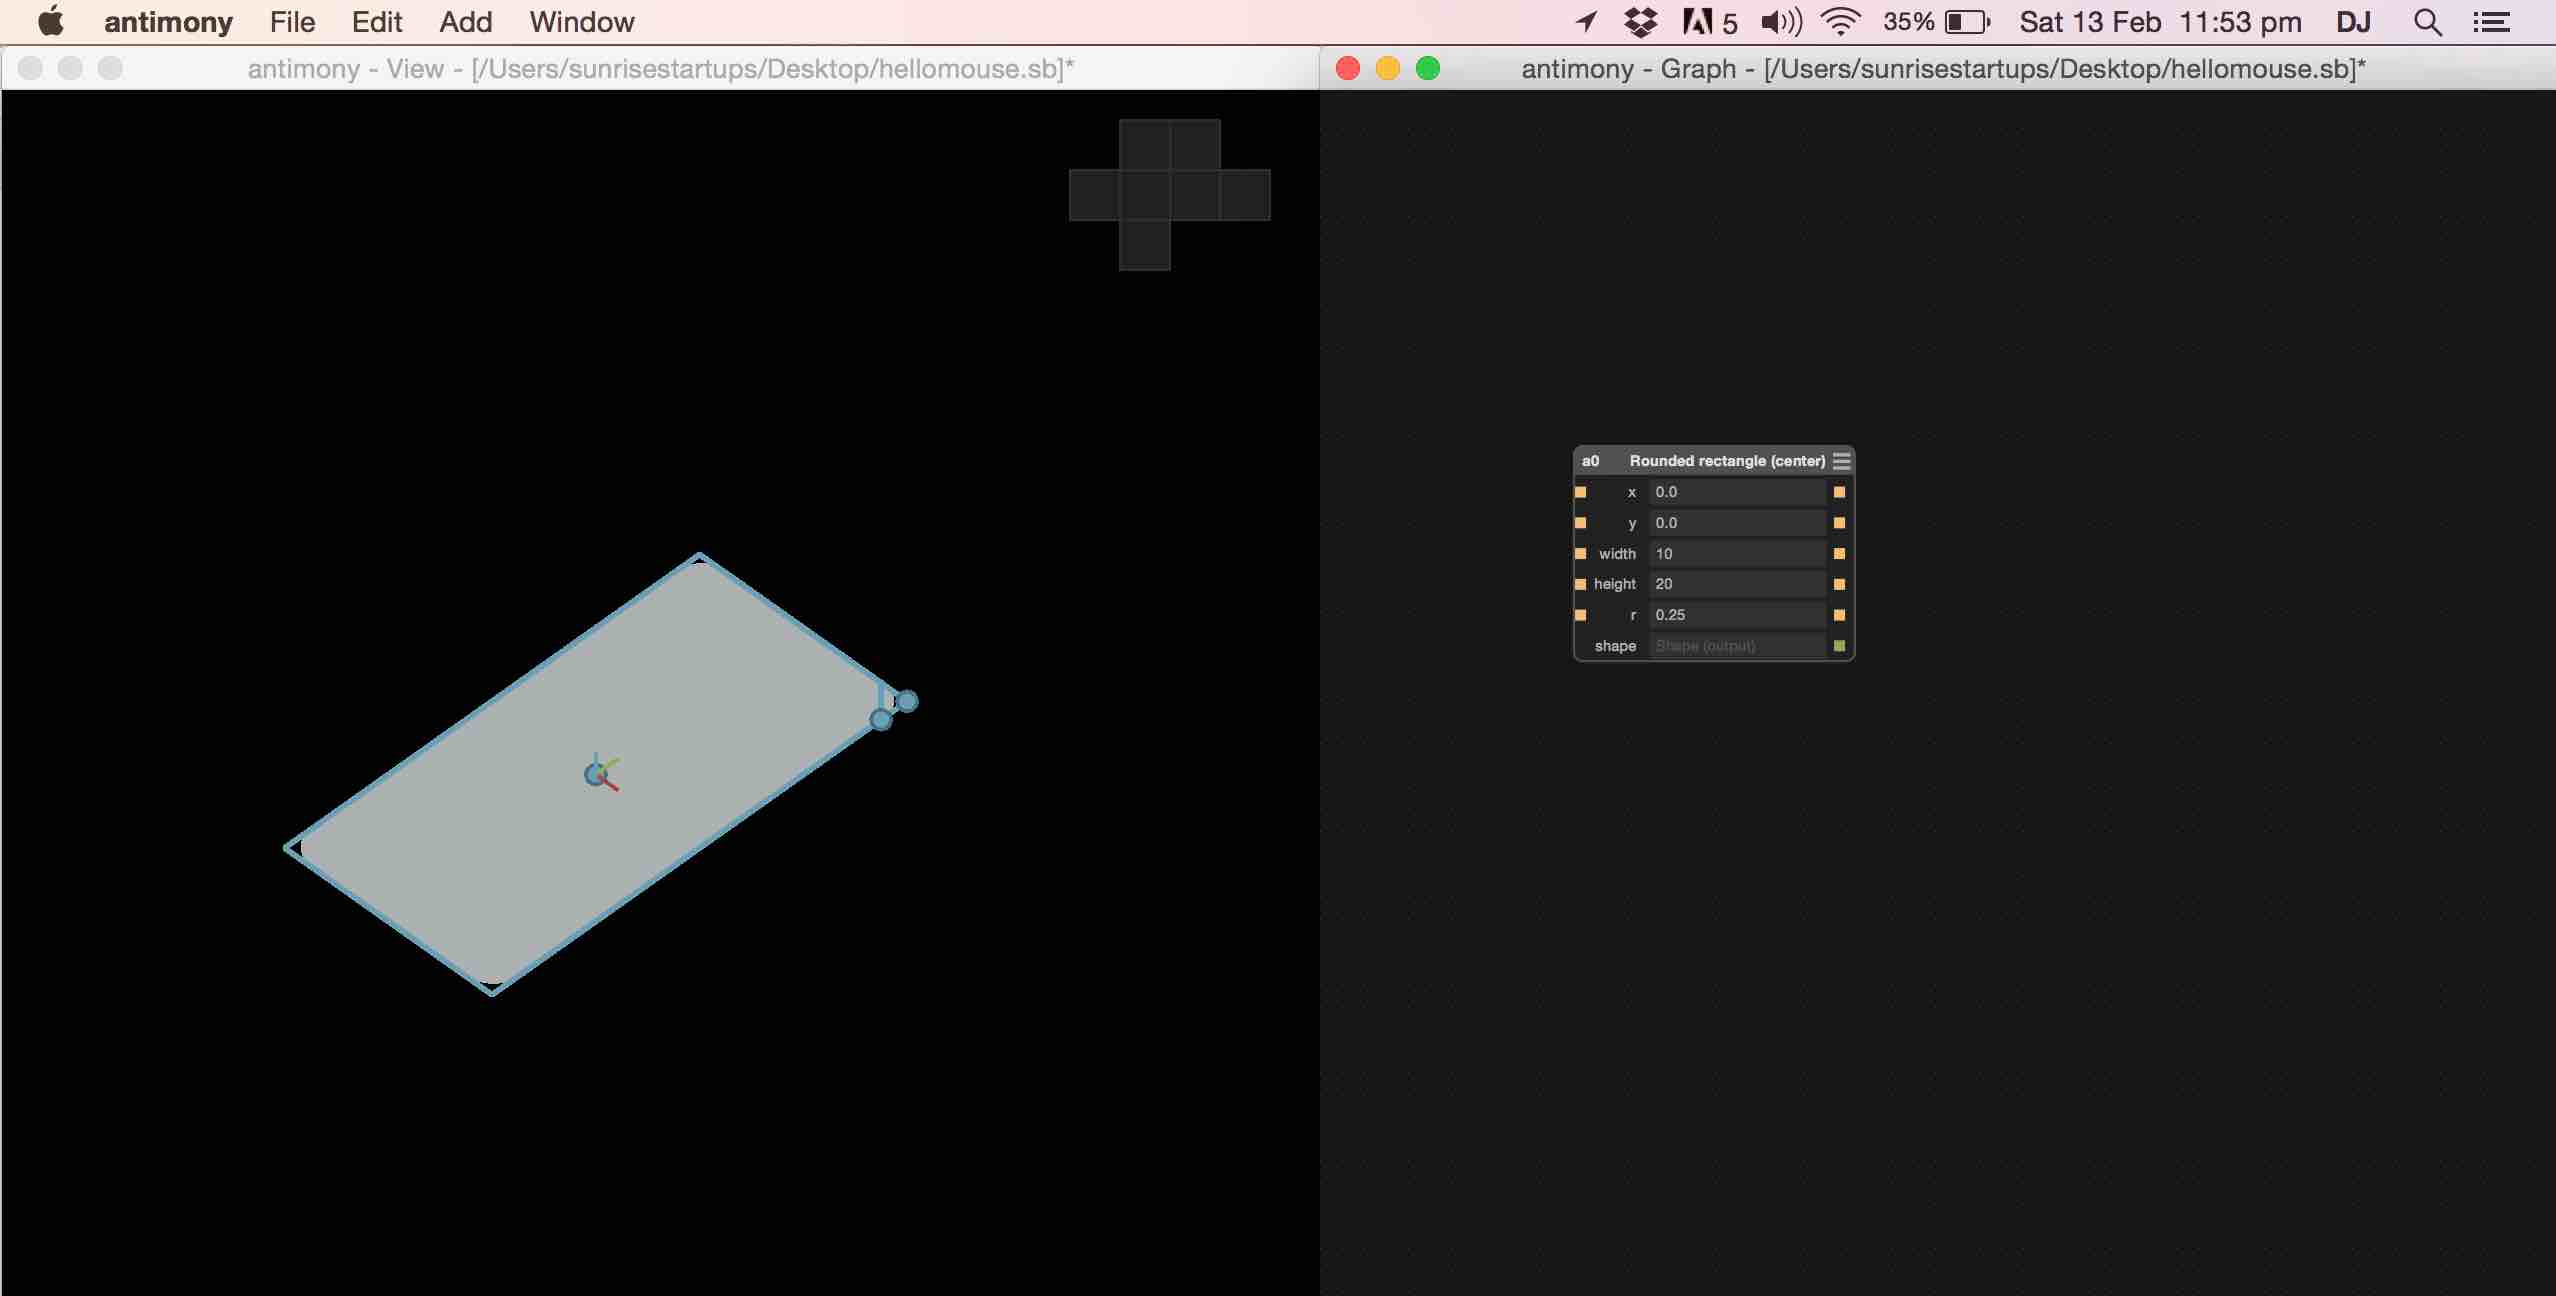
Antimony has two windows, the view window and the graph window. View window shows the design in various angles and the graph window shows the list of 2D, 3D components that are inter-connected to make the final design.
https://github.com/mkeeter/antimony
How Antimony works
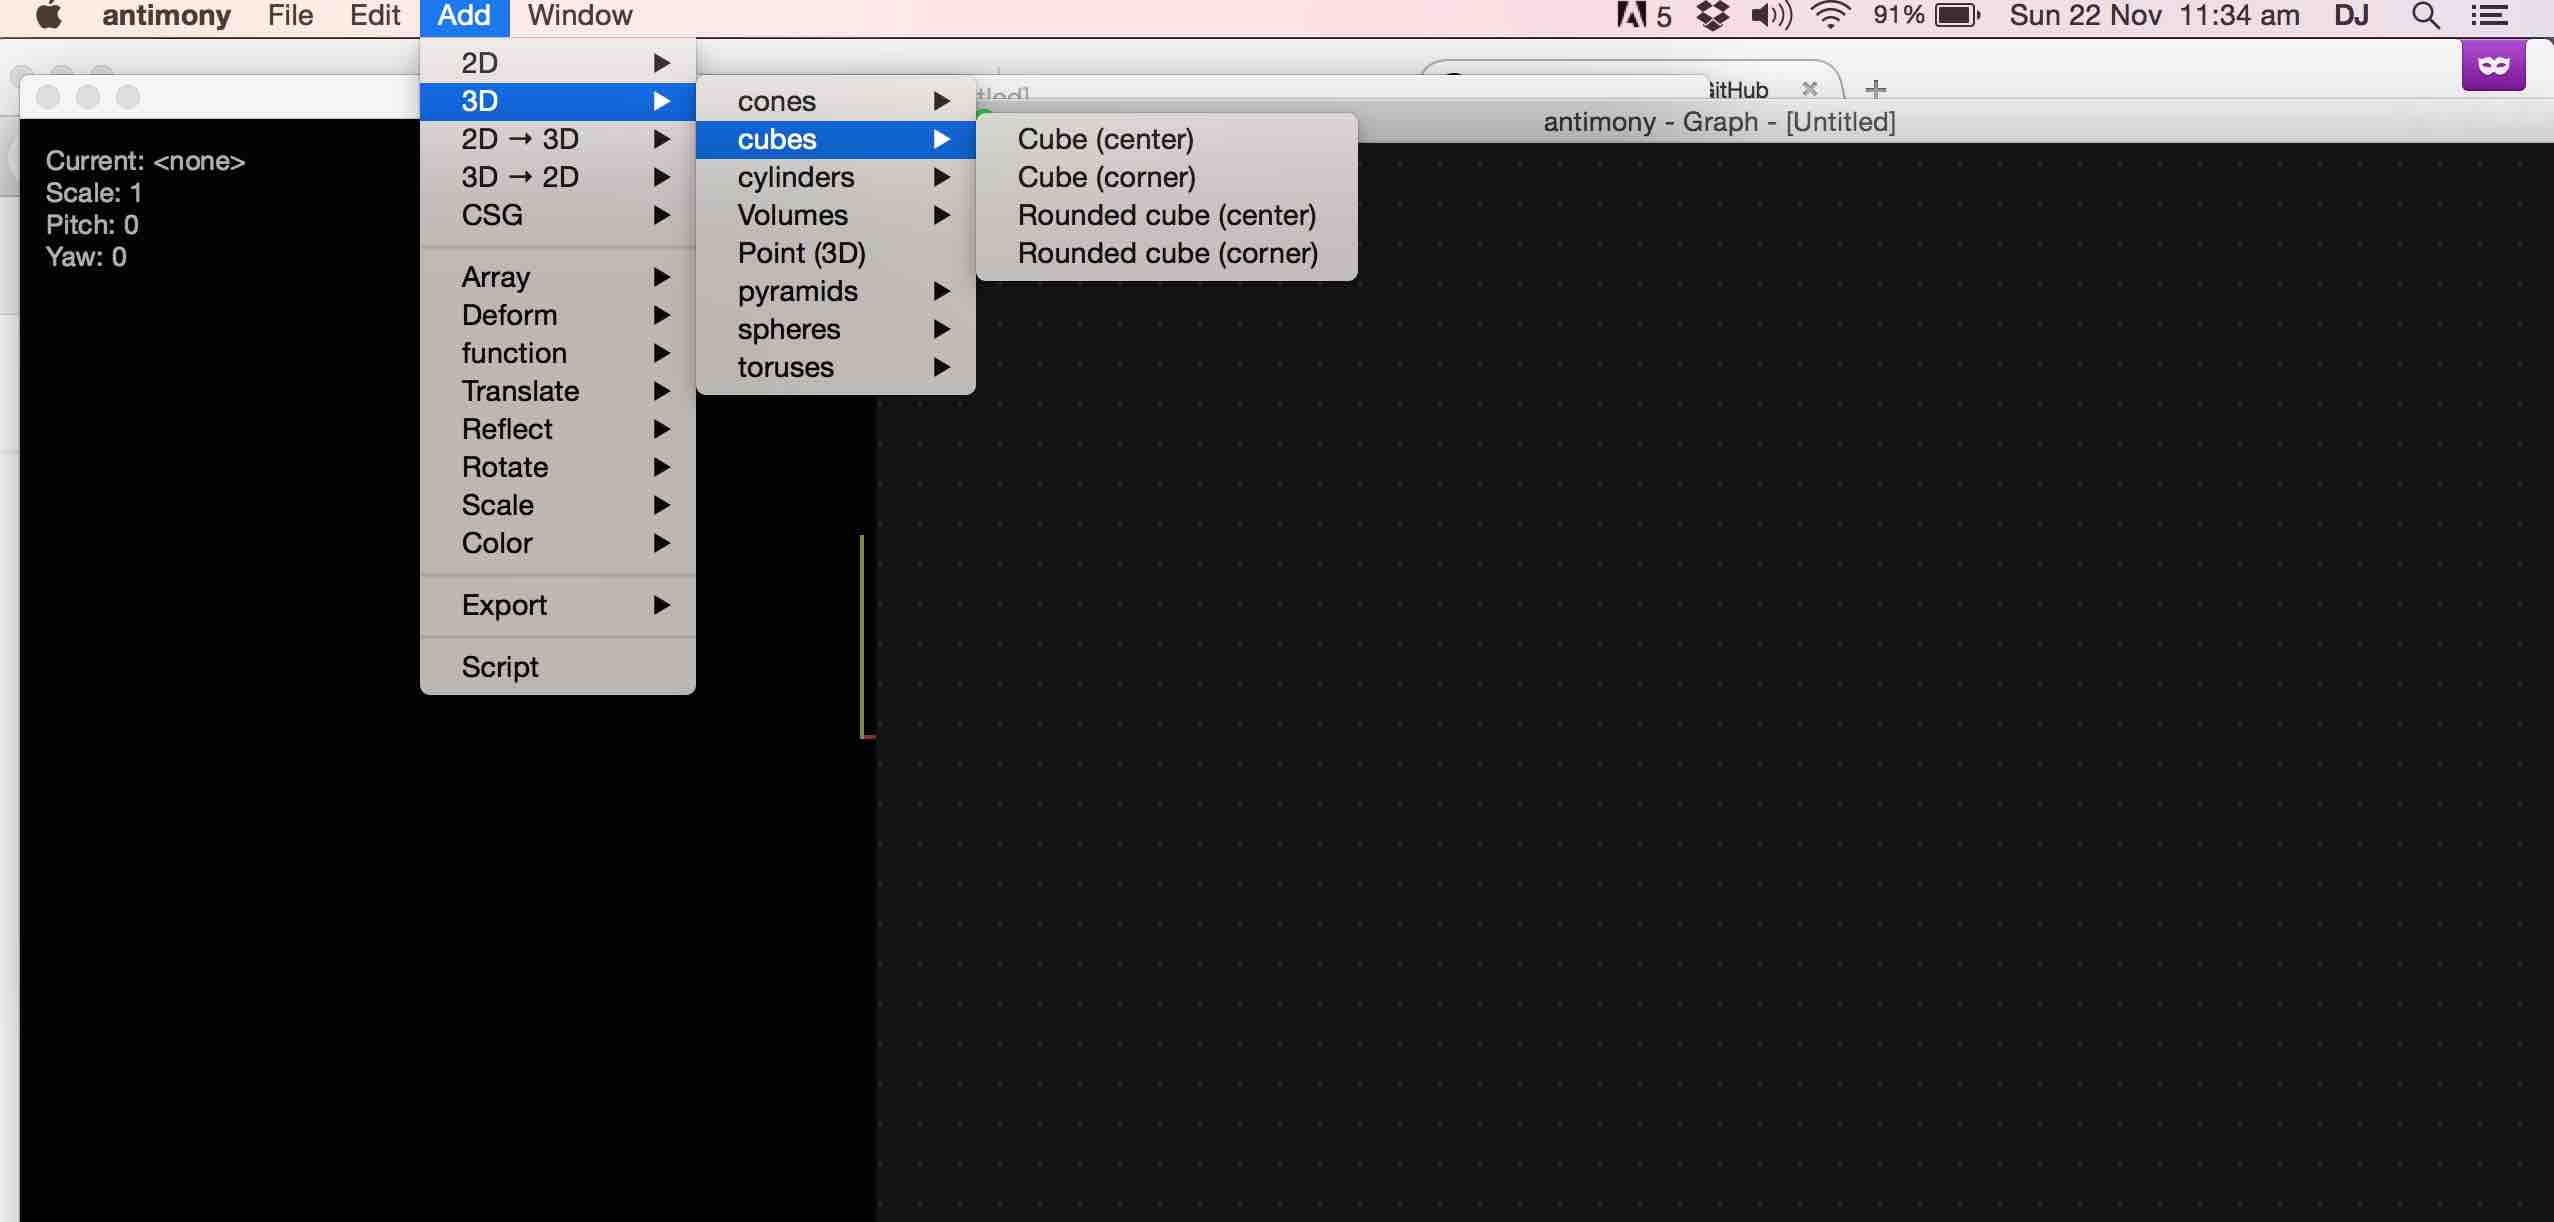
- Various preset 3D and 3D drawings can be added to the graph by selecting from a drop down list.
- Their properties like dimension, xyz position can be changed in the graph.
- Various changes like extrude, 2D to 3D etc can be applied on them.
- Then different drawings can be interconnected in the graph.
- Union, difference, copy etc. can also be performed on them.
- Everything is done through the graph and the changes takes effect in the real time view.
<
3D model of final project in antimony
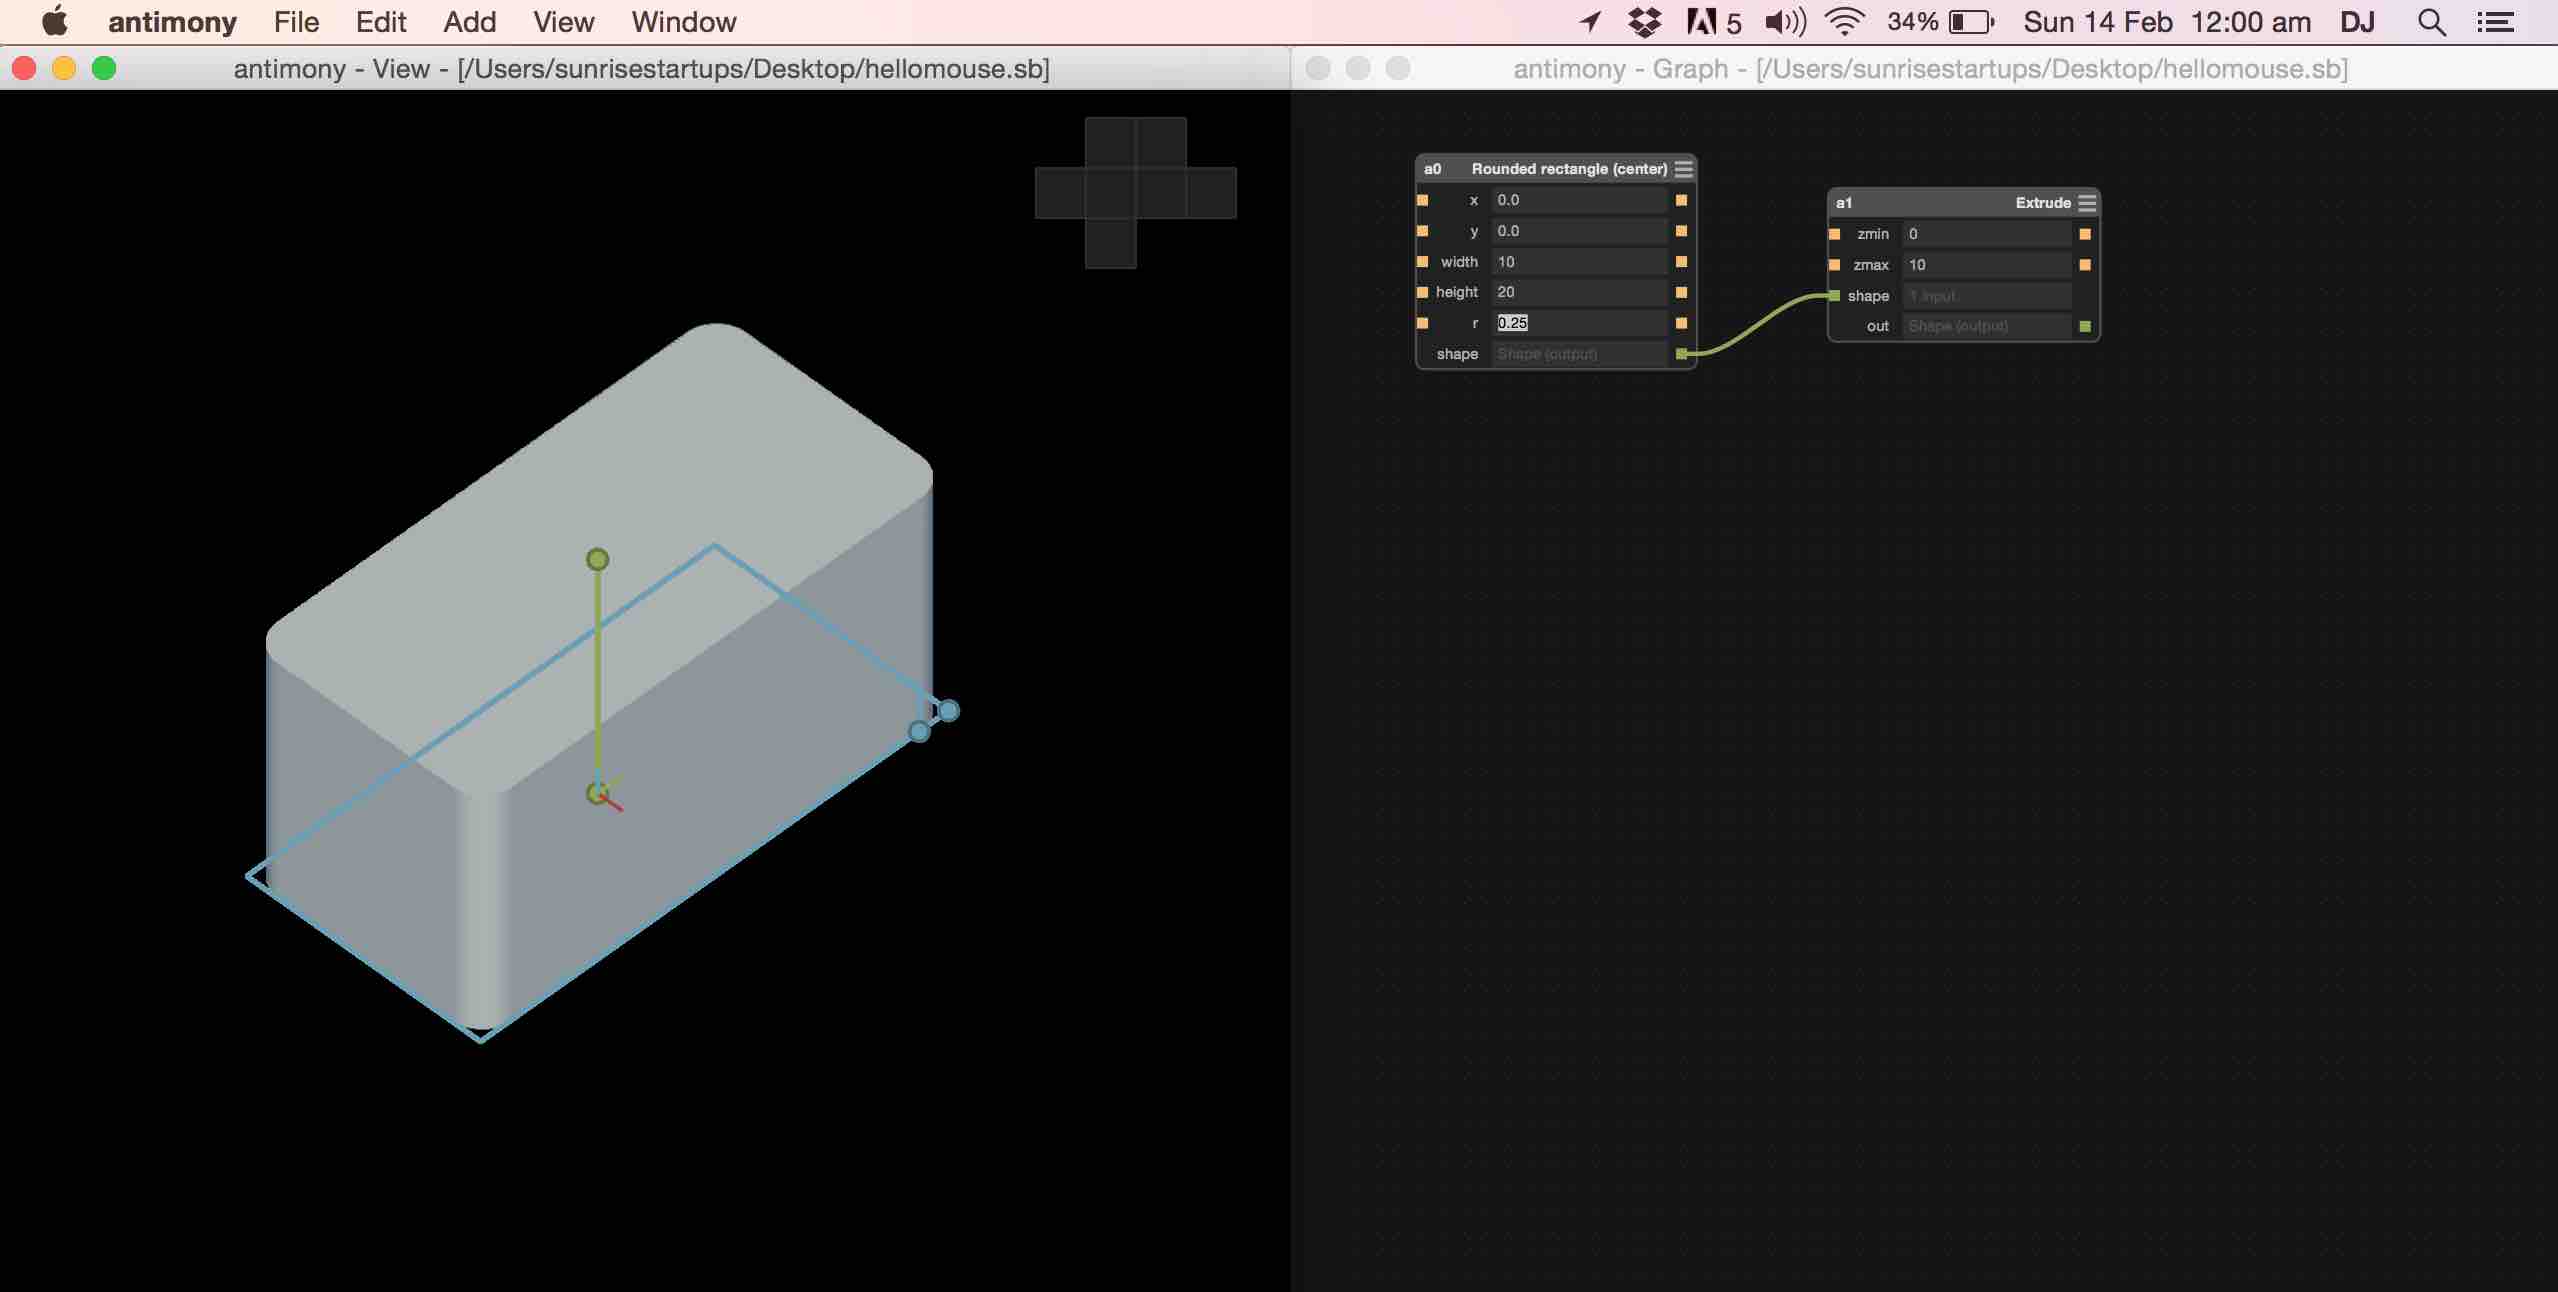
Added a rounded rectangle(center) with width: 10 and height: 20
2D -> 3D Extruded rectangle setting zmax: 10
Added a rectangle(center), x0: 0 and y0 : 10. width: 4 and height: 1
2D -> 3D Extruded rectangle setting zmax:10
Added a rounded rectangle(center), x: -2 and y: 6 width: 2 and height: 2 2D -> 3D Extruded rectangle setting zmax:13

Made a union between all the windows and added an export window
Exported with one voxels per unit with detect features(experimental) enabled.
Download design files here: hellomouse.sb | hellomouse.stl