final project -- weekly assignments -- about me -- fab academy
Week 06: Make something... not so big
This week, I had no initial idea of what to make. Which is new, and not a good thing. Then I ended up with an idea that is way cool, but was not doable with the amount of time (and money) at hand. Which is not a good thing, either. In the end, I made a thing I wanted to have for a long time, but never actually bought. Which is a good thing, even though it's not that big
First ideas, sketching around
My first idea was to build something truly big - A dome like the ones I had printed in the little habitats. I really like the idea of having a structure that can be built up quickly from compact parts and is large enough to be used as a tent, ideally one large enough to stand up in it. In theory, it shouldn't be that complex to build such a dome, as the geometry I used only has edges of two lengths and two types of vertices. In theory. In practice, the half pentakis icosidodecahedron I used for the small habitats has 65 edges and 26 vertices you have not only to build, but also to pay for, and to store somewhere afterwards. A dome of any decent size is a serious amount of wood, and it takes up a ****load of storage space I don't have.
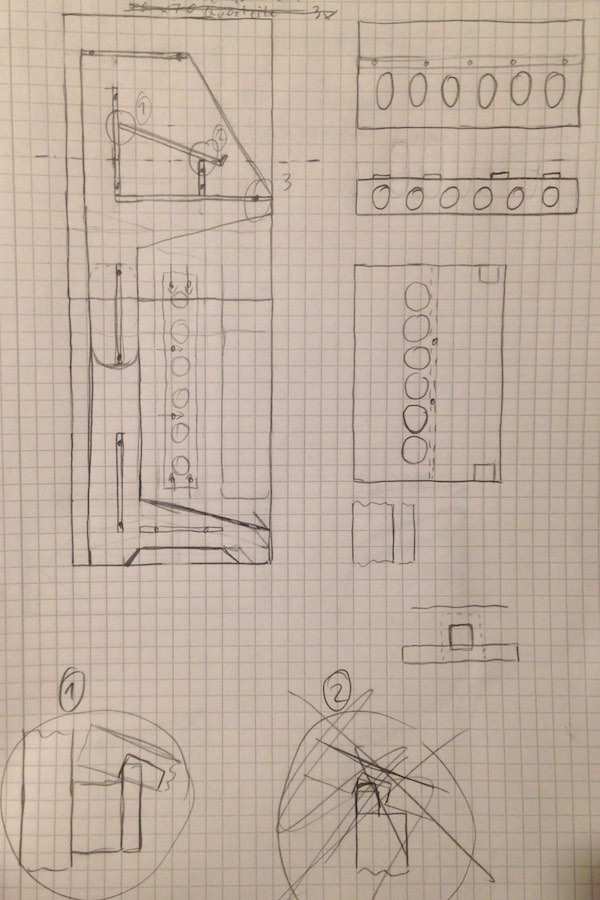
The second idea was to build something I wanted to have for quite some time and can't buy even if I want to. I want to build a standing desk that is built to use a combination of a computer and papery stuff like books, sketch pads or printed datasheets. I made a bunch of sketches for that one, refining the idea and matching it to the hardware I use (our lab has seen some strange stuff, now including me measuring what a good height is...) and planning in stuff like space for laptop chargers, phone chargers and other stuff. It looked cool on paper, but the evening before our only possible milling day I had two serious problems: First, I hadn't found a source for the amount of (quality) plywood I would need yet. Which is a serious show stopper. Second, we only had that one possible day to use the mill, and I still had a load of stuff do draw up if I wanted to mill my desk. Which makes things hard. Also, as it turned out later, the milling time for all those large parts would have been a serious problem.
I still want to make this, and if I find some time to go milling I might just do it, as I now do know where I can get wood of decent quality at a good price. Judging from what I saw when milling, it might take half a day of milling to get the pieces done, though.
Some notes on those sketches, mostly so I don't forget:
- The upper shelf for a notebook is at 150cm from the ground
- The middle shelf for paper stuff is from 130cm to 120cm from the ground and only laid in there, not fixed
- The lower shelf for a keyboard and touchpad is at 110cm from the ground
- All three vertical backs are identical
- The layout is optimized for raw wood (and later parts) to be transported in the cars we have available
Something a little smaller
Panic Realism took over, and I had to come up with something that could be done with the wood I could source (shoddy quality at a horrendous price), and had a chance of drawing up in what time was left. I settled on another project I had thought about for some time: I am far too lazy to attach an external monitor to my laptop when at home, and getting one that is as good as the internal screen of my Macbook would be seriously expensive. Always looking down at the screen is not nice to my back and neck, though, so a laptop stand would be a cool thing. Not a small one, though, but one so tall that the internal monitor ends up at roughly the same height as the monitors I use at work. Which is... tall. Also, having some (well vented) space for chargers to reduce clutter on my overfull desk would be a cool thing, too. Again, I made a bunch of sketches:
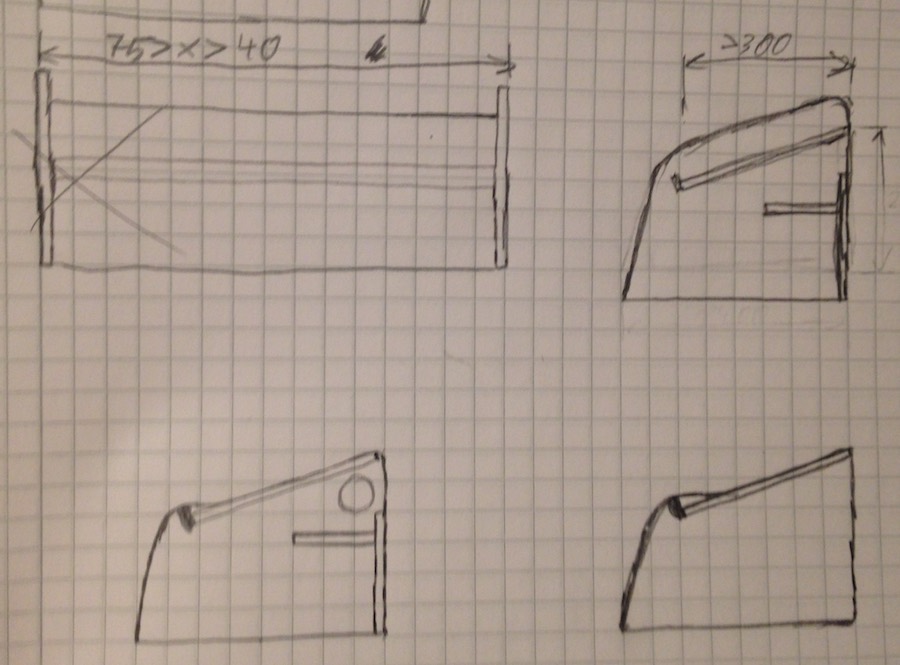
This time, I tilted the upper shelf, not for any useful aspects, it just looks cool. I decided to use birch plywood, not only because it looks good, but also because it is nice to work with - It is rather easy to cut and to sand, it doesn't warp when wet and with wooden floor varnish, it gets enough surface hardness for everyday use.
I really like the look of the alternating bright and dark layers, so hiding the sides of the individual plates was out of the question. On the other hand, I don't really like the look of most wood joints, so I decided to use something I have gotten used to as the "Ikea Screw":
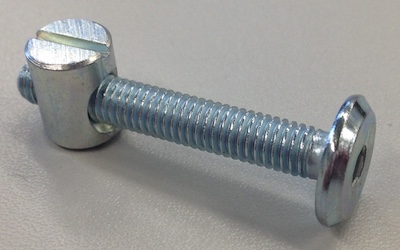
There were times when Ikea used those to make almost anything. They have mostly stopped that, now, and opted for cheaper alternatives - Or maybe alternatives that are easier to mount with two left hands. Or two right hands, if you're left handed. Also, the official name for those things seems to be "cross dowel" ("Quermutter" in German... Took me a while to actually find them).
I first made the parts (or virtual parts, at that point) in Solidworks, which I haven't really done anything with before. Dear Solidworks... we won't be friends any time soon. It worked, though, and I could test-fit the parts and find the misaligned screw holes before milling a set of parts. The files are in here.
Making it real
The day before we could actually mill, Daniel found out where to get quality plywood for a decent price: Holz Leineweber. I called them, and they even made time to cut it up to fit into the car and had it ready when we arrived in the morning. Too late to switch back to the desk now though, as I had no time to actually draw all the parts for it in time.
To actually make something, Daniel and me visited our friends at the Fablab Kamp-Lintfort. They do have a large CNC mill:

The vacuum table is impressive, it's strong enough to still hold stuff in place with a roughly 1cm MDF sacrificial layer - no holes in there, just what seeps through the fibers.
The CAM software that comes with it is a pain, though. First, it only reads a rather old version of DXF files, so a lot of software will not produce output that is compatible. Then, it needs every phase (drilling, pockets, deeper pockets, cutouts, ...) to be on their own layer in one file. Which is something most CAD tools will not output. Many thanks to Adirana for the help sorting the layer mess in Rhino. And the patience to do it again after I fixed the scaling issues.
Milling started "from the inside" with the deep pockets for the Ikea Nuts. I used a 6mm mill they had for everything, and I don't really know much about it (I'll have to find out more about those next time I'm there). It milled OK running at 12000 RPM with a feed of 800 (We didn't find out what unit the CAM uses there, might be millimeters per minute from what it looks like?).
As for the CAM software, every phase has its own final milling depth, the shallower pockets for fitting in the shelves and the back were their own phase, and the CAM failed on them in the first try:
A small change of the pocket settings sorted that, with roughly half an hour added to the milling time. Turns out the CAM is stupid enough to leave material in the middle when the path width you configured doesn't add up to the width of the pocket well enough...
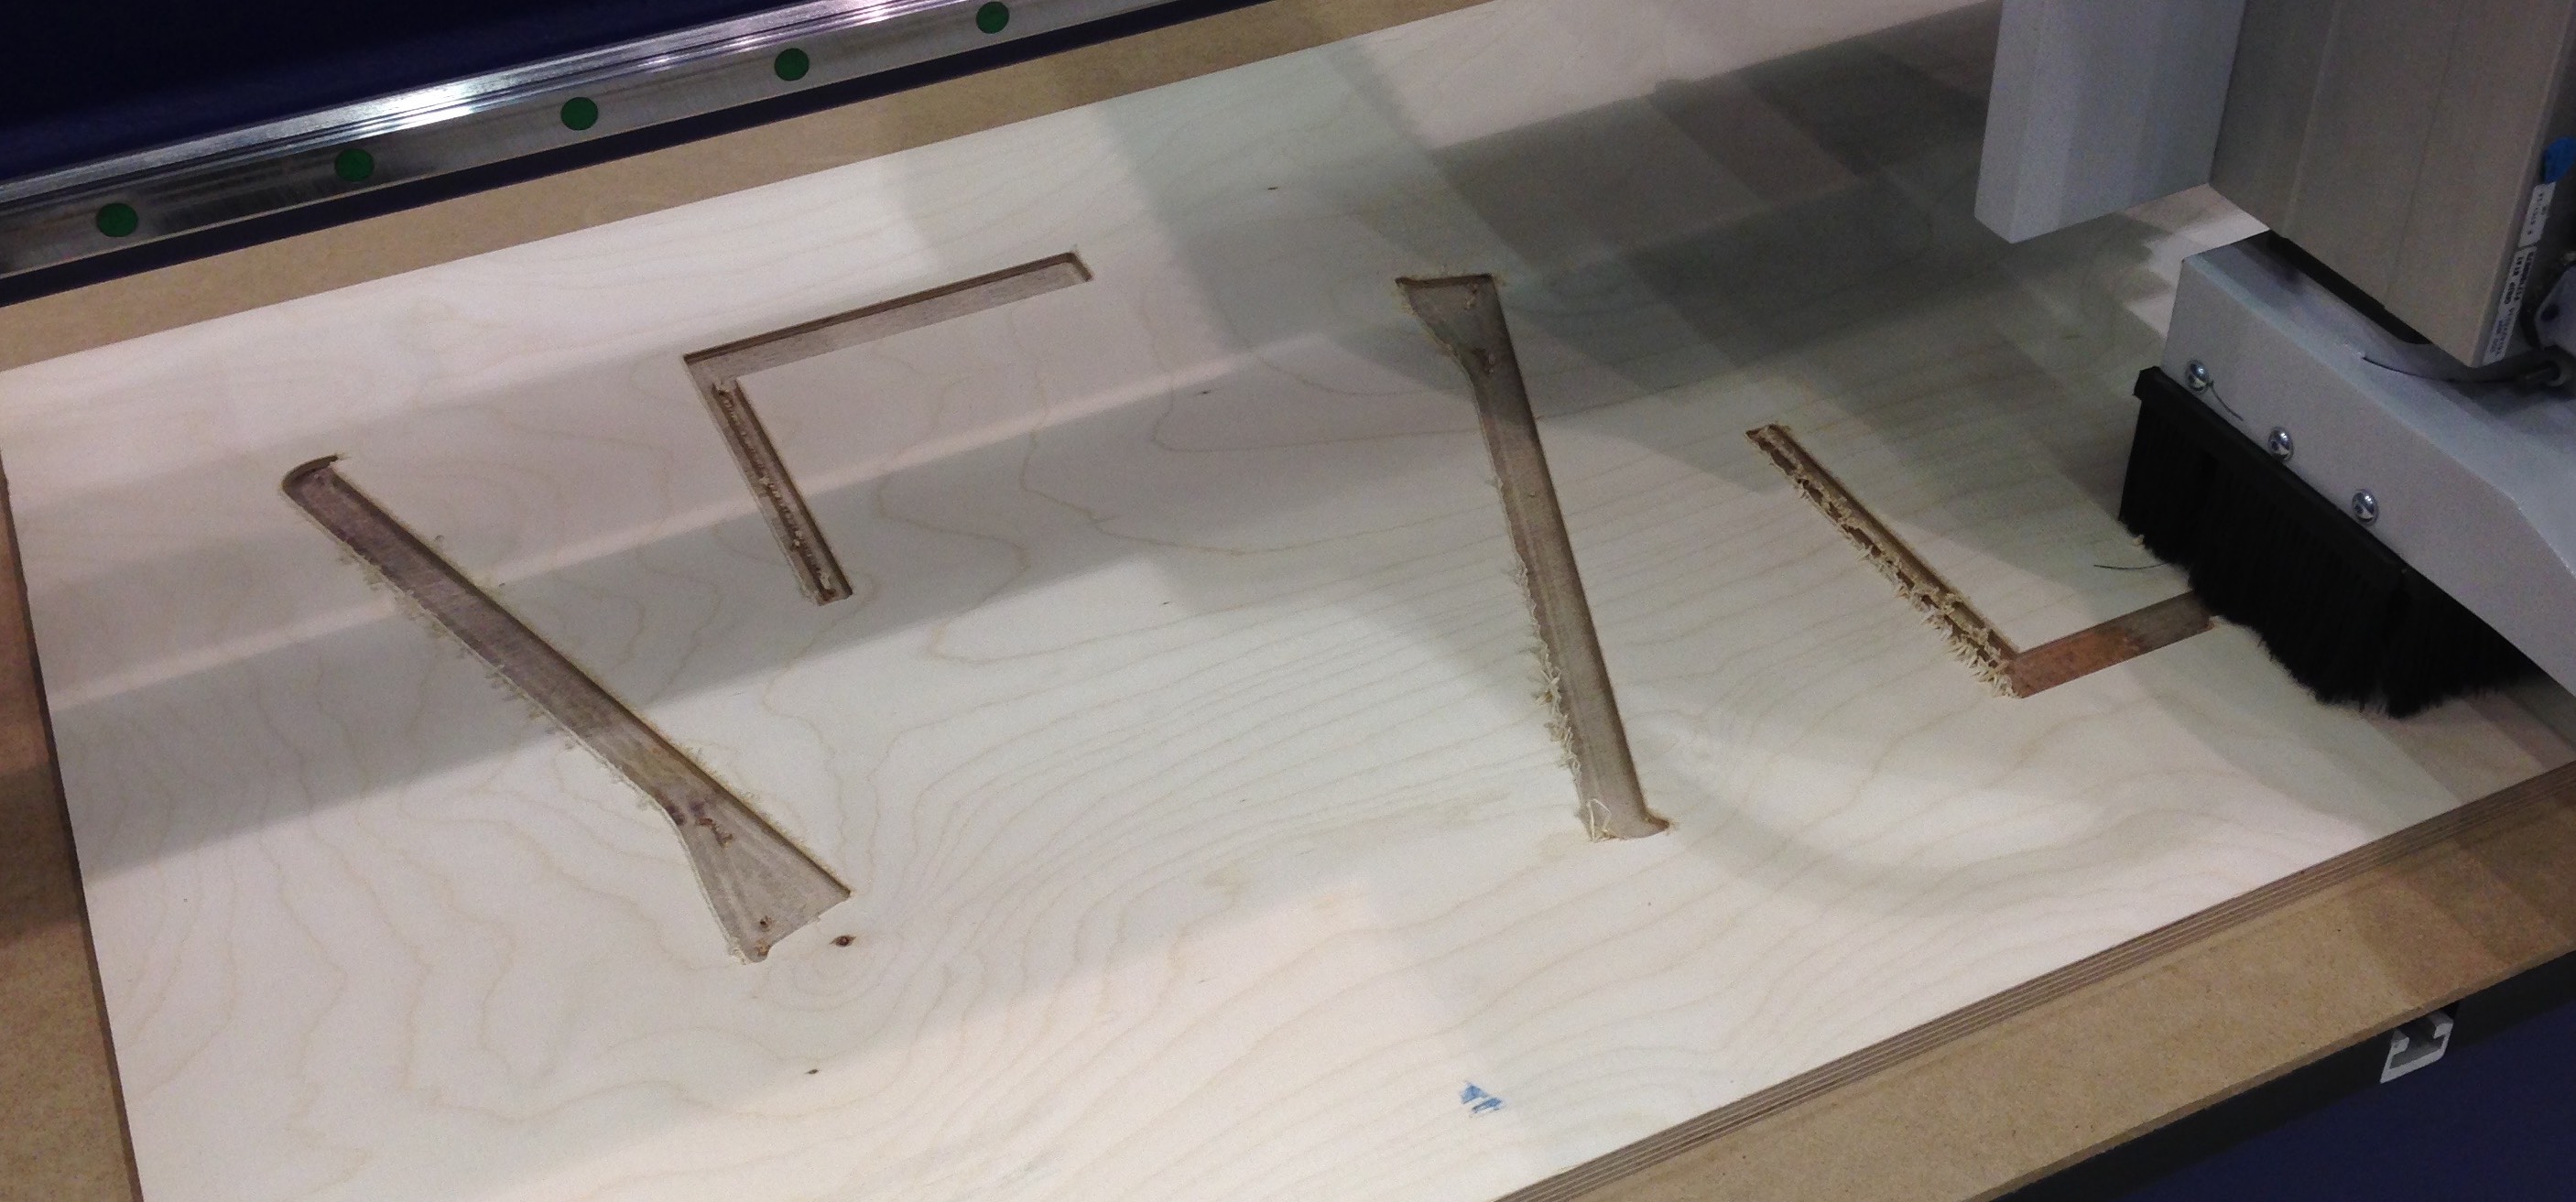
After the pockets, cutouts (including the screw holes) are milled. I was somewhat impressed as the vacuum is strong enough to hold even those rather small parts in place. Following that, the outsides are milled through. With a vacuum table that strong, we didn't need bridges.
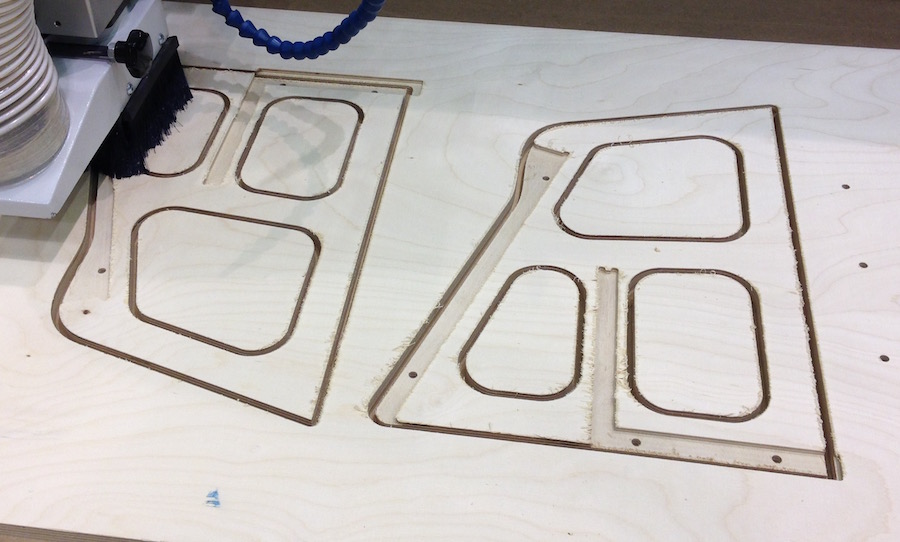
Wait a few more minutes (the outside contours actually cut relatively quickly) and the first panel is finally done:
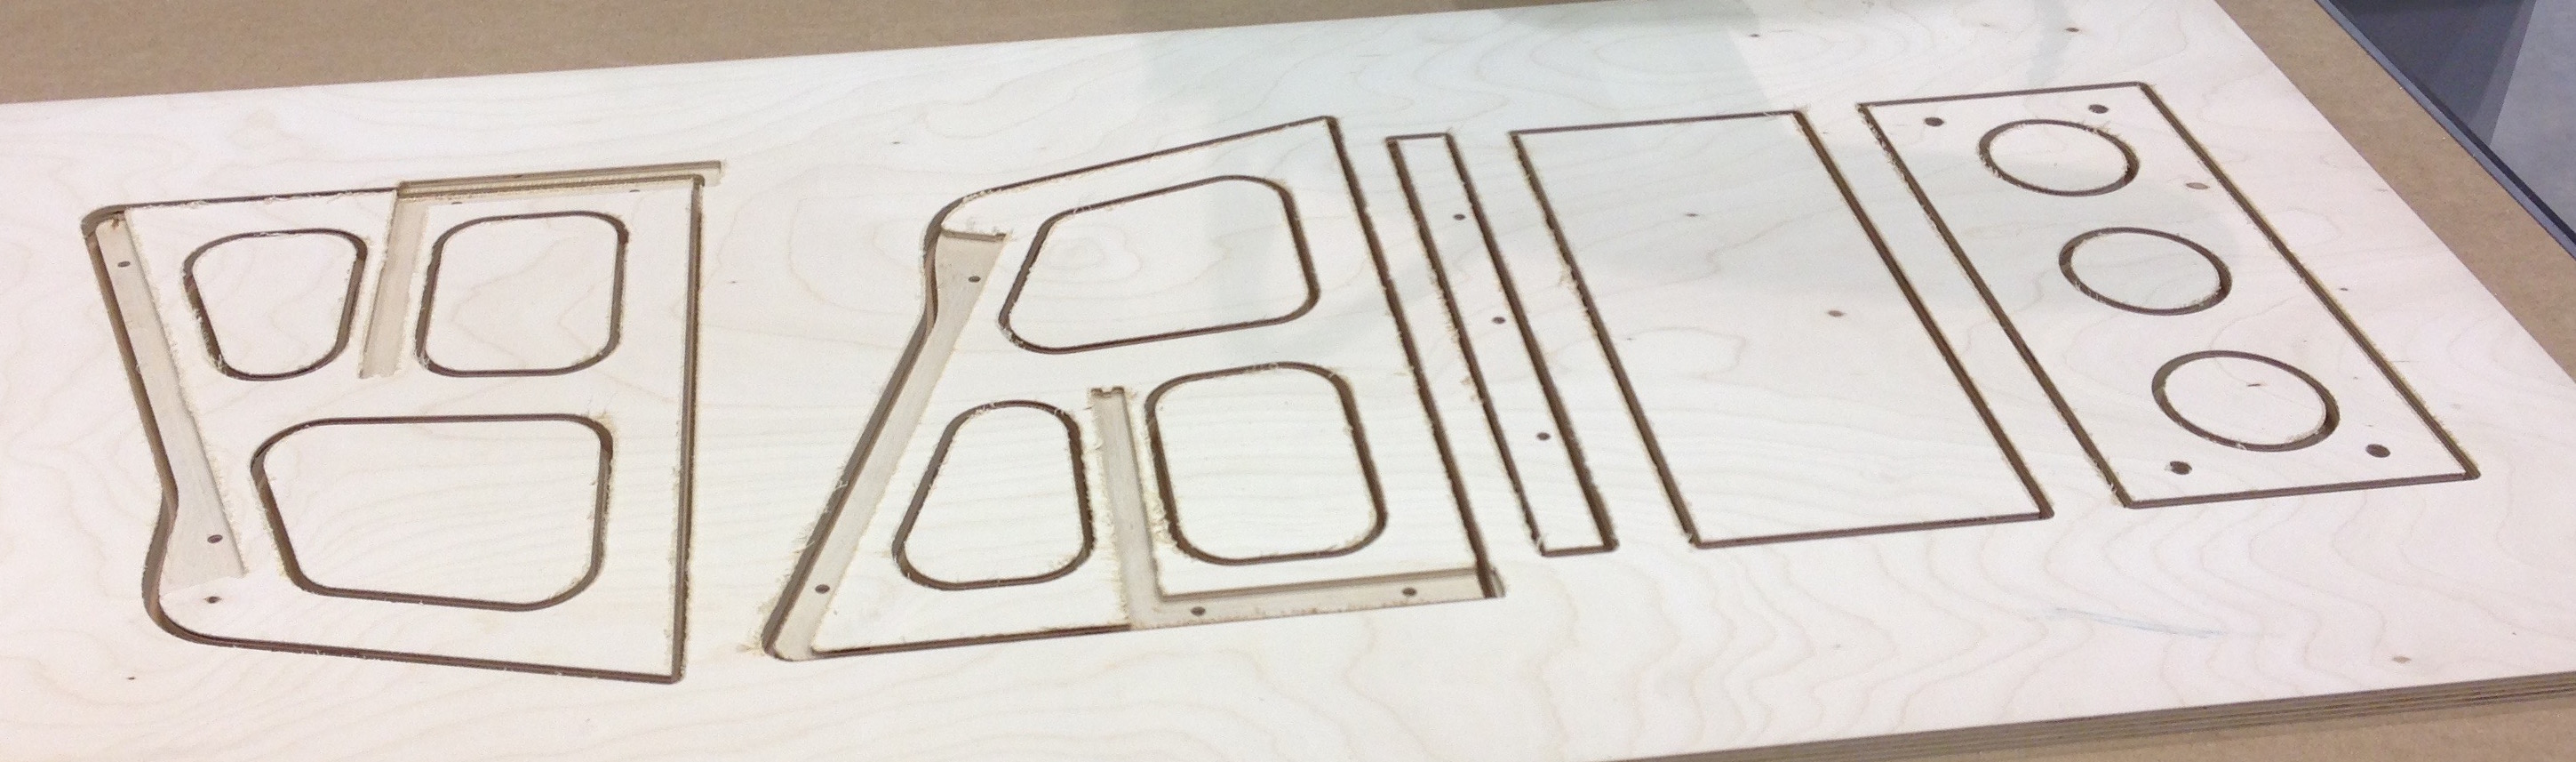
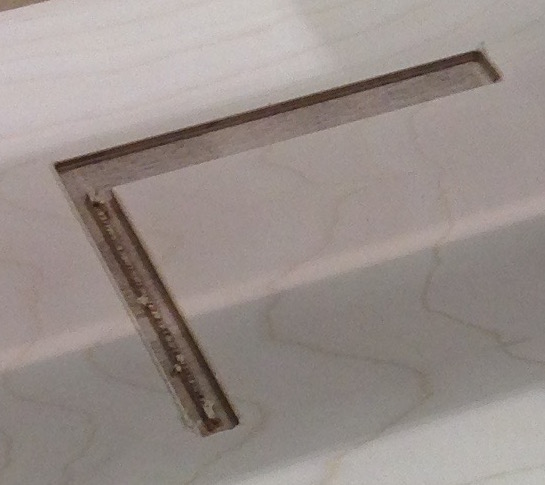
The only part the vacuum table couldn't hold in place was the thin stripe (it will end up at the front of the upper shelf...), and that one only started to move at the very last millimeters of cutting, so it still turned out fine.
The second panel is only the upper shelf, not worth its own photos. We couldn't use larger panels as those are roughly what fits into the car, so their size is not optimized to anything milling-wise. Half an hour of sanding and some drilling later, I could finally put together my shiny new laptop stand:

So, there is little left to do now. I need to dunk the parts in wood floor varnish before actually using it, and I might mill a new back before doing that - the round holes were quick to draw, but they don't match the side parts at all. Also, having some smaller holes in the lower shelf might be beneficial to the rather hot Macbook charger. Together with the desk plans, that might add up to another day of milling with our friends at Kamp-Lintfort...
final project -- weekly assignments -- about me -- fab academy
