
 The traces are taken directly from Neil page
Having already milled the hello board, I took this opportunity to learn from Vincent Dupuis how to etch boards (although it is strongly disapproved by Neil).
The board is then prepared with soldering paste. I use a stencil (rhodoid 0.1mm - laser cutted) to spread the paste.
All component (but plastic connectors) are placed, and the board is reflow soldered. The connectors are finally manually soldered.
Here is the final board:
The traces are taken directly from Neil page
Having already milled the hello board, I took this opportunity to learn from Vincent Dupuis how to etch boards (although it is strongly disapproved by Neil).
The board is then prepared with soldering paste. I use a stencil (rhodoid 0.1mm - laser cutted) to spread the paste.
All component (but plastic connectors) are placed, and the board is reflow soldered. The connectors are finally manually soldered.
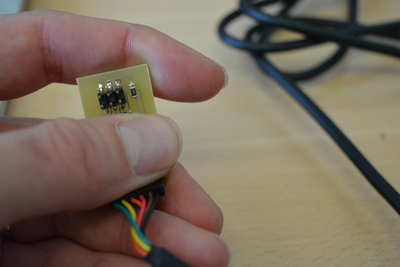
Here is the final board:

The board is connected as follows:
PATH=/Applications/Arduino-1.6.6.app/Contents/Java/hardware/tools/avr/bin/:$PATH
But, it is also mandatory to use the right config file.
Modify the Makefile to use -C /Applications/Arduino-1.6.6.app/Contents/Java/hardware/tools/avr/etc/avrdude.conf
Then everything works fine !
 After numerous trials, after double checking all soldering, reprogramming and so on, I found the solution !
Take a few seconds to look at the previous picture, and then click "here for the answer, and to see it working.