
Week 9
Mechanical Design
The ninth assignment is a group assignment to make a machine, including the end effector, build the passive parts and operate it manually and document the group project and your individual contribution
The build process begins.
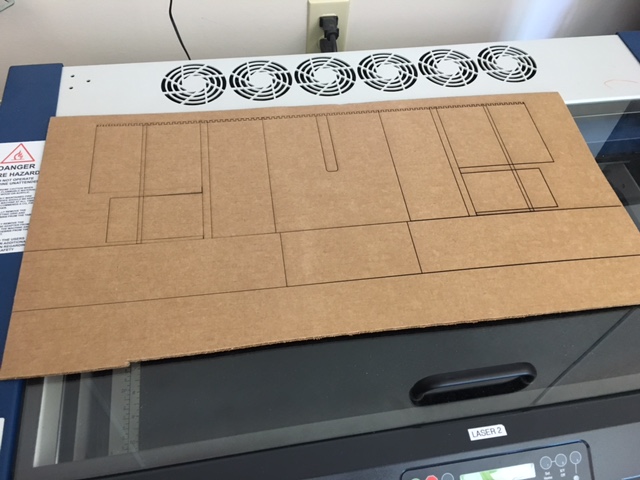
We used cardboard sheets and a laser cutter to cut and partially cut (cut half way through to facilitate bending) the cardboard into the desired shapes. We used a modified version of Nadia's files to make cardboard stages in order to build a stage that acts as a x,y, or z axis on a CNC machine. One could add more stages and make a fourth and fifth axis. This is an early attempt for individuals to make their own CNC machines without spending thousands or hundreds of thousands of dollars. Since our lab at Bakersfield, CA has four members in the course, we decided to each build a stage. With four working stages as a group we could potentially build a four axis CNC machine.
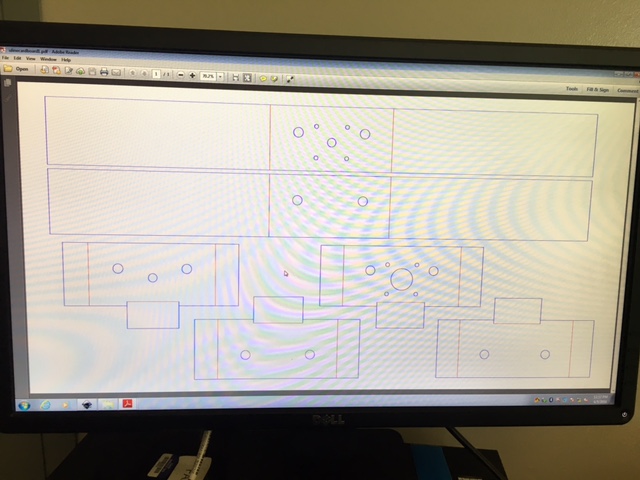
The pdf file used to make the cuts are color coded. The red lines are creases (half depth cuts with lower power laser) The blue lines are full power and cut clear through the cardboard. I had some difficulty as the carboard was a bit warped and in some places did not burn all the way through.

I had to throw this board away and redo it. You will notice the top of the board does not have the long strip of the bottom part of the board. The laser was set to a higher power level than it should have been as the board I was using was thinner. This caused red lines( creases) to be cut instead of scored. So I could not fold the part as it was cut off. One interesting feature you might notice are the two parallel cuts that look like a zipper. (parametric cuts). This was done to splice pieces together. Our laser cutter does not have a large enough bed to make the piece from in one cut. These parametric designs allow us to splicre cardboard with some strength and precision. I was rather amazed how well the joints fit and with the folds and the thoughtful design the strenghth and precision were quite impressive. I would never have thought one could make a precision machine with something made out of cardboard. I have since fell in love with carboard as it is great for rapid-cheap prototypeing.
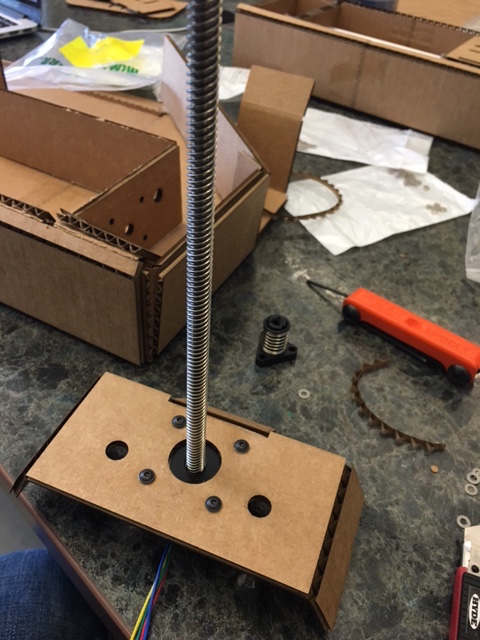
I have mounted the motor and stopped as the small m3 bolts needed to attach the moveable slider were too short. I purchased some longer ones at Lowes and plan to give the extras to my classmates during class.
Waiting to finish and combine my machine with my fellow Bakersfield classmates.
OK, I purchased the M3 bolts and assembled my stage. Two things I noticed was that there seems to be some friction along the edges of the stage.I am a bit concerned about the proper amount of sliding friction and if this will cause some errors. I also noticed that the inner sliding stage seems like it will cause more friction when mounted to the second stage. An easy solution would be to put some spacers (washers) between the two stages. You can see on the far right, the design did not have holes for the rods to go through. We modified the design to include the holes and some mountihg holes on the sliding stage.
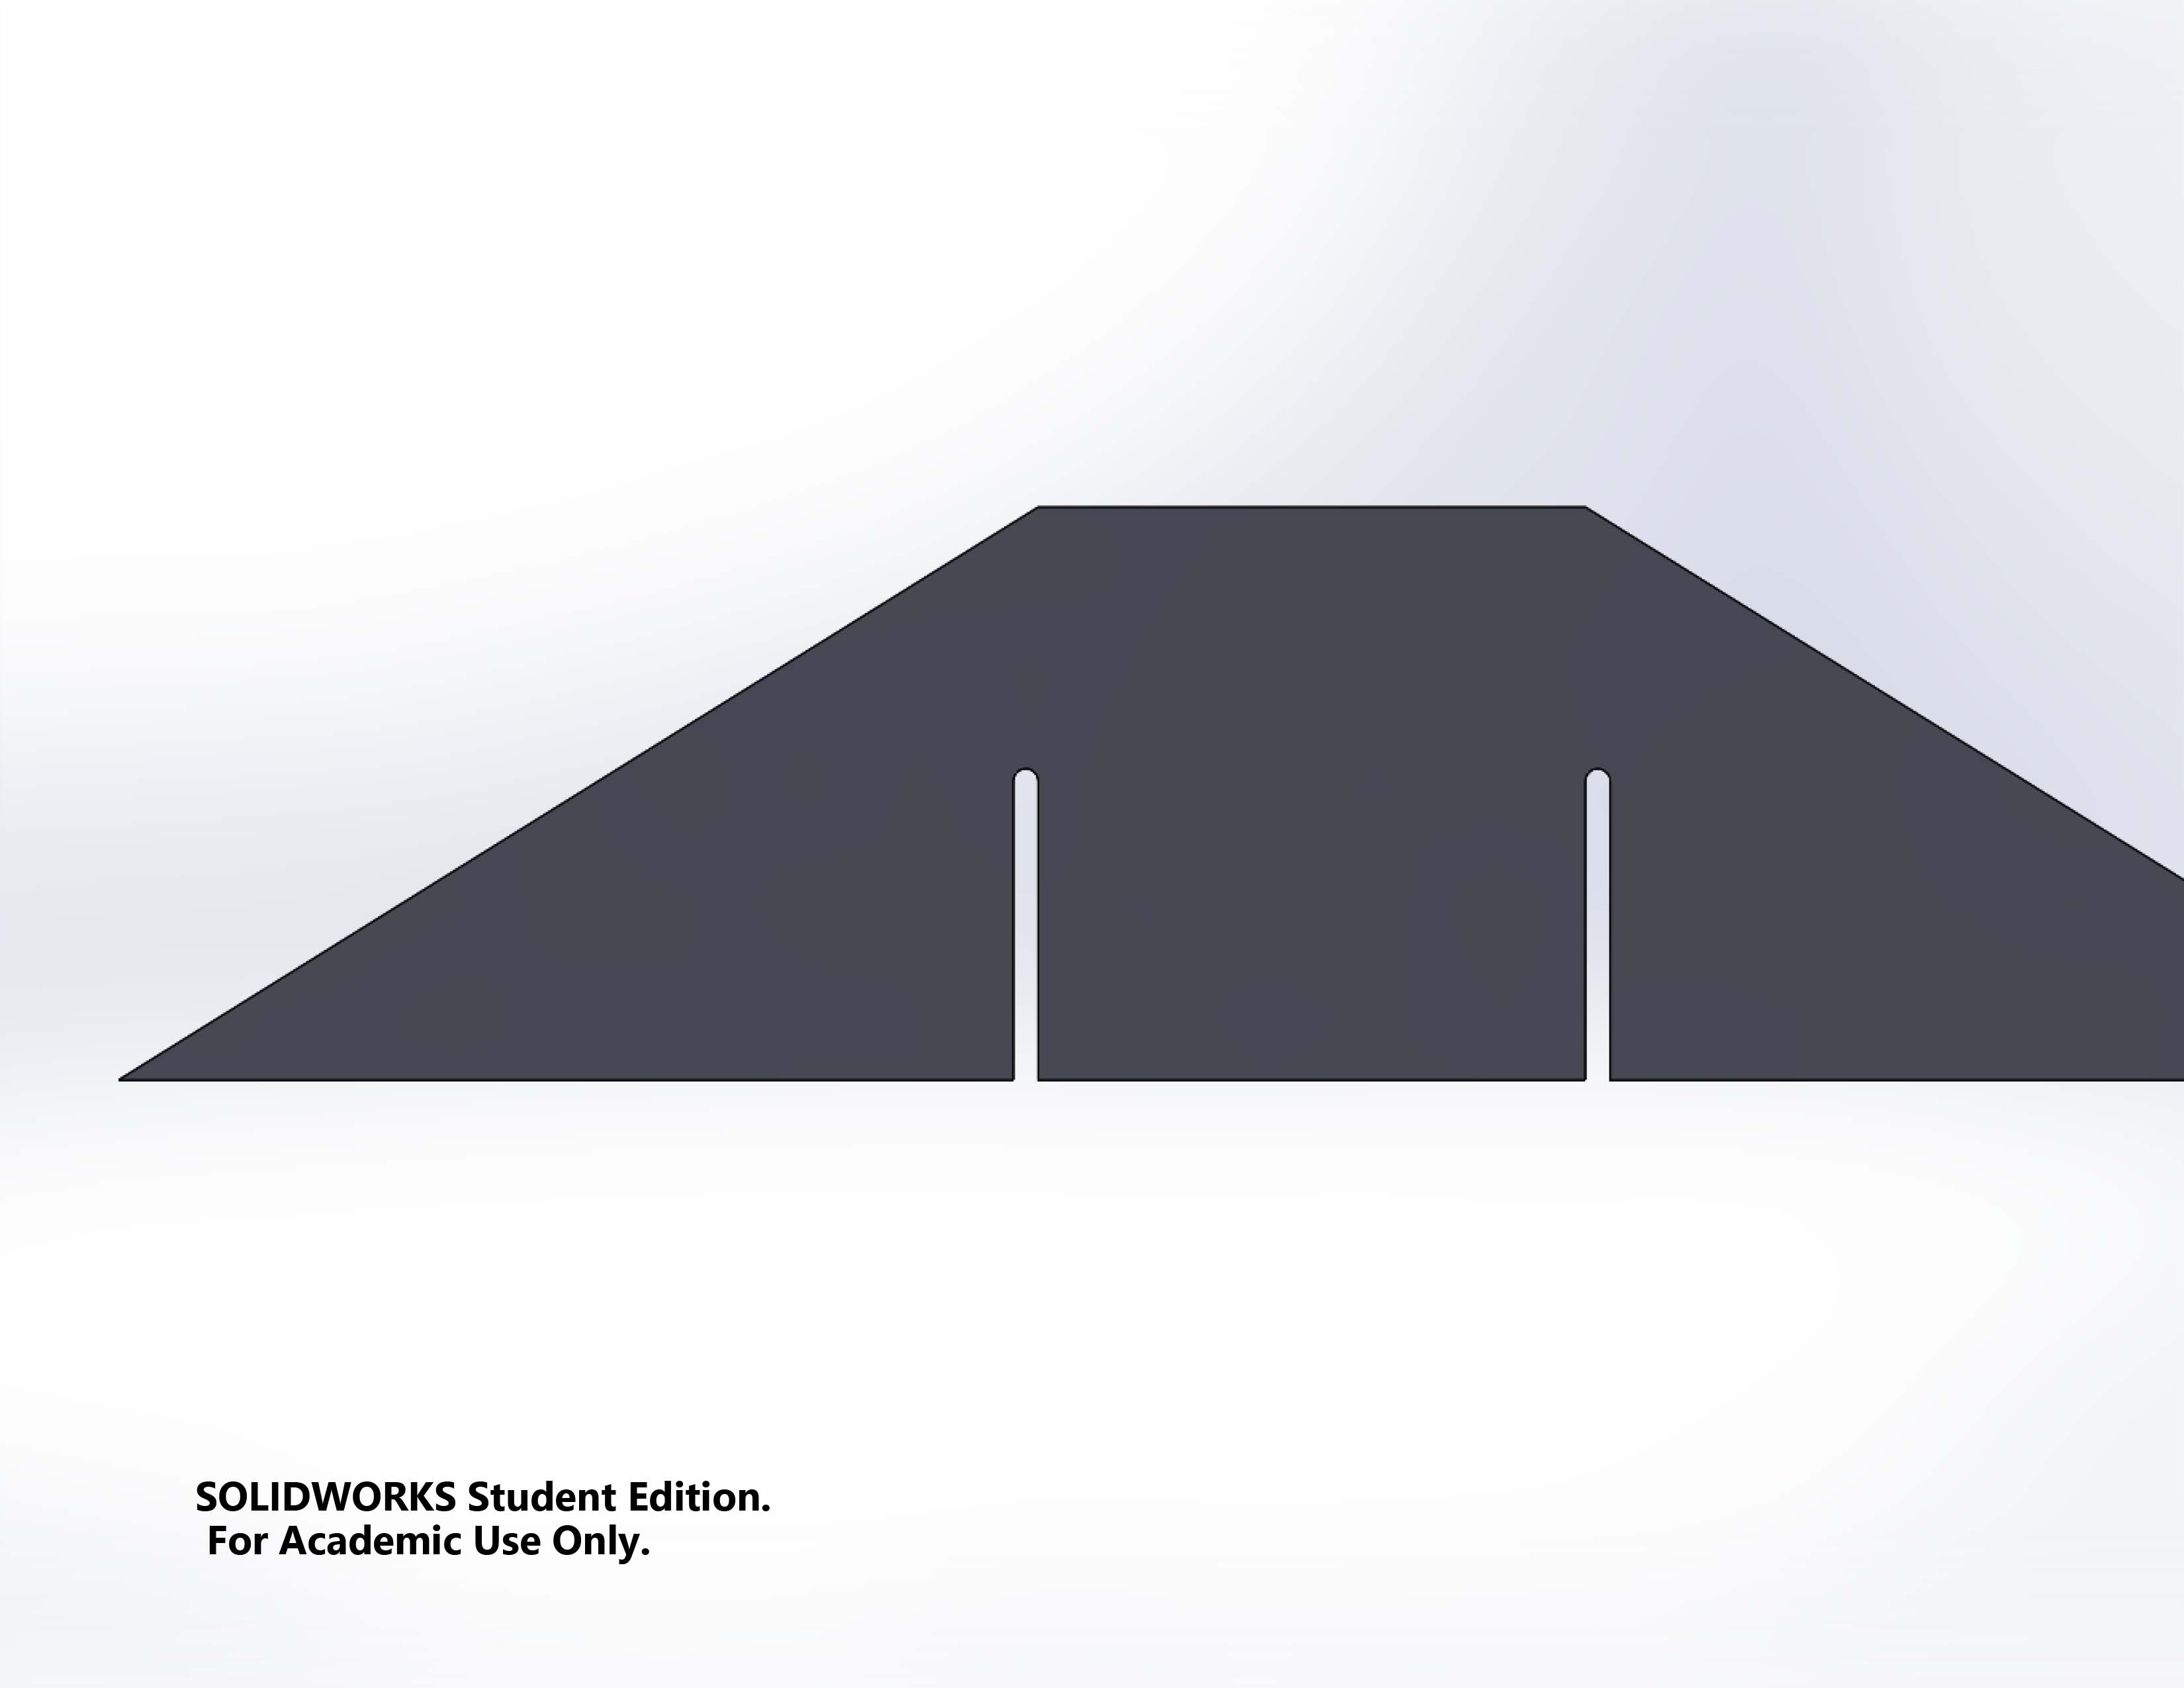
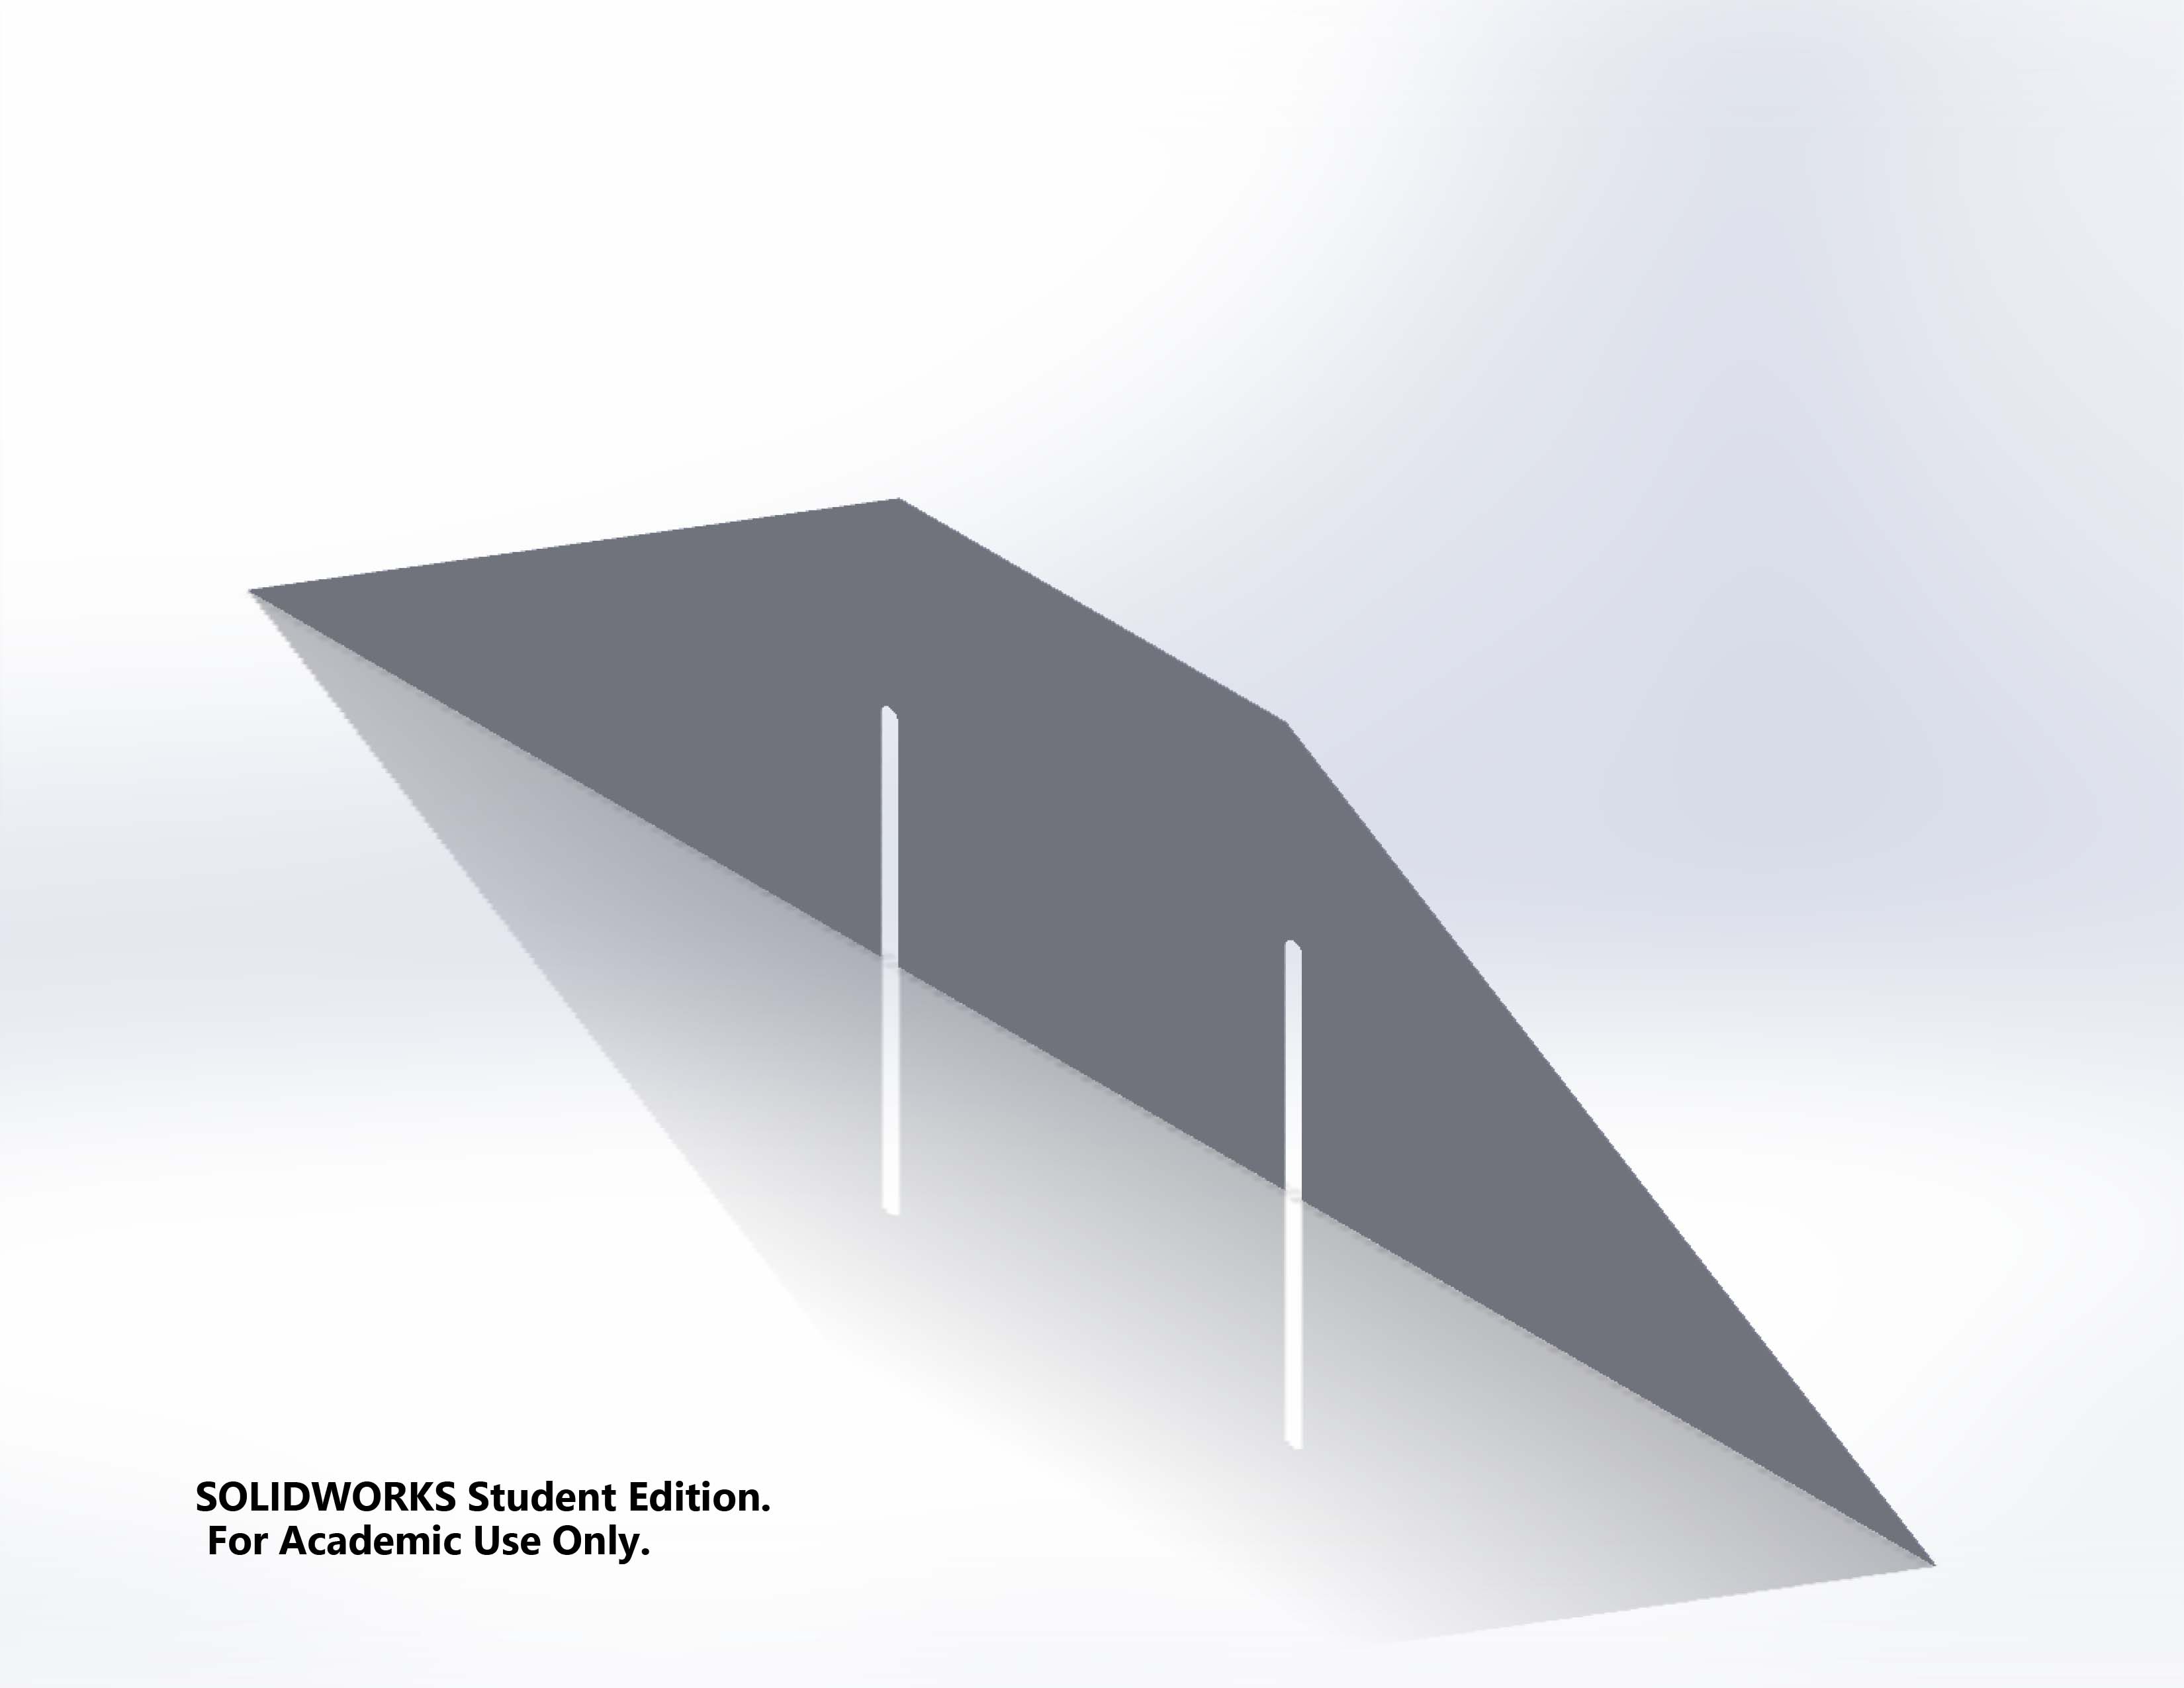
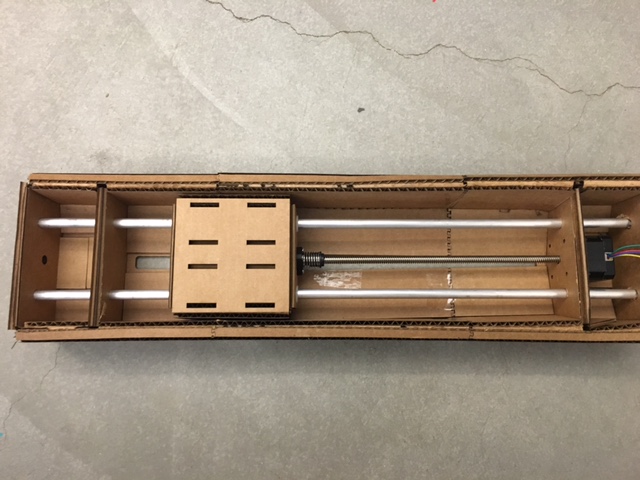
Above, you can see two pieces that I designed to make the base of our furball occupier machine. One needs to lasercut two of both the long and short pieces. The four pieces parametrically fit together to form the base of the furball occupier machine. I had to design these parts in Los Angeles, having only my own machine to work with. I did not have access to a laser cutter, so I sent the files electonically to Matt. I was rather happy to hear that the stand worked perfectly with no modifications. So the four of us at Bakersfield each agreed on group tasks. Since I was absent from the lab during the week since I live in LA, I was assigned a task that did not demand my presence at the lab. I agreed that I could design the machine stand in LA. I also built a stage as all of us built a stage.You can look at our group machine, watch a video, and see team responsibilities at http://archive.fabacademy.org/archives/2016/fablabcaliforniastate/You can also see multiple versions of file types for the machine base I designed and the files needed to make the cardboard stages that Nadia designed and we modified...in the left side of the browser window in the file repository of my website. Although we had difficulty getting the Gestalt boards to talk properly, and late shipment of needed parts, we finished on time. We had originally planned to do a three or four stage machine, but time did not permit. In the future, I plan to redo this project with my high school students. I REALLY like the idea of building your own CNC devices at a low cost. Once you figure out the basics, you can start making your own personal, low cost, fablab. I think students are way more creative than adults, so I look forward to what ideas they come up with, once they learn the basic principles.