Week05 - 3D scanning and printing //////
Assignment:
* test the design rules for your printer(s) (group project)
* design and 3D print an object (small, few cm) that could not be made subtractively
* 3D scan an object (and optionally print it) (extra credit: make your own scanner)
3D SCANNING MODELA
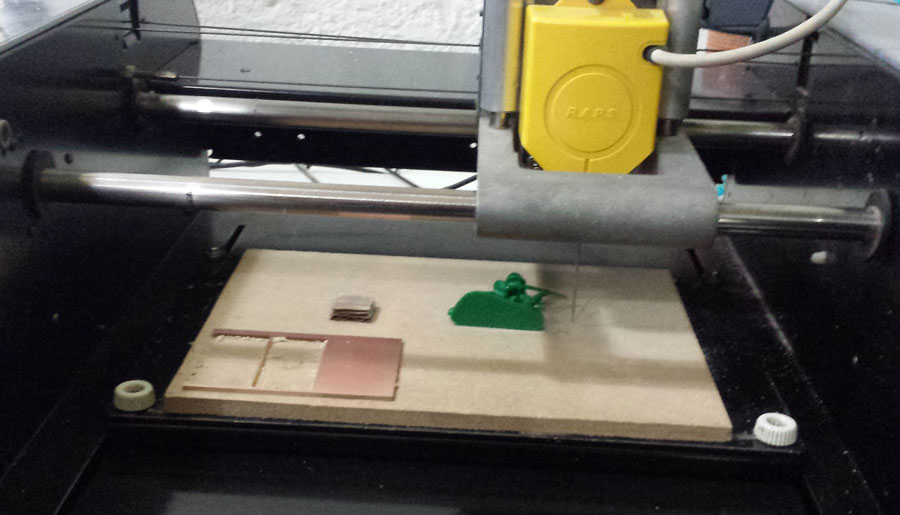
I started the assignment using the Roland Modela. We scanned a little soldier, it took us like 9hs each side, but the result was very good, it has a very good resolution. 3D Scanning on the Modela is great to get high quality 3D models that can be used for 3D printing, casting and molding.
SET UP
Open Dr.Pizca software, set up the piece to be scanned in the machine, it can be done with tape or plasticine.
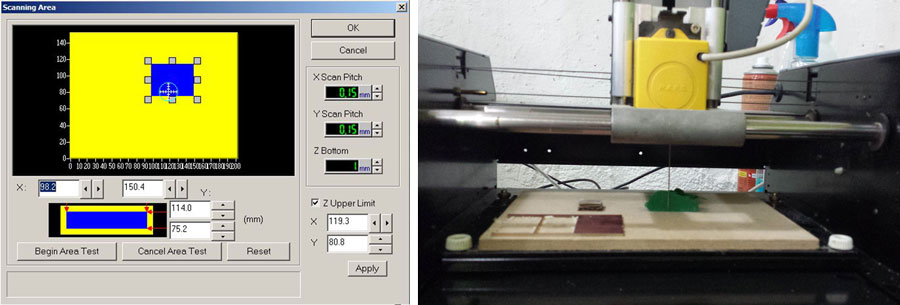
Set up the area to be scanned:
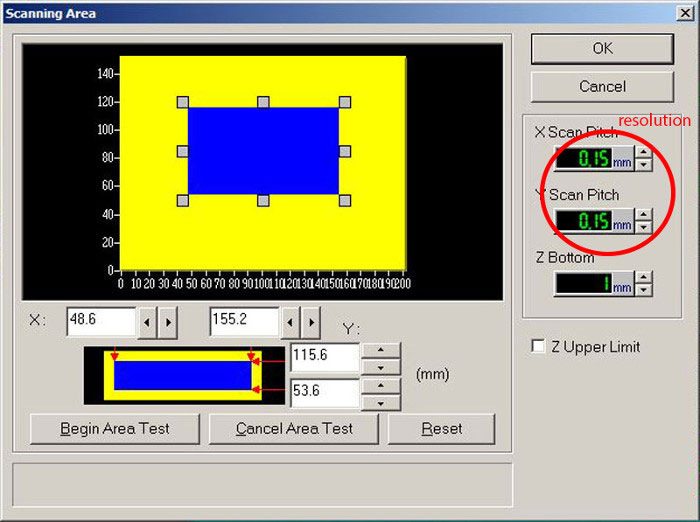
Setting up the highest point (Z Upper Limit).
When the scanned has finished you can save the model as binary or as an .stl file.

The day after we made the same steps for the other side of the soldier but we did it wrong, we set up the upper side of the soldier wrong, so that we scanned the head again in order to blend all the models in one.
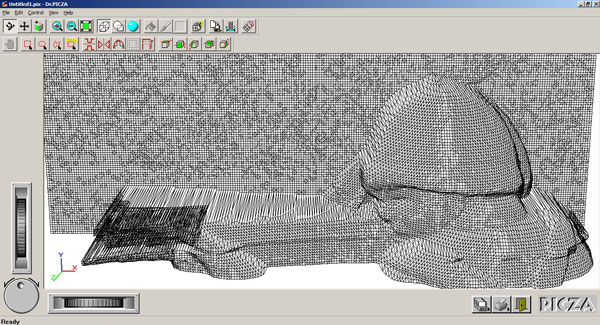
Model made by Jisun in Blender:
3DSCANNING KINECT
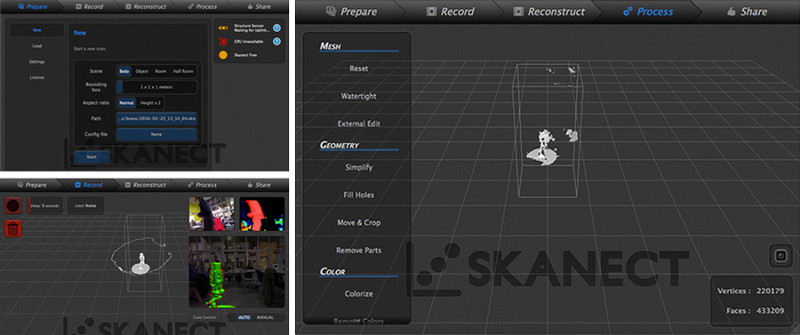
Scanning with another technique, using the kinect takes much less time and it is very fan to use, but on the other hand the files have less resolution than scanning with the Modela. I used Skanect.
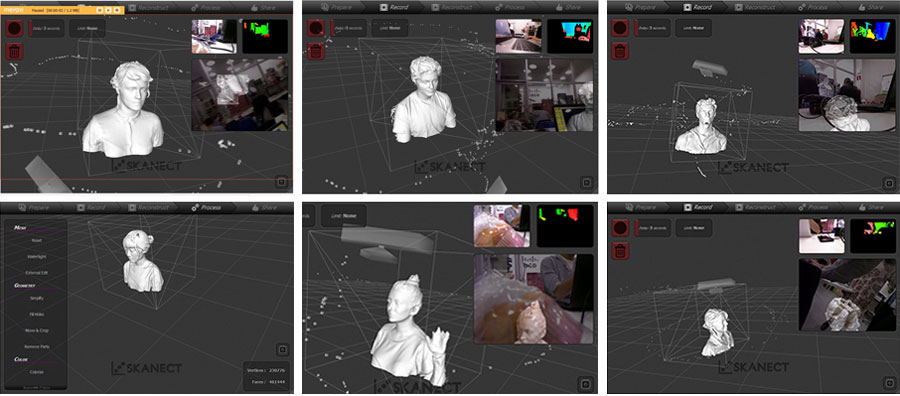
First Arnau, João, Guillaume and i made several test with a robot toy, but it didn't work well, could be due to the robot was very small or the bounding box was too big for the robot. We left the robot still and move around it.
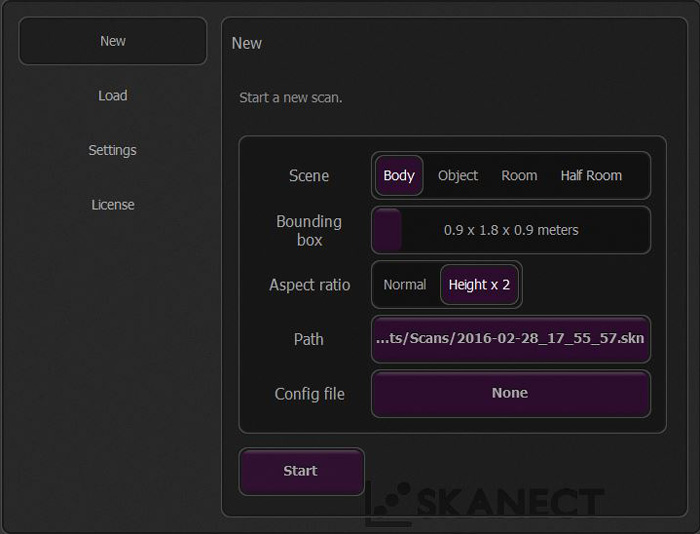
Then we tried with a stand up person (myself) with this values and it worked much better:
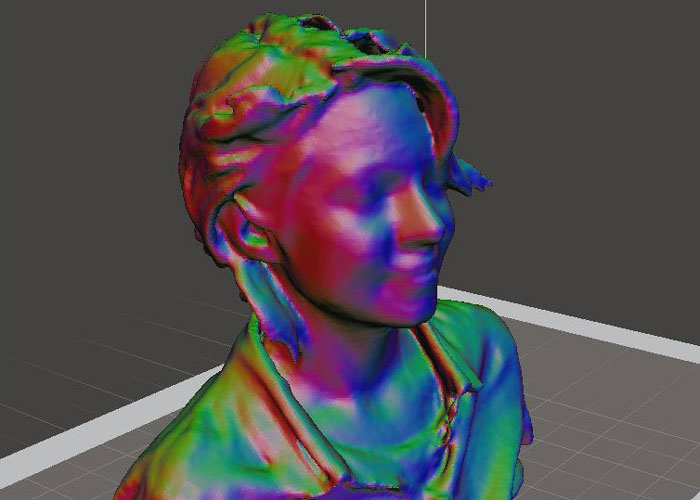
But the resolution is not so good yet, so we tried scanning only the face with this values and it worked even much better:
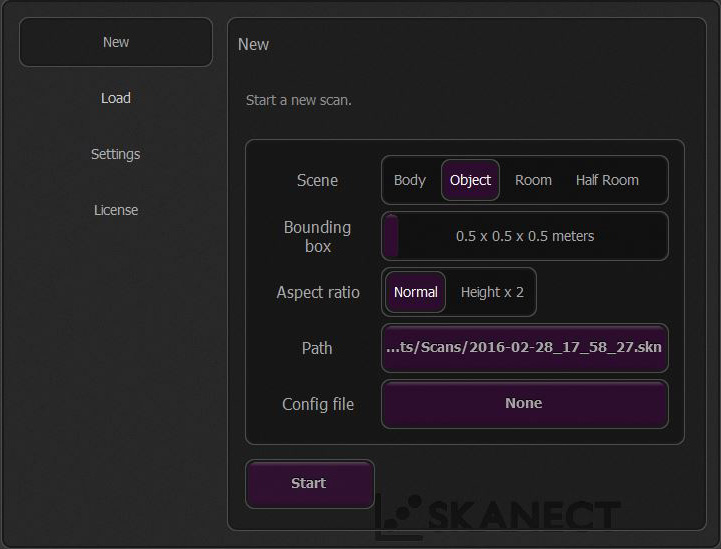
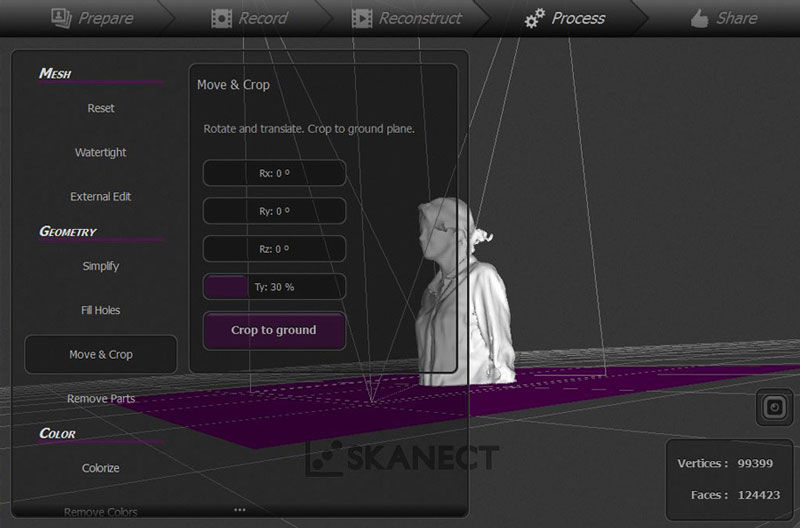
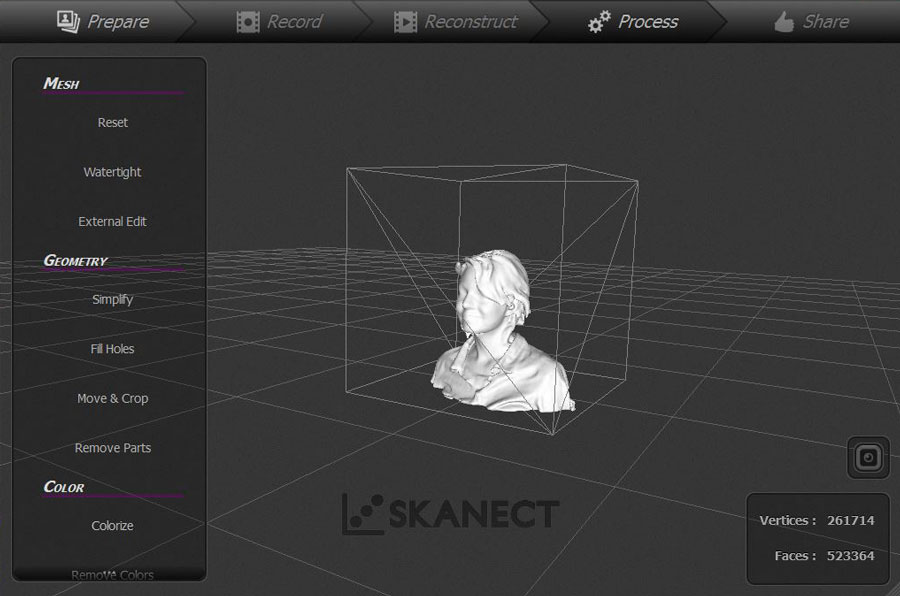
You can edit several settings on the Skanect that helps to the model like Fill Holes, Moves & Crop and Remove Parts, then you can export the model as an .stl file.
Video - Kinect
We installed the software in my computer for the ram memory, so I have been practicing quite a lot with the Skanect software. It was very fun.
3D PRINTING
DESIGN RULES
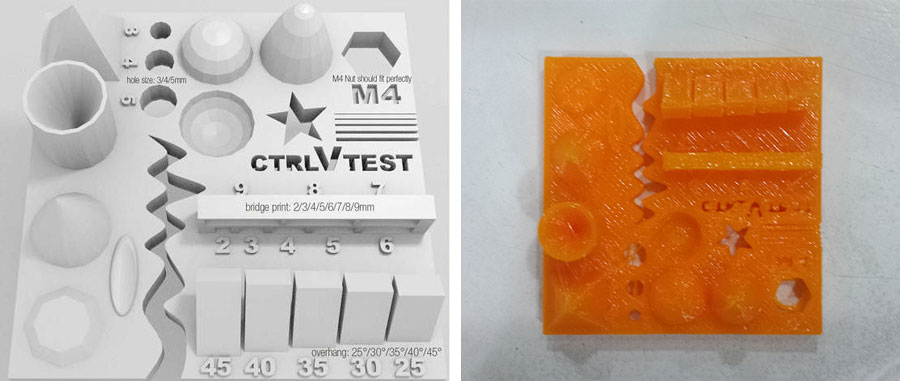
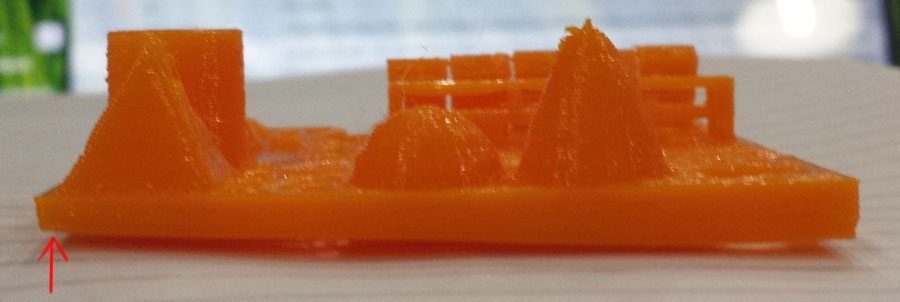
We used this test (below), but we did it wrong because we scaled the model, do not scale the model:
The printer settings should be set to its lowest possible layer height (0.1 mm in most cases), with an infill of approximately 33%, in order to ensure that all the details come out correctly. Once the object has finished printing, you can check to make sure everything is calibrated and working correctly by using the following methods below:
Size: the object is 4 x 50 x 50 mm (baseplate) — measure with a caliper
Hole size: 3 holes (3/4/5mm) — measure with a caliper/drill
Nut size: M4 nut should fit perfectly — insert an M4 nut; it should need a little pressure
Fine details: pyramid, cone, all numbers — check if all things look nice and smooth
Rounded print: wave, half sphere — check if all things look nice and smooth
Minimum distance between walls: 0.1/0.2/0.3/0.4/0.5 mm — depending on your nozzle size and slicer settings you will get different results
Overhang: 25°/30°/35°/40°/45° — depending on printed material/cooling, these will not be as seen on the rendering provided
Flatness: all flat areas — these should be flat with no gaps
Dowload test
PROBLEMS WITH THE PRINTING TEST (besides the scale):
Warping, how to avoid it:
* Layer hight (recommended 0.2 or 0.3)
* Fill density (recommended 15%, 20% or 25% depending on the piece)

* Add brim, printing spots, raft (in case the piece has few points of contact) or something manually as little horizontal lines, other option is heating the space or the platform, so that the piece doesn't cool down so quickly.
* Retraction (recommended minimum travel 1.5mm).
* We sent the model from cura to the Formbytes, but the origins are not the same, if the piece is not symmetrical you have to rotate it.
DESIGN A 3D OBJECT
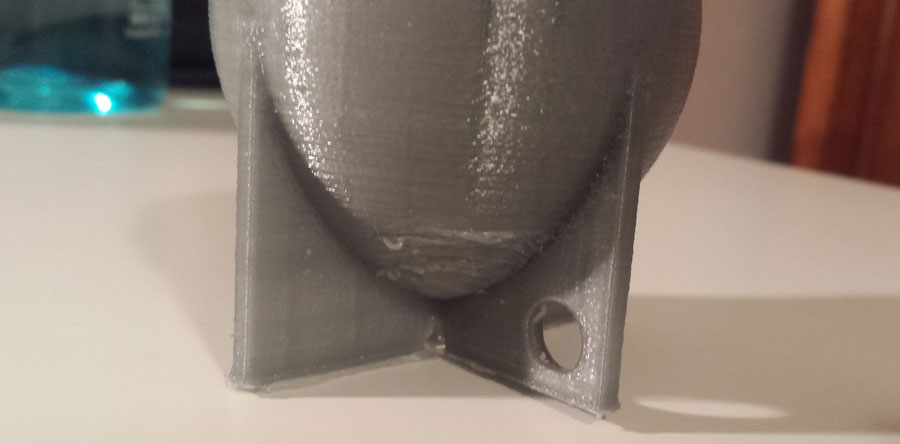
For the printing part I used the Formbytes, I made a model in Rhino of a "mate" (typical drink from Uruguay), but you can't drink or eat from a PLA printed object, one option is trying with a food grade epoxy and coating the printed object with a thick layer of it.
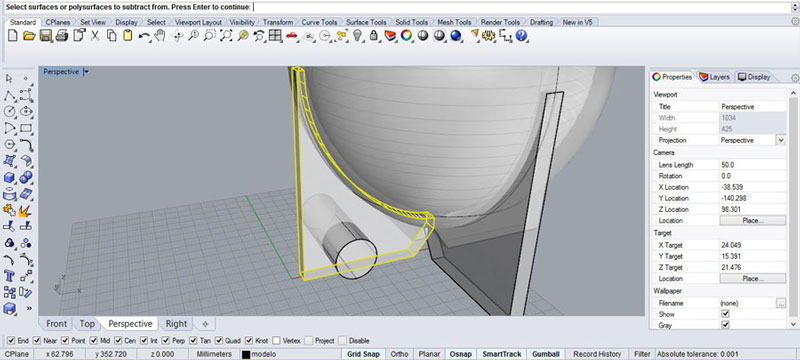
First I did the sketch in autocad, saved it as a jpg file and opened it in Rhino. (Command:Picture Frame, view front).
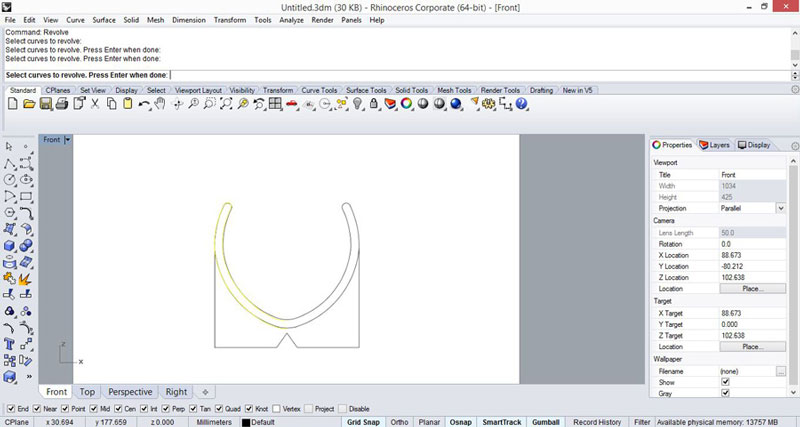
For doing the solid I used only Revolve command and Extrude.
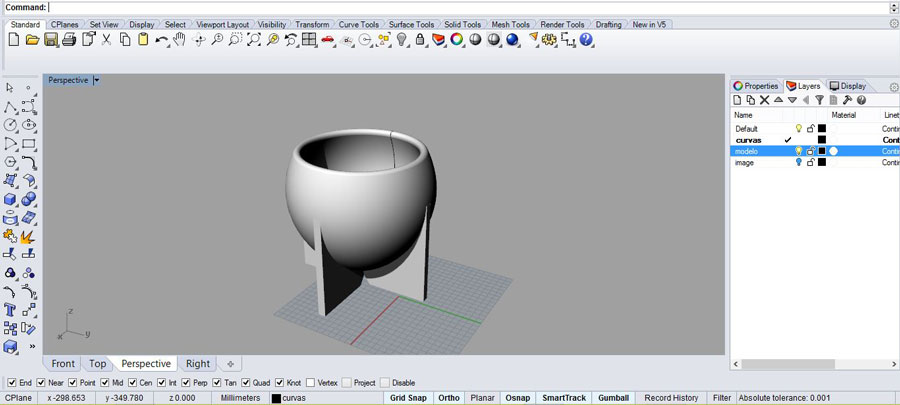
Then I removed some parts with the command BooleanDifference.
Steps that I did before start printing:
PLATE:
* Remove and clean the plate on both sides
* Put hair spray (for bed adhesion)
* Check leveling
FILE:
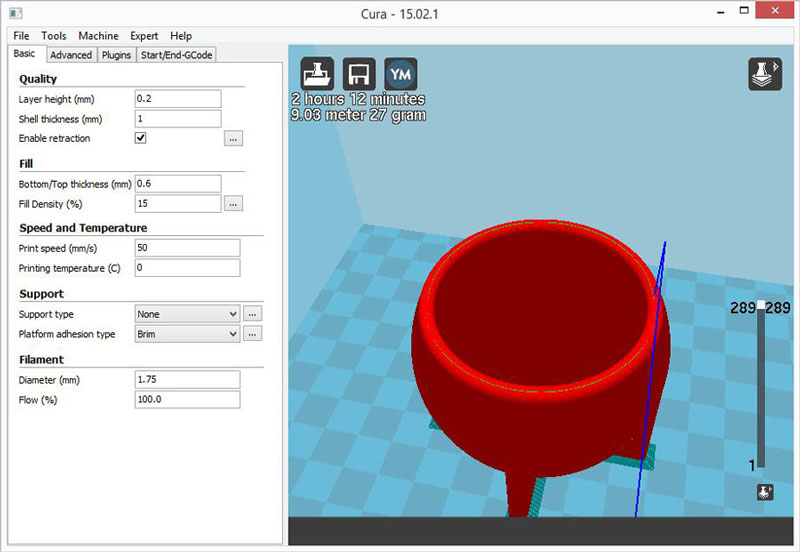
* Export the file as an stl.
* Open the stl file in Cura (version 15.02.1)
* Put the Settings (Cura)
* Check the layers
* Save the G-code in the sd card

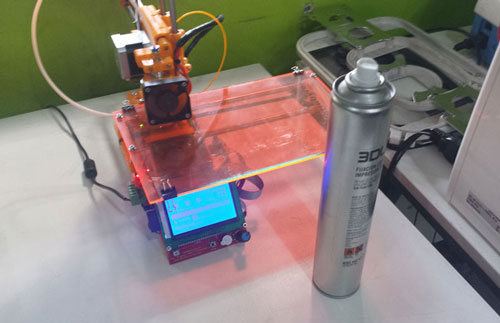
FORMBYTES:
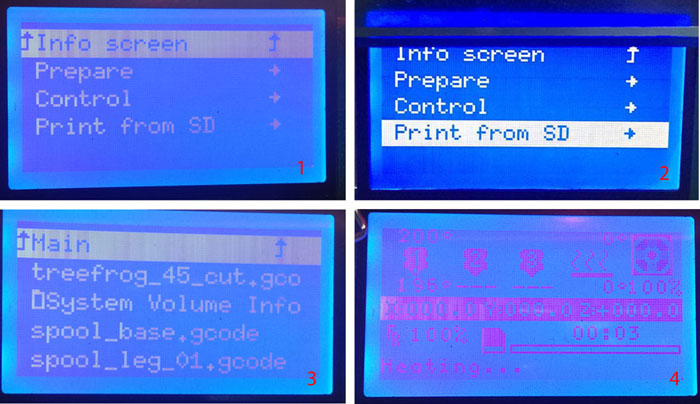
* Put the sd card
* Choose the file
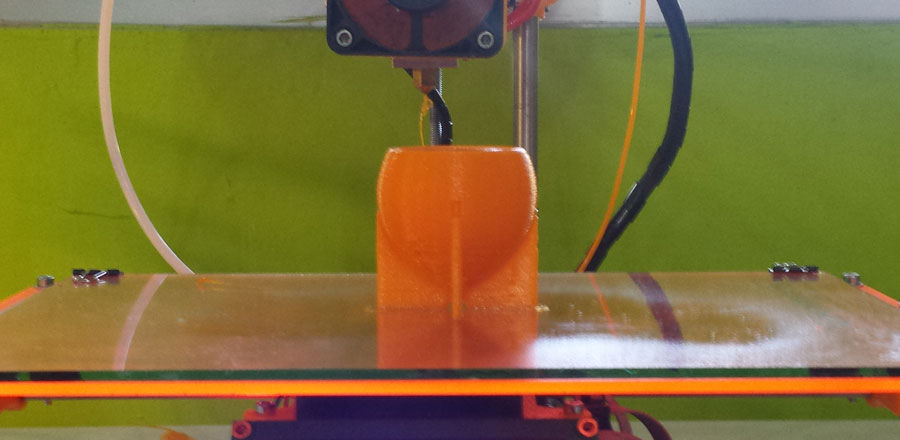
First test h=48mm:
I did a test with a smaller model (I scaled the original model (96mm) in cura), the lower part of the curve was not printed well, colud be for the overhang.

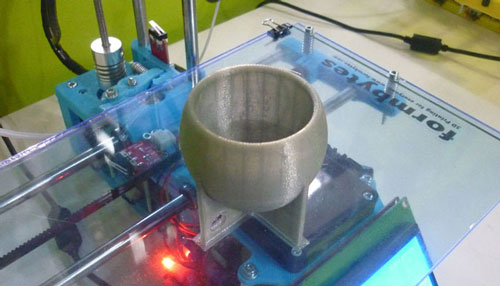
Second test h=58mm:
The lower part of the curve was not printed well either, but not as much like the first test.
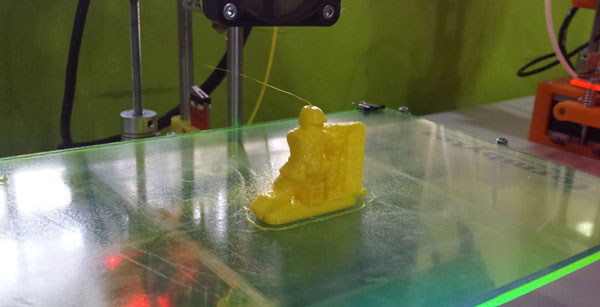
The scanned soldier printed:
Download file (mate)
Download scanned-face
Download scanned-soldier
home