Week.03 Computer-Controlled Cutting
CAD Modelling
The packaging box sols
I decided to spend the time for this assignment producing something useful for my Final Project, that consists in the production of customized insoles for shoes and I would try to produce a prototype of the packaging.
The content
The customized soles will be produced by 3D printer in the next few weeks. At the moment I have decided to prepare only a rough outline that takes into account the maximum dimensions. The idea is to consider the customized soles like a precious object kept in a customized box.


The Core
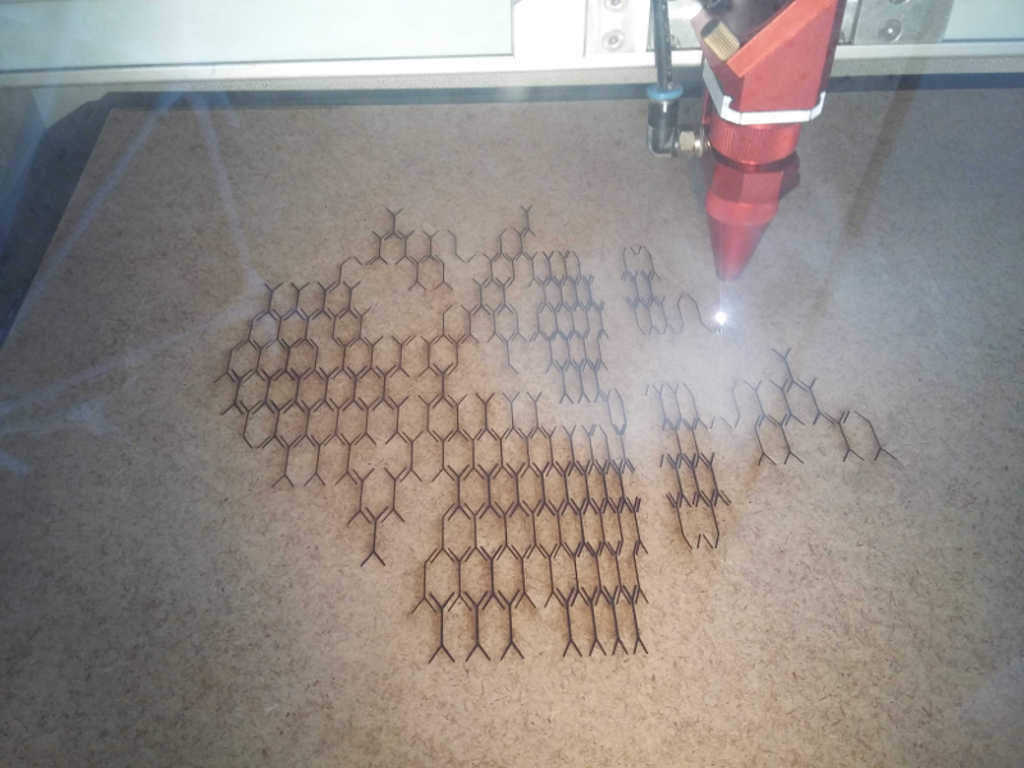
The inner core is made from a 3 mm cardboard strip placed parallel to the X and Y axes to form a mesh grid whit a press fit joint.
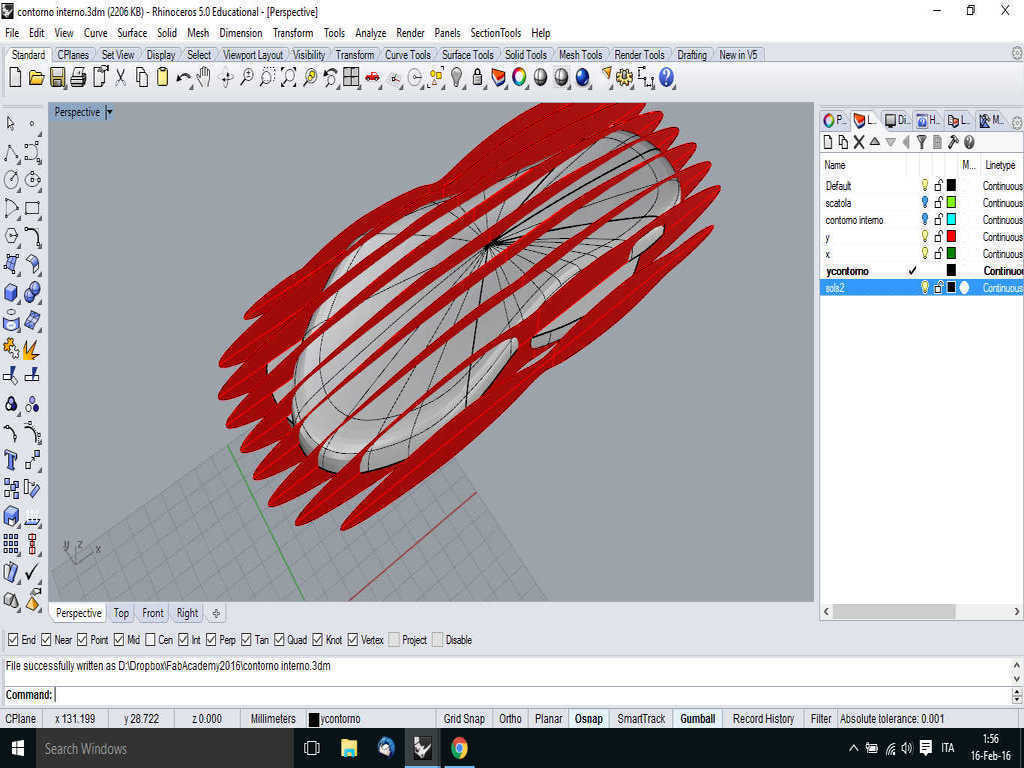
The shape of the core is designed to accommodate custom soles and is divided into two parts along the centreline to allow the opening.
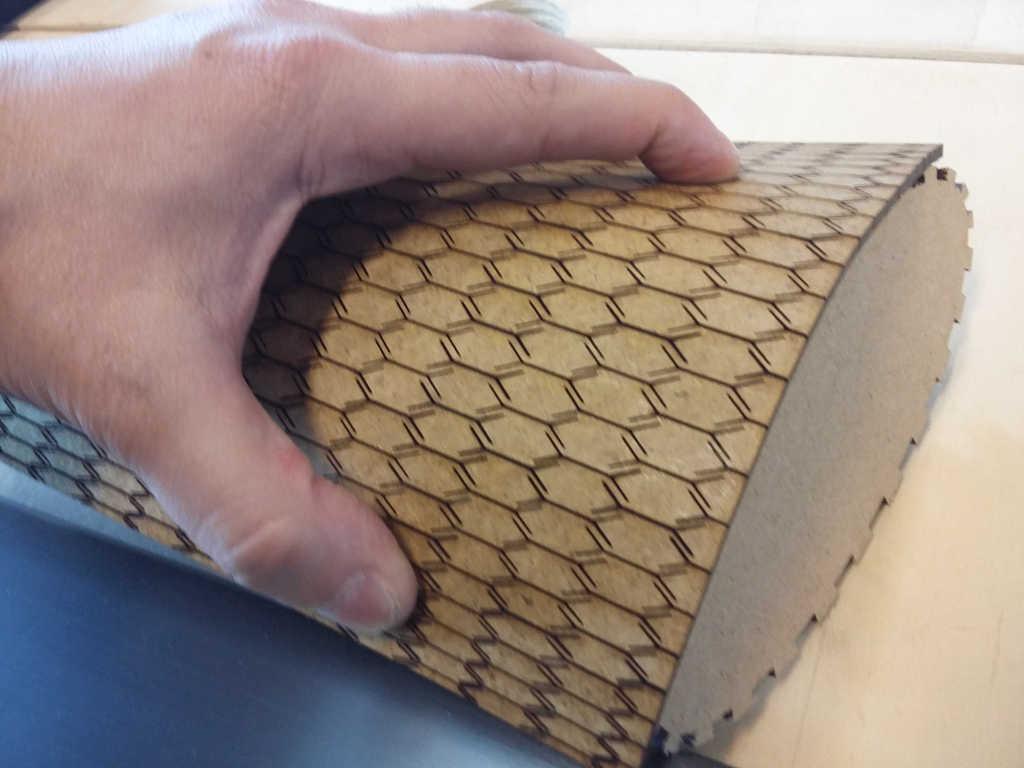
The Box
The outer box has an oval section. The surface is flexible thanks to the patterns usually used to bend the plywood. The pressure joints allow to fix the lateral faces and open/close the box

Workflow
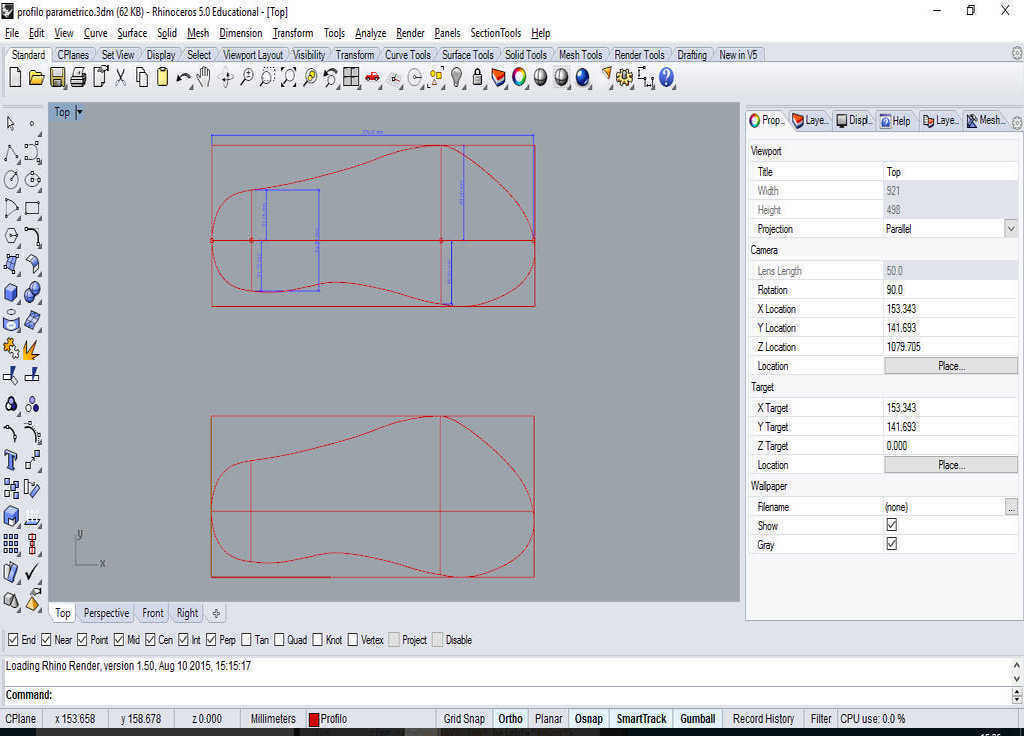
I started by a generic profile of sols

I modelled a 3D volume to define a sols space in the core of the box.
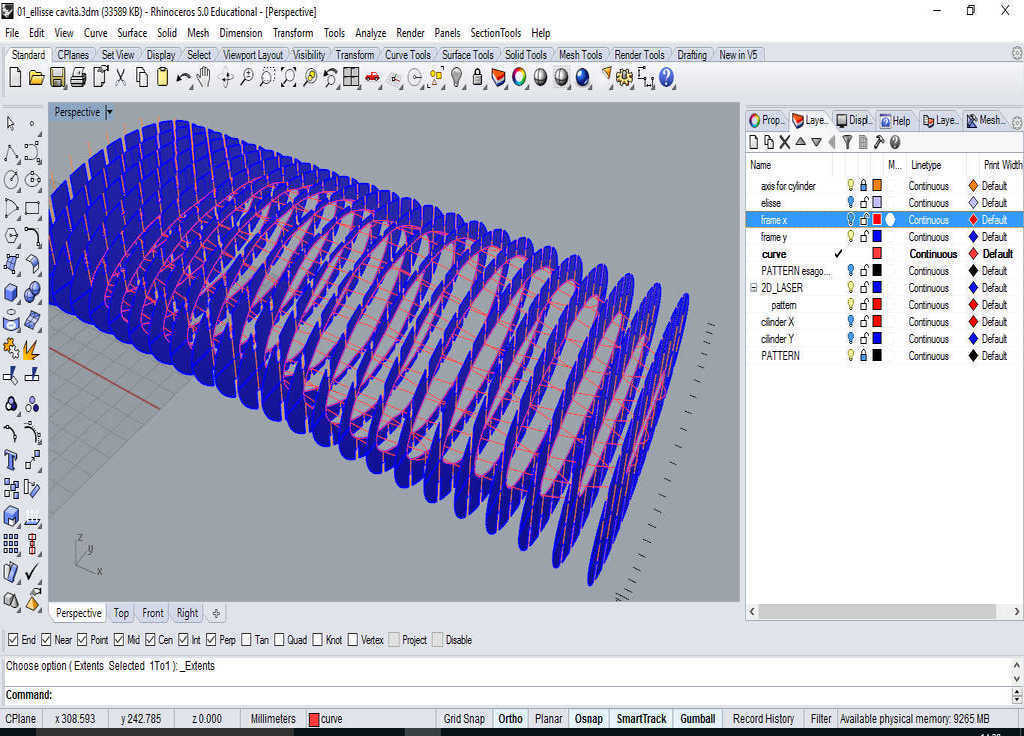
I define the oval section of the external box and I extrude it

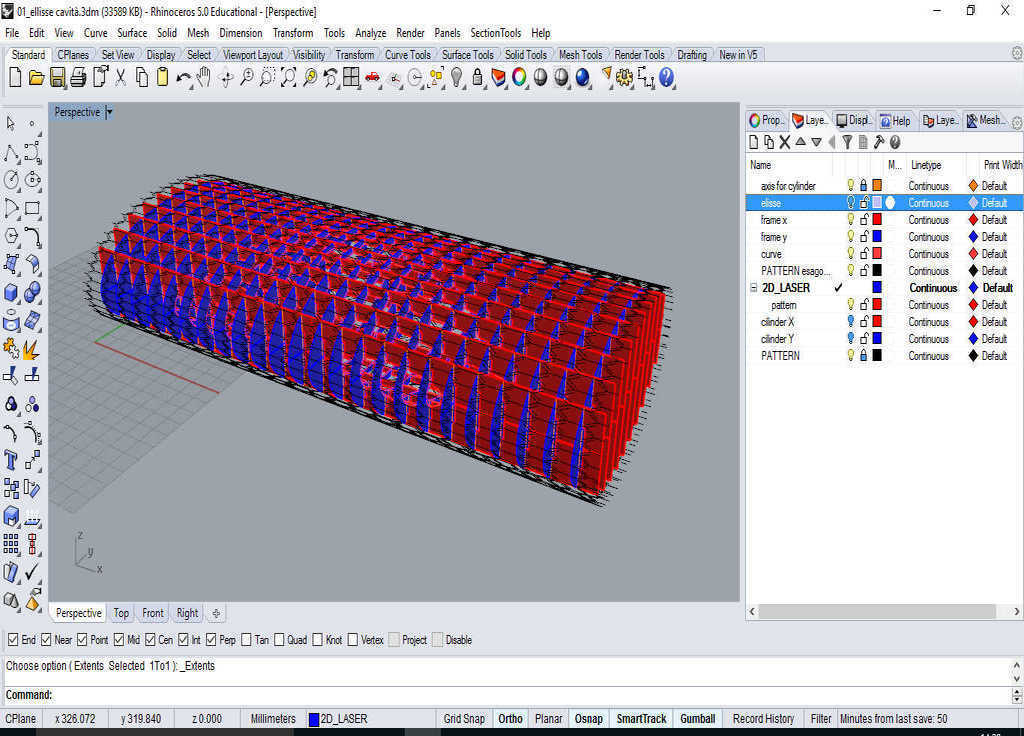
I arrayed a surface along the X and Y axis.
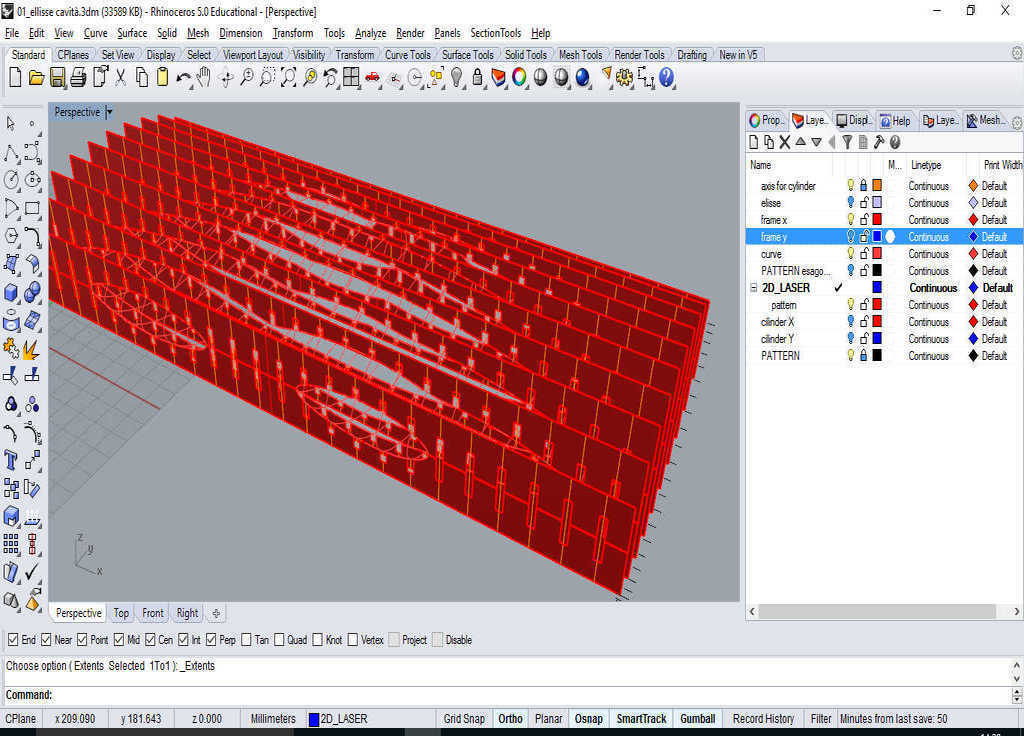
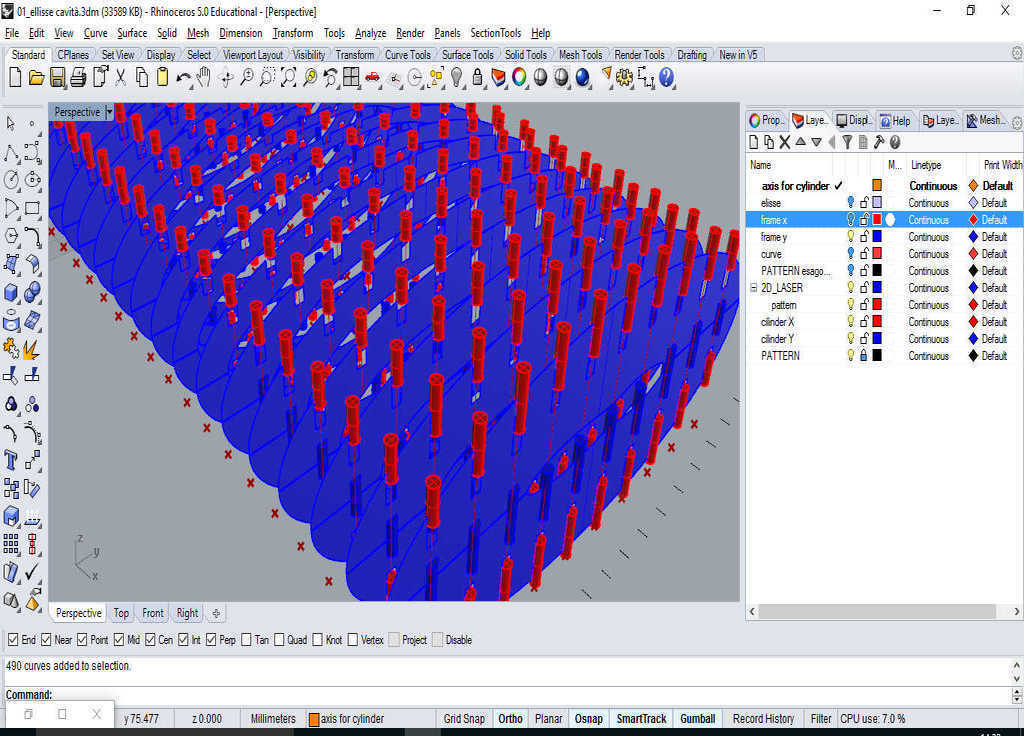
Define the intersections of the sols volume in the core

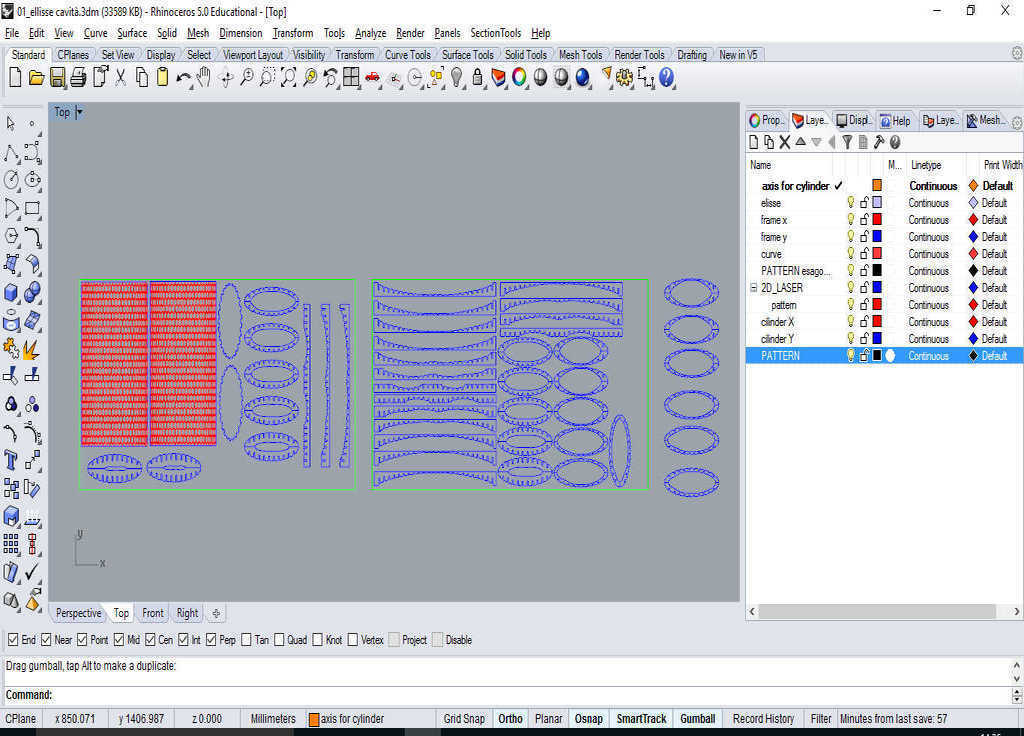
Using Grasshopper I defined the cutting object like a cylinder drawn at the intersection of the core frame and I splitted and cancelled the surface I didn't need.

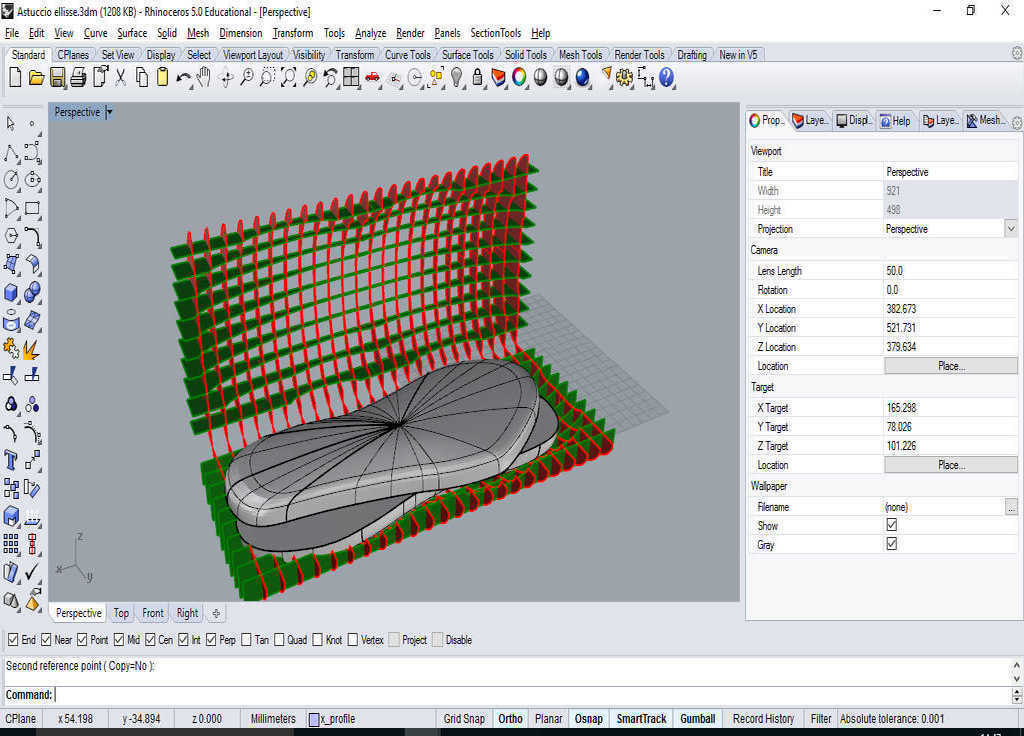
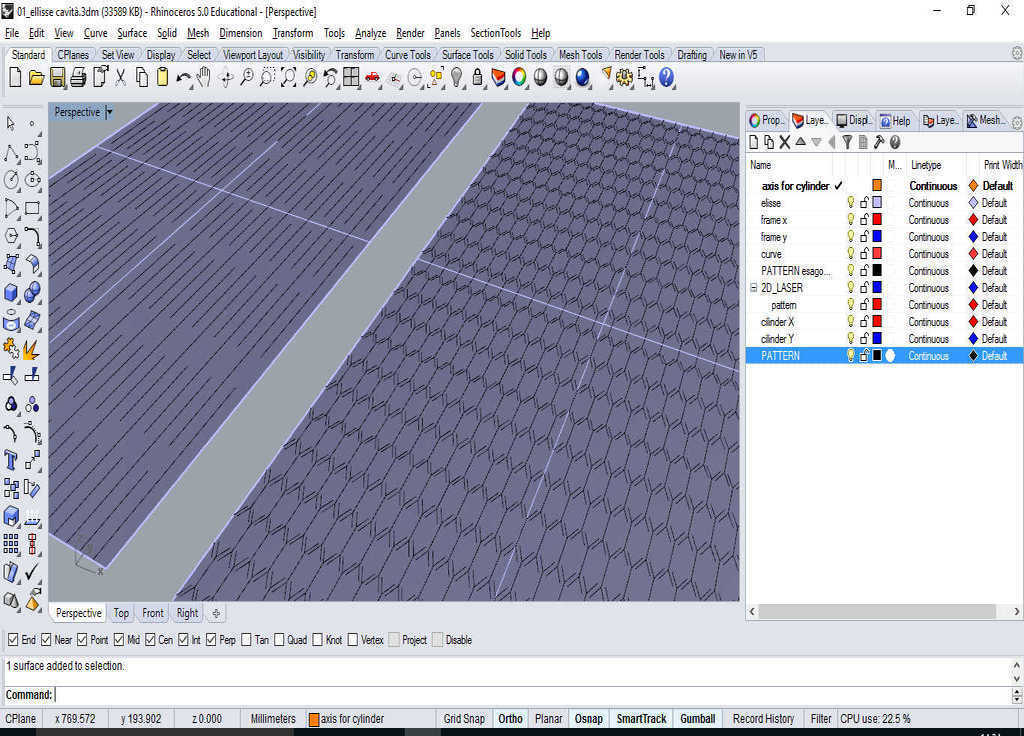
By unrolling surface I unrolled the box surface on a flat surface where I could design a bending pattern.
By a "flow along Surface" I applied the pattern to the external box surface.
By a projection of the pattern in the top and bottom of the oval section I was able to define a press fit fingers. I just needed to extrude it!

I just prepared a file for cutting, therefore I needed a planar projection of the box and two caps by sides. I needed a planar 2D disposal of the internal frame too.
Planar projection, internal frame oval sides and pattern are now ready to be cutted by a laser cutter.
Laser Cutting
To cutt this box, I used the Tortec Speedy 400. Here there are the parameters for cutting MDF 3mm.
Laser Parameter
Power 100
Speed 100
Lens   2"
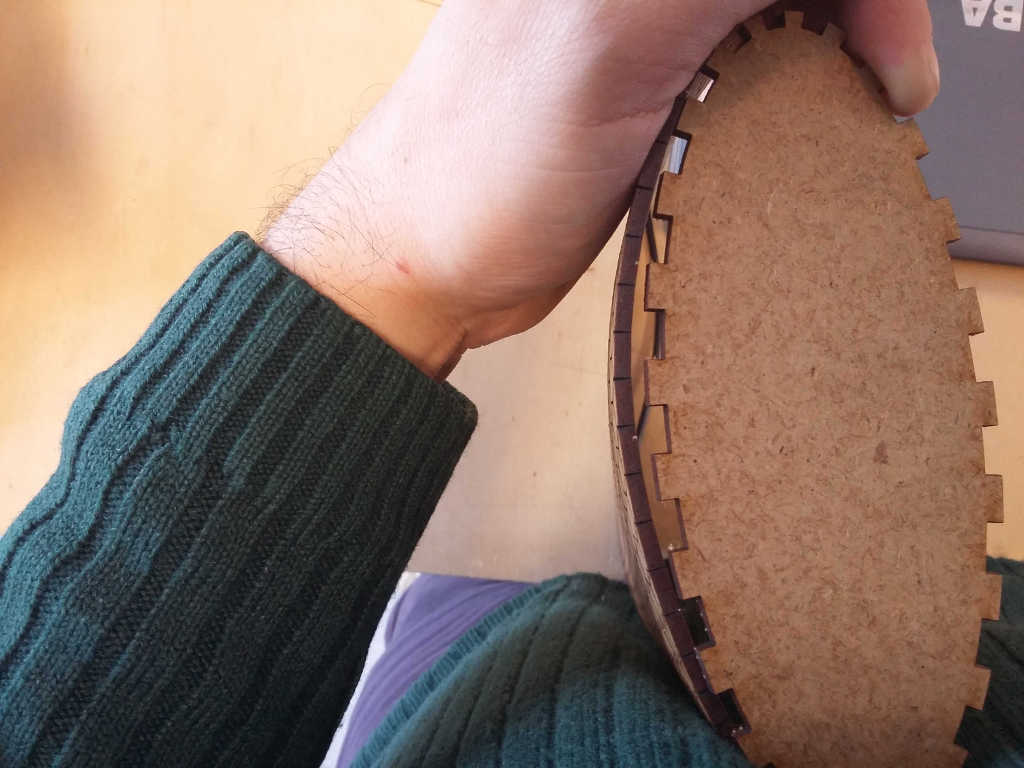 Mistake: At the end of the first attempt I forgot to properly draw the press fit joint on a curved path.
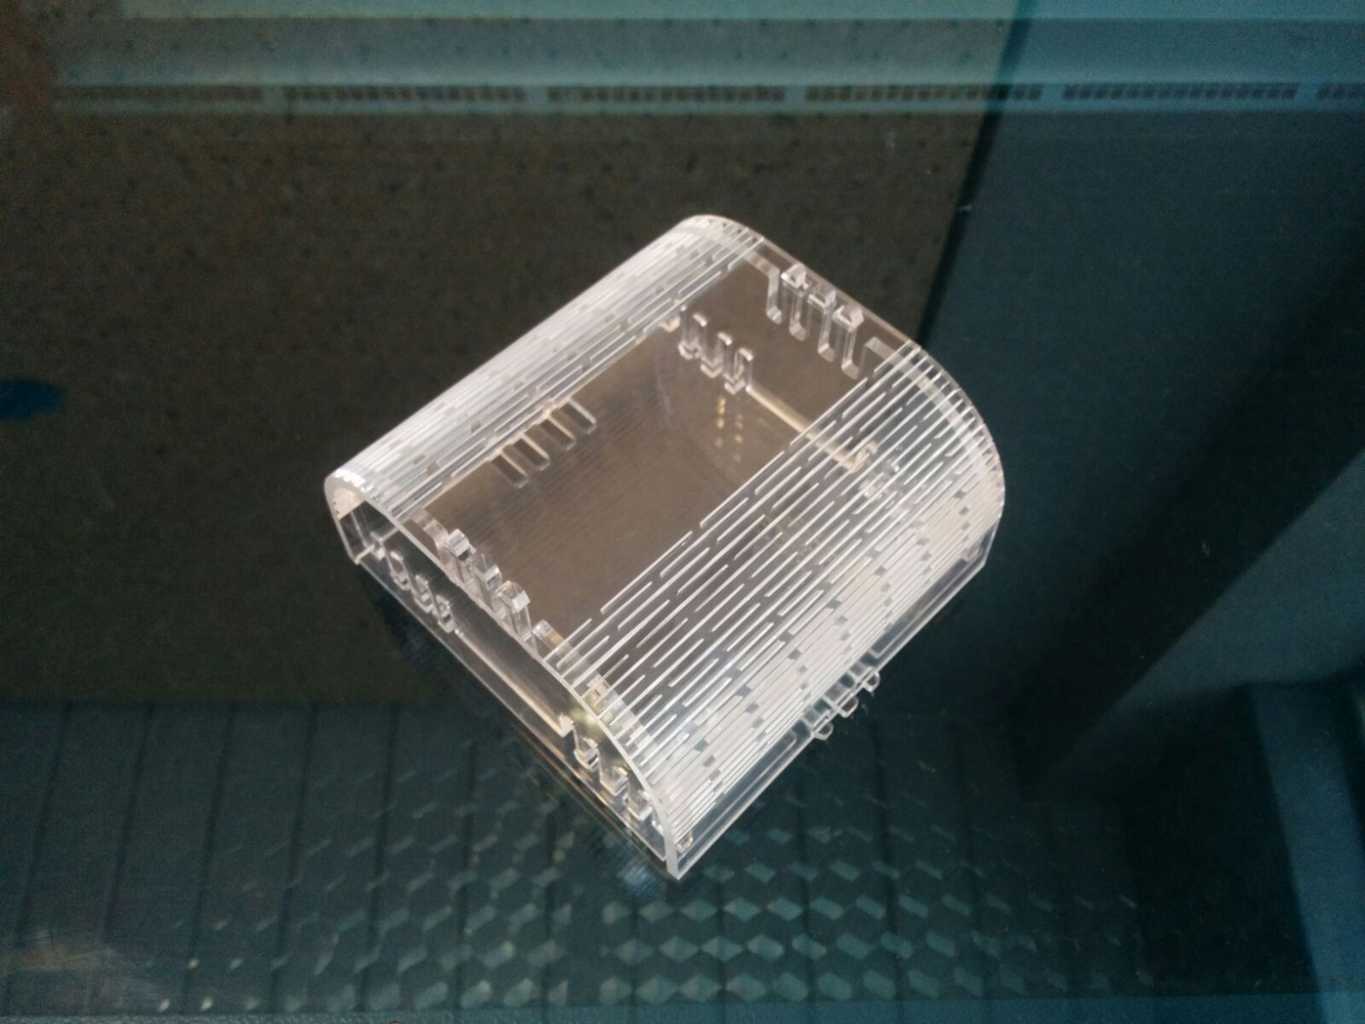
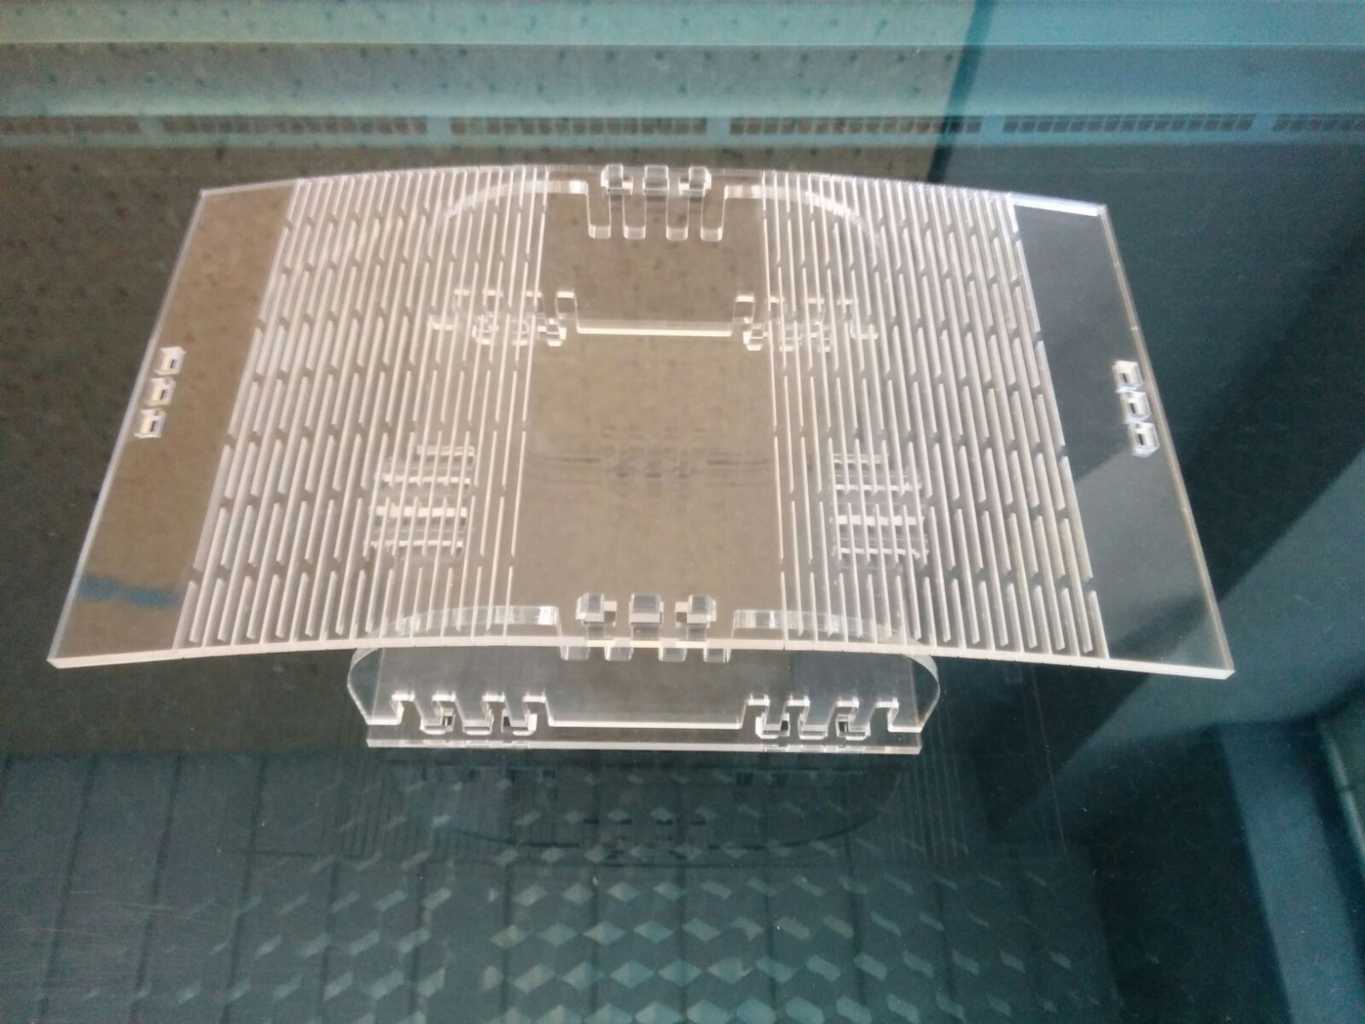
Plexiglass Press Fit Joint
I didnt' find enought time for fix the mistake of the fitt joint in the previous model, and after change the final project in Footballino I decided to design and fabricate a super simple plexiglas box with press fit joint.
.png)
.png)
The Box has Press fit and the pattern that I really like, the flexible pattern!


Laser Parameter Trotec Speedy 100
Power 100
Speed 20
 Source 3D Model
press_fit Box.3dm
press_fit Box.dxf
Other works with laser cutting
During the school I also attended the Fab Textiles workshop where I finally experienced an idea I have being having for a long time, that is to say gluing wood to fabric and fine-tuning the laser power to cut only wood veneer.
.jpg) wood laminated, thikness 0,5 mm
wood laminated, thikness 0,5 mm
.jpg) glued wood in different tissues, both synthetic and natural
glued wood in different tissues, both synthetic and natural
Laser Parameter
0.5mm wood +  denim
Power 50
Speed 4
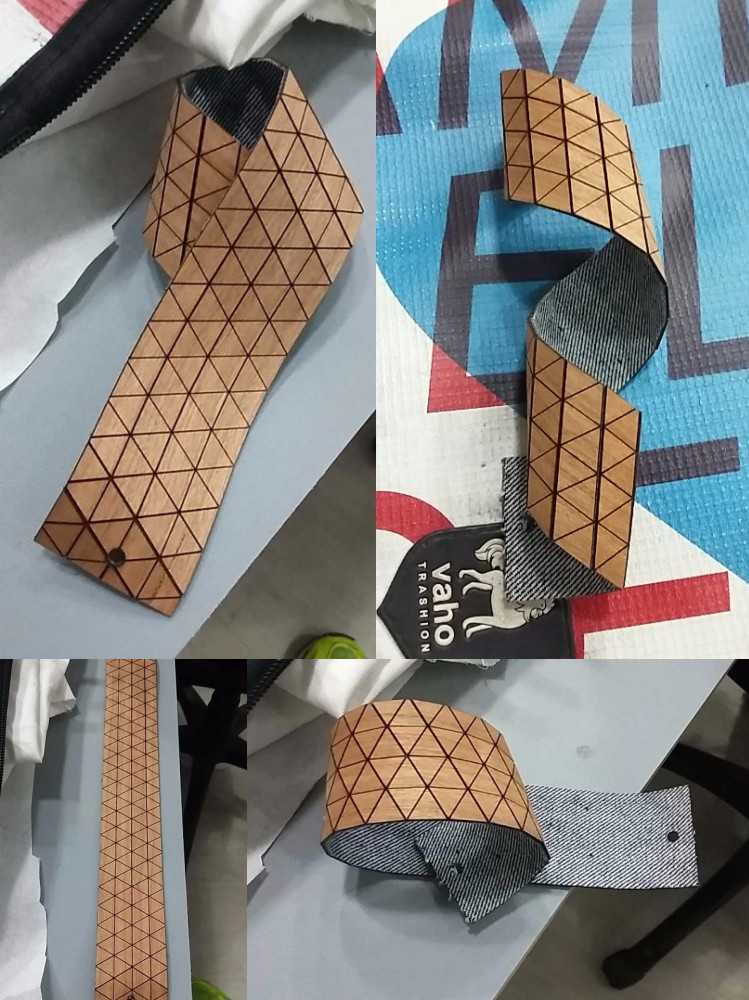 the result!
Source Code
TexWood Bracelet.dxf
Vinyl Cutter
For Vinyl exercise I cutted the second layer of my Chalrlyplex double layer Output Device. Unfortunatly I made a mistake in the following step, nonetheless vinyl was very well cutted!
.jpg) Importin DXF file into the Roland
Importin DXF file into the Roland
.jpg) Select the machine
Select the machine
.jpg) Set the dimension of the page, It is veryy close to a normal 2D office printer...
Set the dimension of the page, It is veryy close to a normal 2D office printer...
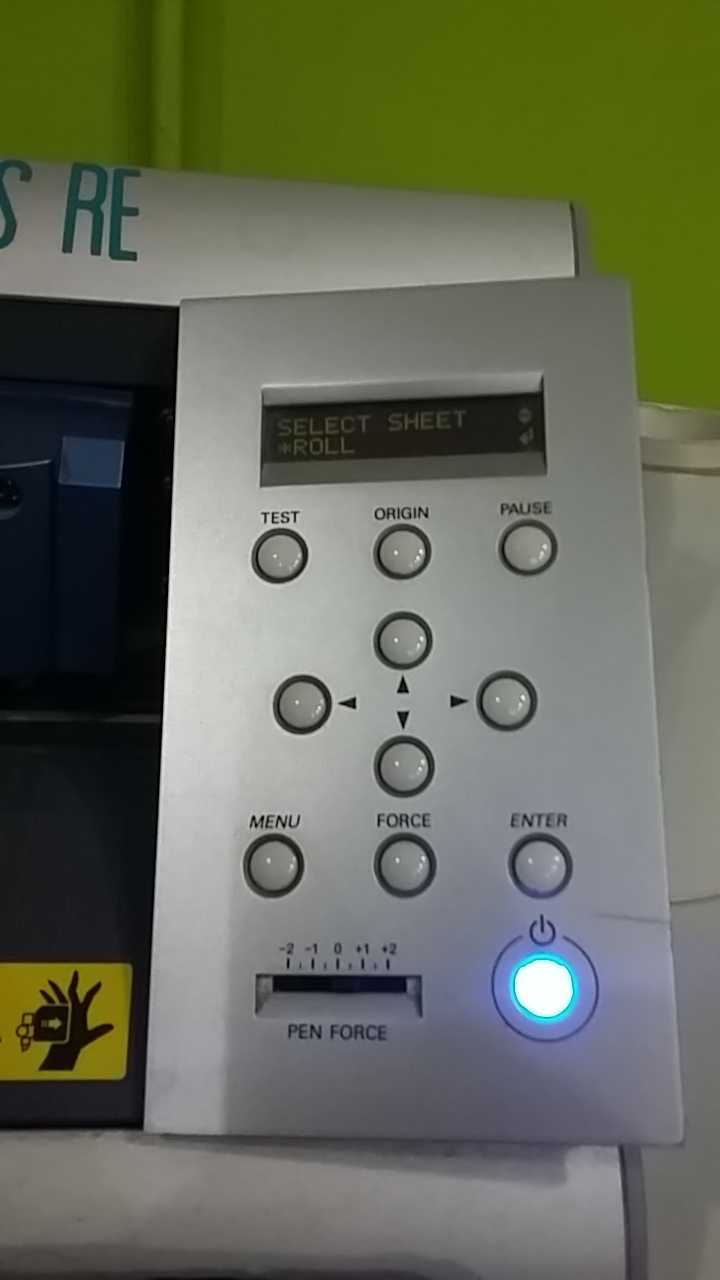 Set origin and force
.jpg) the out of the machines
the out of the machines
.jpg) the result applied!
the result applied!
The color is different because I picked the wrong Vinyl and I had to do it with the vinyl for elettronic applications
Source Files
Charlyplex Vinily Layer.dxf
Footballino Cover
 Flexible pattern 1,5 sqm for the bottom cover of Footballino
W7.Laser Cutting
Copyright © Elia De Tomasi 2016