Computer Controlled Cutting
This week we're putting the 2D sketch skills to use cutting the designs. The focus is on constructing some pressfit examples. The first project is a simple construction set. First, a simple tool was cut to test the appropriate size of the cut.
Design 2D
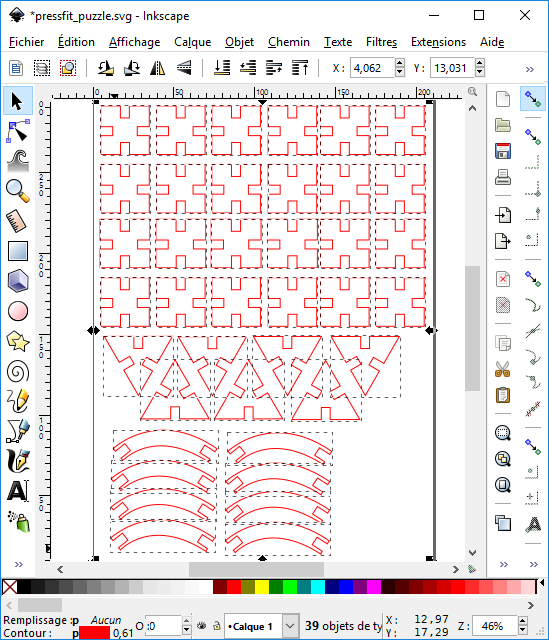
Here we start by designing a simple object in 2D using inkscape to optimize the cut size. This will help use get the initial sizing correct.

First try
This is the "test comb" where the size of the slot is varied by 0.1 mm starting from 6.0mm and working down.

Puzzle Sketch
Here we design our puzzle pieces using the correct slot size calculated in the previous example.
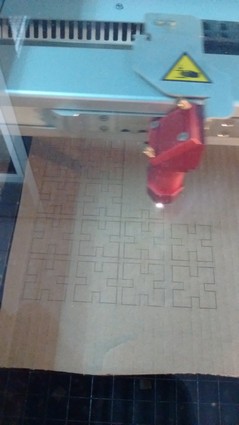
Laser Cutting
Pieces were lasercut using a standard CO2 laster on 6mm cardboard.
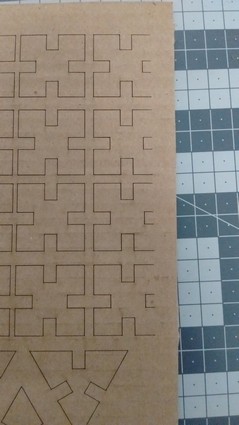
Issues
The first try had some issues, so it was necesssary to recut. Here you see missing cuts.
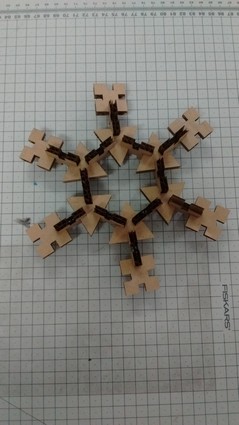
Final Assembly
Putting it all together, we have another opportunity to exercise our creative energy.
Conclusion
In this project, which was very basic, I didn't directly apply parametric modelling as I didn't see the need. However, in the instructor review, it was made clear that while the sizing comb was appropriate for a project of such a limited scope, if it were necessary to change the material and the thickness also changed, the entire model file would need to be changed resulting in lost time. Point taken!!!! Postscript: When I made the final cut, the cardboard was slightly larger then the test cardboard. The pieces did not properly fit together. Had the pieces been modeled parametrically, it would have been easy to change the gaps and recut. Since I didn't parametrically model, I would have to go back and change everything by hand. I've learned my lesson!
Example of using the vinyl cutter
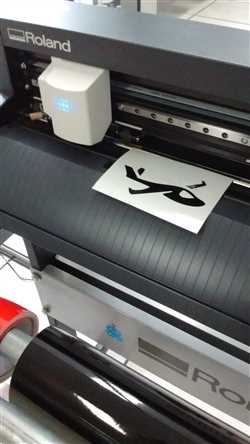
The vinyl cutter was never a machine that inspired much attention from me but I now realize the errors of my ways. Not being the creative type, I went on the internet to find some clip art usable as an icon for my project. Inkscape was used to import the image and clean it up. Because the image is a SVG vector graphic, it was resized to approximately 6x10cm. It was then 'cut' on the vinyl cutter and below are the results:
This machine is one to which I will definitely return, as I already have a number of ideas for labels and stickers that could be useful as well as fun. We also need something on the bay windows at home to make them more visable and some translucent vinyl cut into pleasing objects will do the trick.