Principles and Practices, Project Management (Jan. 27)
SSH, Site Development, and Git Setup Process
Below you will find my dictation, notes and documentation about the processes I went throught with regards to SSH, my site development, and git setup process as well as the git commands. Each of the areas will be covered in seperate sections.
SSH
Description of the SSH process and instructions:
The first time I attempted to setup my SSH lead me to difficulty. I had a problem with recieving an error message when I pasted what I thought was my SSH key from my terminal into the git.fablabacademy.org site. I began trouble shooting, but made little progress. I emailed a colleague about the issue who had success with setting up his SSH. He looked at the screenshots below and told me he would help me the next day.


The following morining I fixed the SSH issue after meeting with my colleague and Terence Fagan. I was directed to try the other directions provide to me by my Terence Fagan. I previously used directions that a team member sent me that work for him the prior evening. When I used the SSH key instructions below using the following commands, I found success. It provided me the ability to connect to the git.fablabacademy.org, which lead me to learning about the terminal commands for creating the SSH key.
Here is the process I did below in my terminal and on the git.fablabacademy.org to generate my SSH Keys.
ssh-keygen -t rsa -C "david.taylor@charlottelatin.net"
Than I hit enter 2-3 times always answer the command question with “y” for Yes. Next, I pasted the following code:
cat ~/.ssh/id_rsa.pub. I found success.
I learned that an SSH key allows you to establish a secure connection between your computer and GitLab. Before generating an SSH key in your shell, check if your system already has one by running the following command:
cat ~/.ssh/id_rsa.pub
If you see a long string starting with ssh-rsa, you can skip the ssh-keygen step.
Note: It is a best practice to use a password for an SSH key, but it is not required and you can skip creating a password by pressing enter. Note that the password you choose here can't be altered or retrieved.
To generate a new SSH key, use the following command:
ssh-keygen -t rsa -C "$your_email" ← I inserted my own email address here.
This command will prompt you for a location and filename to store the key pair and for a password. When prompted for the location and filename, just press enter to use the default. If you use a different name, the key will not be used automatically.
Use the command below to show your public key:
cat ~/.ssh/id_rsa.pubb>
Below is the image of my successful SSH connection that was created when I pasted the SSH key from the terminal in the http://git.fabacademy.org site. Next, I named the title after my email, david.taylor@charlottelatin.net. Finally, I saved it and it worked.

The Generate SSH Key instruction in the Fab Academy 2016 Archive Instructions were very helpful with this process. Below you can use the link to access the instructions.
Fab Academy 2016 Archive InstructionsSite Development
Description of my site development process and instructions:
For my site, I used Brackets. Brackets is a open source web design and text editing software. Brackets features in text color highlighting of code, syntax and more, which is extremely useful a for someone starting off with web design. The inline editor and live preview features were very useful. It provided me the opportunity to move back and forth between sections as well as test and view my work in a browser quickly. It uses support coding filling when you began typing a command, which helped supported my own HTML5 coding development.
Our group originally looked a using the text editors titled Notepad and TextPad. After researching them, they both seemed to be cumbersome and did not feature tools that would support an individual new to web design with limited HTML5 experience. I did not like how sharp the learning curve seem to be with needing more prior knowledge in HTML5. This created a search for another option, which lead to the discovery Brackets and the Fab Lab template.
Here is the process of me using Brackets. First, I download Brackets and installed it on my computer. Second, my fellow colleagues and I taking the class together sat down and went through a general overview of the software as well as how to use it. Third, one of my colleagues shared with us a Fab Lab site template by Massimo Menichinell from GitHub, https://github.com/openp2pdesign/FabAcademy_Template, that he found and we all downloaded, unzipped and opened the Brackets software. Lastly, I began experimenting, try new things and making mistakes to learn how to use the software on the template. For example, I learned on to use p /p to create visible text, headers with sizes <h2 /h2>, and commenting <!-- --> as well how to insert images using a direct link on the web of the image using <a href=”” /a>. I also used CSS Snippets' Brackets Course to learn some foundations of using Brackets. Over all, I spent a lot of time learning how to use Brackets, developing my site, and making corrections and updates to it.
My site will continue to be a work in progress throughout the course. I have found Brackets to be a great way for me to begin learning HTML5 and web designing, because of, the live preview with editing tools. These tools have made it easy for me to learn from my mistakes and discover how different code was functioning. The template, Fab Academy Template, by Massimo Menichinell has been very useful for seeing how different layouts and functions of coding working. It has provide me the opportunity to see HMTL5 in actions and be able to manipulate it to learn how it works. Bootstraps came with the template I used for my site. Bootstraps is the framework for interacting with HTML5.
In the process of creating my site, I looked at previous Fab Lab students’ sites from the last few years. It helped me get comfortable with the layout of my own site as well as integrating ideas and designs that I liked from others sites, such as layouts, pictures and information.
In the process of creating exercise 1, I learned even more functions and commands through collaboration with my team and my own discoveries. I learned how to create bold words using <b> </b> as well as how the <pre> class="" </pre> functions by changing the text and putting a border around it. I am believe that I will know a lot more HTML5 by the end of this course than I previously would ever would have dreamed.
I have been using Pic Resize to resize images so that they will fit the size requirements for my site. I would load an image from my computer or the internet to the site. Next, I would resize it by 50%. Now, I would open the area for uploading it to the an internet social media source. Finally, I would click on the new image so that it would open in a new browser tab, so that I can copy the URL link for pasting it into my Brackets code for embedded links.
I used the w3schools.com site to help create <> symbols in my HTML5 coding that would not affect my code when I previewed it live. Terence Fagan helped me find the link above to use < >: for the symbols. I originally was using the greater than and less than symbols backwards to make my point. For example, I made the symbols around the repository backwards: git pull git@git.fabacademy.org:fabacademy2016/Repository<.git as well as just not using them..
Git Setup and Commands
Description of my site development process and instructions:
I first began setting up my git process by adding a folder on my desktop titled FabAcademy2016. I had to change the title to the current name without space from Fab Academy 2016 after I realized the terminal command of cd Desktop was sensitive to spaces, when I was trying to locate the folder on my desktop in the terminal. This took some trial and error as well as help from one of my team members. Than I cd the charlottelatin respositry to gain access to the folder.
Next, I ran the following git command lines to begin learning how to clone, push and pull information and changes from my desktop to the repository. When I used the command, git clone git@git.fabacademy.org:fabacademy2016/charlottelatin.git, I had to approve by typing yes, which allowed the computer to communicate with the repository. I originally typed y for yes, but I did not work until I typed yes. This allowed for information to be brought to my computer by checking that the SSH key matched.
Than I used the following command to pull information from the depository to my computer:
git pull git@git.fabacademy.org:fabacademy2016/<Repository>;.git
Now, I was read to move all of the code from my Brackets web design folder into the housed all of the files for my website into the desktop folder titled FabAcademy2016 > charlottelatin > students > 87. The charlottelatin and student folder as well as my folder number of 87 were created by my Guru in the git.fabacademy.org repository. I was able to access this information due to the success of the cloning and the git pull command.
As I continued with this process, I used the following command lines to establish a given name for the updated information being pushed from my website, a name for the update, and the push of it:
git add -A
git commit -m “Name it whatever”
git push git@git.fabacademy.org:fabacademy2016/<Repository<.git
The git commit -m “Name it whatever” command provided a name for my updated information that I add for my website that was pushed by the git push command to the repository. To keep organized with my changes, I have established naming my changes each week after the Exercise Week as well with decimal point for the modification change number. This name will be changed with each update I do during the module and etc. For example, this week is named Week 1.0, and every change after it will be given a number, such as Week 1.1, Week 1.2, and so on in that style. This will be done each time I go through the process of pulling. The more I do the better I will get a remebering the process naturally.
Below is the list of commands were are using at our lab:
Latin Git Commands
To Clone the Repository
Change your location to clone repository to Documents or Desktop
git clone git@git.fabacademy.org:fabacademy2016/charlottelatin.git
To push changes to Cloned repository
git pull git@git.fabacademy.org:fabacademy2016/<Repository>.git
git add -A
git commit -m “Name it whatever”
git push git@git.fabacademy.org:fabacademy2016/<Repository>.git
Final Project: Concepts and Ideas
General Project Ideas
Description of my project ideas:
My Final Project idea will be a Batman spotlight for my new born son's room. I want to create a controllable rotating night light that projects the Batman logo. I want it to be a type of night light controlled by a microcontroller using electronics, design software, laser cutting and 3D printing. I am a huge Batman fan and I want to pass that on to my son as well as provide a fun, useful gift for his room. I got the idea from a USB Batman Spotlight Instructables project. This Instructable project has a basic spotlight that is powered through a USB cord. I want to take the project further by using micro servos to make the spotlight move, which will be controlled by an Arduino Uno. Currently, I want to use LEDs to project the light as well as build and program my own microcontroller. Lastly, I want to laser cut a wooden box with Batman themed engravings to house all the electronics and mount the servo arm. Below is a general sketch of the over all project:

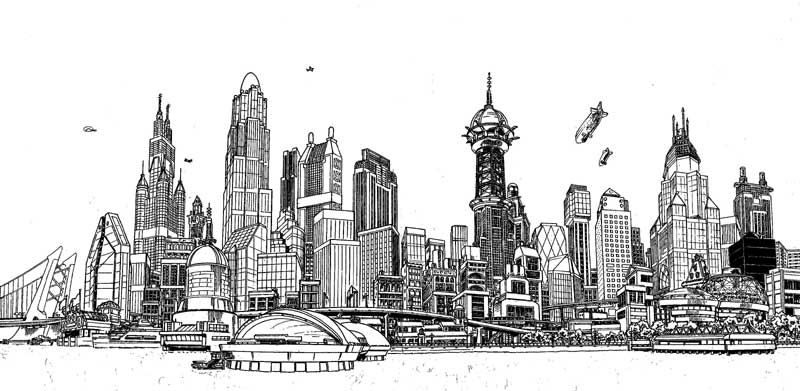
I want to engrave the skyline of Gotham City on each of the long sides of the box and the Batman logo on both of the short sides of the box. Lastly, I want to engrave Batman in large letters across the top of the box. The box itself will house all of the electronic parts as well as have the spotlight attached to the top of the box. The arm will allow the spotlight to rotate and move the spotlight's project around the room.
The following links are to images I might use for the Gotham City skyline and the Batman logos:
Sketching
Description of the sketching process:
I began this design process by sketching thumbnail images on graph paper. These images will be used as the foundation for my CAD section. I created an orthographic and isometric drawings with scale and sizes. I used a caliper and a ruler to create my dimensions for my drawings. I used these tools to gain sizes from a mini pan-tilt with micro servos that I want to be able to put my batman spot light housing on it. My drawings show the the different views of my project, the sizes, and the breakdown of the spot like section into three pieces. Finally, I than scanned the drawings as PDFs to be used for my documentation.You can see the three drawings below:


The sketches below are for my laser cut box ideas that will house the electronics for the spotlight. Plus, the box will be made out of wood with engraved logos. The sketches are the top, front and side views of the box.


