5. Electronics production
Assignment
-
Group assignment
characterize the design rules for PCB production process -
Individual Assignments
make an in-circuit programmer by milling the PCB and program it
Group Assignment
FabISP
In-system programming (ISP) is a method of programming the AVR microcontroller. It can rewrite the entire memory of the AVR including the bootloader area. In this project I have created “FabISP (resonator type)” designed for production in Fablab. The board data I referred to is as follows.


Create path data
I created path files for SRM-20 using mods. The operation was the same as the way we did during group work.
- Change “outputs file “ from “WebSocket device” to local pc, since the SRM-20 at my lab is not connected to internet.
- Import the png file of trace data
- Select 1/64 bit in PCB defaults window
- Confirm parameters in “mill raster 2D” window

- Push calculate button to find the path as follows

- Repeat the operation for outcut image.
- As for PCB defaults, select 1/32 bit


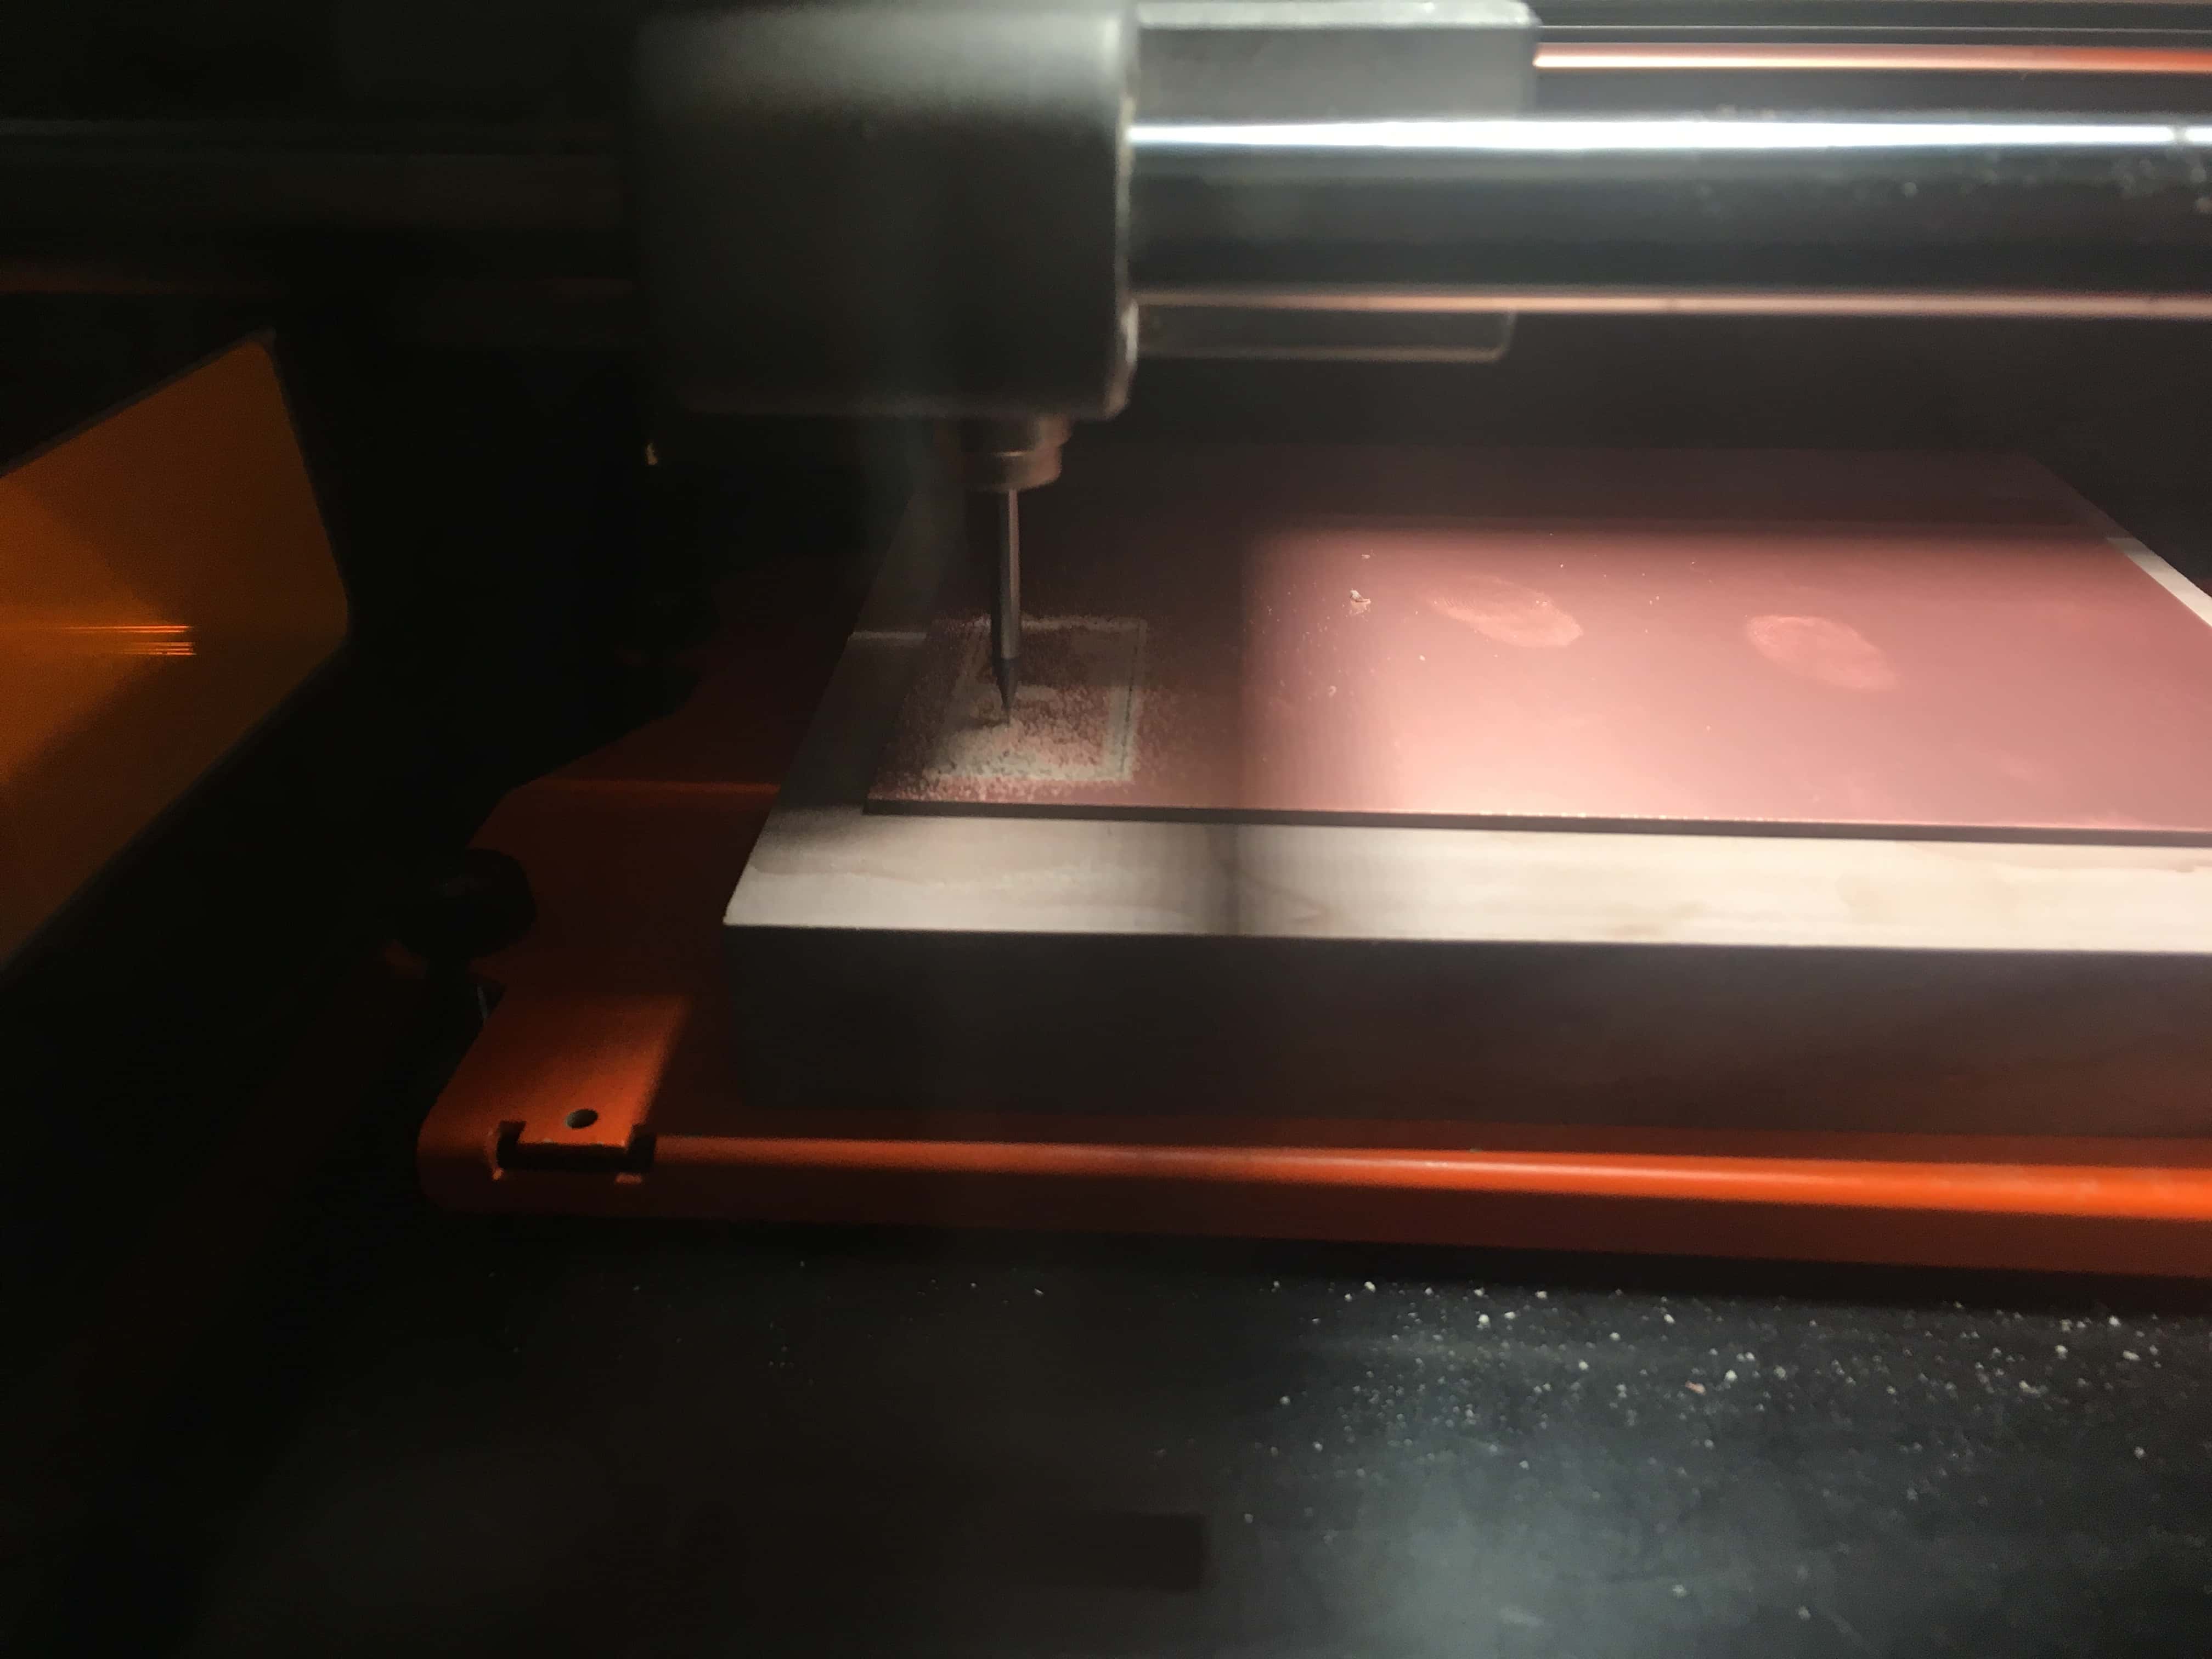
Milling

I set new board in the SRM-20. Applied double sided adhesive tape carefully at the backside. After cutting the tape a little big, I cut it according to the edge.

problem:
The first attempt failed. I was anxious about damaging the tip of the bit, so it seems that I set it to a height not touching the board. So I improved my operation to tighten the screw after checking the faint sound that the bit hit the board. Although milling seemed to be successful at the beginning, it gradually became shallow (see the photo below). Kamakura instructor told me that the board might not be flat a little.

So I tried to cut the same path again and succeeded.
As the post treatment
- Cut unnecessary spots that could become an obstacle to soldering (red square area )with ultrasonic cutter
- Brash the surface with steal wool
- Deburring the outer edge with cutter
- Apply flux on the surface

Milled FabISP boared

Soldering
I prepared following components for stuffing

Components
- 1 ATTiny 44 microcontroller
- 1 Capacitor 1uF
- 2 Resistor 100 ohm
- 1 Resistor 499 ohm
- 1 Resistor 1K ohm
- 1 Resistor 10K
- one 6 pin header
- 1 USB connector
- 2 jumpers - 0 ohm resistors
- 1 Resonator 20MHz
- two Zener Diode 3.3 V
- one usb mini cable
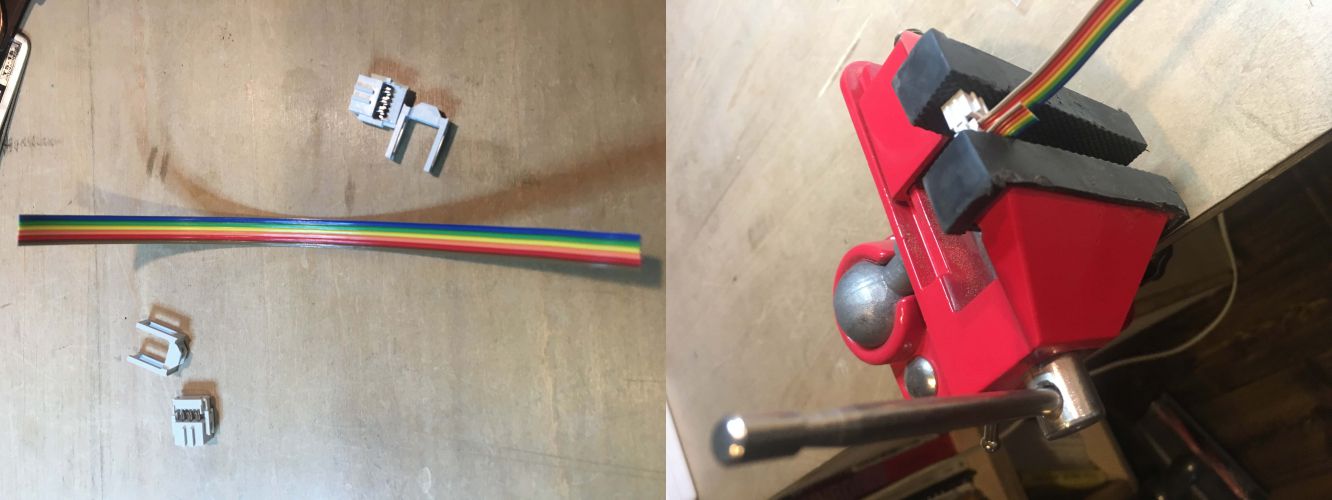
- one ribbon cable
- two 6 pin connectors
I put the usb connector first, because it is difficult to solder. Then applied the ATTiny 44 with special care about orientation. Other parts were placed from the low and middle one.

6pin cable were tightened to connectors with vise.
Smoke test
Prior to the smoke test, I did a visual inspection of the board and checked connectors such as power and ground line, 6pin header, microcomputer, and the pins on the front of the mini USB header using multimeter. Since there was no error, I Plugged the FabISP into my computer via the mini USB cable. No message was displayed, so I proceeded to the next step.

FabISP Programming
Installing software
I installed necessary softwares for AVR programming.
-
Avrdude for programming AVR microcontrollers
Download and Install the AVR development environment CrossPack. -
Xcode for Get Make
Xcode is already installed to my mac -
FabISP firmware
Download and save to desktop, unzip and move into the fabISP_mac.0.8.2_firmware folder.
K-MacBook-Pro:desktop naganoyoshie$ cd  fabISP_mac.0.8.2_firmware
K-MacBook-Pro:fabISP_mac.0.8.2_firmware naganoyoshie$ ls
Makefile    main.elf    main.o      usbdrv
main.c      main.hex    usbconfig.h
According to the advice of the instructor, I set PATH of CrossPack. Create bash_profile file
$ touch .bash_profile
Then add the path “export PATH=$PATH:/usr/local/CrossPack-AVR-20131216/bin” to the file with nano editor
K-MacBook-Pro:~ naganoyoshie$ nano .bash_profile
Power the FabISP Board
To power the FabISP bord
- Connect FabISP board and my computer with mini USB cable
- Connect ATAVRISP2 to 6 pin header of FabISP board
Then led on AVTAVRISP2 lighted green as the image below. It means that the header is soldered correctly, the board is getting power.

Program the FabISP
moved to the firmware directory and compiled the firmware. “make clean” and “make hex” command were succeeded.
K-MacBook-Pro:fabISP_mac.0.8.2_firmware naganoyoshie$ make clean
rm -f main.hex main.lst main.obj main.cof main.list main.map main.eep.hex
main.elf *.o usbdrv/*.o main.s usbdrv/oddebug.s usbdrv/usbdrv.s
However at “make fuse” step, an error was displayed as follows. It seems that USB port was not recognized properly.
avrdude -c avrisp2 -P usb -p attiny44  -U hfuse:w:0xDF:m -U lfuse:w:0xFF:m
avrdude: usbdev_open(): did not find any USB device "usb"
make: *** [fuse] Error 1
USB Problem analysis
So I explored
- USB recognition check @ terminal >> NG
The device name was not listed at terminal.
ls -l /dev/tty.*
/dev/cu.Bluetooth-Incoming-Port
So I checked whether Arduino is recognized at the terminal. In case of Arduino, the port was displayed properly.
ls -l /dev/tty.*
/dev/cu.Bluetooth-Incoming-Port
/dev/cu.uabmoswm14401(Arduino/GemuinoUno)
-
USB recognition check @ system > OK
Go to the System Profiler > Hardware > USB, then the port was displayed properly. It seems that AVRDUDE is invisible at mac terminal. -
Type-C port check > OK
Since my Mac has three type-c ports, I doubted the possible difference, but there were no difference. -
Type-C USB Hub check > OK
-
FabISP Hardware > OK
In order to isolate the problem, I suspected my USB hub. I tried other USB hubs, but the same error was displayed. So the instructor in Kamakura tried FabISP & AVR ISP on her Mac, then USB was listed correctly on the terminal, and “Make Fuse” was successfully done. It means that the FabISP Hardware has no problem. -
Software ?
With the advice of instructor, I installed libusb library that provides generic access to USB devices. However USB port was still invisible at terminal window. Then I tried to uninstall crosspack, then installed AVRDUDE formula via brew. But still USB was invisible. -
Unvisible is no matter ?
I searched how to make visible at terminal, but could not find good solution.
After a while, Kamakura instructor discovered with another FabISP board that “make program” can be done even if the USB is invisible. So I tried with my board, then “make fuse” and “make program” passed successfully as follows.
Make fuse success
K-MacBook-Pro:fabISP_mac.0.8.2_firmware naganoyoshie$ make fuse
avrdude -c avrisp2 -P usb -p attiny44  -U hfuse:w:0xDF:m -U lfuse:w:0xFF:m

avrdude: AVR device initialized and ready to accept instructions

Reading | ################################################## | 100% 0.00s

avrdude: Device signature = 0x1e9207 (probably t44)
avrdude: reading input file "0xDF"
avrdude: writing hfuse (1 bytes):

Writing | ################################################## | 100% 0.01s

avrdude: 1 bytes of hfuse written
avrdude: verifying hfuse memory against 0xDF:
avrdude: load data hfuse data from input file 0xDF:
avrdude: input file 0xDF contains 1 bytes
avrdude: reading on-chip hfuse data:

Reading | ################################################## | 100% 0.00s

avrdude: verifying ...
avrdude: 1 bytes of hfuse verified
avrdude: reading input file "0xFF"
avrdude: writing lfuse (1 bytes):

Writing | ################################################## | 100% 0.01s

avrdude: 1 bytes of lfuse written
avrdude: verifying lfuse memory against 0xFF:
avrdude: load data lfuse data from input file 0xFF:
avrdude: input file 0xFF contains 1 bytes
avrdude: reading on-chip lfuse data:

Reading | ################################################## | 100% 0.00s

avrdude: verifying ...
avrdude: 1 bytes of lfuse verified

avrdude: safemode: Fuses OK (E:FF, H:DF, L:FF)

avrdude done.  Thank you.
make program success
K-MacBook-Pro:fabISP_mac.0.8.2_firmware naganoyoshie$ make program

avrdude -c avrisp2 -P usb -p attiny44  -U flash:w:main.hex:i

avrdude: AVR device initialized and ready to accept instructions

Reading | ################################################## | 100% 0.00s

avrdude: Device signature = 0x1e9207 (probably t44)
avrdude: NOTE: "flash" memory has been specified, an erase cycle will be performed
         To disable this feature, specify the -D option.
avrdude: erasing chip
avrdude: reading input file "main.hex"
avrdude: writing flash (2002 bytes):

Writing | ################################################## | 100% 0.70s

avrdude: 2002 bytes of flash written
avrdude: verifying flash memory against main.hex:
avrdude: load data flash data from input file main.hex:
avrdude: input file main.hex contains 2002 bytes
avrdude: reading on-chip flash data:

Reading | ################################################## | 100% 0.63s

avrdude: verifying ...
avrdude: 2002 bytes of flash verified

avrdude: safemode: Fuses OK (E:FF, H:DF, L:FF)

avrdude done.  Thank you.

avrdude -c avrisp2 -P usb -p attiny44  -U hfuse:w:0xDF:m -U lfuse:w:0xFF:m

avrdude: AVR device initialized and ready to accept instructions

Reading | ################################################## | 100% 0.00s

avrdude: Device signature = 0x1e9207 (probably t44)
avrdude: reading input file "0xDF"
avrdude: writing hfuse (1 bytes):

Writing | ################################################## | 100% 0.01s

avrdude: 1 bytes of hfuse written
avrdude: verifying hfuse memory against 0xDF:
avrdude: load data hfuse data from input file 0xDF:
avrdude: input file 0xDF contains 1 bytes
avrdude: reading on-chip hfuse data:

Reading | ################################################## | 100% 0.00s

avrdude: verifying ...
avrdude: 1 bytes of hfuse verified
avrdude: reading input file "0xFF"
avrdude: writing lfuse (1 bytes):

Writing | ################################################## | 100% 0.01s

avrdude: 1 bytes of lfuse written
avrdude: verifying lfuse memory against 0xFF:
avrdude: load data lfuse data from input file 0xFF:
avrdude: input file 0xFF contains 1 bytes
avrdude: reading on-chip lfuse data:

Reading | ################################################## | 100% 0.00s

avrdude: verifying ...
avrdude: 1 bytes of lfuse verified

avrdude: safemode: Fuses OK (E:FF, H:DF, L:FF)

avrdude done.  Thank you.
- Cause of “make fuse” error
Since I was distracted by the invisible USB, I did not try the command each time. Though I do not know what was effective to solve the problem, I would like to try to analyze with instructor.
I checked the USB connection of system information, and confirmed that FabISP is listed as follows.
and confirmed

Then I removed the red bridge to use the board for programmer to program other boards. I will remove green part in case I want to program target boards that don’t use 5v voltage.

Files