Group Assignment
1.Design rules of our 3d printer
2.Orientation test
3.Overhang and supports test
4.Bridge
5.Infill and time test
6.Hole diameter test
7.Wall thickness test
8.Types of support test
1.Design rules of our 3d printer
For testing the 3D printer and check the limitations we have done is we printed an different object which contains many shapes like circles, angles, gaps bridge etc. By cross checking the original s measurements and printed shapes measurements, we can understand how precise our printer is.
I design all test part in solid works
2.Orientation test
Here we tested a simple object by changing its orientation of printing. We checked the strength,the supports and the fininsh of the object.
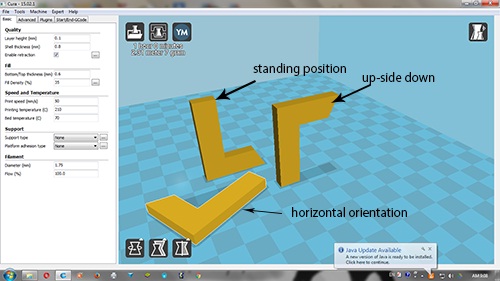
Different orientation of the object
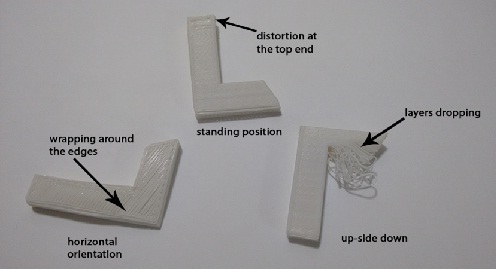
Observations
1 - This orientation resulted in a best surface finish as smaller area was touching the bed although there is some distortion observed at the top surface, this might be because the narrow section bent under its own weight.
2 - This orientation resulted in total failure of the object, the overhang could not hold its weight and the layers fell down under its own weight.
3 - This is a stable job, although maximum area was sticking to the bed which resulted in a lot of wrapping around the edges.
2.Overhang and supports test
In this test I made a parametric design and changed the angle of the overhang. We wanted to test at which angle the 3d printer can print overhang without supports.
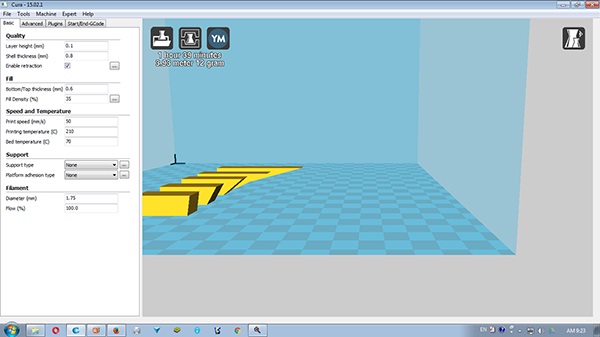
Supports being created after an overhang angle of 25 degree

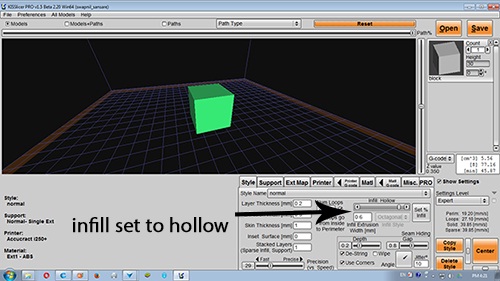
Observations - The printer could print without the support upto an an angle of 25 degree, after 25 degree it starts creating supports, this is an important observation as we have set a limit for the permisible overhang. We have set the infill to hollow, the permissible overhang angle might change as we change the infill settings
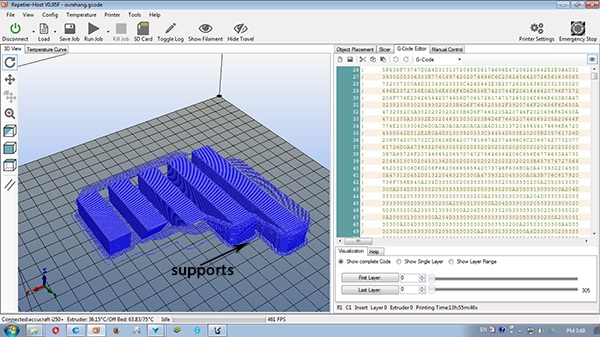
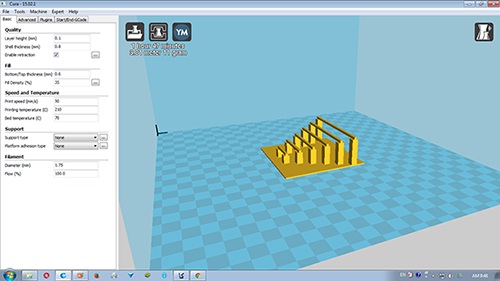
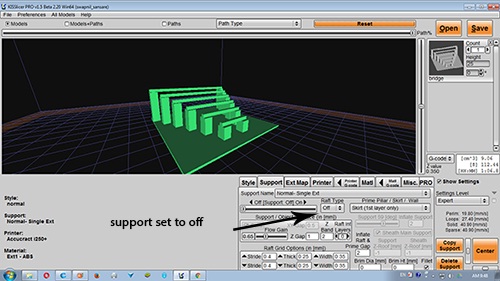
3.Bridge test
In this test we wanted to see the amount of sagging of the object when it is supported on its two ends. The infill is set to hollow and the supports are set to OFF settings. We tested the object by varying the unsupportd lenght.
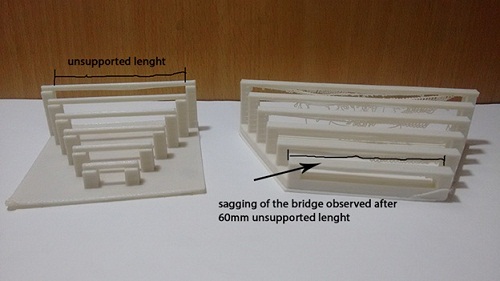
Observations - The bridge could support its weight upto 60mm unsupported lenght, the bridge starts to sag and the layers tend to drop as we increase the lenght of sagging from there on. Thus we have set a limit for an unsupported lenght the 3d printer can print. We have set the infill to hollow, the permissible unsupported lenght might change as we change the infill settings, this is obvious as the weight of the material will increase as we increase the infill.
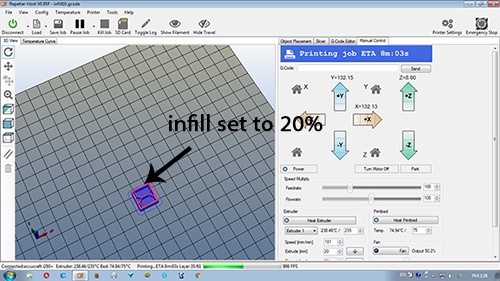
4.Infill and time test
In this test we wanted to try out the strenght of various infills of 20mm*20mm cube. Slicer software lets us change the infills of the material.Skin thickness was also changes during the course.
Unsupported lenght varying from 10mm to 100mm
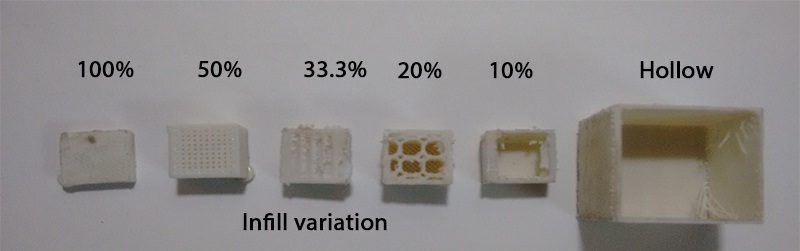
Observations - The time of printing and amount of material required is majorly determined by the infill. For 20mm*20mm cube there was no major difference in the strenght. This might not be the case for a larger object.
The time of printing was to the longest for 100% infill, it took 17 mins to print 20mm*20mm*20mm cube, while it was 14 mins for 10% infill. The accuracy was set to 29 and skin thickness to 1mm in Slicer software.
The hollow cube was printed with 5mm skin thickness, it turned out to be quite strong and it took 29 mins for printing with the same settings. Thus we have to play around and change the infill and skin thickness according to our requirement, I would personally prefer hollow sections with 2-3mm skin thickness rather than increasing the infills, this would save a lot of time, although the material required might not vary much.
5.Hole diameter
In this test we tested our 3d printer for its minium dimension that it can print. We made a cube having holes of various dimensions from 0.2mm to 5mm and printed it to set a limit to the minimum diameter of hole it can clearly print.
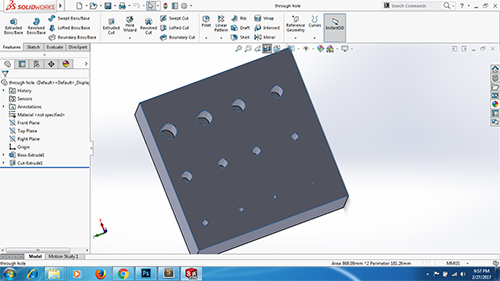

observation-in this test i observe that after 2mm all holes are printed good but from 0.25mm to 1.75mm it was not print good.
6.Wall thickness test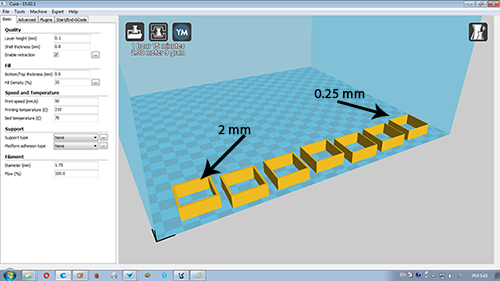
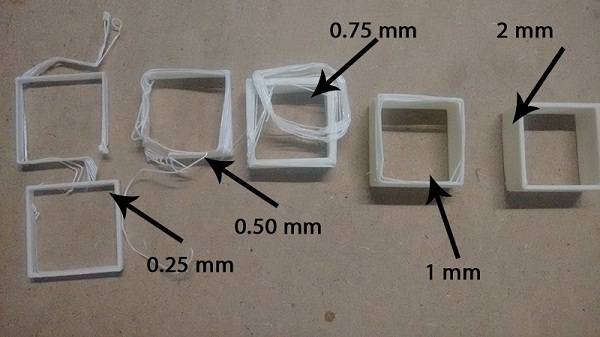
observation
This test is similar to the previous test, here we tested our 3d printer for the smallest wall thickness it can print. The skin thickness was 1mm and the infill was set to 20%.
Learning outcomes
This task is very usefull for to understand the setting of 3d printer and i refer this in my further working of 3d printer.