This week task was to get in touch and explore
as many 2D and 3D modeling software as possible and to use them also
to shape a possible final project.
To start with, I did what shouldn't never be done: I downloaded all together the
ones I intended to use:
- 2D:
- Gimp
- Krita
- 3D:
- Rhino
- Fusion
- OnShape-not downloaded actually because it has to be used in the web
I decided to get started with these because I had already worked with others before:
- Illustrator: it's actually the software I go best with and I've been getting closer to it a lot in all the projects I developed with laser cutting and engraving technique.
- Inkscape:I don't like to draw with it since I think the command bar is a bit spoil and confused, mixing 2D and 3D designing tools. Somehow it reminds me Paint but maybe I should just understand which are illustrator corresponding commands and practice a bit, but still, nothing moved me to do this
- SketchUp:I used to work with it at middle school and my thought is that is really handy to design buildings and for architectural projects renderings
- Solidworks:it's the 3D modeling software I've been using till now: I find it intuitive and simple, its tools are well organized in the command bar and sketching activities are separated from 3D ones; I appreciate a lot the simple quotation method of dimensions and the record of model history . I designed and then created simple furnishing with it and I may improve my skills a lot but, during this week, I caught the opportunity to experience something new.
< 2D modeling >
Rasterizing a picture: Gimp&Krita
What I wanted to do with both software was to work on a
picture made to a real drawing and see how far I could optimize
and improve the resolution using light tools (exposure, contrast, input
and output color levels, definition) and artistic effects.
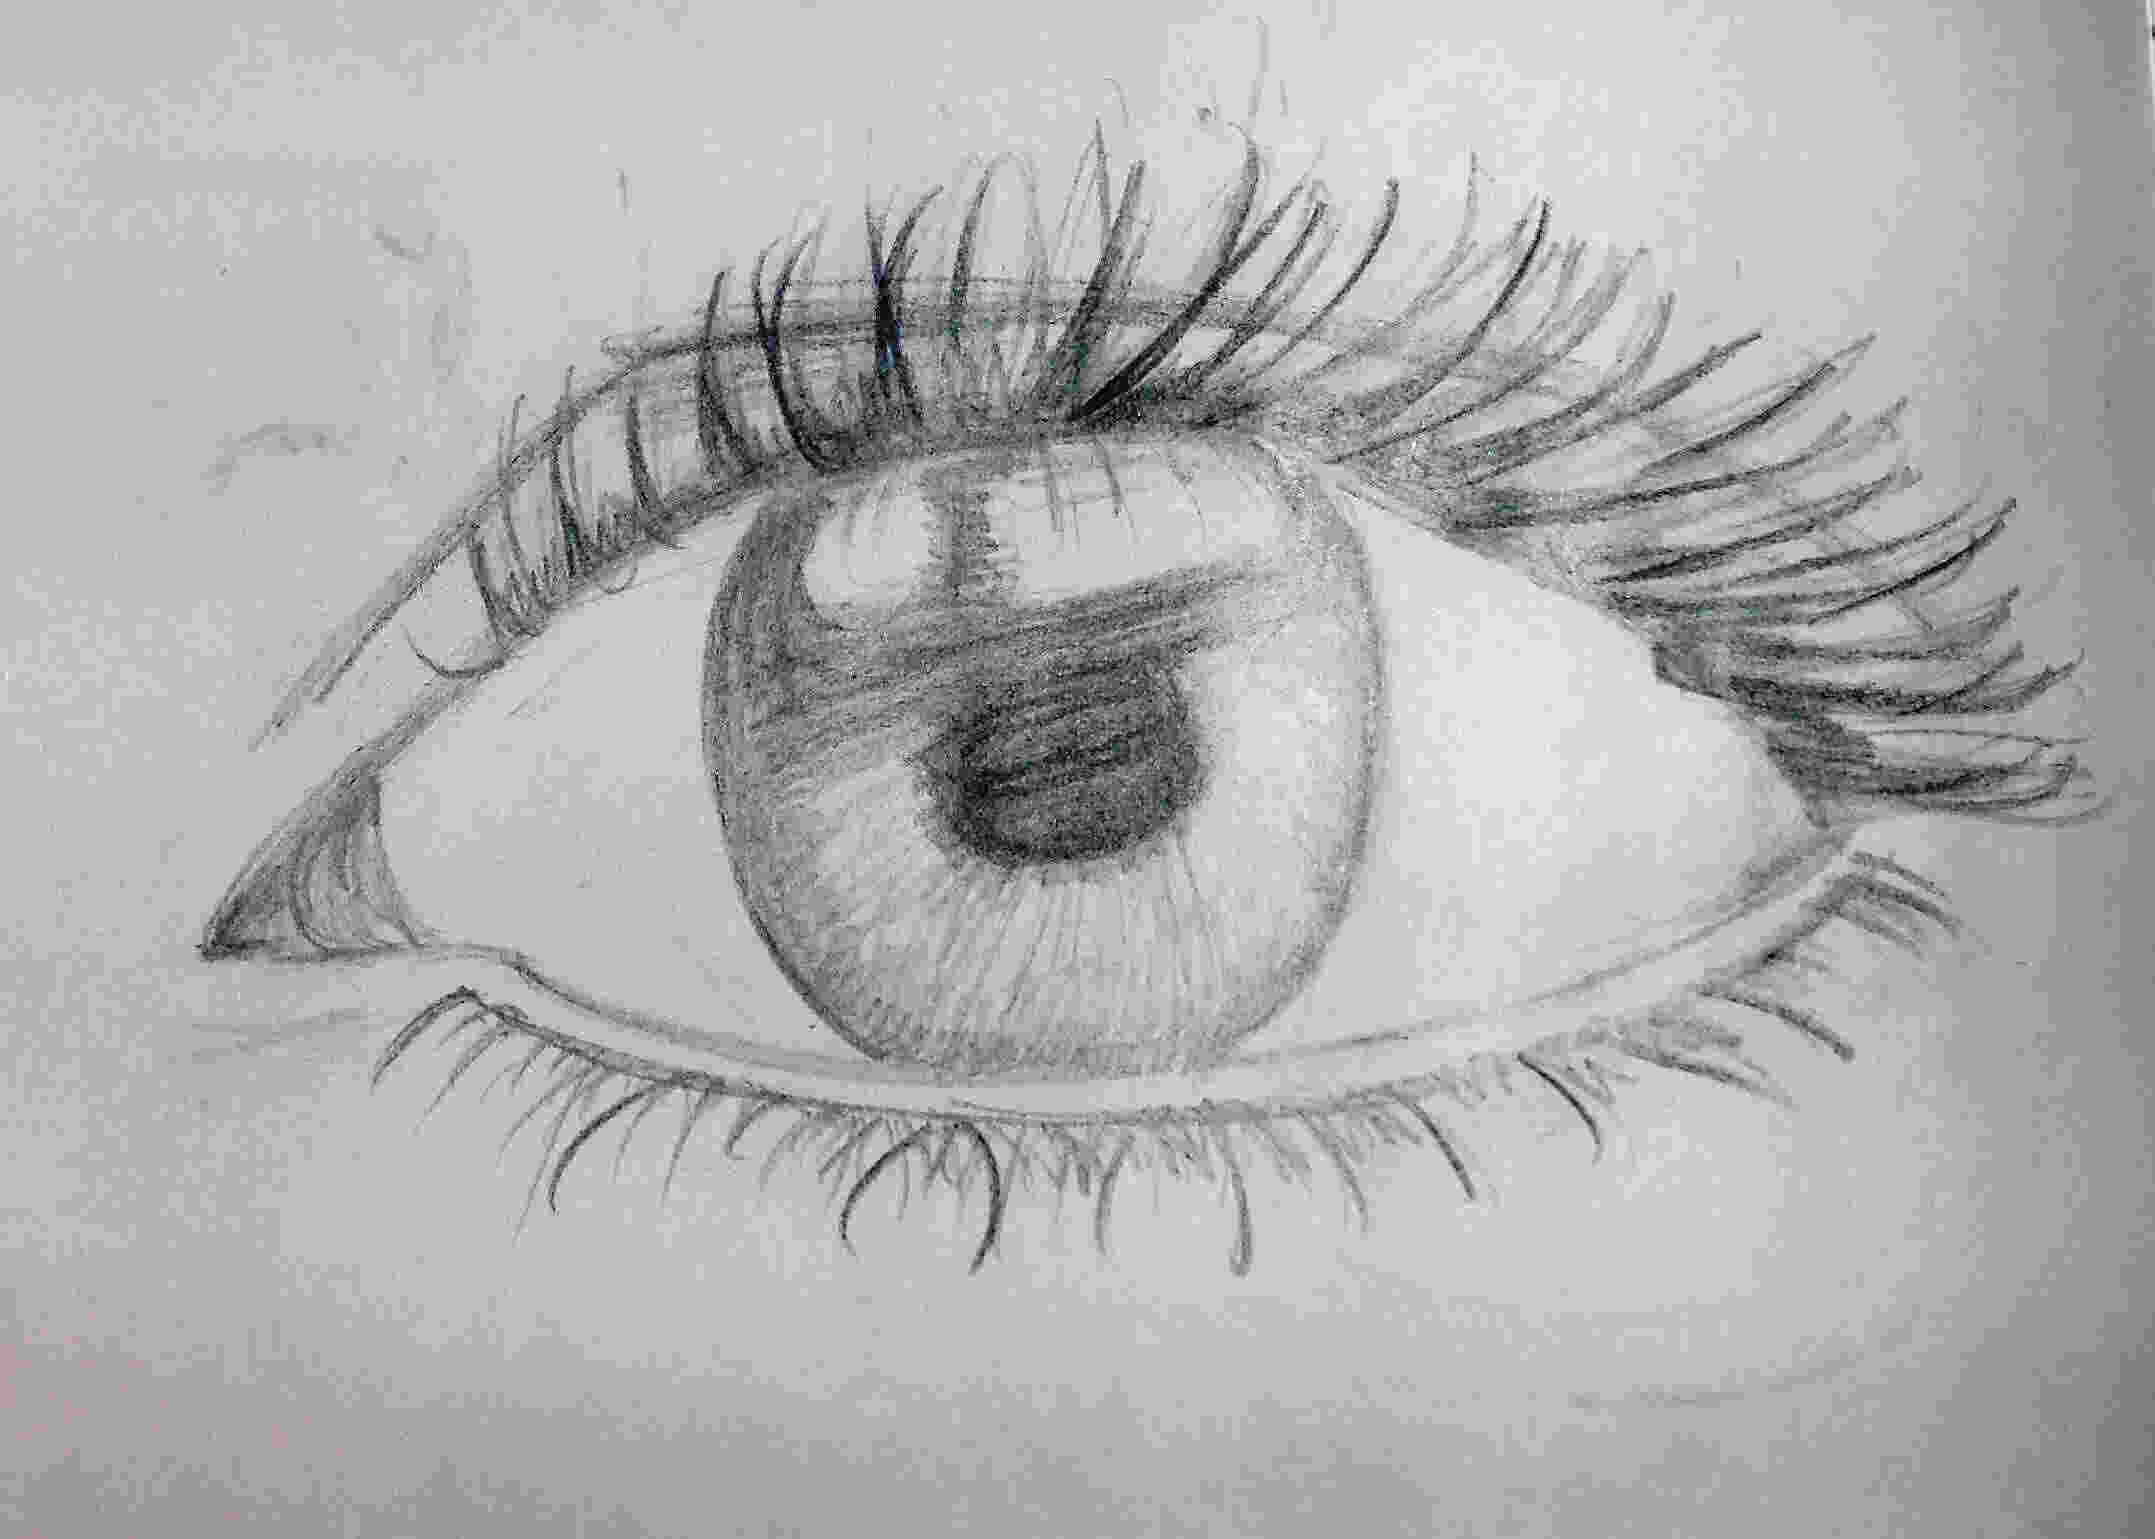
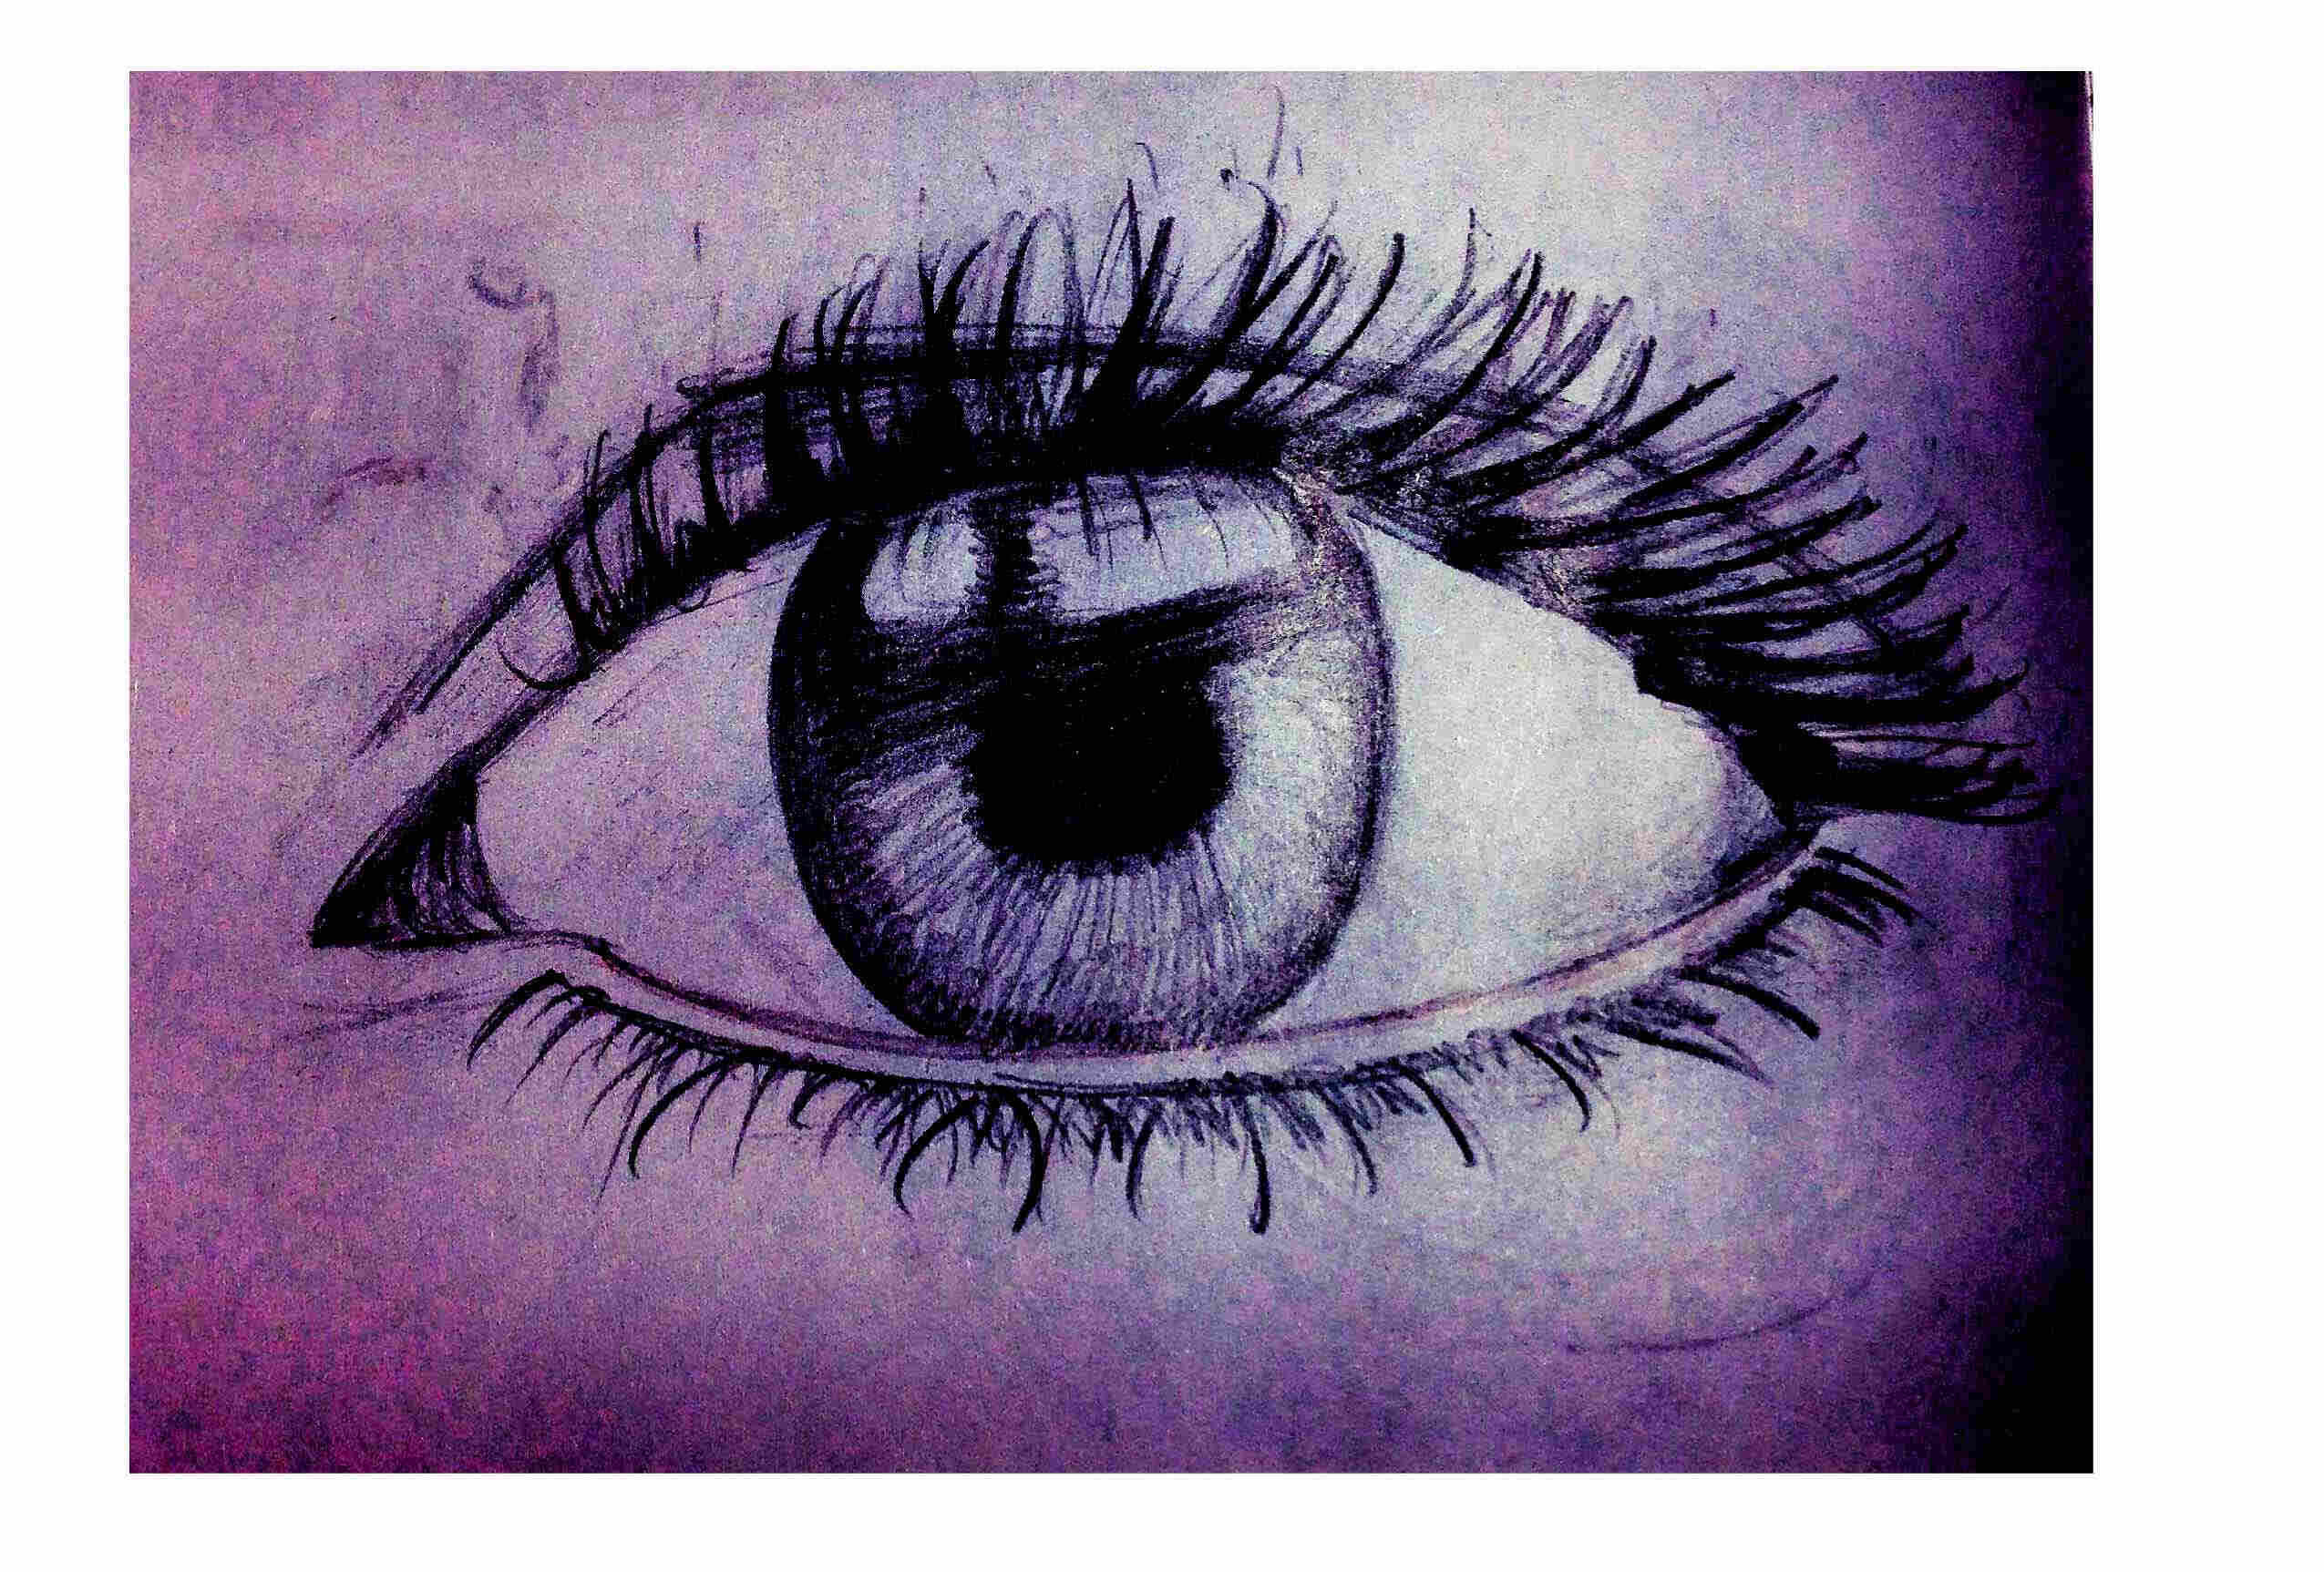
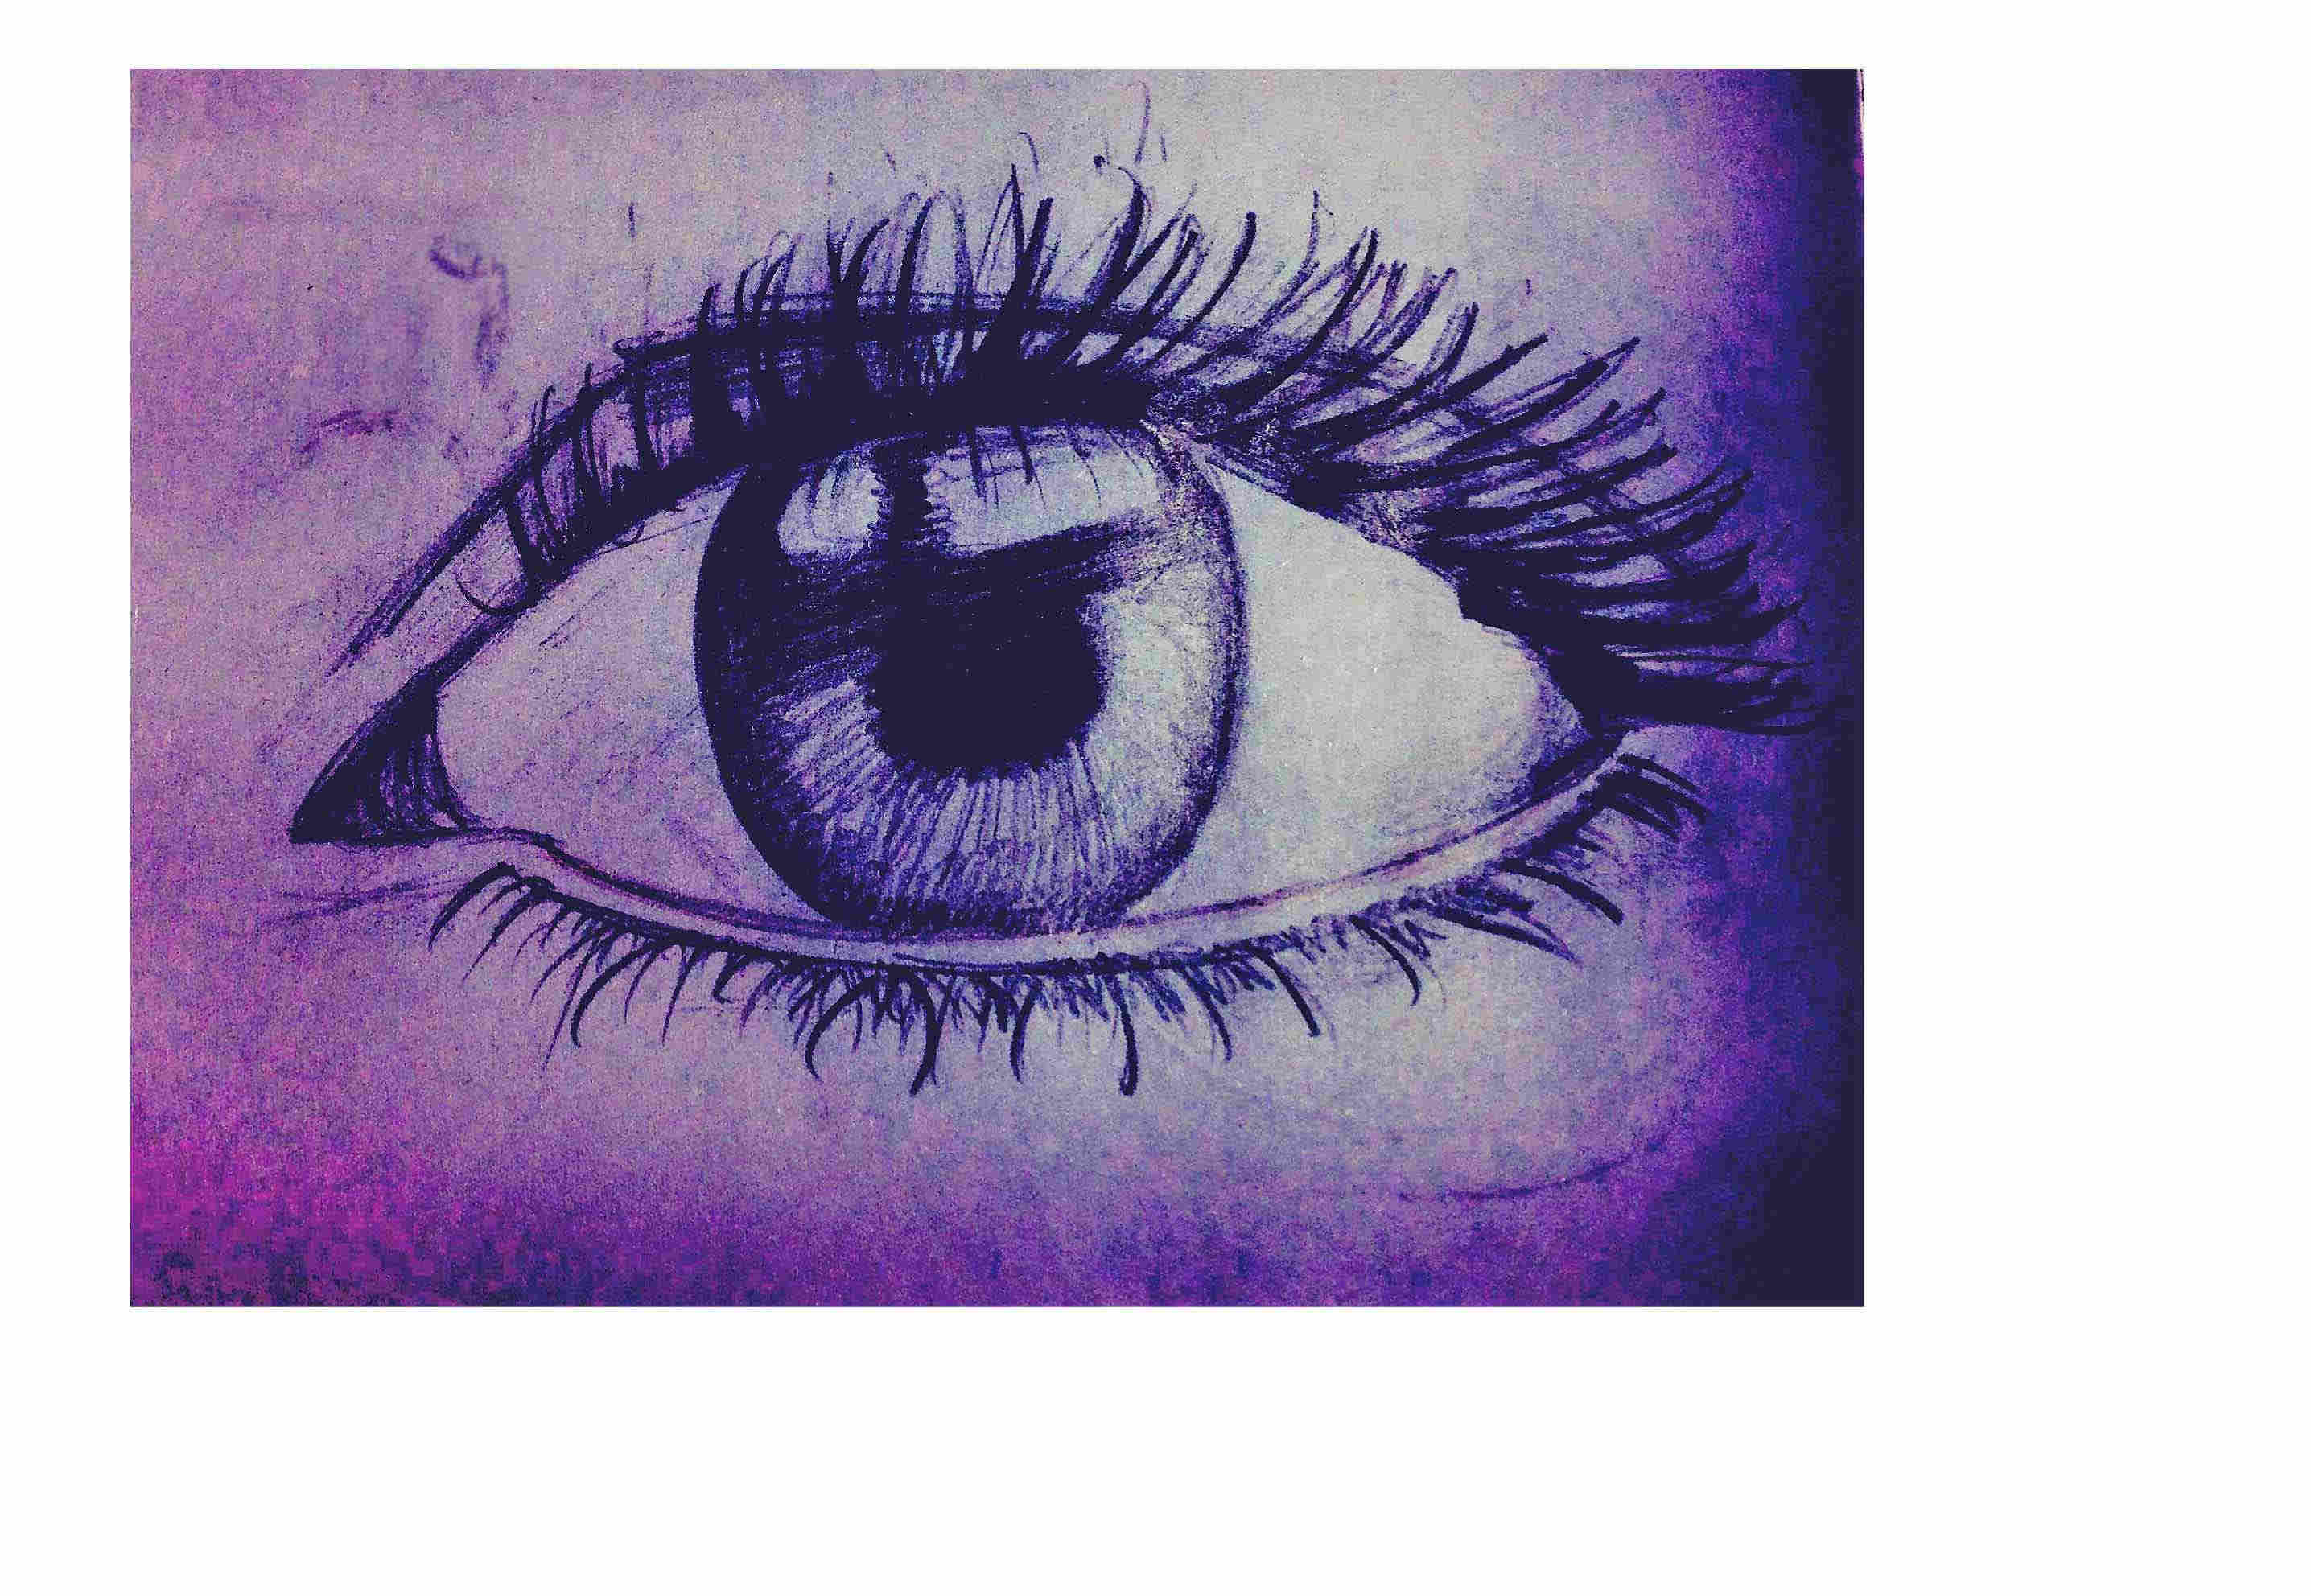
The main reason why I did that was because I have low abilities in free hand drawing,
so instead of humiliating myself, I wanted to focus on how those software
could result useful to me.
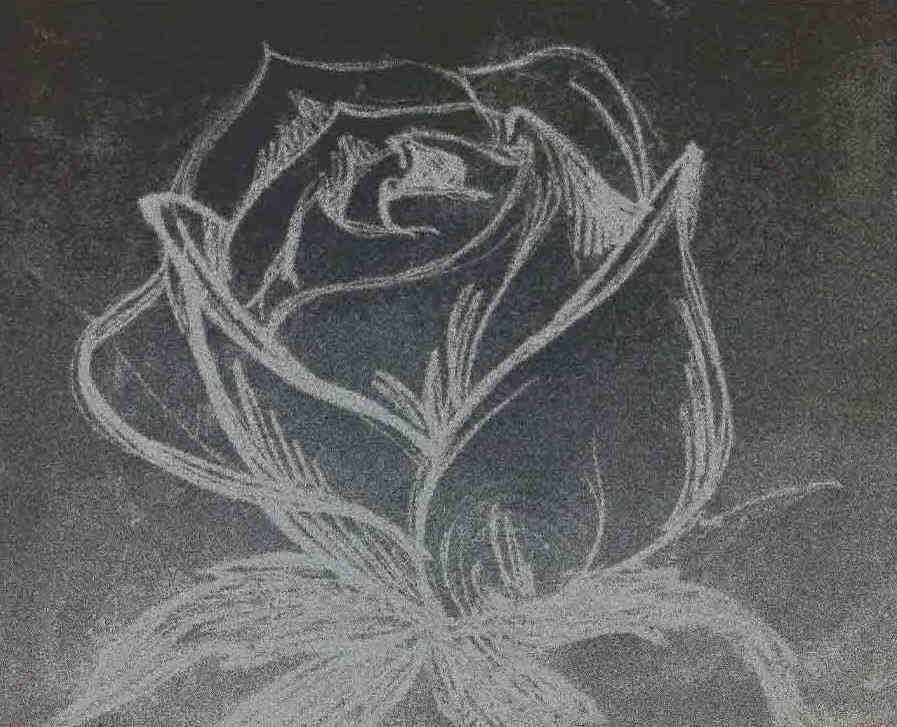
The quality of the starting images was really low and that helped me in seeing the "before-and-after" difference to evaluate the level of results one can obtain just having a basic knowledge of the software.
Gimp: discovering levels facility
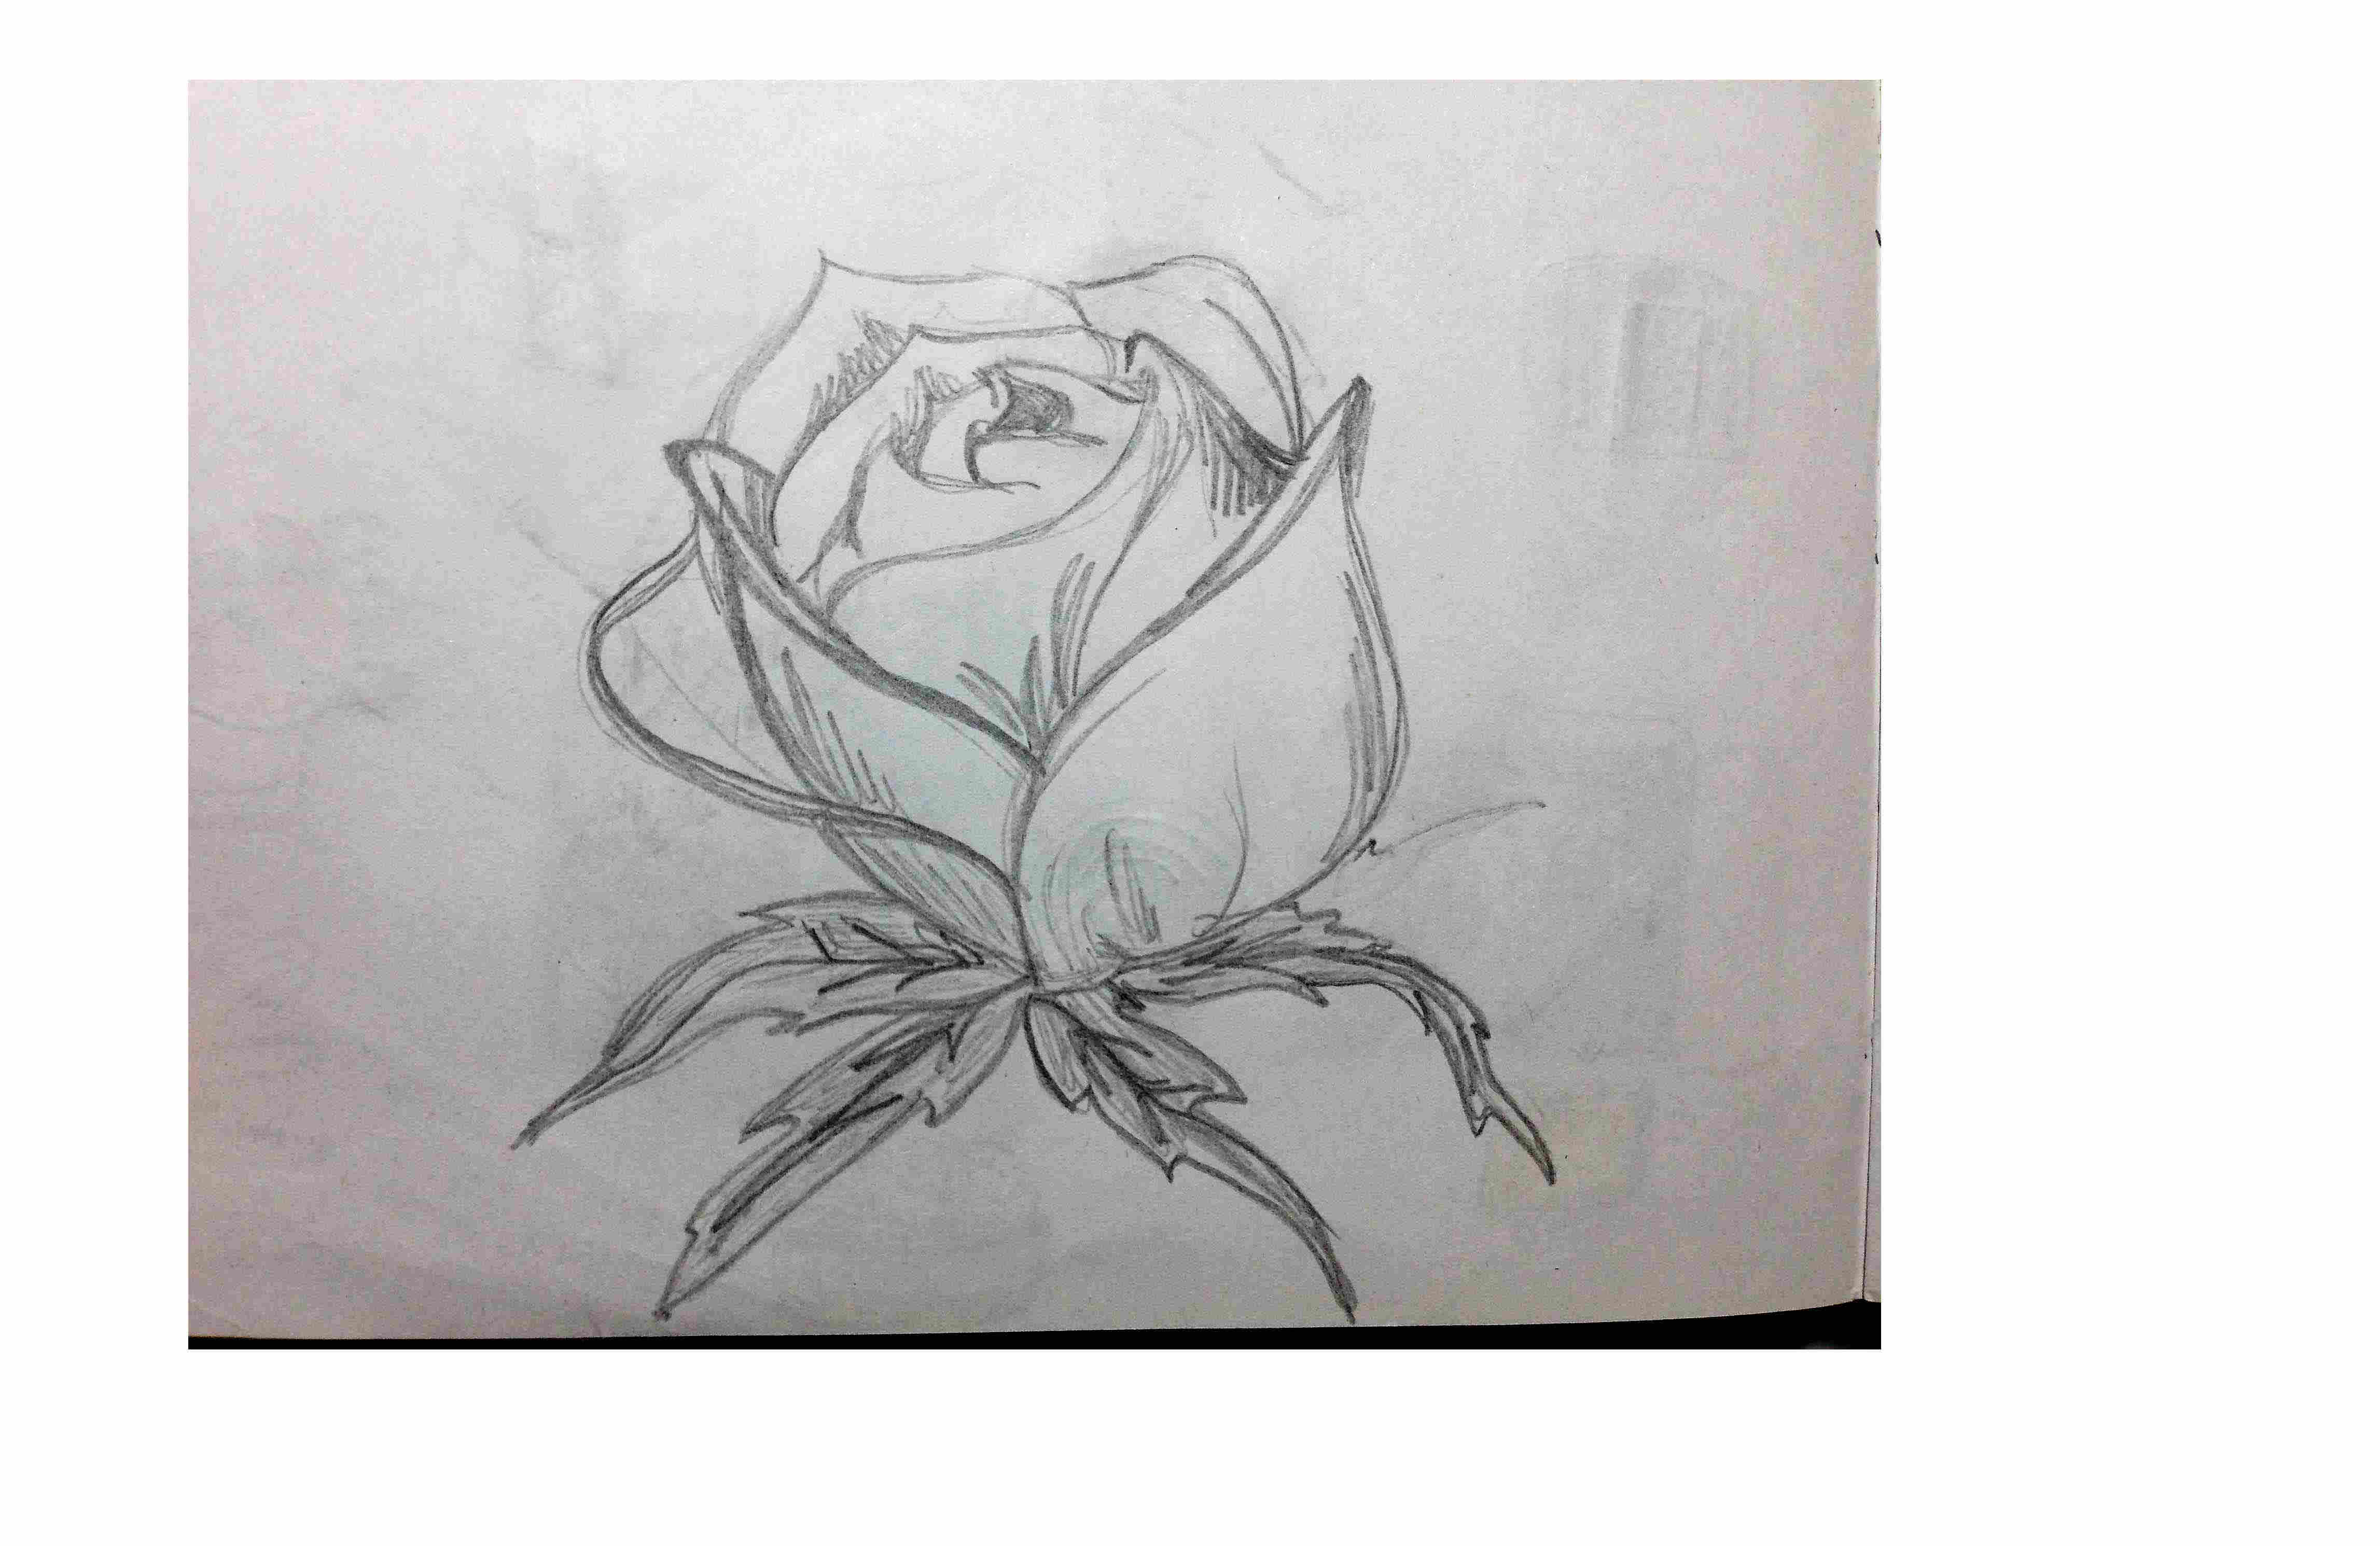
This was my picture:
 Just editing light features with commands in "Colors" menu (Color balance,
Brightness-contrast, Levels), I obtained this result:
Just editing light features with commands in "Colors" menu (Color balance,
Brightness-contrast, Levels), I obtained this result:
 I then wanted to play a bit with artistic effects but to maintain my previous
result, I copied the level (from Levels command bar, usually in the right of the page)
I was working on ("Contrasto e ombre"") and gave it a different name ("Fumetto")
to remember in what I was making changes.
I then wanted to play a bit with artistic effects but to maintain my previous
result, I copied the level (from Levels command bar, usually in the right of the page)
I was working on ("Contrasto e ombre"") and gave it a different name ("Fumetto")
to remember in what I was making changes.
Note: Level tools are really helpful, even if it could
take a bit to understand them at first: there icons that permit to hide or show levels
(a little square with an eye inside on the left of the level's name), to block them,
identify them with a color and so many levels can be showed
together, mixing their features and obtaining an integrated result that may become a new level
and also to.
I tried "Cartoon" effect (" Filters->Artistic->Cartoon"):
I then created a new level to low the opacity: actually to do so, you don't need
to go through menu command bars like "Colors" or "Filters" but you
can work on Levels command bar. I also added "Apply canvas"(" Filters->Artistic->Apply canvas")
effect:
 Here there's a screenshot about Gimp interface with the commands and bars I listed.
I'm sorry I didn't change language preferences before working, so you'll see everything written
in Italian, but I'll fix that soon (Gimp uses system language by default but it's possible to change it -
Edit->Preferences->Interface); anyway the command paths I wrote in italics refer
to english version
Here there's a screenshot about Gimp interface with the commands and bars I listed.
I'm sorry I didn't change language preferences before working, so you'll see everything written
in Italian, but I'll fix that soon (Gimp uses system language by default but it's possible to change it -
Edit->Preferences->Interface); anyway the command paths I wrote in italics refer
to english version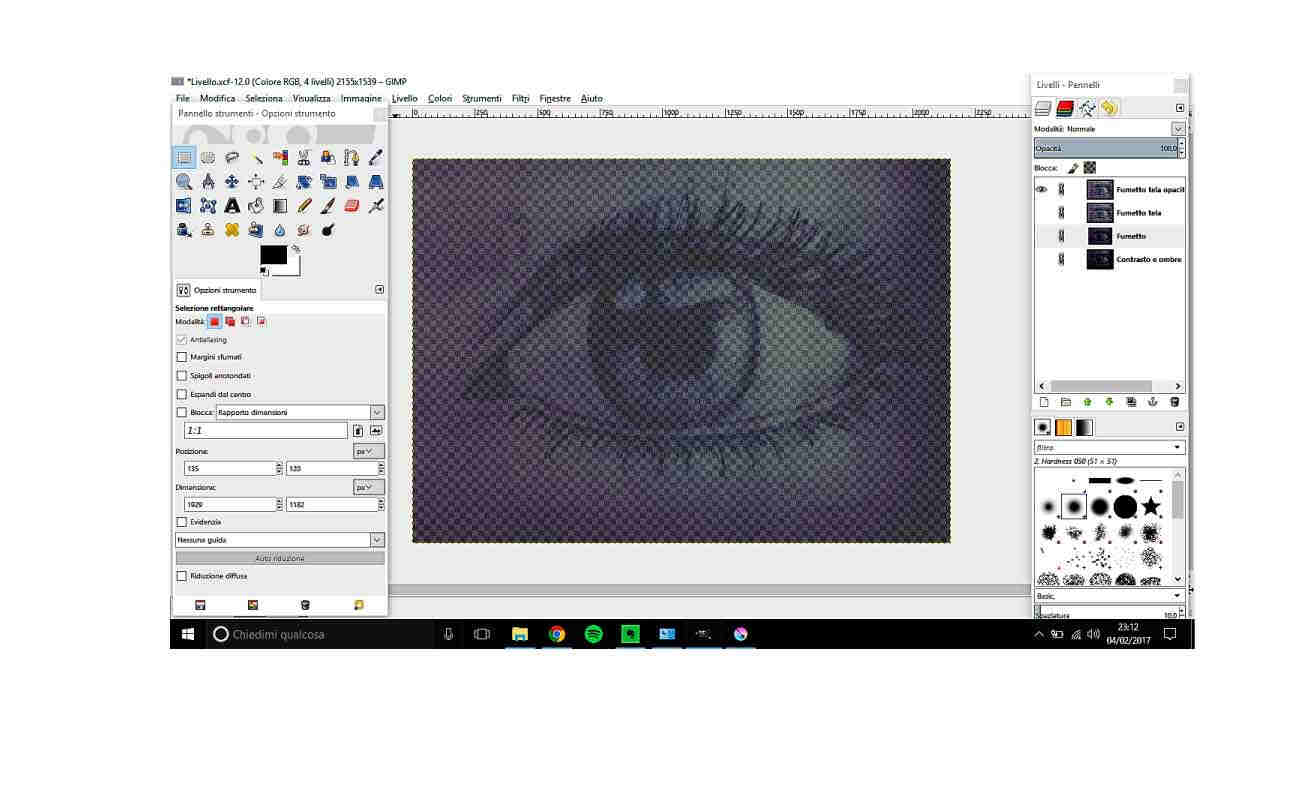 Conclusions: I once already tried Gimp before but I thought it was
poorly organised (honestly, I don't like that tools to draw splines or geometric figures
are in the same line of 3D already made and editable basic models), but I decided to give it
another chance. For what regards picture's simple editing it's fairly easy to be used.
Conclusions: I once already tried Gimp before but I thought it was
poorly organised (honestly, I don't like that tools to draw splines or geometric figures
are in the same line of 3D already made and editable basic models), but I decided to give it
another chance. For what regards picture's simple editing it's fairly easy to be used.
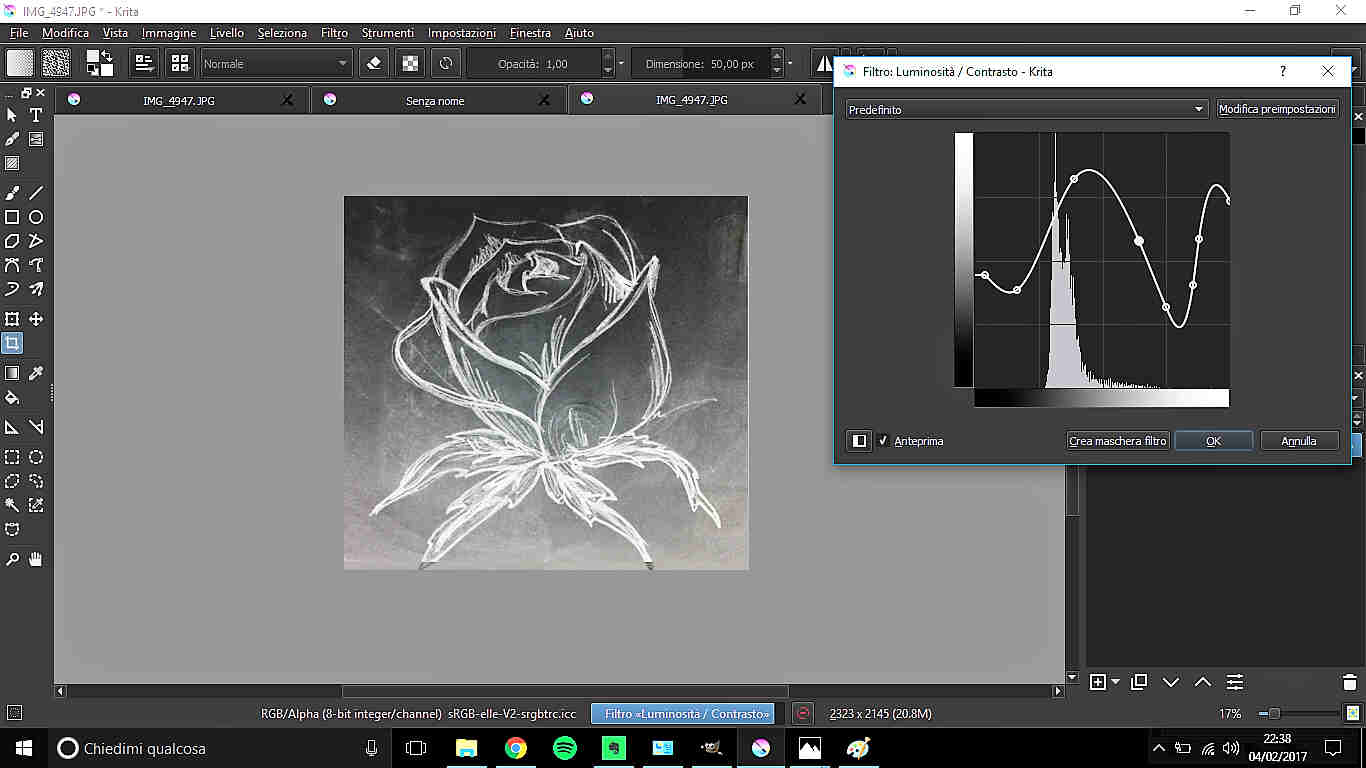
Krita: a cool luminosity-contrast regulating tool
I changed software and picture:
 As anticipated in the title, I found out Krita has a powerful
brightness and contrast regulation system, that allows you to make changes by means of
point adding and line manual editing of a curve (Filters->Adjust->Brightness/Contrast curve).
As anticipated in the title, I found out Krita has a powerful
brightness and contrast regulation system, that allows you to make changes by means of
point adding and line manual editing of a curve (Filters->Adjust->Brightness/Contrast curve).
 Just relying on this and "Levels" (Filters->Adjust->Levels) tools, I ended up
with three different results:
Just relying on this and "Levels" (Filters->Adjust->Levels) tools, I ended up
with three different results:
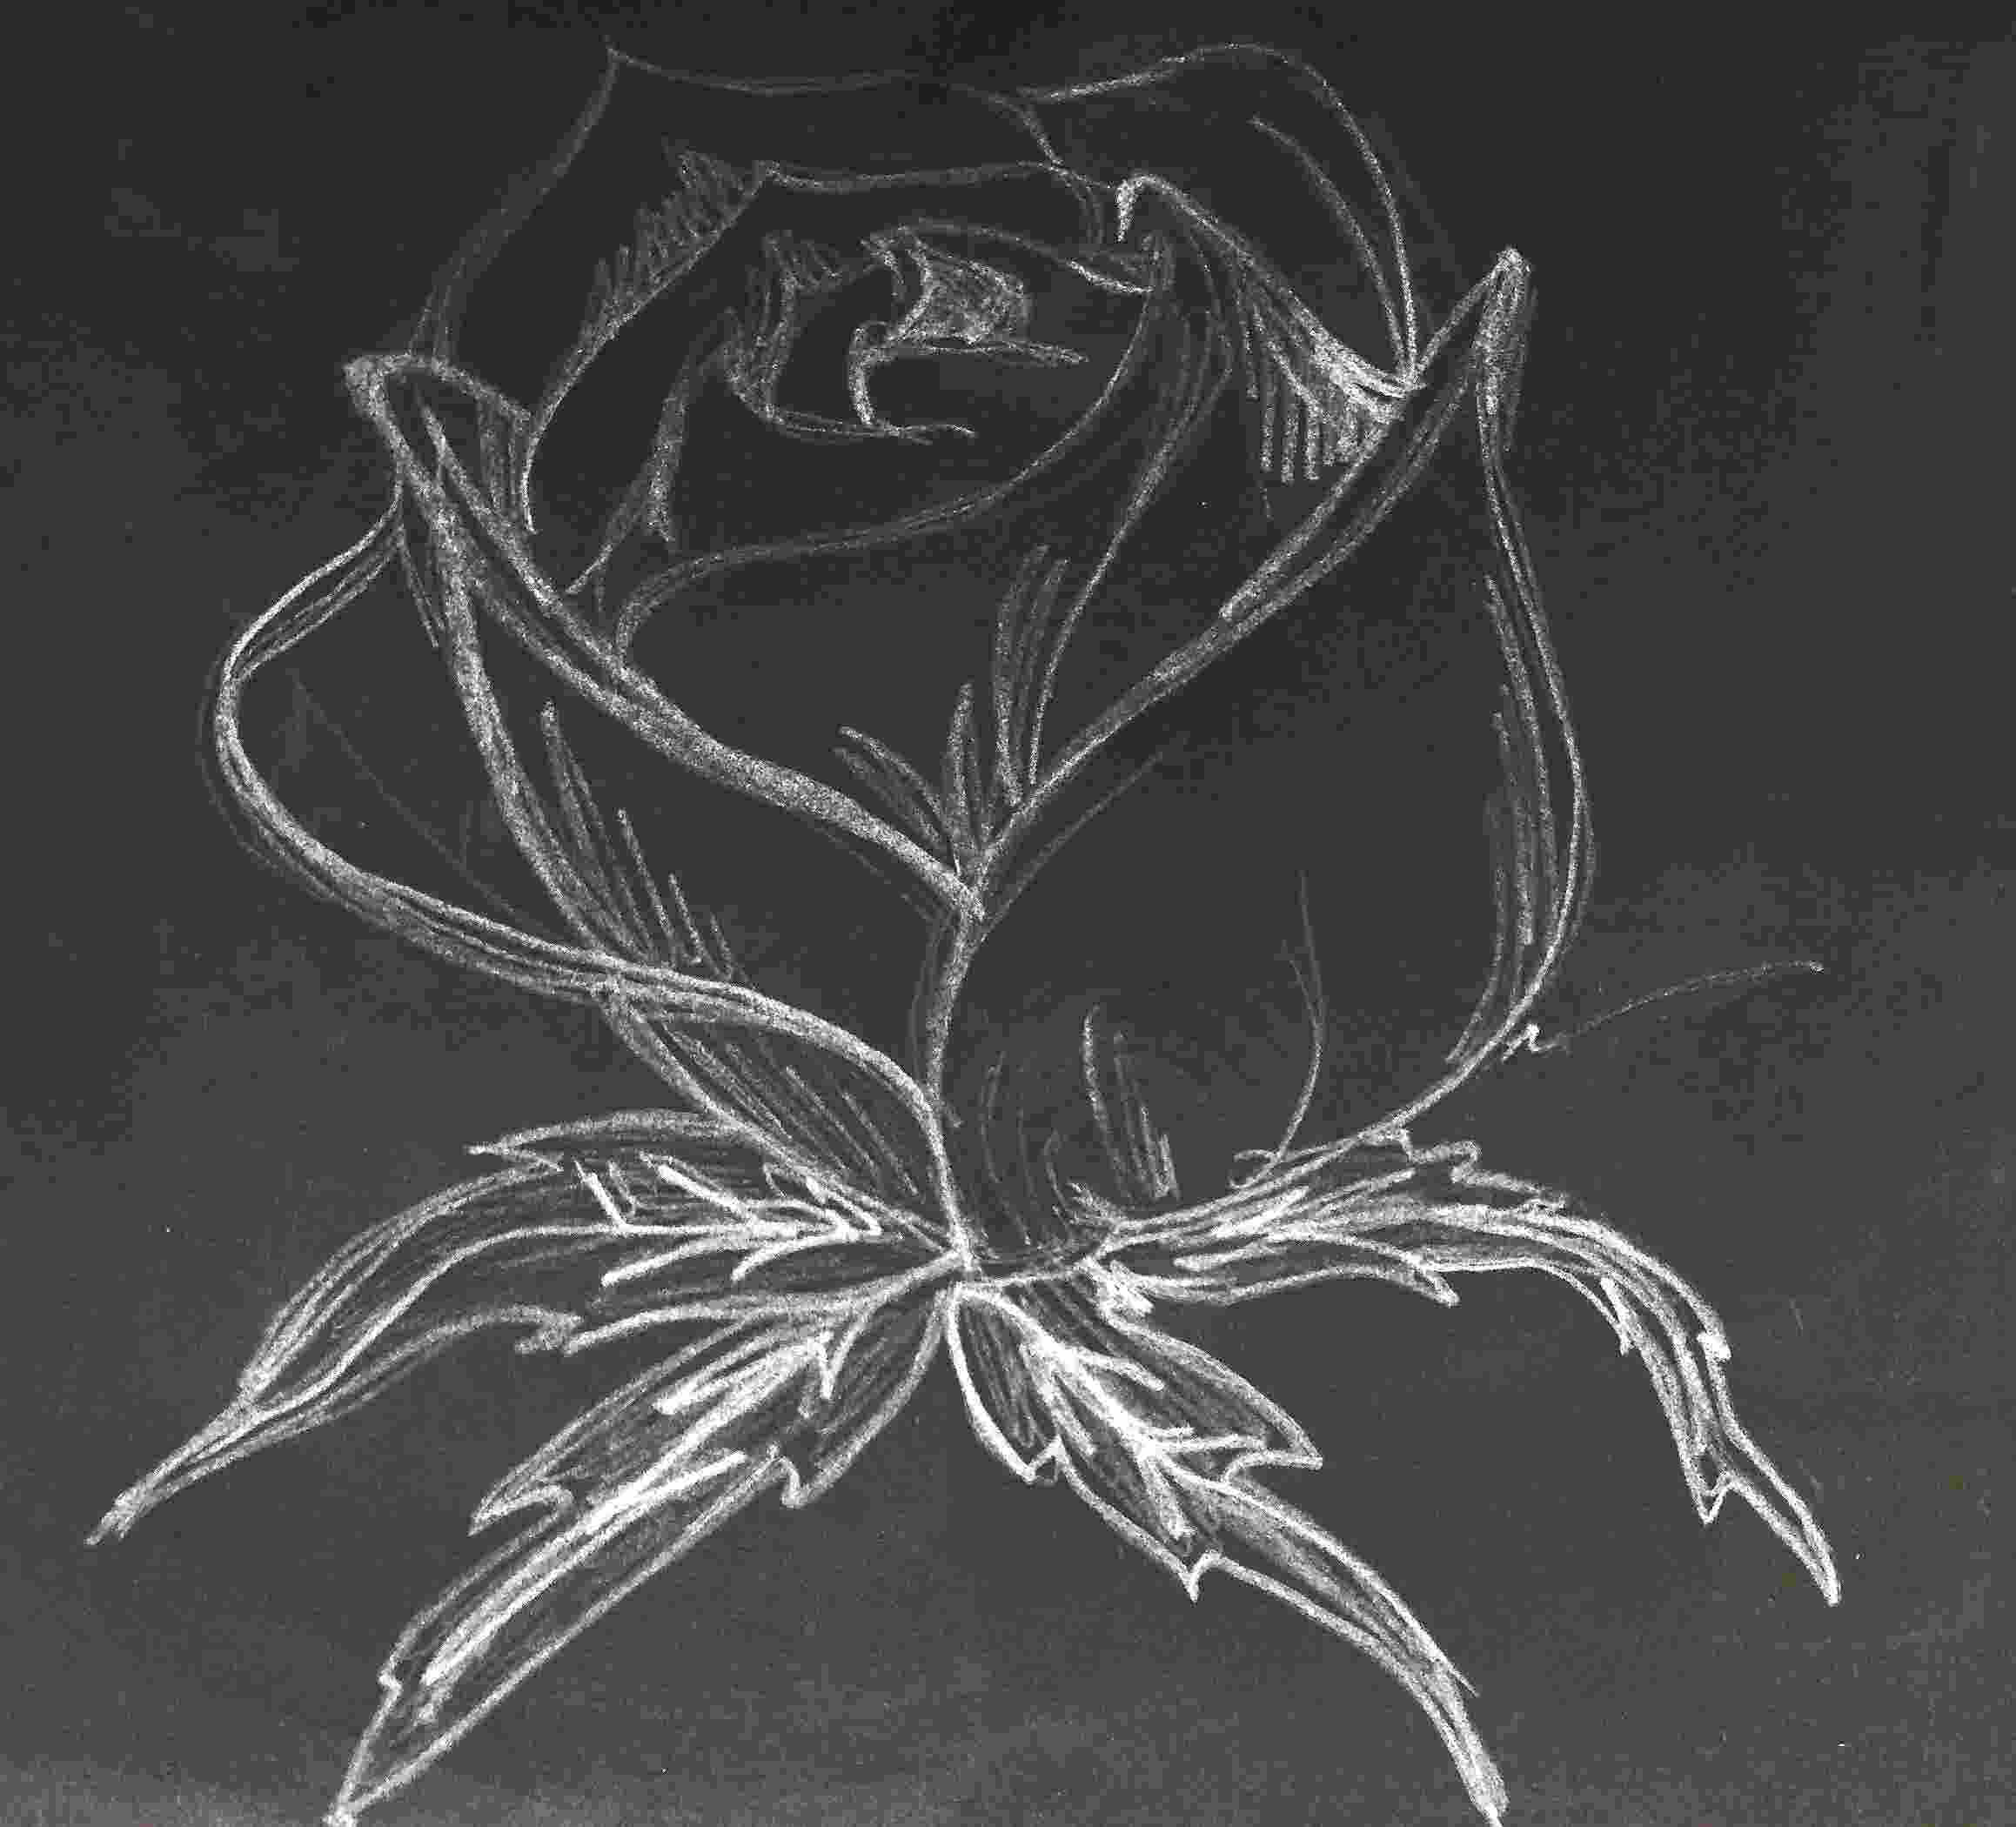 Like drawing with a white pencil on black cardboard
 Like drawing on a blackboard
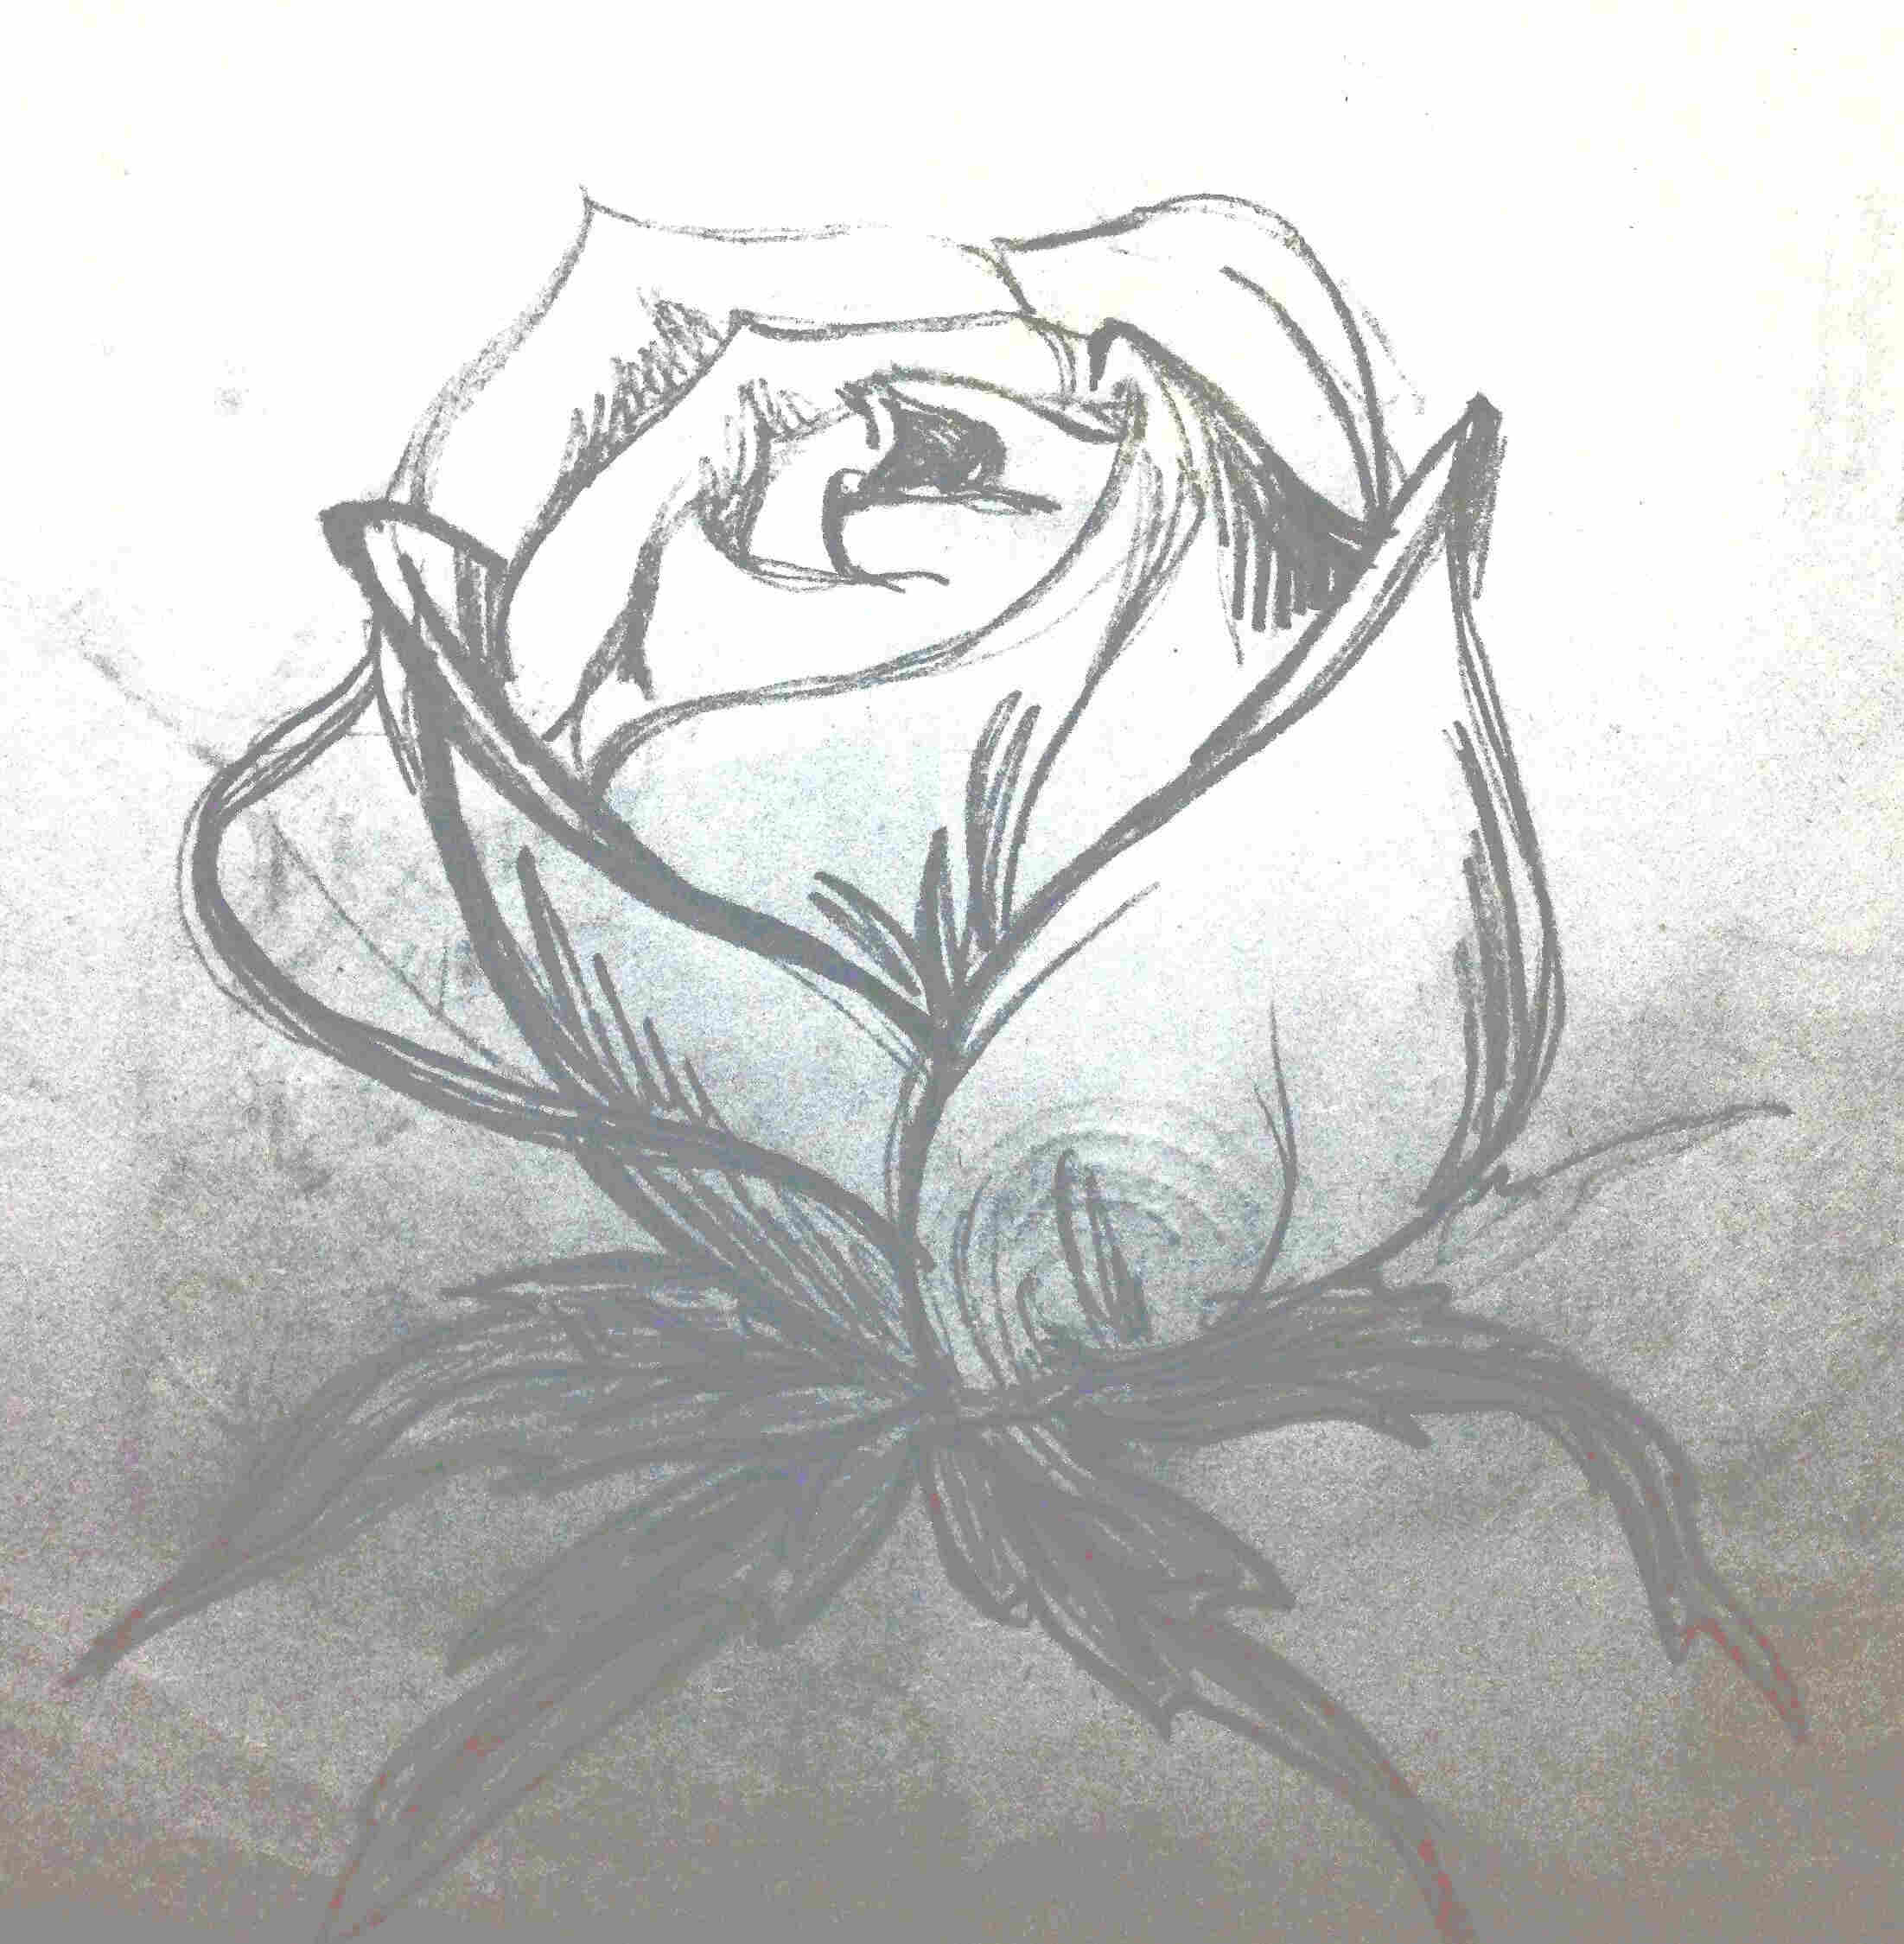 Like a real drawing
Conclusions: I didn't explore Krita much more but I found having a tool like that permits to have results with great differences making little changes, using as a reference two grey scale, that permit immediately to see if you are increasing or dropping down a value.
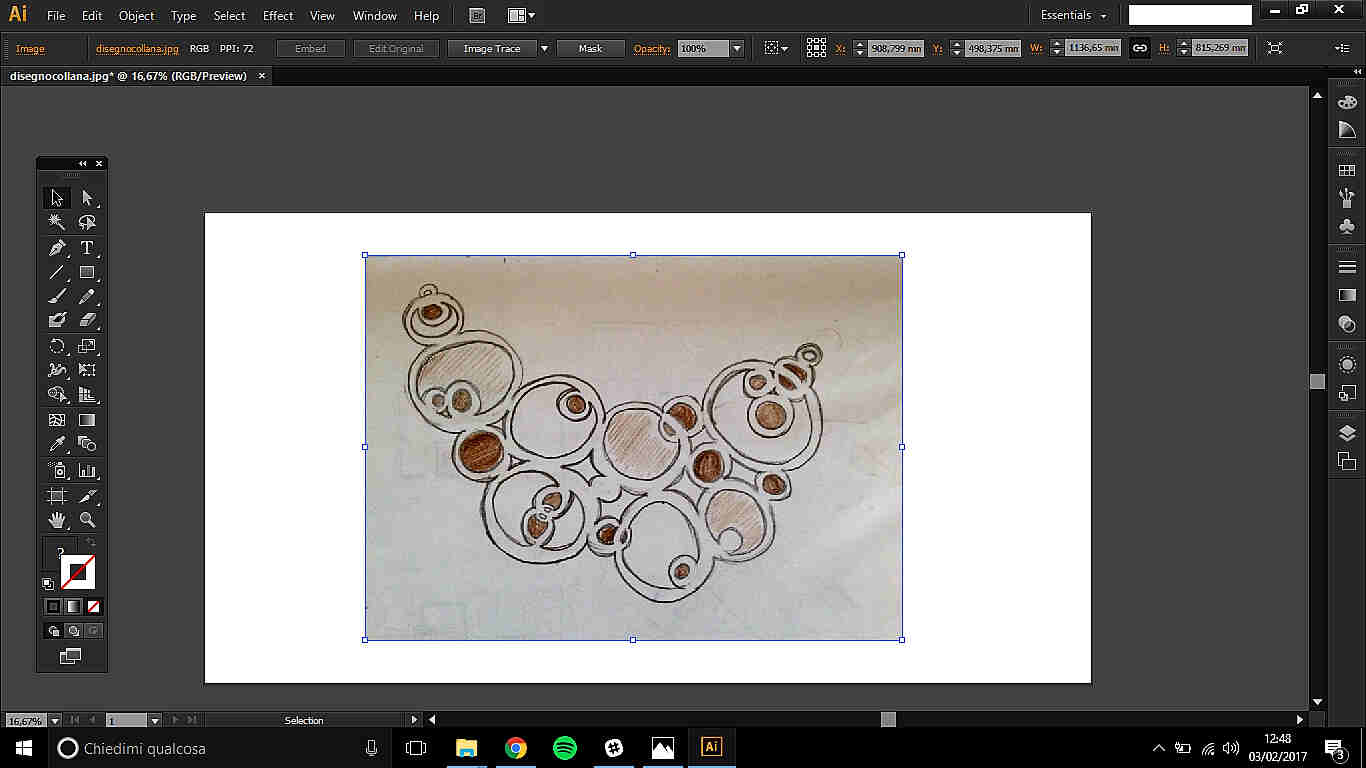
Vectorising a picture: Inkscape&Illustator
Even if Illustrator and Inkscape were quite known to me, I wanted to make
comparisons about the result of vectorising the same picture.I used a drawing of my
final project's detail.
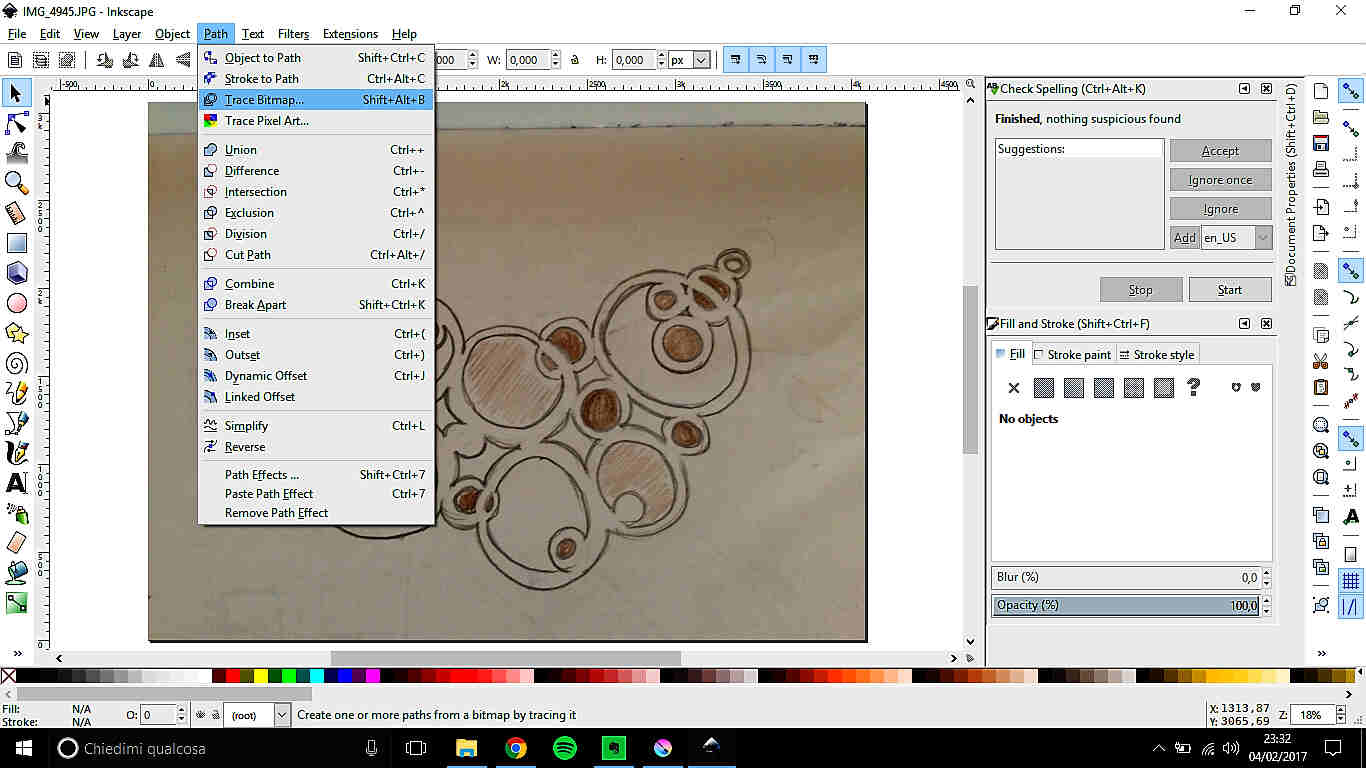
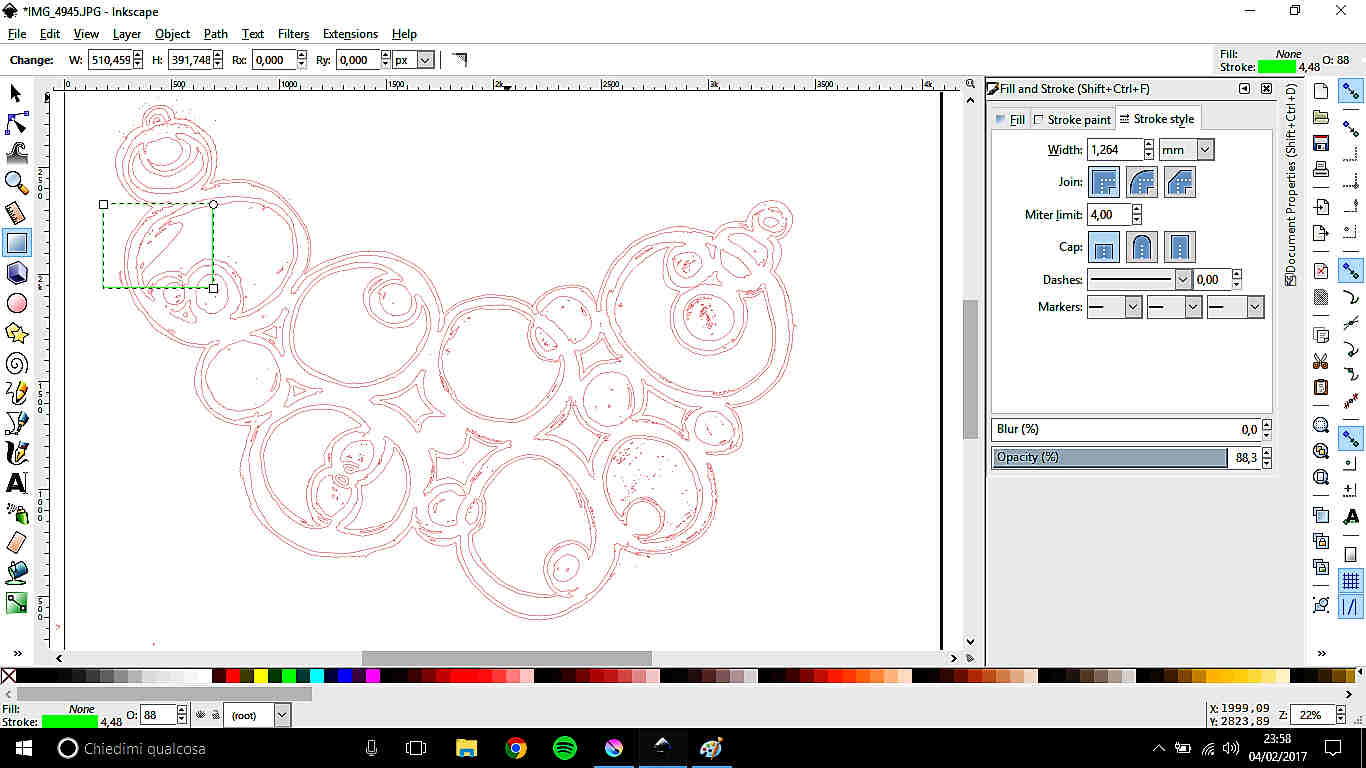
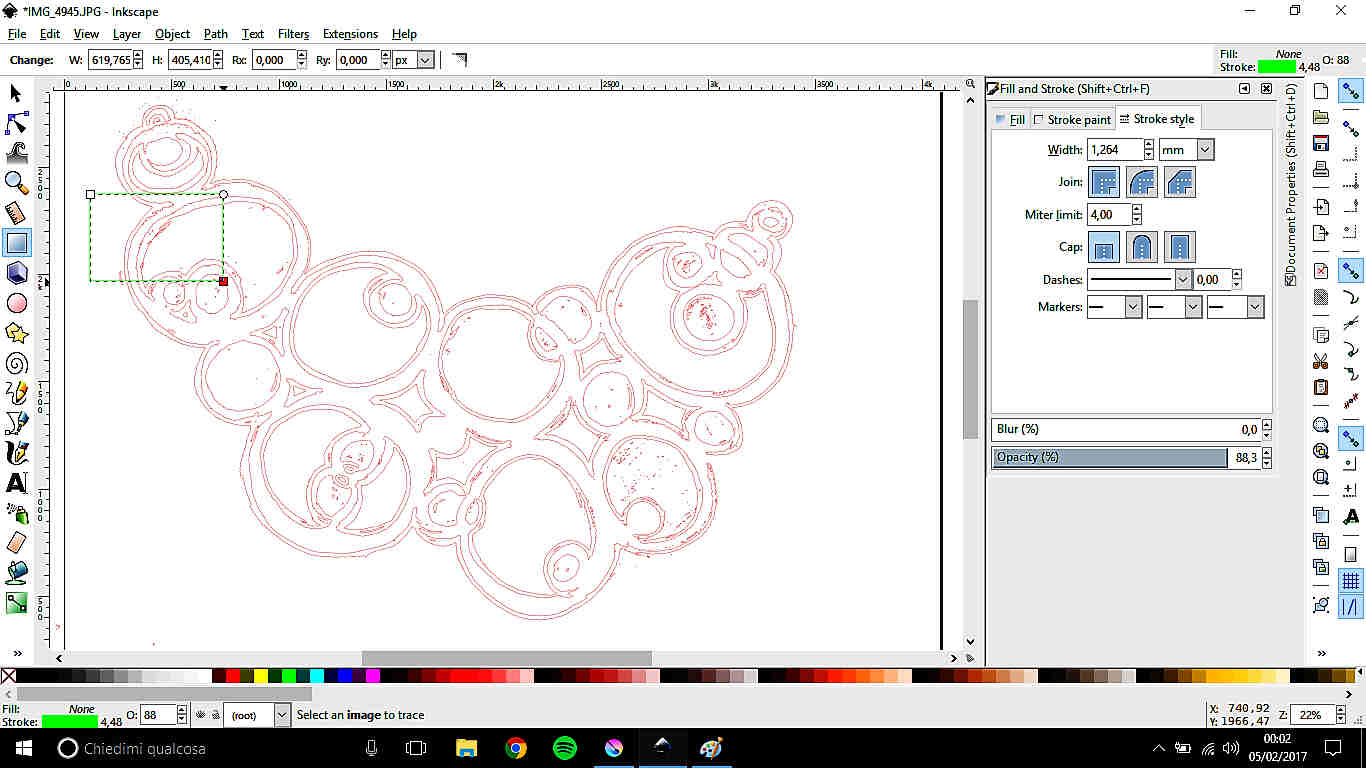
Inkscape:Tracing bitmap and line gaps
Once you open an image, it still doesn't result as a group of points and lines, so you
can't modify curves, colors, thickness or infill. To do that first you have to vectorise
the picture: "Path->Trace Bitmap"
 Then, an window will open and there you can edit tracing parameters (brightness, edge, colors
) and see the preview
Then, an window will open and there you can edit tracing parameters (brightness, edge, colors
) and see the preview
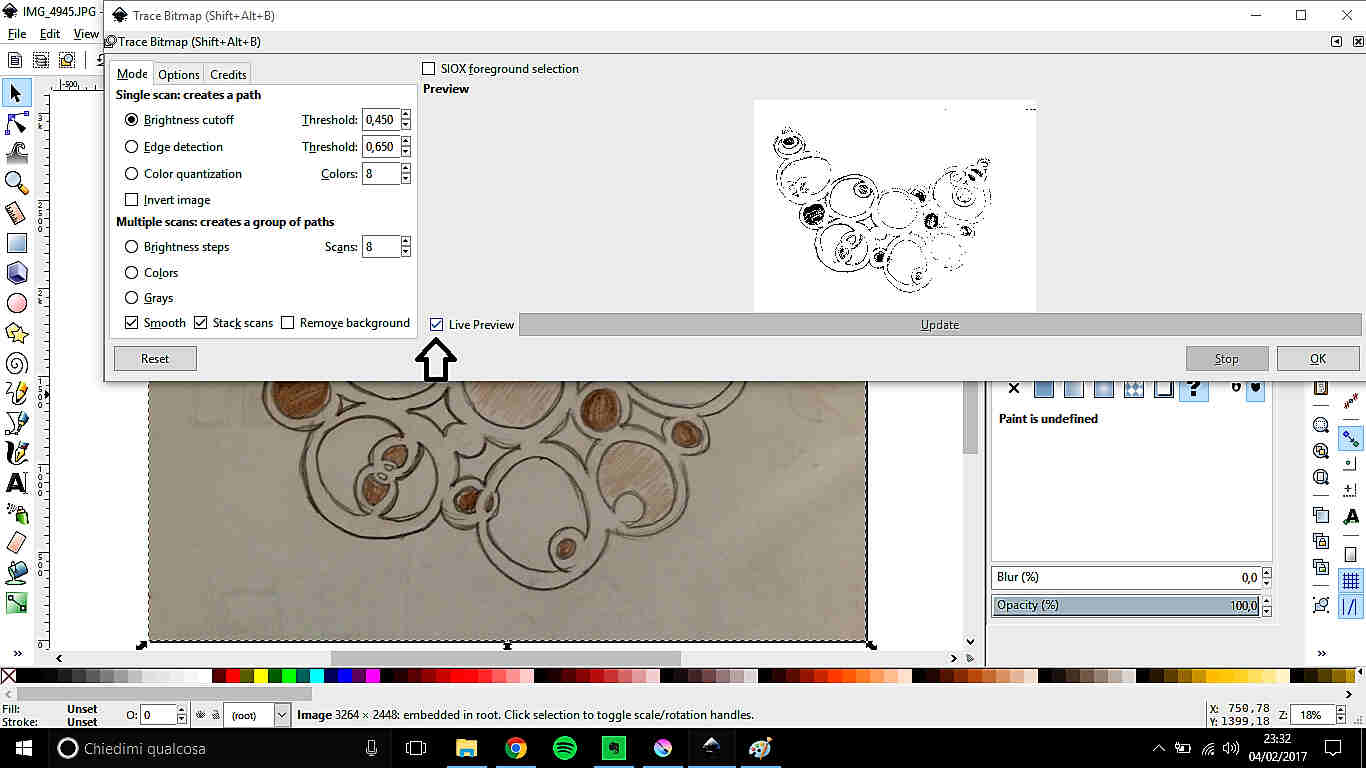 Once you set all parameters and pressed "OK", you'll have both your starting .png (or .jpg) and vector
file on your artboard: delete image file
Once you set all parameters and pressed "OK", you'll have both your starting .png (or .jpg) and vector
file on your artboard: delete image file
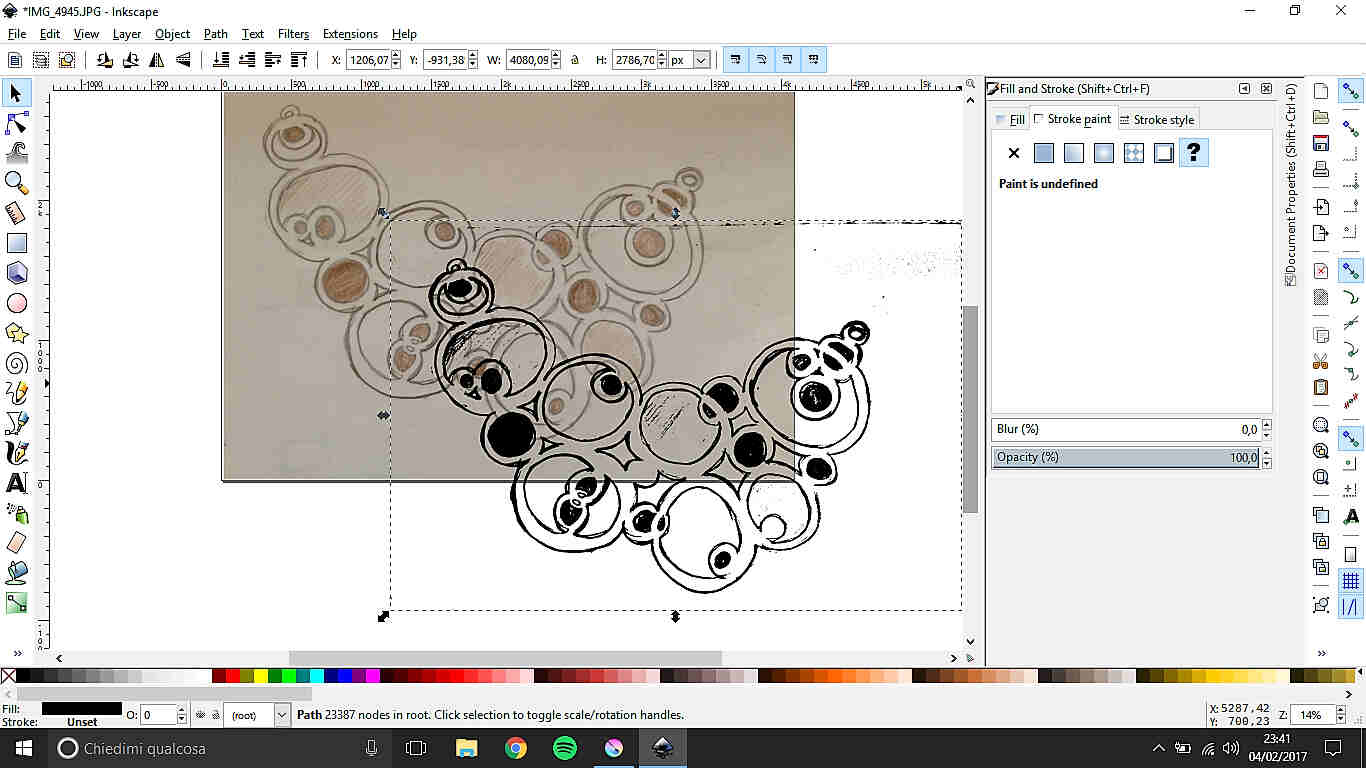 Now you can edit infill and edge color, thickness, opacity, etc. using commands in
the "Fill and Stroke" window. I set no infill and red (RGB: 255,0,0) edge line
(0,001 mm thick) cause this is default setting used for laser cutting...but we will
talk about it next week ;)
Now you can edit infill and edge color, thickness, opacity, etc. using commands in
the "Fill and Stroke" window. I set no infill and red (RGB: 255,0,0) edge line
(0,001 mm thick) cause this is default setting used for laser cutting...but we will
talk about it next week ;) 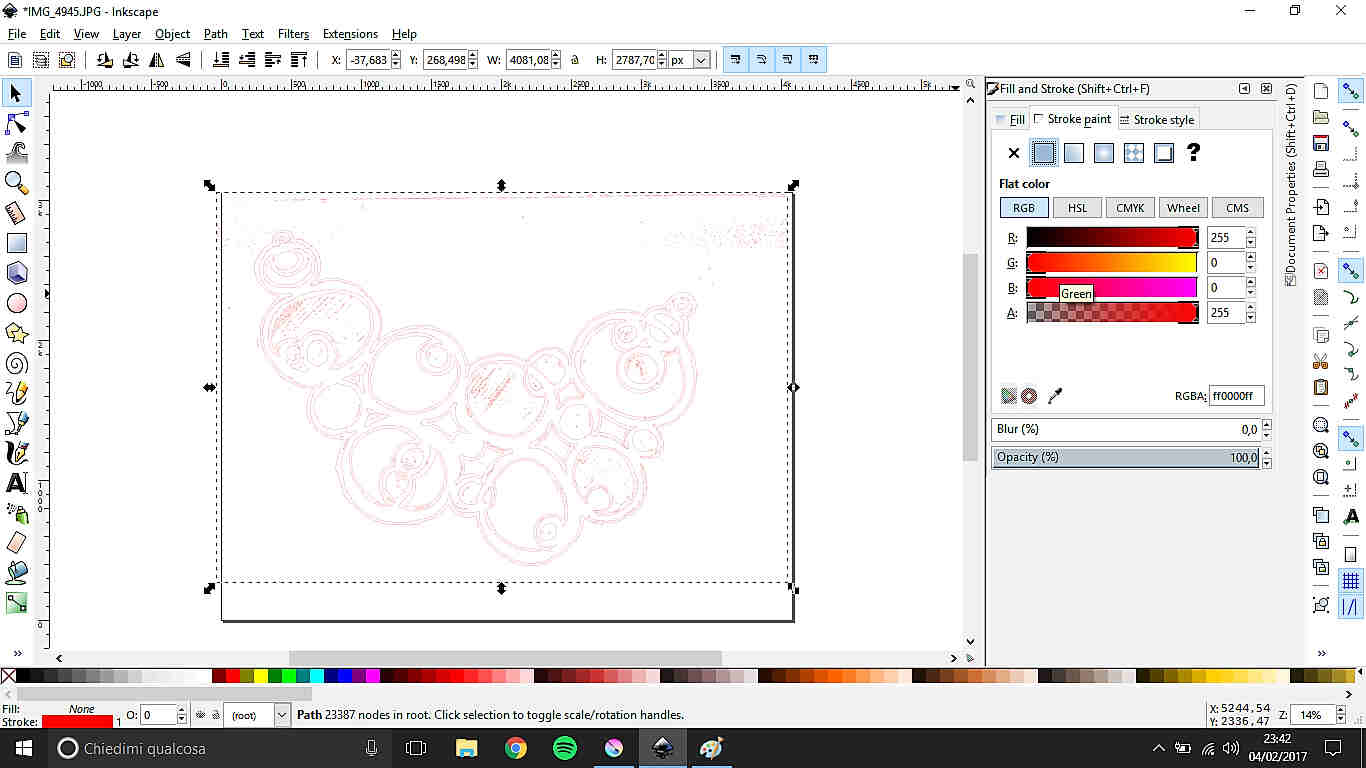 If you change pointer in the upper left of the artboard, you'll se all the anchor points
of your vector file. As you can see, even being a powerful tool to computerize drawings,
still a lot of dirt remains.
If you change pointer in the upper left of the artboard, you'll se all the anchor points
of your vector file. As you can see, even being a powerful tool to computerize drawings,
still a lot of dirt remains.
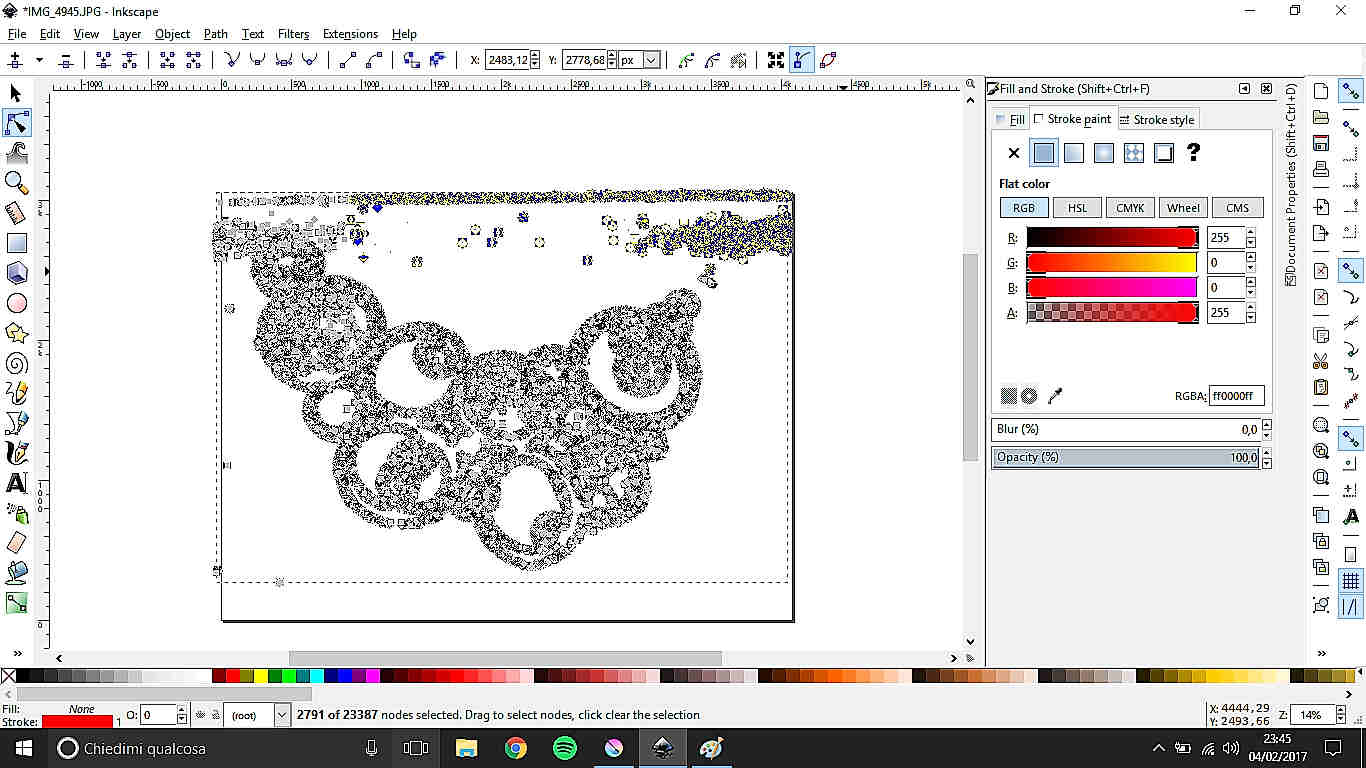 You may decide to clear your file but it's really unlikely you won't have to face
with a very precise and long work, cause there will be several little lines or points
also were you just didn't draw on paper - that can depend on picture resolution, dust,light..-
You may decide to clear your file but it's really unlikely you won't have to face
with a very precise and long work, cause there will be several little lines or points
also were you just didn't draw on paper - that can depend on picture resolution, dust,light..-
 I tried to fix it but as you will see the result wasn't that good and it took me
something like ten minutes.
I tried to fix it but as you will see the result wasn't that good and it took me
something like ten minutes.
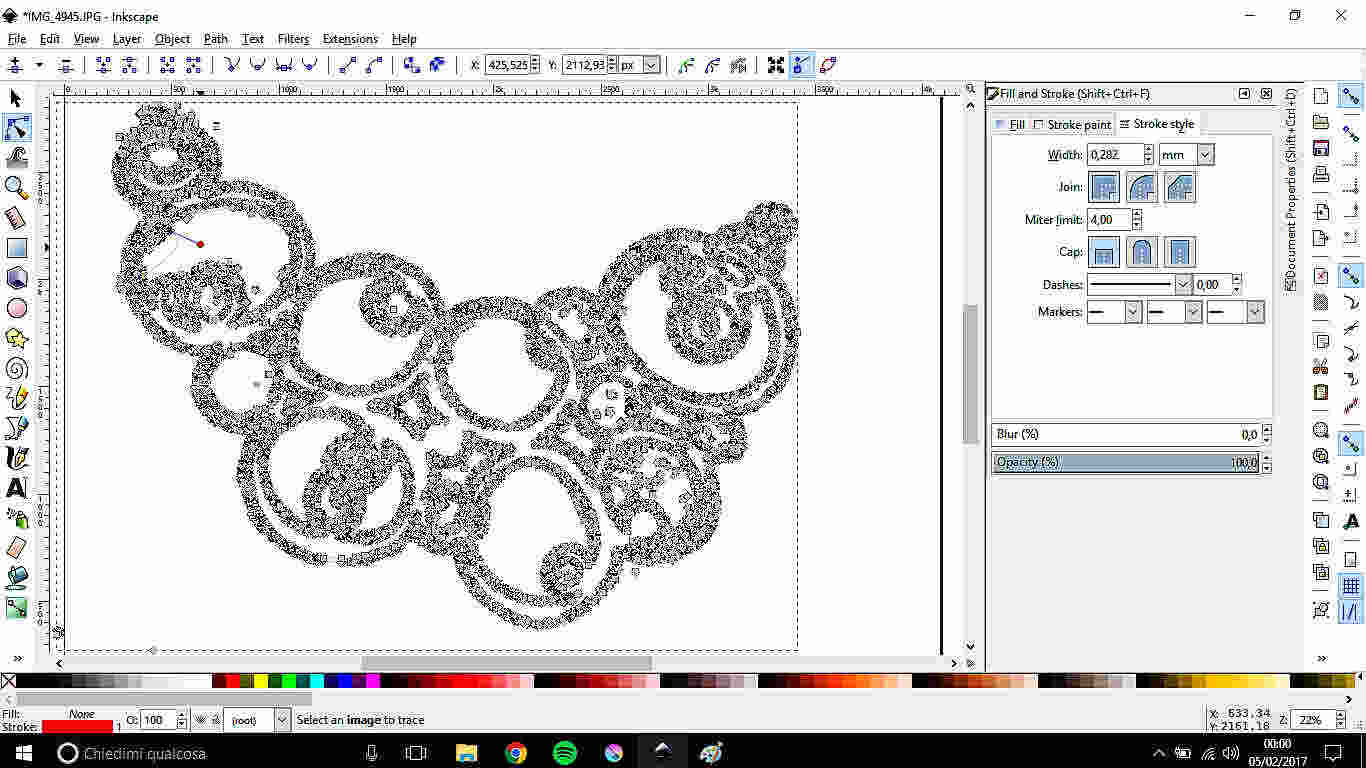
 Conclusions: like Gimp, I didn't explore
all tools Inkscape has but I didn't like that sketching tools figure together
with 3D ones. Nevertheless, I used to rely quite often on this software to vectorise
pictures....Until I discovered Illustrator has it too.
Conclusions: like Gimp, I didn't explore
all tools Inkscape has but I didn't like that sketching tools figure together
with 3D ones. Nevertheless, I used to rely quite often on this software to vectorise
pictures....Until I discovered Illustrator has it too.
Illustrator: best to vectorise or design?
To exploit better my knowledge of Adobe's software, I wanted to compare how longer could take to make a geometric drawing vectorial than designing it on your computer. Actually my reasoning makes sense when related to hand drawings (mostly if you are a dud like me), while, using silhouette images, often designing it's more complicated.
Open your file in Illustrator.
If you click on the image (select it), on the command bar in the upper part of the page
will appear a "Image Trace" button:
 If you click on it, another menu will compare:
- "[Default]": this button let you decide which method to use to catch your picture details (lots of deails "High fidelity photo","16 colors", few details "Low fidelity photo","3 colors","Silhouette");
- "View": the menu related to this voice let you decide the output of your operation showed
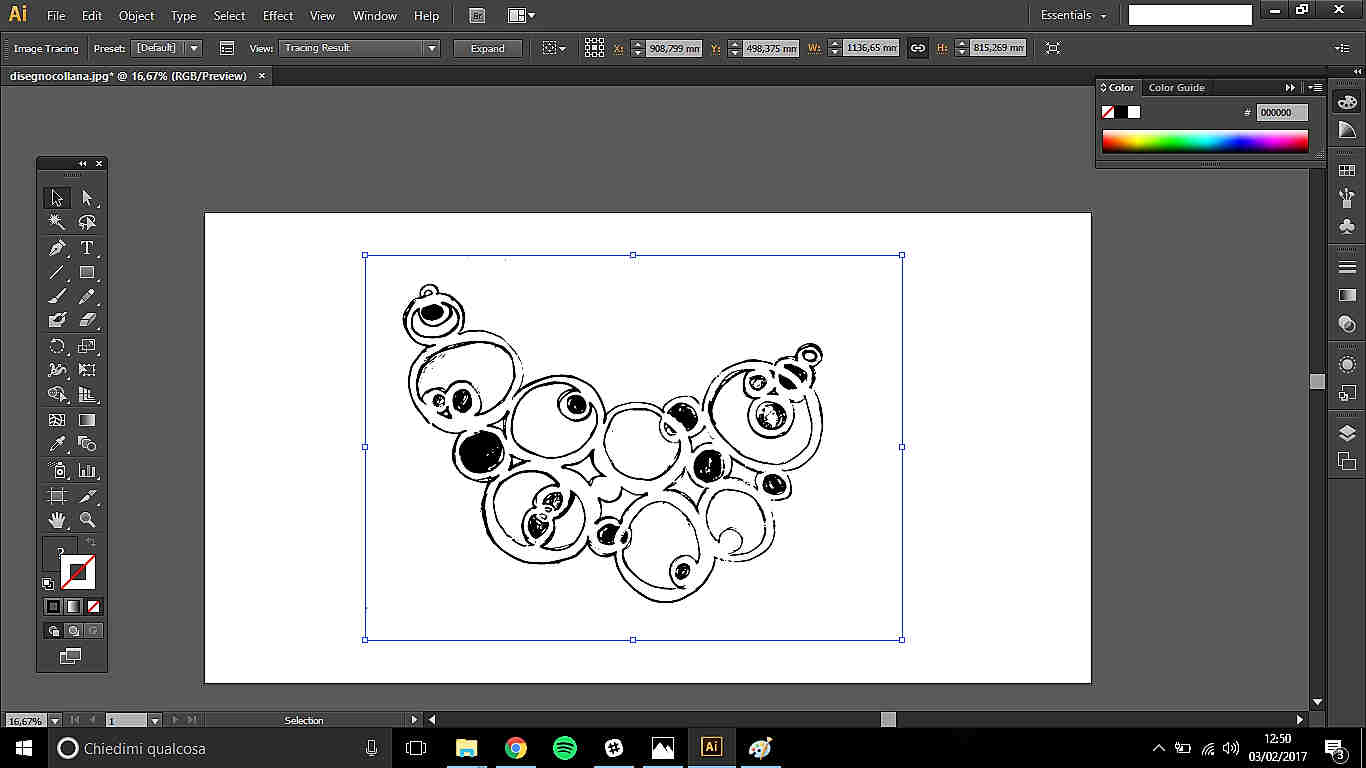
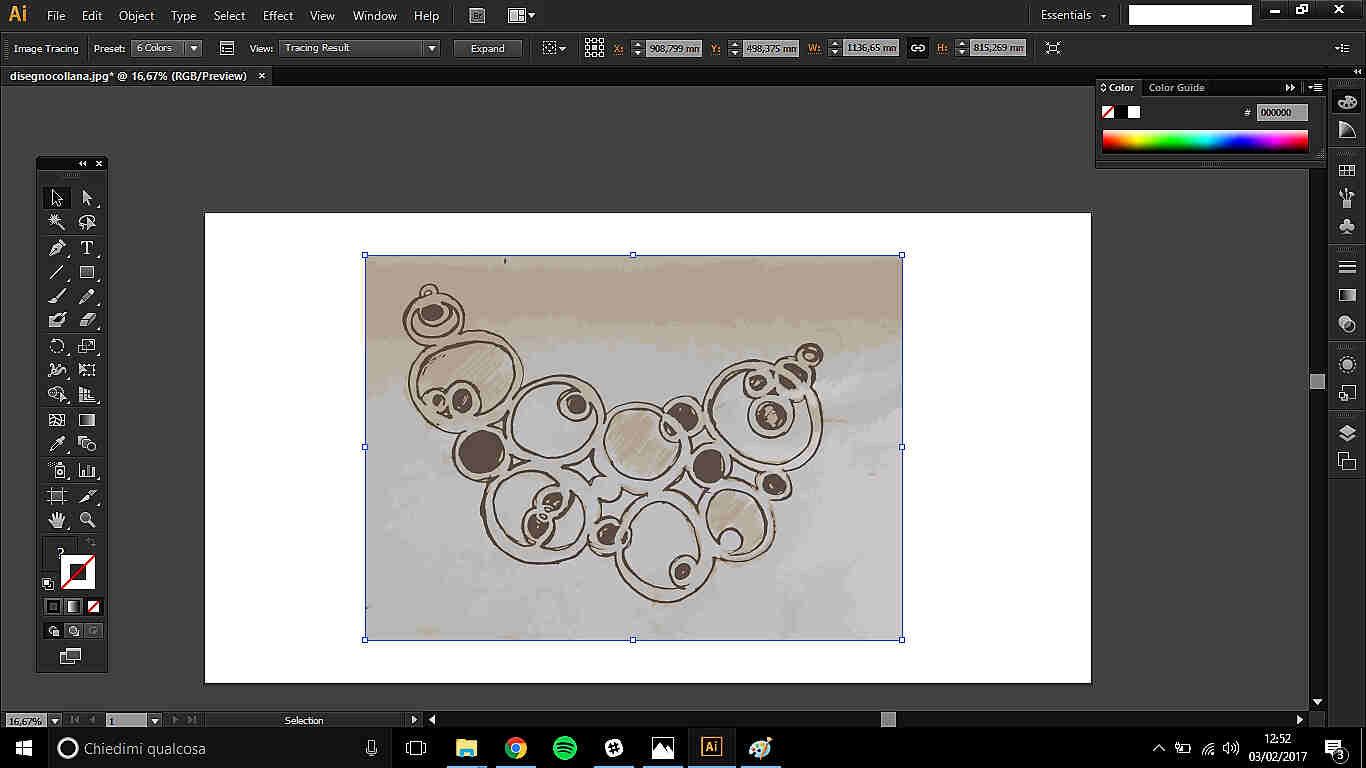
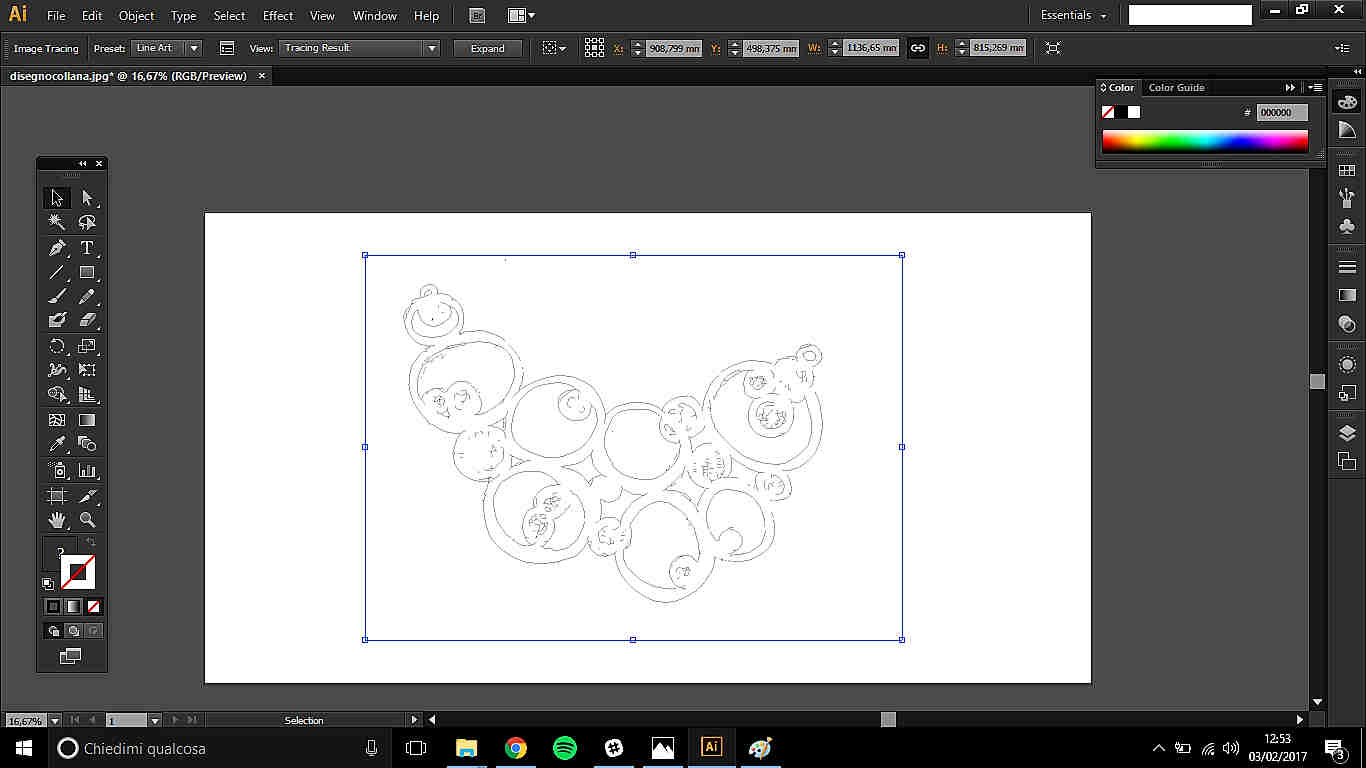
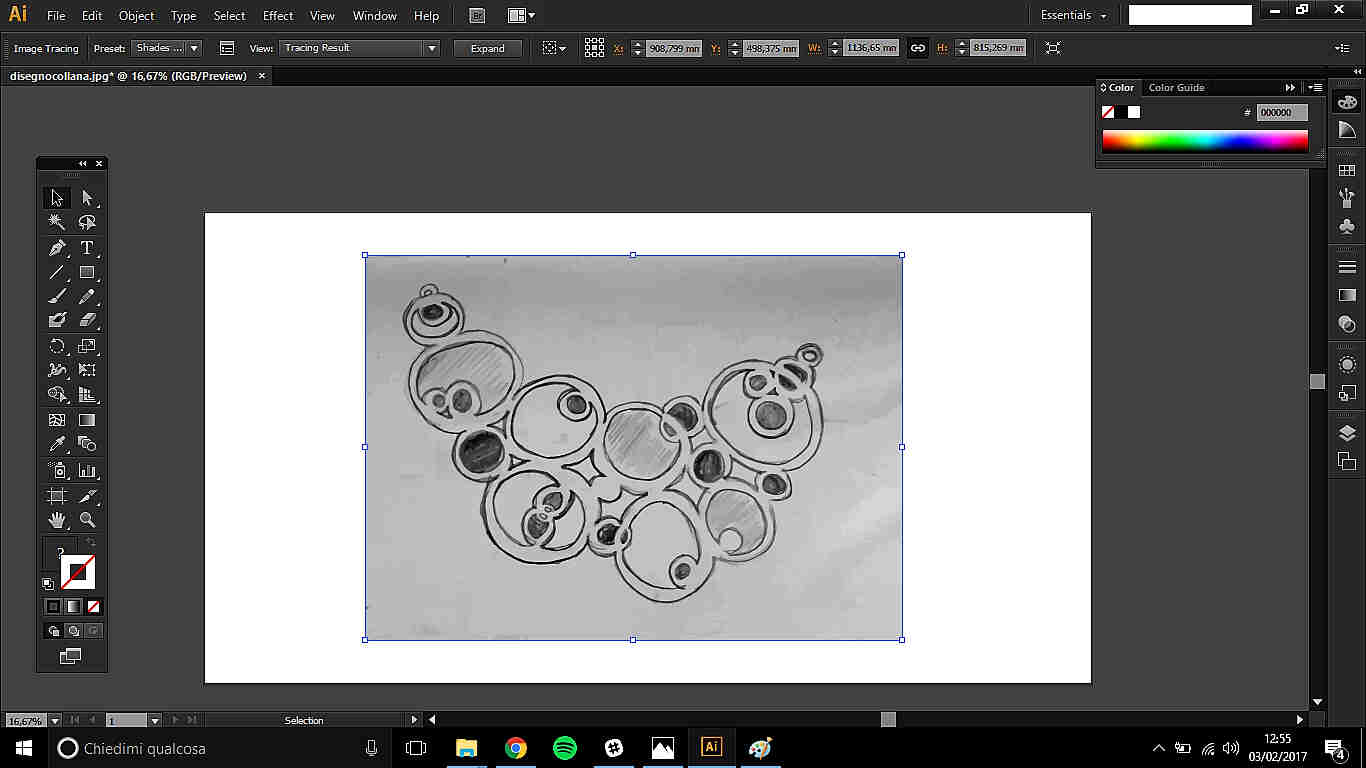
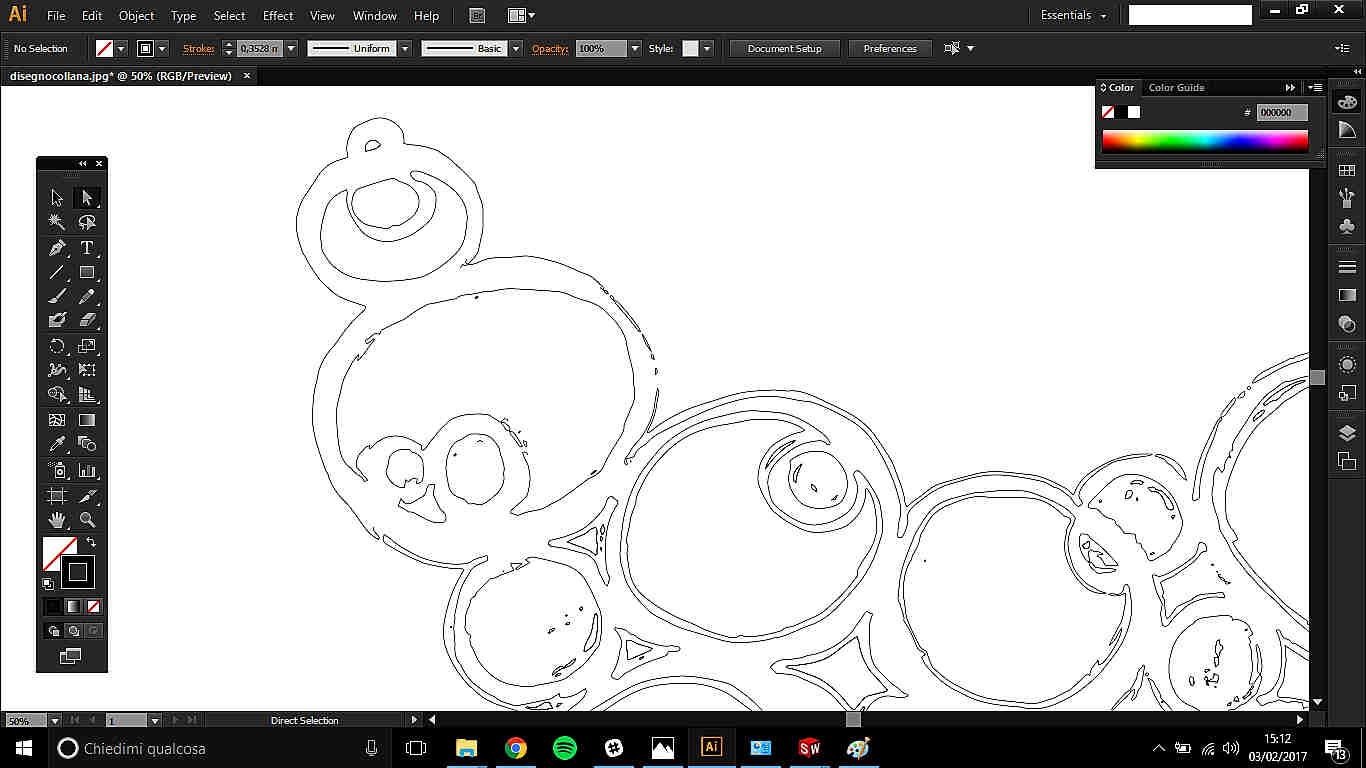
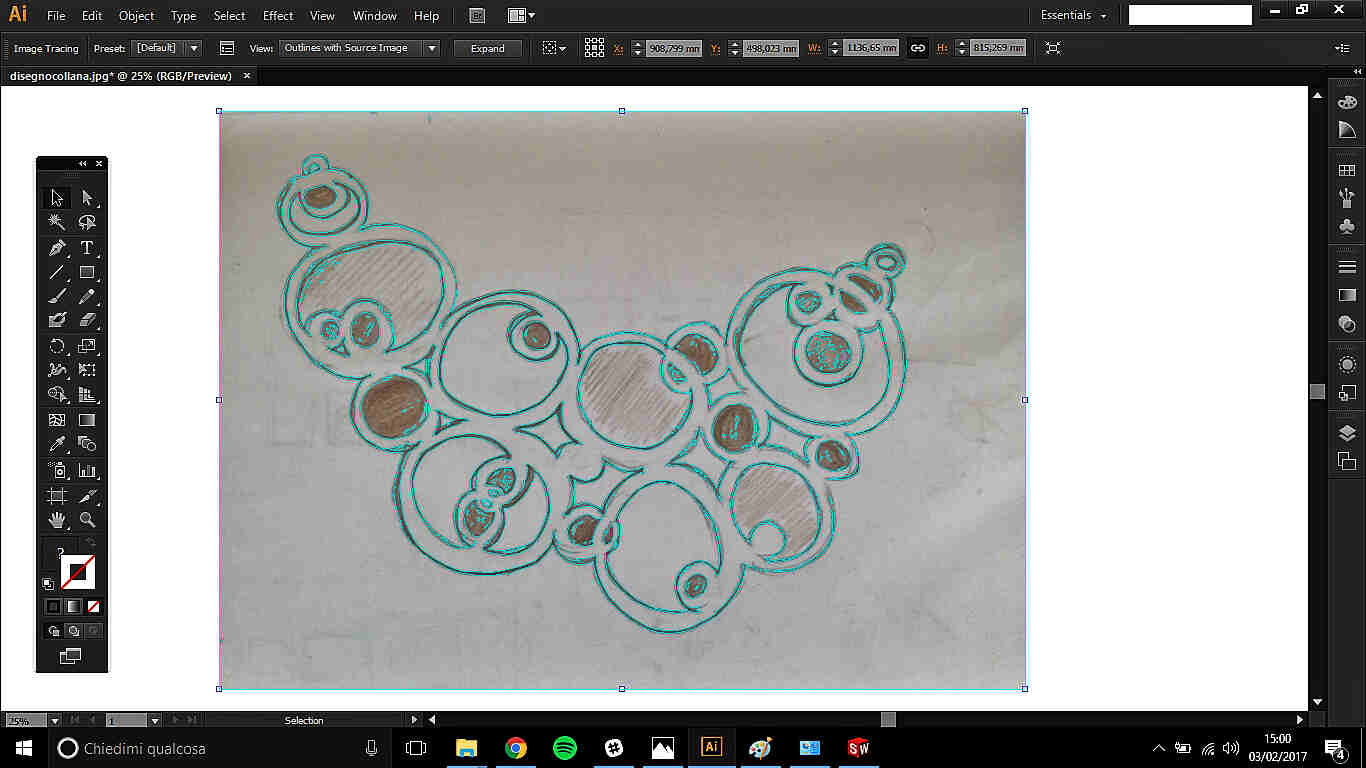 Once you chose your preferences, the result will be highlighted with a blu line
 ATTENTION:the white background you see is not the editboard but part
of traced result. You clearly see it if you ungroup it (Object->Ungroup)
ATTENTION:the white background you see is not the editboard but part
of traced result. You clearly see it if you ungroup it (Object->Ungroup)

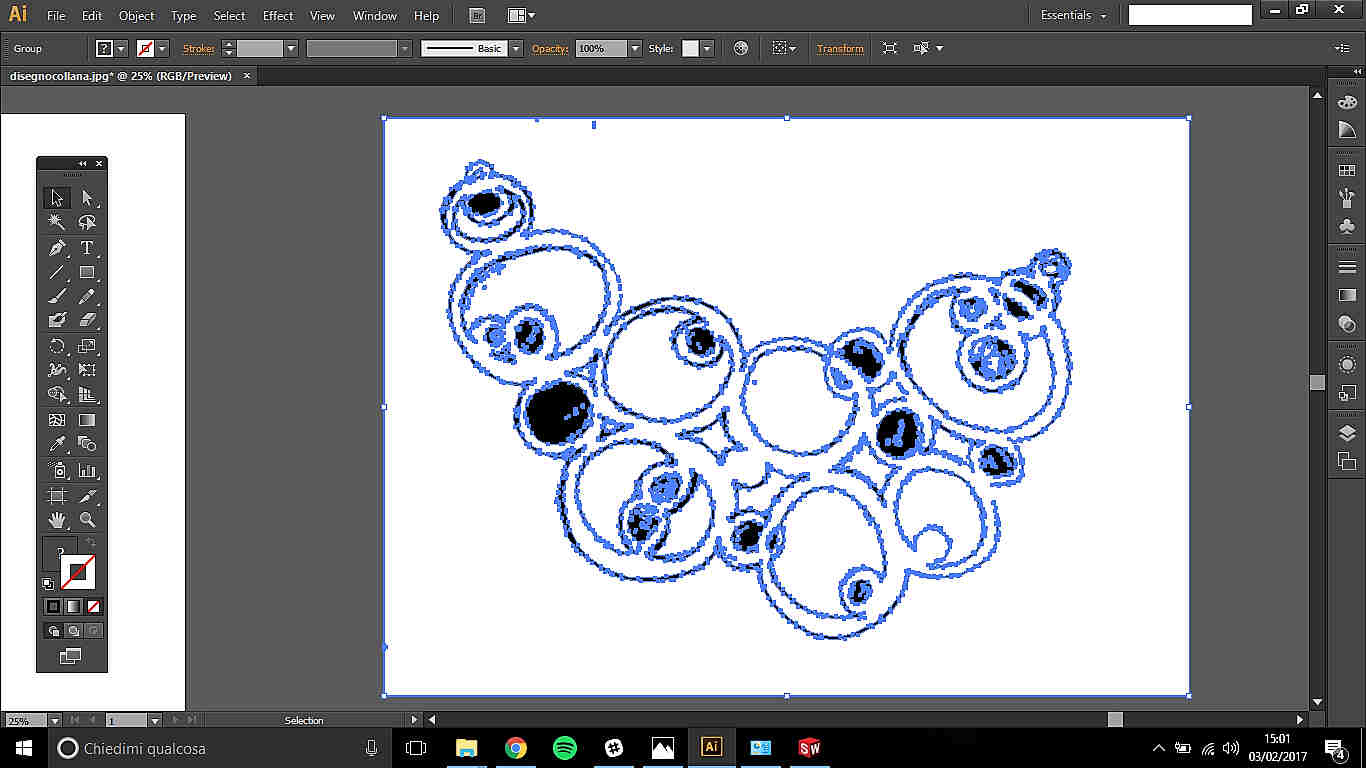
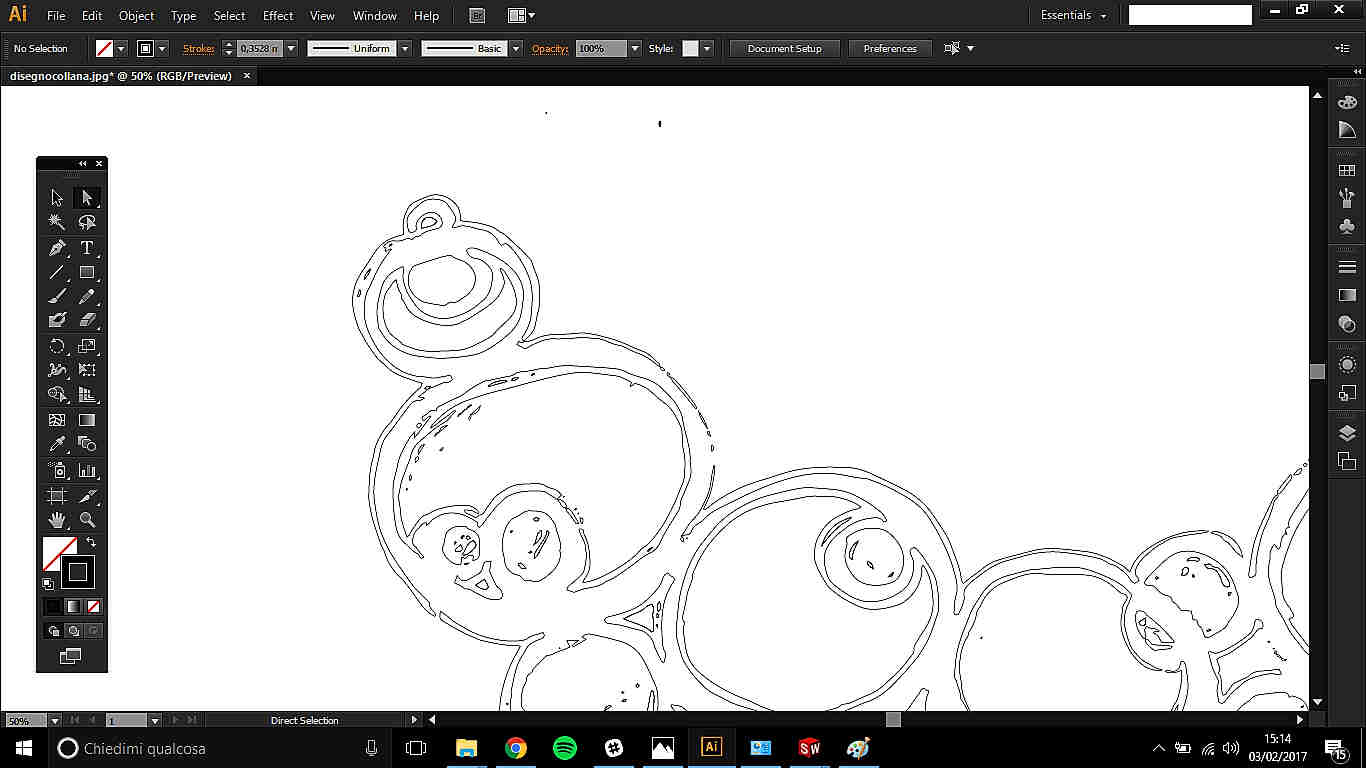
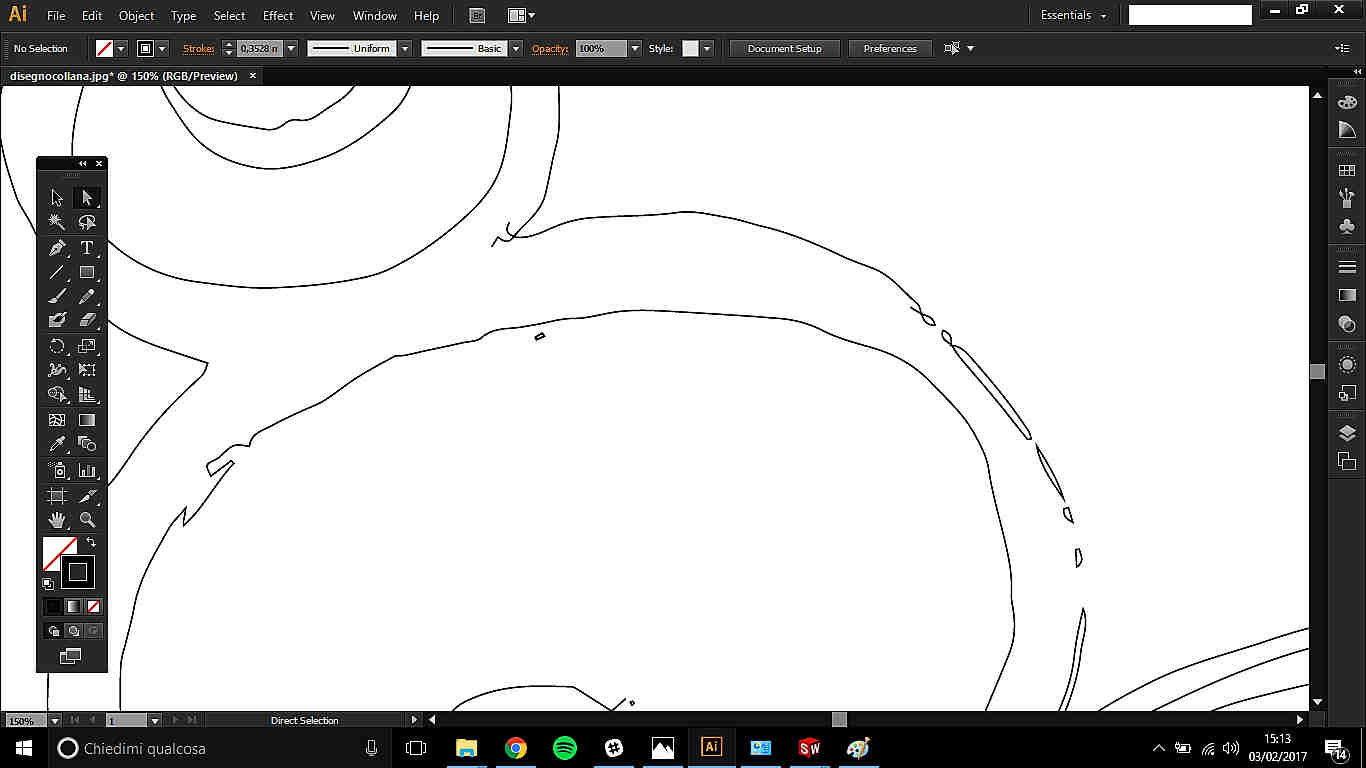
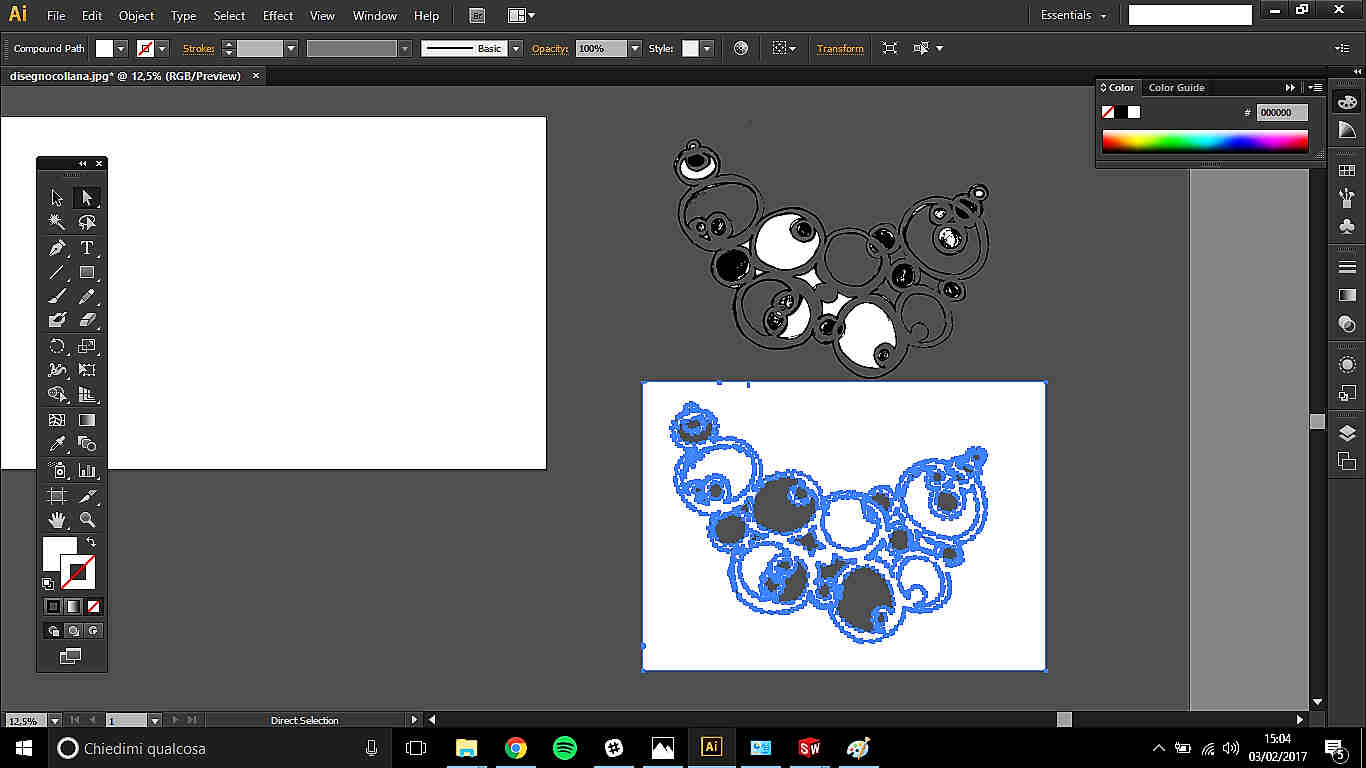 Then, to have just the edge I put no infill and black line and I tried to clean
the sketch using the white pointer: again, it too me quite long with bad results:
Then, to have just the edge I put no infill and black line and I tried to clean
the sketch using the white pointer: again, it too me quite long with bad results:
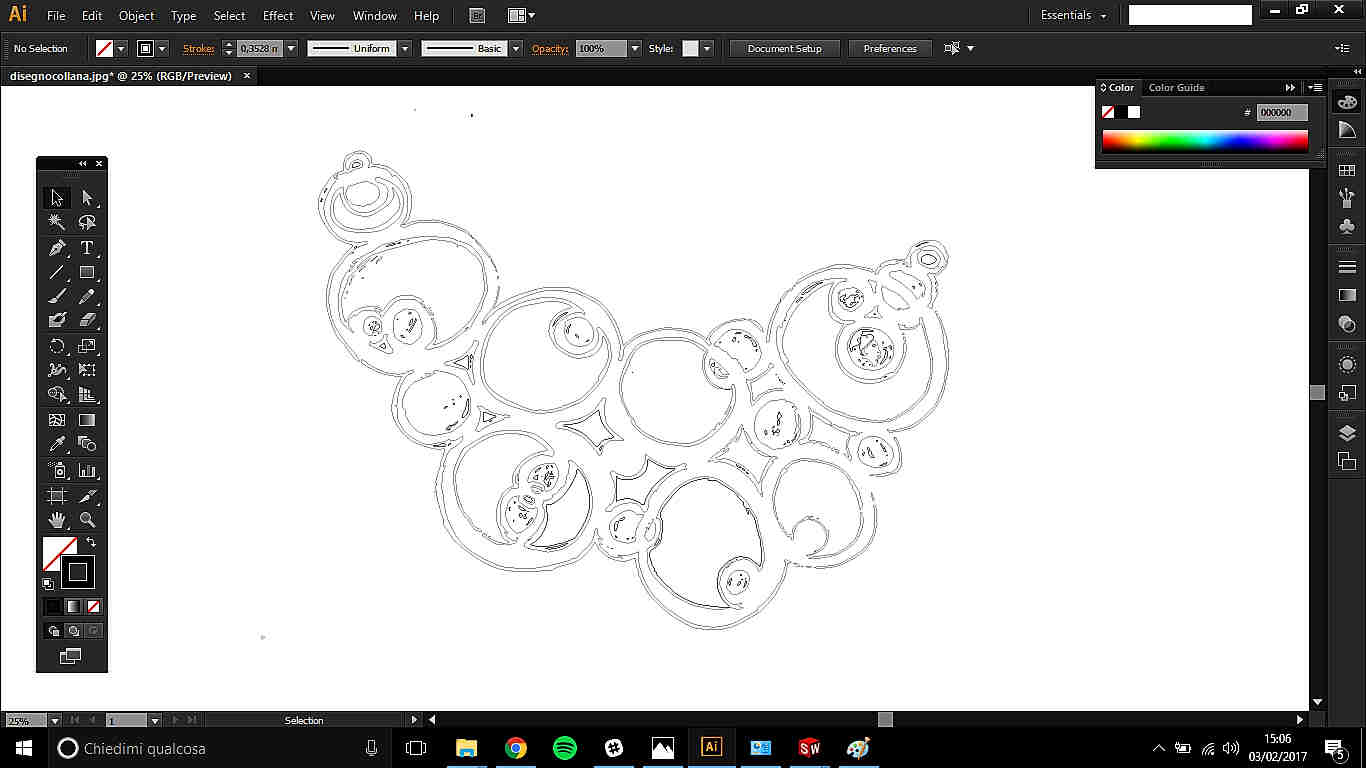
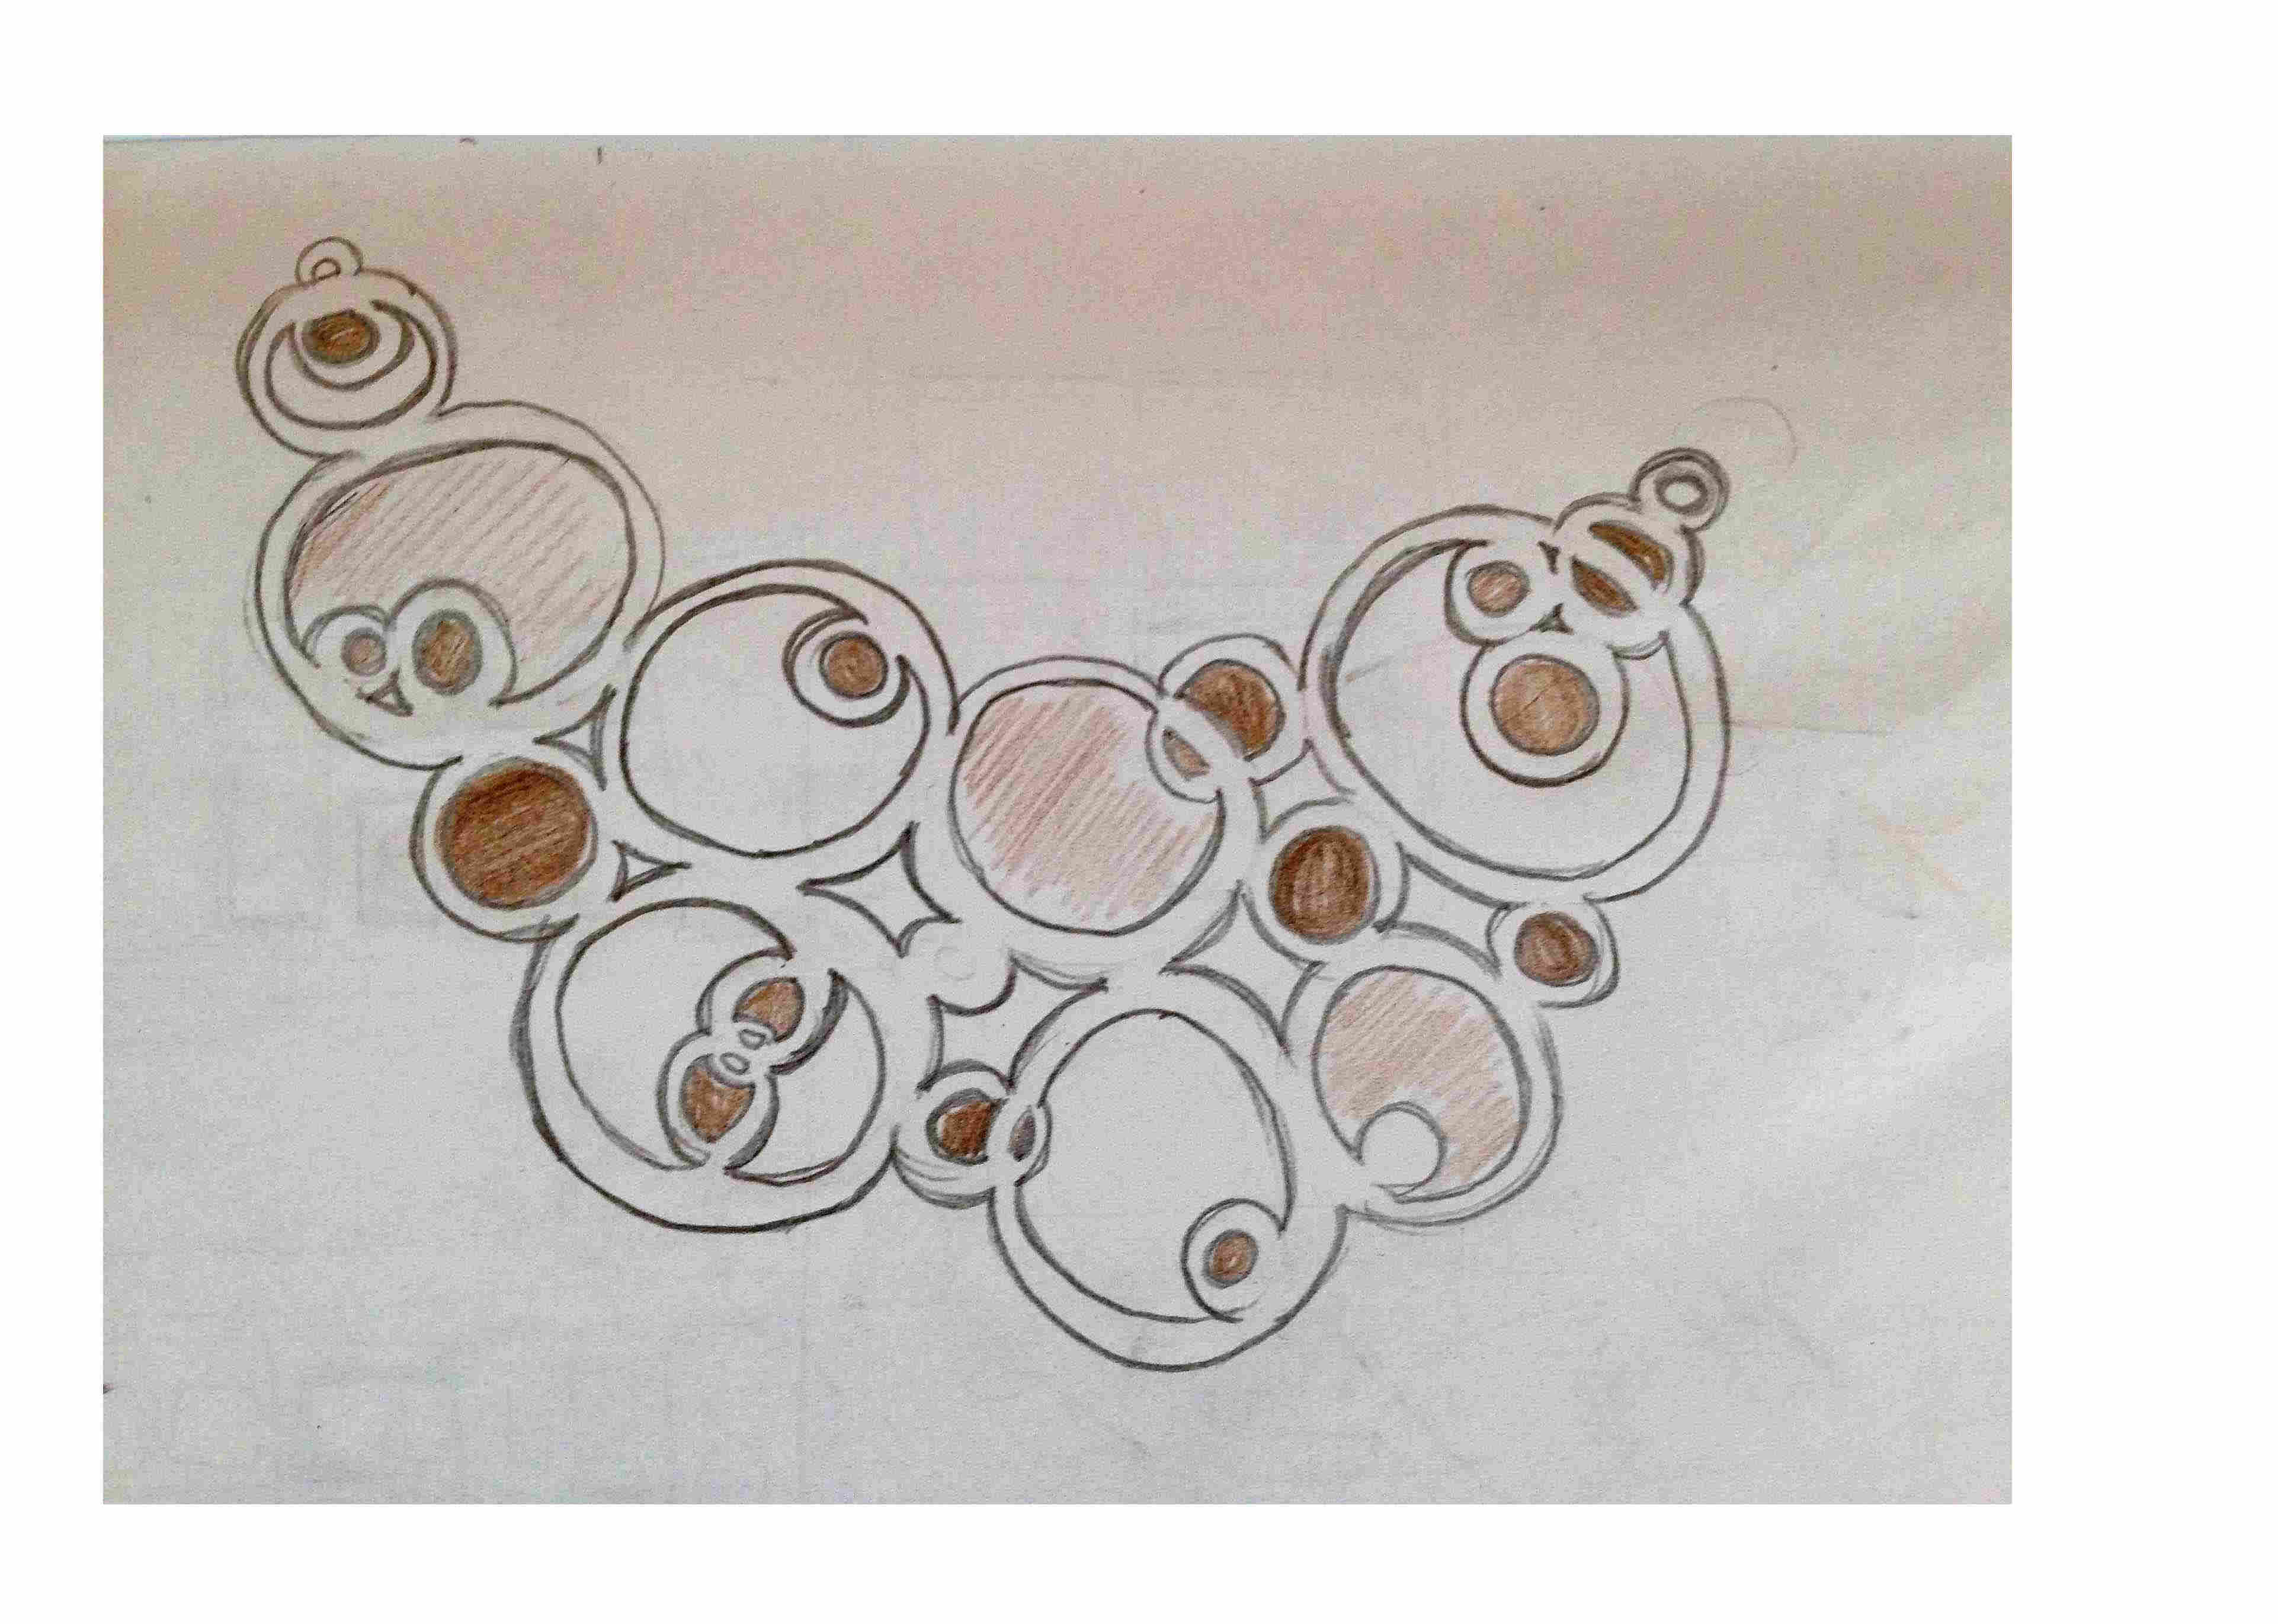
To make the comparison that was in my intention, I designed my necklace using
geometric features. I realised that, being quite big, my jewel had to be divided
into parts to gain greater flexibility(part1,
part2,
part3,
part4)
Conclusions: even if recognise Illustrator
to have a well defined and developed system to make a picture vectorial, I think
it's best to reflect if sometimes designing our project directly on software can
have more complete and sharp detail.
Traditional 2D sketching: Paper pattern drawing
In this section I would like to talk about a style of 2D sketching whose software are
just...your hands!
Since I was very little, my mum and my grandma used to sew me dresses, shirts, skirts,
trousers and jacket and, growing up, I decide to learn how to do from them.
The process path is not that far from digital 2D designing:
- Think about what you want to create
- Look for similar already made piece of clothing (usually in a monthly journal, which can represent documentation- my favourite one is Burda)
- Once you find an object to realise, follow the instructions of your model;
- Then trace on flimsy paper the curves indicated by the red arrow, using these guidelines:
- cut edges of your 2D sketch and put all pattern items on fabric by means of pins;
- cut fabric and thread them together by hand;
- wear on and check if size is ok and you like it;
- if changes aren't needed, use the sewing machine to finish it.
References are colors and numbers:
you'll have to search for
a range of numbers -that corresponds to forms- of a specific color.
NB: it is possibile to draw patterns freely, without this kind of support,
but
it requires advanced skills in material flessibility
and behaviour comprehension and also
in body round shapes flattening;
In the video below I quickly show how to trace pattern from guideline:
Paper Pattern Drawing from Silvia Palazzi on Vimeo
Valentina:digital paper pattern drawing
I was suggested by Fiore Basile to have a look at Valentina software, which basically let you
design 2D sketches of clothes by means of geometric items and mathematical function.
Unfortunately, I still have little abilities in sewing so it seemed a bit difficult to use
this software but I think I'll follow some tutorials in the next week: it can also be my way of learning
free paper pattern drawing.
< 3D modeling >
Fusion 360, Onshape & Rhino
The second part of the weekly task was to try as many 3D modeling software as possible.
Unfortunately I couldn't experiment all those I would have liked to because I had two exams
at university and they took me quite a lot time away.
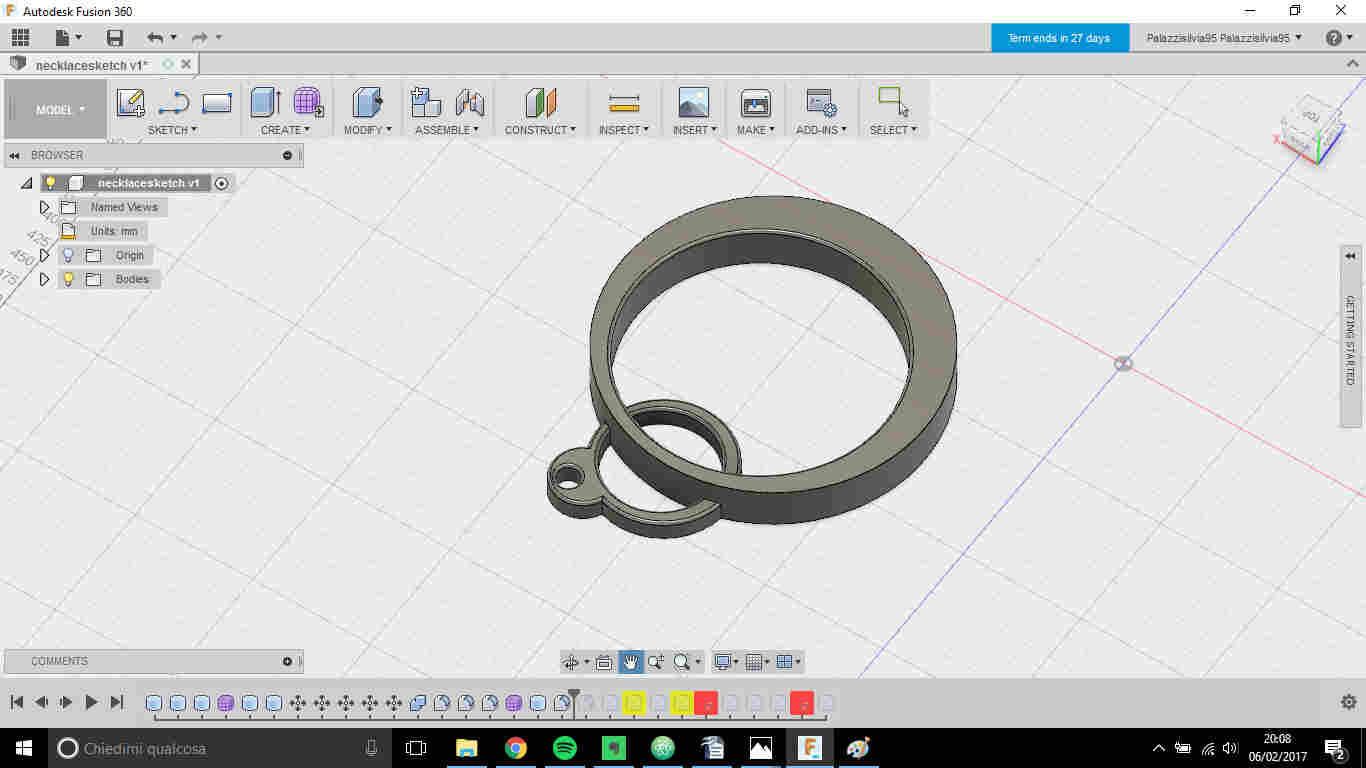
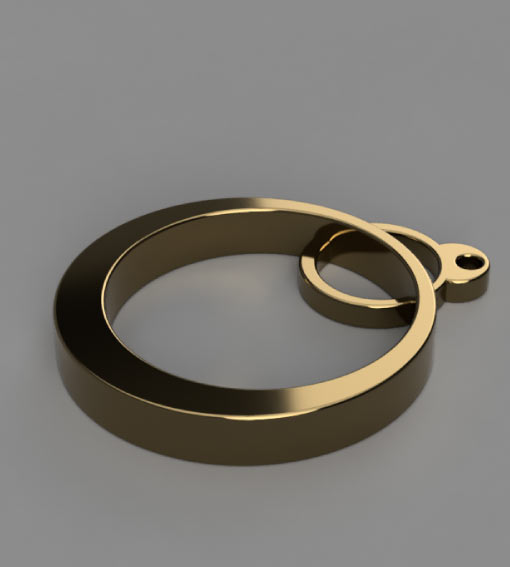
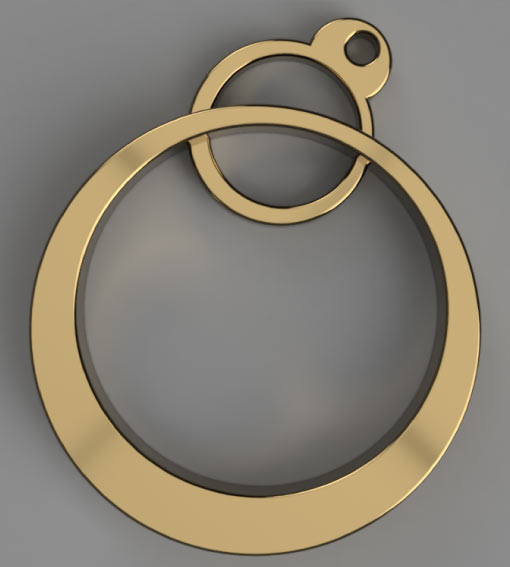
Fusion 360: issues with solid combination and cutting
Basically, a 2D drawing represents quite well the necklace I would like to include
in my final project.
Anyway, I didn't embrace the path of exporting vector files on a CAD software and
just extrude it, it looked too restricted and I want to exploit more new interfaces.
I so planned to replicate my original sketch combining, intersecting and cutting cylinders.
After putting on the top plane my first part (Create->Cilinder), I wanted to arrange
a larger one so as they could intersect, I had bad surprises:
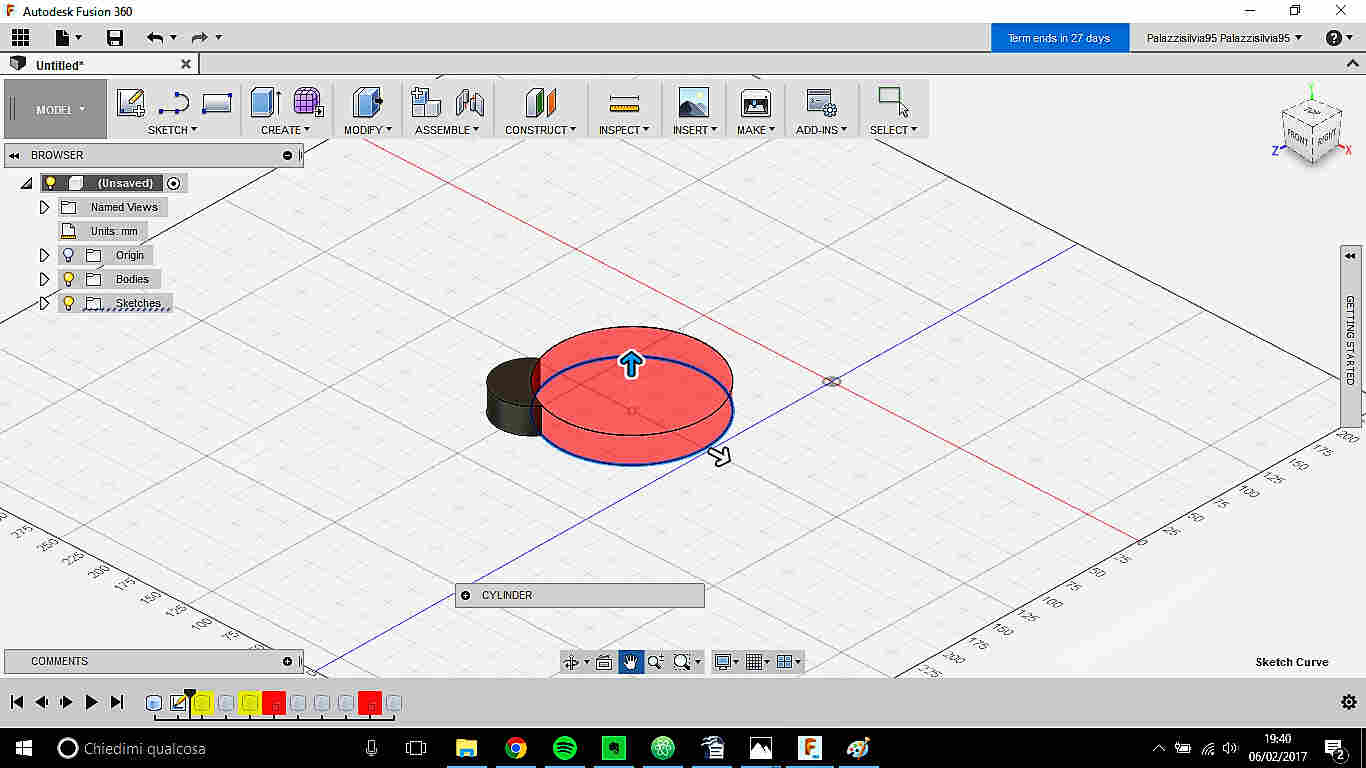
 As you can see, the second larger disk disappeared and the previous was cutted.
I repeated the operation several times but everytime I had the same problem.
As you can see, the second larger disk disappeared and the previous was cutted.
I repeated the operation several times but everytime I had the same problem.
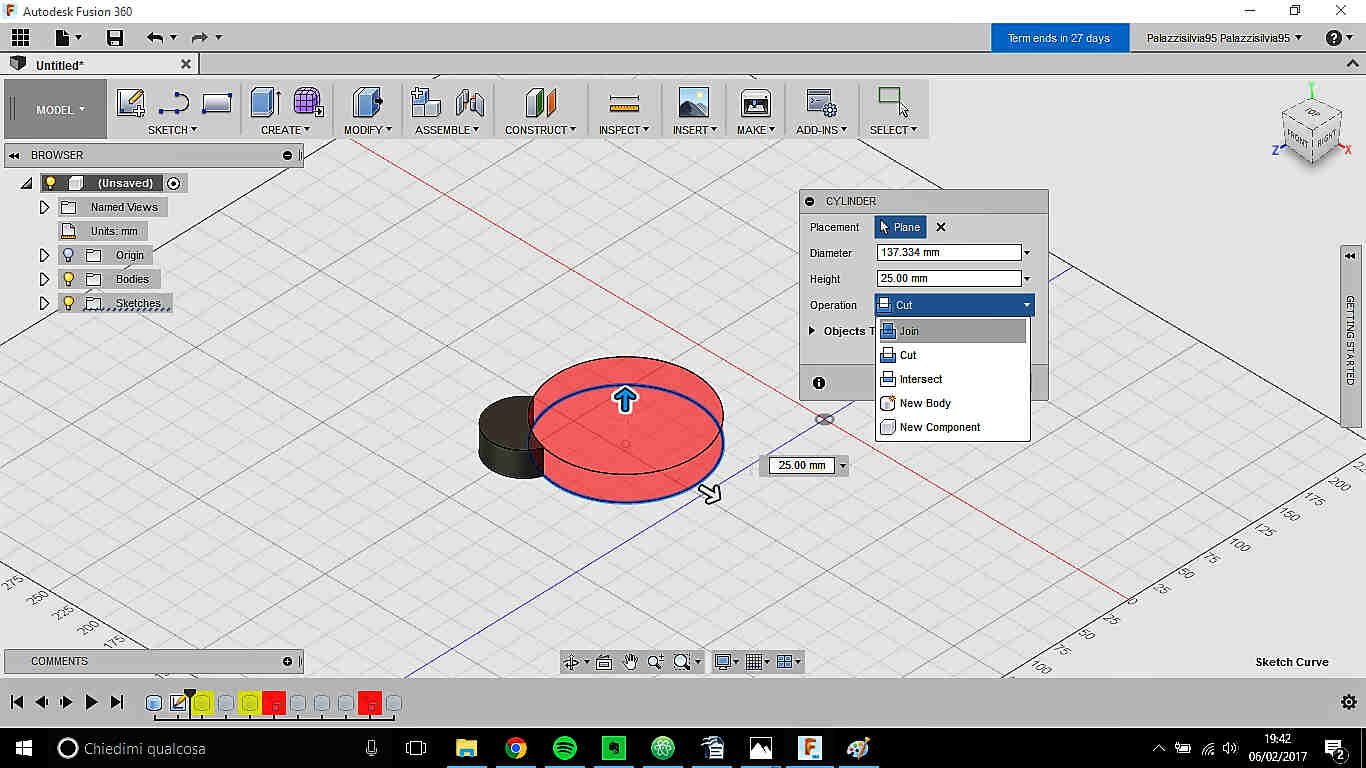
The
reason was I didn't payed attention to the options of the menu that
appears by default when you put a new part on the sketch (on the right of the cylinders in the image below)
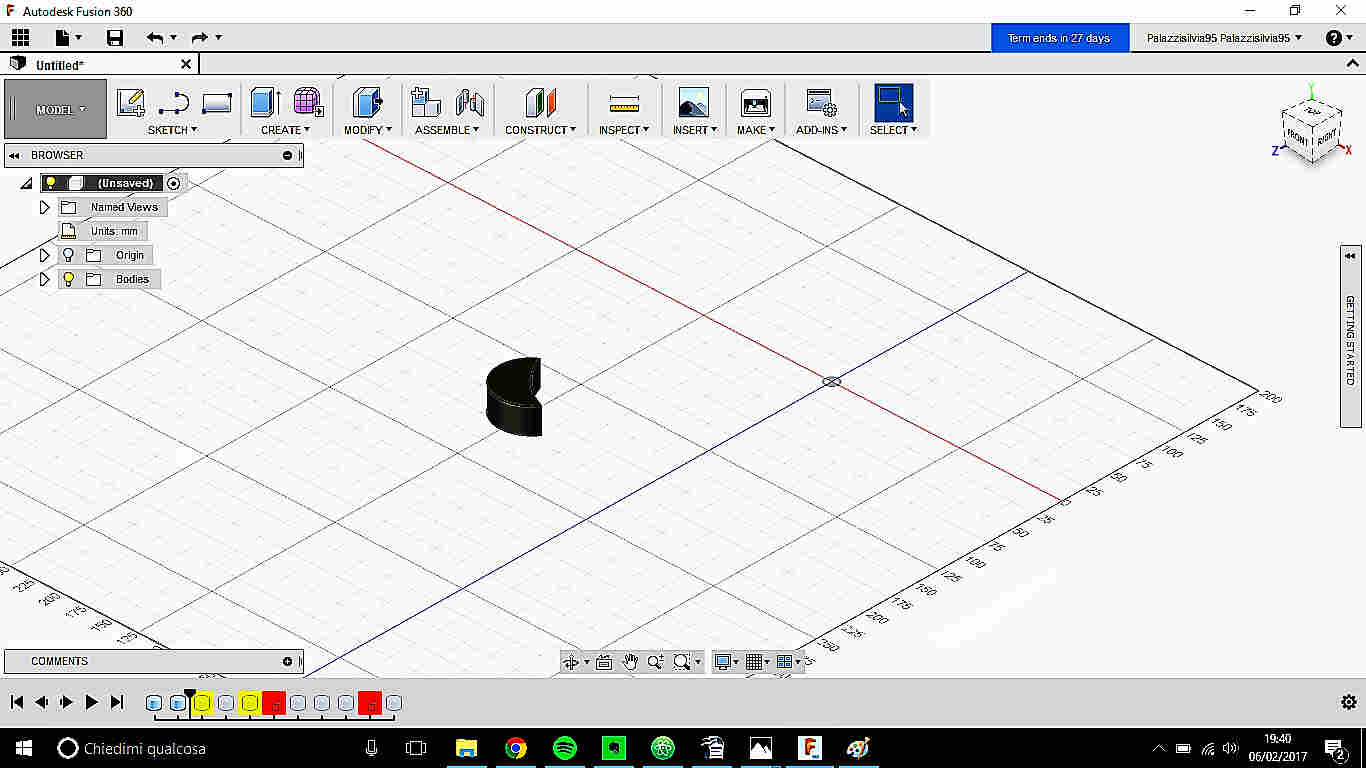
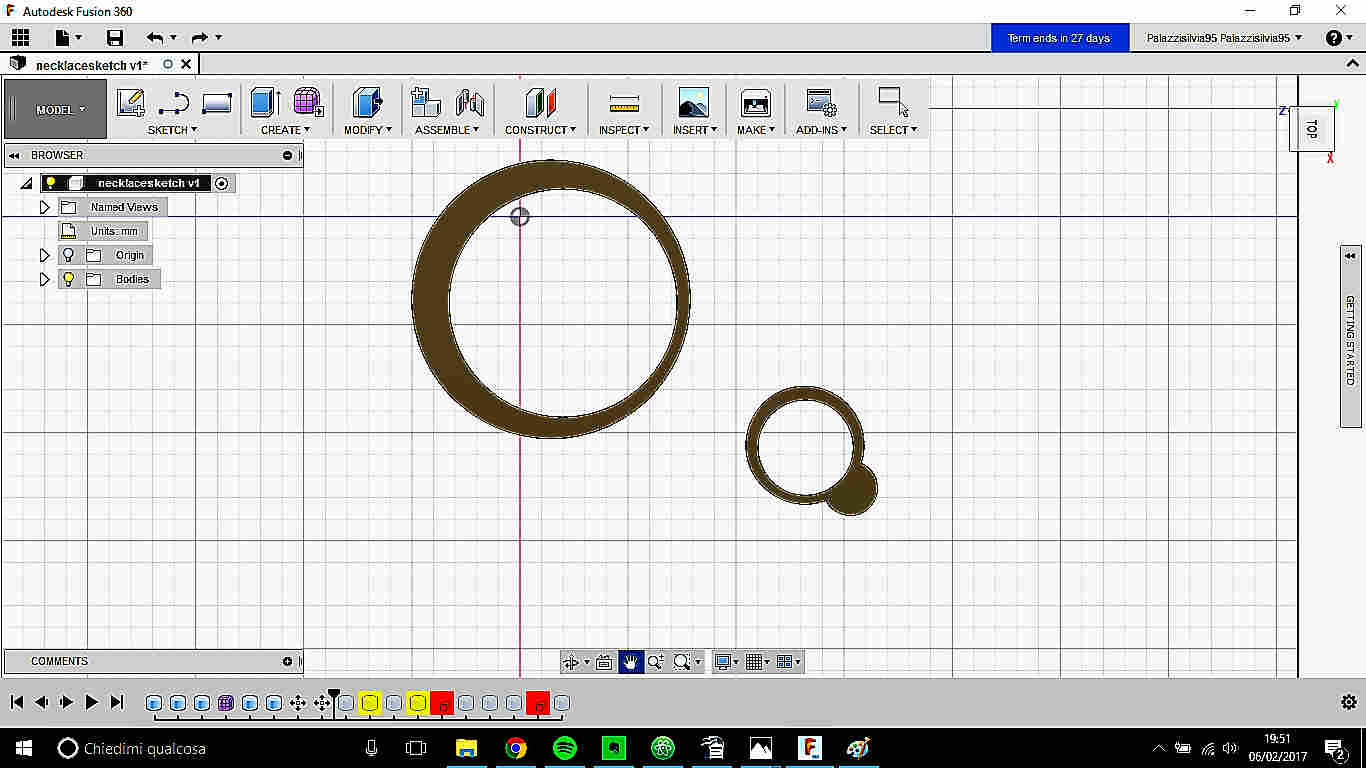
Now that I caught the method, I made an hole in two-cylinders combination and then,
to make things simple, I designed a big pierced cylinder apart with the purpose
of putting them together only after.
In fact, when I tried to add directly to the group a bigger cylinder,
I had problems with join and intersection options because none of them gave me the result expected.
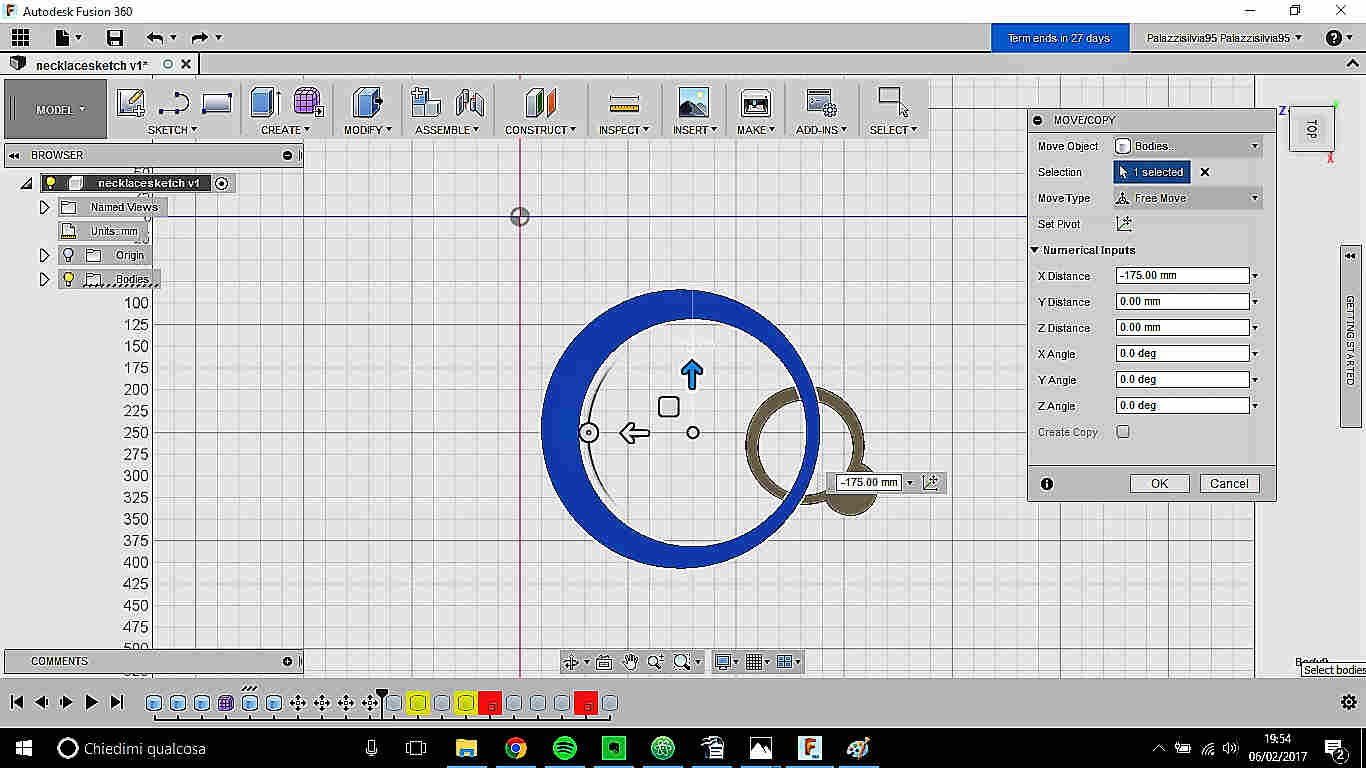
 I then used Movy/Copy function (Modify->Move/Copy) to intersec them as I wanted.
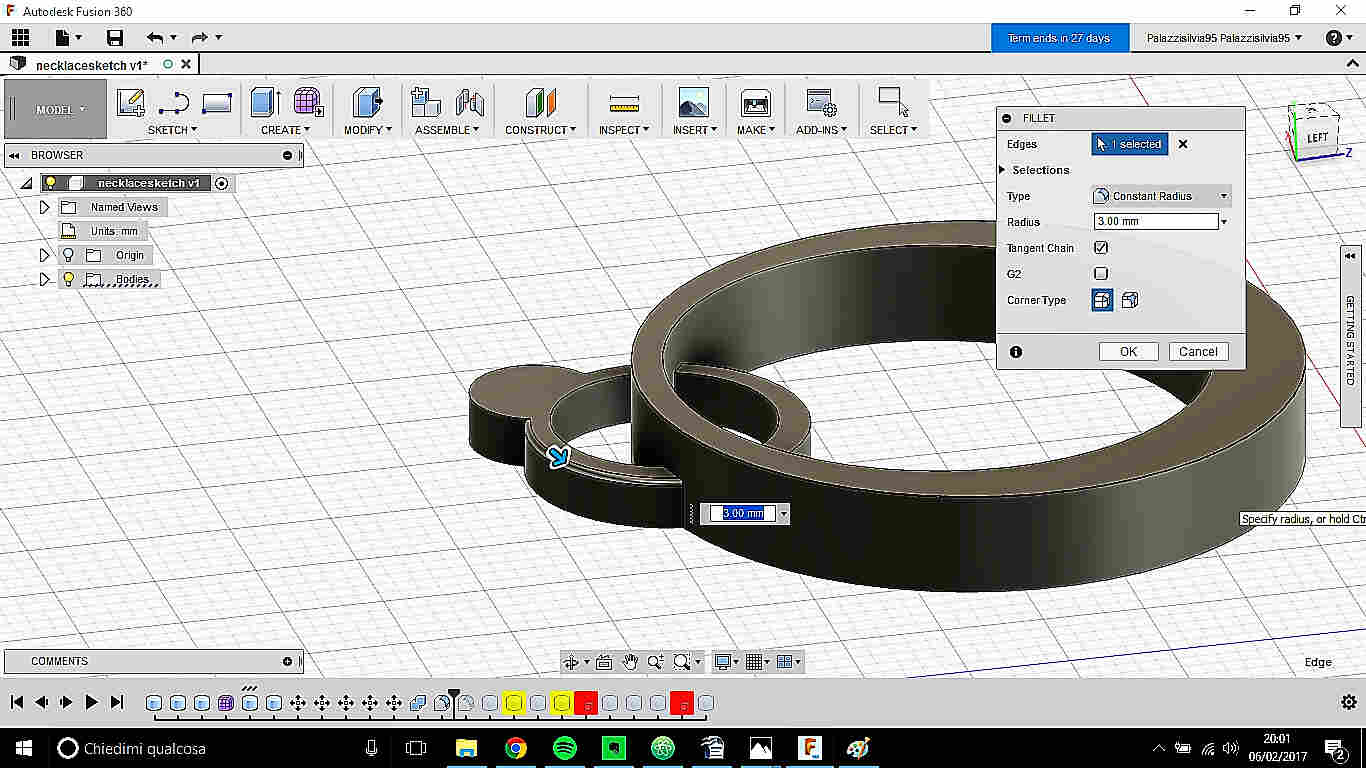
 To make the appearance more pleasant, I applied Fillet (Modify->Fillet) to solid
edges - menu let you decide fillet radius and it's possible to choose more edges at the same time.
To make the appearance more pleasant, I applied Fillet (Modify->Fillet) to solid
edges - menu let you decide fillet radius and it's possible to choose more edges at the same time.
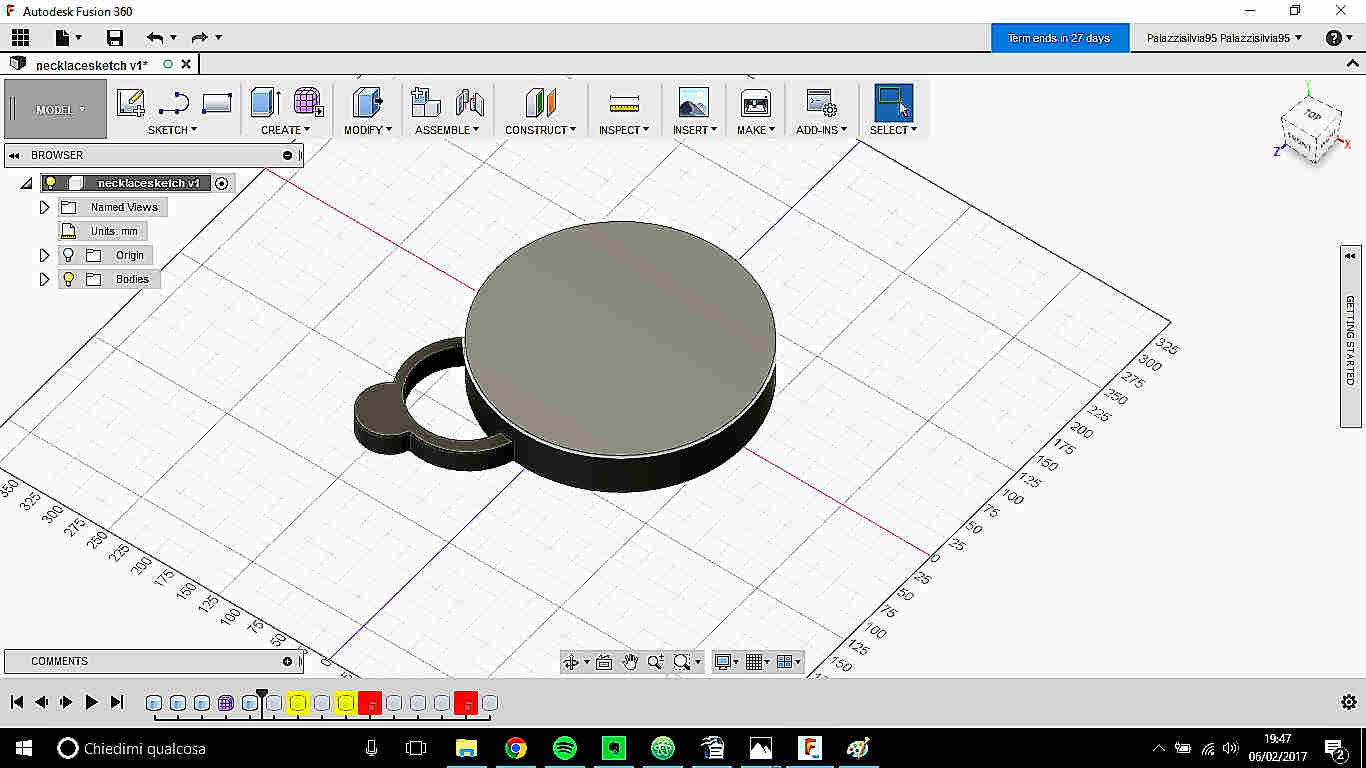
 To increase my self-esteem I played a bit with rendering tools.
To enter render menu you have to click on Model in the upper left part
of the sketching space and choose Render from the options.
 DOWNLOAD TIP: Fusion 360 saves your file on your web cloud by default.If you want to have
your project on your computer you have to do File->Export and choose destination; for
more you can see this link.
DOWNLOAD TIP: Fusion 360 saves your file on your web cloud by default.If you want to have
your project on your computer you have to do File->Export and choose destination; for
more you can see this link.
ORIGINAL FILE--->here
Conclusions: Fusion 360 revealed a nice software, quite intuitive
and easy to be used. A menu appears to support your design in almost all
your actions and that's really useful to edit results immediately. I didn't
like that much that some functions (Extrude, Revolve etc) are in the same menu
of already-designed basic solids, but that's maybe because I'm used to Solidworks
toolbar.
In addition, I didn't find difficulties in making a simple rendering of
my part, even if it was the first time I did something like that. I recommend
Fusion 360 for those who want to approach to 3D modeling, cause each step is guided
by menu and you can find lots of tutorial online.
Onshape: un-chatty designing on the web
When I faced with this online software, I immediately saw a great difference
from Fusion 360: there was almost no word.
Ok, if you put your mouse over each single icon, a tooltip will explain the
function but, honestly, do you like wasting so much time while designing?
Maybe with time you'll memorize them easily but at first I found great difficulties
in moving among the toolbar, no tutorial and an empty workspace lasting for minutes.
I finally found "Skecth" button on upper left and so I understood why all curves
and 2D functions were missing after logging in, the previous toolbar left its position to the sketching one.
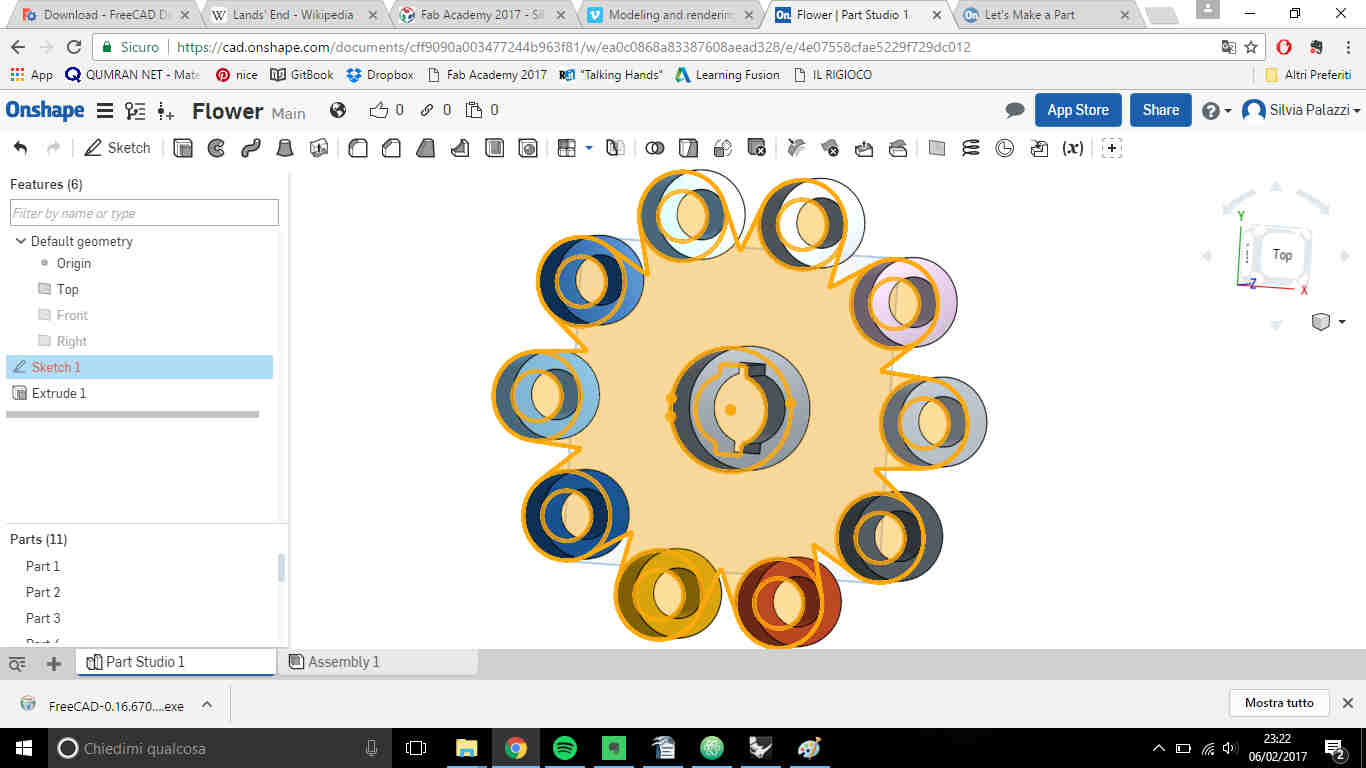
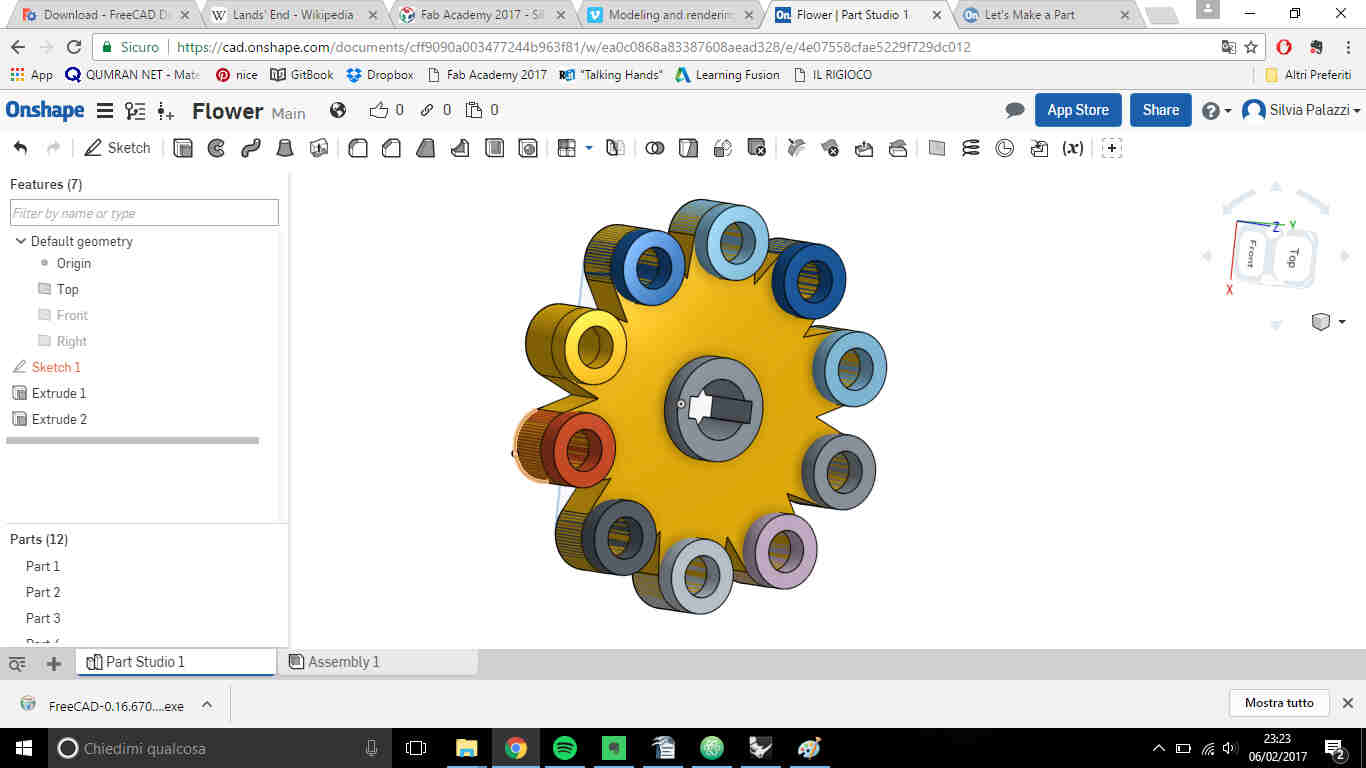
I started with two circles joined by a tangent: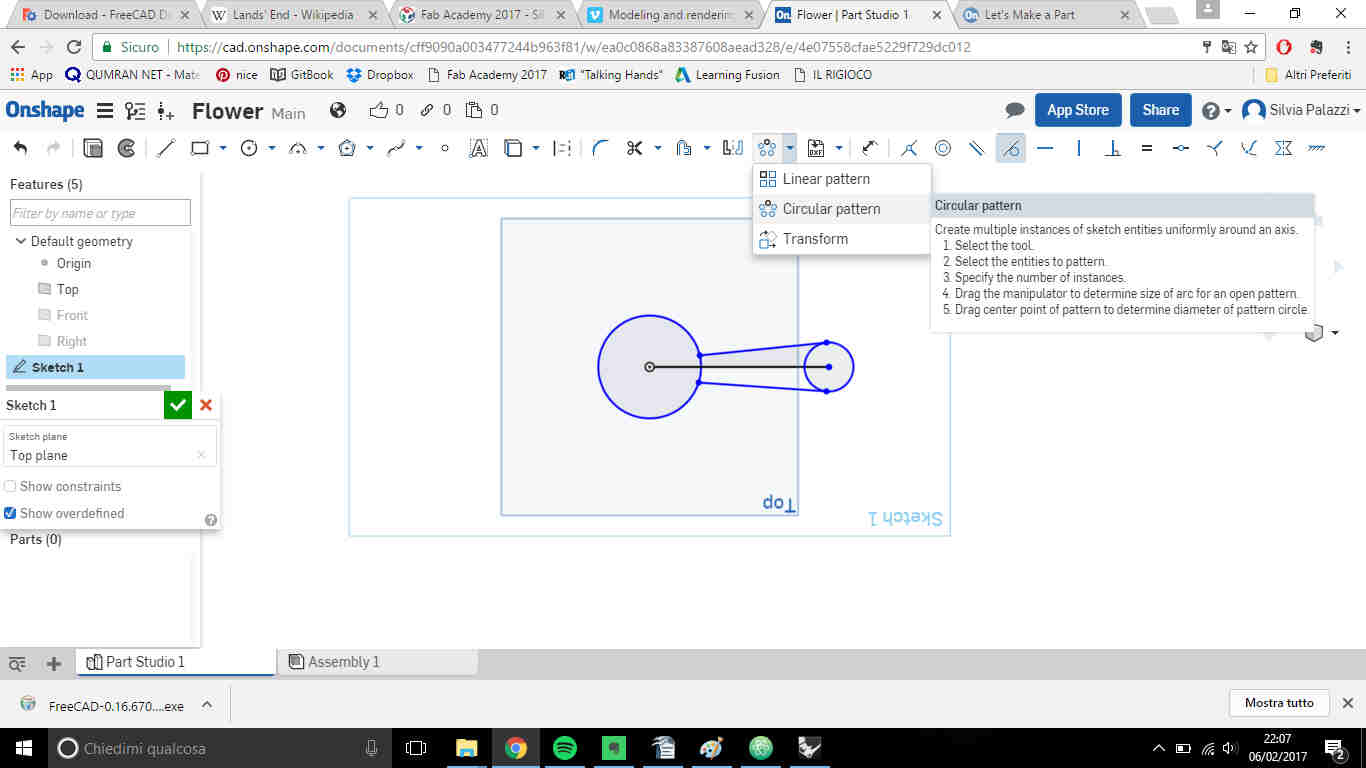 Then I used Linear pattern and chose Circular pattern from the list to replicate
the sketch 10 times around the origin
Then I used Linear pattern and chose Circular pattern from the list to replicate
the sketch 10 times around the origin
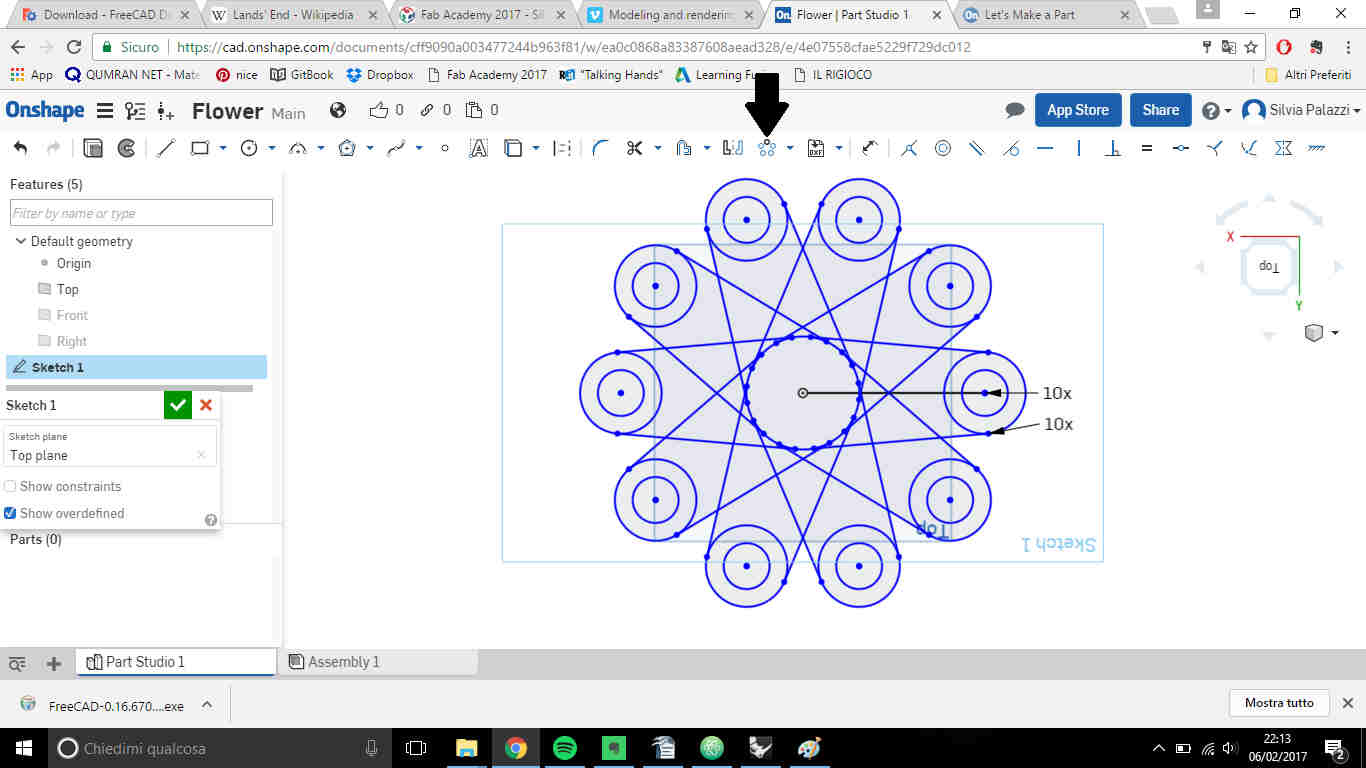 I then cleaned from intersection lines.
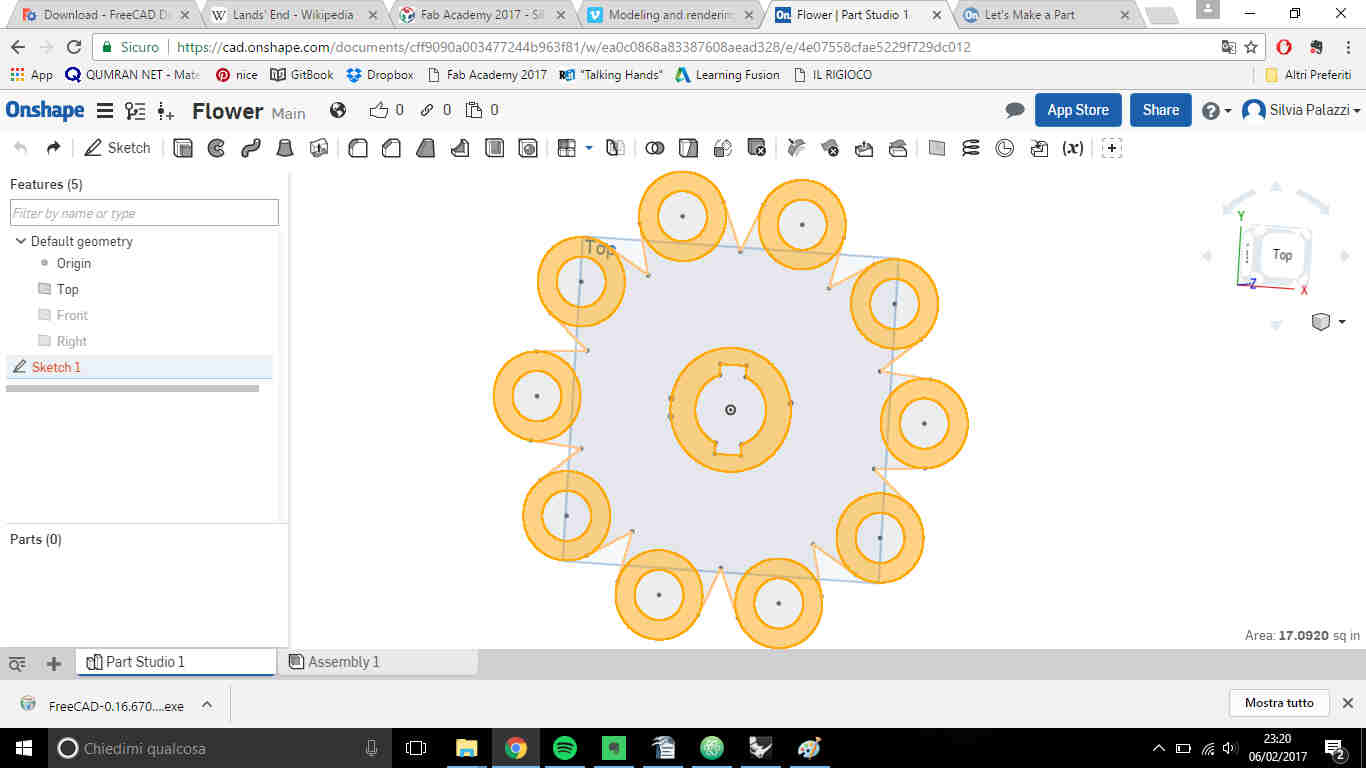
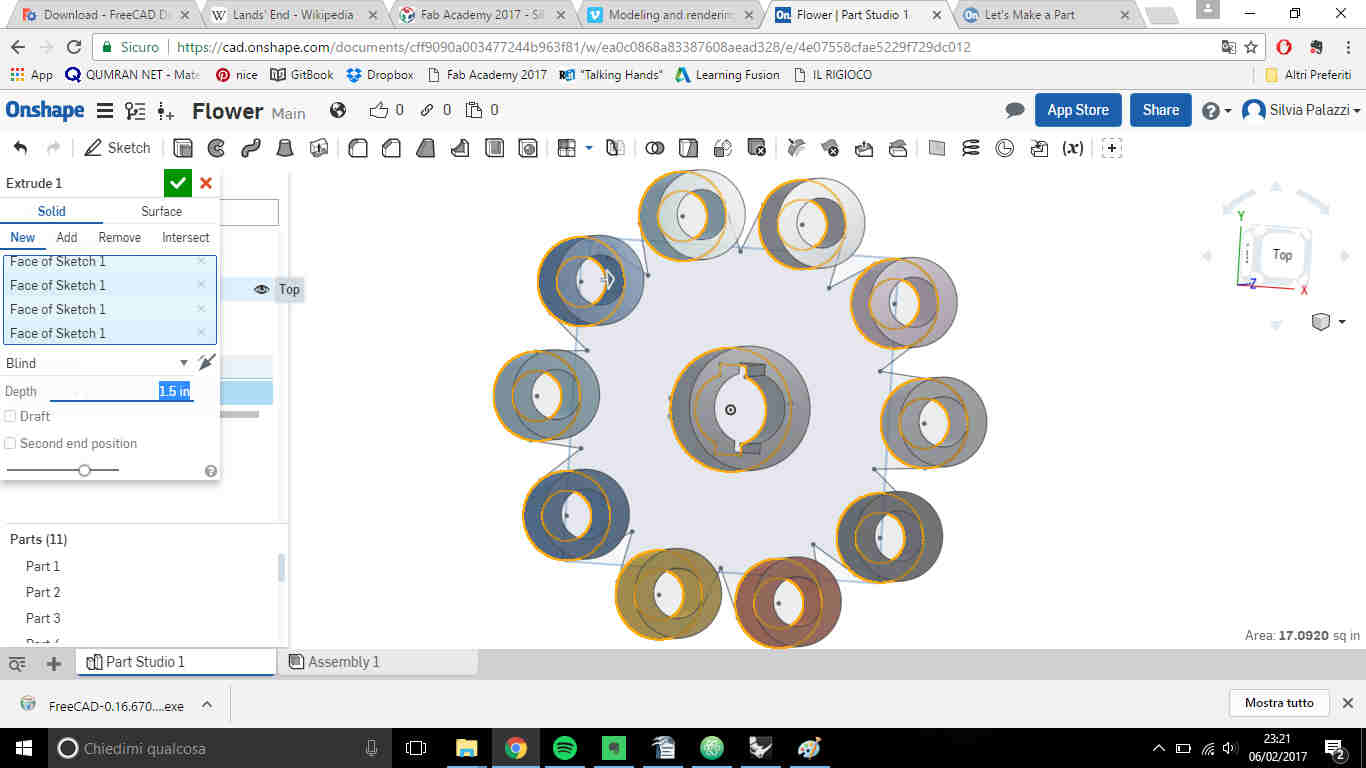
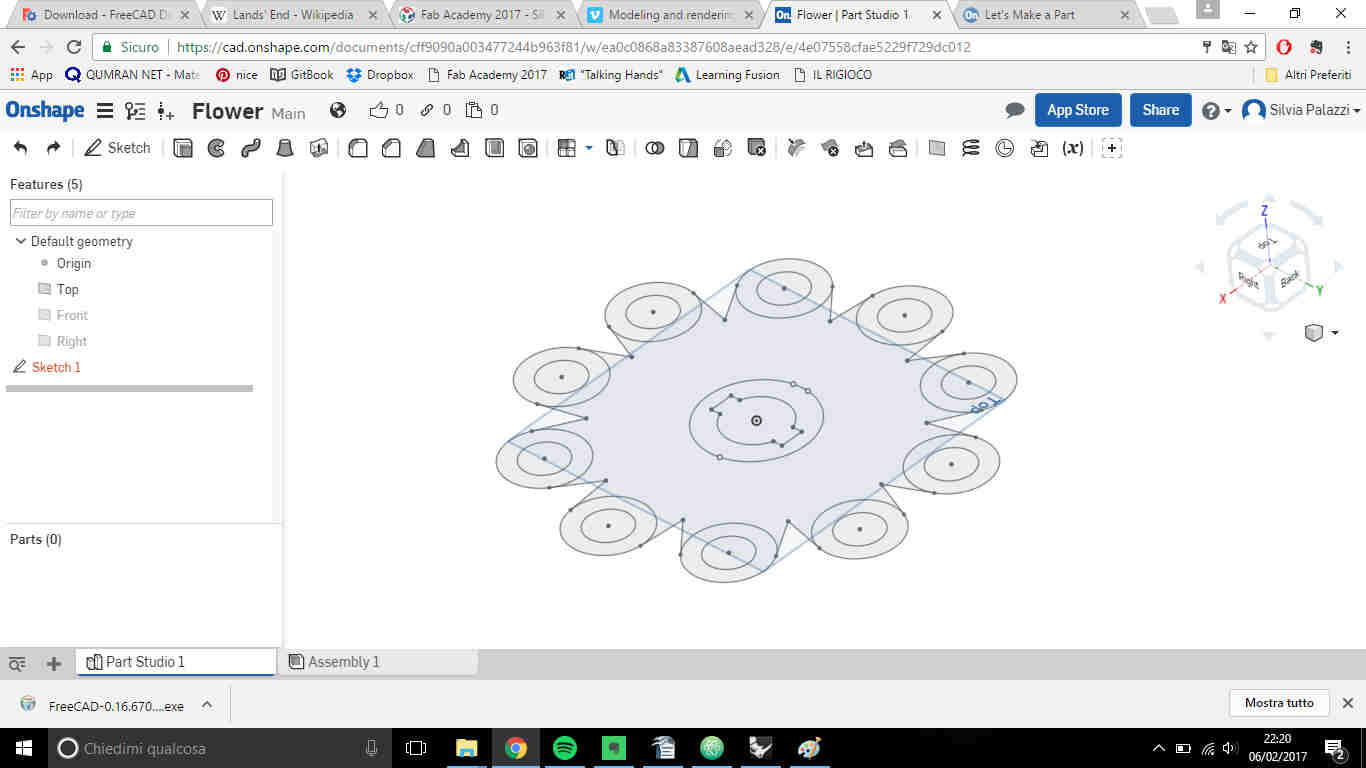 I confirmed the sketch from the window in the left of the page and I then decided to extrude
with different heights.
I confirmed the sketch from the window in the left of the page and I then decided to extrude
with different heights.
ORIGINAL FILE--->here
Conclusions: Scketch is simple and intuitive and not just in using easy commands like circle or line, but because there are also tools to quickly give you linear or circular repetition of the sketch and to help you design tangent, parallel or perpendicular lines (that's nice support because Onshape doesn't have point snapping indicators like Solidworks, i.e., which tells you that you're going horizontally, vertically or parallel to a line while drawing it). Also quotations are easily editable, both from toolbar and from windows that appear when drawing a new figure.
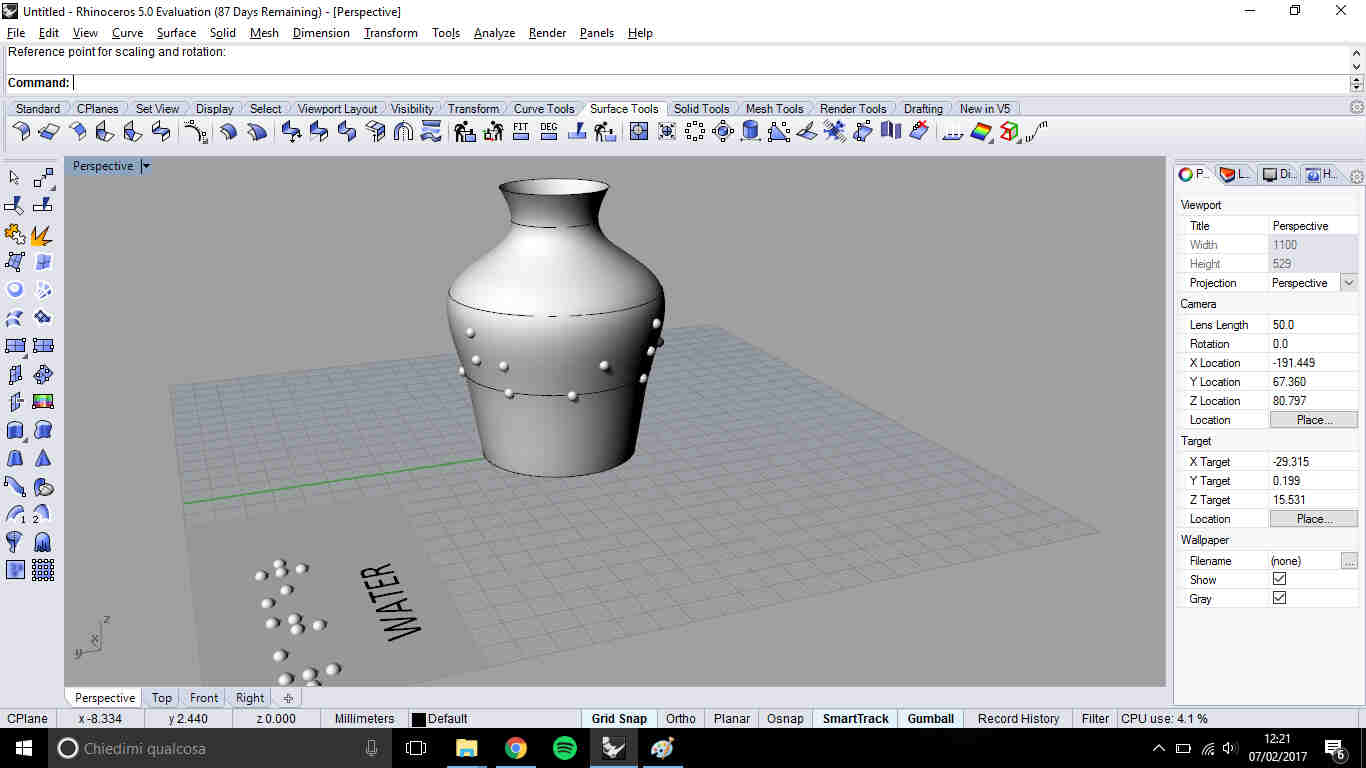
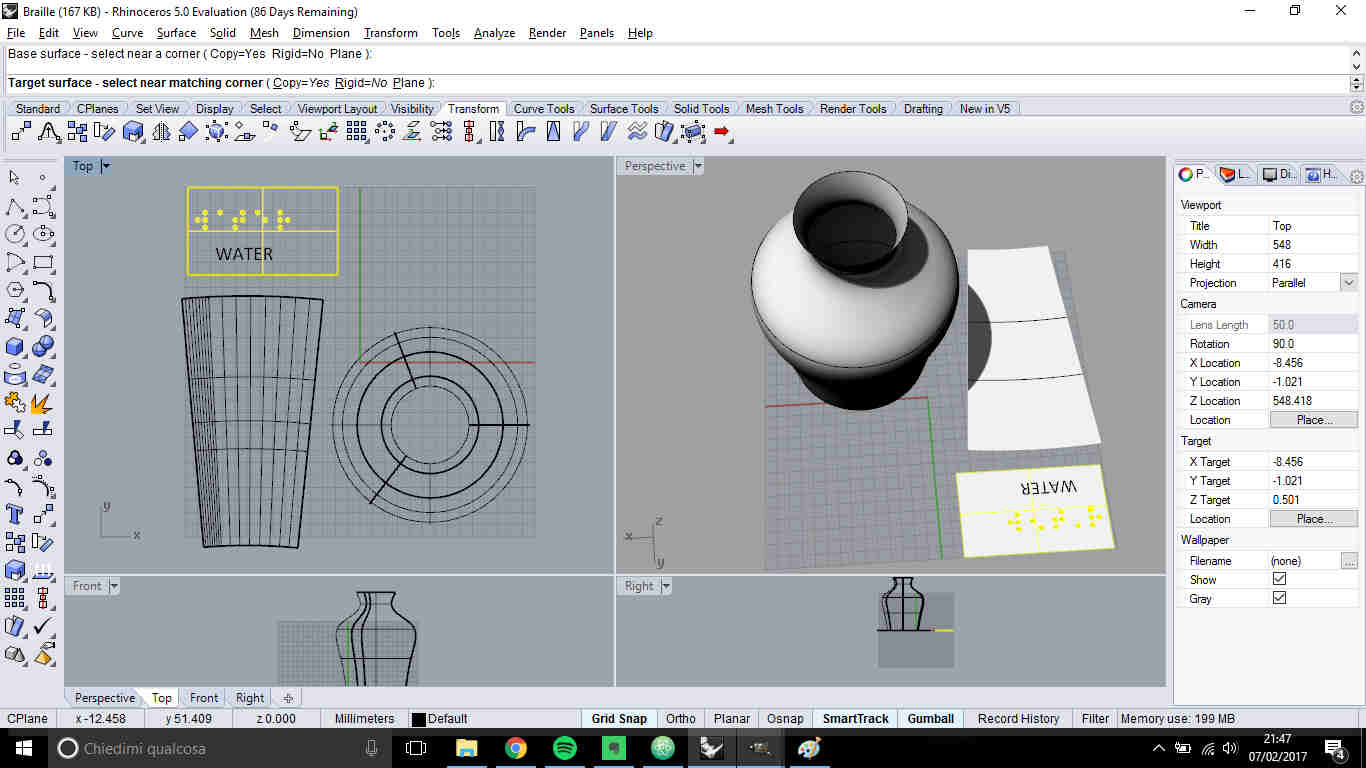
Rhino: I won't throw in the towel
I've always heard about Rhino to be suitable for organic design and quite hard for beginners. Actually, it's one of the most complete software I've ever seen. On my opinion it's worth spending time in learning as many tools as possible because Rhino has huge potential for 3D design (that is something Onshape didn't make me think). One more reason, maybe the most useful one, is that Rhino has a Command line where you can type functions name and messages will guide you through all steps.
My intention was to design a bottle and write on surface "water" in Braille
language.
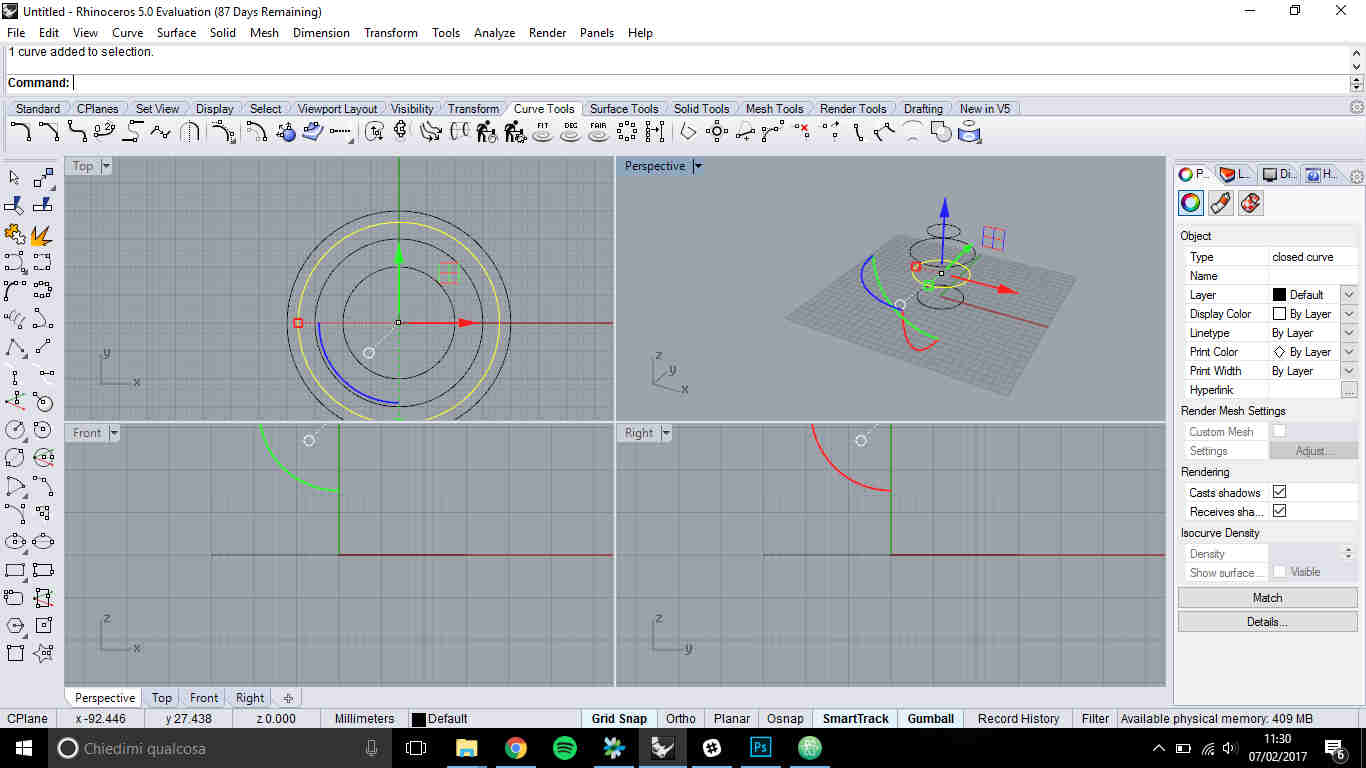
Surprisingly, designing the bottle was quite easy because to make concentric
circles ad different height consist only in drawing them on the same plane
and then change their relative distance with Move command.
 VIEW TIP:From the upper toolbar, going through View,
you can choose solid layout (Wireframed, Rendere, Shaded..).
VIEW TIP:From the upper toolbar, going through View,
you can choose solid layout (Wireframed, Rendere, Shaded..).
To wrap a solid object around another one, you have first to create a plane
(Plane in command line), design the sketch and then make it 3D.
In my case, sphere were the most suitable item to represent letters.
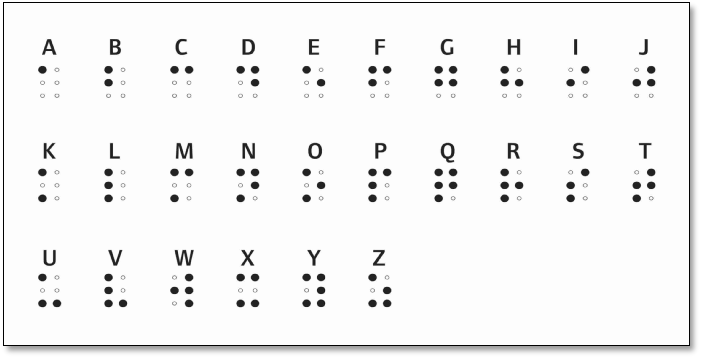
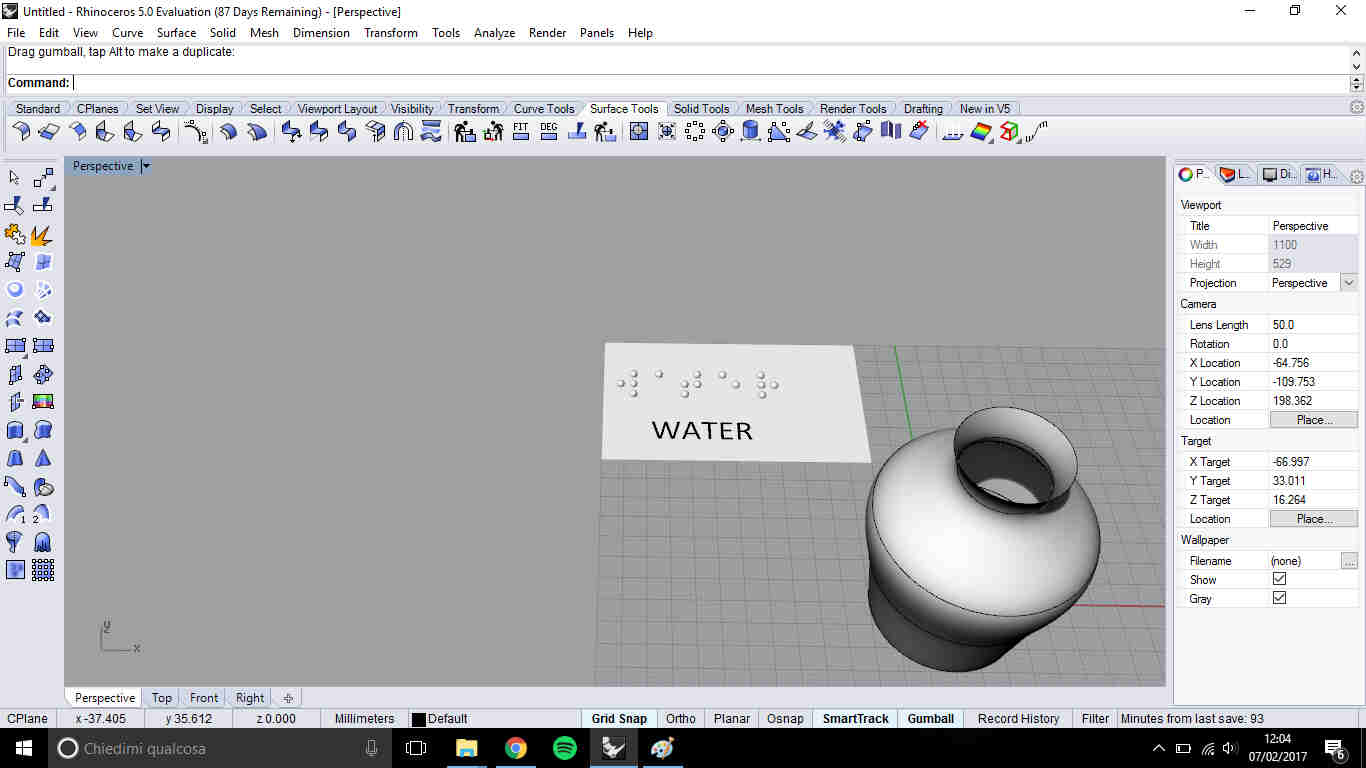 To translate water into Braille alphabet, I used this picture
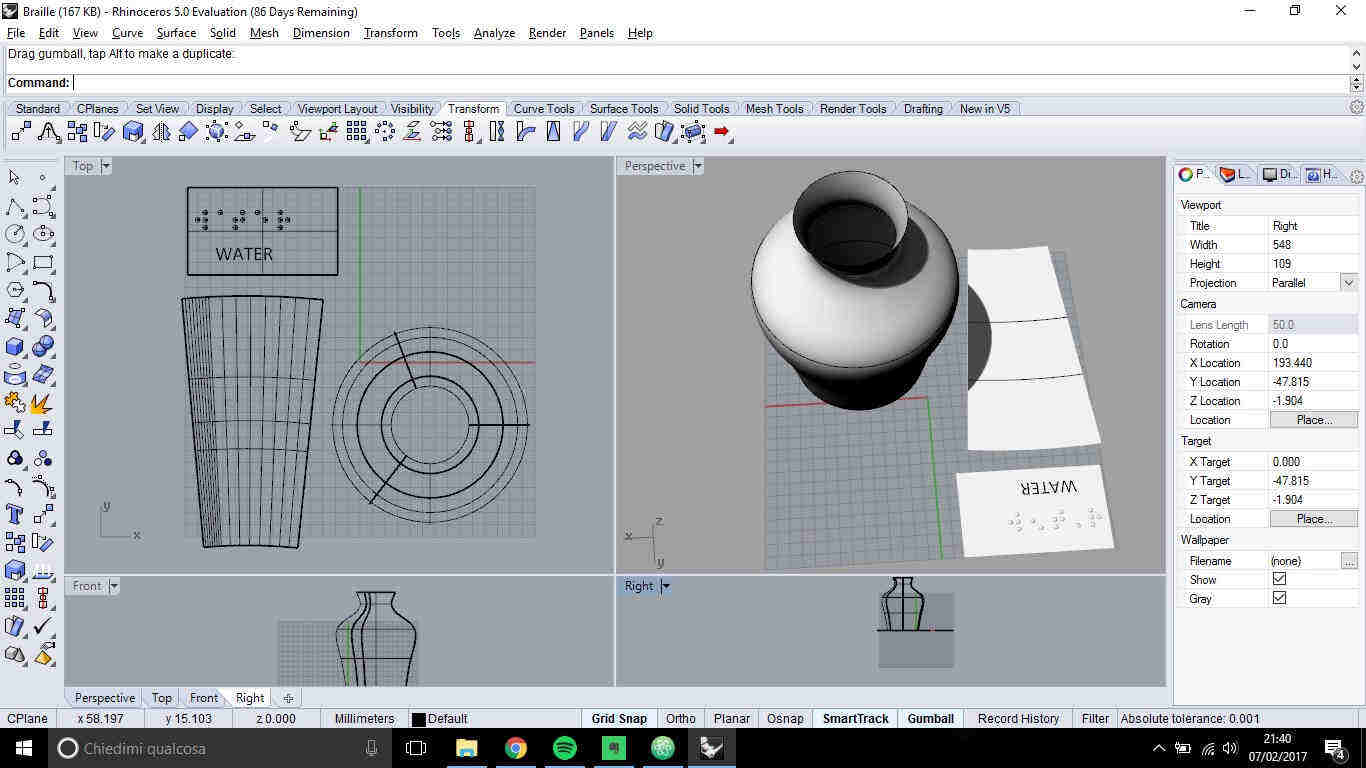
 I then asked
Pietro Rustici, who did something similar during
this week, the function name to put the letters on the bottle surface:
FlowAlongSrf - in command line. Anyway, the result wasn't good: the dots
had been put vertically along bottle height and they didn't maintain a spheric shape.
I then asked
Pietro Rustici, who did something similar during
this week, the function name to put the letters on the bottle surface:
FlowAlongSrf - in command line. Anyway, the result wasn't good: the dots
had been put vertically along bottle height and they didn't maintain a spheric shape.
To fix it I:
- first changed the orientation of my plane (command line: Dir-> SwapUV) and I obtain horizontal wrapping;
- put Rigid=Yes when asked to select Base surface and dots turned to spheric shape;
- split the bottle surface in many areas (Split);
- Unrolled one (UnrollSrfUV);
- FlowAlongSrf on this new one
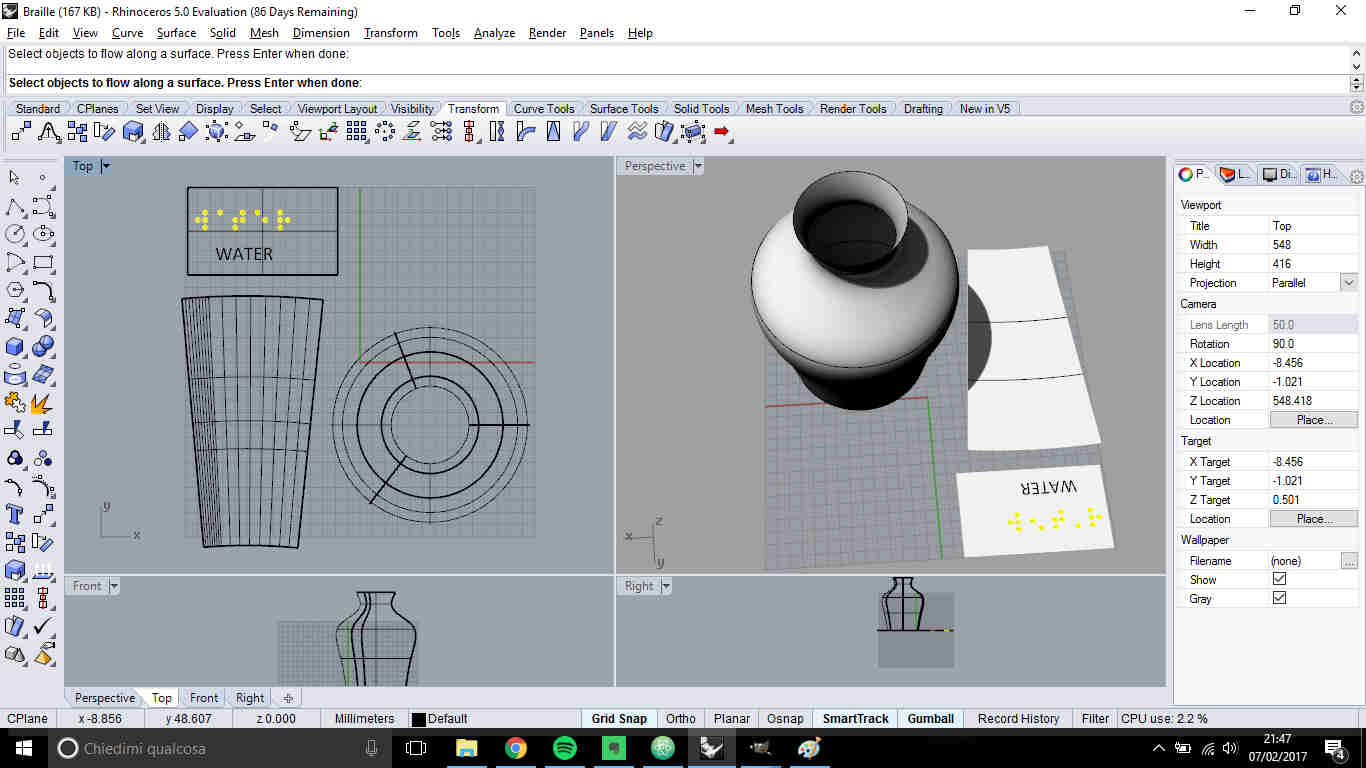
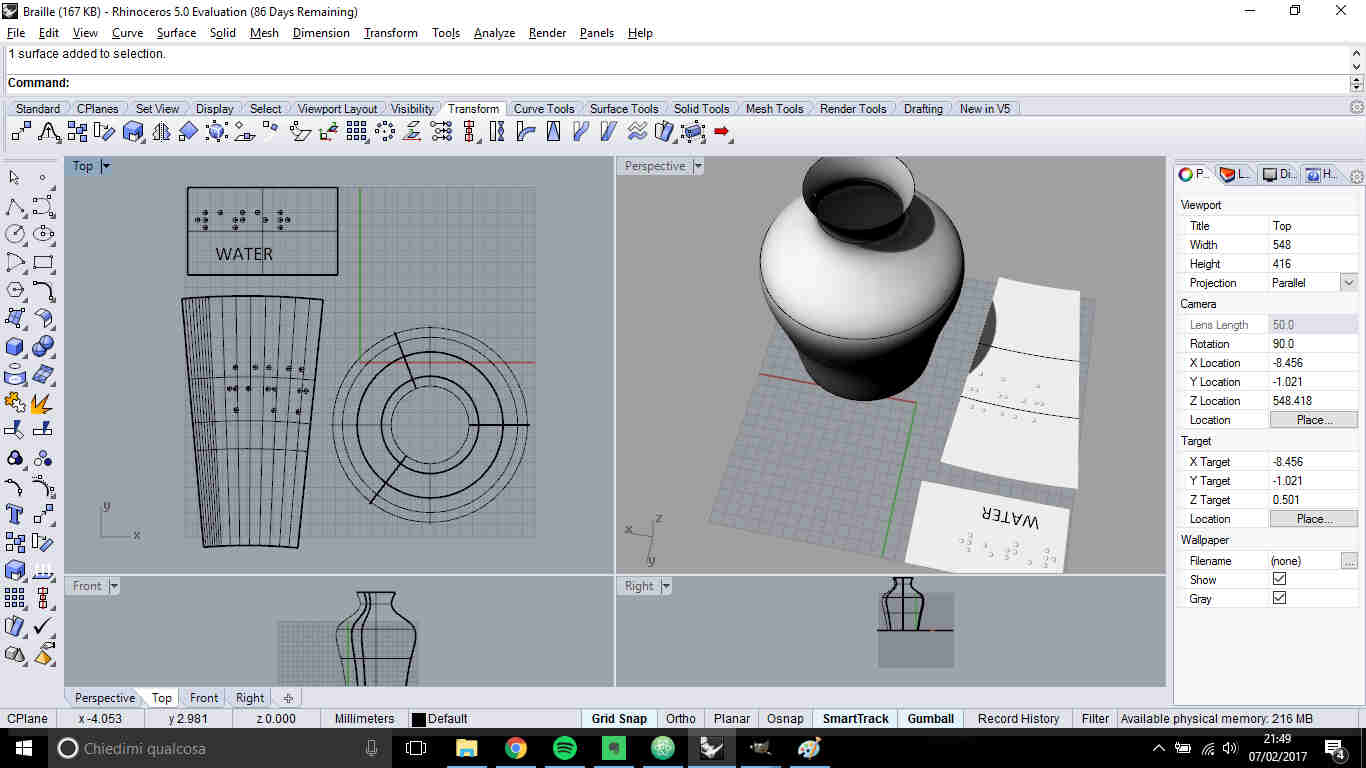
Still, relative sphere distances weren't respected and so I manually moved
closer all of them. I'm pretty sure there is a command to do that but I wasn't able to find
it on the Internet, neither I found a function to "re-roll" back my flattened surface
section to its original position (Rebuild didn't suit my request).
I didn't find and answer for this week but my stubbornness will drive me to the solution in the next weeks.
UNFIXED FILE--->here.
Conclusions: Rhino is undoubtedly a superb
software (not by chance is among the most used by professional designers),
it requires time and resolution to get used to its features and to learn
its commands but it's worth spending time on it because it can lead you to high level results.
It also has an intriguing plug-in (Grasshopper) for graphical algorithm
editing that I quickly met months ago in a work shop held by
Mario Fullone
in Siena and that I would really like to examine in depth in next future.
< New score: TOP3 OF FILE SIZE WEBPAGE >
If you scrolled my week 2 documentation till this point, you see how
many picture I inserted. And this couldn't seem a big issue in itself...
if I only checked image size before!
What happened was that I've been using Stamp->Ctrl+v on Paint
without putting attention to file generated size. I simply pushed a 66 MB website doing this.
I started panic because I had realli A LOT of pictures to fix with no idea about how
to do that but many suggestions and web researches lead me to rely on the following methods.
Save for Web- Illustrator
One way is to open your image on Illustrator and then go through File->Save for web.
 Yellow rectangle indicates where you can drop down the quality of the image and the arrow shows
the file dimensione reached with defined settings. It is quite an handy interface but with really big files it actually
can't do significant changes.
Yellow rectangle indicates where you can drop down the quality of the image and the arrow shows
the file dimensione reached with defined settings. It is quite an handy interface but with really big files it actually
can't do significant changes.
Anyway, you can work with just one picture at time and if you need to modify many images, editing
manually one by one helps having specific results but it could take very long.
NB:Photoshop has the same tool
BIMP-Gimp
Bimp is a lovable plug-in for Gimp that can resolve a problem like mine (with loads of
images) in just one step. Its name stands for Batch Image Manipulation and in fact you found this
tool in File->Batch Image Manipulation.This window immediately opens:
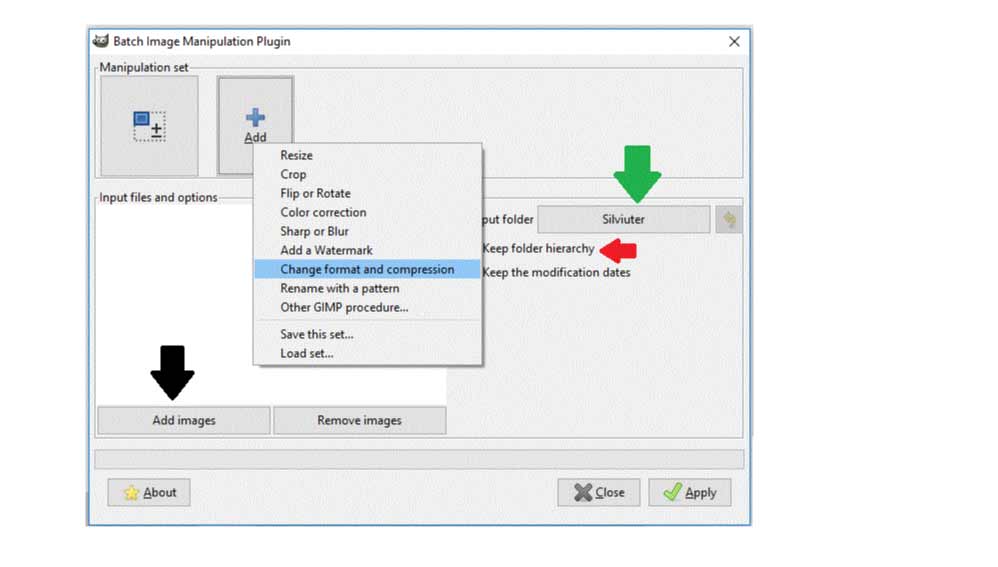
- With the button indicated by the black arrows, you add multiple images or folders;
- In the upper bar (Manipulation set) it is possible to add functions to be run -
to compress files I used Resize and Change format and compression; - Green arrows point at destination file editing button.
This plug- in almost solved all my problems with image size in a step and it's really useful because beside working with more file at the same time, there are lot of parameters you can edit. Anyway I had some file which were really huge and I have to work a lot on them still.
Do-it-in-your-shell optimization
Fiore Basile
suggested me two more software to resize files but unfortunately I didn't have time enough
to try them till today because my problem came out yesterday, when I first pushed this week
documentation.
NOTE: that's a good reason to start pushing little by little during the week
so as not to spend an entire day in fixing errors.
These software are run by shell commands and that's why I postponed their testing( since I'm still
getting started with terminal tools, it will take me longer to understand what to do)
Other suggestion
In addition to image resizing there are also other behaviours you should follow to avoid skipping to top 3 file size rankbr
- Github:having a personal repository helps you keeping all heavy files away from your Fab Academy one. To insert those heavy file in HTML you just have to copy and paste URL address;
- Vimeo: this is a nice solution to put video in your website because you just have to put the link of the video you uploaded on Vimeo (so is no weight file) instead of keeping the original one in Fab Academy repository;
- Check what folders contain: if you are a scatterbrain like me, it may happen that you forgot to move or delete heavy file, so checking media folders properties it's always a good rule.
Results
Pre-resizing: 66,5 MB
After-resizing: 8,3 MB
Update 13th March 2017- BIMP download on linux
Working a lot on Linux, I wanted to download BIMP also there. So I needed to download and unzip these files.
I found great help for installing process
here