Week 12
Molding and Casting
Objectives
Learning Outcomes
Have I ...
Documentation
I did my mold parts using plywood, it has two parts mold "hembra" and mold "macho". Usually, fabbers use Modela MDX-20 to make molds, so I decided to do something more bigger than those. I used Shopbot and Partworks 3D software. I consider it a good experience because make that mold allow me to learn and integrate several topics.
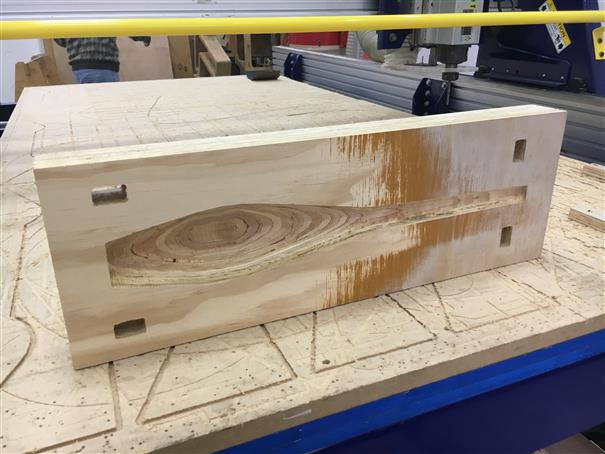
More information about how I design my mold, how I made mi files for machinig and what I casting, here links of my assignmentsComputer-Aided Design, Computer-Controlling Cutting and Composites.
Molding & Casting
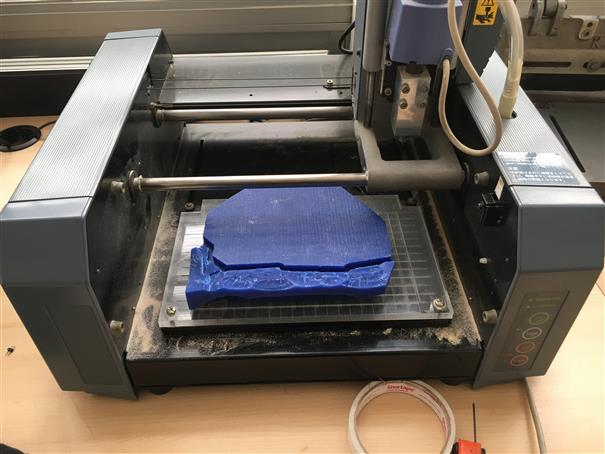
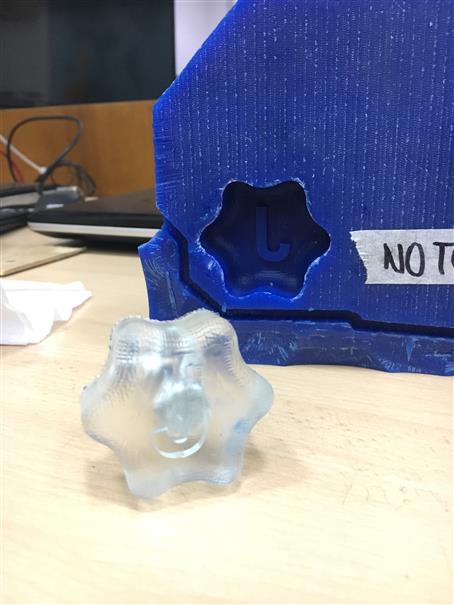
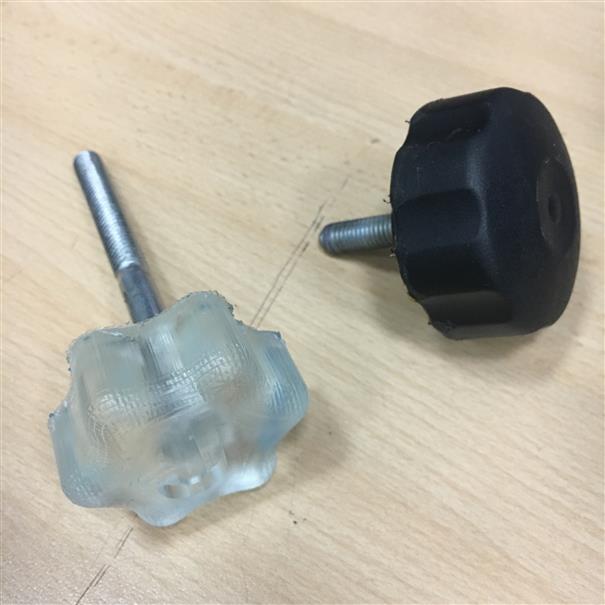
I decide to make a handgripe using an embedded bolt, this idea was born when I was assembling my FrijoHand. So for this I used inventor to make my design.
When design was finished, export it on ".stl" extension.
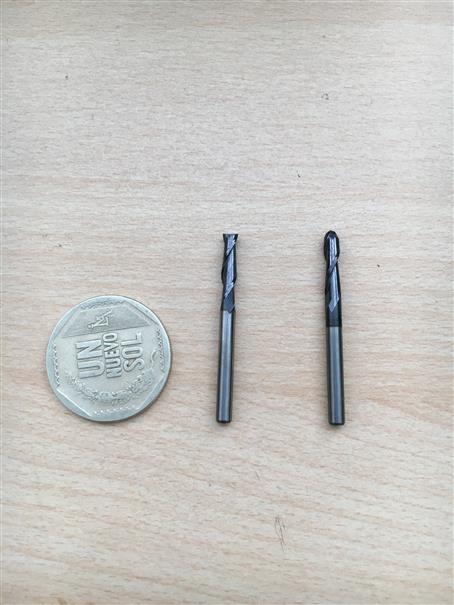
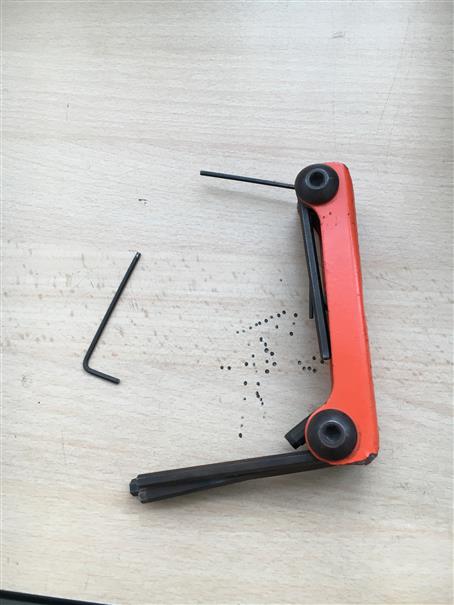
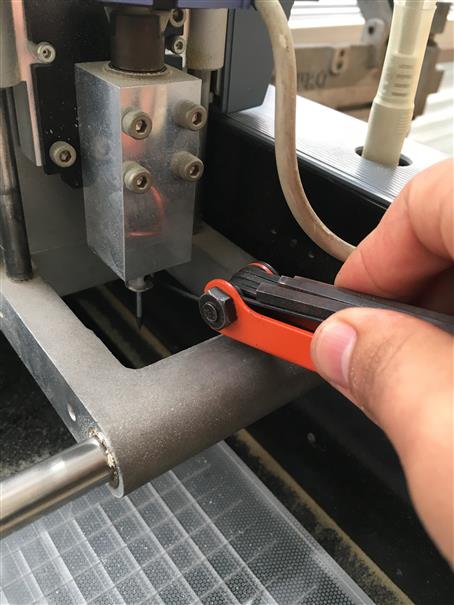
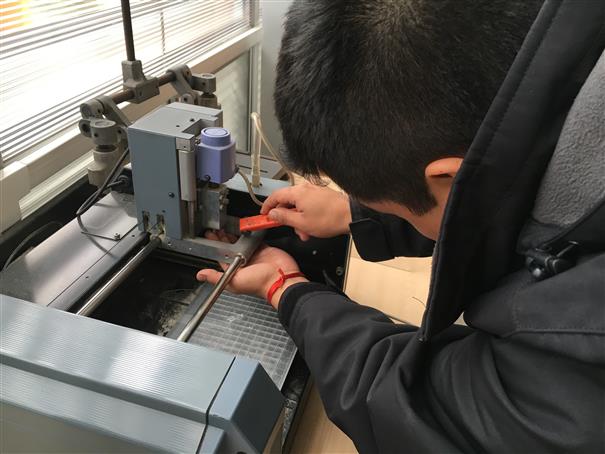
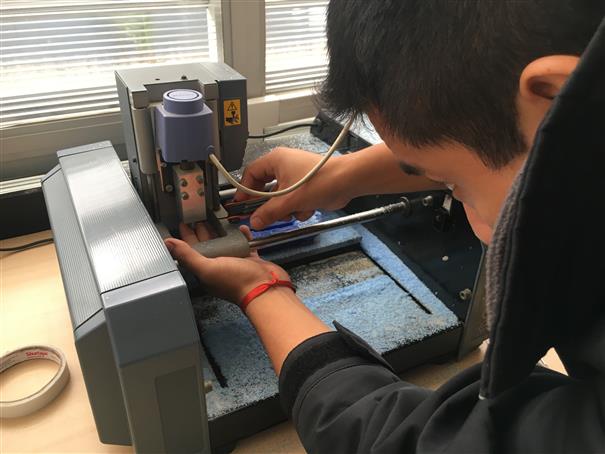
Looking for milling tools. One is "1/8 straight rough tool" and the other "1/8 ballnose end tool". Then, using an allen wrench change currently Modela milling tool had. First, let to use "1/8 straight".
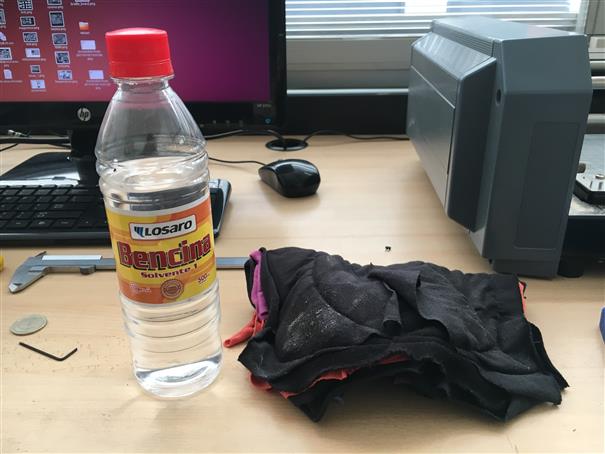
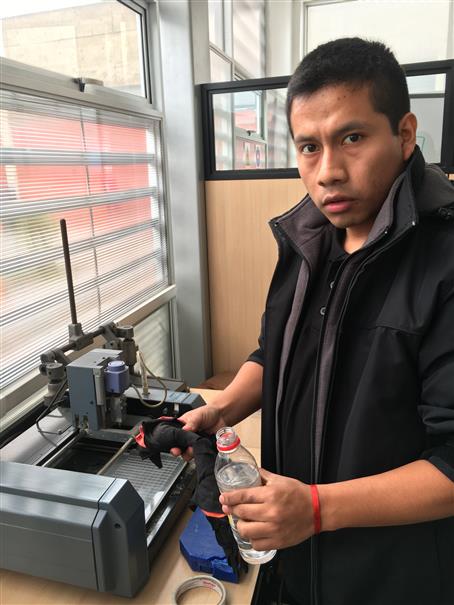
Now, using benzine and a cloth to clean the surface.
Using double-sided tape we glue the wax to the base. You may notice that the wax is damaged around. This is why I am recycling wax. I cut the end edges of both sides to have greater contact area with the base.
Steps to milling:
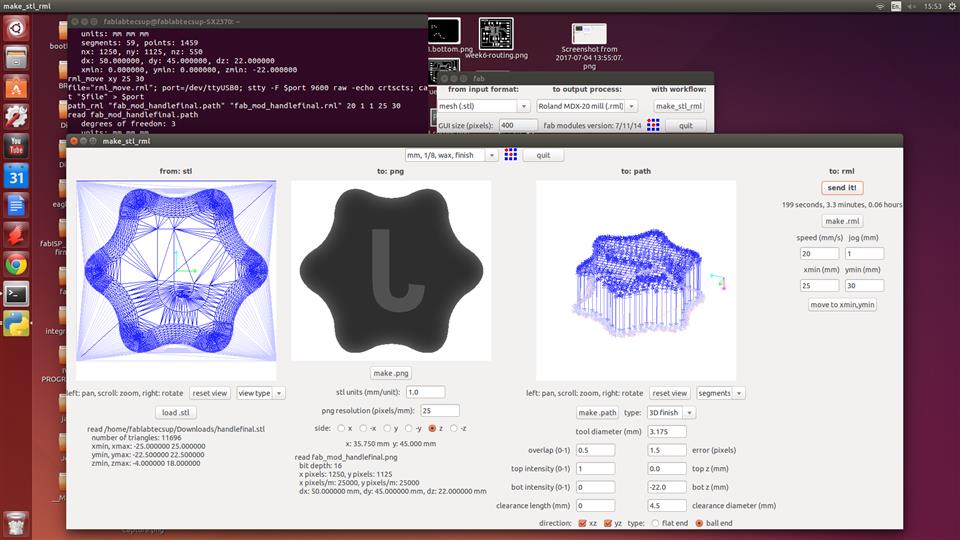
1.Open "Terminal" on Ubuntu. 2.Write "sudo fab" and enter your password. 3.Then, a window appears where there are 3 options to modified. On "from input format:" choose "mesh(.stl)". On "to output process:" choose "Roland MDX-20 mill(.rml)" and click on "make_stl_rml". Another window will appear.
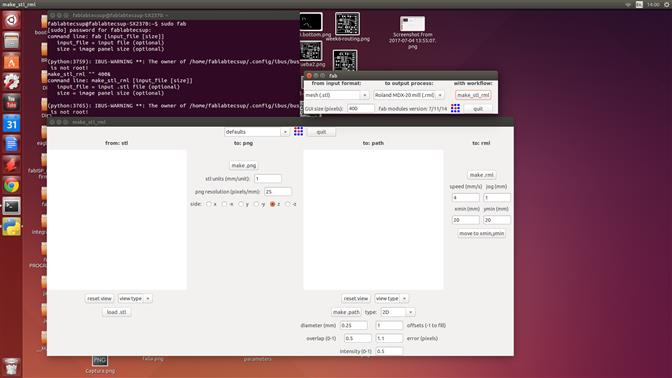
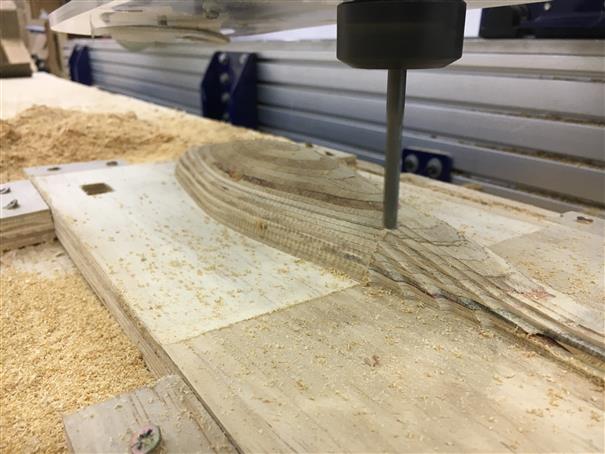
4.When we mill wax, first we do it using a "1/8 straight rough tool" and then a "1/8 ballnose end tool", So, in this new window, on top choose "mm, 1/8, wax, rough", in the left-side window click on "load .stl" to choose your file to mill. Next "to: png", choose de side of your object, to check if it is correct the image shown have to be a top view of your object, otherwise choose within all options (+x, -x, +y , -y, +z, -z). [IMPORTANT: verify your measurements]. Click on "make.png". Then "to: path", keep the values by default. "-1: offsets = means milling all the piece" / "0.0: top z(mm) = means the top part where milling begins" / "-22.0: bot z(mm) = means the maximum depth to be milled [the thickness of the wax must be greater than this value]. You can interact with the image, there are routes. Finally, on your right-side window, there is the option to set our zero. Turn on Modela MDX-20, press "View button (white color)" and enter values on "xmin (mm)" and "ymin (mm)" until you find the location you want in the wax.
5.Click on "make.rml" and "send it!".
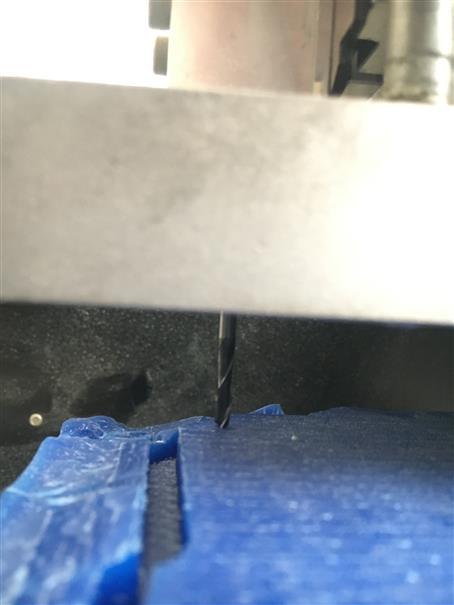
6.When this is over. Change "rough tool" by "end tool".
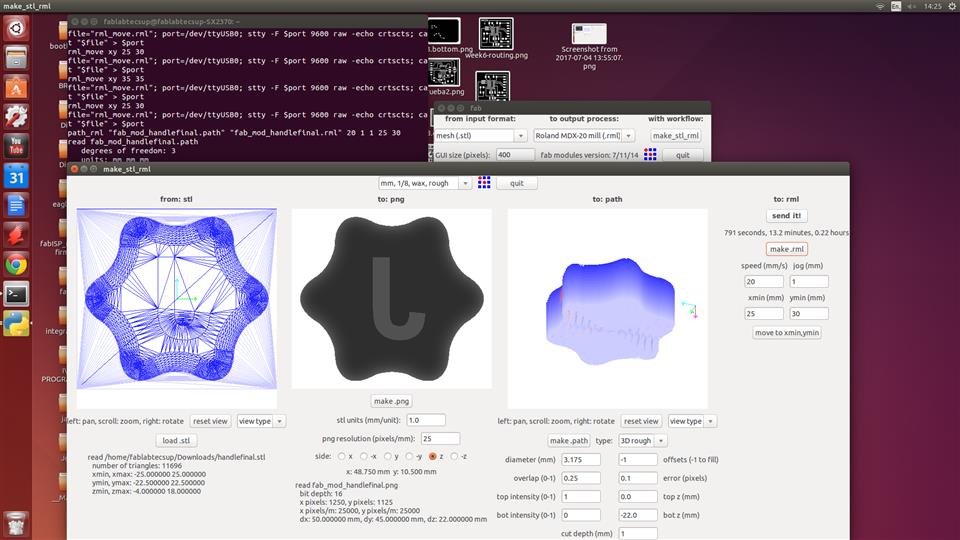
7.Now, at top change to "mm, 1/8, wax, finish". Focus on "to: path" side, on "clearance diameter (mm)" enter value "3.175 (it is the tool diameter)". Check off "direction: xz", "direction: yz" and "ball end". Move tool to the same zero, click on "make.rml" and "send it!".

8.Once it finish, on "clearance diameter (mm)" enter value "4.5 (it is the tool diameter plus half)", click on "make.rml" and "send it!". Ballnose tool, has rounded tip ,so when it makes the routes it leaves wax between stroke and stroke. For that reason, another milling is done by increasing the "clearance diameter" to half the diameter. In this way the excess wax is removed leaving the surface as smooth as possible.
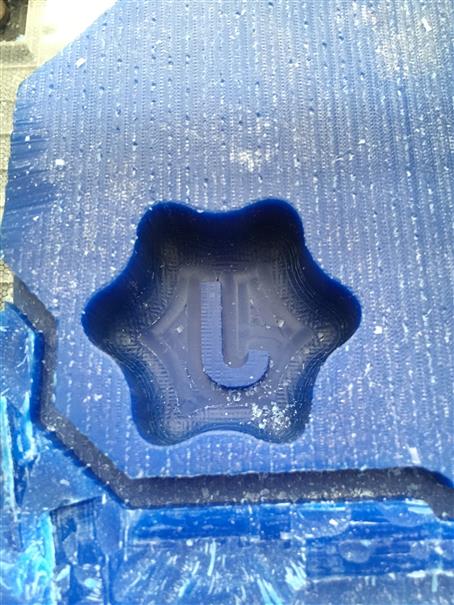
Our result!
Steps to casting:
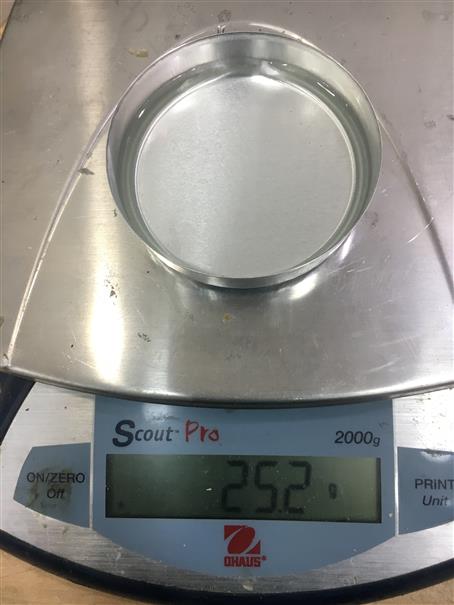
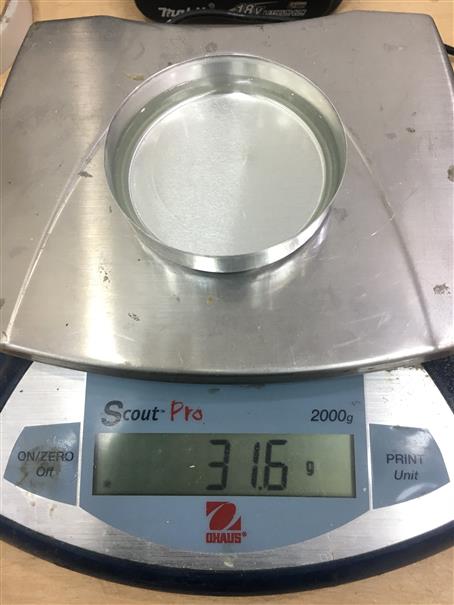
1. I used Epoxy resin to casting.
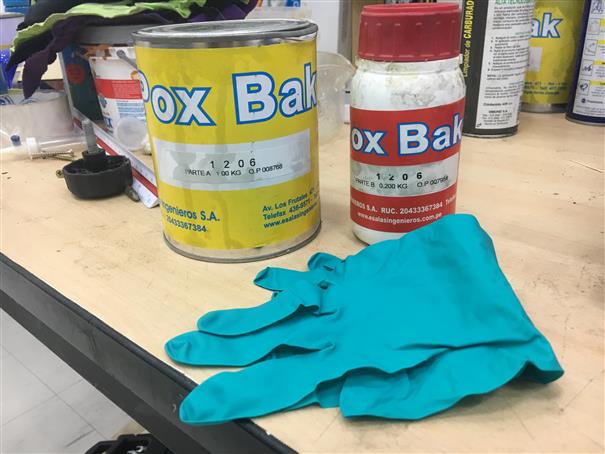
2. The proportion is: 1 part of red bottle and 5 parts of yellow jar. I used 5 parts of 5g (yellow jar) and then add 1 part of 5g (red bottle).
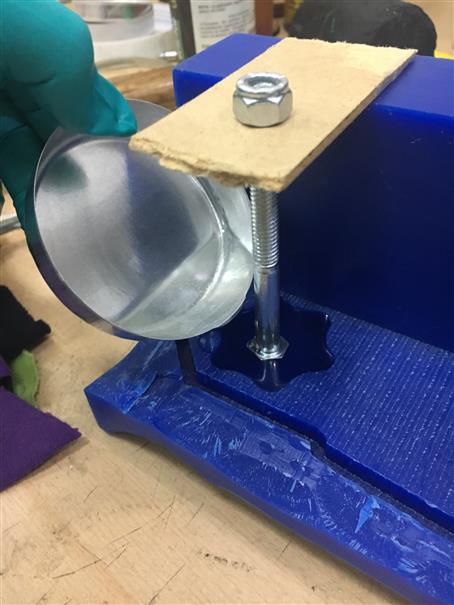
3. Make a support to center a nut inside our mould. Mixed both substances and pour over the mold.
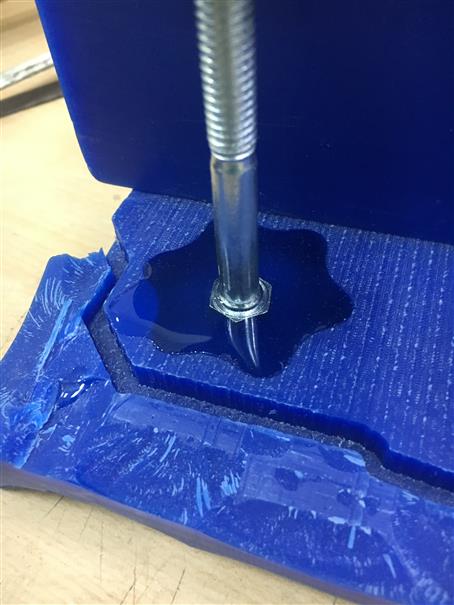
4. Just wait around 24 hours!
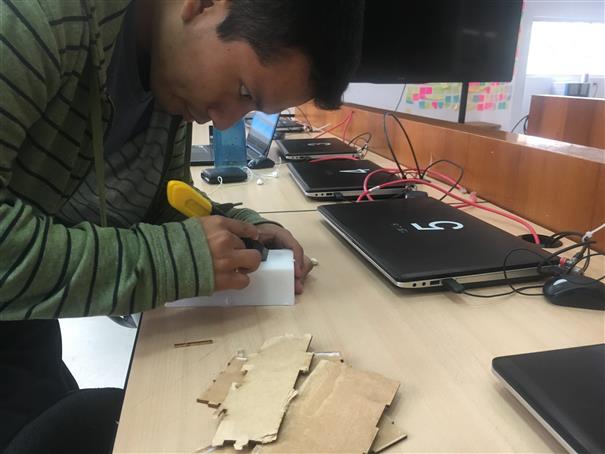
Doing a molding to replicate a piece
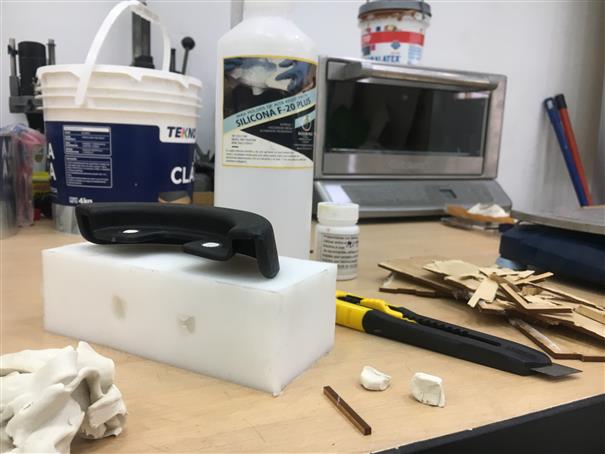
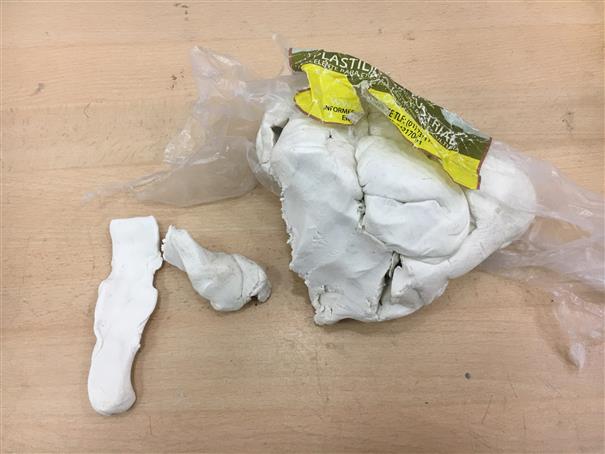
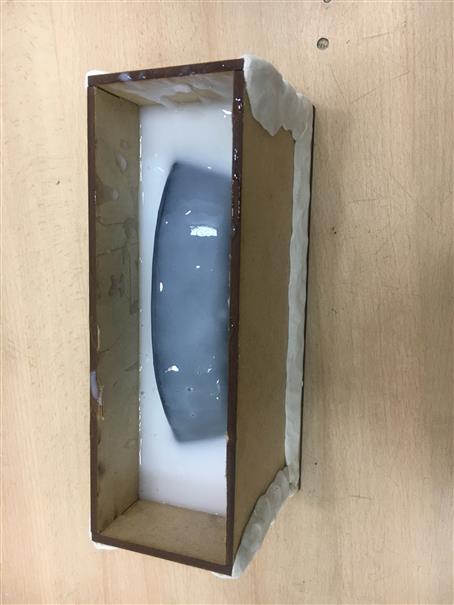
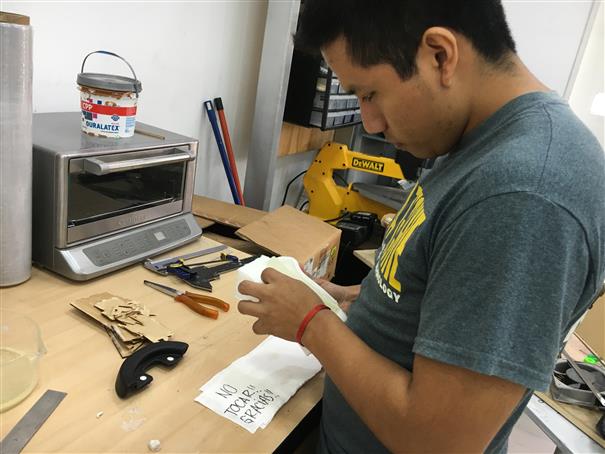
First of all, material used were white silicon (founded in local supplier), industrial plastiline and an MDF box.
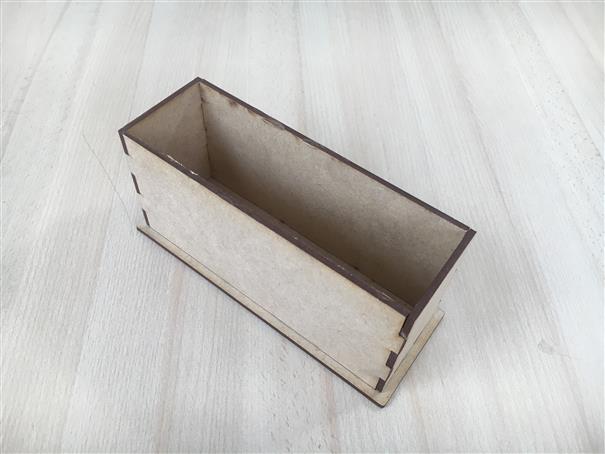
Using plastiline let to seal MDF box in this way there will not leak material.
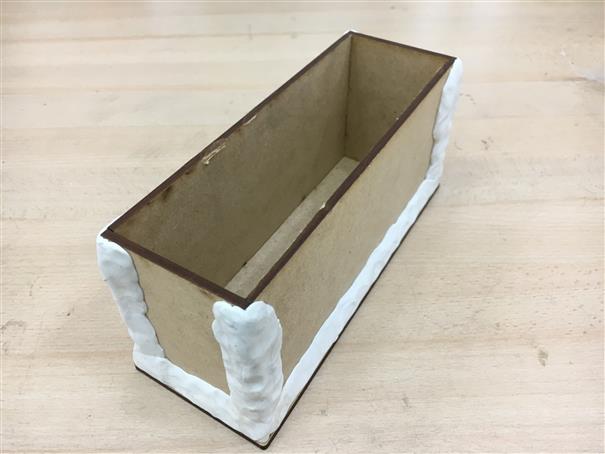
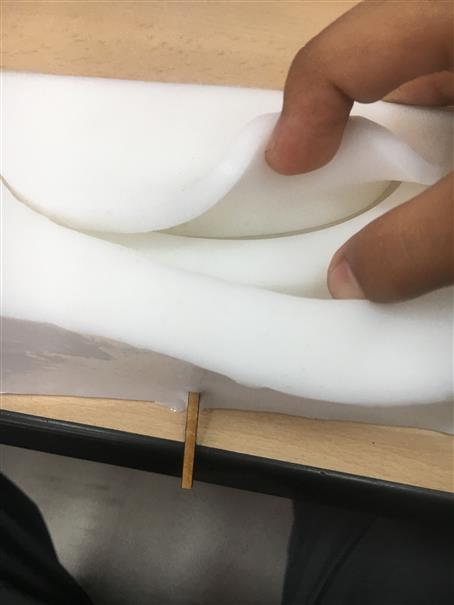
Then, fill the holes of the piece with plastiline. Because, when it is covered by silicone it enter trough holes being difficult or impossible to remove the piece of mold. Now, piece is placed inside the box. HERE AN IMPORTANT TIP, PLACE PLASTILINE IN THE TWO CORNERS OF SOLID, it serves as defog.

Now, pour silicone in the box until to cover the solid, as it is possible to see in next picture leave a toothpick above. It serves as defog too. Allow to dry for at least 12 hours.
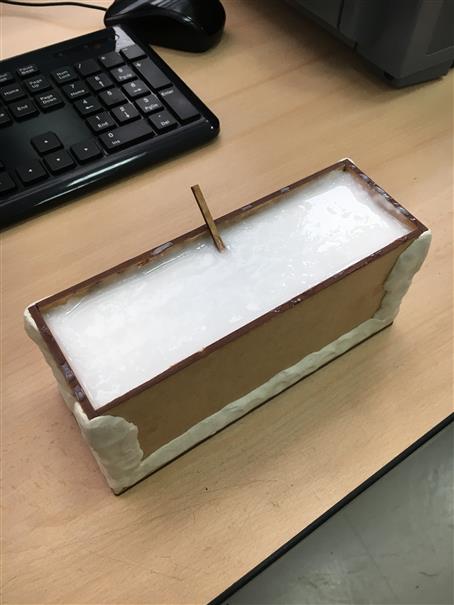
Next day, removed the mdf box carefully. Plastiline can be recycled.
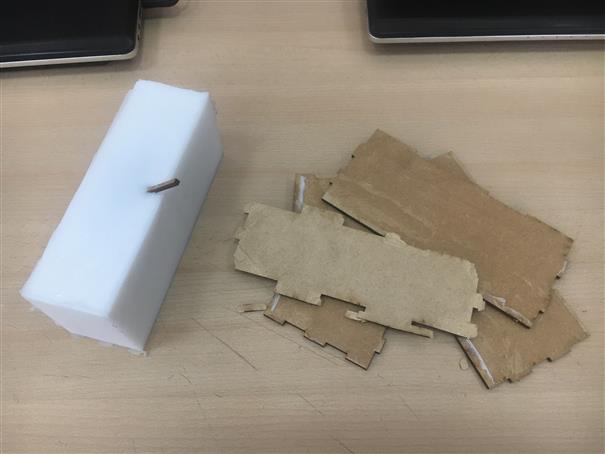
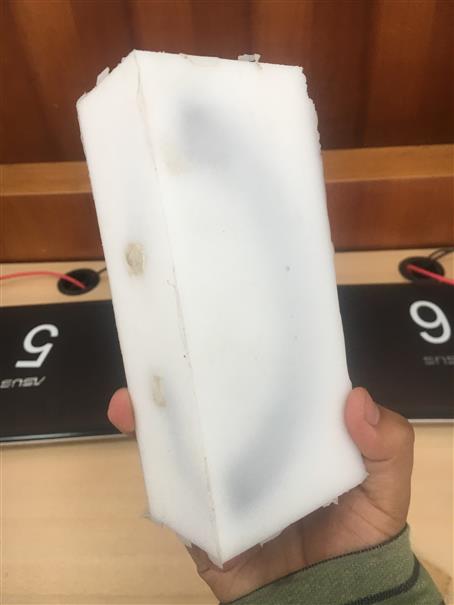
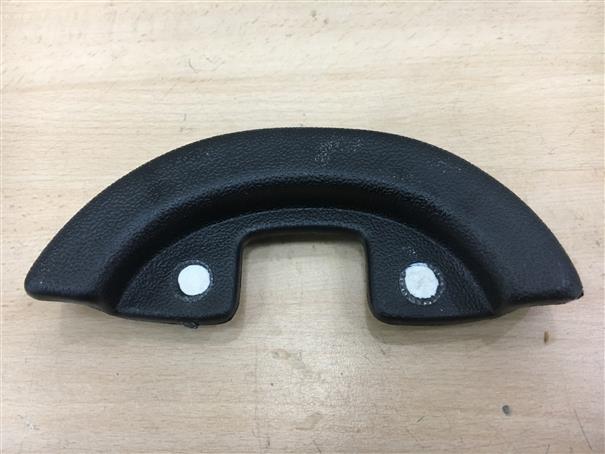
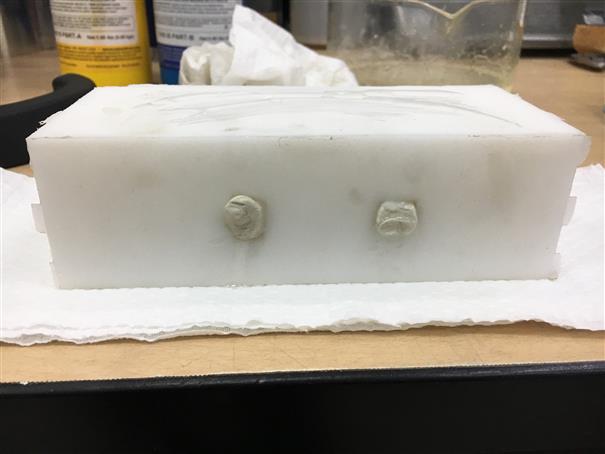
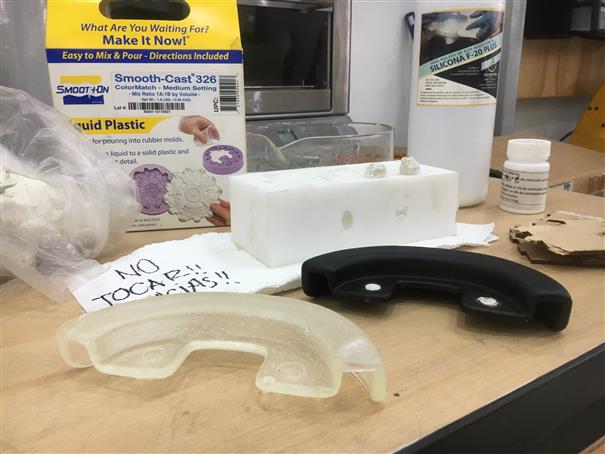
As a good surgeon, I made a cut to remove the piece. Good job I consider.
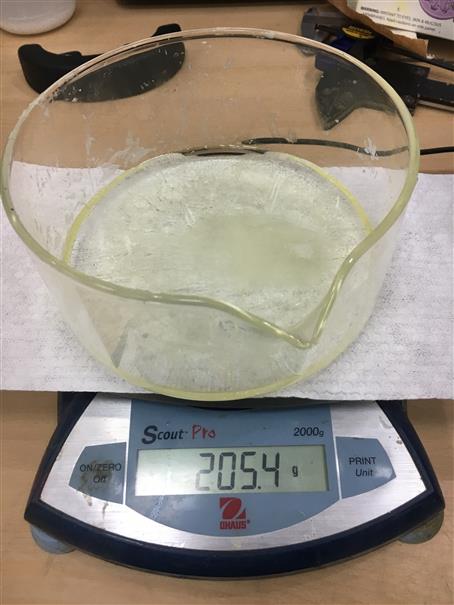
Well, let's to prepare Smooth-Cast 326 liquid plastic, around 150 gramos was necessary and pour it inside mold. HERE ANOTHER TIP, USE PLASTILINE TO FILL HOLES DEFOG, in this way we asure liquid plastic cover the entire inner part.
Allow to dry for at least 12 hours. Leave a message of Don't touch because the plastic tends to warm. Also, we have better result if mold are not moved many times.
Files
Here, files: -Hanlde design (.ipt and .stl) -MDF Box (.dxf)
Result
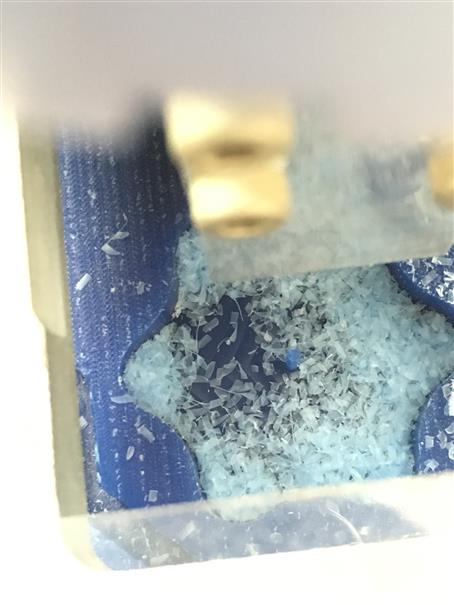
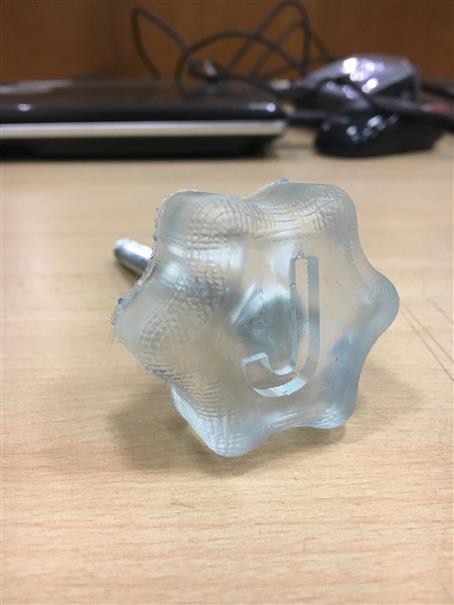
We have our bolt with handle!
Using a hand drill, make the holes. Ready, work done!
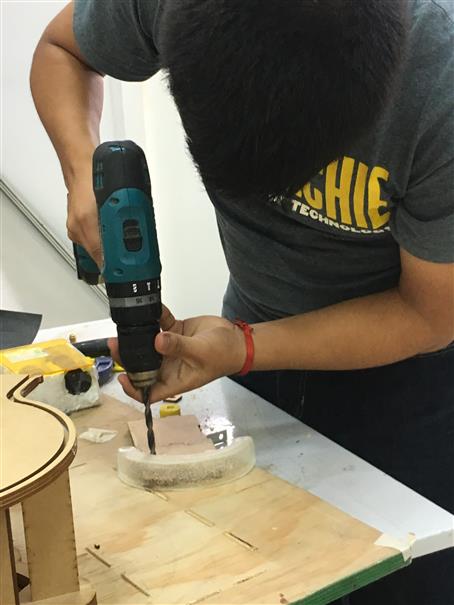
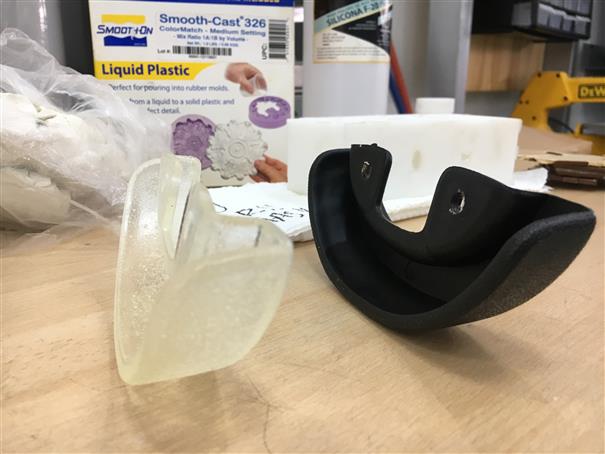
I recommend to use vacuum pump, because my piece casted has bubbles.