*Test the design rules for your printer(s) (group project).
*Design and 3D print an object (small, few cm) that could not be made subtractively.
3D scan an object (and optionally print it)
Learning outcomes:
*Identify the advantages and limitations of 3D printing and scanning technology.
*Apply design methods and production processes to show your understanding.
Have you:
*Described what you learned by testing the 3D printers.
*Shown how you designed and made your object and explained why it could not be made subtractively.
*Scanned an object.
*Outlined problems and how you fixed them.
*Included your design files and ‘hero shot’ photos of the scan and the final object.
Printing
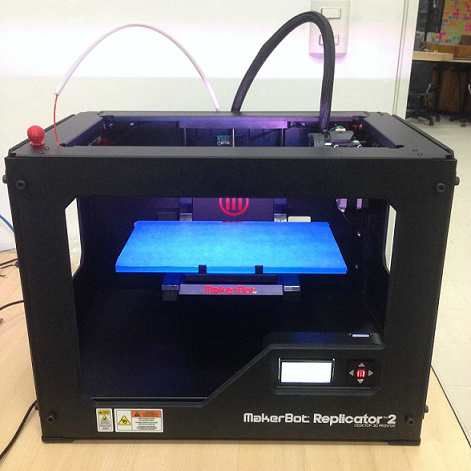
In order to achieve this assignment, I used a Maker Bor Replicator 2.
To design and 3D print an object that could not be made subtractively I used Inventor and made this bridge of spheres:
Through this experience I learned how difficult is for the printer to make this kind of objects, because the angle of the empty part needs some support, and there is not. So that's why this part has a rouugh finish.
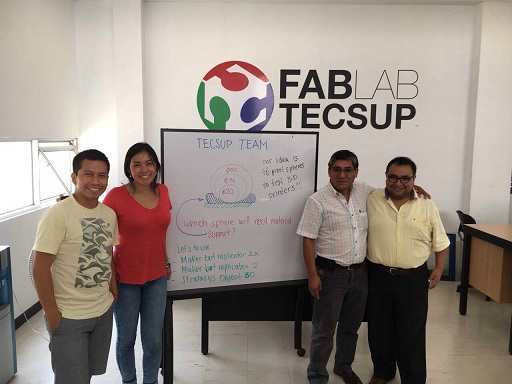
Group challenge
Team:
John Lozano
David Maita
Midori Nuñez
Armando Sarco
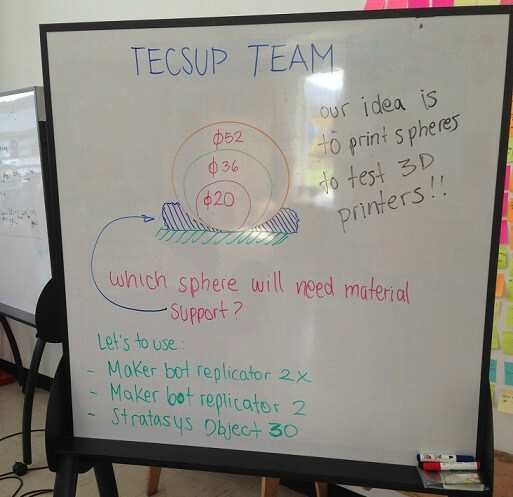
Target:
Make spheres of 20, 36 y 52 mm of diamenter. I selected this object to demonstrate that it could not be made subtractively because with those diameters it's difficults to make the curves without support material, here we will see what will go on.
Identify the advantages and limitations of 3D printing technology.
Compare differences between Tecsup printers.
Teamwork process:
We made a brainstorming about geometric forms and decided to print spheres of 20, 36 and 52 of diameter.
We used Inventor software to model. System: Metric, Piece: Normal (mm).jpt
Then selected (X-Y) work plane.
We drew a semi sphere and then the thickness of 0.5 mm was applied.
And then we generated revollution of this area, modeling spheres.
Stratasys Object 30 Prime:
In this video you can see our first try with "Stratasys Object 30 Prime", we used VeroGray RGD 850 as raw and support material. There we show you: Printer indicators, Object Studio opening screen, tool bar (Cinta Tray Settings and Cinta Model Settings).
As you can see, we tested resin injectors. Here we have the Job manager screen; according to temperature and speed, we insert the spheres, optimize the space, and validate the consumption of raw and support material and the time of printing.
Then we sent it to print. You can see the print process in this video, 50 min and 3:30 min after the order. Finally, after 10 hours you can see the result.
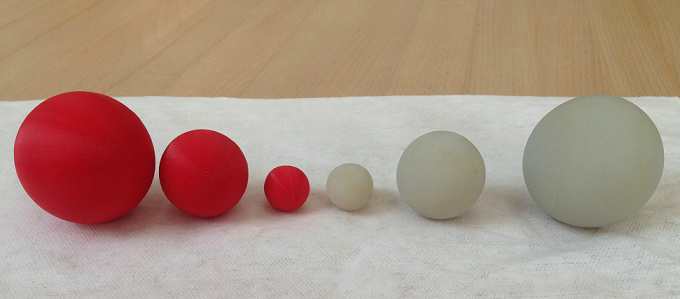
These spheres were washed to take off the remaining of the support material. Here is our final result.
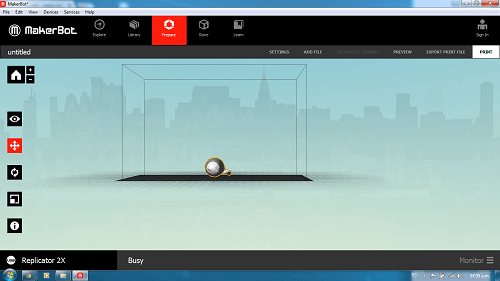
MakerBot Replicator 2:
This works with PLA material, We configured the settings to print and calibrated the printing platform.
Material settings: standard quality, support material, infil 30% and number of shell: 1.
Here you have some previews before printing. You should usually wait for the injection heads to heat up and remove the waste material.
Immediately the raft print started. You can see in this video how does the print process look and the final result.
Comparison:
In order to show you the differences between the Tecsup printers, in this video we have the weight of each sphere with Stratasys and MakerBot.
Approximations of the diameter are the same but the surface roughness is better with the Stratasys printer.
For this diameters, we did not need lots of support material with MakerBot.
What I learned:
In this challenge, we discovered through our faults that when there is no stability or fixation, the printing process is interrupted faster.
The material that is stored more than 6 months becomes very brittle.
Speed should not be added to a job when it has already started.
The print development depends of the material color.
As you can see in the video we had this faults with MakerBot printer:
The thickness of this job was too thin: according to the manufacturer recommendation, minimum thickness when elements maintains an arc is 1.6 mm and minimum thickness when element is flat is 0.4 mm.
Any risk of printing 0.1 or 0.2 mm retracts 1 millimeter of synthetic.
In complex, curves 0.1 resolution increases the possibility of failure.
Tolerance is from 0.2 to 0.15 mm.
For printing, it is better to use your card and not the computer directly, to avoid the risk to waste time when the process stops.
About Stratasys Object 30 Prime, as you can see in the video, by placing a too thin wall, and only by washing it, it fractured, allowing to see the material support inside.
Finally, here are the 6 printed spheres, that's how they look.
Individual challenge:
3D Printing
Description process:
For this challenge, the first thing I did was to test printing a mandala, using the MakerBot printer. First, I designed the mandala using the Inventor software, then I converted the file with the printer software and saved it in a SD memory.
Improving:
I wanted to print a mandala design that I found on the internet, but this was not possible since when trying to transform the 2D design using Corel Draw, I had many points that needed to be joint. This activity became extremely tedious, until I overcame this inconvenience using Rhinoceros, with this, I managed to get the design together and extrude it to print it in 3D. Here you can see how it looks like.
My object:
After that, I made a case for my cell phone, taking all the necessary measures I started to design using Inventor. This is how my object looks.
Problems:
I should improve taking measures for the design.
3D Scanning
What I do:
This is the first time I made a 3D scan, it was a very fun experience. We first installed the Kinect Xbox 360 software, then installed a turntable using two chairs, adjusted the camera distance and started testing.
I tried to scan my favorite ring, but it was not achieved because the room lighting was not adequate and the camera could not recognize it, so I tried a larger object.
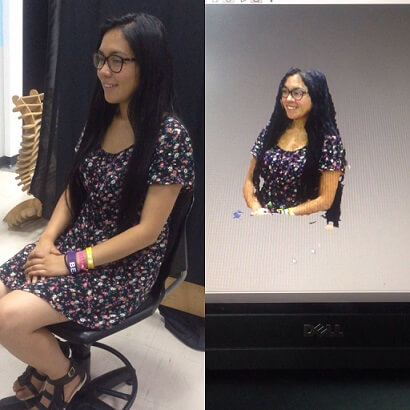
Scanning myself:
After practicing with my colleagues, I decided to scan myself, for this purpose I configured the software with 24 captures with a lapse of 3 seconds.
Result:
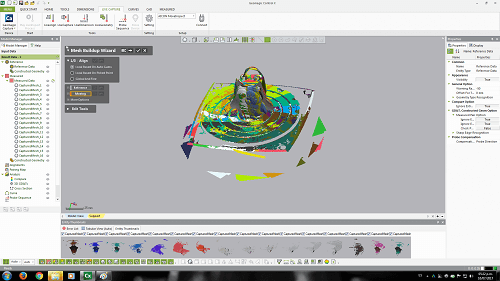
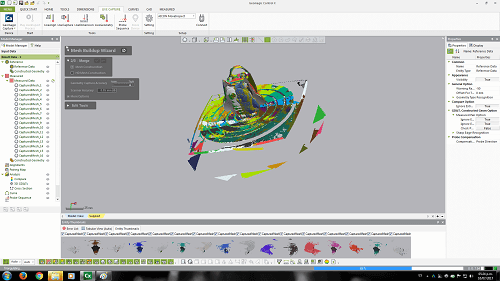
In this video you can see the result. At this point I just aligned the captures.
Improving:
The next day, I continued practicing and tried combining the captures, which allows the scan to have a better finish, so I understood that the proper order of the work is: to make the captures, to align them, to combine them and to finish them. Then manually, you can choose which captures are unnecessary.
3D Scanning & Printing
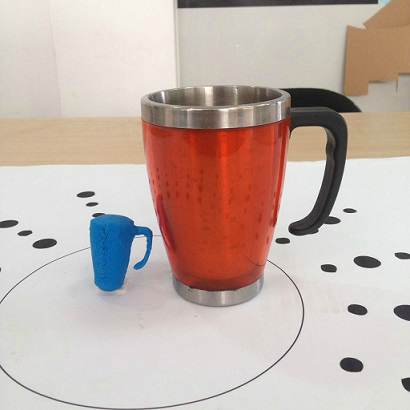
What I do:
I used the points method to scan a cup. First, I took some captures and then, using 3D SOM software I achieved this challenge, scanned and printed. After scanning I used MakerBot printer to get this little PLA cup.
Making my own scanner:
Description process:
For this challenge, I had the idea of using a model hp scanner which was discarded before. I was thinking of taking advantage of the guide with the laser by changing its direction. That means, instead of laying in a horizontal plane, to locate it vertically so that the light of the laser can propagate in front of an object that is located in a wall, and a camera could capture the shots.
Improving this assignment:
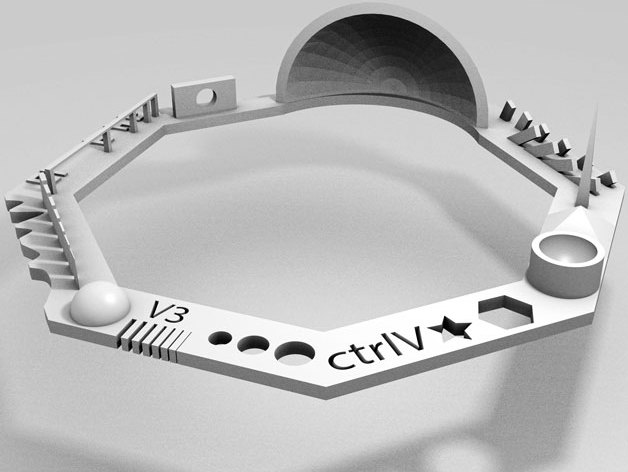
Improving group challenge
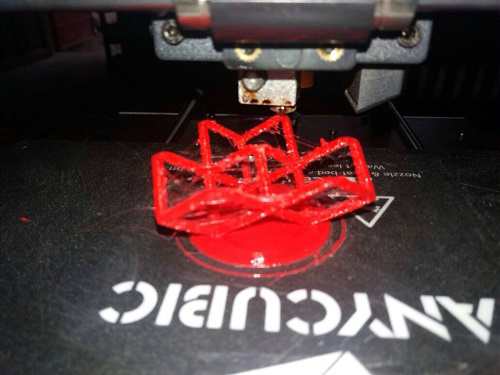
Para poder demostrar cómo se puede testear una impresora, descargué este diseño de Thingiverse
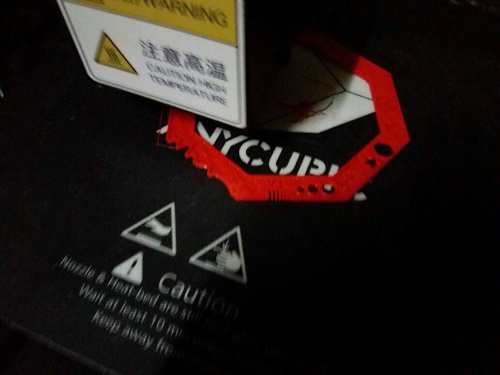
Usé la impresora: Anycubic 13 Mega, it's a new one, and it was grateful to work with this one. Thanks to Isaí, to let me work with this one.
These are the parameters:
Basic:
Quality:
Layer height (mm): 0.25
Shell thickness (mm):0.8
Enable retraction: check
Fill:
Bottom / Top thickness (mm): 0.6
Fill Density (%): 30
Speed and Temperature:
Print speed (mm/s): 50
Printing temperature (C): 210°
Bed temperature (c): 70°
Support:
Support type: none
Plataform adhesion type: none
Filament:
Diameter (mm): 1.75
Flow (%): 100.0
Machine:
Nozzle size (mm)0.4
Advanced:
Retraction:
Speed (mm/s): 40.0
Distance (mm) 4.5
Quality:
Initial layer thickness (mm): 0.3
Initial layer line width (%): 100
Cut off object bottom (mm): 0.0
Dual extrution overlap (mm): 0.15
Speed:
Travel speed (mm/s) : 150.0
Bottom layer speed (mm/s): 20
Infill speed (mm/s): 0.0
Top/bottom speed (mm/s): 0.0
Outer shell speed (mm/s): 0.0
Inner shell speed (mm/s): 0.0
Cool:
Minimal layer time (sec): 5
Enable cooling fan: check
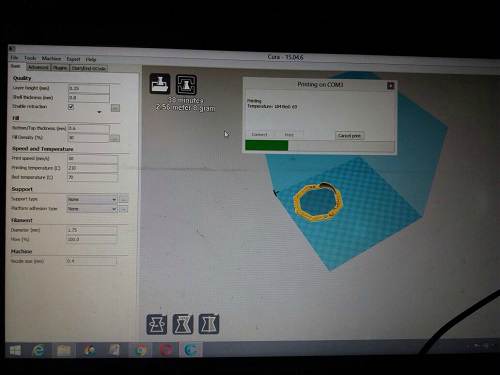
Start-Gcode, and start printing on COM3, it takes 38 minutes, and use 2.56 meter of PLA red (8gram)
Conclution & Recommendation:
This printer is very good, comparing with Maker Bot Replicator 2
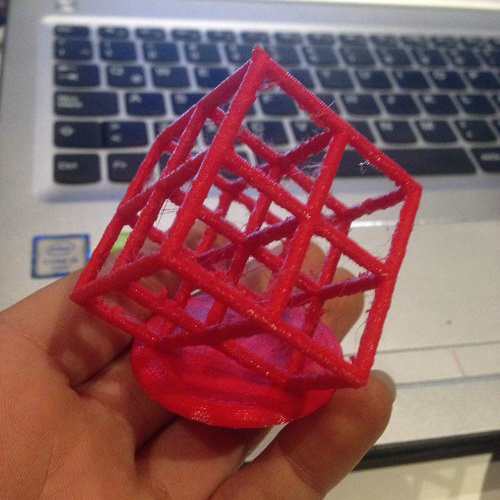
For this challenge I used a 50% of scale to did it fast, and I get a good result, as you can see at the video, I worked without material support and it's done.
For this printer is good to have wider extrusion on the first layer to get better bed adhesion.
About 3D print font, was very good.
About hole, was very good.
About Z-height, it works pretty fine from 0.1 to 1.1 mm, was very good.
About bridge print, there are some scrap at the detail, was good.
About wave, was good.
About minimum distance, there is just 0.1 mm joined, was good.
About surface, was pretty good, excelente, Not twisted or raised. Same for the base plate.
About warp, was excelent, It doesn't bend.
About overhang, was vvery good.
About spike, I got the detail, I just take off the scrap with a pliers, was good.
About pyramide and rounded print, was very good too.
About star and nut, was very good too, fine finish.
About text, I can read it, very good.
I had not to made a pad, as when I worked with Maker Bot 2X, I'm happy with this printer, I will miss it
Improving individual challenge
Printing
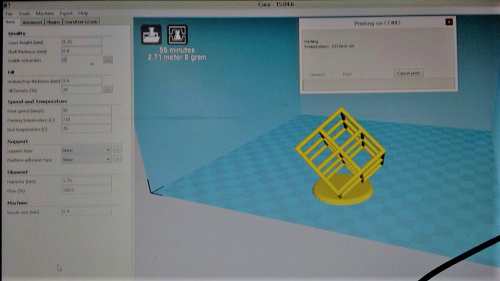
In order to achieve this one, I used the same parameters, to print this one:
In this case I used reverse engineering, I downloaded from Thingiverse and designed at Inventor, as a way to learn to make an object not be made subtractively.
An the main different using this technique (additively) and how importante it is.
You will build whatever you want, fastly
It takes 55 minutes, used 2.71 meter (8 gram)
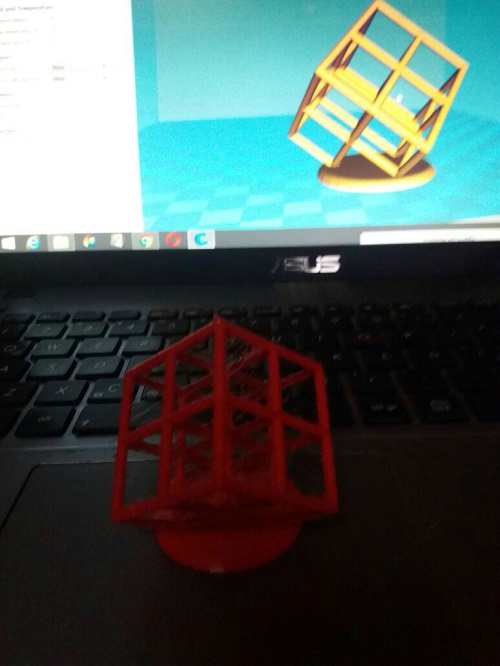
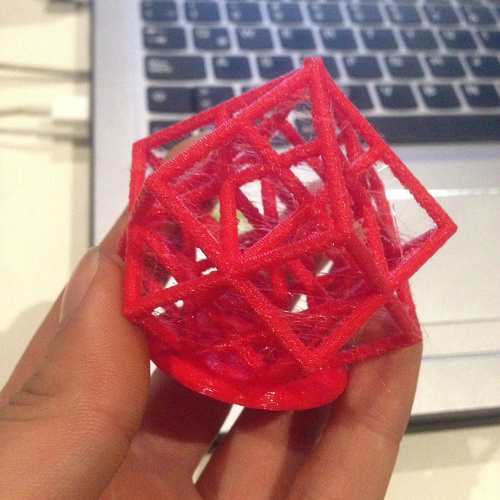
I also printed this one:
(Just to show you)
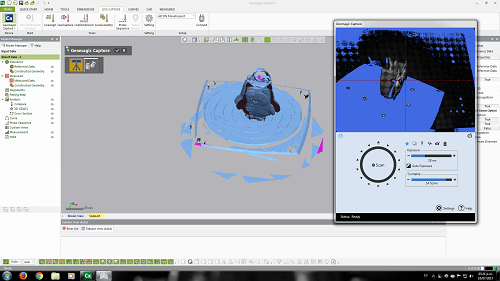
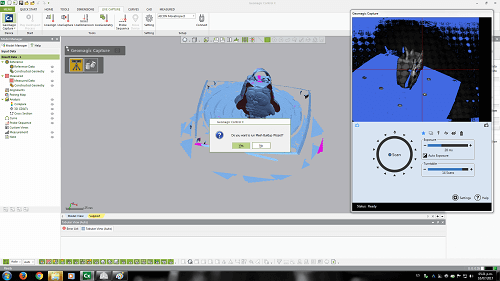
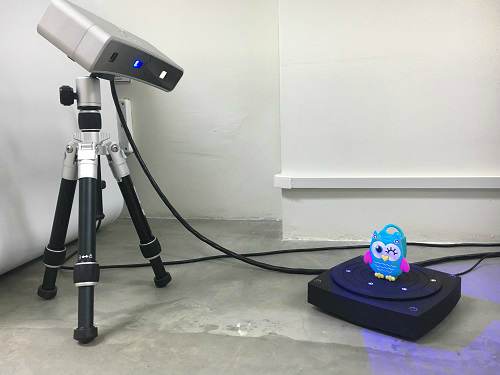
Scannig
For this try I used 3D Systems Capture scanner
I wanted to share with you the files from the previous scans, but the laptop we worked with was formatted and my files were not saved. By the way I am learning how to use a new one.
I worked with two printers, MAkerBot Replicator 2 and Stratasys Object 30 Prime, to test the desing rules.
In this assignment I learned a lot about 3D printing, it is very important to have the proper temperature of the heads to start printing. Also defined the parameteres depending of the design that you are making, and the material that you are using, in this case I worked with two kinds of material, and it was really different, I didn't try with ABS but i will do it in the future, when I have the material.
We chose spheres as an objects that could not be made subtractively, to test if these needs material support and how it looks with the dimentions that we defined
I achieved to 3D scan an print objects, this part of the assignment was very funy, I had never done it before but it is possible and incredible.
I will continuos learnig about this assignment after Fab Academy to take advantage of that in other project ideas.
.jpg)
.jpg)
.jpg)