Assignment 12. Molding & Casting
In this week I will be making a mold and cast different material with it..
Week 12 checklist:
Molding
Is the process of manufacturing by shaping liquid or pliable raw material using a rigid frame called a mold or matrix. This itself may have been made using a pattern or model of the final object. (Wikipedia).
Onshape:
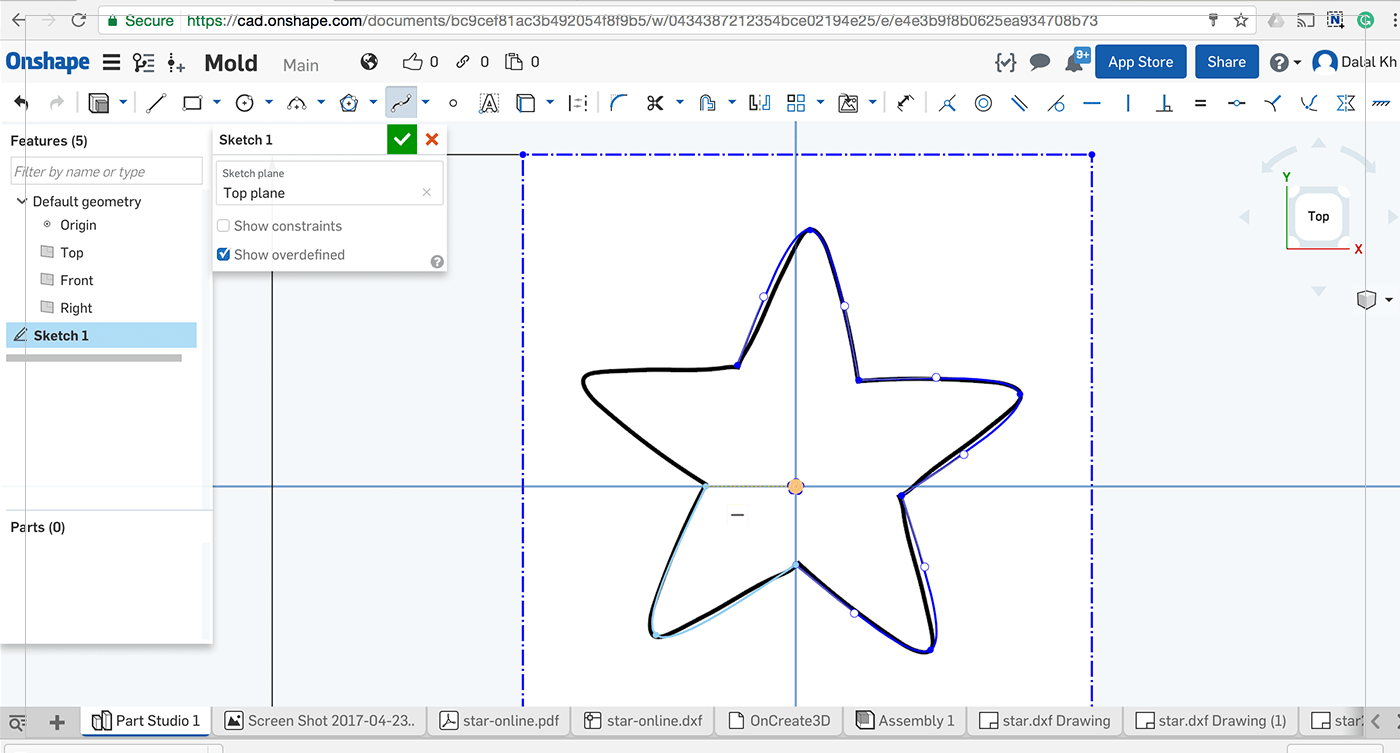
I have started designing my 3d mold shape in OnShape, by using the Spline tool I have traced over the star image I made in Adobe illustartor, it was very easy to control, then I have added some Facial expressions to add some details to the design..
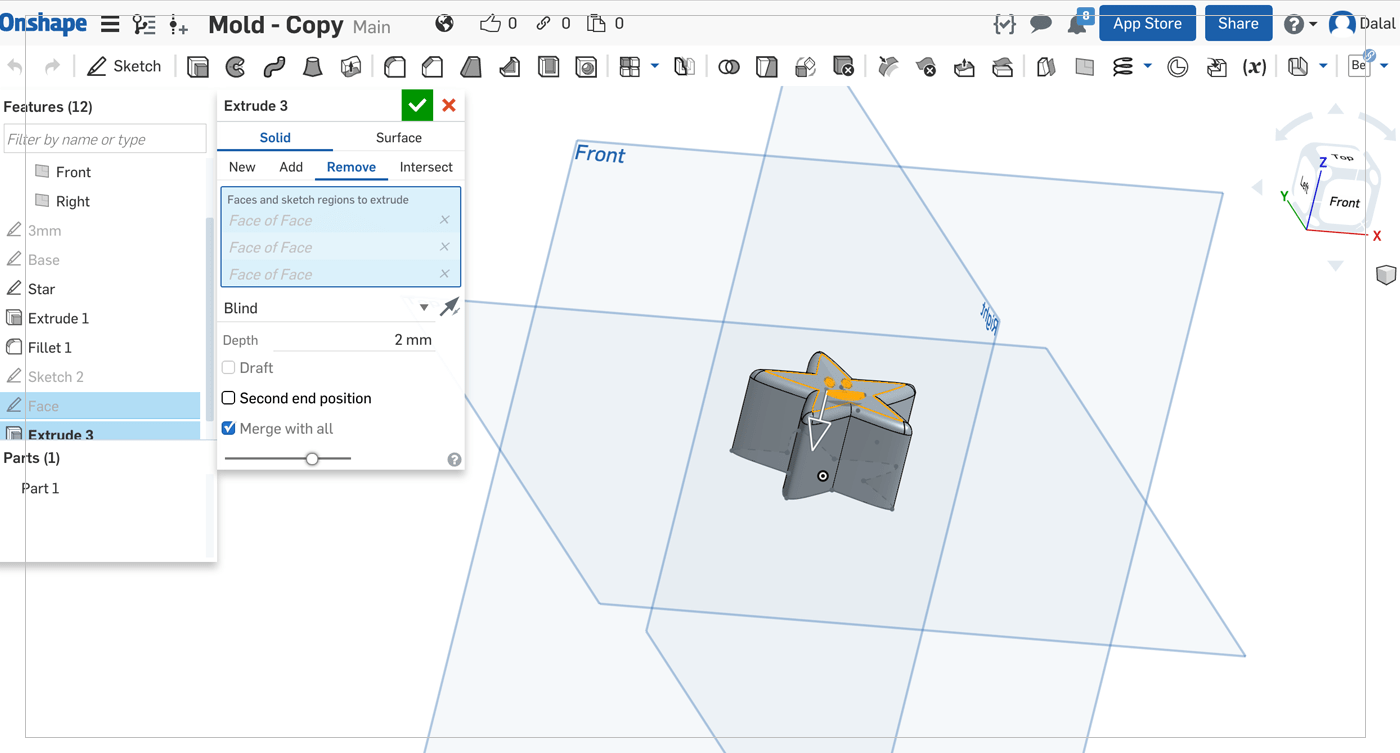
I have then Etruded the star 20mm, reduce the faisal expression by 2mm and the added fillet to round the couners little bit..
After that, I have downlded the STL file to start making the NS file for milling,, I have started by using OnCreate3d and Kiri add-on applications in Onshape, but I could not find enough resorces to teach me how to use them correclty,, for that reason I went back to ArtCam ..
Mold making steps:
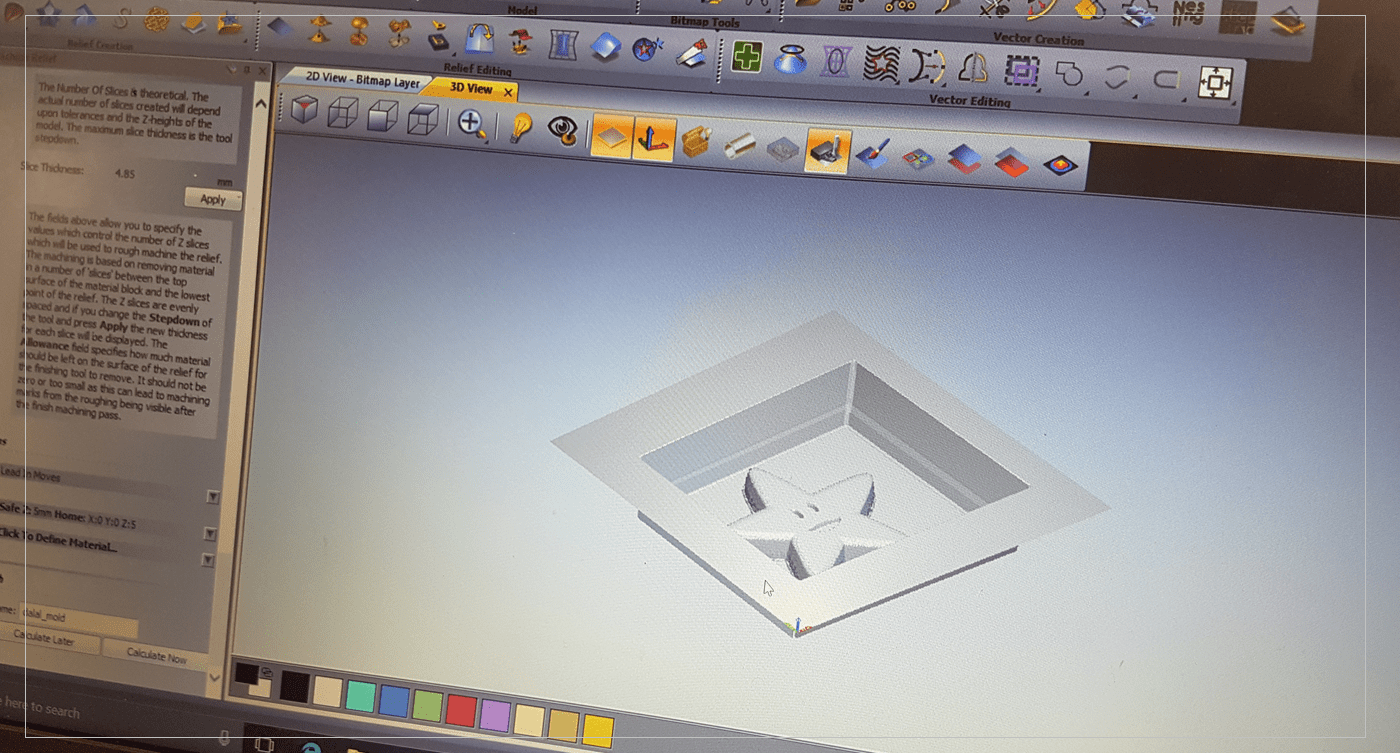
1. Import STL into ArtCam (Go to Relifs > Import 3d Model) and place it to the center of the working area.
2. To create the mold, first draw a square then right click on it, choose Shape Editor.
3. In Start hight enter the hight value you want your final cast to be subtracted from the cubic mold, then click on Subtract.
4. To Genereate the toolpaths for the CNC machine, go to the bottom left panels and choose Assistant.
5. From 3D toolpaths choose Z level roughing.
6. To clean the materials around the shape, select Selected Vector From Area to machine, then choose your tool size ( in my case it was 3mm End mill).
//End Mill can be used for Roughing, Area Clearance, Cutouts, Inlays and Profiling.
//Tool settings: (Diameter:3mm - Stepover:1.2mm - Stepdown:5mm - Spindle Speed 15000 rpm - Feed Speed 76 mm/sec Plunge Rate 50 mm/sec).
7. From Material,, Enter the total size of your material in Material thickness, then keep the top hight at 0, and change the following vlaue to the toltal hight of your cast, then it would automatically calculate the rest of the matiral left.
8. From Startigey Choose None then name this step so that you would know it when prioritizing the machince work steps, then click calculate .
9. To refine the edges of the mold, go back to Assistant and choose Machine Relief from 3D toolpaths and Selected Vector From Area to machine.
10. Choose the Tool for this process ( or modify an existing tool) from 3D finishing or V-carving, then rename it, and click calculate.
//V Carve can be used to carve the material and take the most of it away without a second step, usually it is used for lettering or detailed work.
//Tool settings: (Diameter:3.18mm - Stepover:0.1mm - Spindle Speed 4000 rpm - Feed Speed 400 mm/sec Plunge Rate 200 mm/sec)
11. Finally, from Toolpath Operation click on Save toolpaths Save each tool path in different name then save them as NS or PLT file.
Casting:
Please see the video, its fun : )
Casting: Is a manufacturing process in which a liquid material is usually poured into a mold, which contains a hollow cavity of the desired shape, and then allowed to solidify. The solidified part is also known as a casting, which is ejected or broken out of the mold to complete the process. (Wikipedia).
Silicone Rubber:
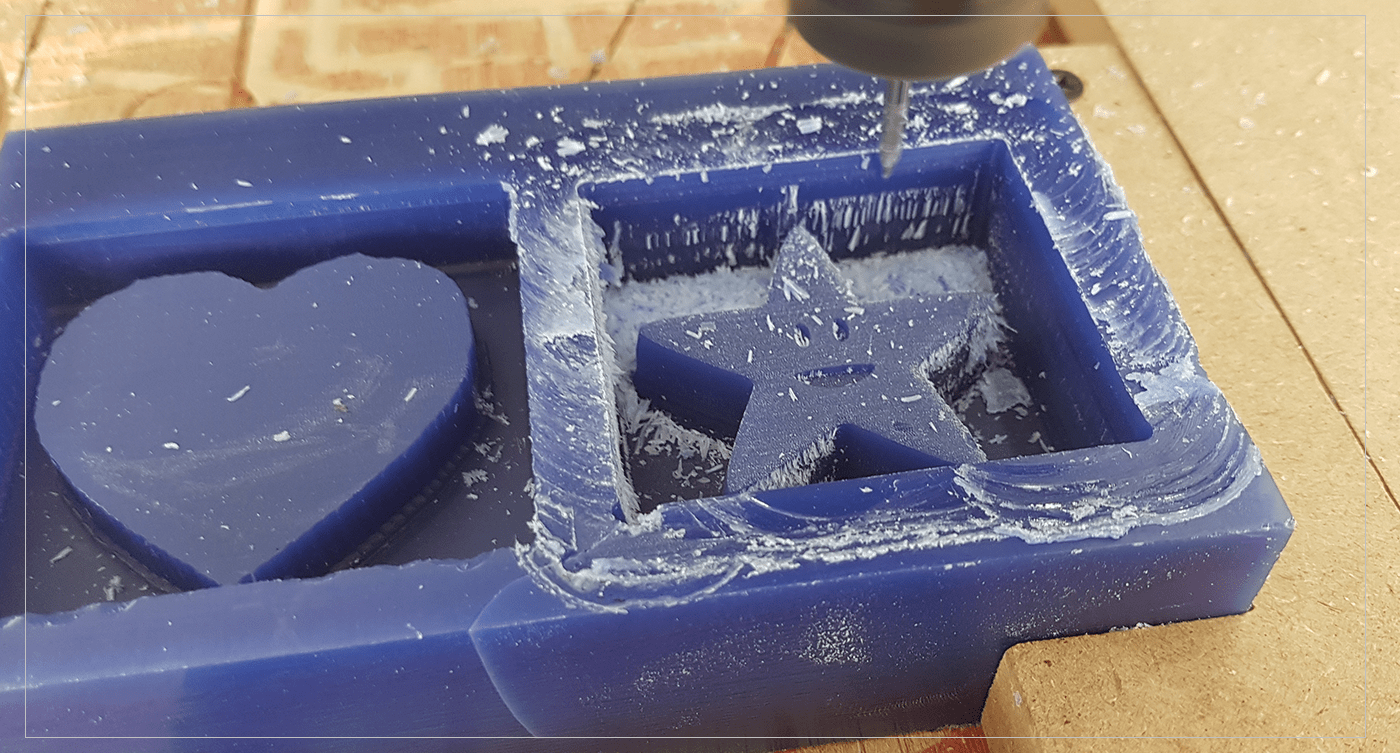
After making the mold in ArtCam, I have taken the NS file to our CNC milling machine to start making the mold out of the Wax,, The process was easy to mentain after calibrating the machine I have inserted 3mm end mill to start cutting the "big chunk" out of the mold,, then I have replaced the bit with 0.2 V shape finishing bit to make the details,,
The Next step was to make the Resin Mold by combining the 2 equal parts of the Silicone Rubber Mold,, to measure the exact amount needed,, I have pour water inside my wax mold, then measure it, by dividing the amount of water by 2 I have the exact amount of resin needed from each part..
After 3 hours the mold was ready to use! So I started by using the Resin material, it also need to combine 2 equal parts of two liquids,, we have experimented with adding a drop of acrylic blue color, which resulted in making some bubbles in the final product,, actually the effect fits perfectly with my star,, it looks like a starfish : ),,
Takig the Mold home, I have experimented with other casting materials I found home,,
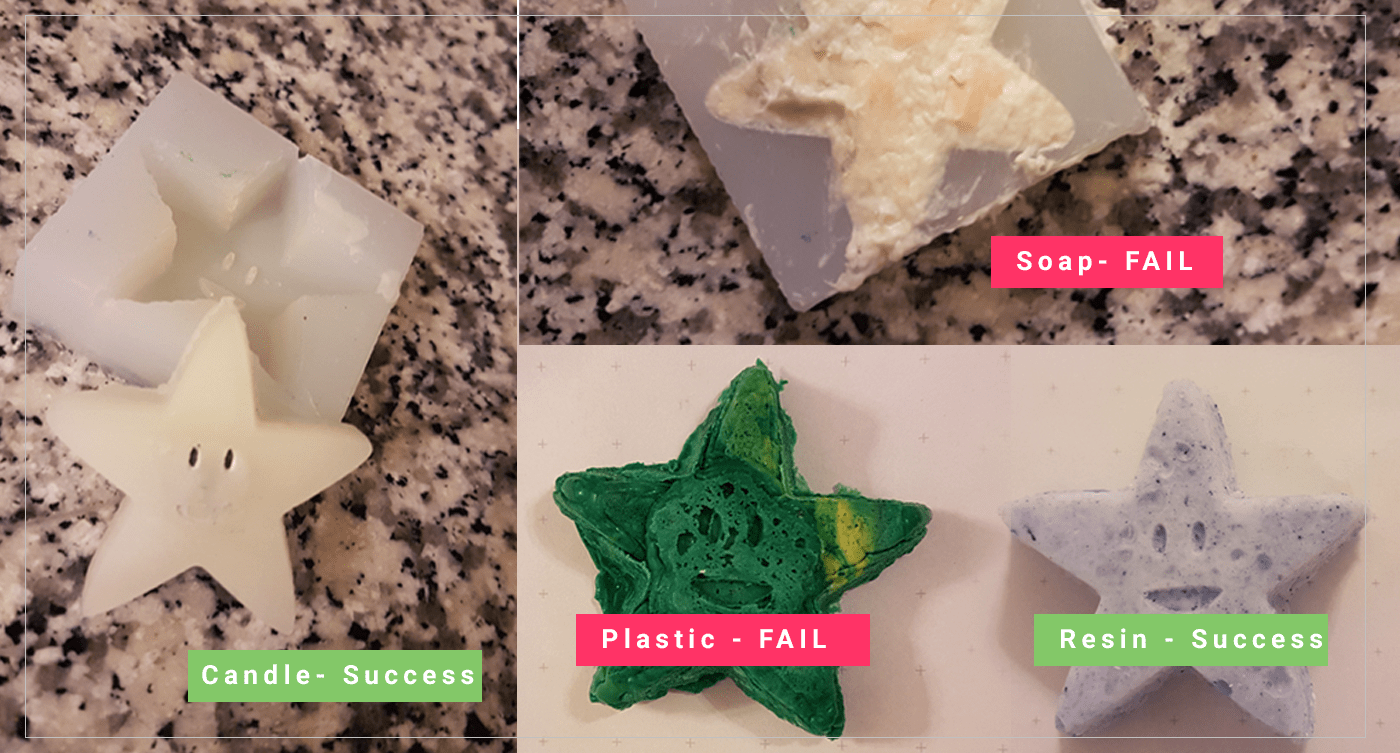
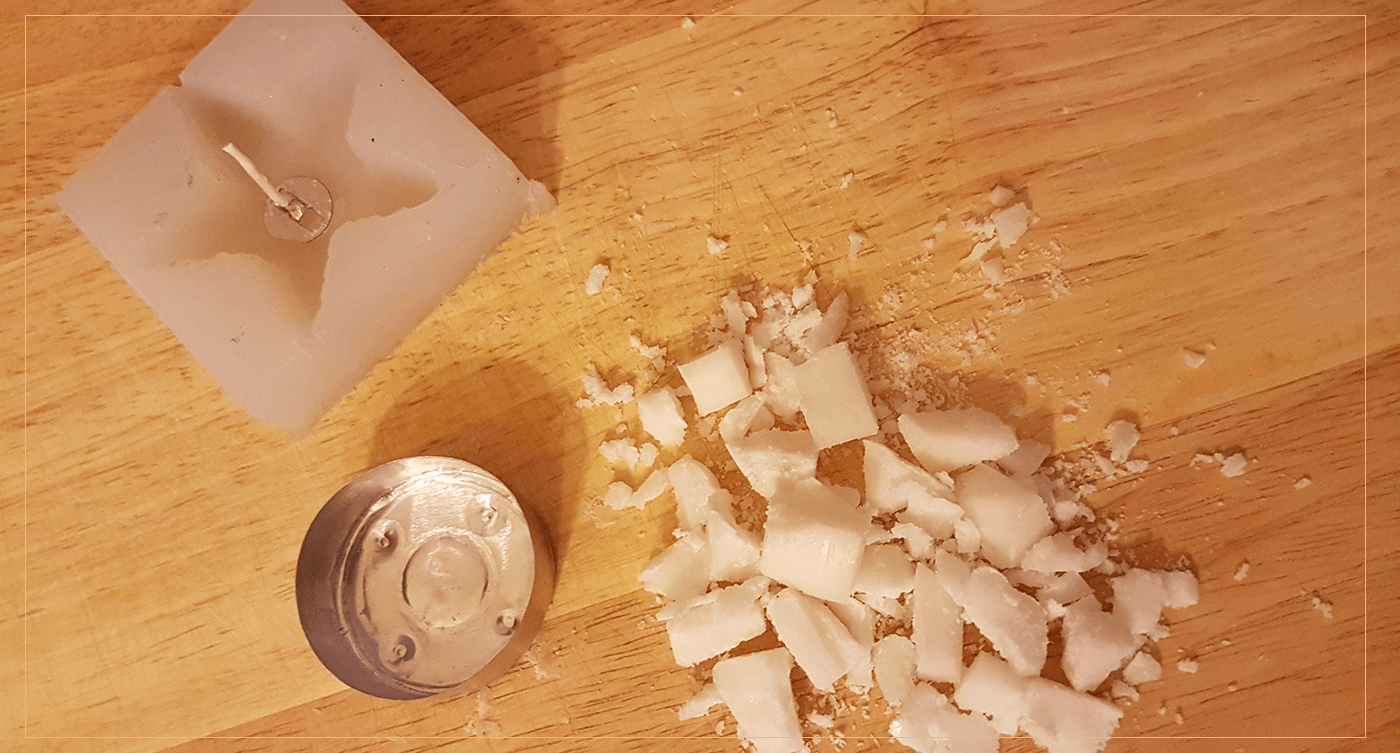
1. I sarted with melting a candle, then pour it into the mold, it takes less than an hour to fully harden,,
2. Plaster was the second option to try, by adding little water to the plaster powder I was able to have a good consistancy to pour in the mold,, I left it over-night to harden, the paint it with gold paint and glitter.
3. I have Tested with Resin + Acrylic and it was very good..
4. Then experimented with Soap, I tried to melt it over the stove but it did not melt, it burnt out!
5. My last experiment with this mold was with bottle plastic caps,, I have been collecting these caps for sometime to melt them one day, and I thought it was a great opporunity to do so for this project,, so I did melt them using a metal pot over the stove,, at first it did melt very well,, but it was not as liquidy as I was expecting! and it seem that it would not melt any further, so I pour what was on the pot into the mold, which was hard, as the plastic was sticking to the sides of the pot, and it hardens very qulickly! it was a FAIL attempt,, I think next time I will cut the plastic in small parts and add them directly to the mold then put the mold in the over for sometime,, I think it will work!
Silicone Putty:
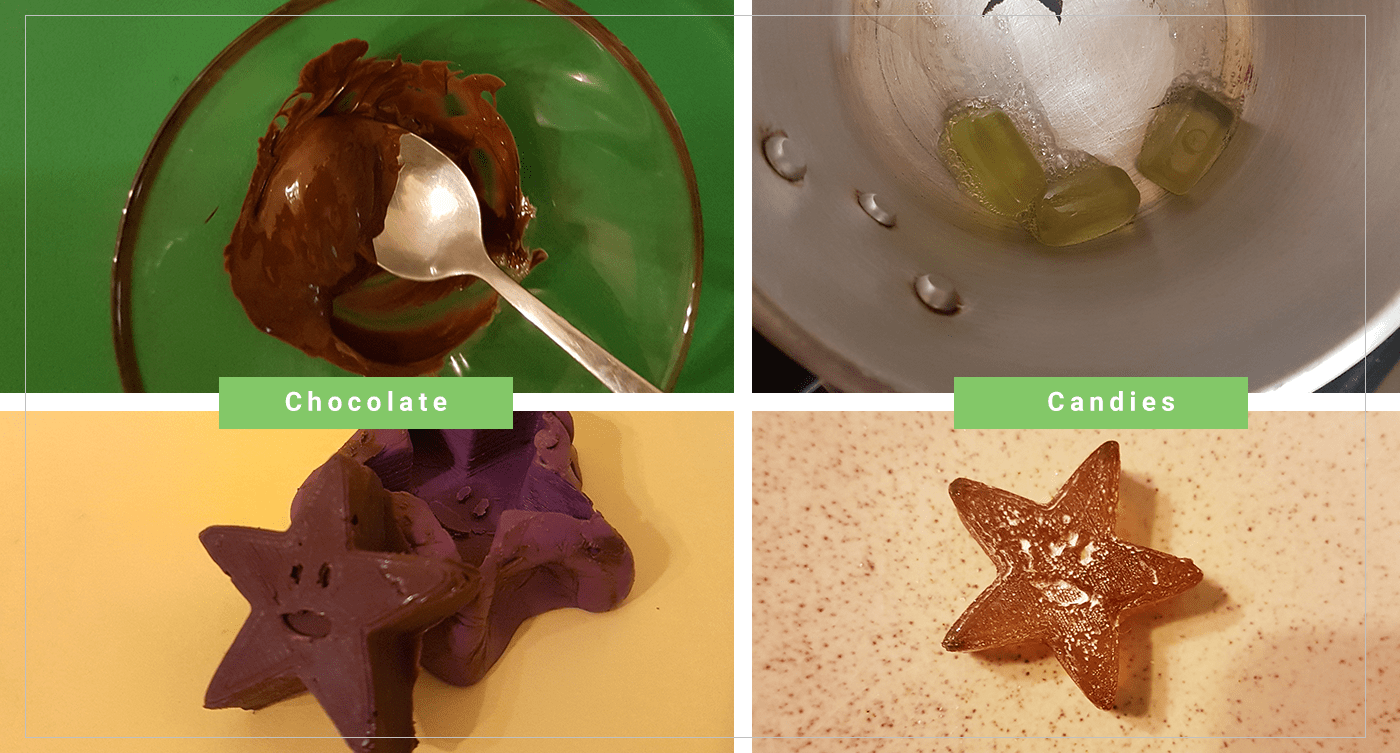
Because the Rubber Silicone mold was not FOOD-SAFE, I have used another mateial I have to make a Food Safe mold that I would be able to experiment with to make Chocolate and Candies..
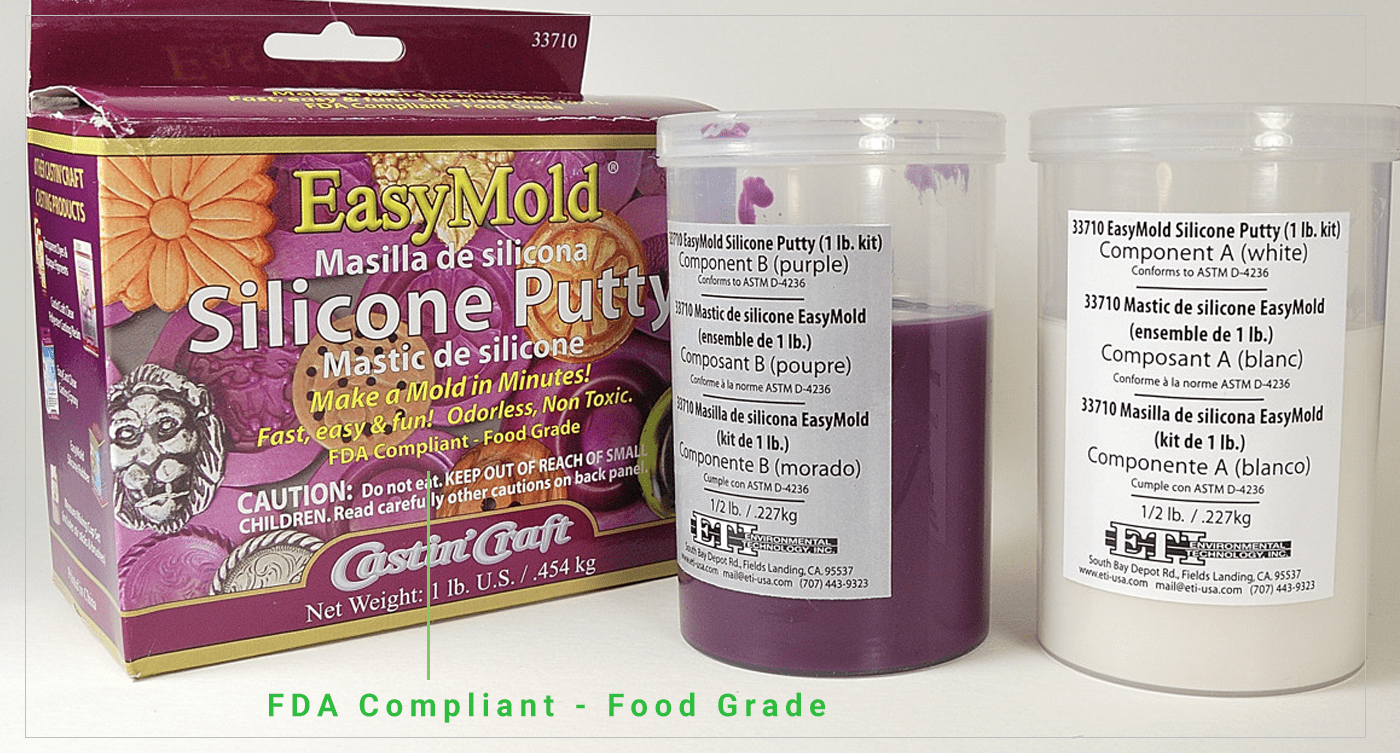 I Started by printing my design using 3d Printer, then I used the Silicone putty to mold around My 3d printed star, by mixing two equail parts from A & B jars, I was able to make a mold that have cured in 30 mins!
After That I went directly to the kitchen and melted some chololate and pour it into the mold,, it was AMAZING! but I have noticed a small problem that I have to put in mind next time,, I have positioned the face of the star at the top when printing my star,, so when I make the mold there was clear lines on the face! Next time I have to position the face direclty on top on the heated bed, so it would melt it little bit and have a smooth surface..
The second attempt using this mold was by melting some store-bought hard candies over the stove then pour it in to the mold,, The Star Candy was GREAT : )
[ Source File - ART File ]
[ Source File - ONShape File ]
[ Source File - STAR DXF File ]
[ Source File - FACE DXF File ]
Previous Week Home Next Week