This week were introduced to the world of computer controlled machining. Basically this is a process used in the manufacturing sector that involves the use of computers to control machine tools. Tools that can be controlled in this manner include lathes, mills, routers and grinders.
To do list:
- Make something big
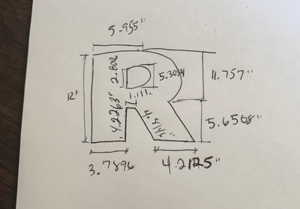
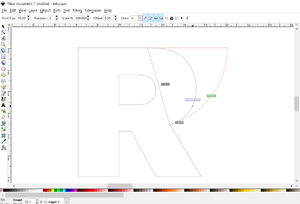
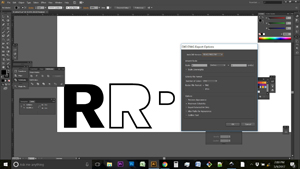
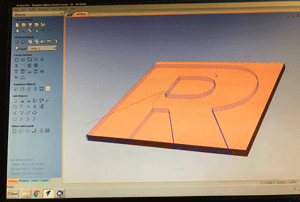
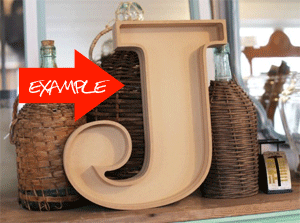
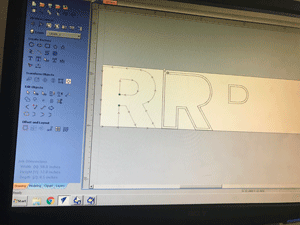
For my assignment, I decided to work towards my final project and construct the R in my son's marquee sign. My initial step was just skecthing out the R and use a CAD package to design the letter. Unfortunately on this particular day, Michigan experienced the largest power outage in the state's history. Due to this, our internet in the Fab Lab was impacted. I originally planned on using Fusion 360 to design it but I opted for Inkscape and Adobe Illustrator since I was only doing a letter. I ran into some difficulties trying to figure out the appropriate joinery. I discovered that working with any angle other than a 90 dgree angle presents a problem. Also worth mentioning, I originally plan on tackle the art of kerfing. However, for the sake of successfuly completing this assignment, I chose an alternative method.
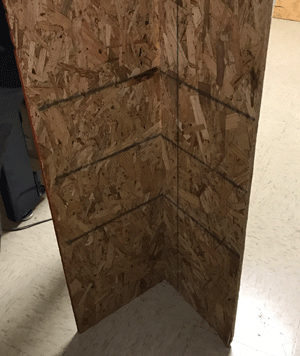
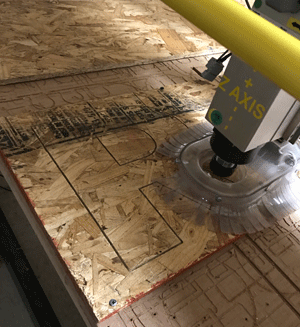
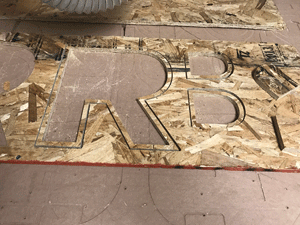
After I designed the layout, I found some OSB (Oriented strand board) to use for the construction. I wanted the R to be at least a foot high so I had to make sure the board was large enough.
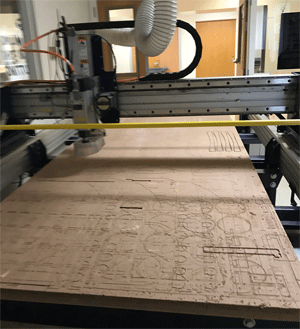
With help, I loaded the dxf file into VCarve pro and adjusted the settings. I made sure to note that the thickness of the osb was 3/8" thick. When setting up my material onto the machine, I secured it by and drilling screws along the top and bottom borders. After drilling the screws to stabilize the board, I had to set my zero and set my adjustments to avoid milling over the screws and creating a disaster.


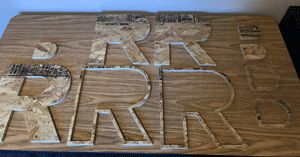
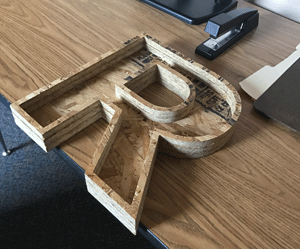
To achieve the marquee letter effect I decided to go for an "open pocket" look. So for that I decided to mill out the outline of the letter R. This allowed me to stack the outline and form the marquee letter effect.
Things to remember:
- Safety is key when using the shopbot.
- Safety goggles and proper hearing aids are recommended.
- Be patient
Problems I ran to:
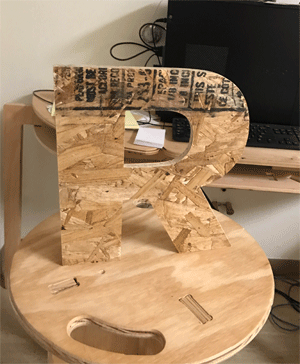
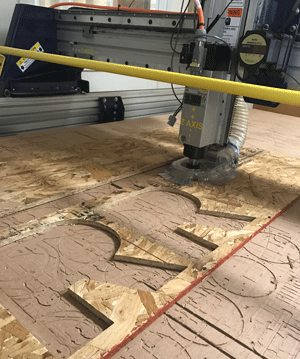
- The first "R" wasn't successfully cut all the way through. The bit depth needed to be adjusted to .5
- The joinery and kerfing process was a bit advanced for my first time. For the sake of the assignment I decided on a feasible alternative.