Laser cutting group assignment @FabLab CEPT
Exploring more than 15 materials


As you can see in pictures, We at FabLab CEPT explored more than 15 material which are regularly available around the campus.
We have included MDF, different types of papers, boards with different thicknesses, acrylic.
So now whoever comes at lab to use Epilog mini can have all these materials for reference with speed and power parameters for different materials.
As you can see we have explored parameters for through cutting, marking, half cutting/folding and rastering/hatching.
Parametric design for press-fit kit parameters
After getting a laser cutting training from local instructors and finish the above task of exploring different materials and cutting them we had to choose material for our press fit construction kits. Most of us decided to use MDF of different thickness.
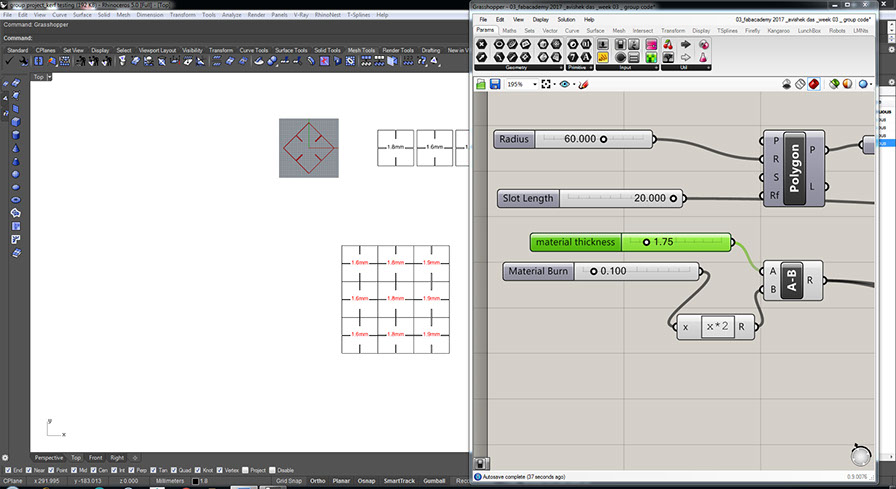
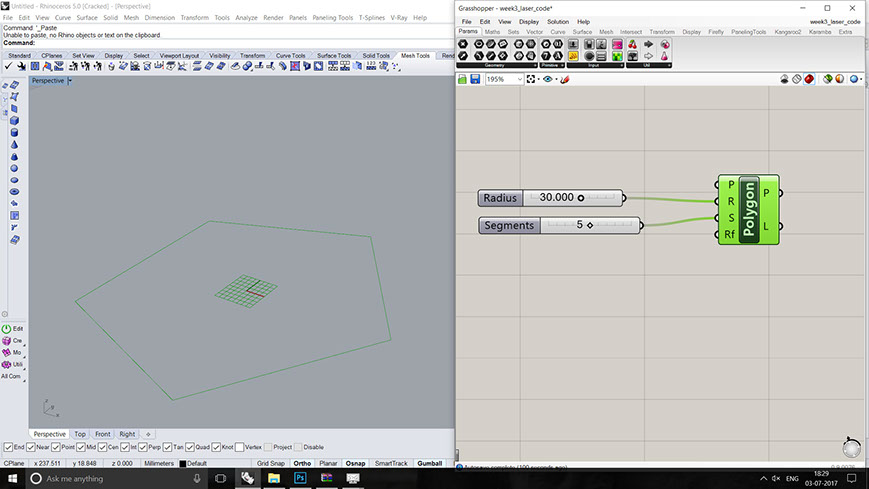
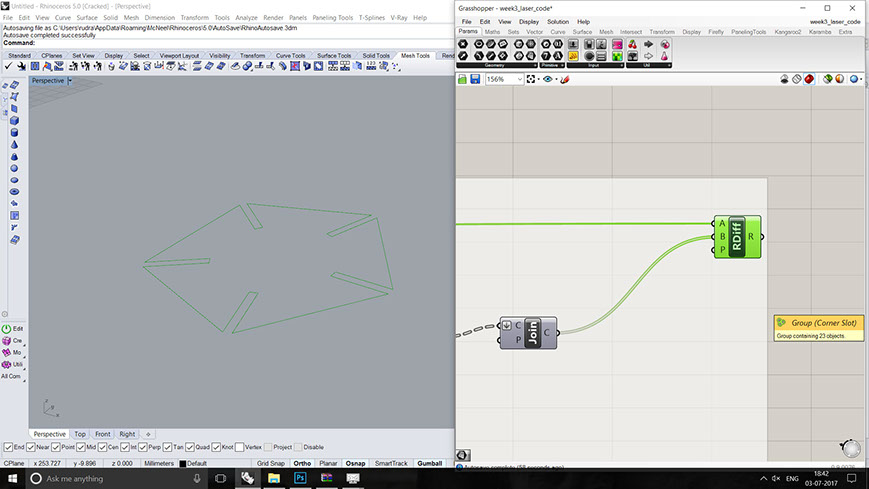
We made a rhino-grasshopper script to clear our doubts and to bet the perfect press fit kits with perfect frictions.
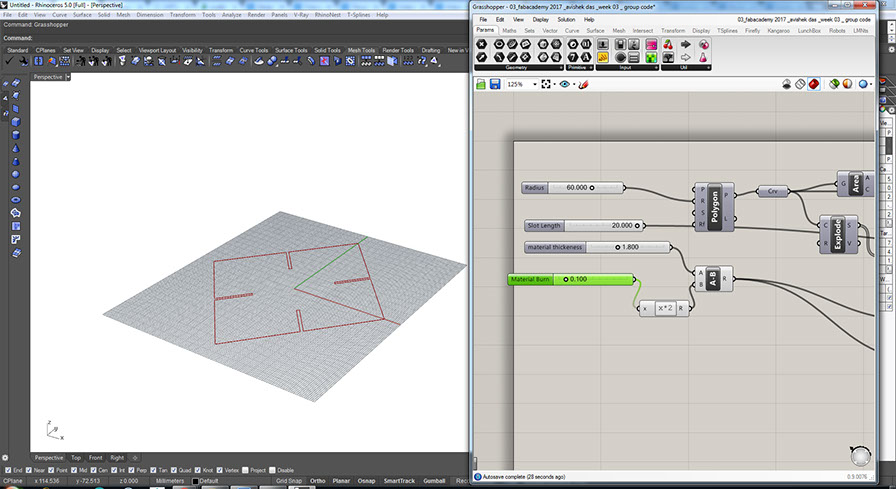
Considering following image, we took four main parameters which are radius, slot length, material thickness, Material burn.
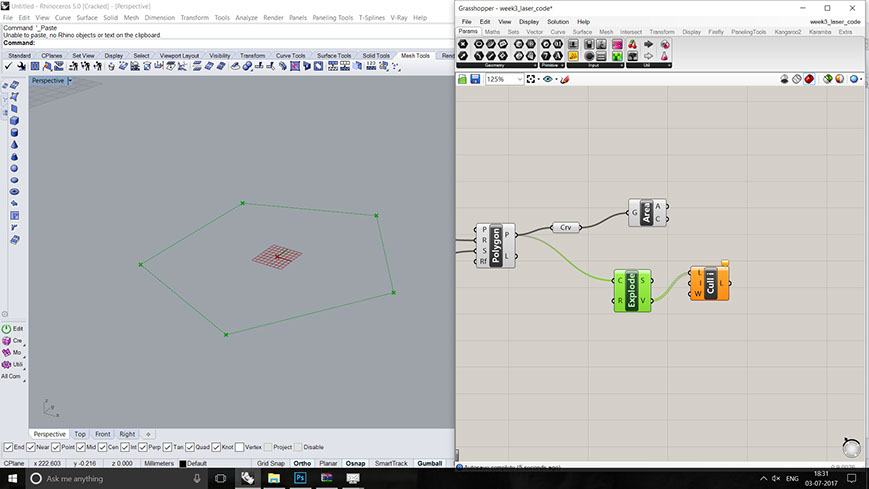
We have made different polygons, which you can see in the following image section.
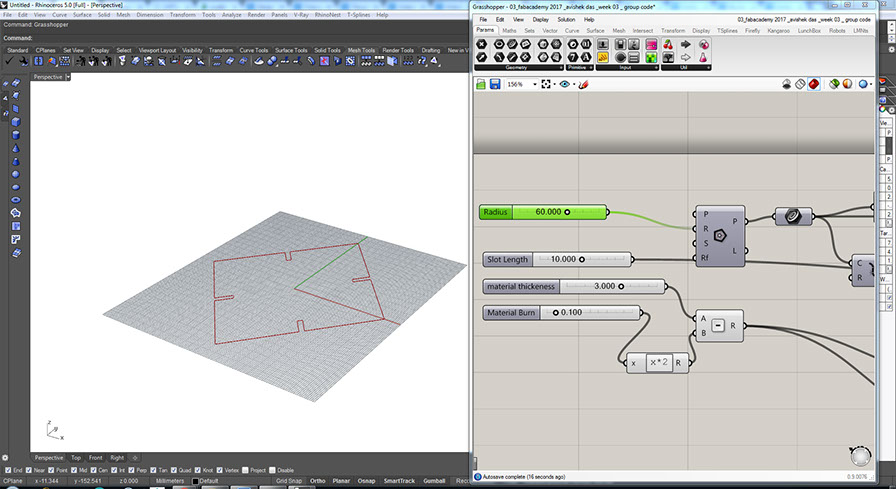
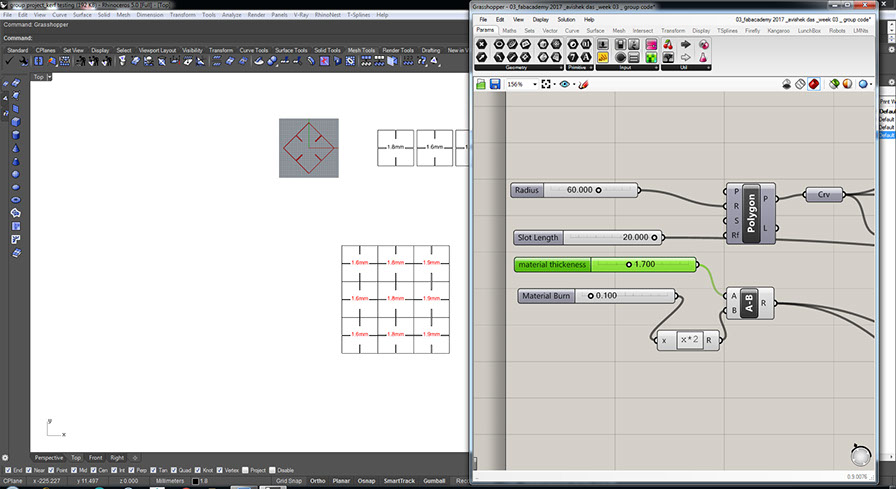
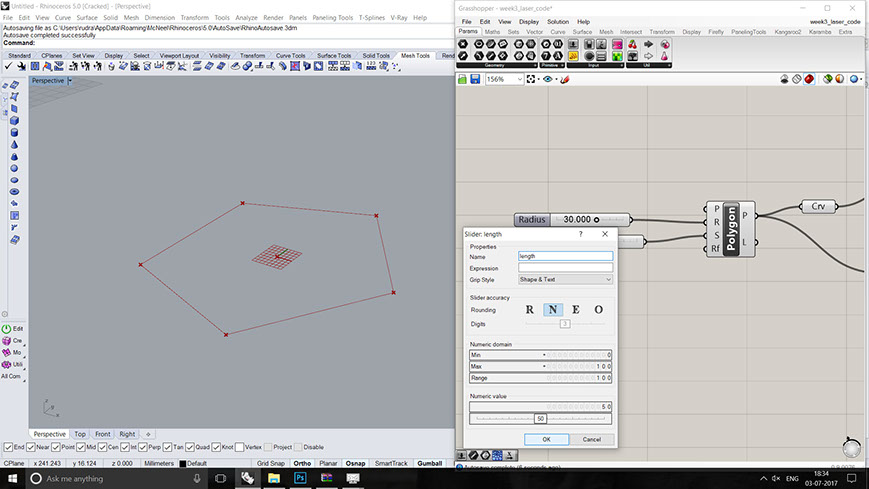
Making a basic shape and setting up parameters and values
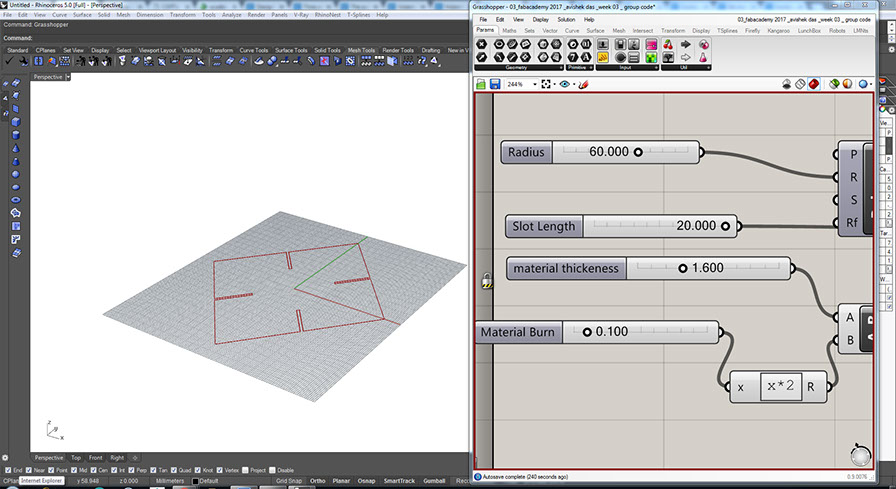
changing the material burn.
setting up one test config.
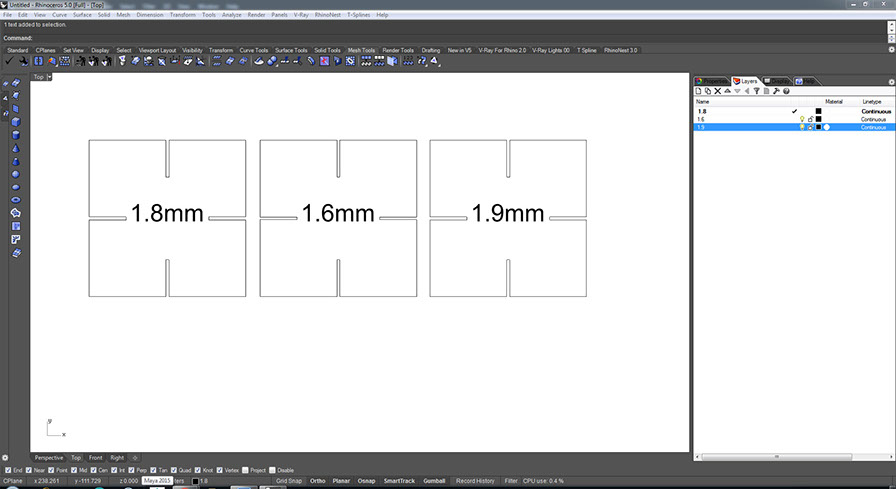
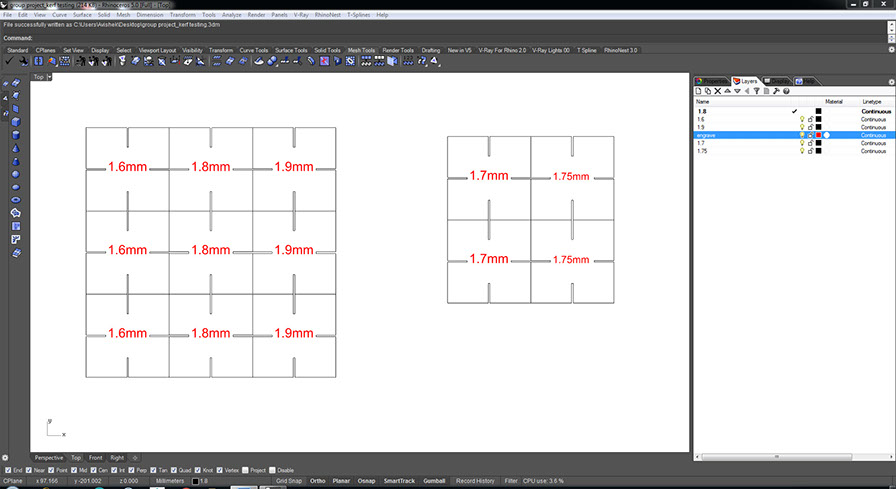
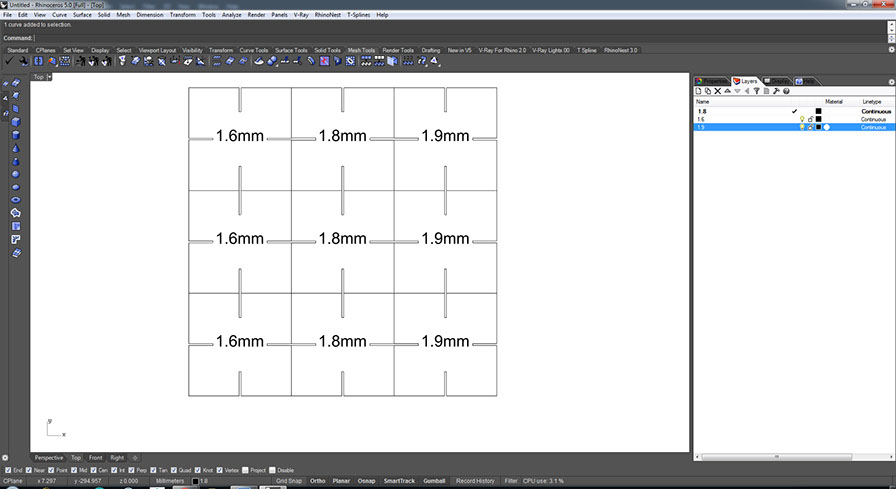
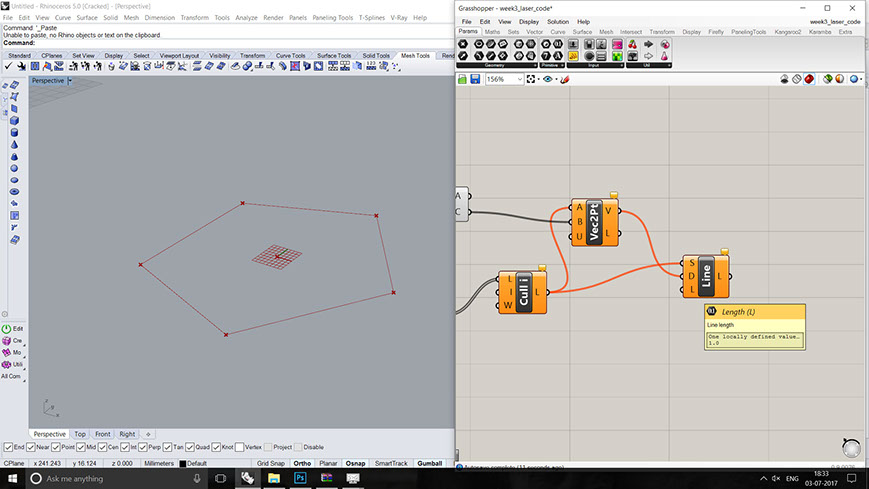
Testing of three different values.
Final Cutting file in rhino
Cutting file comp
8 - 8
<
>
Testing with different polygon shape
Rhino grasshopper scrip with "number of segments"
Increasing one more segment and having a pentagon
setting up the length parameters
Having the final component with the same parameters.
5 - 5
<
>
After having the final file with cutting we went to set the parameters in the software called "RD works". We have got new laser cutting machine in mid of academy. Machine is with side of bed "1200 mm * 900 mm" and power of "100 watt".
There is a software called RD works which works with the machine for transferring the file to the machine as well as controlling the machine.
In the following images you can see the user interface of the machine software.
We have used black and brown color code for two different operations.
For, Marking- Brown: speed: 75 mm/s - power range: 10-20%
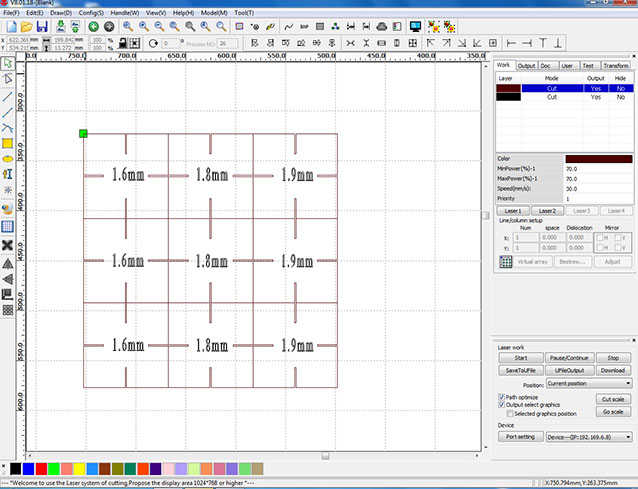
Through cutting: Black- speed: 30 mm/s - power: 70%
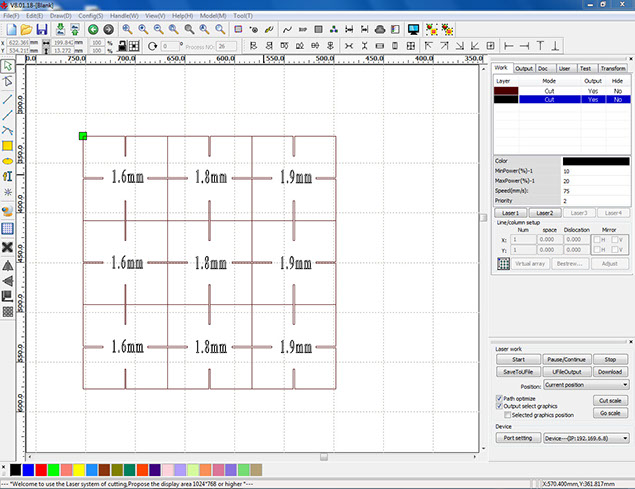
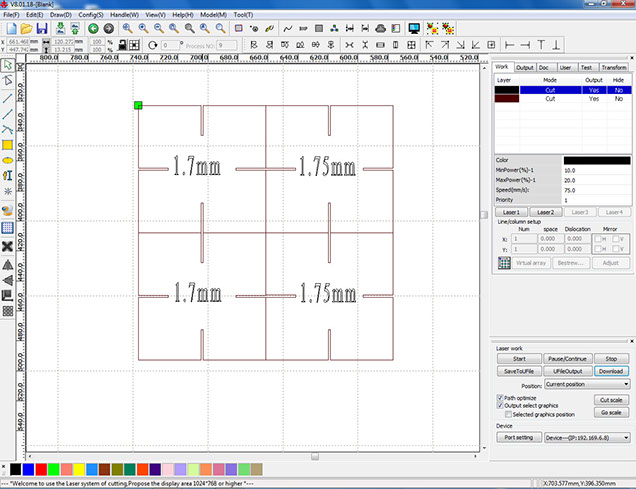
Importing the file and giving the color coding
Setting parameters for brown color from right side of the window panel
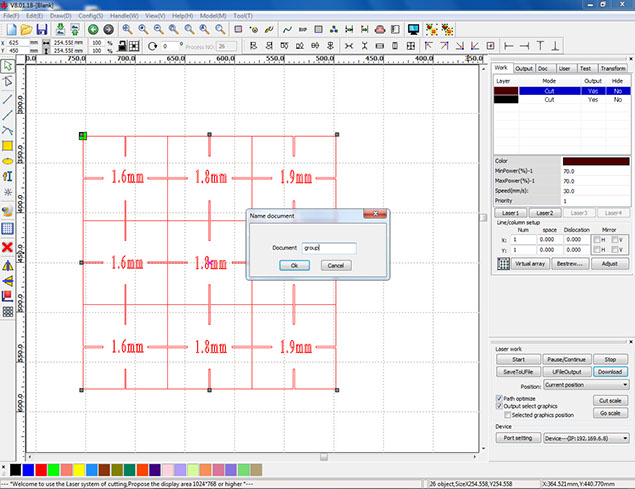
Selecting the objects and giving the command to the machine from lower right panel
Setting up parameters for marking the black color objects
4 - 4
<
>
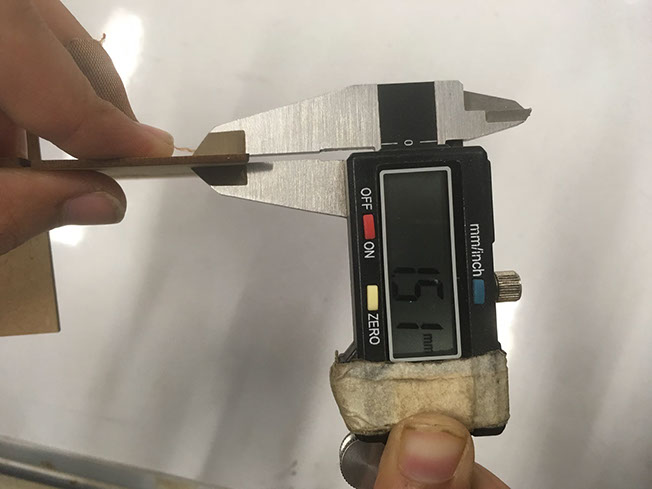

Checking the thickness using vernier caliper for accuracy.
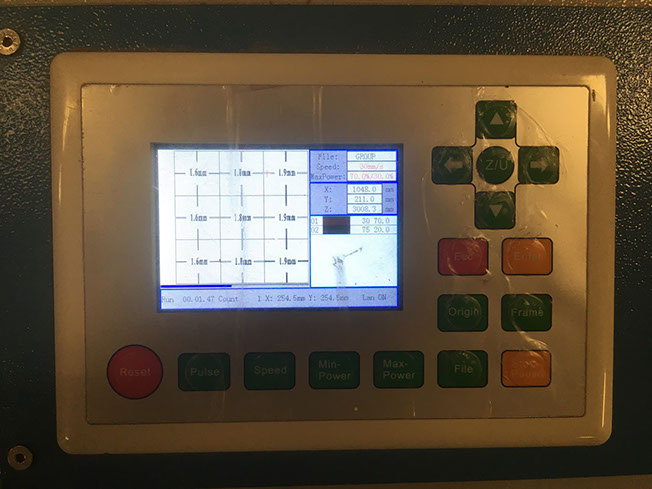
Control panel of the machine for manual operation.
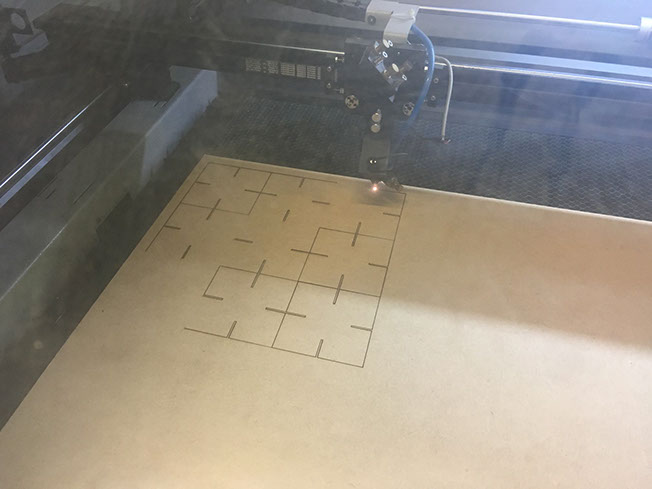
Cutting
Cutting
Cut parts
Final product
6 - 6
<
>
Now once we have set all the parameters we go to the machine.
First we turn on Machine, then air pump, then chiller and then only we start the cutting.
You can see the machine control panel, cutting area, cutting images and final out come in the following section.
Refer following video to check how we start on our laser cutting and how do we check the frame for the cutting
Refer following video for laser cutting of group project
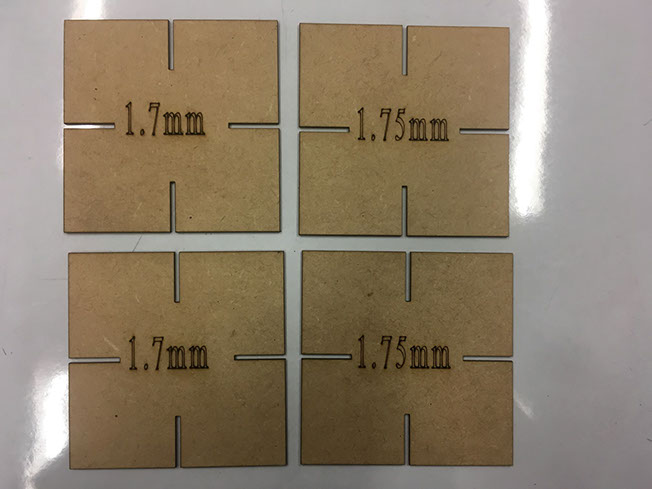
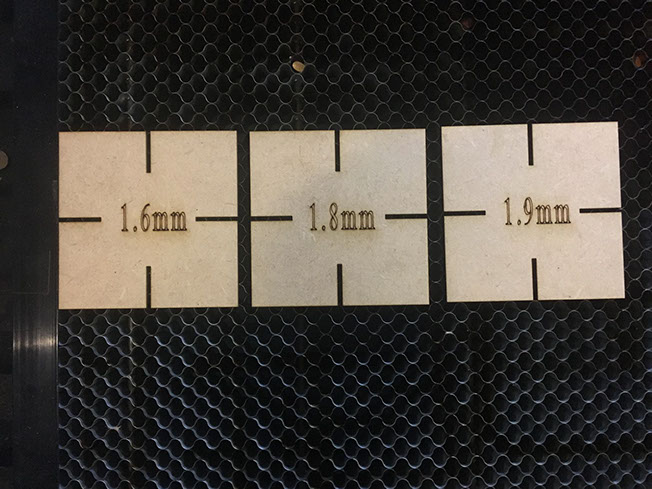
Kerf testing trial 1
Kerf testing trial 2
Conclusion
Material burn for pine MDF: 0.1 mm
Press fit kits with different parameters are shown in the video. Hence, one can use from above options depending on their press fit kits design complexity and material thicknesses.