Recipe
- Linux Ubuntu Mate 16.04 (MAC, Windows will also work but steps will differ)
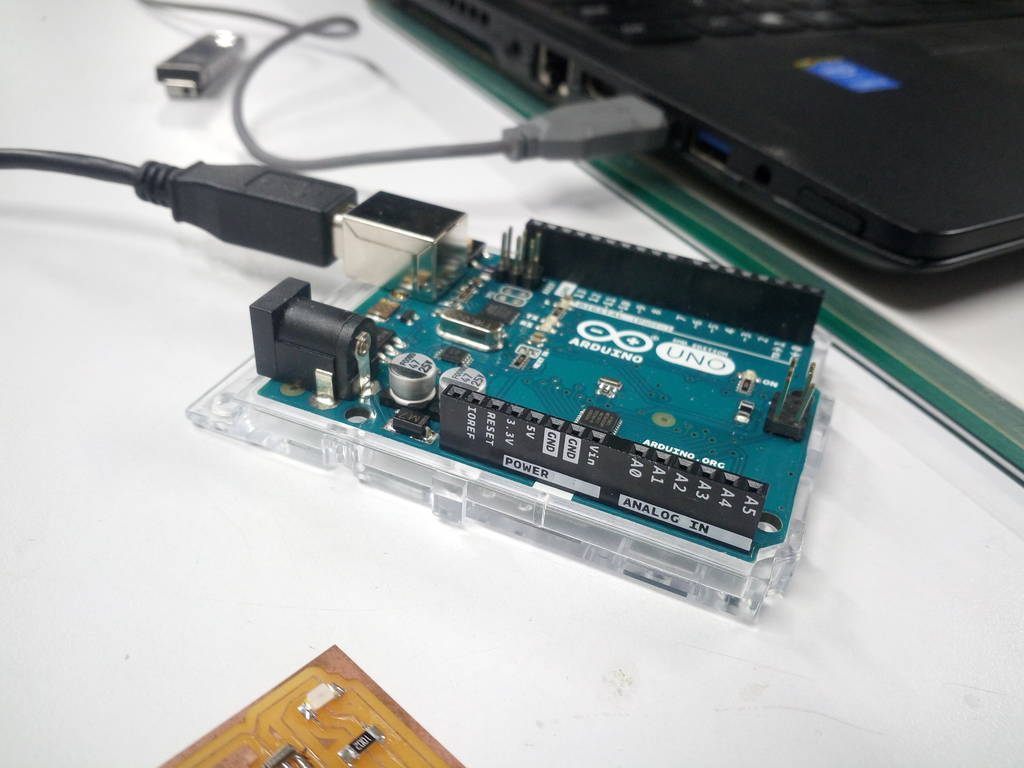
- Arduino UNO with USB Cable
- Hello ftdi board which is made in Week 6
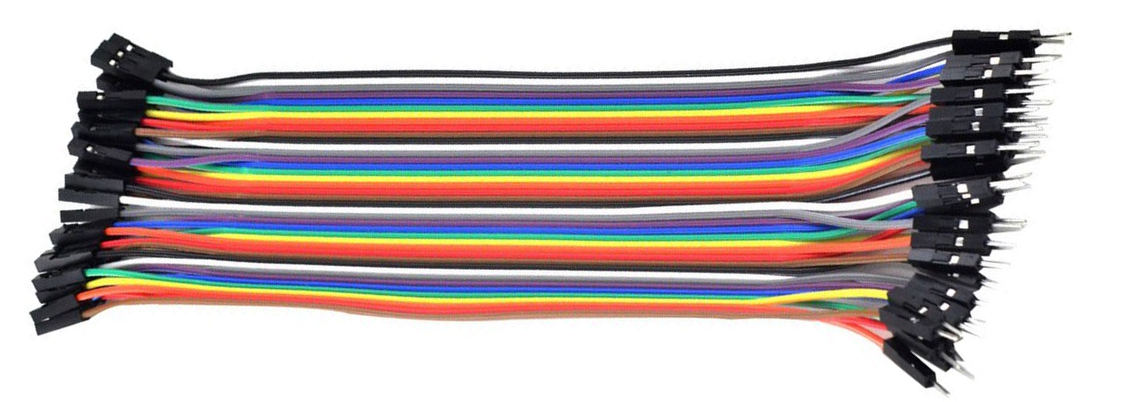
- 6 Nos male to female Jumper cables. Preferably following colors
Male to female jumper cables

Steps in programming Hello ftdi board
- Read Attiny44 micro controller datasheet
- Install Arduino IDE
- Make arduino as ISP
- Download Arduino Board libraries for ATtiny boards
- Connect FTDI to Arduino
- Burn bootloder in Hello ftdi board
- Compile C program
- Transfer C program to your FTDI board
Reading Attiny44 micro controller datasheet
Before starting of programming I have decided to go through Attiny44 datasheet
Here is a link for Attiny44 Datasheet Attiny24/44/84 datasheet
My friend Chaitali had explained us how to read datasheet and introduced us some of the important concepts
Here is a link for Attiny44 Datasheet Attiny24/44/84 datasheet
My friend Chaitali had explained us how to read datasheet and introduced us some of the important concepts
Following are some of the takeouts after reading Datasheet
- Attiny44 has 4K memory whereas Attiny24 has 2K memory and Attiny84 has 8K memory everything else remains the same
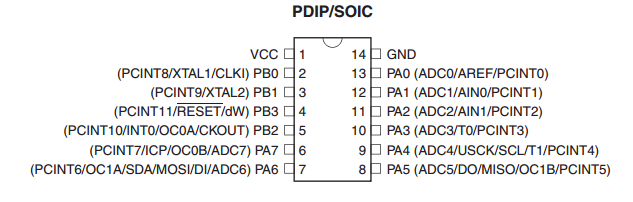
- Pinout diagram is useful and need to take it handy while designing circuit. It shows that it has total 14 pins
- PA stands for port A and PB stands for Port B
- PB0 and PB1 are the pins where external crystal can be connected
- There are MISO, MOSI, SCK (SCL), RESET, VCC and GND labels respecctively at pins PA5, PA6, PA4, PB3, VCC and GND
- PA4 and PA6 has SCL and SDA hence this controller can be used for I2C communication
- Block diagram can be seen on Page no 4 which indicates it has
- DDRA : Data direction register for port A
- DDRB : Data direction register for port B
- PORTA : Register to activate pins of a port A
- PORTB : Register to activate pins of a port B

Installing arduino IDE
- Download arduino IDE from Arduino IDE Download
- For linux 64 bit it will download file naming "arduino-1.8.1-linux64.tar.xz"
wget https://downloads.arduino.cc/arduino-1.8.1-linux64.tar.xzEven though you can copy and paste this command in terminal and execute. Its better to manually download the latest version of arduino IDE
- Extract "arduino-1.8.1-linux64.tar.xz" at suitable location. Preferable extract it in your home folder
mv arduino-1.8.1-linux64.tar.xz /home/-Your Username Here-/Will move compressed file to your home foldercd ~Change your directory to home directorytar -xJf ./arduino-1.8.1-linux64.tar.xzExtract compressed file which will create a folder naming "arduino-1.8.1" which is your installation folder of Arduino IDEcd arduino-1.8.1/
./install.shOpen arduino-1.8.1 folder and run install.sh scriptThis will install shortcut of Arduino IDE. Thats it. Arduino IDE is installed
Making Arduino as ISP
Connect arduino to computer using USB Cable
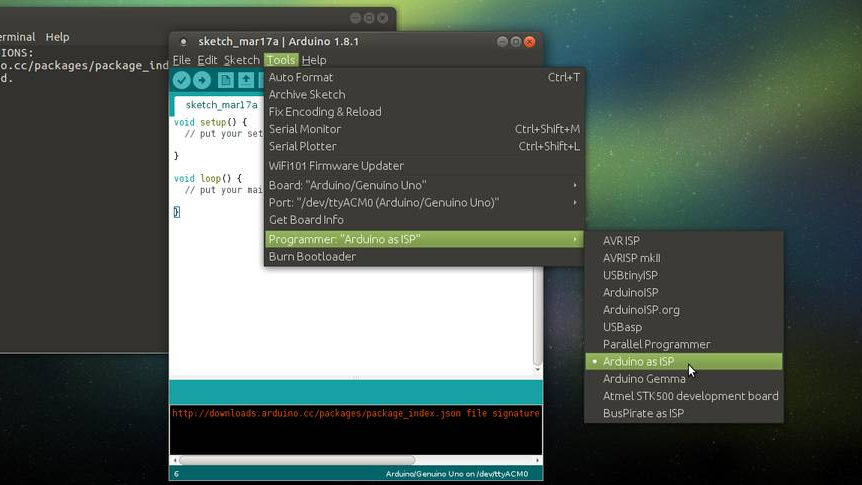
Open Arduino IDE and select settings as mentioned
Select Tools -> Board -> Arduino/Gennuino Uno
Port -> /dev/ttyACM0 (Arduino/Genuino Uno)
Programmer -> Arduino as ISP
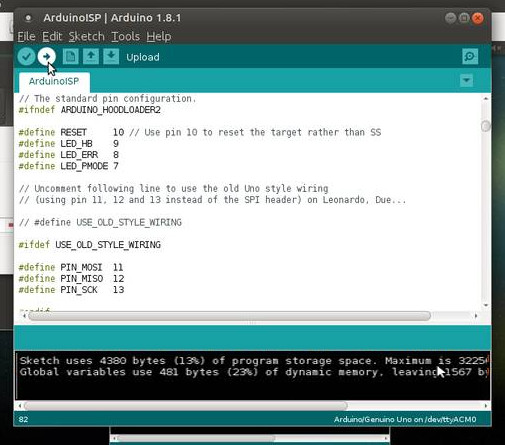
Select Arduino sketch and upload
Select File -> Examples -> ArduinoISP -> ArduinoISP
Click on Upload 
Note down pin numbers. Preferably put it in spreadsheet
| RESET | 10 | Yellow |
| PIN_MOSI | 11 | Black |
| PIN_MISO | 12 | Blue |
| PIN_SCK | 13 | Brown |
Arduino is now programmed as ISP
Unplug Arduino
Download and install ATtiny board libraries
Without which ATtiny boards will not be visible under Tools -> Board
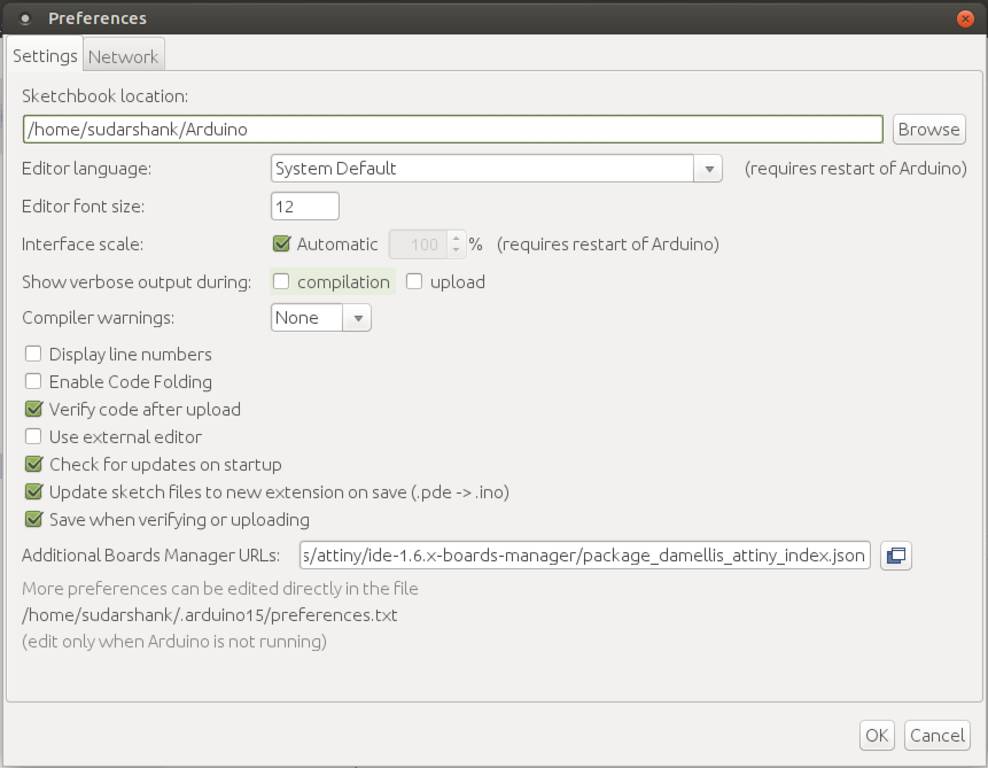
Set board manager Url
Open Arduino IDE and click on File -> Preferences
Set Additional Boards Manager Urls as
https://raw.githubusercontent.com/damellis/ATtiny/ide-1.6.x-boards-manager/package_damellis_ATtiny_index.json
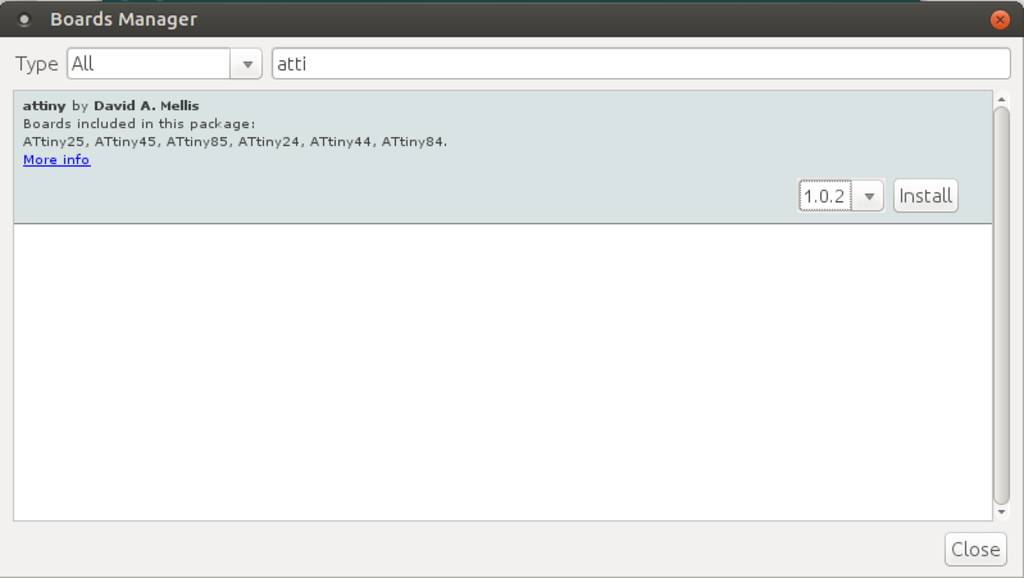
Download and install boards from Board Manager
From Arduino IDE open Tools -> Boards -> Board Manager
Search for ATtiny. It will show up ATtiny Library
Select version and click on install
It will download and install required libraries
Check under Tools -> Board -> ATtiny Microcontrollers
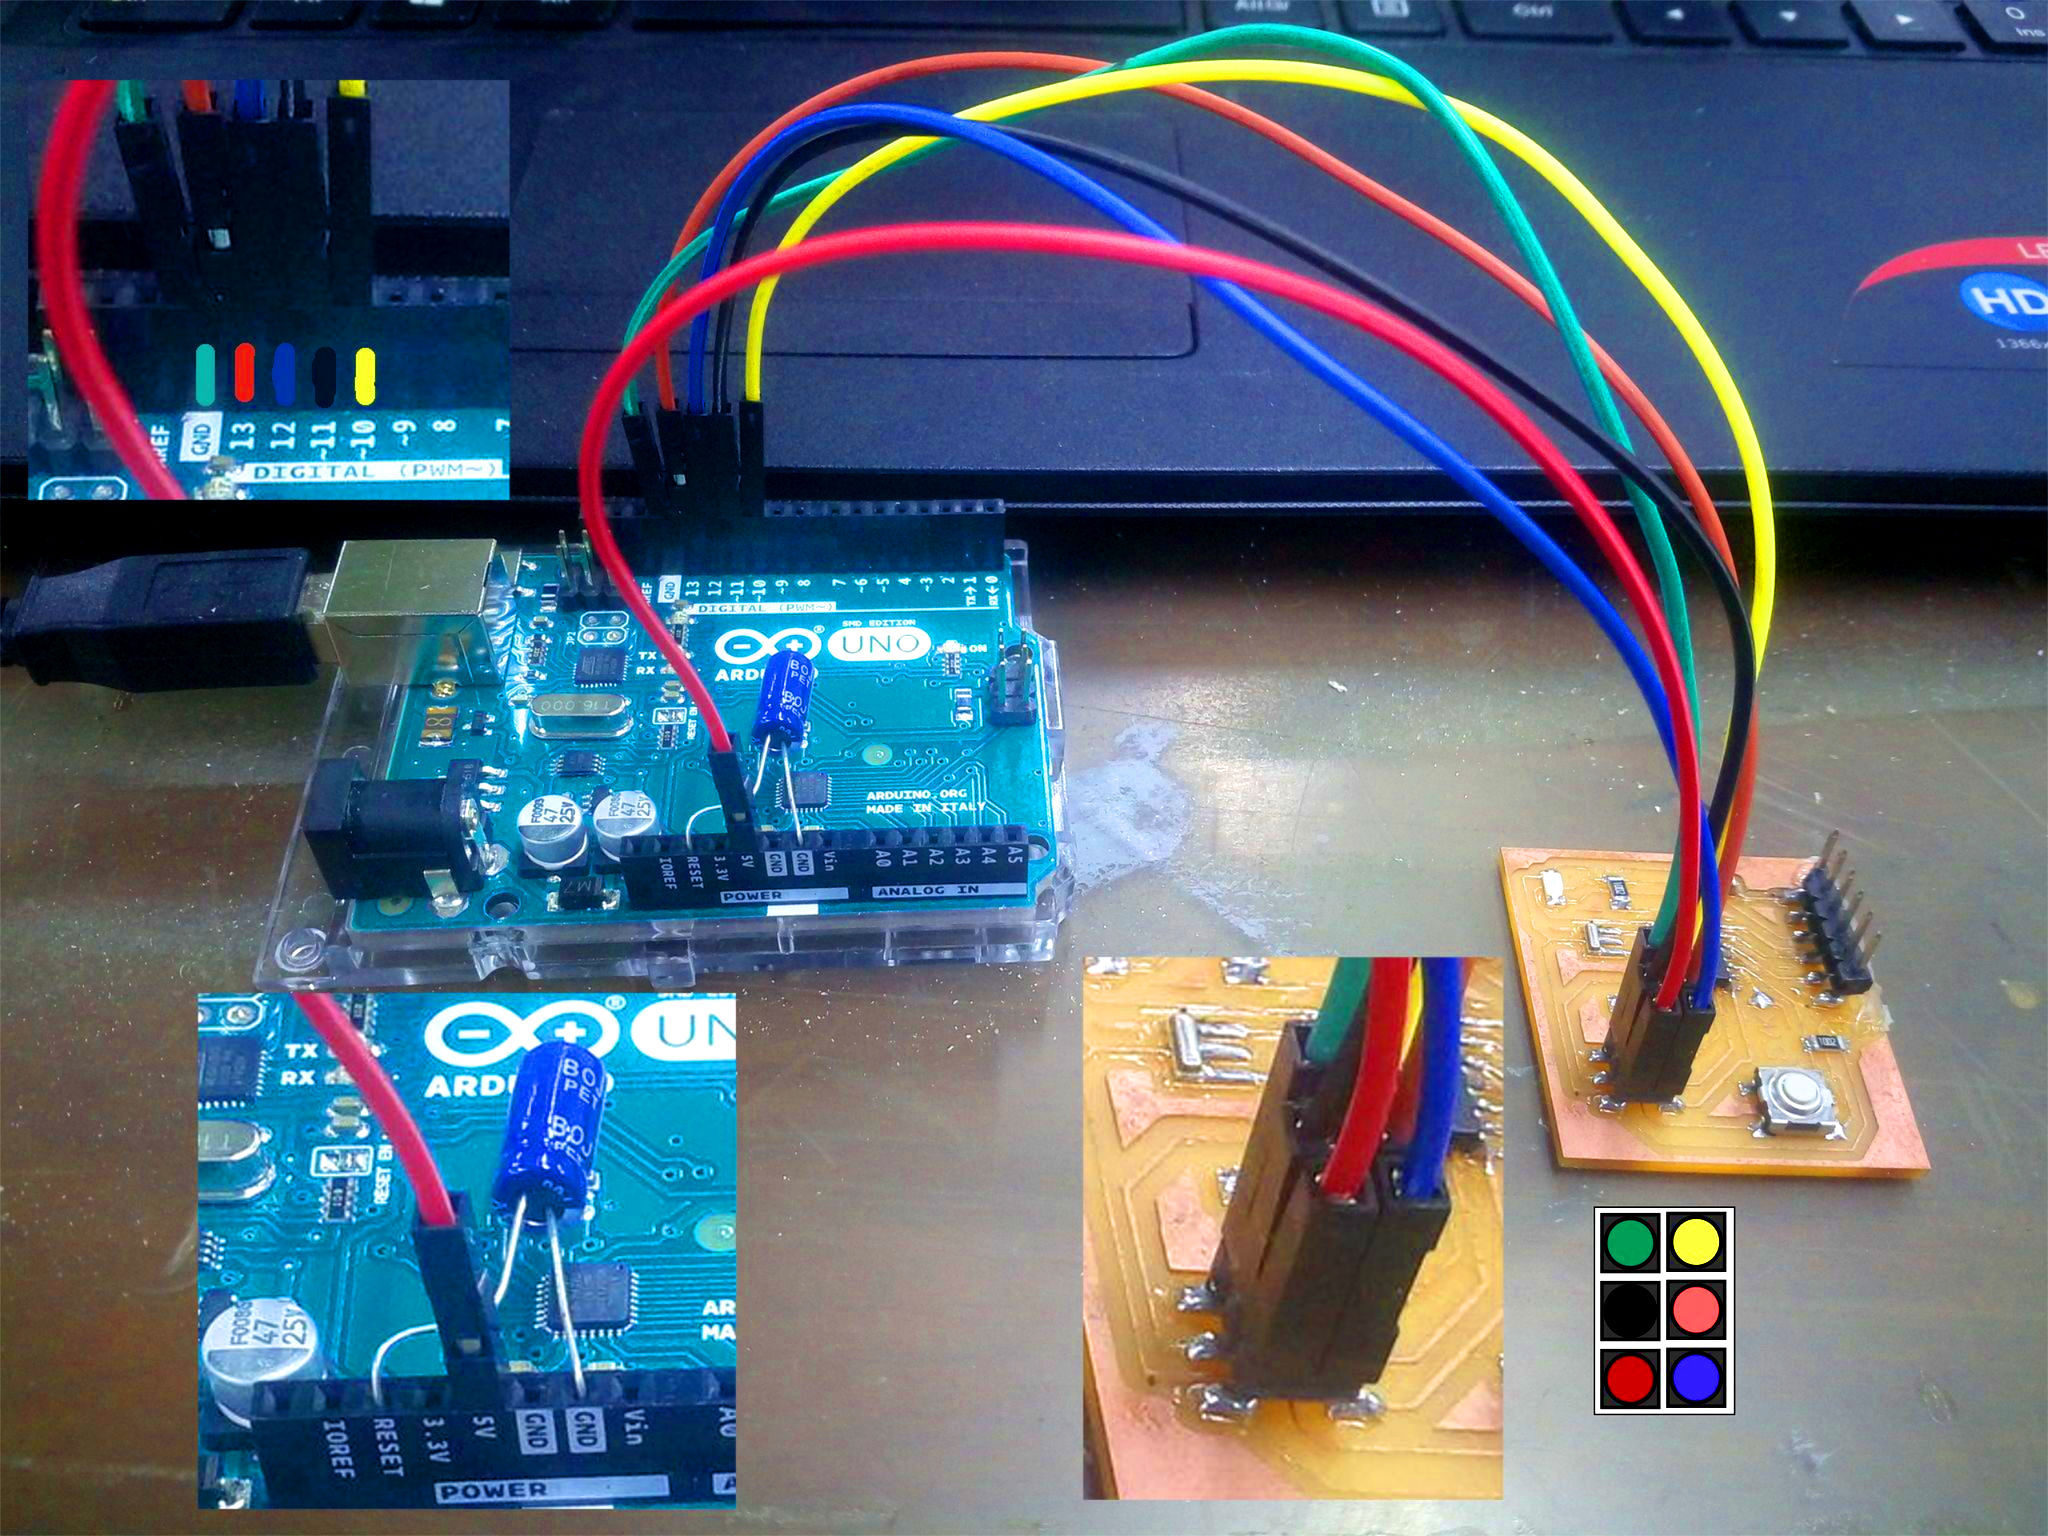
Connect FTDI to Arduino
Connection points
| Color | Arduino | FTDI |
|---|---|---|
| Blue | Pin 12 | MISO |
| Yellow | Pin 10 | RESET |
| Green | Ground (GND) | GND |
| Brown | Pin 13 | SCK |
| Red | VCC (5V) | VCC |
| Black | Pin 11 | MOSI |
It is recommanded to use color coding for connections. But its your choice. You can use all same wires for all connections. Using color coding makes it easy to reconnect again if required
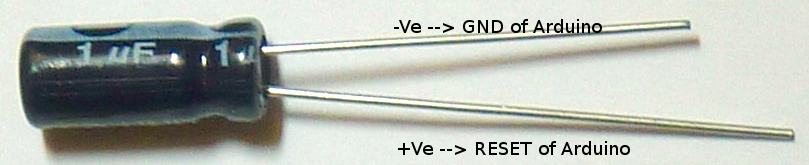
Use capacitor and connect between Ground and reset pins of arduino. This is to ensure that arduino ISP program remains inside Arduino
Plug back Arduino in PC using USB
Burn bootloader on Helloftdi
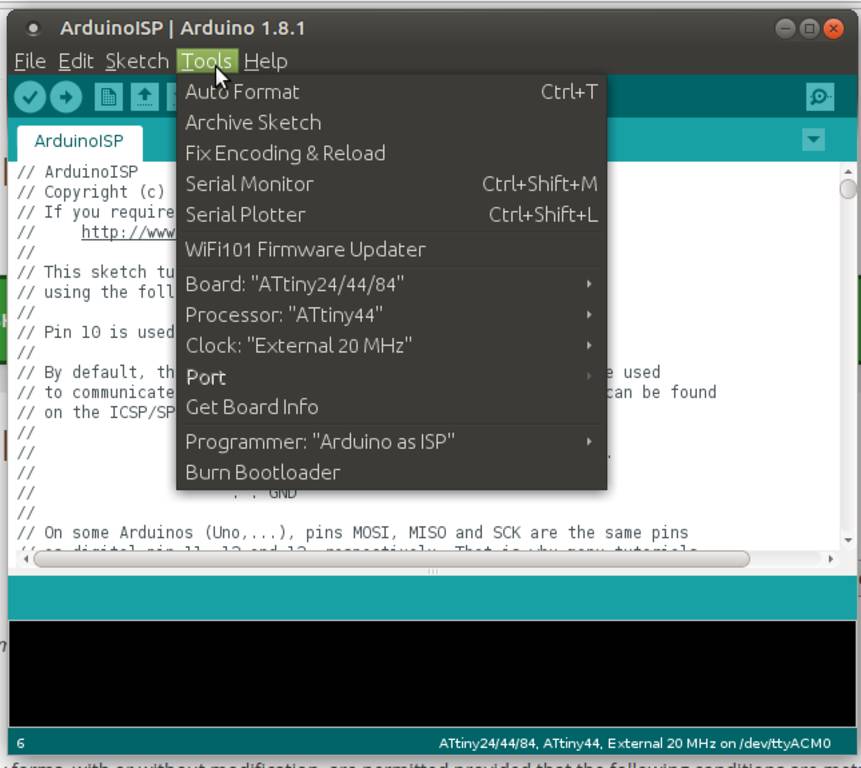
Steps for burning Bootloader
- Open arduino IDE
- Select Tools -> Board "ATtiny24/44/84"
- Processor: ATtiny44
- Clock: "External 20 MHz"
- Click on Burn Bootloader
Prepare C Program
- Write your own c programs. Download sample program from here
- Write make file based on what processor you are using
- I have changed following lines in the original make file
PROJECT=hello.ftdi.44.echo
PROJECT=t44.blink.sykavrdude -p t44 -P usb -c usbtiny -U flash:w:$(PROJECT).c.hex
avrdude -p t44 -P /dev/ttyACM0 -c stk500v1 -b19200 -U flash:w:$(PROJECT).c.hexavrdude -p t44 -P usb -c usbtiny -U lfuse:w:0x5E:m
avrdude -p t44 -P /dev/ttyACM0 -c stk500v1 -b19200 -U lfuse:w:0x5E:m-P /dev/ttyACM0 is a port on which board is connected. You can find it in Arduino IDE tools menu
-c stk500v1 is a programmer type. Since we are using arduino as a programmerFor more info on avrdude command line arguments you can refer http://www.ladyada.net/learn/avr/avrdude.html
- I have changed following lines in the original make file
-
Install avr-gcc package if not installed on your computer. Its GCC compiler for c programs
sudo apt install gcc-avrWithout installing gcc-avr you will encounter error "make: avr-gcc: Command not found"
-
Install avr-libc package if not installed on your computer. These are header files available in software repository of Ubuntu Mate
sudo apt install avr-libcWithout this package you will encounter following error
avr/io.h: No such file or directory #include <avr/io.h> ^ compilation terminated -
Install avrdude package if not installed on your computer
sudo apt install avrdudeWithout this package you will encounter following error
make: avrdude: Command not found -
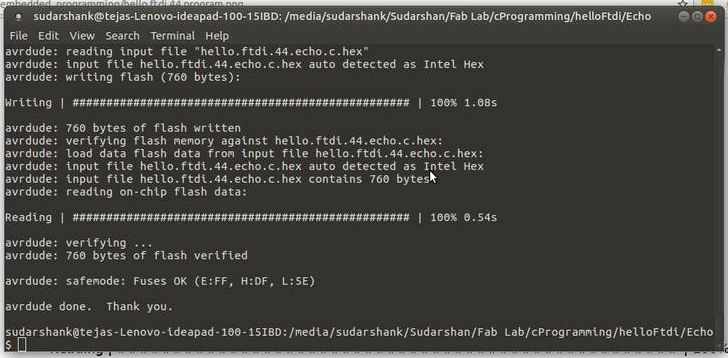
transfer.sh is a bash script combining all following make commands. Run following commands in terminal to compile and transfer c program to your board
Make sure your board is connected through arduino and Capacitor is still connected
- make -f t44.blink.syk.c.make
- make -f t44.blink.syk.c.make program-usbtiny-fuses
- make -f t44.blink.syk.c.make program-usbtiny
OR
- ./transfer.sh
Program transfered successfully