This week we looked at computer controlled cutting. Our assignment is to design, create, and manufacture a press fit construction kit. This is to be done using the main tool we discussed in our global lecture, i.e. the laser engraver/cutter. We were also supposed to develop something creative out of the vinyl plotter and explore its utility. This is going to be very exciting as we finally get to use the tools to take our CAD designs and make physical objects from our creations.
Prerequisite for this week’s assignment is to know computer-aided design, which we have already worked upon as a part of last assignment. In this week’s assignment, we must implement our designing skills and make prototypes. Also, we must make sure to incorporate parametric design into our files.
Last week I worked on SolidWorks to create my project’s 3D model and again I will be revisiting it to make some fun parametric models to cut them on laser cutter. Also, I will be cutting some stickers on vinyl plotter to make my fun model aesthetically beautiful.
SolidWorks
Parametric Design
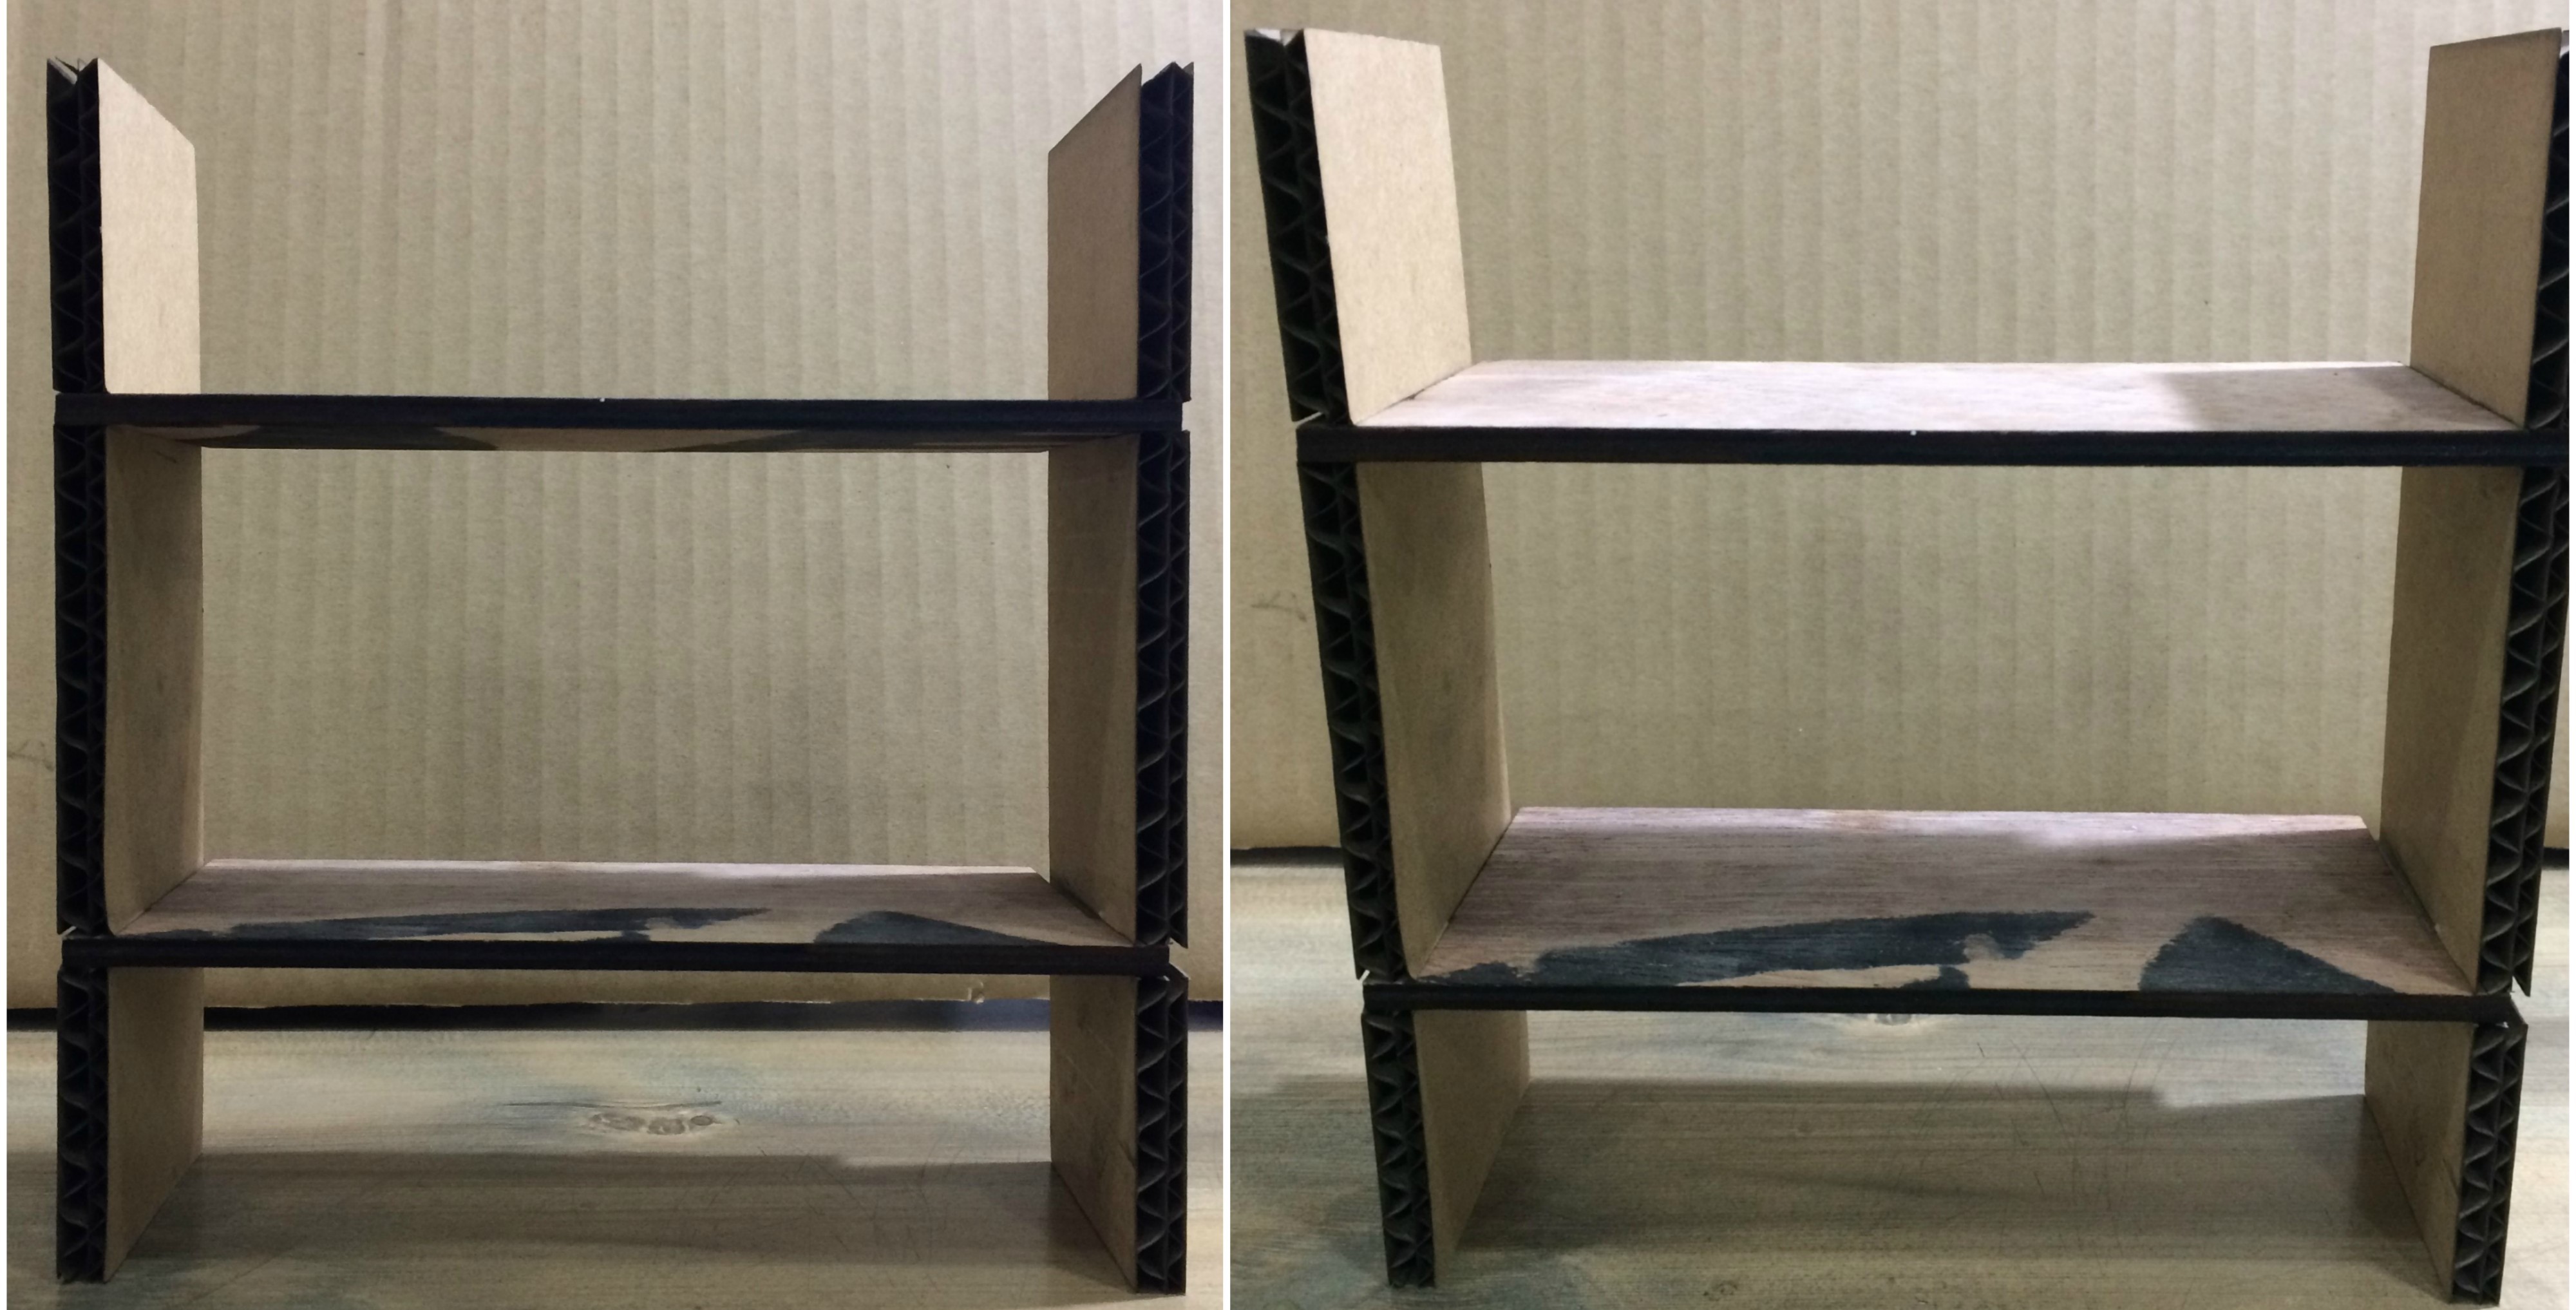
I thought of making a miniature model of bookshelf, whose legs will be of 06 mm cardboard and the rack of 4.5 mm plywood to provide proper strength and avoid sagging, while loading.
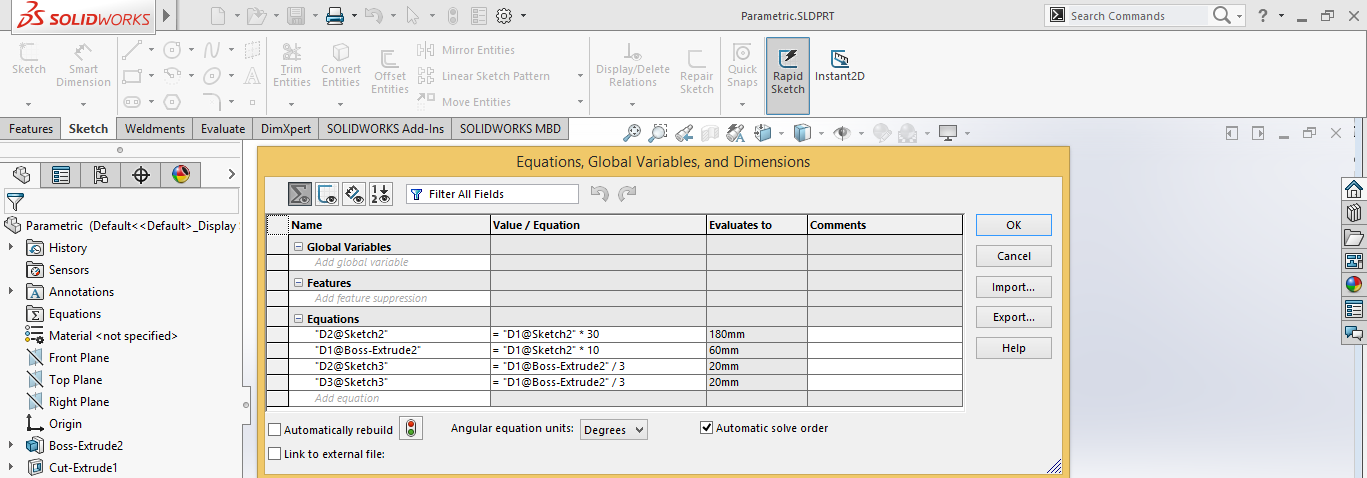
Following is the parametric model of the leg. Since, the width of the cardboard is fixed i.e. 06 mm, so all the other parameters are set in accordance with it.
The following picture deplicts the equation which is being used to make leg of the assembly. It can be observed in the equation that the parameter D1 (thickness of the cardboard) is constant and other parameters are dependent on it.
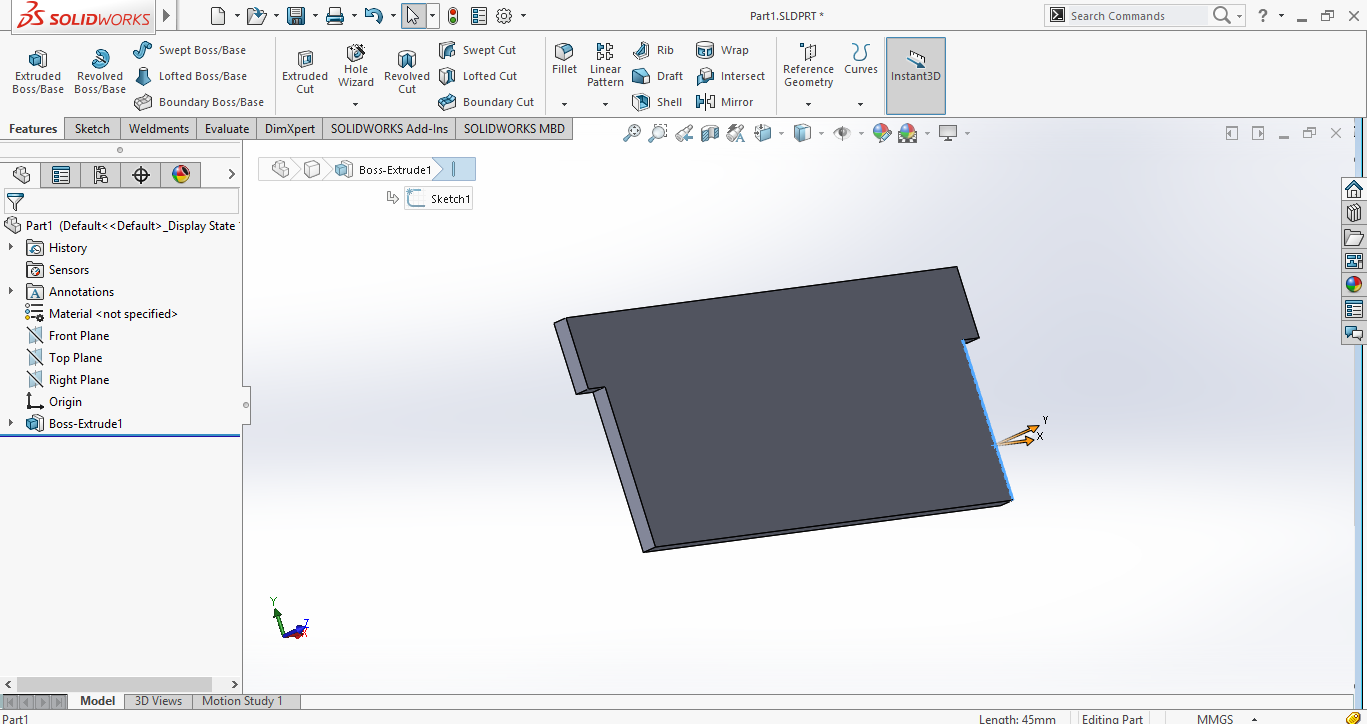
This image shows rack, which will be fixed between the legs of the bookshelf to keep objects upon it. It is made out of 4.5 mm plywood.
Laser cutter use in our lab has following parameters.
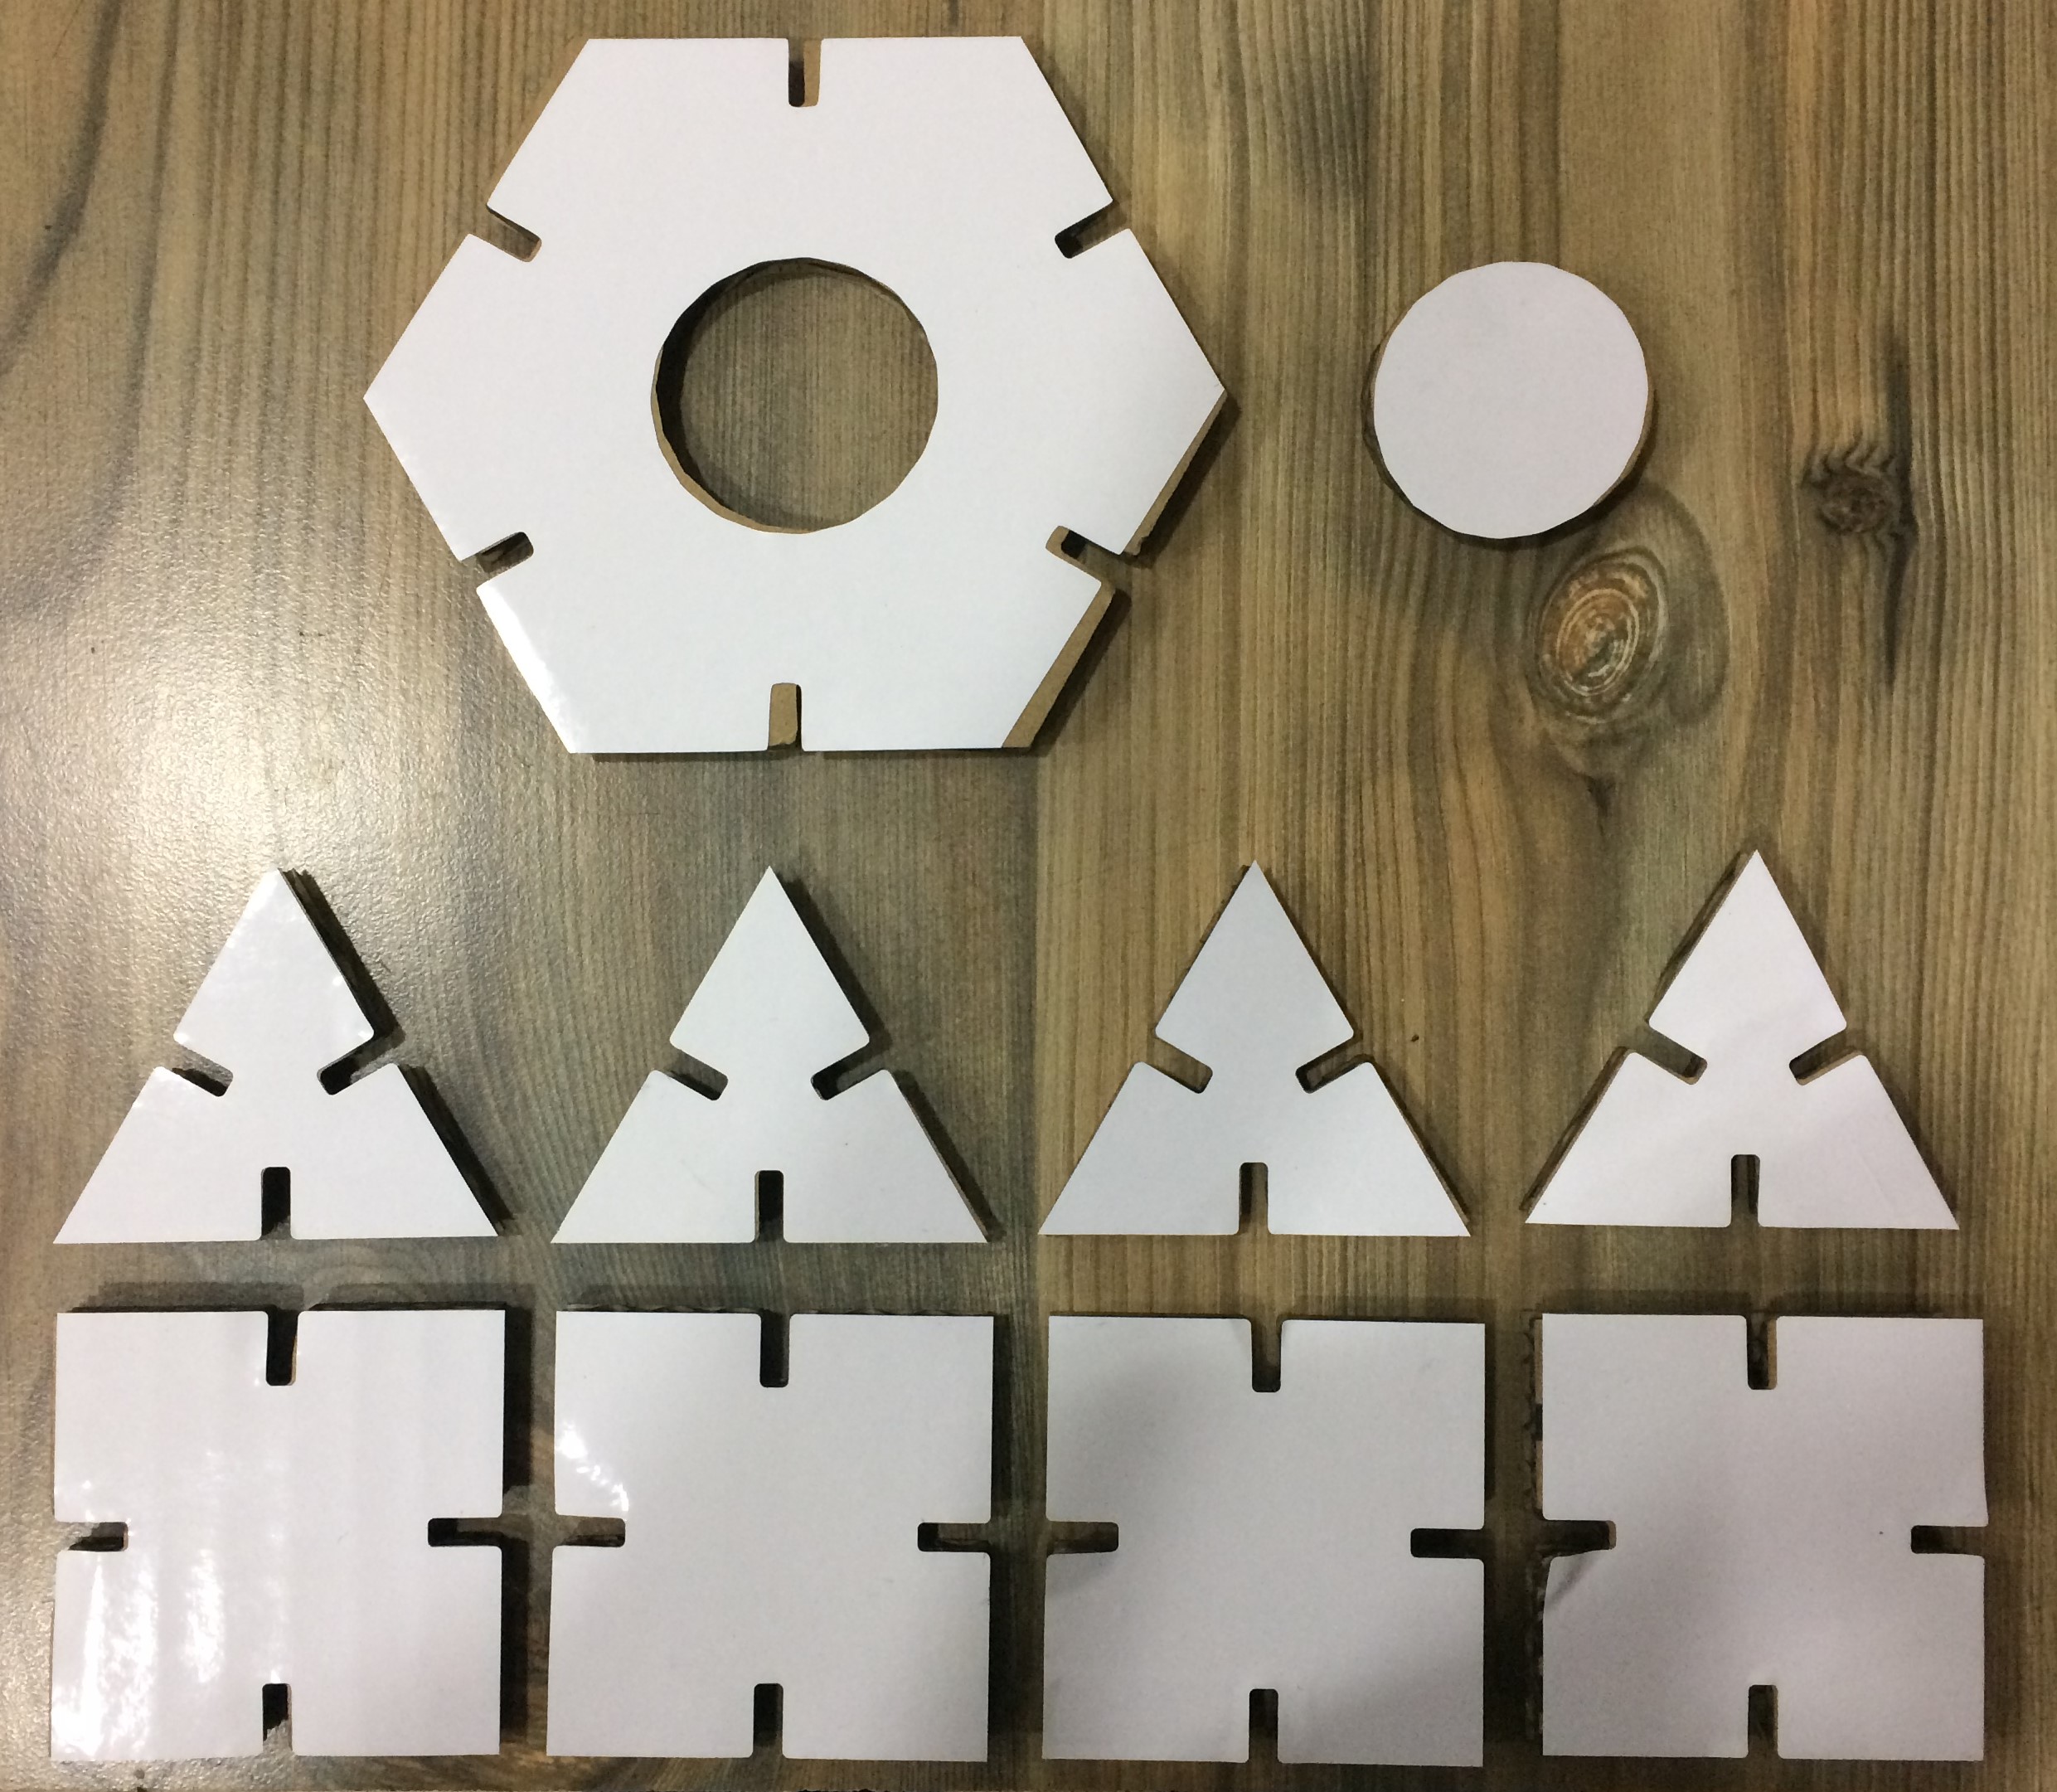
As specified in the image that, this laser can take .DXF images, so after creating required 3D model in SolidWorks, I saved it as .DXF and imported this file to cut on the laser cut. I also created a tetrix kit by laser cutter as shown below.
While making the final cut a series of trial cut has been conducted to know the exact parameters for cutting. Therefor, for cutting of 06 mm cardbord, speed of 20 mm/s and intensity of 30 Watts is used, whereas for cutting of 4.5 mm plywood speed of 15 mm/s and intensity of 65 watts is used.
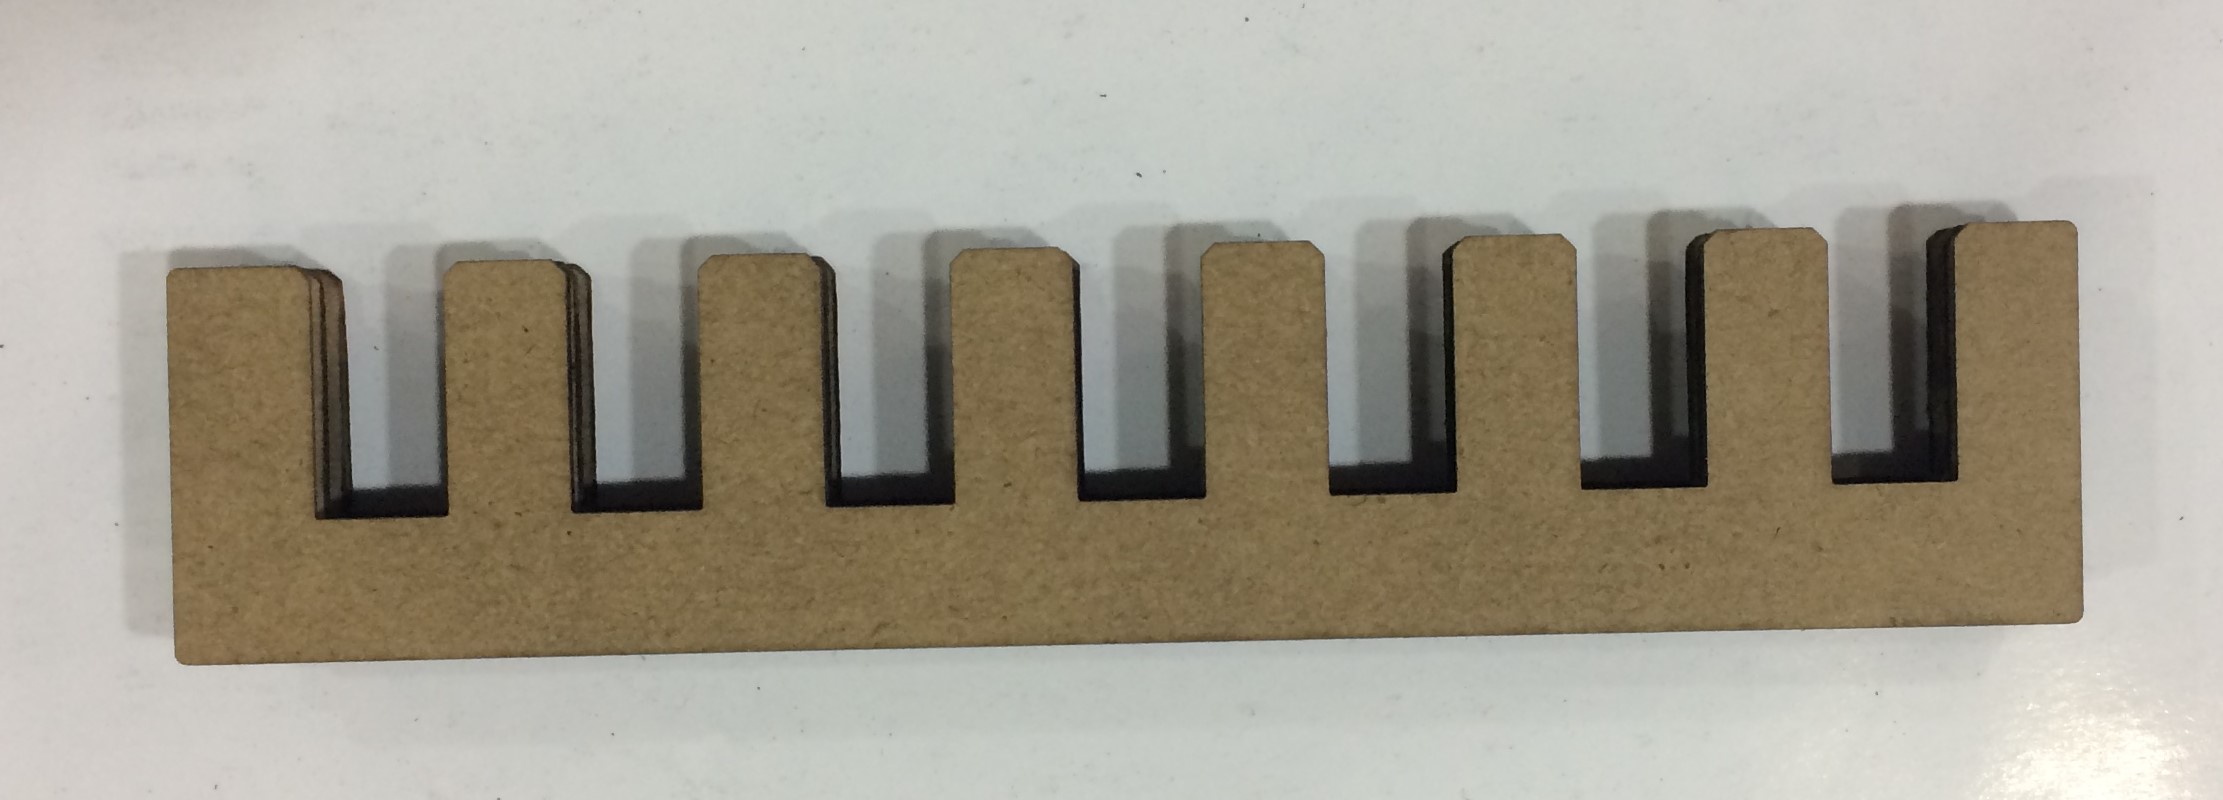
Also, to know the exact cut dimensions for press fit assembly, a press fit comb is made with different dimensions within the teeths and all the teeths are fitted with the assembly to know the best forced fit.
Press Comb Fit
Miniature Bookshelf
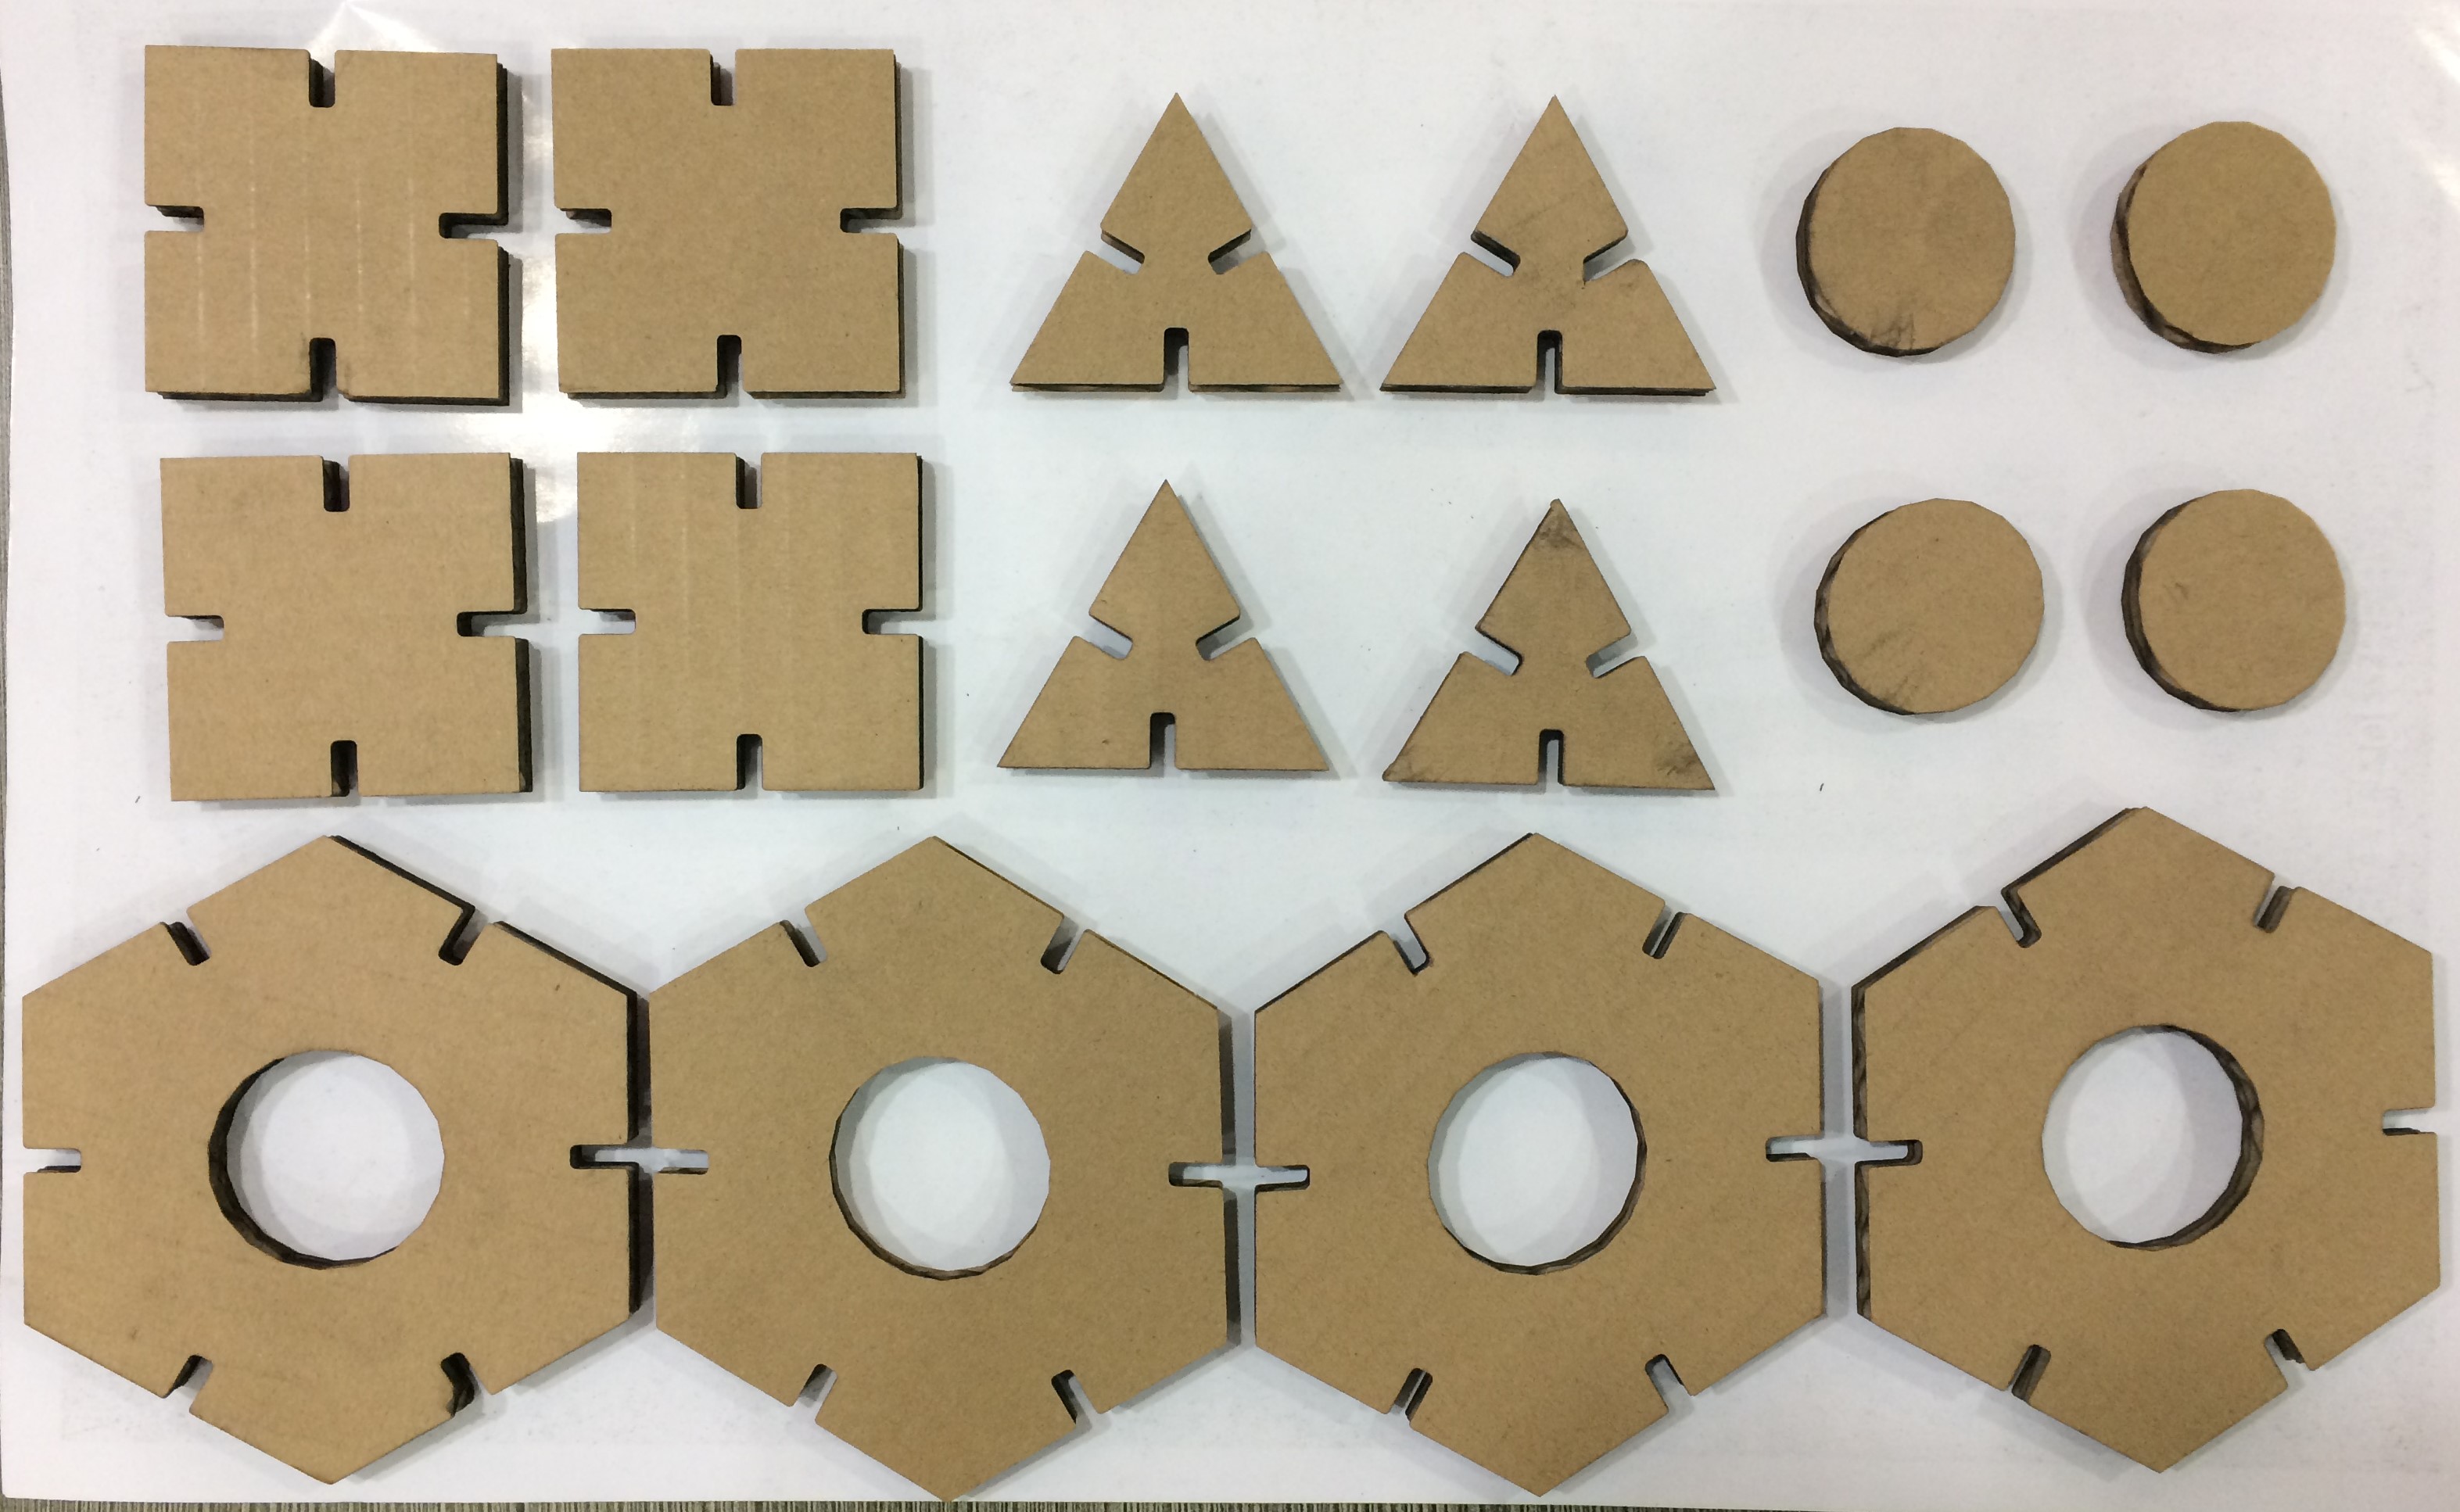
Tetrix Kit
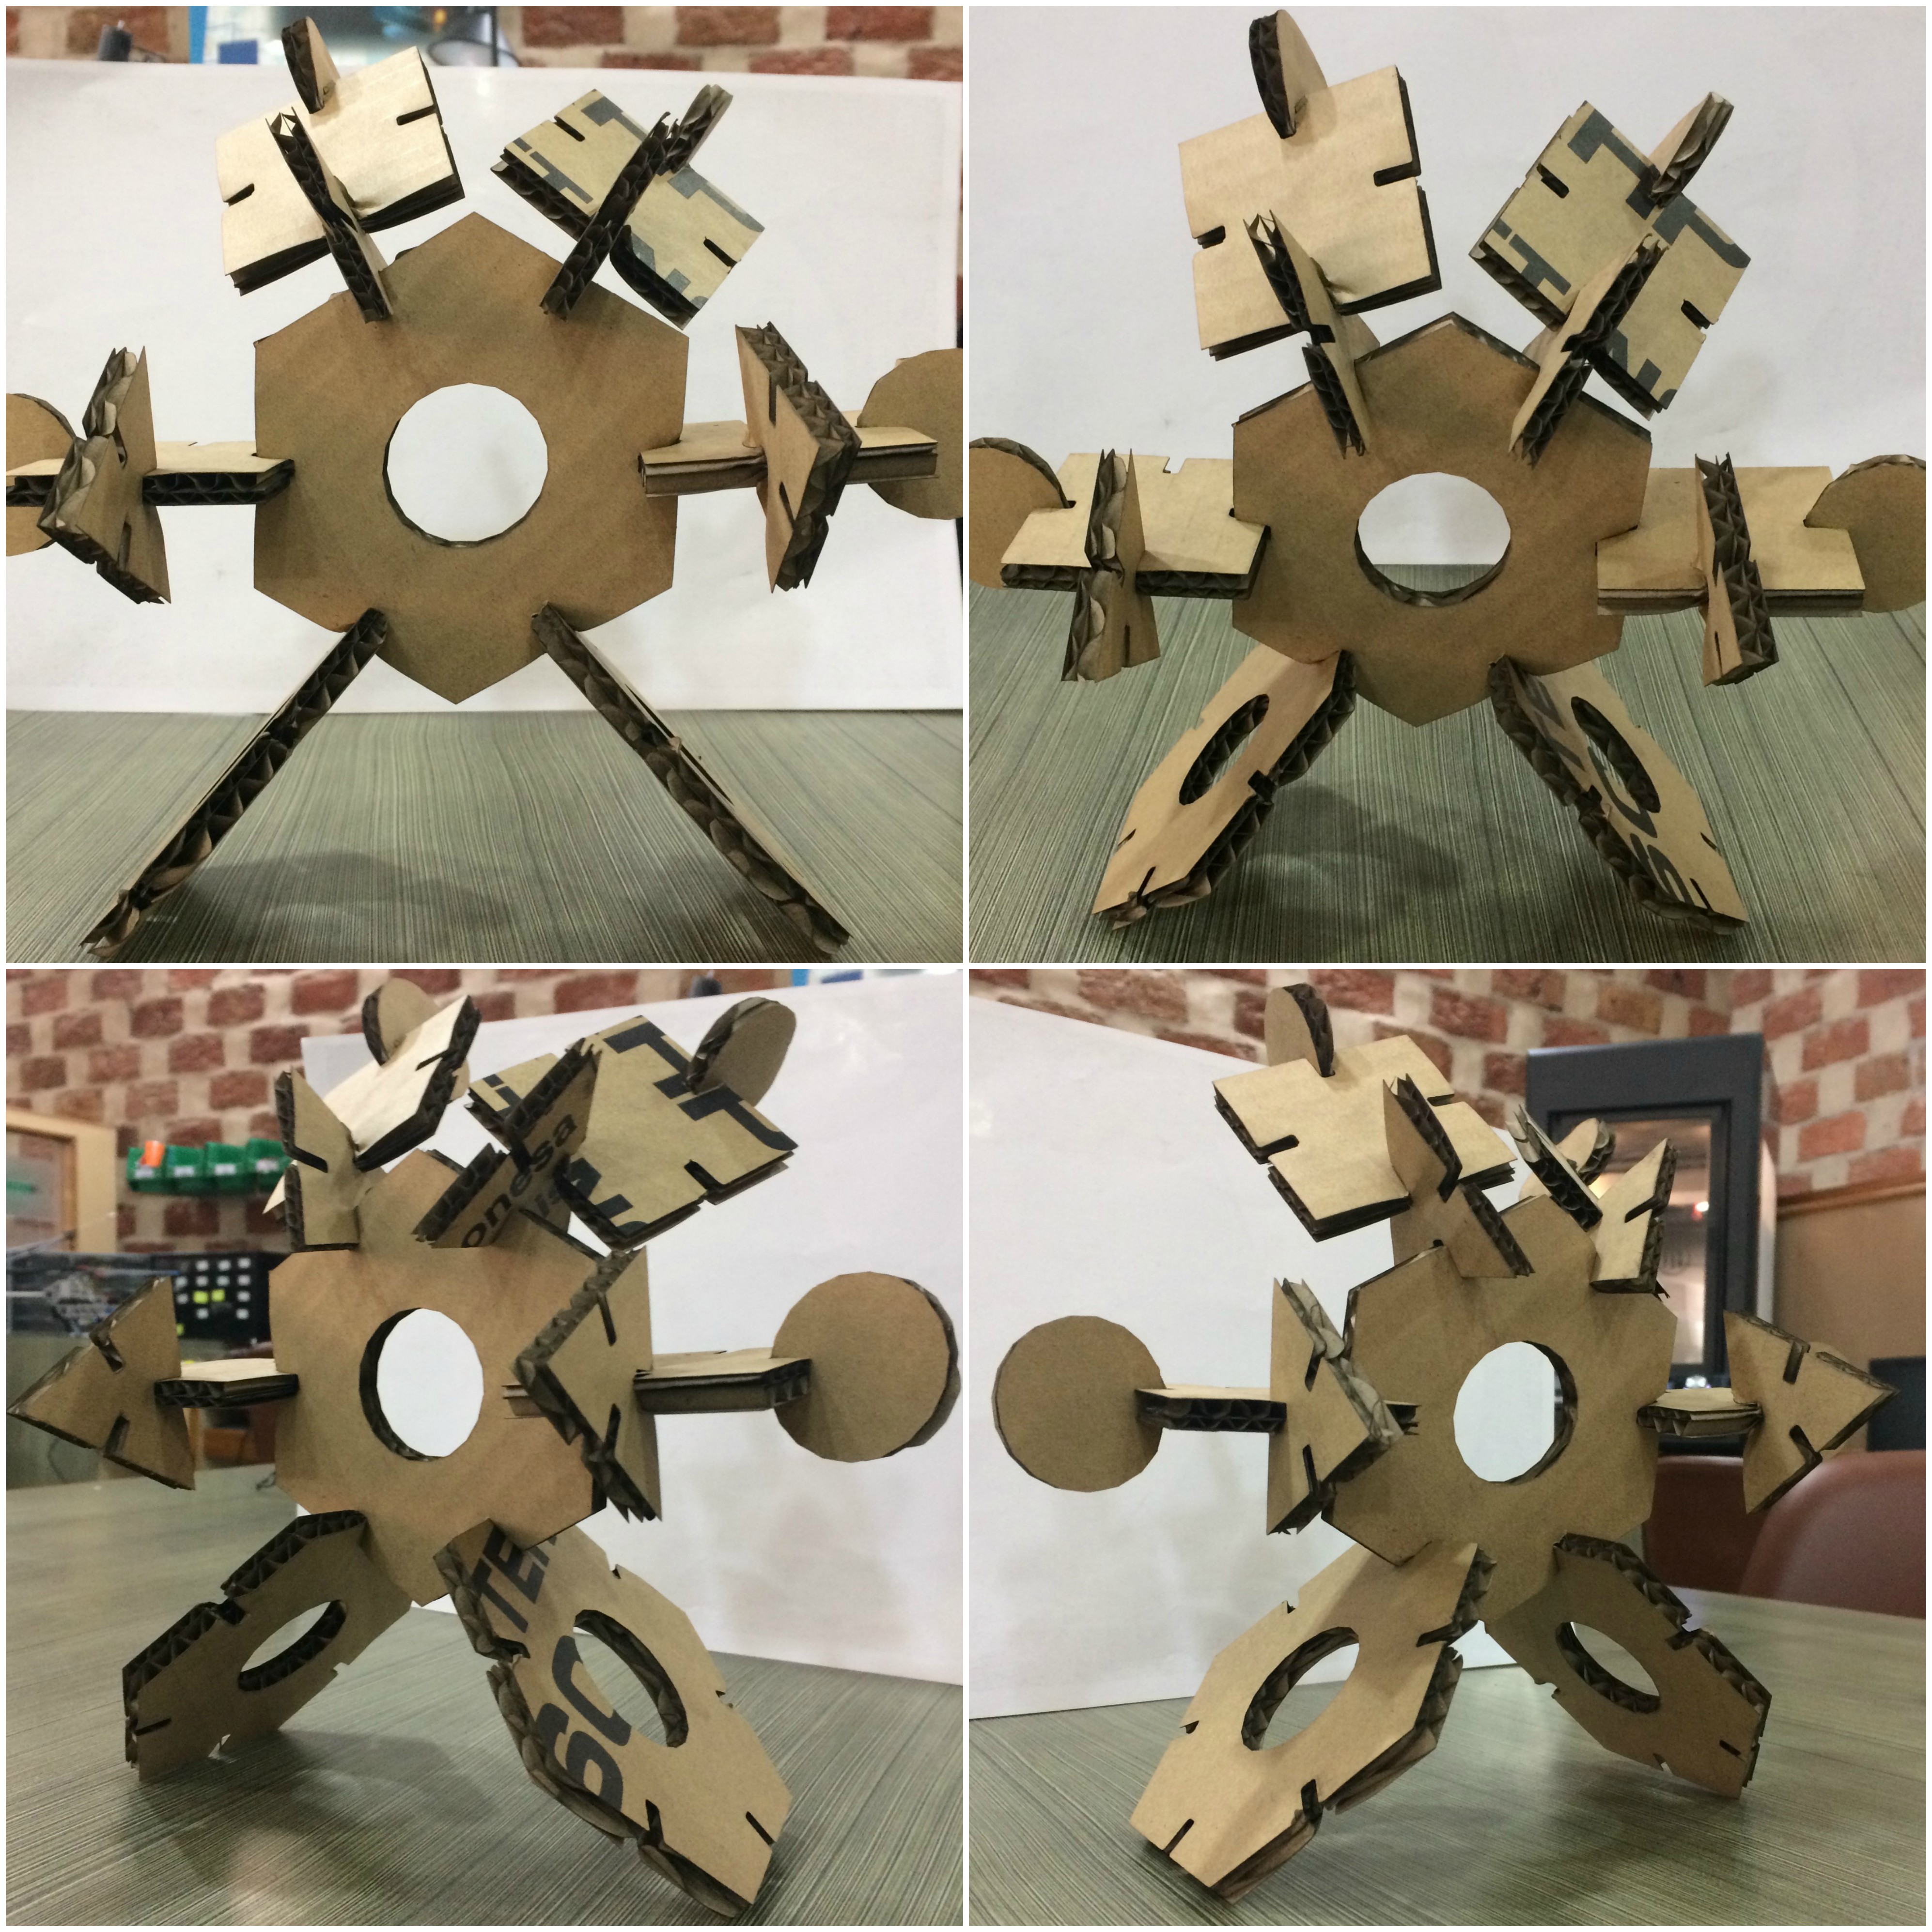
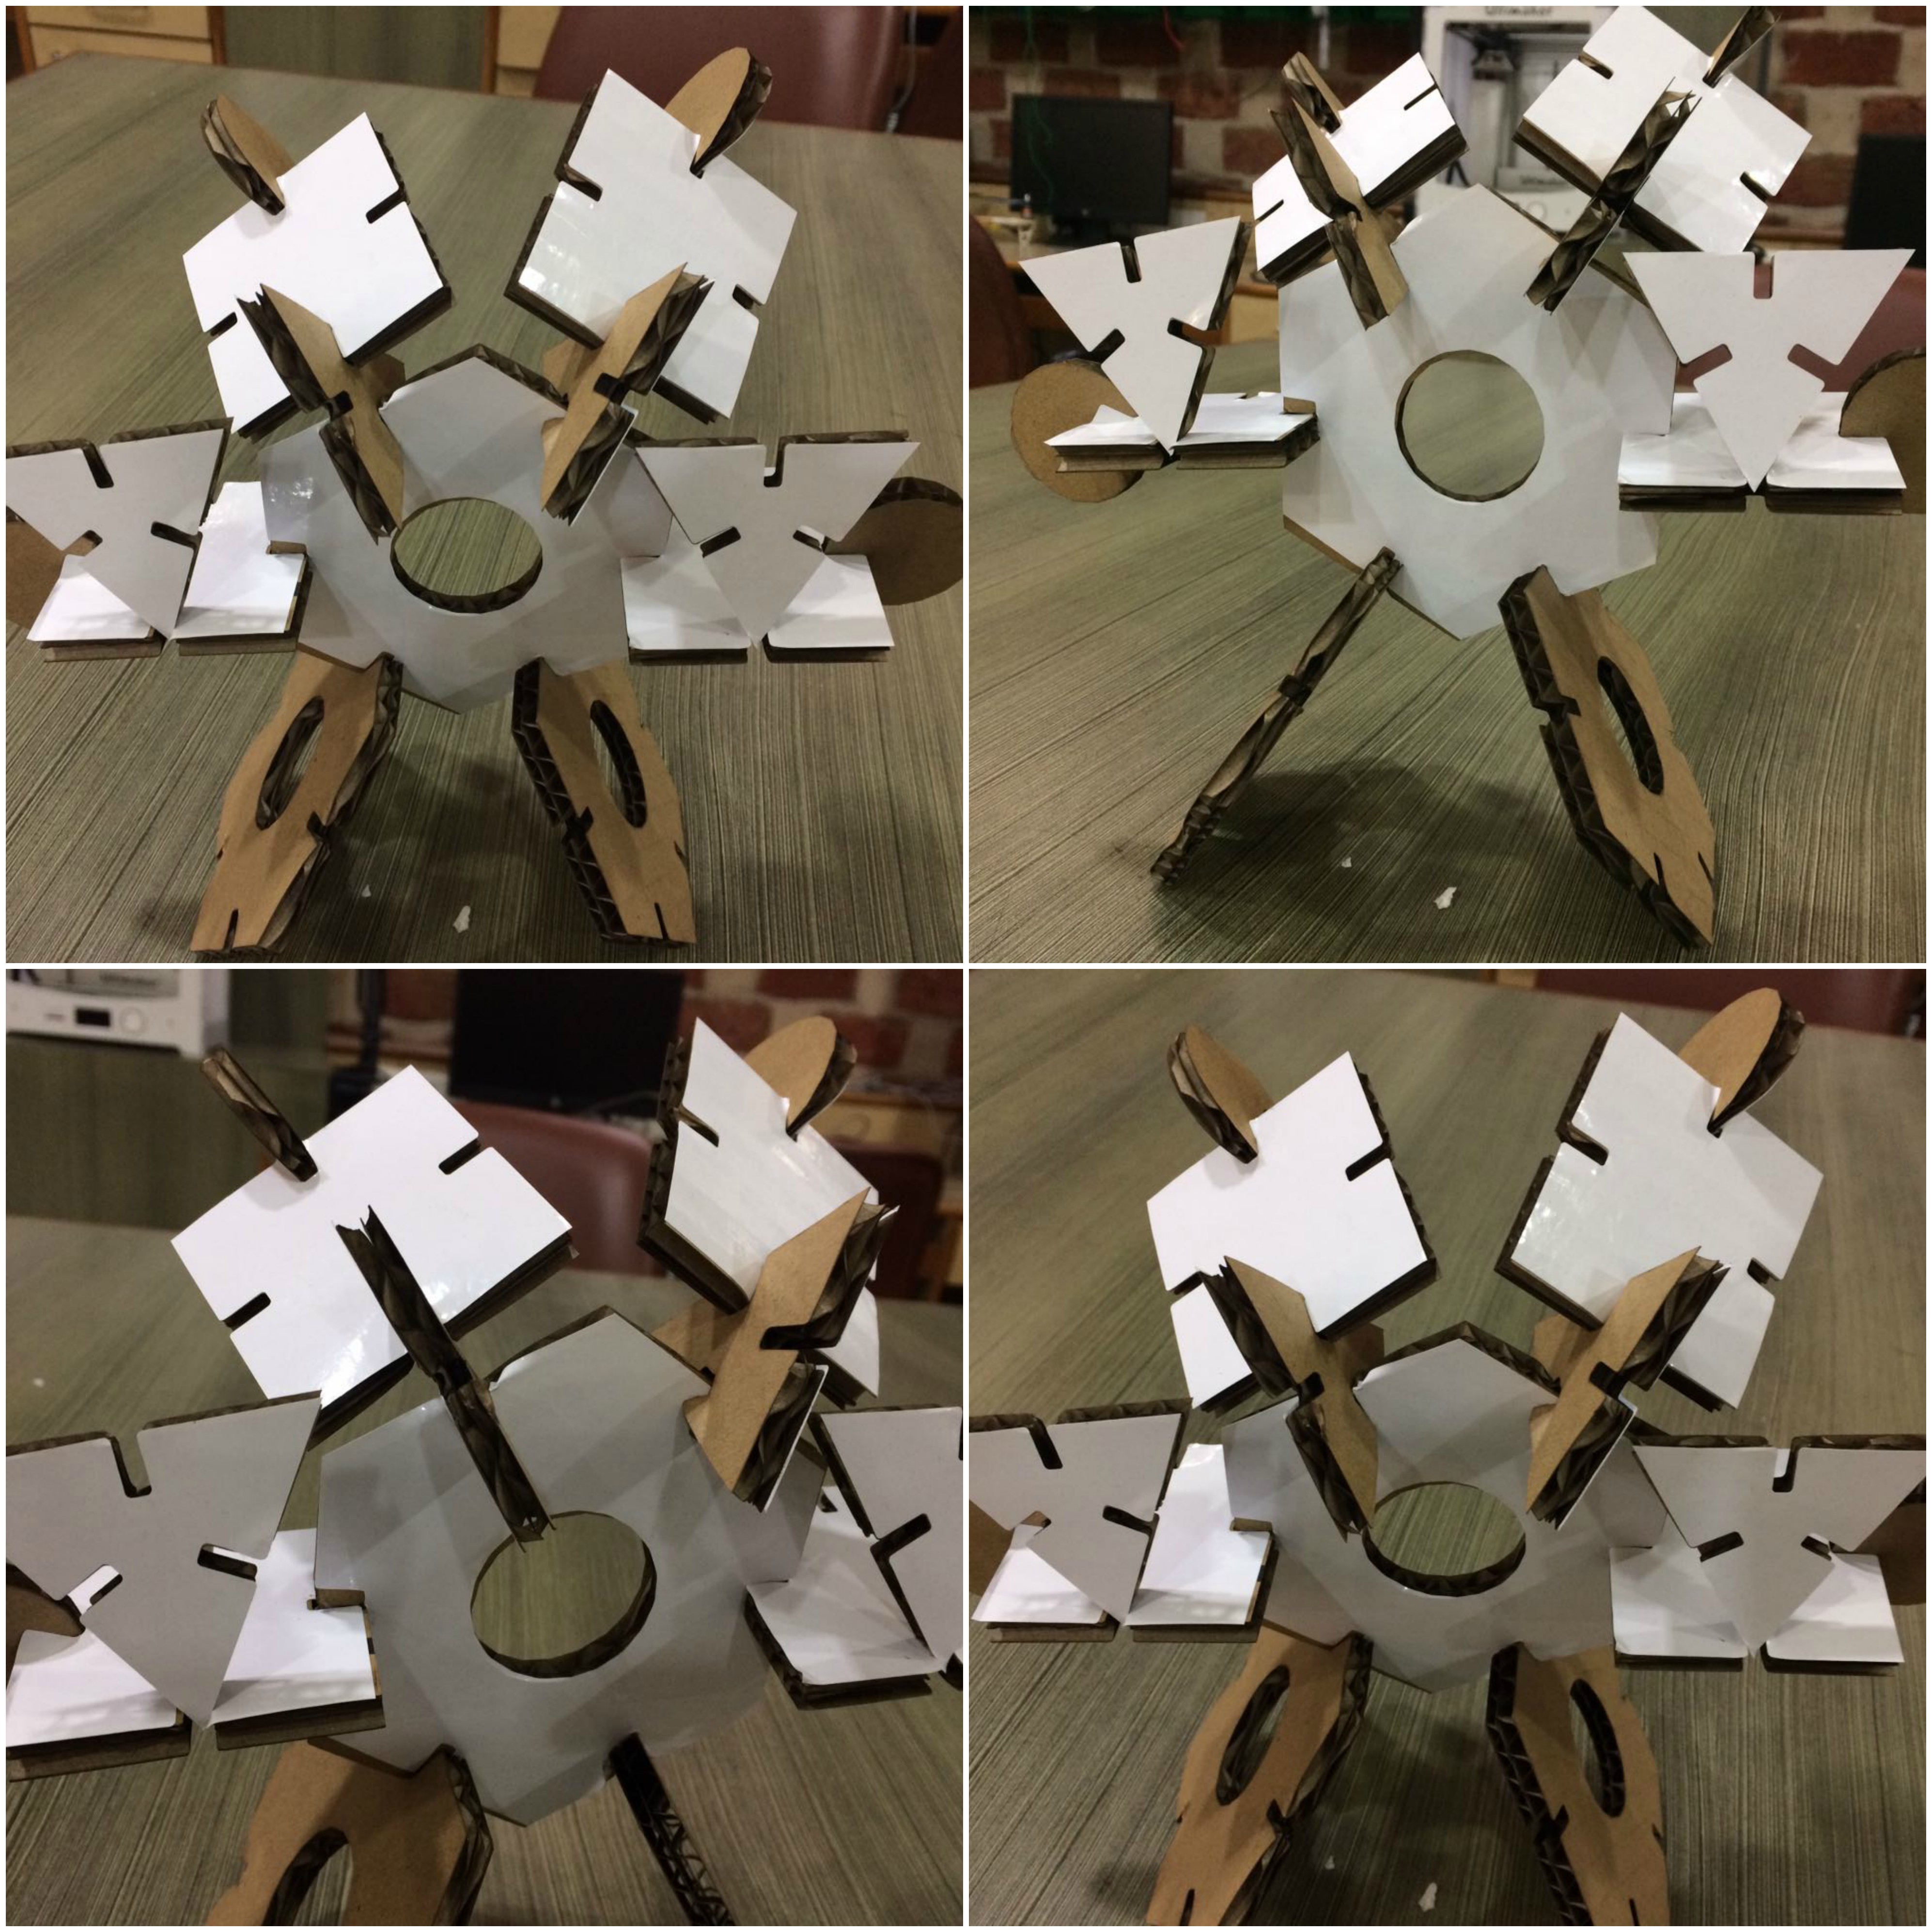
Assembled Tetrix Kit
Laser Cutting Video
Vinyl Plotter
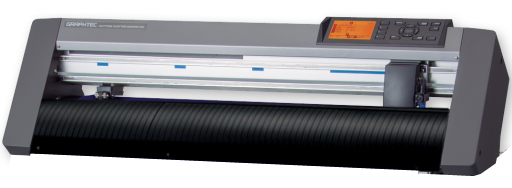
The vinyl plotter available at our lab is "GRAPHTEC CE6000-60".Before using, it is necessary to go through the manual or tutorials to understand the basic functions of the machine. Therefore, I had gone through some of the videos available on youtube to understand the setting of the machine and it's operations. Speaking from personal experience, it is very simple to operate and set.
Steps to set up the machine
Step 1
Download the necessary drivers in your PC to interface the machine.
Step 2
Attach a tool (cutter plunger, plotter pen) to the plotter.
Step 3
Load Roll Media. One lever need to be pulled up to lift the rollers and after setting the sheet it is pushed down. Roll media is fixed on the top of the stock shaft and then insert the roll media into the shaft. Position the media and push rollers to correspond with the width of media.
Step 4
Aligning the push rollers. Position the left and right push rollers to correspond with the width of the media.
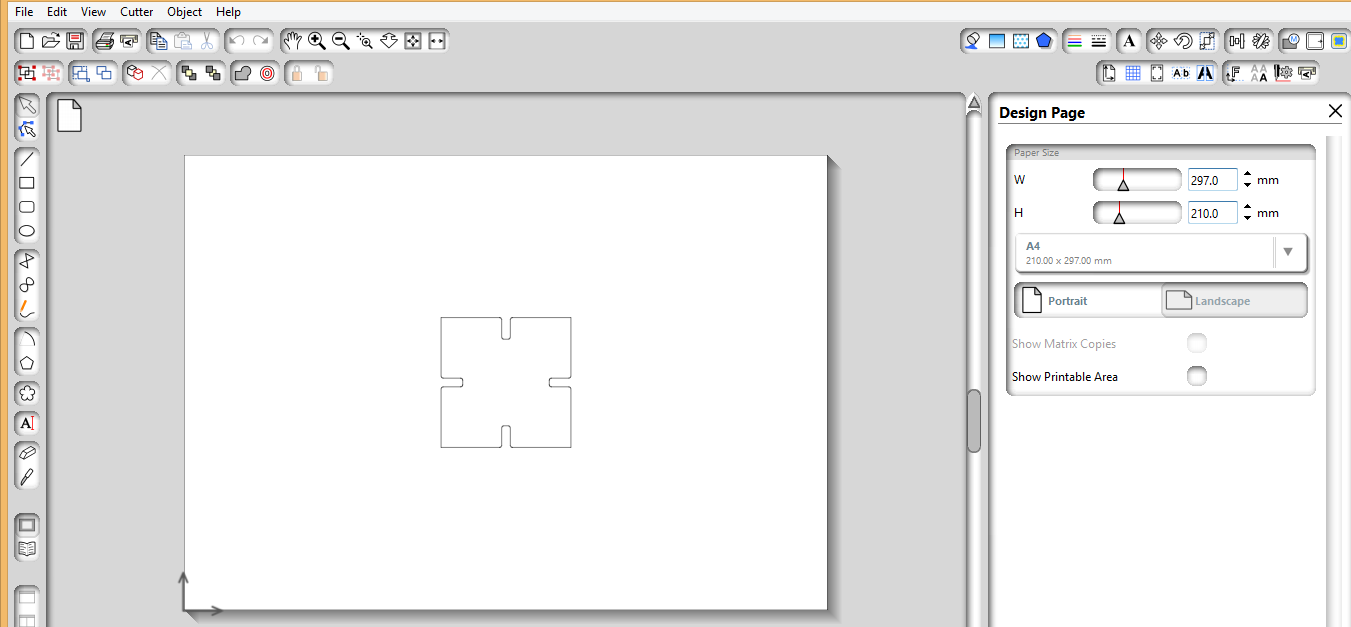
I used Graphtec Studio software for the interfacing (Provided by Graphtec). I directly imported the .DXF files, which was used for the laser cutting operation and the cutted sheets are pasted on the tetrix kit, as shown below.
Procedure to use Graphtec studio
Step 1
Open .dxf file need to be cutted.
Step 2
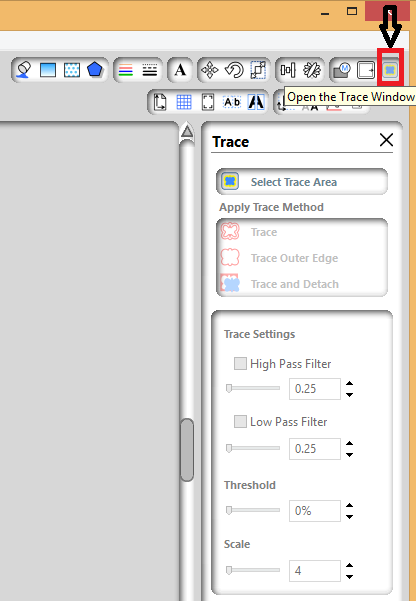
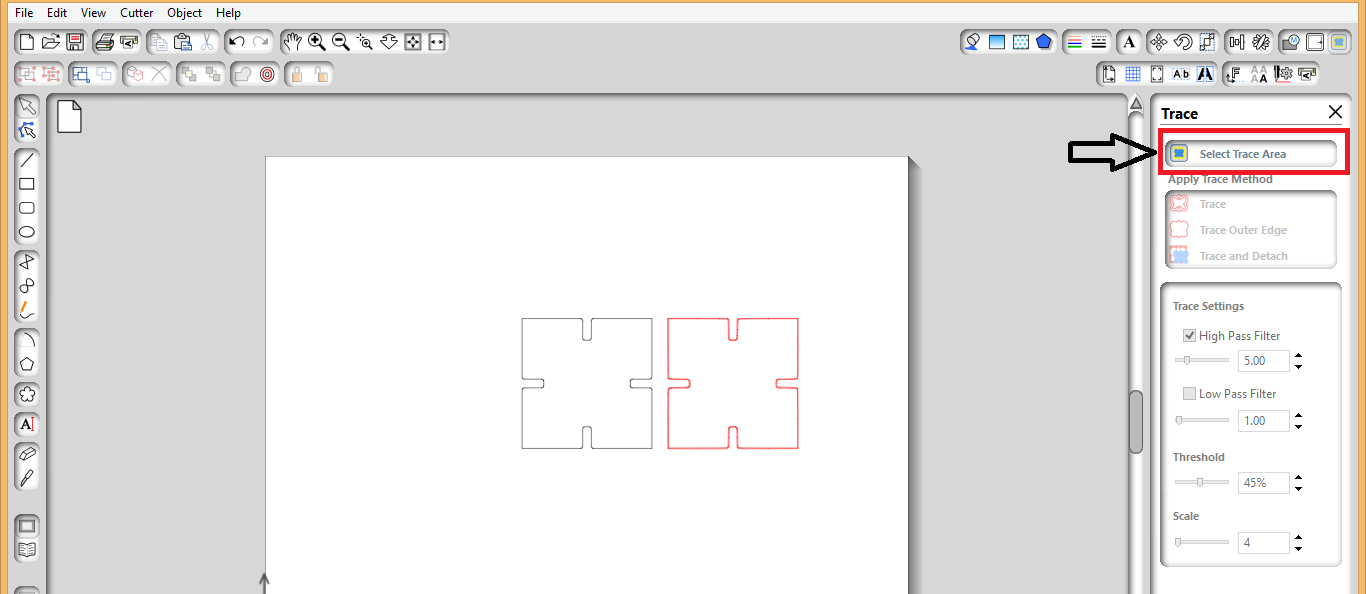
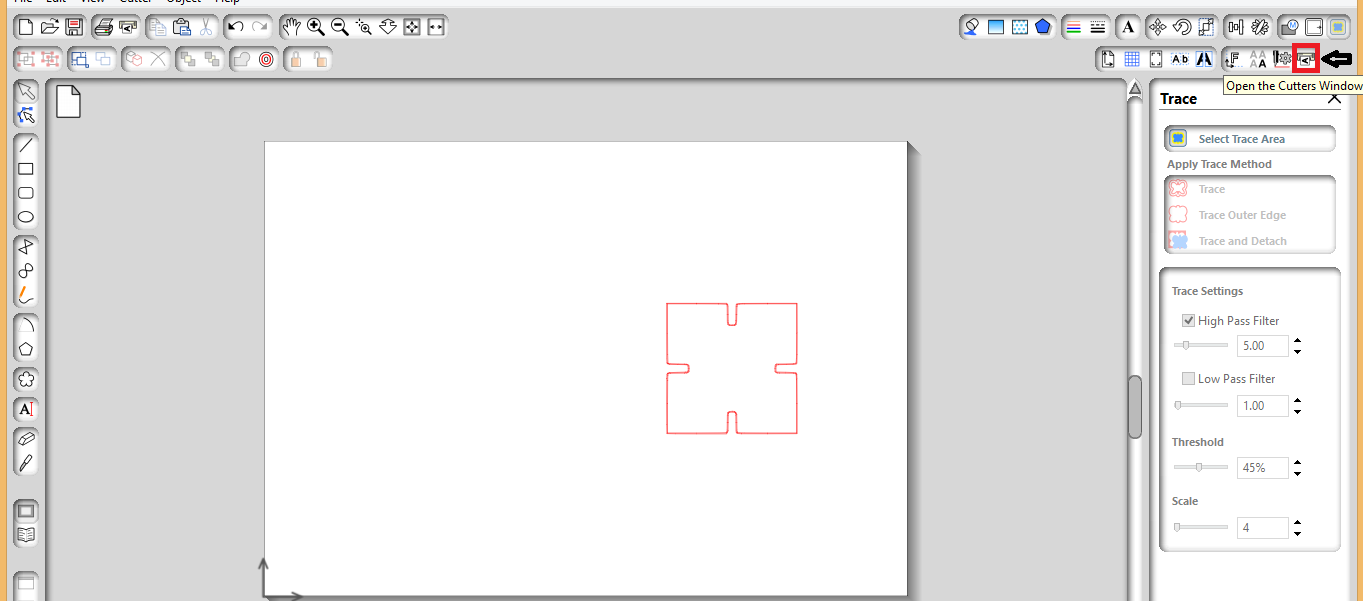
Open the Trace window, to trace the outline of the image.
Step 3
Select the image and afterwards select trace area. A trace will be generated over the image, drag the trace from the original image and delete the original image.
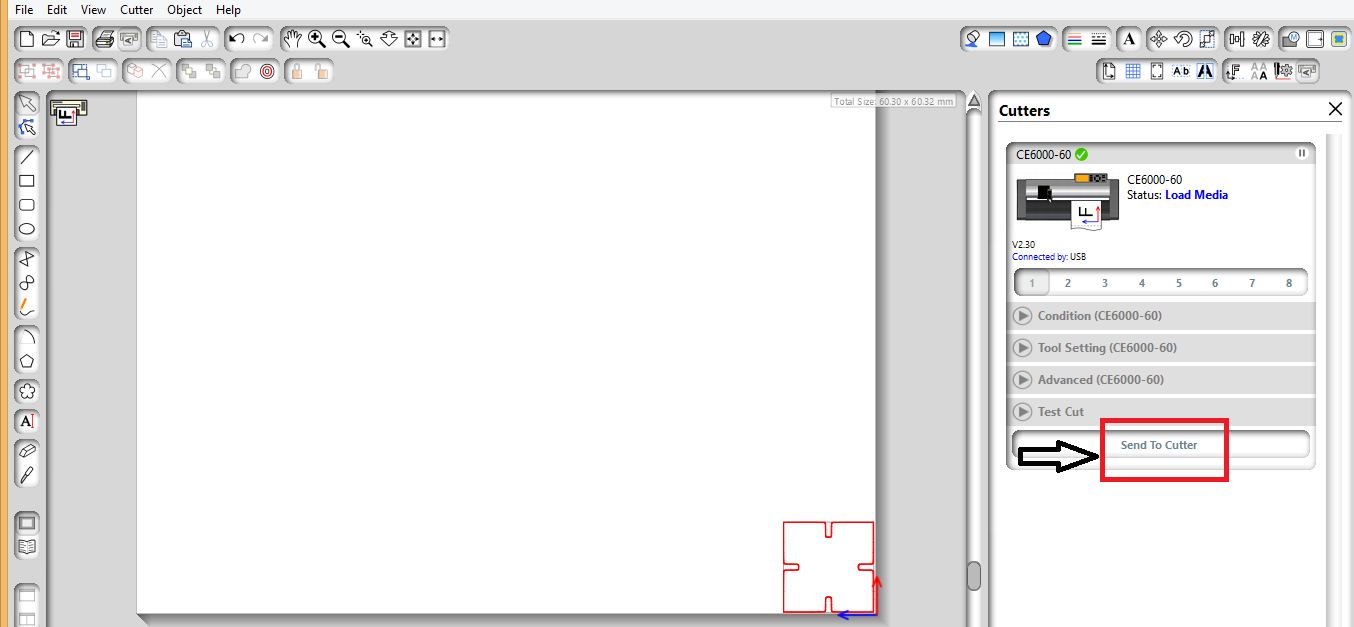
Step 4
Open cutter window and the send the file to the vinyl cutter.
Step 5
In the similar fashion, as discussed above cut all the other designs also.

 The following picture deplicts the equation which is being used to make leg of the assembly. It can be observed in the equation that the parameter D1 (thickness of the cardboard) is constant and other parameters are dependent on it.
 This image shows rack, which will be fixed between the legs of the bookshelf to keep objects upon it. It is made out of 4.5 mm plywood.
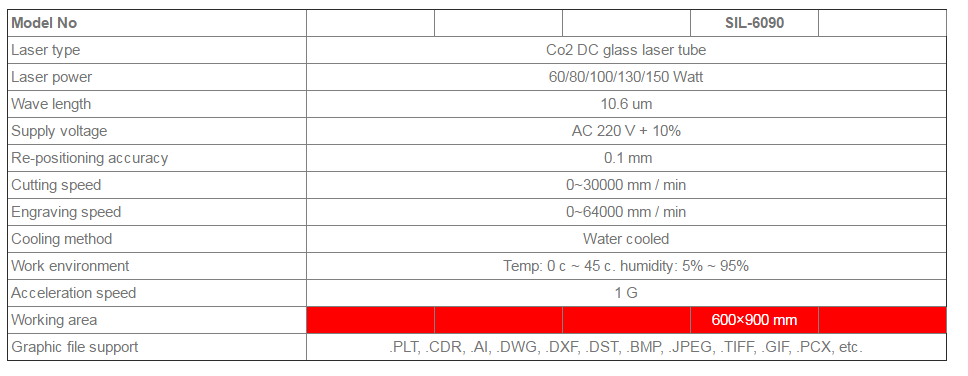 As specified in the image that, this laser can take .DXF images, so after creating required 3D model in SolidWorks, I saved it as .DXF and imported this file to cut on the laser cut. I also created a tetrix kit by laser cutter as shown below.