This week's assignment
Design an Object
3D scanning
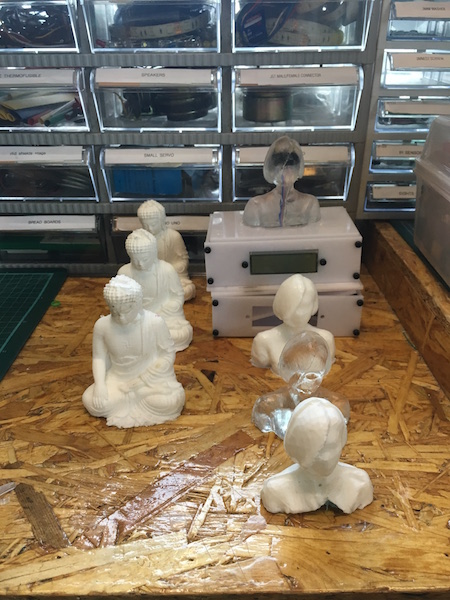
This week I will make a mini-me. I did 3d-me previous week but this time I will make a mold for mass production of myself. To do this, I 3d scanned myself again with local instructor. Process is same with previous one.
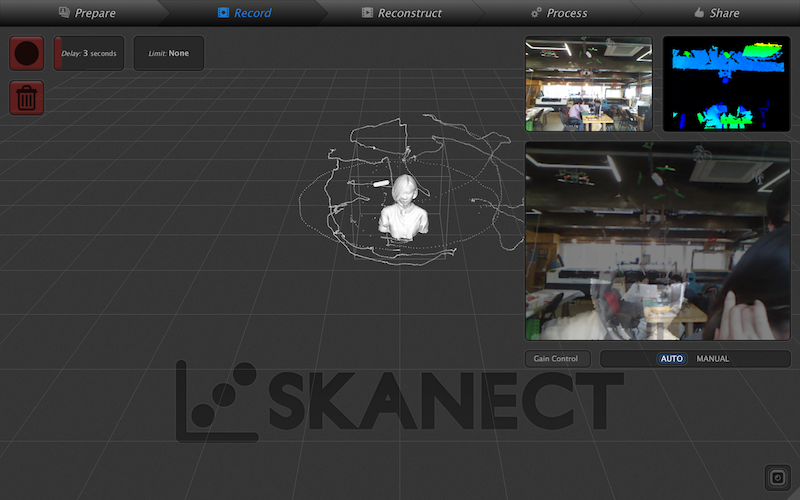
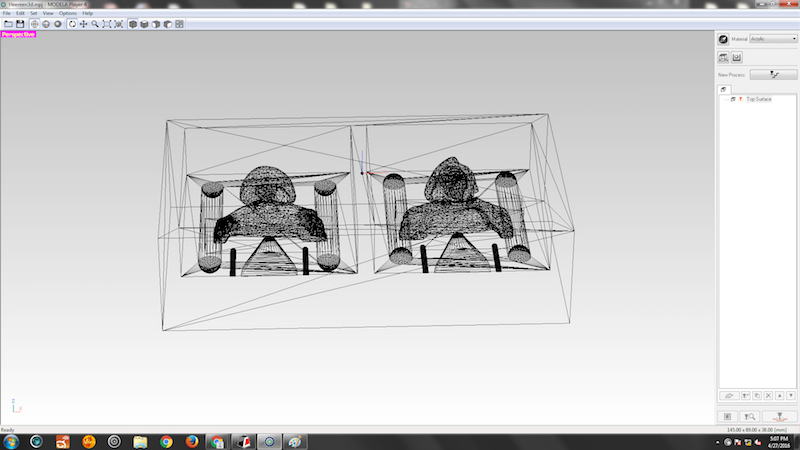
As you can see in the picture above it looks way better because this time I took more picture. After scanned, I simplified mesh and fill holes.
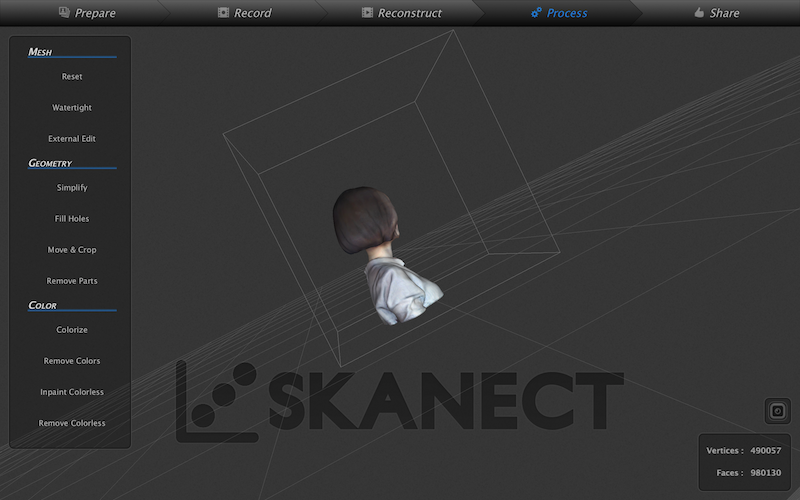
3D Mesh Fix
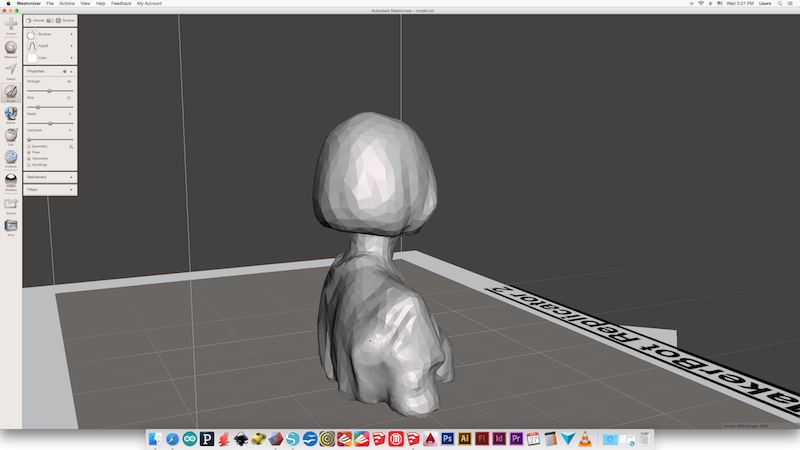
Big difference from last time is that I'm using 3-axis machine not 3d printing. 3D printing cannot be made substractively, but 3-axis machineing is basically 3d sculpting (cutting). And I need at least 2 sides mold. My mold will be consisted of two sides; front face and back. I used Meshmixer to modify my design to be appropriate for machining. SO I simplified 3d mesh and filled some parts by using sculpting tool in Meshmixer. After finished design an appropriate 3d model, I export as stl. So this stl model looks excatly same with future casting result.
Next thing I did is make a negative mold. I used skechup with help from instructor. Summary of the design proccesses is like this:
- Import stl file which will be the future result
- Make a box which size is same with actual wax block we will use for 3d machining
- Cut the stl model in half and put into a box
- Make bumps inside the box
- Make a funnel shape for pouring a casting material
- Check(double check!) if two sides fit into perfectly
Make a mold and cast
CNC milling
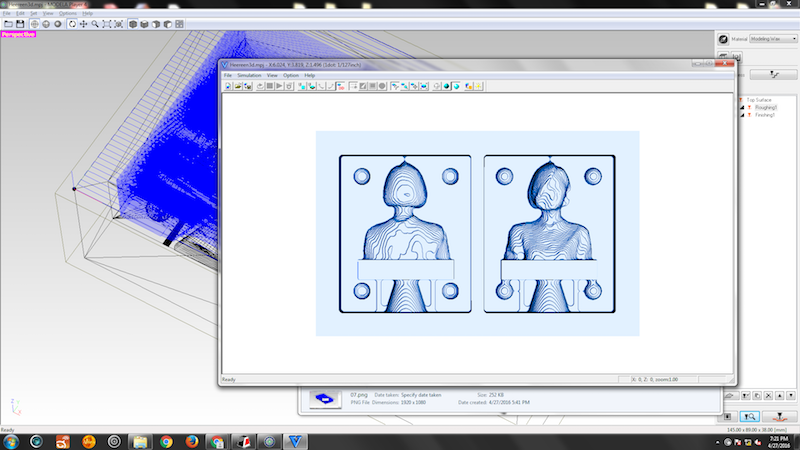
Our local fablab has Roland cnc machine for miliing the copper board but it also can be used for milling the wax. For this week's assignment, we changed the bottom part for cuting a wax.
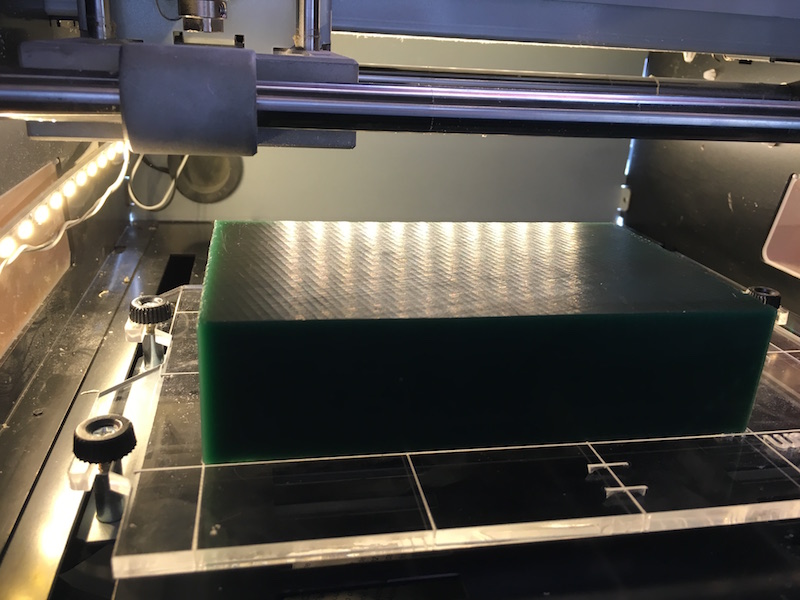
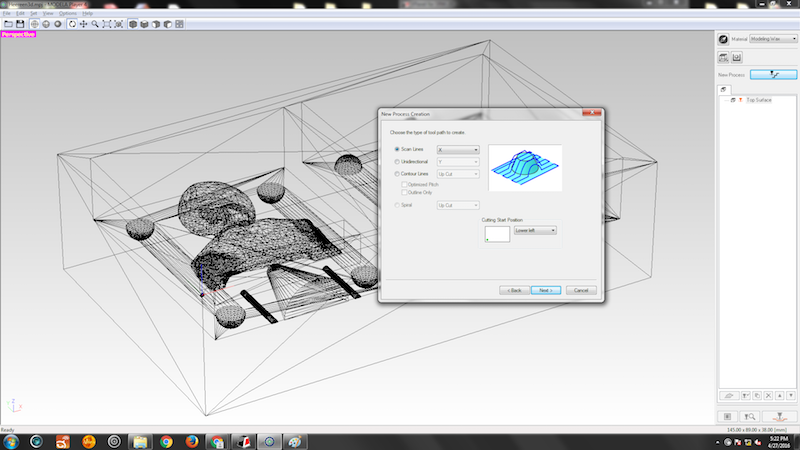
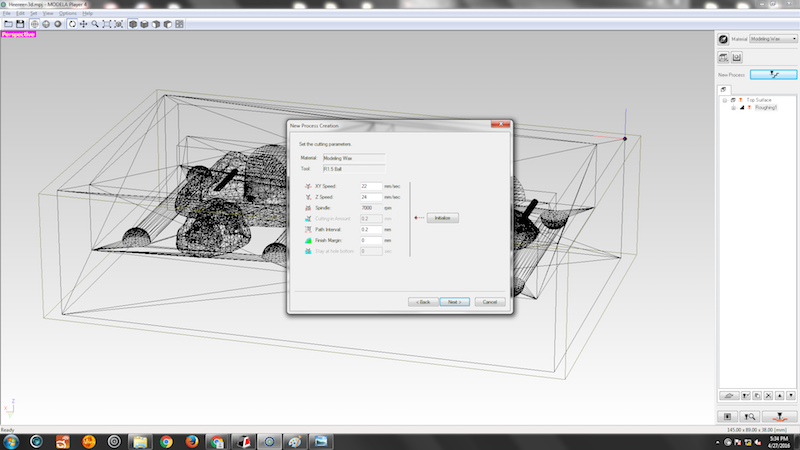
I used Modella for making tool path. Generating tool path is pretty much same with shopbot. First, make a rough cut and then final cut.
Notes for generating tool path
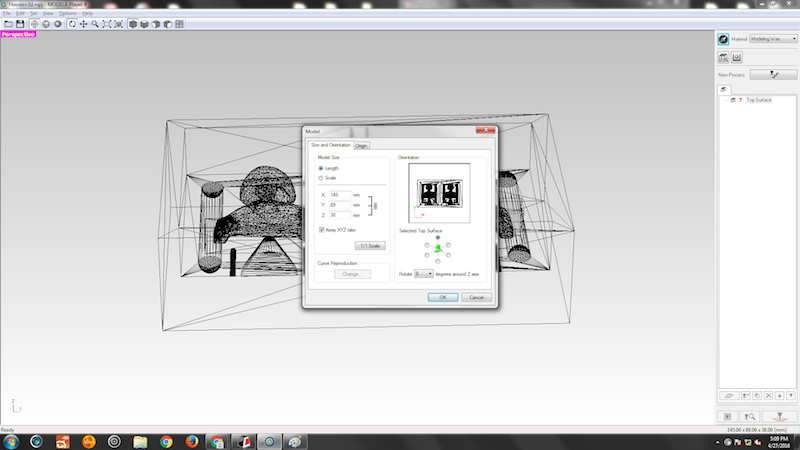
- Import stl file
- Check the model size
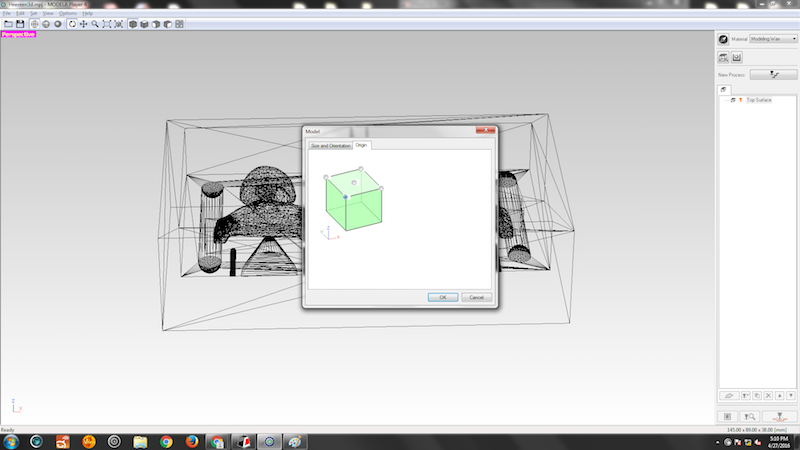
- Set the origin properly
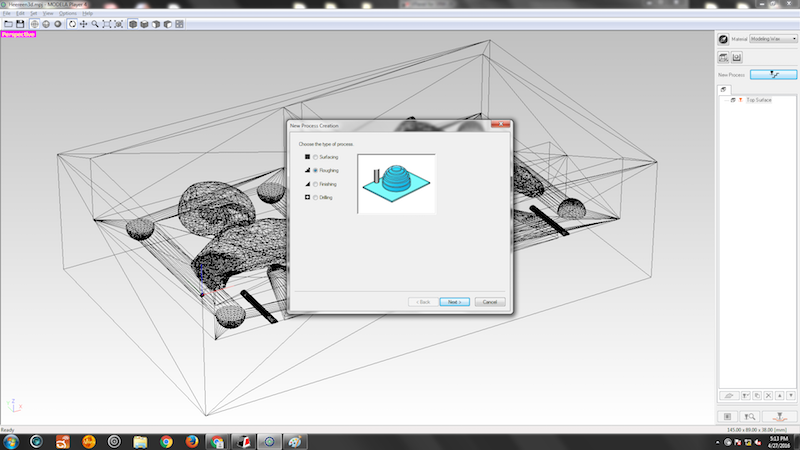
- Select the cut type
- Select scan line
- Set cut speed
- Check the tool path
- Check preview
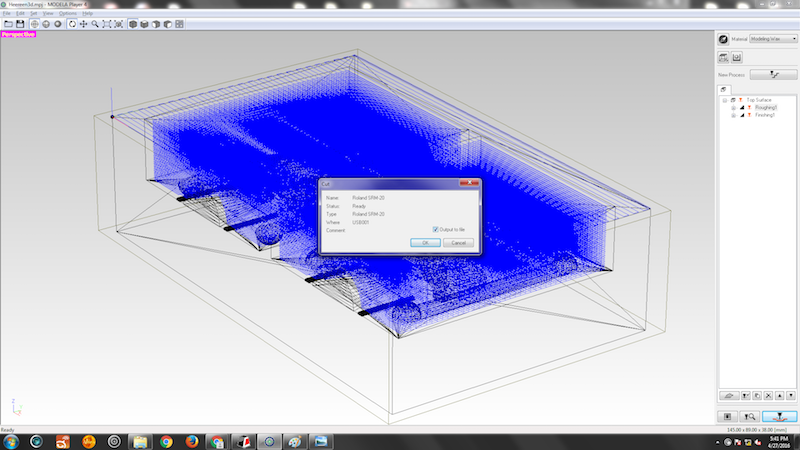
And it takes long time so grab a beer and just chill!

Molding
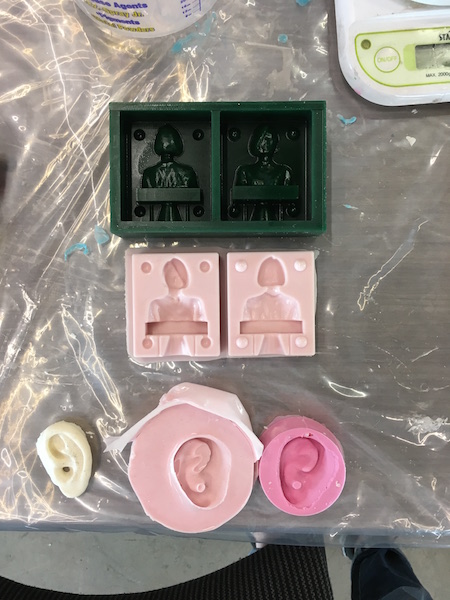
After spend a over night, it's done!
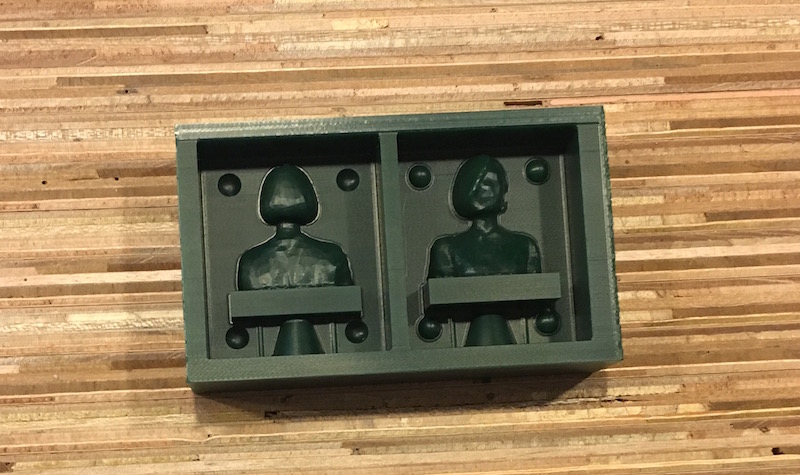
So now is the time for making a mold.
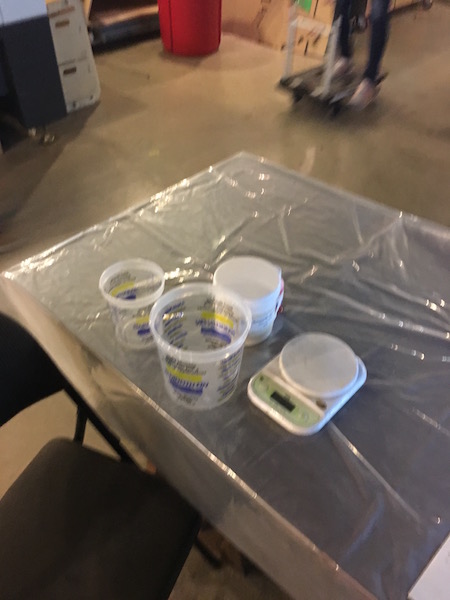
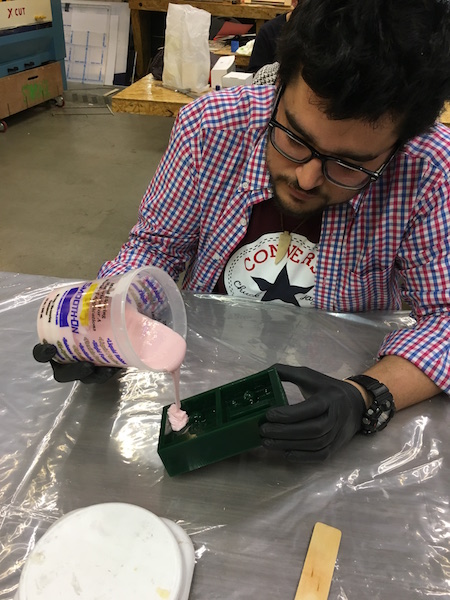
I chose to use a food safe material(smooth-sil 940). You can find a datasheet for this material here. Check mix rate, pot life and cure time.
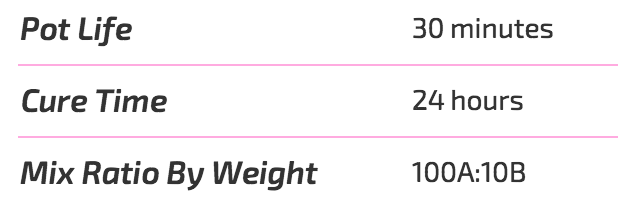
As I checked the datasheet, pot time is short. Then I must finish mixing and pouring a material in limited time. Our instructor gave me a solution for this. Using a drill to mix it.
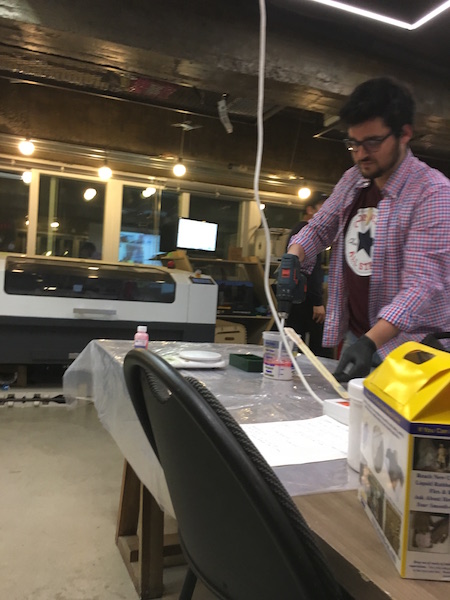
Thanks to drill, we mixed material very well in short time. Next thing is pouring. You should be carfull when pouring a material, because it is easy to make a bubble inside the mold and it will ruin everything.
And another over night for curing. Grab anoter beer!
So this is the result. It took almost 3-4 days to make this. But it seems it was worth waiting that time!
Casting
Since I made a food safe mold, I better make a something edible. I tried to make a ice cube but I failed because of gab betweeen molds. Let's make something sweet then.
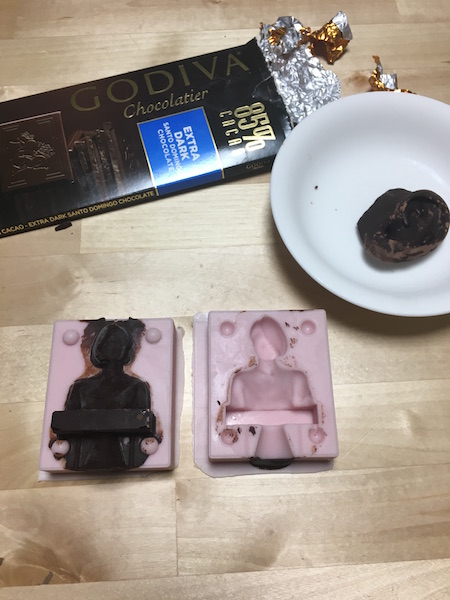
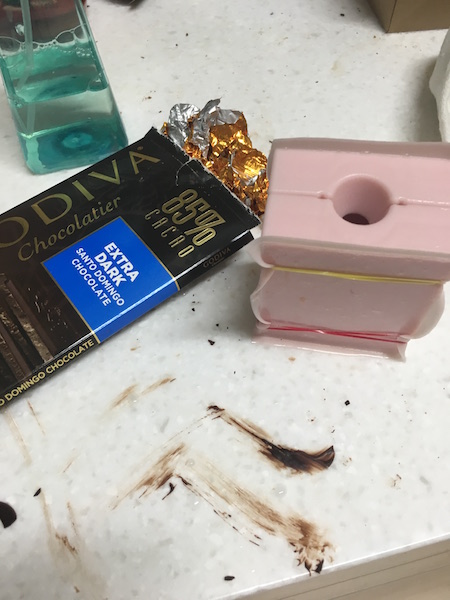 I cut and melted a chocolate. Pour the melted cholcolate into a mold. Make sure that two sides of molds are fit exactly and tight enough. This is sweet version of myself.
Final Result
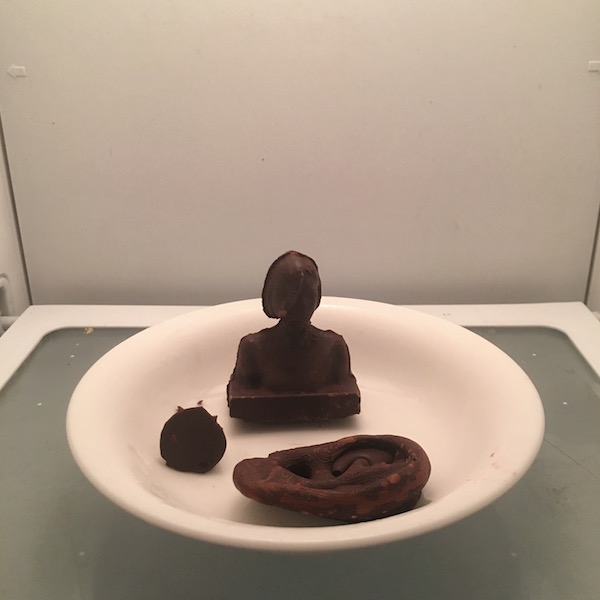 My sister was freacked out when she woke up in the morning and open the frizer. Haha.
Happy molding and casting!
Design Files
downloadConclusion
What I succeeded
- Make 3d design for mold
- Make food safe mold
More test and trials
- check the final precess here
| ← week12 | input device | week14 | output device → |
|---|