Interfaces
Johnny 5
Johnny 5 is a javascript library that works with node. I want to use Node in my project(I have used Node.js to test many
of my sensors using Neil's example code.)
Here is the process:
Install Node.js
NPM install Johnny5(npm install johnny-five)
Upload the StandardFirmata(in Arduino Examples) onto board
Create a script
Node run the script
Node setup webserver
View the webserver page generated by Node.js
Processing
I used processing in my input project:
Input Devices
Processing works very nicely with the Arduino, but I felt limited on the graphics.
Python Applications
I have used several of the example python applications to test components this year. I adapted Neil's
Step Response RX TX to use in my final project.
Final Project Documentations.
Three.js
I have spent most my time on this week's excersice playing with Three.js. The 3D library is great.
I have an adapted code from one of the examples. A ball. I would like to play a simple game with an
outside input.(A game similiar to Pong)
I am struggling getting this to work. It has taken me a while to rap my head around Node.js.
I can have Node.js act as the intermediate listening to both the webpage and the microcontroller.
Still struggling to get the inputs right. Here is the javascript code for the game:
Javascript + Firmata
In my final project, I had my sensor board(a capacitor sensor) communicate with the computer through Node.js
The Node.js script saved the state of the sensor to a file. That same file was opened by a different
javascript running on a webpage. This allowed the sensor to continually update its state and a display to show this
changes. This was my work around for not getting the socket to work. This works for the project, and may be better,
since I could create a log. I would like to get the socket working in the future.
WebRTC
WebRTC has several features one of which is an API which will allow us to take an image.
I would like to combine my project with it. I want my sensor device for my final project to trigger
the computer app to take a picture.
![]()
Example from HTML5Rocks:
Tutorial
    //Example Code
        var video = document.querySelector('video');
        var canvas = document.querySelector('canvas');
        var ctx = canvas.getContext('2d');
        var localMediaStream = null;

    function snapshot() {
        if (localMediaStream) {
            ctx.drawImage(video, 0, 0);
            // "image/webp" works in Chrome.
            // Other browsers will fall back to image/png.
            document.querySelector('img').src = canvas.toDataURL('image/webp');
        }
    }

    video.addEventListener('click', snapshot, false);

    // Not showing vendor prefixes or code that works cross-browser.
    navigator.getUserMedia({video: true}, function(stream) {
        video.src = window.URL.createObjectURL(stream);
        localMediaStream = stream;
    }, errorCallback);
Interfacing with Processing
Purpose
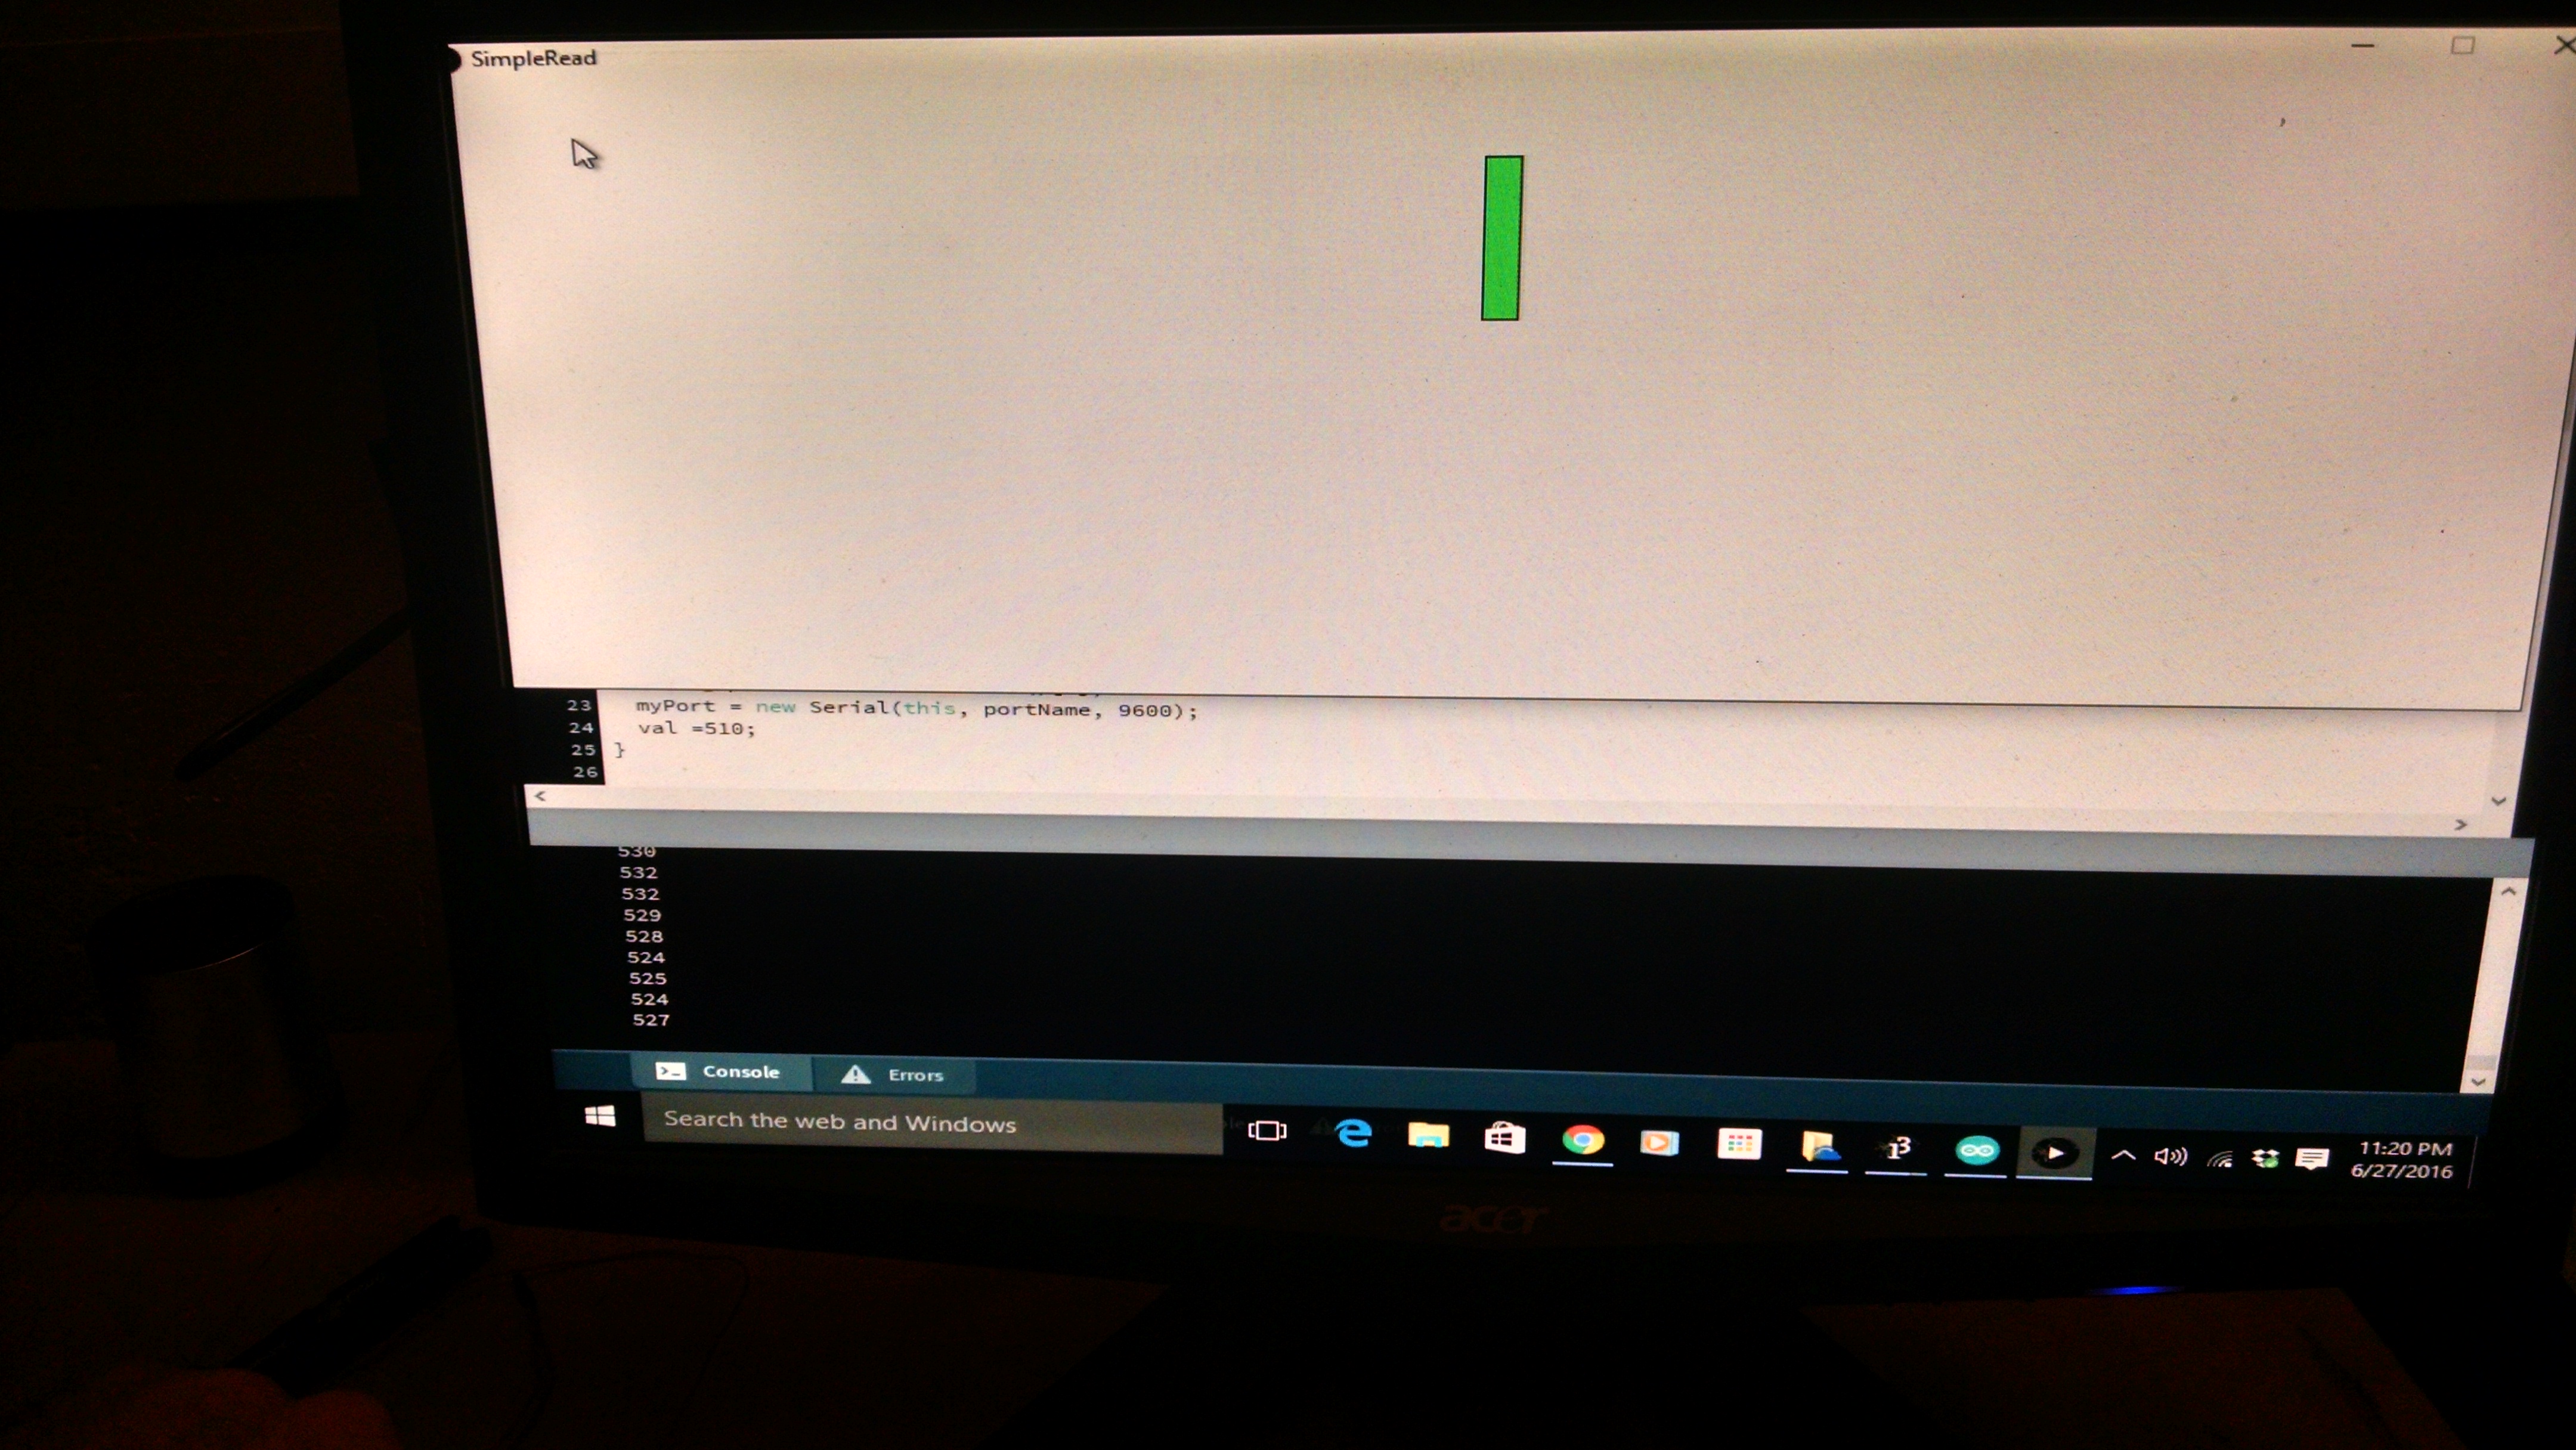
The microcontroller board is sending data. The goal is to take that data, read it in with the computer, and display it.
             //Code based on SimpleRead Example in Processing
//Edit by D Conner 2016


import processing.serial.*;

Serial myPort;  // Create object from Serial class
int val;      // Data received from the serial port

void setup()
{
  size(1020, 400);
  String portName = Serial.list()[2];// Port 2 is Com 3 on my computer
  myPort = new Serial(this, portName, 9600);
  val =510;//The sensor has an average initial value of 510.(Max is 1024, so this is almost half.)
}

void draw()
{

  if ( myPort.available() > 0) {  // If data is available,
    String r = myPort.readString();//Read in a string

    String[] outputValues = split(r, " = ");//The expected input is "Out = 'value'"
    if(outputValues.length>1){  //Ensure the data has the Out value
    if(outputValues[0].equals("out")){

       try {
      int n = Integer.parseInt(outputValues[1].trim());//Check to see if input is a integer.
        println(n);
        val = n;
       } catch(NumberFormatException e) {}

     }}
}//If statement(port available)
  background(255);             // Set background to white
  if (val > 510) {              // If the value is greater than 510, color bar green
    fill(0,255,0);
    rect(510, 50, val-510, 100);// make a bar that is the magnitude of the strength
  }
  else {                       // If the value is less than 510, color bar red. Draw bar equal in magnitude.
    fill(255,0,0);
      rect(val, 50, 510-val, 100);
  }


}
Processing Code
Explanation(Code used to read Hall Sensor)
Line 5: Import serial library into our program.
Line 7 & 8; Creat global variables for port and data recieved
Line 12: Set the size of the window.
L13:Find the name of the device plugged in. For me it was usually the third entry, i.e the [2] index
L15:Declare port and baud rate.
L16:Reference variable which represents the mid value of the sensor.
The device reads from 0-1024. Maybe the mid value is low because of the
Earth's magnetic field.
L18: The draw function is used by processing to draw to the window.
L21:Conditional statement to check if we are getting data.
L24:Read in the data to the variable r.
L25: The sensor is sending data as "Out: 510". The 510 number changes with the sensor.
The code splits the string to get just the value(510 in this example.)
L26: Conditional to make sure there was some data.(probably unecessary.)
L27: Conditional to make sure the string started with the word "Out".
This makes sure that the next item we read was intended.
L28-L32: Try statement makes sure that the read-in is a number.
L36: Sets the background to white.
L37-39: Draws a rectangle from the mid point to the right.
The size of the rectangle depends on the magnitude of the signal above the 510 reference.
The color of the bar is green.
L41-43:Draws a bar to the left, colored red, with magnitude equal to the difference
below the 510 reference.
When the code is run from within Processing, the chart pops up and starts displaying.