Final Project
Project Development
This project is a cumulative event that required me to use many of the skills that I learned this spring. I will list the processes I used including files, links and videos where appropriate.
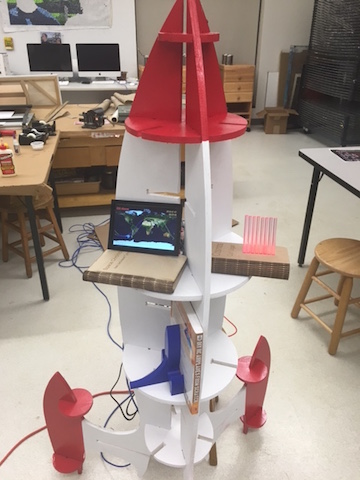
My project was a pressed-fit rocket bookshelf that would track the International Space Station and provide live video feeds from the space station. I wanted our young students to experience space by seeing live feeds sent from the ISS. I decided to add a Raspberry Pi, a display, and ISS- Above software . This software is often packaged with a Raspberry Pi and an add-on board called PiGlow The Piglow is a board containing LEDs that change color and brightness when attached to a Raspberry Pi.
I have done a lot of research on this topic learning everything from hex code to the International Space Station. The following is a link to my resources..
See below for a list of processes that I used while making my rocket bookcase. I will follow this list with details. Please note: I have included links for Embedded Programming and Networking because I spent a great deal of time and effort on these processes to make my project work.
Processes
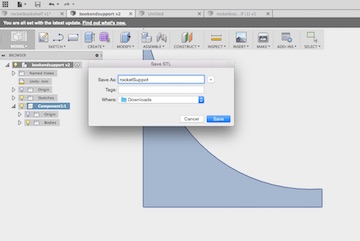
- Computer-aided design - I used TinkerCaD and Fusion 360 to design bookstop
- Computer-controlled cutting - I used a laser cutter to make book covers - specifically living hinges
- Electronics production, electronic design, output devices and networking and communications - I designed and created a Fab Arduino
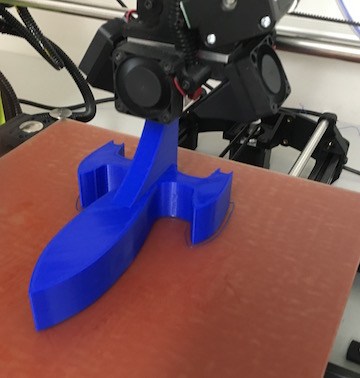
- 3D Scanning and Printing - I used 3D printer to created a bookstop
- Computer-controlled machining - I used Othermill to make the Fab Arduino and the Shopbot to make the rocket
- Embedded programming - I was able to intercept closed programming code from Raspberry Pi, anaylze it, manipulate it do what I want using Arduino.
- Molding and casting - I made Rocket Bookmarks
- Composites - I make a minuture rocket that I used to decorate the large rocket
- Networking - I exploited the I2C bus that connected the Raspberry Pi to PiGlow using an Arduino.
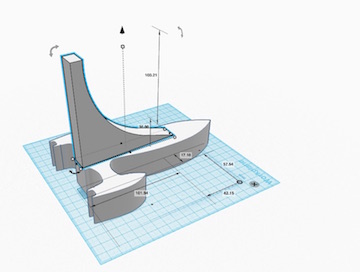
Computer-Aided Design
I designed a bookstop using a 3D printer.
I began by importing an inkscape STL file that I used in the computer-controlled cutting exercise into Tinkercad and I made the support fin in Fusion 360.
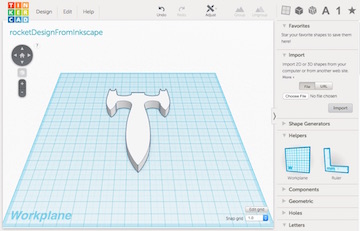
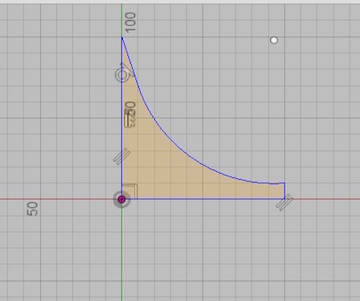
I downloaded the Fusion 360 fin support and then uploaded the fin to Tinkercad.
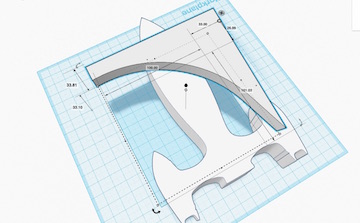
I combined the rocket pieces. I made sure to push the fin support into the rocket so it would produce a sturdy print.

Computer-controlled Cutting
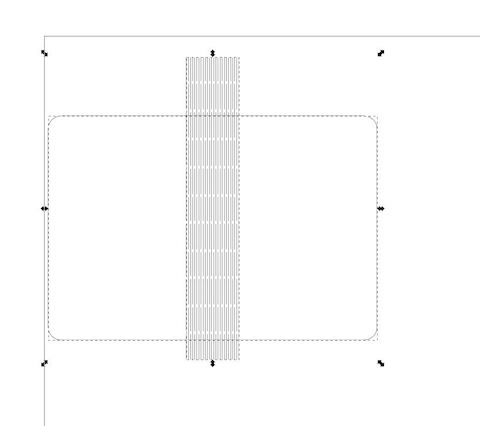
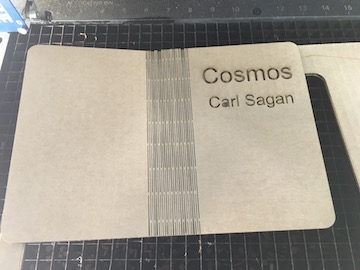
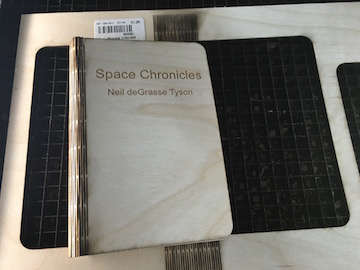
I wanted to hide my electronics inside "books". I am curious about living hinges so I designed wooden book covers to hold and hide the electronics for the rocket ship.
I began with a living hinge file that I found at the epilog laser web site . I started by opening the example epilog file and changing the size to fit my needs - 7.5 inches by 5 inches.
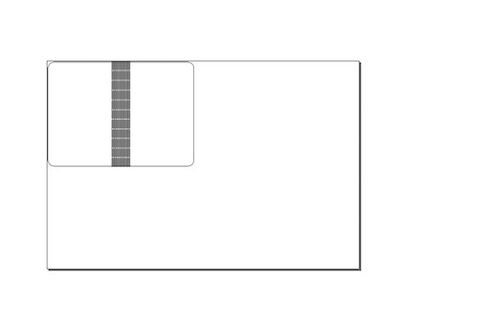
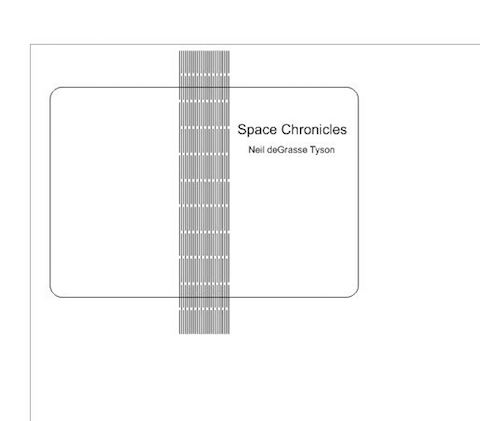
I added the name of the "book" and the author. I decided that I woould first start with cardboard. I sent it to print with engraving setting at 50,50,50 and the vector setting at 20,100,07
. The first cut went fine and then I repeated just a vector cut
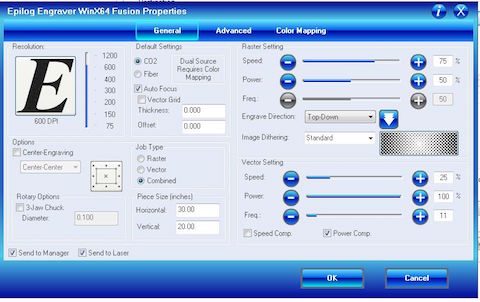
The cardboard cut came out great. I went ahead and cut 1/16 birch. I completed one combine cut and another vector cut using the same settings as before.
Electronics production, electronic design, output devices and networking and communications
- I designed and created a Fab Arduino. See Exercise 13 - Output Devices
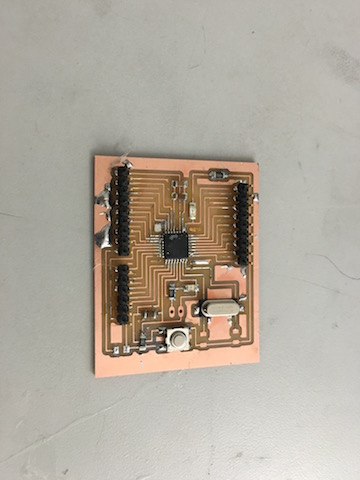
Computer-controlled machining
- I milled a Fab Arduino using an Othermill and I used a shopbot to make the rocket. Recently, I made an additional Fab Arduino which featured additional Ground and VCC pin. Therefore, besides building the programmer, hellow world board and designing and building ATtiny 45 sonar sensor, I designed and built three seperate Fab Arduinos based on the Satshakit model. I made my Fab Arduino following the workflow that I used in Exercise 13 - Output Devices and Exercise 7 respectively
Embedded Programming
This was one of the most difficult part of the project. I was able to intercept closed programming code from Raspberry Pi, analyze it, manipulate it do what I want using my FabArduino. Besides learning about the code behind networking, I learned about using time instead of delay function as well machine states Click here for more information.
Molding and casting
I designed, mold and cast rocket bookmarks. See Exercise 12
Networking
This was probably the most important part of the project and at least as difficult as the embedded programming, but I did learn a great deal. I used I2C Pleae click here to get the details including workflow.