
Introduction
During this week we learnt about Fab Academy in general terms and we were asked to make a website, to introduce ourselves and describe and make a sketch for the final project.
You can look into a description of myself in the About Me page in this website! And also my ideas and sketches for the final projects are written in this other page. To walk through how I made this website and also how I uploaded it using GIT, you can look into the following steps.
Assignment
Make a website and describe how you made it, doscuent steps for uploading files to archive and push them into the class archive using GIT.
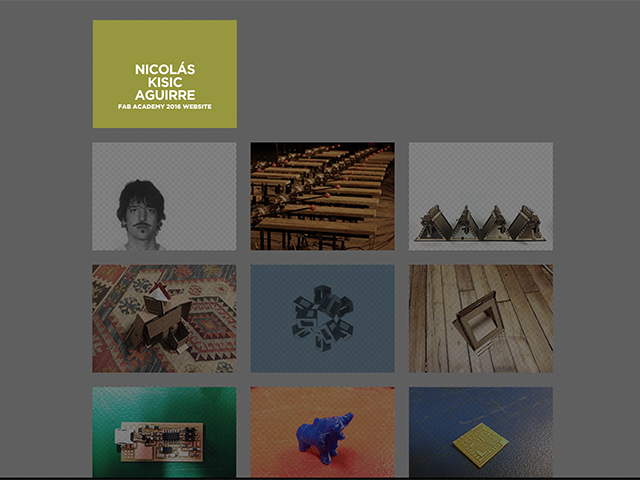
I made a website using only html and CSS. I knew how to do HTML websites from my early internet years, but this was very useful to go through CSS, which was a language not very used back in the 90s. Or even inexistent. I challenged myself to have a website that would also react to mouse-overs and to have a nice graphic display throughout. It looks a little bit like this:
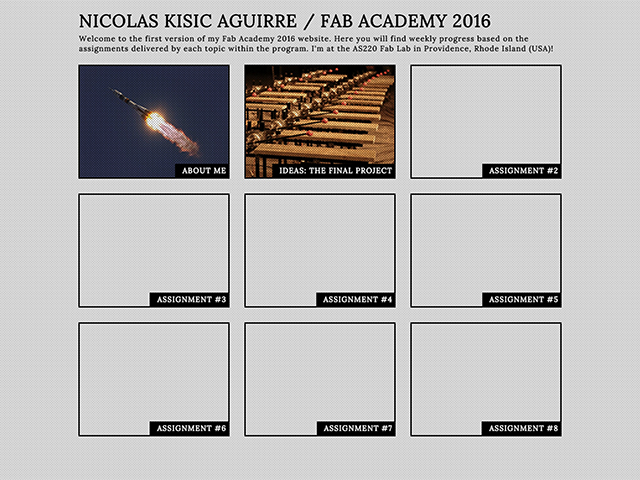
But it wasn't always like that, I had to struggle a bit until I reached what I wanted, this is what it looked like before.
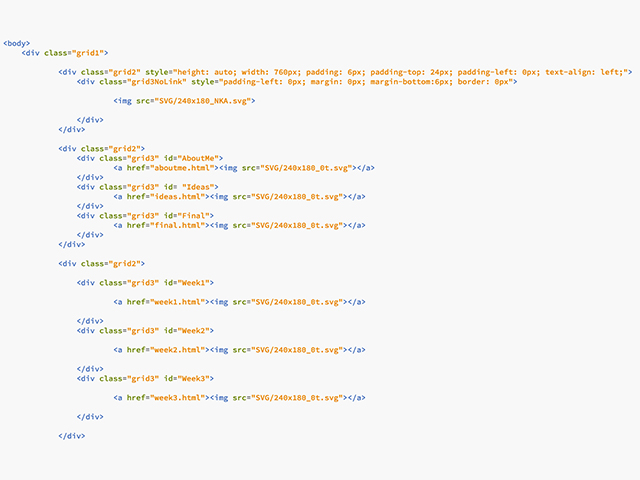
The HTML code basically defines the grid that has 3 blocks / images per row, and I do this by using mainly the "DIV" tag. You can view the entire HTML code of my index website by accessing it and clicking under your browser VIEW > Developer Tools > Code. In the following image you can see how the DIV tag is used to create a general block that then contains each row of 3 blocks each. These are labeled by "class" and "id" because they are referred to in the CSS file also referred to in the html file. I used Brackets to edit and create html and css files. It's very useful and free.
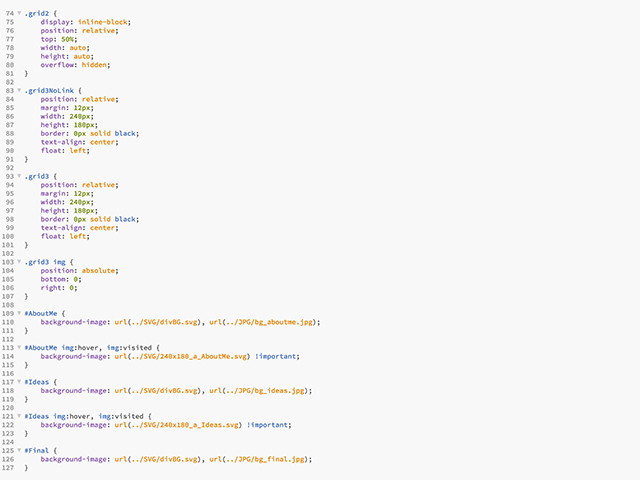
The CSS code then sets a number of graphic attributes for every tag, class and ID referenced in any file to looks for the specific stylesheet's graphic directions. You can see the full CSS file by clicking here. Note that when I want to refer to an ID, it has to be called with the hashtag. It is withing the CSS file that I defines what images were to be shown under the img:hover (read: mouse-over) action!
While I was trying to get comfortable using these techniques building my website, I also had to start uploading it using GIT. To install it I downloaded Homebrew first, by using Terminal and accessing the download link via their own instructions:
/usr/bin/ruby -e "$(curl -fsSL https://raw.githubusercontent.com/Homebrew/install/master/install)"
Once I had Homebrew installed I could install git by only typing "brew install git". Note that also XCode has to be installed in your computer. In my case, I'm using a MAC, these instructions are for a Mac!
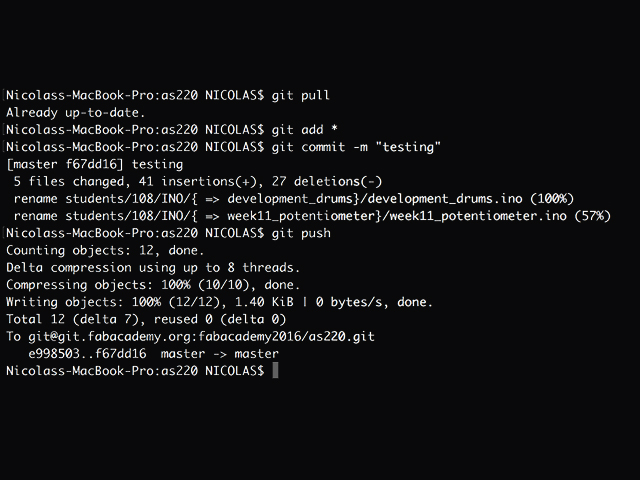
Once GIT was installed and configured, I could follow the sacred 4 steps to use GIT. That is, withing Terminal, the following actions: PULL, ADD, COMMIT, PUSH. These can be seen in the following image:
Conclusion
Creating a website for yourself can be an easy task but it can get very complicated easily. CSS is the answer to many questions, but at the same time learning from it can be time consuming. The best way I had to learn was by just googling the questions I would have and someone already would have had the same problem before.
Additionally, GIT is a great resource to have a repository for files that are published at the same time, available to everybody. Sometimes it can get tricky, especially when there is conflict between files. Again when this happened I would always search for the problem / error code or name on google and I would get someone else's solution to fit mine perfectly.