Week 16 - Interface and application programming
Menu
Interface and application programming
There is a variety of possibilities to use interfaces and program applications. I will use the serial communication in this week to send sensor data to from my board to my computer. As there is also a lot of possibilities on how to program an application, I will also have to narrow my focus to some which I'm also going to use in my final project. I will particularly look into python and JavaScript, using the following IDEs and frameworks:
Python:
- python: Install python 2.7 (https://www.python.org/downloads/
- IDE: pycharm https://www.jetbrains.com/pycharm/
JavaScript:
- framework: NodeJS
- IDE Brackets as IDE
So here is the assignment for Week 15:
- write an application that interfaces with an input &/or output device that you made,comparing as many tool options as possible
Application programming
Hardware setup
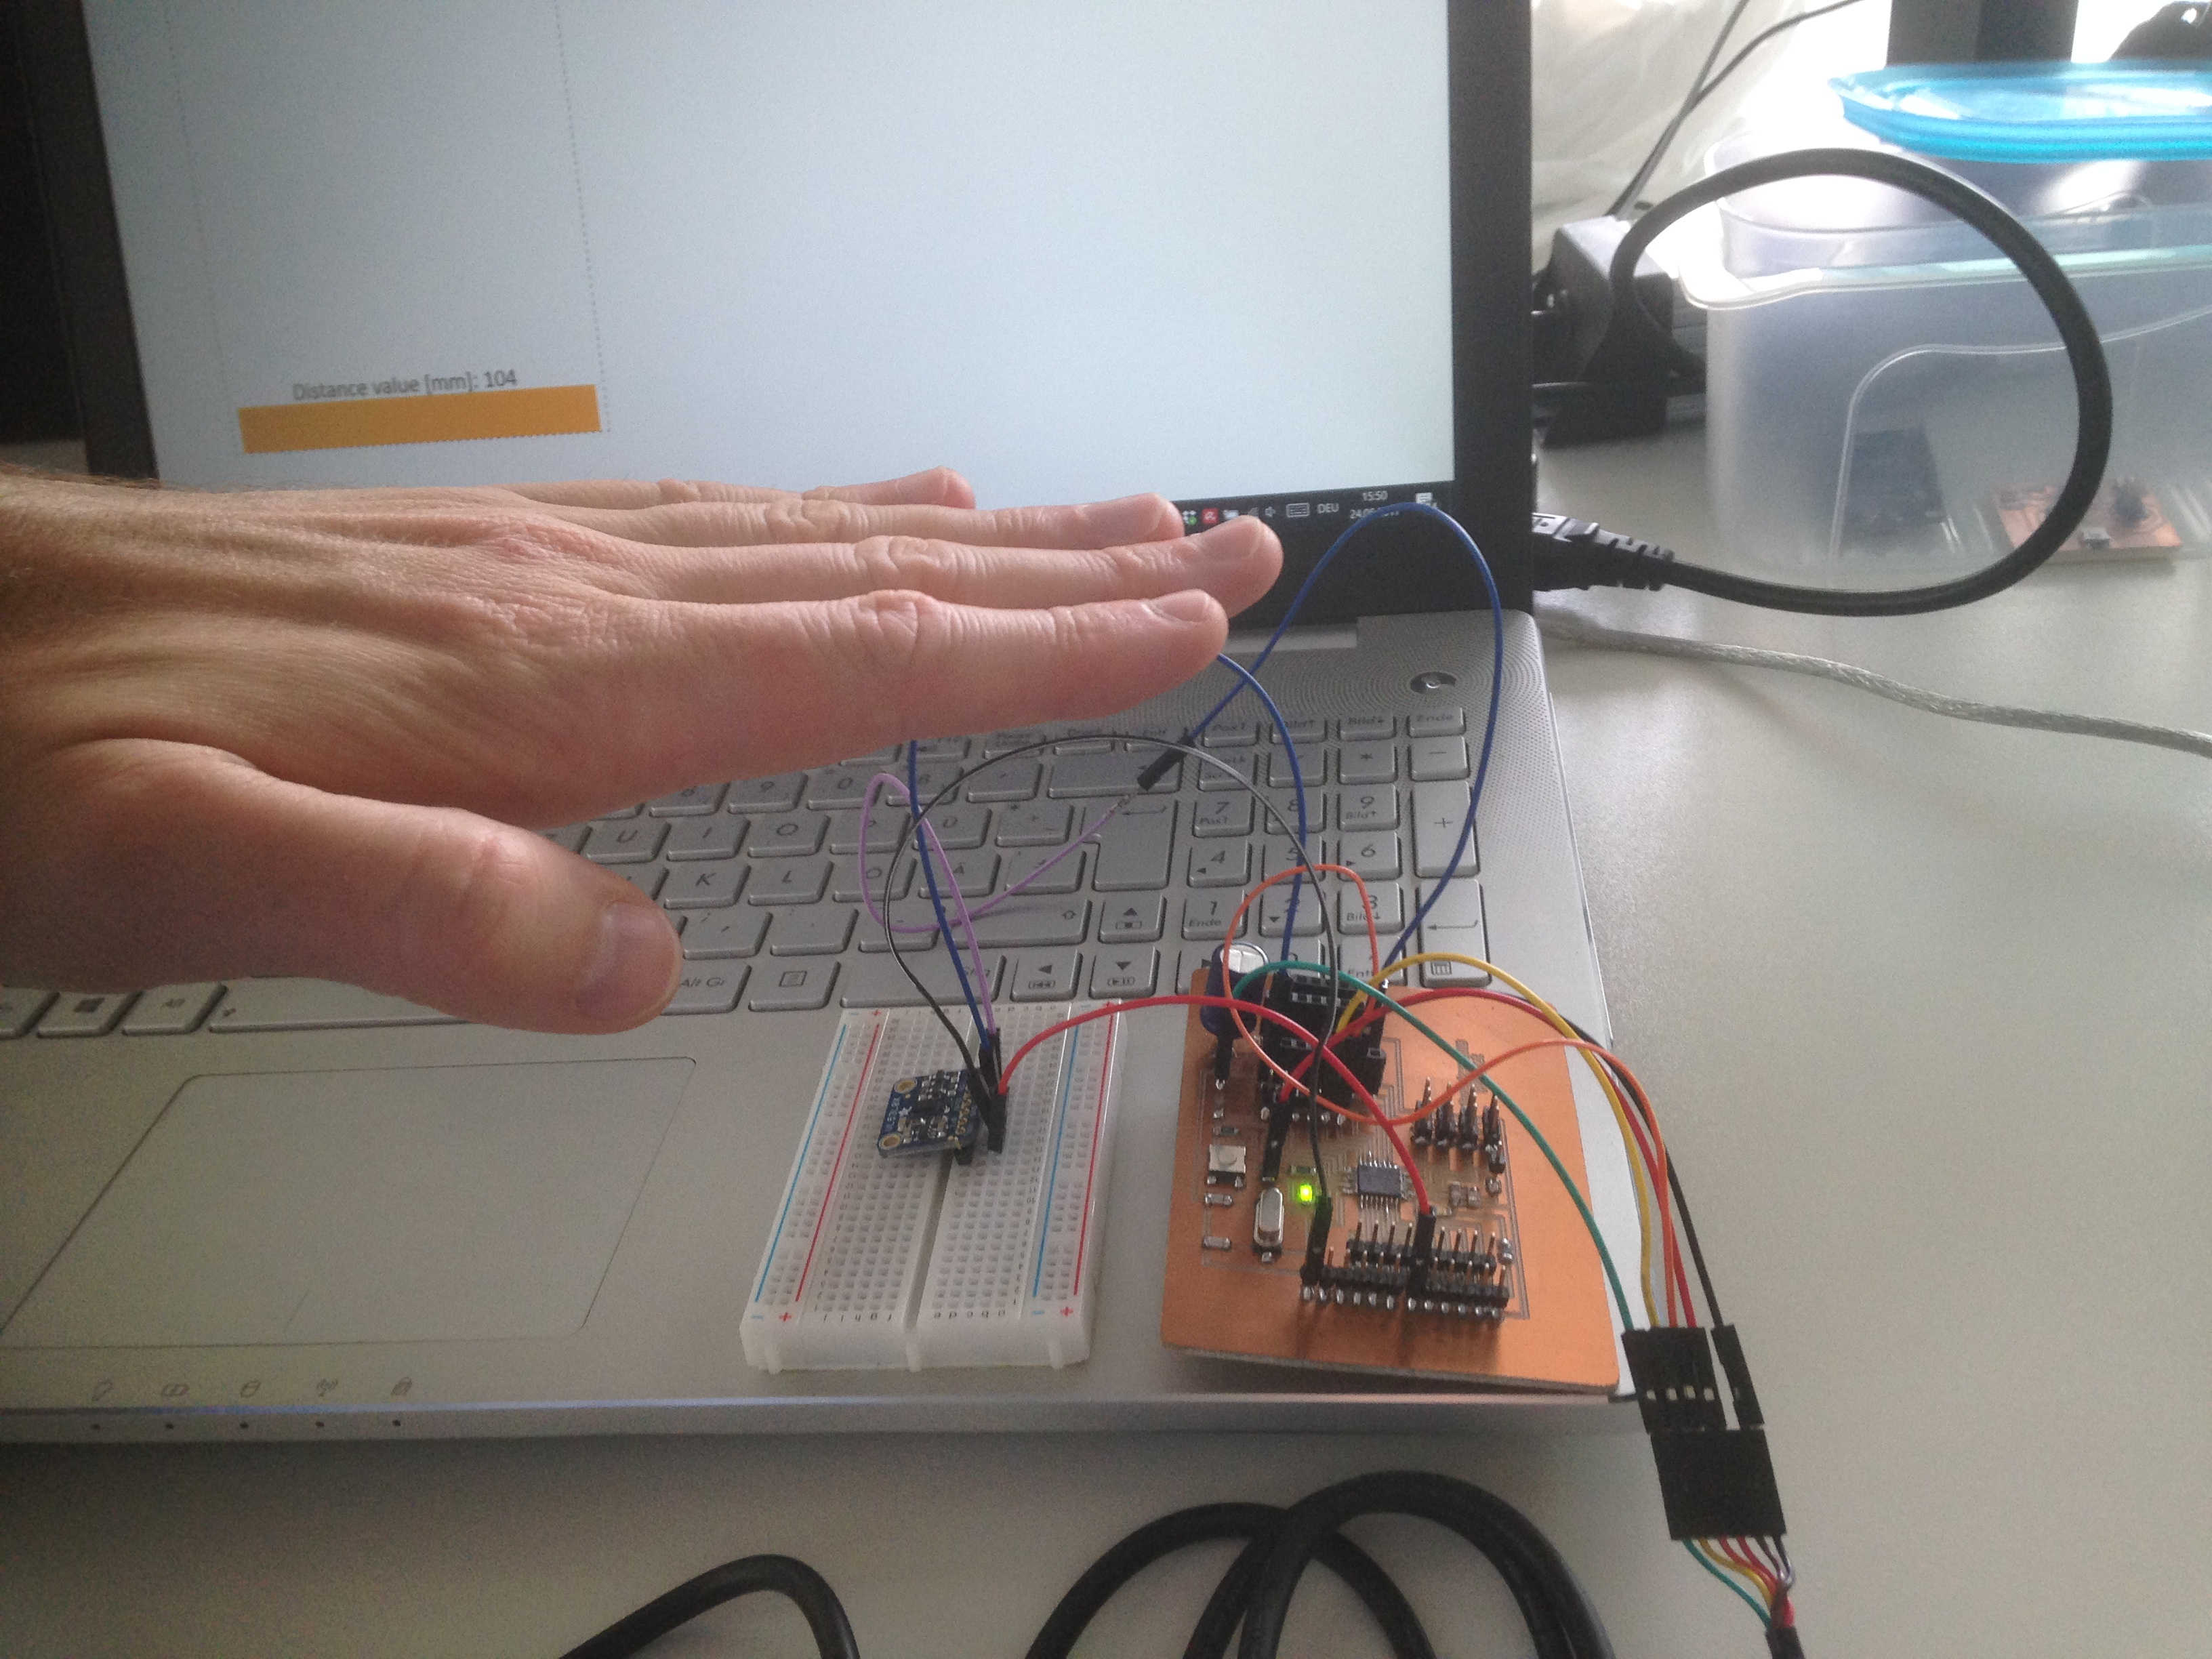
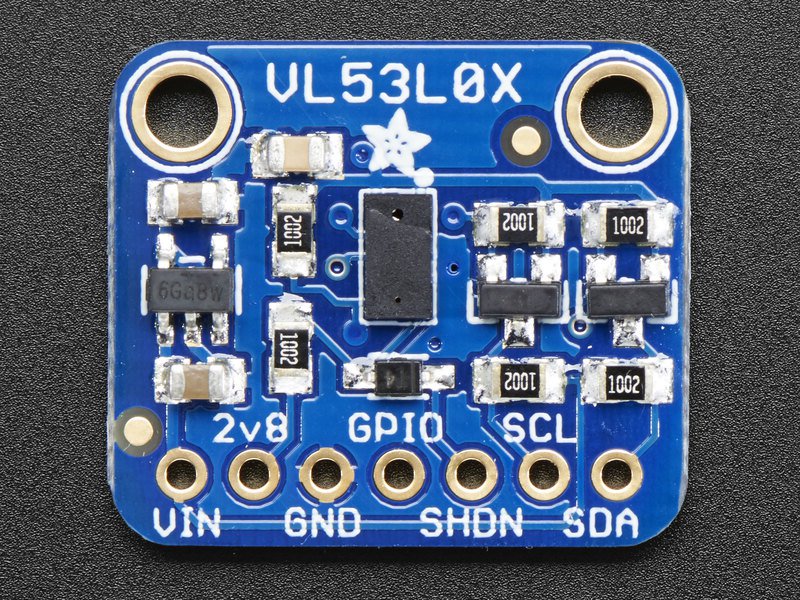
I will be using a VL53L0X distance sensor, which I was already planning to use for my input assignment, but never did. I uses I2C to communicate with the microcontroller. My plan is to read distance values from the sensor and send it via serial to the computer and display it with python or JS scripts. Please find more information on the sensor and how to use it here. I used the ready-made board from Adafruit, but by looking at it, it seems rather easy to make.
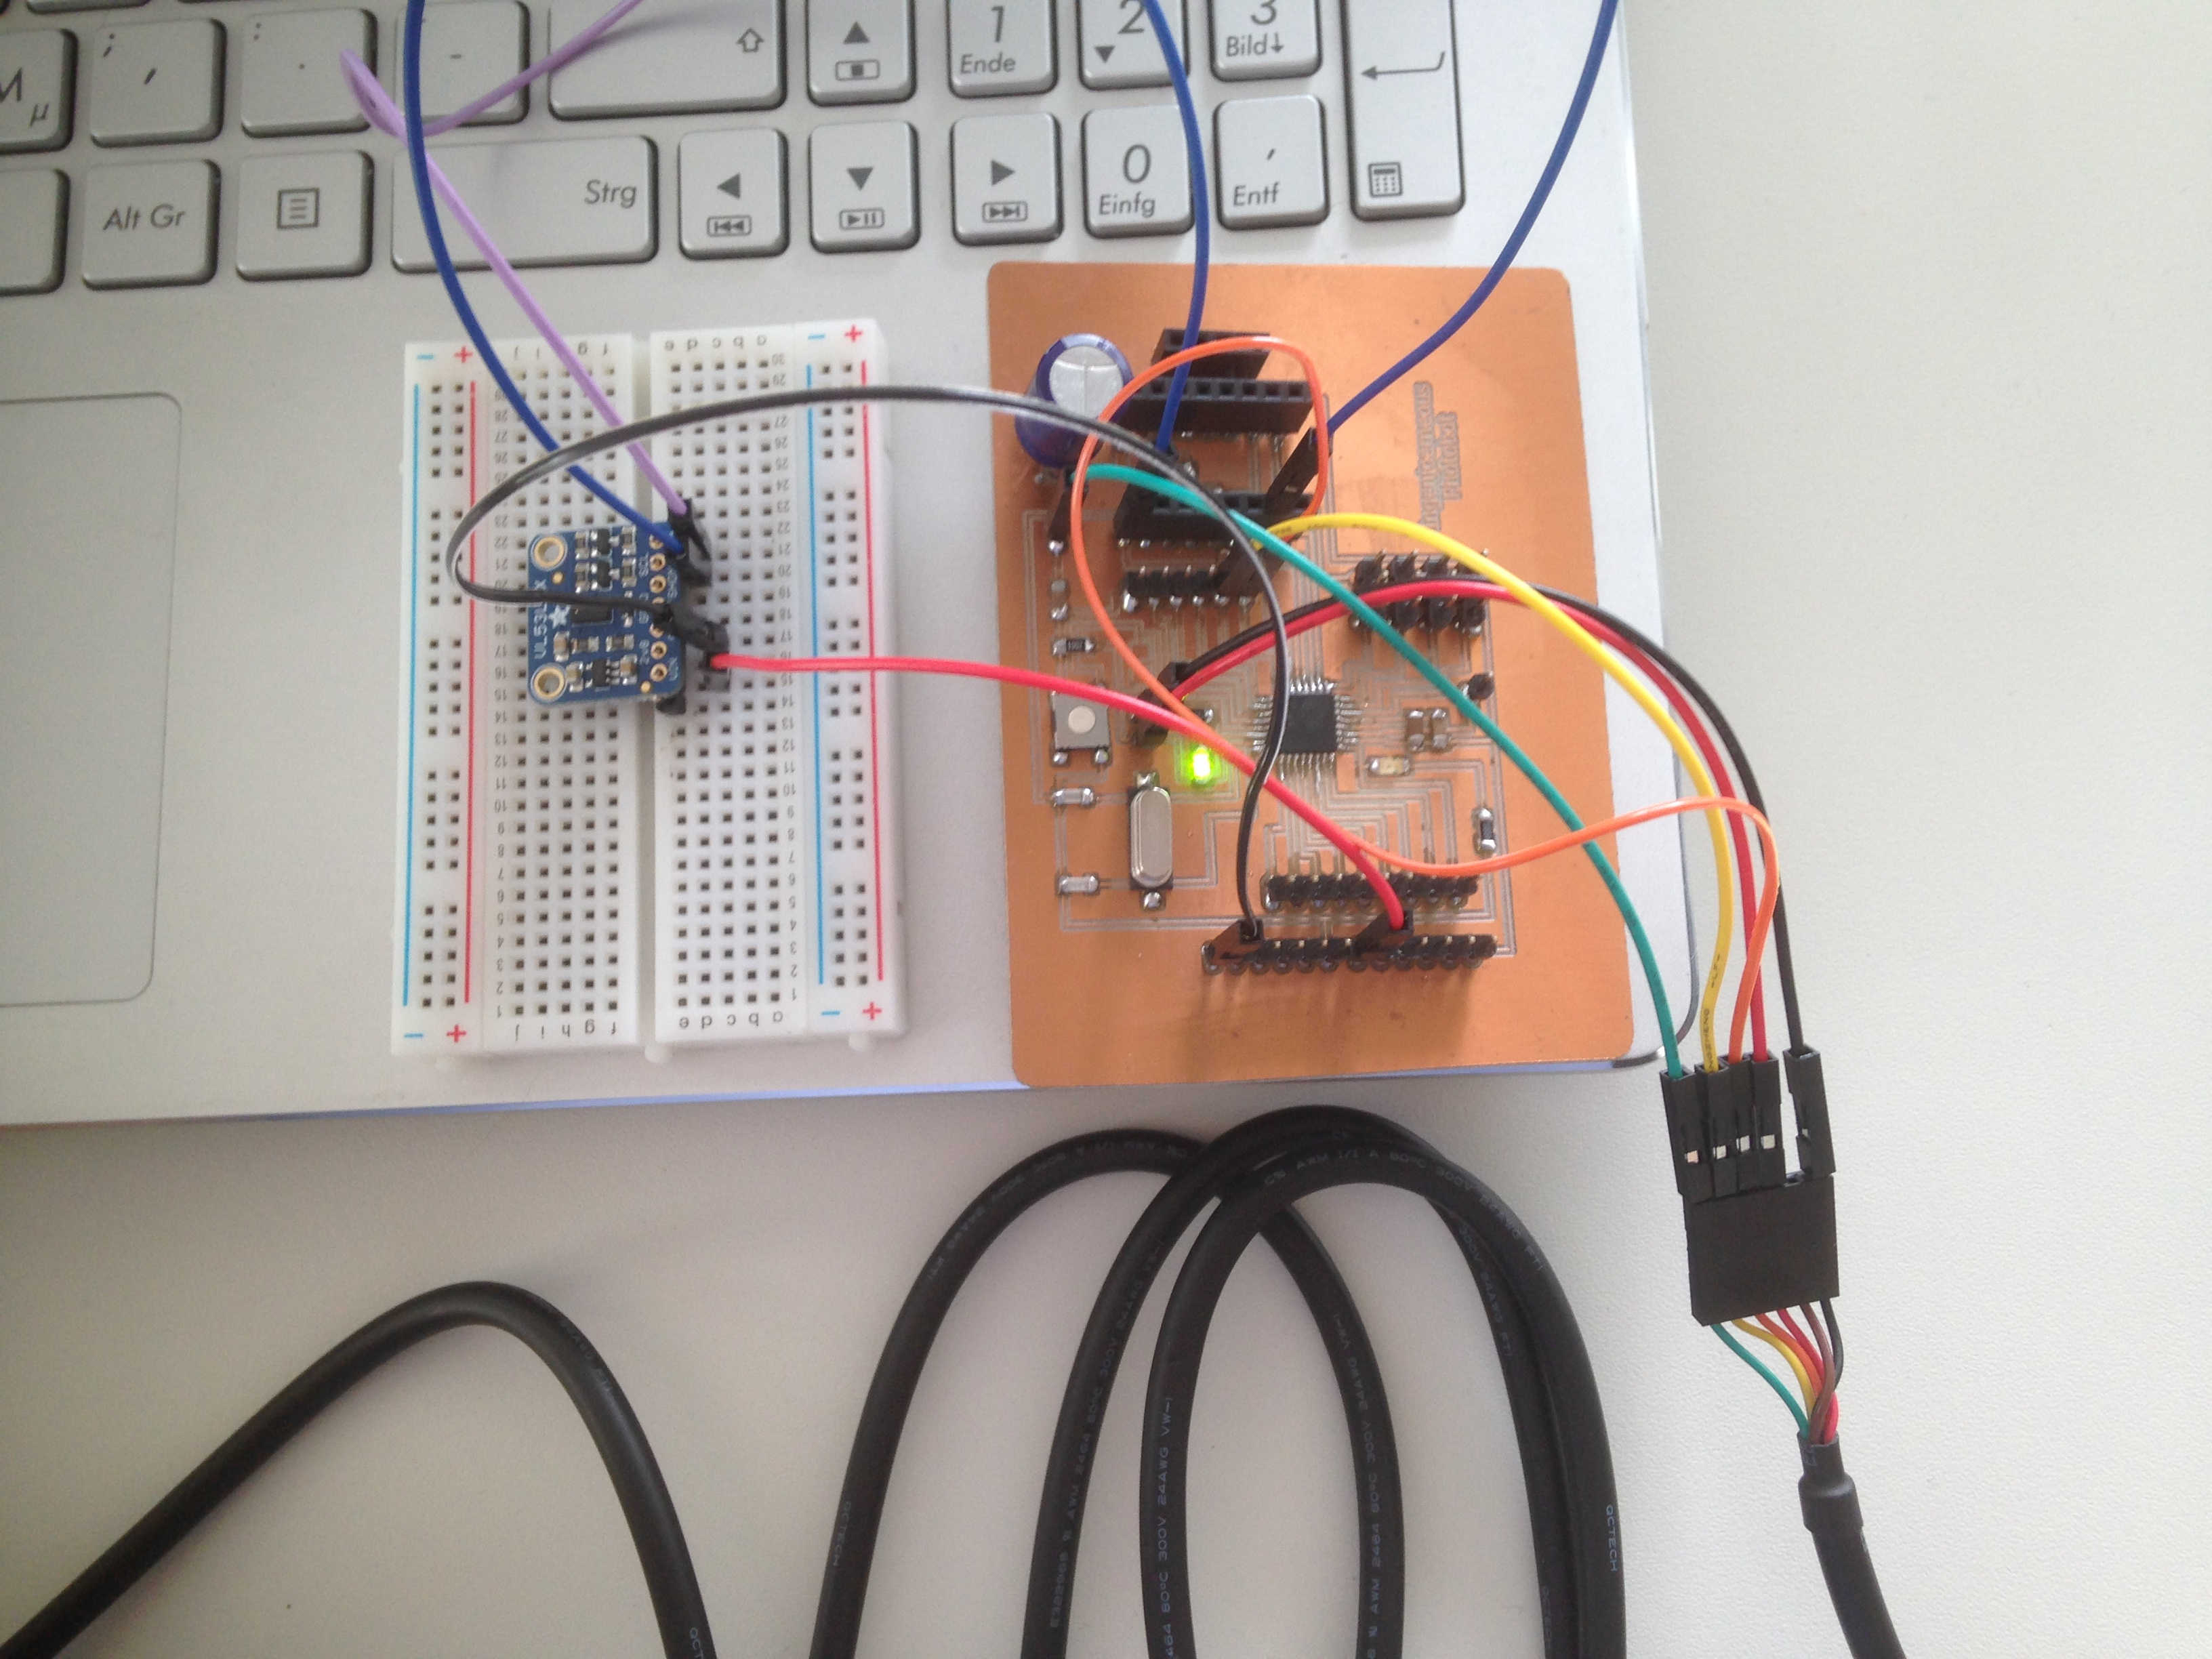
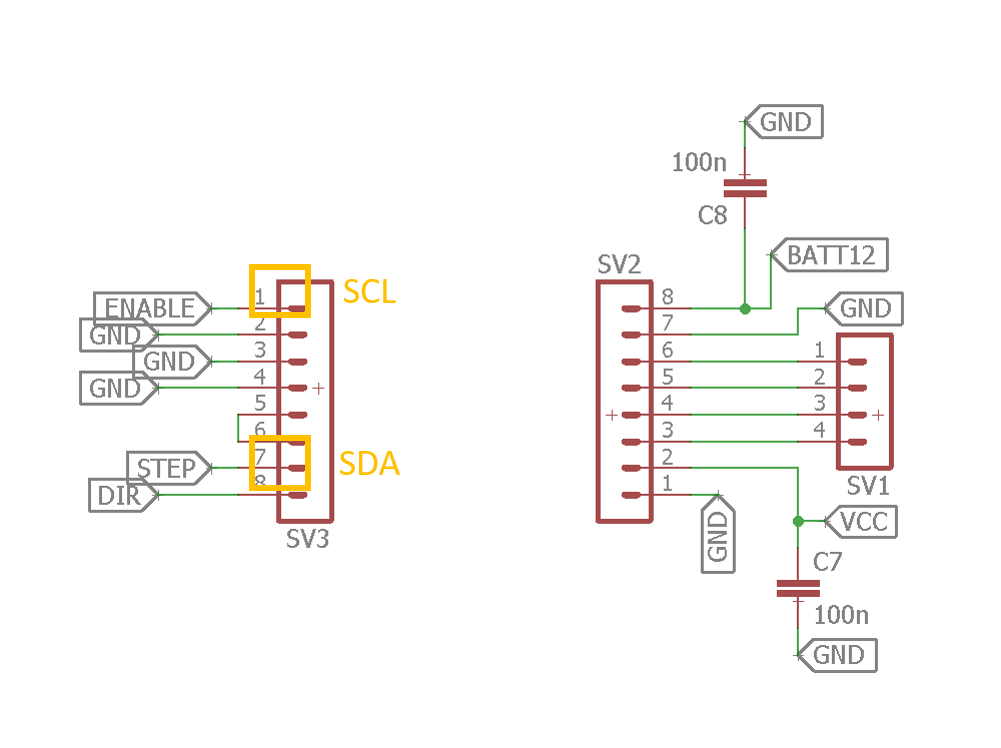
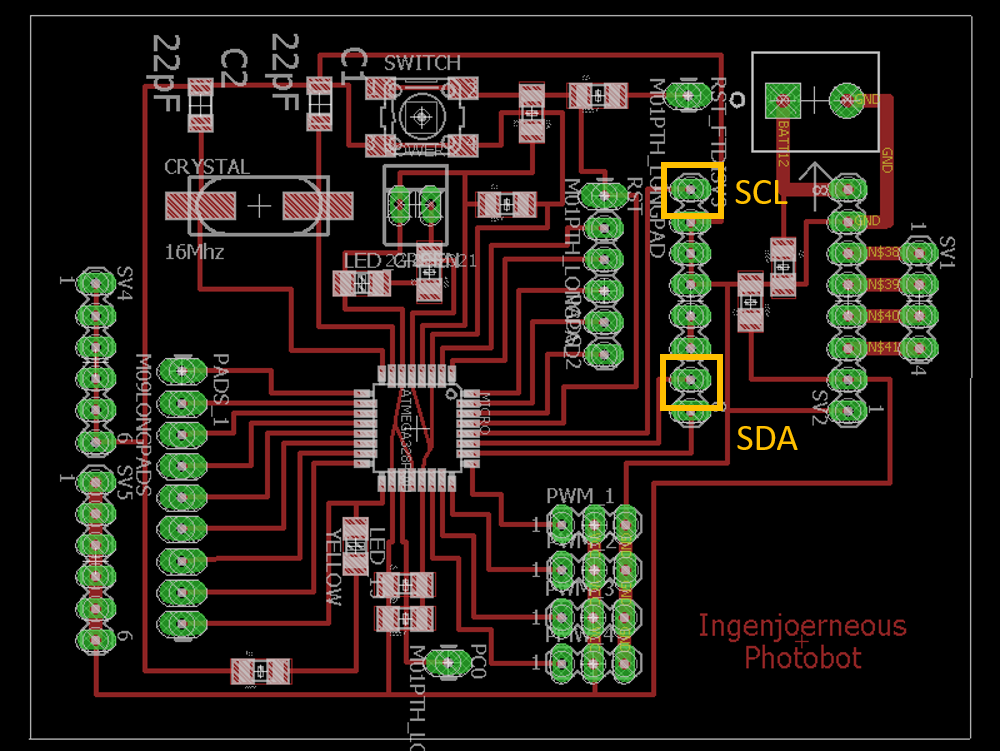
Connecting the sensor to I2C discovered something I had not considered upfront. As I have some dedicated ports for the stepper motor which include the native I2C ports, later on, I will have to use software I2C ports.
Connections of the sensor to the Arduino:
- Connect Vin to the power supply, 3-5 V is fine. Use the same voltage that the microcontroller logic is based off of. For most Arduinos, that is 5V
- Connect GND to common power/data ground
- Connect the SCL pin to the I2C clock SCL pin on your Arduino. On an UNO & '328 based Arduino, this is also known as A5, on a Mega it is also known as digital 21
- Connect the SDA pin to the I2C data SDA pin on your Arduino. On an UNO & '328 based Arduino, this is also known as A4, on a Mega it is also known as digital 20
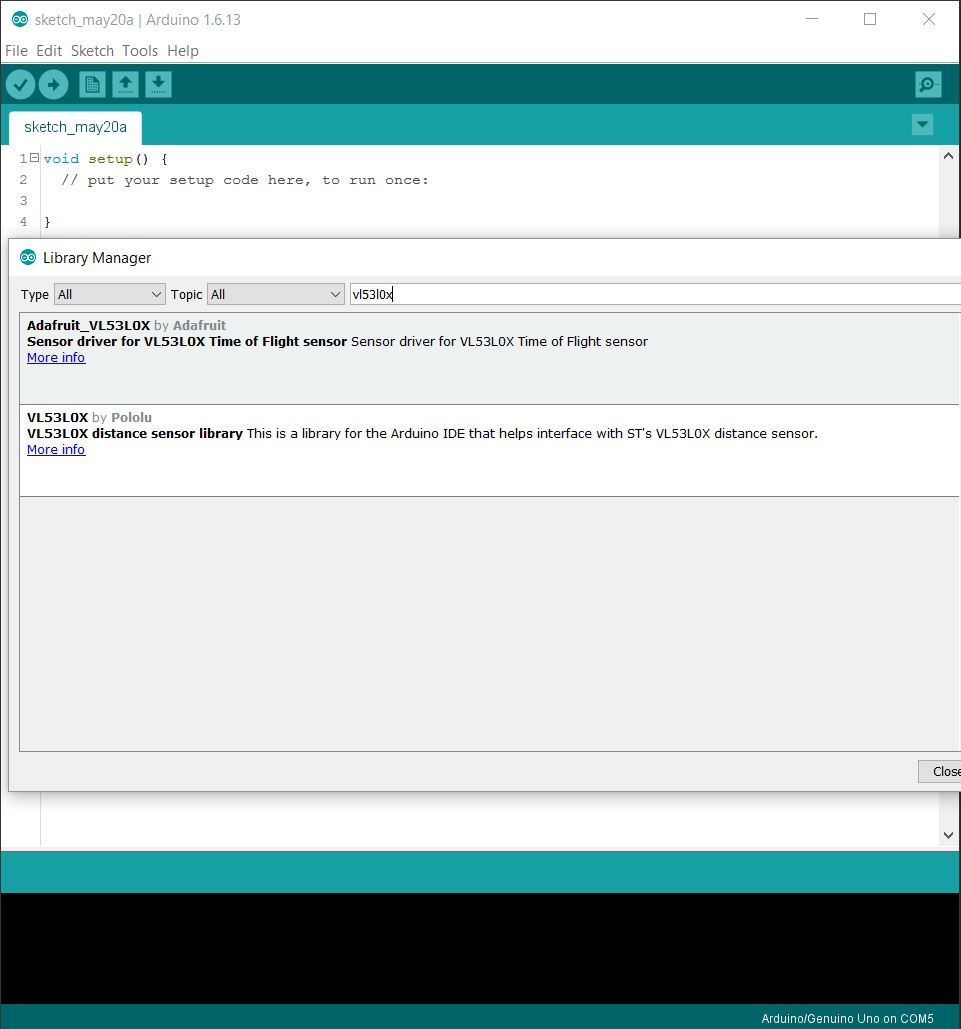
You can download the sensor's library here or install it with Arduino library manager.
I commented all non integer values to work with the data only on the serial interface and uploaded the example code to the board.
The code for the microcontroller board:
#include "Adafruit_VL53L0X.h"

Adafruit_VL53L0X lox = Adafruit_VL53L0X();

void setup() {
  Serial.begin(115200);

  // wait until serial port opens for native USB devices
  while (! Serial) {
    delay(1);
  }

  if (!lox.begin()) {
    Serial.println(F("Failed to boot VL53L0X"));
    while(1);
  }
}

void loop() {
  VL53L0X_RangingMeasurementData_t measure;

  //Serial.print("Reading a measurement... ");
  lox.rangingTest(&measure, false); // pass in 'true' to get debug data printout!

  if (measure.RangeStatus != 4) {  // phase failures have incorrect data
    Serial.println(measure.RangeMilliMeter);
  } else {
    Serial.println("2000");     // Default for "out of range"
  }

  delay(100);
}
Python
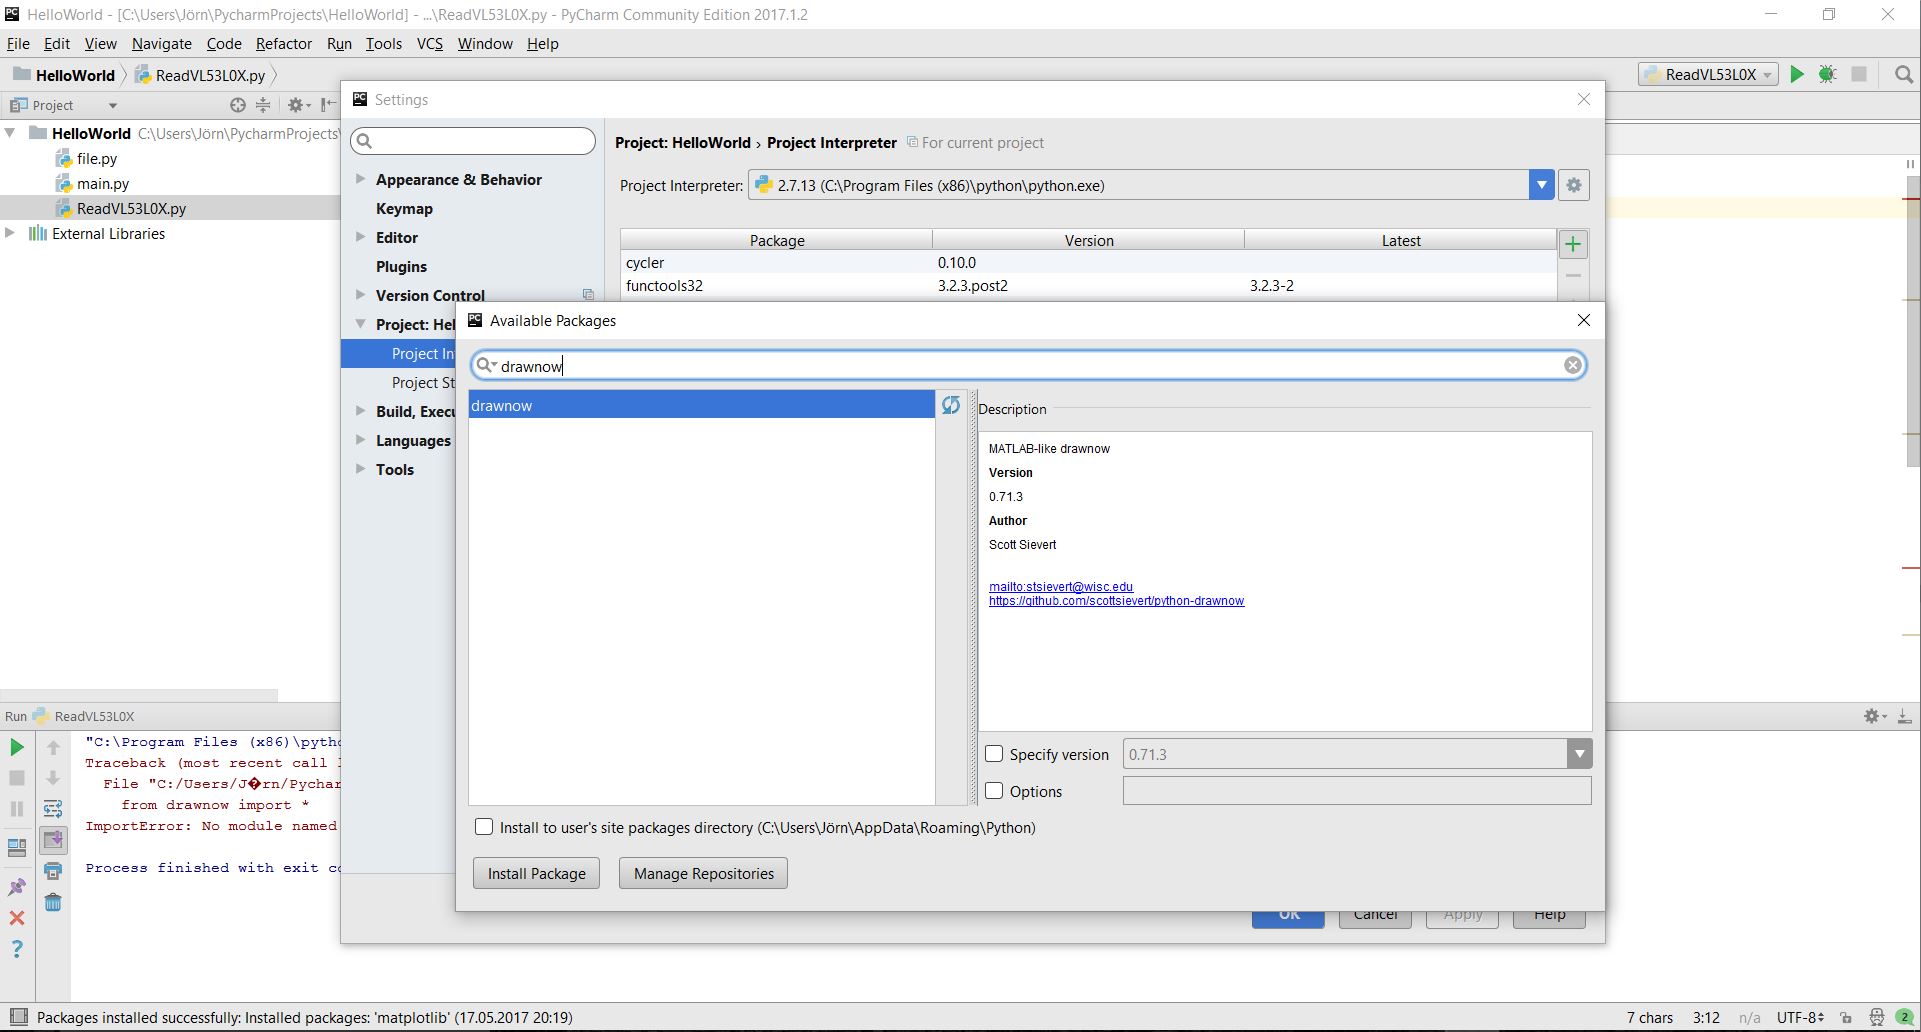
Go to PyCharm to create a python script to read serial data. If you need to install packages, go to file > settings > project > project interpreter and click +. First, I used some code, I found here.
For Python, I'm using the matplotlib.pyplot library, which uses basically the syntax of Matlab and which is also true for drawnow which is used for continuous updating.
The code for python:
import serial
import matplotlib.pyplot as plt
from drawnow import *

values = []

plt.ion()
cnt = 0

serialArduino = serial.Serial('COM4', 115200)

def plotValues():
    plt.title('Distance value from VL53L0X')
    plt.grid(True)
    plt.ylabel('Distance in mm')
    plt.plot(values, 'rx-', label='values')
    plt.legend(loc='upper right')

# pre-load dummy data
for i in range(0, 26):
    values.append(0)

while True:
    while (serialArduino.inWaiting() == 0):
        pass
    valueRead = serialArduino.readline()

    # check if valid value can be casted
    try:
        valueInInt = int(valueRead)
        print(valueInInt)
        if valueInInt <= 2048:
            if valueInInt >= 0:
                values.append(valueInInt)
                values.pop(0)
                drawnow(plotValues)
            else:
                print "Invalid! negative number"
        else:
            print "Invalid! too large"
    except ValueError:
    print "Invalid! cannot cast"
This then plots a graph of distance over time, however there is a lag of at least 5 seconds. This seems to be caused by the drawnow command. Just reading data within Python (drawnow commented) from the command line goes with no noticable lag.

However, the alternative using the animation function seemed to much faster.
import serial
from matplotlib import pyplot as plt
from matplotlib import animation
import numpy as np

sensorData = serial.Serial('COM4', 115200)

fig = plt.figure()
ax = plt.axes(xlim=(0, 1), ylim=(0, 500))
line, = ax.plot([], [], 'g-')
ax.set_xticklabels('')
plt.title('Distance from VL53L0X')
plt.ylabel('Distance in mm')

def init():
    line.set_data([], [])
    return line,

def animate(i):
    x = np.linspace(0, 1, 5)    # linspace(from, to, intervals)
    y = sensorData.readline()
    line.set_data(x, y)
    return line,

anim = animation.FuncAnimation(fig, animate, init_func=init, frames=20, interval=20, blit=True)

plt.show()

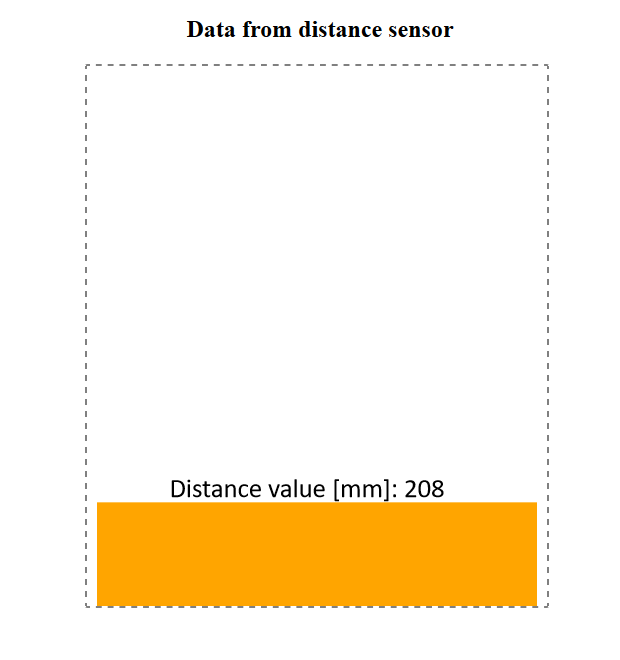
JavaScript
I used the Node JS which is a server-side solution responding to http-requests, you can download it here. Node JS has a SerialPort module. Socket.io is a JavaScript Library that enables realtime bydirectional communication between web clients and server.
To install additional packages, you can use the build in Node package manager (npm). You install from Node's command prompt on Windows machines, e. g. npm install socket.io to the node_modules directory of your application's folder. I will use serialport and socket.io.
As I was not used to JavaScript too much before, I build upon an existing solution called Node.js communicating with Arduino tutorial, which you can find here.
In this example, analog data from a potentiometer is read by an Arduino and sent via serial to the computer. Furthermore, the protocol implemented on the Arduino takes the letter B as the beginning of a serial message and the letter E as the end. I implemented the same logic in my code.
...
Serial.print("B"); // begin character
Serial.print(measure.RangeMilliMeter);
Serial.print("E"); // end character
...
Due to some changes in the Node JS version, further modifications to the code had to be done in the server.js file, replacing the serialport constructor as well as call an update function with is commented accordingly in the code below. If you download the files from below, please install socket.io as well as serialport via npm to the node_modules folder. Make sure to set the right COM-port in the server.js file.
// Code for index.js modified from:
// http://www.barryvandam.com/node-js-communicating-with-arduino/

var fs = require('fs'),
http = require('http'),
socketio = require('socket.io'),
url = require("url"),
SerialPort = require("serialport");

var socketServer;
var serialPort;
var portName = 'COM4'; //change this to your Arduino port
var sendData = "";

// handle contains locations to browse to (vote and poll); pathnames.
function startServer(route,handle,debug)
{
	// on request event
	function onRequest(request, response) {
	  // parse the requested url into pathname. pathname will be compared
	  // in route.js to handle (var content), if it matches the a page will
	  // come up. Otherwise a 404 will be given.
	  var pathname = url.parse(request.url).pathname;
	  console.log("Request for " + pathname + " received");
	  var content = route(handle,pathname,response,request,debug);
	}

	var httpServer = http.createServer(onRequest).listen(1337, function(){
		console.log("Listening at: http://localhost:1337");
		console.log("Server is up");
	});
	serialListener(debug);
	initSocketIO(httpServer,debug);
}

function initSocketIO(httpServer,debug)
{
	socketServer = socketio.listen(httpServer);
	if(debug == false){
		socketServer.set('log level', 1); // socket IO debug off
	}
	socketServer.on('connection', function (socket) {
	console.log("user connected");
	socket.emit('onconnection', {pollOneValue:sendData});
	socketServer.on('update', function(data) {
	socket.emit('updateData',{pollOneValue:data});
	});
	socket.on('buttonval', function(data) {
		serialPort.write(data + 'E');
	});
	socket.on('sliderval', function(data) {
		serialPort.write(data + 'P');
	});

    });
}

// MODIFICATION FOR CONTINOUS UPDATNG
function SocketIO_serialemit(sendData){
      //console.log("serial emit: ",sendData);
      socketServer.emit('updateData',{pollOneValue:sendData});
}


// Listen to serial port
function serialListener(debug)
{
    var receivedData = "";
    serialPort = new SerialPort(portName, {
        baudrate: 9600,
        // defaults for Arduino serial communication
         dataBits: 8,
         parity: 'none',
         stopBits: 1,
         flowControl: false
    });

    serialPort.on("open", function () {
      console.log('open serial communication');
            // Listens to incoming data
        serialPort.on('data', function(data) {
             receivedData += data.toString();
          if (receivedData .indexOf('E') >= 0 && receivedData .indexOf('B') >= 0) {
           sendData = receivedData .substring(receivedData .indexOf('B') + 1, receivedData .indexOf('E'));
           receivedData = '';
         }
       // CALL CONTINOUS UPDATE FUNCTION
        SocketIO_serialemit(sendData);
      });
    });
}

exports.start = startServer;
It works pretty nice and smoothly.