
WEEK 15 (10 May 2017)
[Networking and Communications]
The assignment for this week is to design and build a wired &/or wireless network connecting at least two processors.
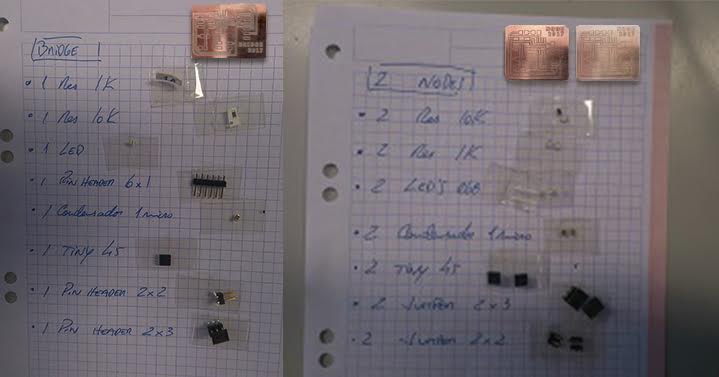
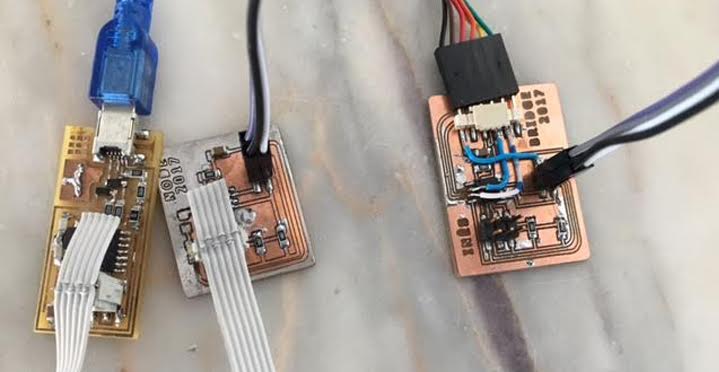
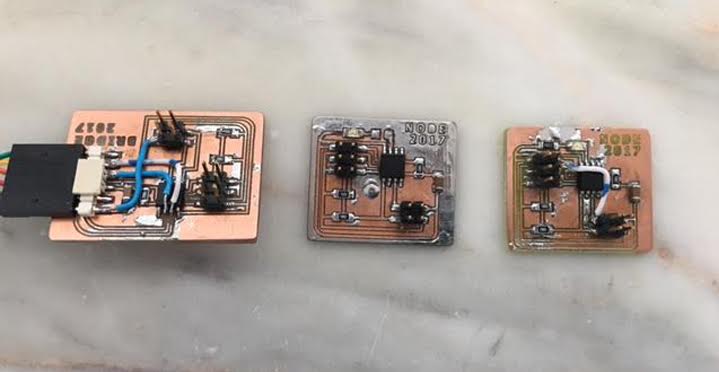
For this assignment, I made the hello.serial.bus with 1 bridge and 2 nodes.
The purpose of this example is to link several boards together (serial bus). The bridge board is connected to a computer via a FTDI cable and the two node boards are connected to the bridge board, receiving power and signals via bridge.
So, the bridge will power up the 3 microcontrollers (ATtiny45) trough FTDI cable and will send the signals from PC to the other 2 nodes:
Tests:
- Signal sent to node 0 (bridge), the LEDs on all the boards light up once, after that, just the node 0 lights on the LED;
- Signal sent to node 1, the LEDs on all the boards light up once, after that, just the node 1 lights on its LED;
- Signlal sent to node 2, the LEDs on all the boards light up once, just the node 2 lights on its LED;
To achieve this purpose we may proceed this way:
Download the necessary files from:
http://academy.cba.mit.edu/classes/networking_communications/index.html
With Ubuntu we need to download the following files:
bus
asynchronous
components
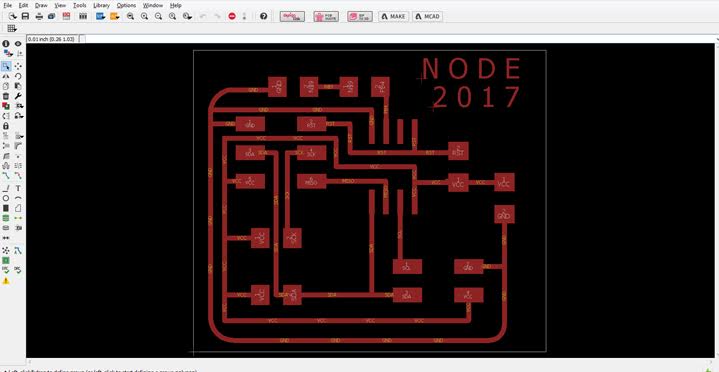
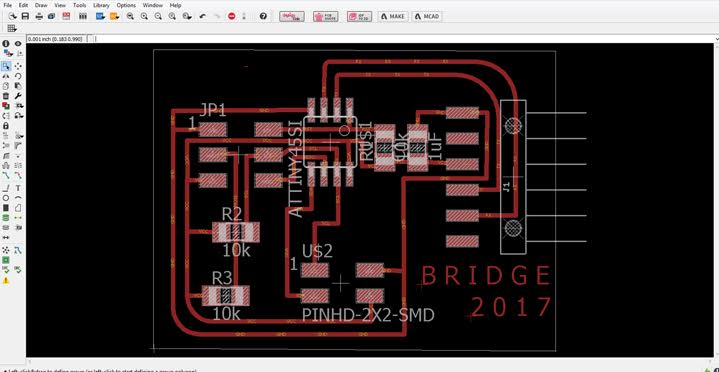
hello.bus.45.bridge - board traces interior
hello.bus.45.node - board traces interior
hello.bus.45.c (same for node and bridge, basic c file), makefile (to compile c files)
Design, Mill and stuff the boards
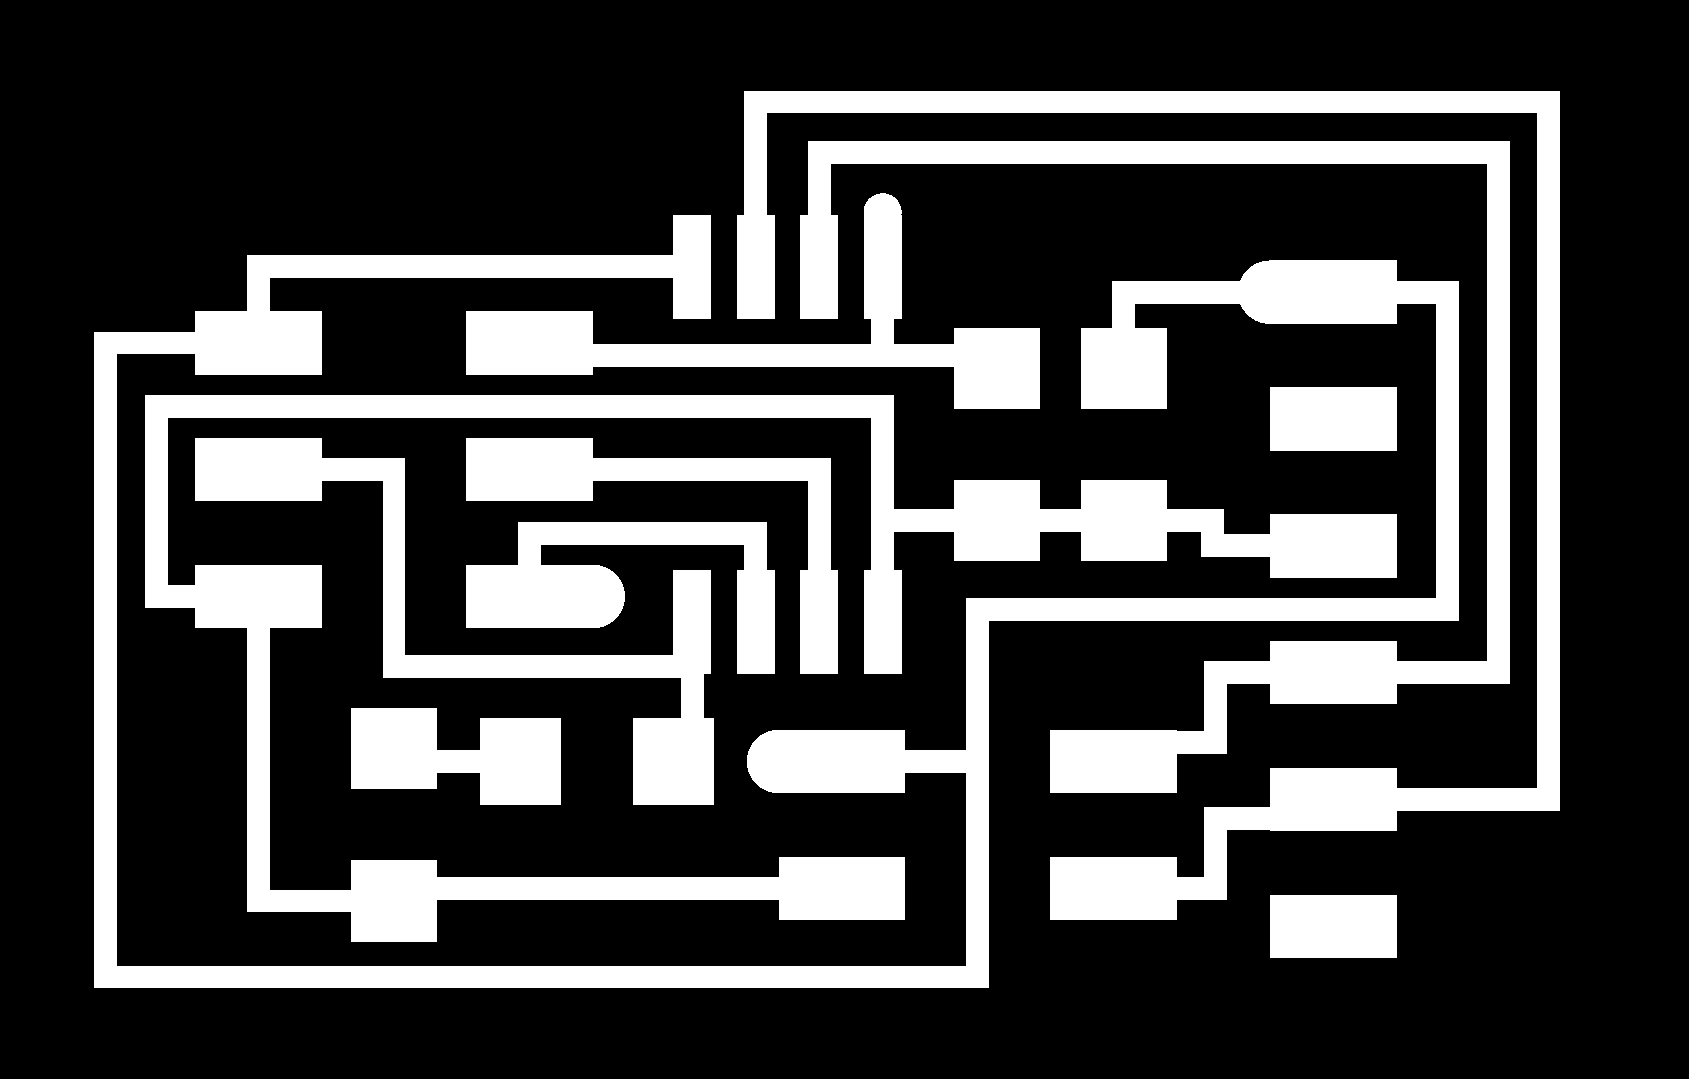
Schematic Node Board:
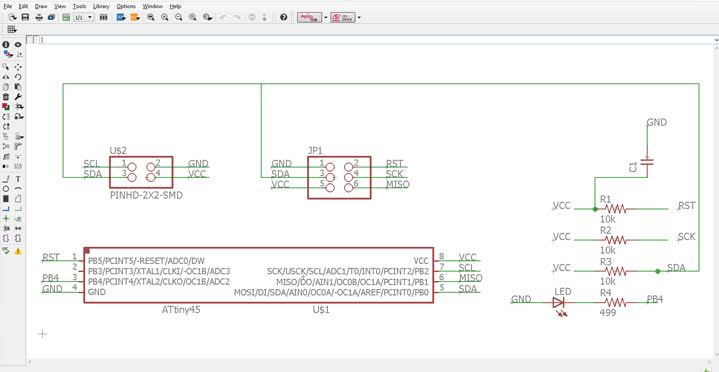
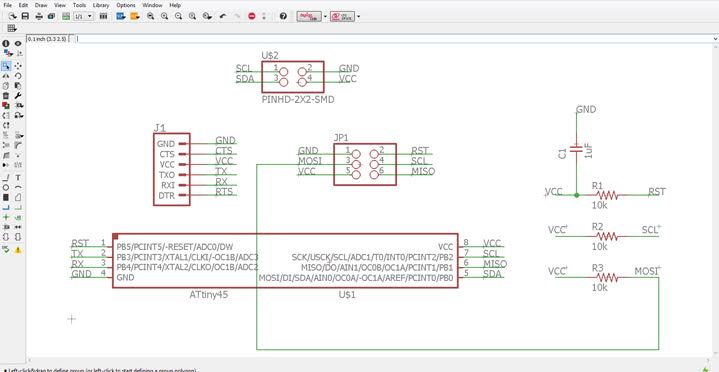
Schematic Bridge Board:
Cheking the boards and components:
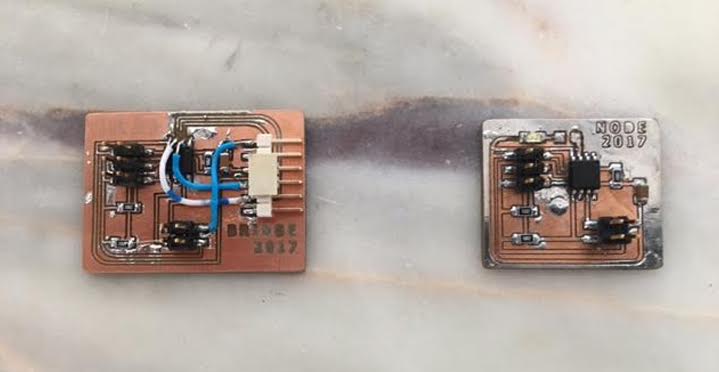
Bridge and node assembly boards:
Programming bridge board with FabISP
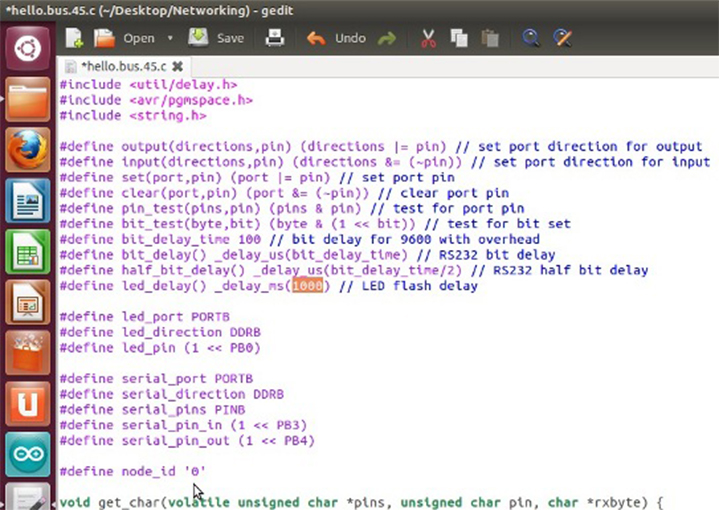
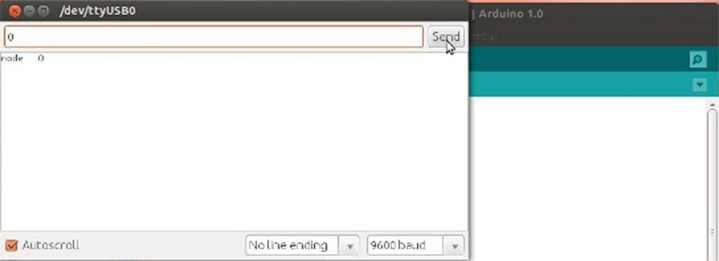
I edited the original hello.bus.45.c file and changed delay time to 500 ms instead 100 ms. (the image below shows 1000 but I saved 500 value). Next to the mouse cursor shows node_id '0', for bridge (node 0).
Connect FabISP we must not forget to power on the bridge board with FTDI cable connected to PC

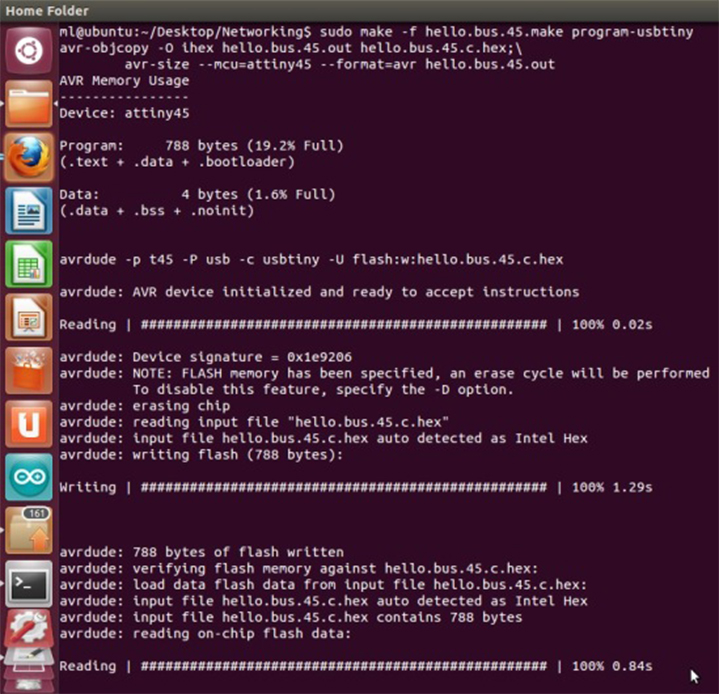
In the terminal, I move to the directory that contains hello.bus.45.c and hello.bus.45.make files and type sudo make -f hello.bus.45.make program-usbtiny to compile c file and send it to the helloboard (ATtiny45) through the FabISP (usbtiny).
The output from terminal:
Programming each node:
I proceed with the same procedures with nodes 1 and 2. I edited hello.bus.45.c and change node id (one board with id 1 and the other node with id 2), after that I program the boards.
Finally, open the arduino, and serial monitor on it, adjust the baud rate to 9600 (same as the c file) and I typed 0 followed by "enter" or "send".
Networking assembly for serial bus (1 bridge and 2 nodes)
The next video shows the output. Signal sent to node 0 (bridge), the LEDs on all the boards light up once, after that, just the node 0 lights on the LED; furthermore, the circuit board returns the signal with the message "node 0".
Watch the VIDEO:
Files:
- Files : schematic - png - rml

