WEEK11-MACHINE DESIGN
- Prepare
- Set firmware and upload
- RAMPS1.4 connection
- Connect and make motor move
This week assessment make the machine and make sure it can work.
We have to control motor that write on ground. The components are below:
• Stepmotor YH42BYGH47-401A X3
• Stepmotor 28BYJ-48 X1
• Pump DC12V X1
• Mega 2560 X1
• RAMPS1.4 X1

I have to test them and make sure they can move as we want.
1.The software we need.
1.1 Arduino IDE, this is used for uploading firmware.Download

1.2 Slic3r, this software can recognize the G code, so it can controll the motor.Download

1.3 Printrun is a full suit for CNC and 3d print. It read the G code and transfer to Mega2560 by usb, and controll the step motor precisely Download

1.4 Marlin is the firmware for mega2560.Download the file and open it, find the pde or ino file and open it with Arduino IDE.Download
2. Install the dirver for MEGA2560.
Find the file inf in Arduino IDE file folder, and install it.
#define BAUDRATE 250000
Configure serial port rates, when the rates are same they can communicate. In CNC or 3D print we always use 57600, 115200, 250000.
#define MOTHERBOARD 33
Set the type of board.
const bool X_ENDSTOPS_INVERTING = true;
const bool Y_ENDSTOPS_INVERTING = true;
const bool Z_ENDSTOPS_INVERTING = true;
This set is for limit swith.
#define INVERT_X_DIR false
#define INVERT_Y_DIR true
This set make the start point in the left bottom.
#define X_HOME_DIR -1
#define Y_HOME_DIR -1
#define Z_HOME_DIR -1
This is the home point set.
#define X_MAX_POS 200
#define X_MIN_POS 0
#define Y_MAX_POS 200
#define Y_MIN_POS 0
#define Z_MAX_POS 40
#define Z_MIN_POS 0
Upload firmware
Choose board, click on tools>board>ArudinoMega2560 or Mega ADK

Set serial. Tools>Seial Port>

Compile the file, if no error,click on upload.

The TX RX and L led will blink, when it is stop the upload done.

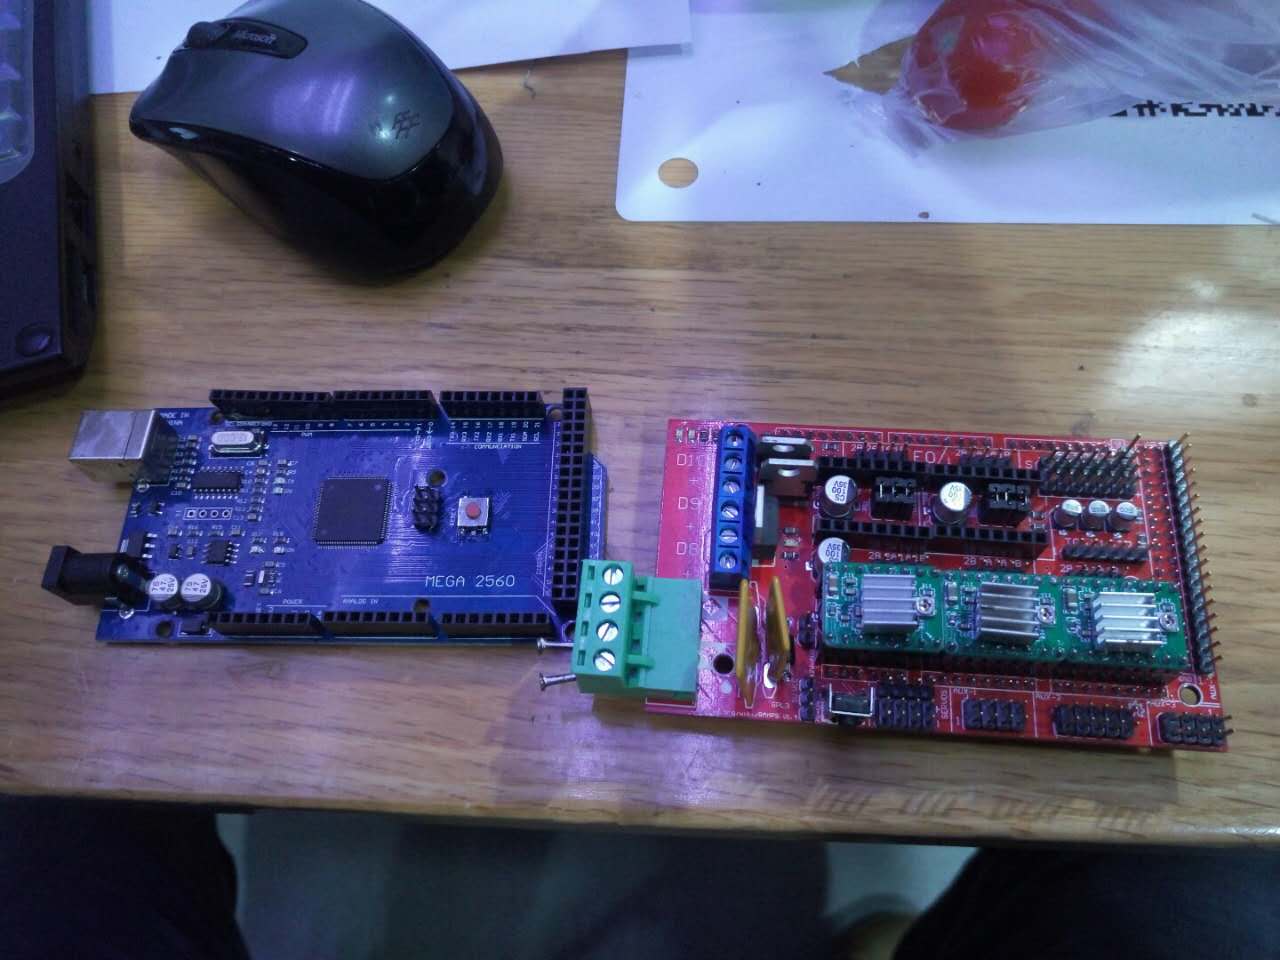
Put RAMPS1.4 on mega2560, the connections show in the picture.

Connect on USB and open printrun, when the power is on the green LED1 on RAMPS will blink then off. This means the firmware in Mega2560 is starting.
Set port and baud rate, click on connect. Then on right it will show the messages below:
Connecting...
start
Printer is now online.
echo: External Reset
Marlin 1.0.0
echo: Last Updated: Sep 8 2013 15:04:20 | Author: (MakerLab, default config)
Compiled: Sep 8 2013
echo: Free Memory: 4260 PlannerBufferBytes: 1232
echo:Hardcoded Default Settings Loaded

The connection of stepmotor is very important, red connect to B-, blue connect to B+, green connect to A+, black connect to A-.Click on X+ X- Y+ Y- Z+ and Z- then the motor will rotate.

Open slicer and generate a gcode put it to printrun and have a test, the motor move well.
Two days later find another controll software that is better for our machine. It's a CNC controll software Grbl.
Grbl Download
Set port and baud rate then the motors and pump will connect and it can recoganize the code genearted by fabmodue.
After many works with Travis our machine worked it was showed in our lab.