
Thank you Joaco for walking us throught molding and casting basics.

shring my notes in case you can read unreadable morse code:

I did not struggle much in this one. I quickly decided I wanted to try a basic piece with multiple materials to value the outcome (part one: tangram) and then a Cheess piece fosile (part two: fossilized horse).
A tangram is an type of puzzle. You can read more about its origins here. I took the basic 2D profile as base and starting point and add a 3rd axis (z) to the puzzle.

Not a great idea to start from a plane (by points given). I mean, it can be done that way but you easily loose the pieces sense and it's eady to get ugly and unproportioned pieces. At least that happened to me.
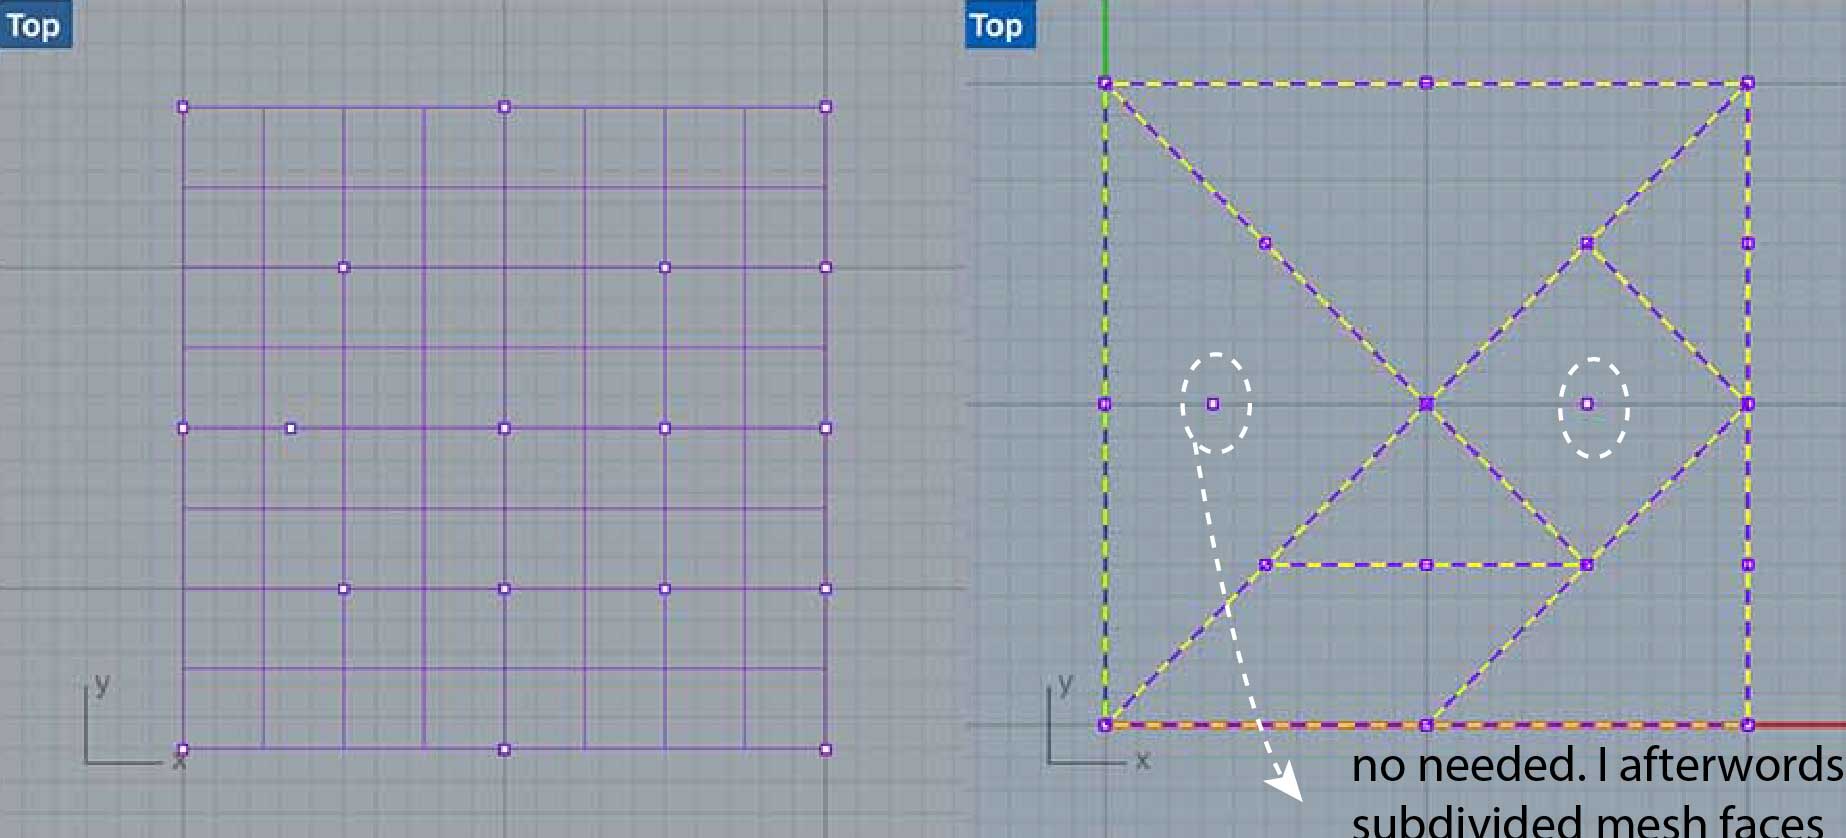
So I modeled every piece separately and played with height variation y vertex. Just made sure the max heigh of the material we used to keep my model in the material boundaries.

As a result it's just a puzzle that has a topography on it rather than being a flat surface.
I also want to create a puzzle holder to make it a litle more interesting an versatile. How so? Even if I added a 3rd axiz to the puzzle (z) The base of every piece reamain a flat surface so: If I manage to use piece is both directions is like having two puzzles in one. Or even bette having the same puzzle and two levels of complexity in only one piece.This is of course: PENDING!!!! Here's a quick sketch.

I used Aspire as interface between my model and the CNC. Haven't tryed it before since I missed the CNC assignement (yet). Below the parameters I used and a quick glimpse on the setup values.
Here's my piece getting milled:
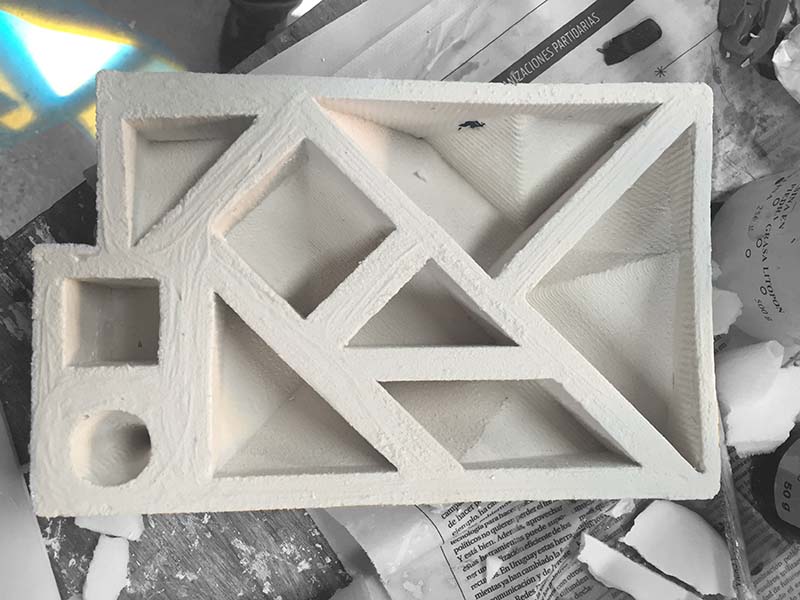
The outcoume was pretty neat still quite big. I scaled it only in x,y like 3/4 size and milled it again. My final pieces were less flat and more "ponty". I also added a couple of pieces for the ambared fosillized chess piece.

I fisrt made sure the surface of every piece was smooth and flawless.Adding vaseline to make unmolding easier is the first step. just with a pencil and making sure no lumps are left in smooth happy surfaces.
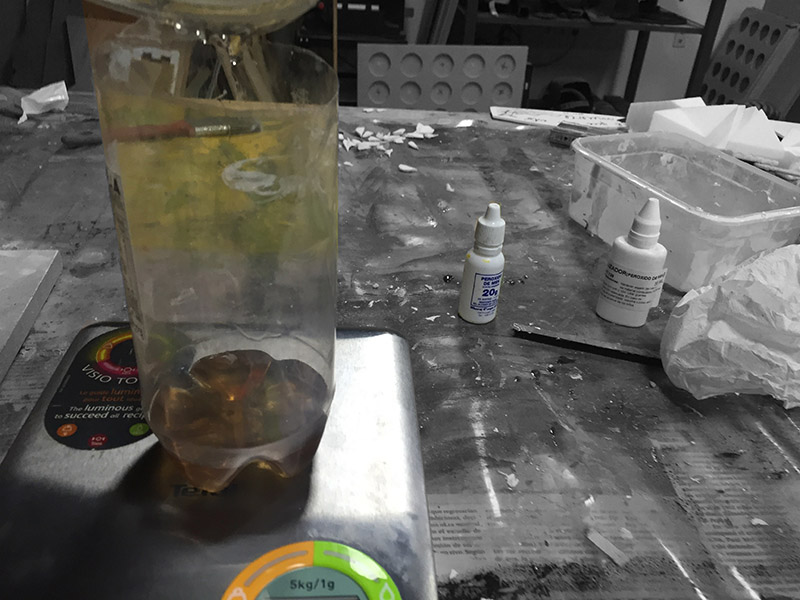
After filling the CNC mold and unmolding it I got my real mold (master one) to fill in with resin. Resin and catalyst need to be mixed with the right proportions. Make sure to check that info with oyour local seller or the resin specs sheet. In my case for 100grs (use a weight scale) of resin needed 25 drops of catalyst.
When filling the mold after mixing the right proportions I made sure I filled it up to the same level in every piece. That's something that's a good practice to take into consideration during the CNC milling. Maybe adding a small mark o tapper the piece.

Wait until the resin is completely dry to unmold. My pieces looked decent but not perfect. I had to sanded them quite a lot so they can look smooth. This has to do with the irregularity of my CNC mold that was afterwords copied to the silicone one.
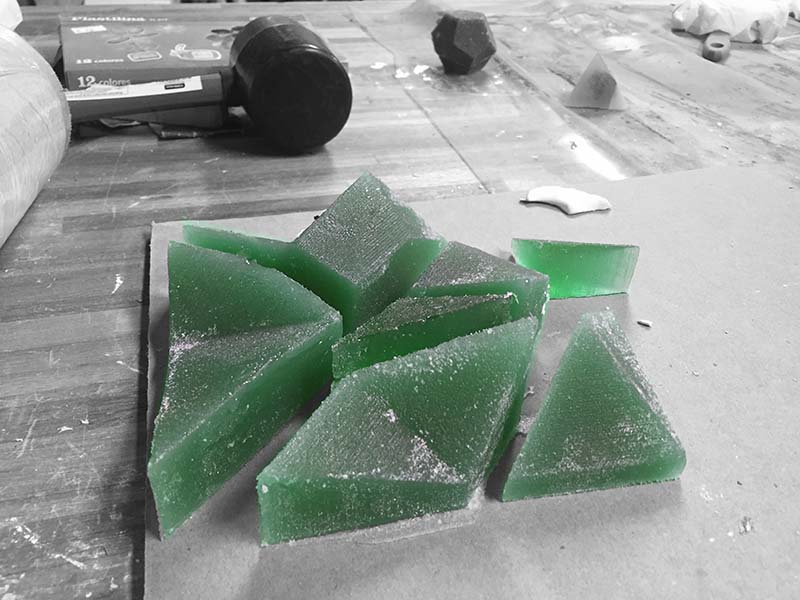
I edited the picture hue, my pieces aren't criptonyte.
As you might have seen I did a lot arround chess and chess pieces. This assignmetn is not different. I modeled a basic, rather geometric horse, maning a piece that is easily milled with the CNC.

So, the rest of this week I will do a chess piece captured in "ambar". Or maybe a piece of tissue captured in ambar. (Ambar means resin)
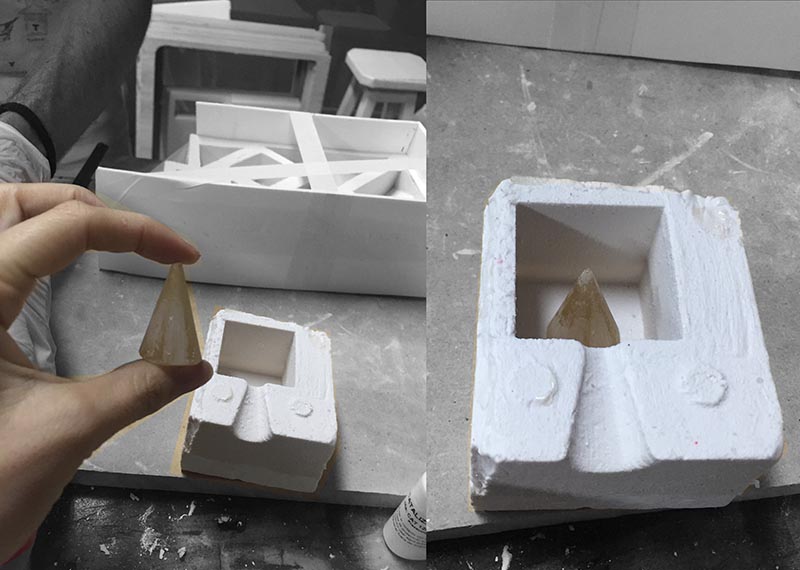
This was kind of a fail since we runned out of transparent resin at the lab and the one that was left was not as transparent as I needed it to be. Will retry next time.

Go backto the INDEXor to thefollowing WEEK?