

Programming and electronics for dummies. Pablo walk us through the basic principles of programming and hardware (yes, I was a lil bit surprise, programming knowledge and computing knowledge are both needed)
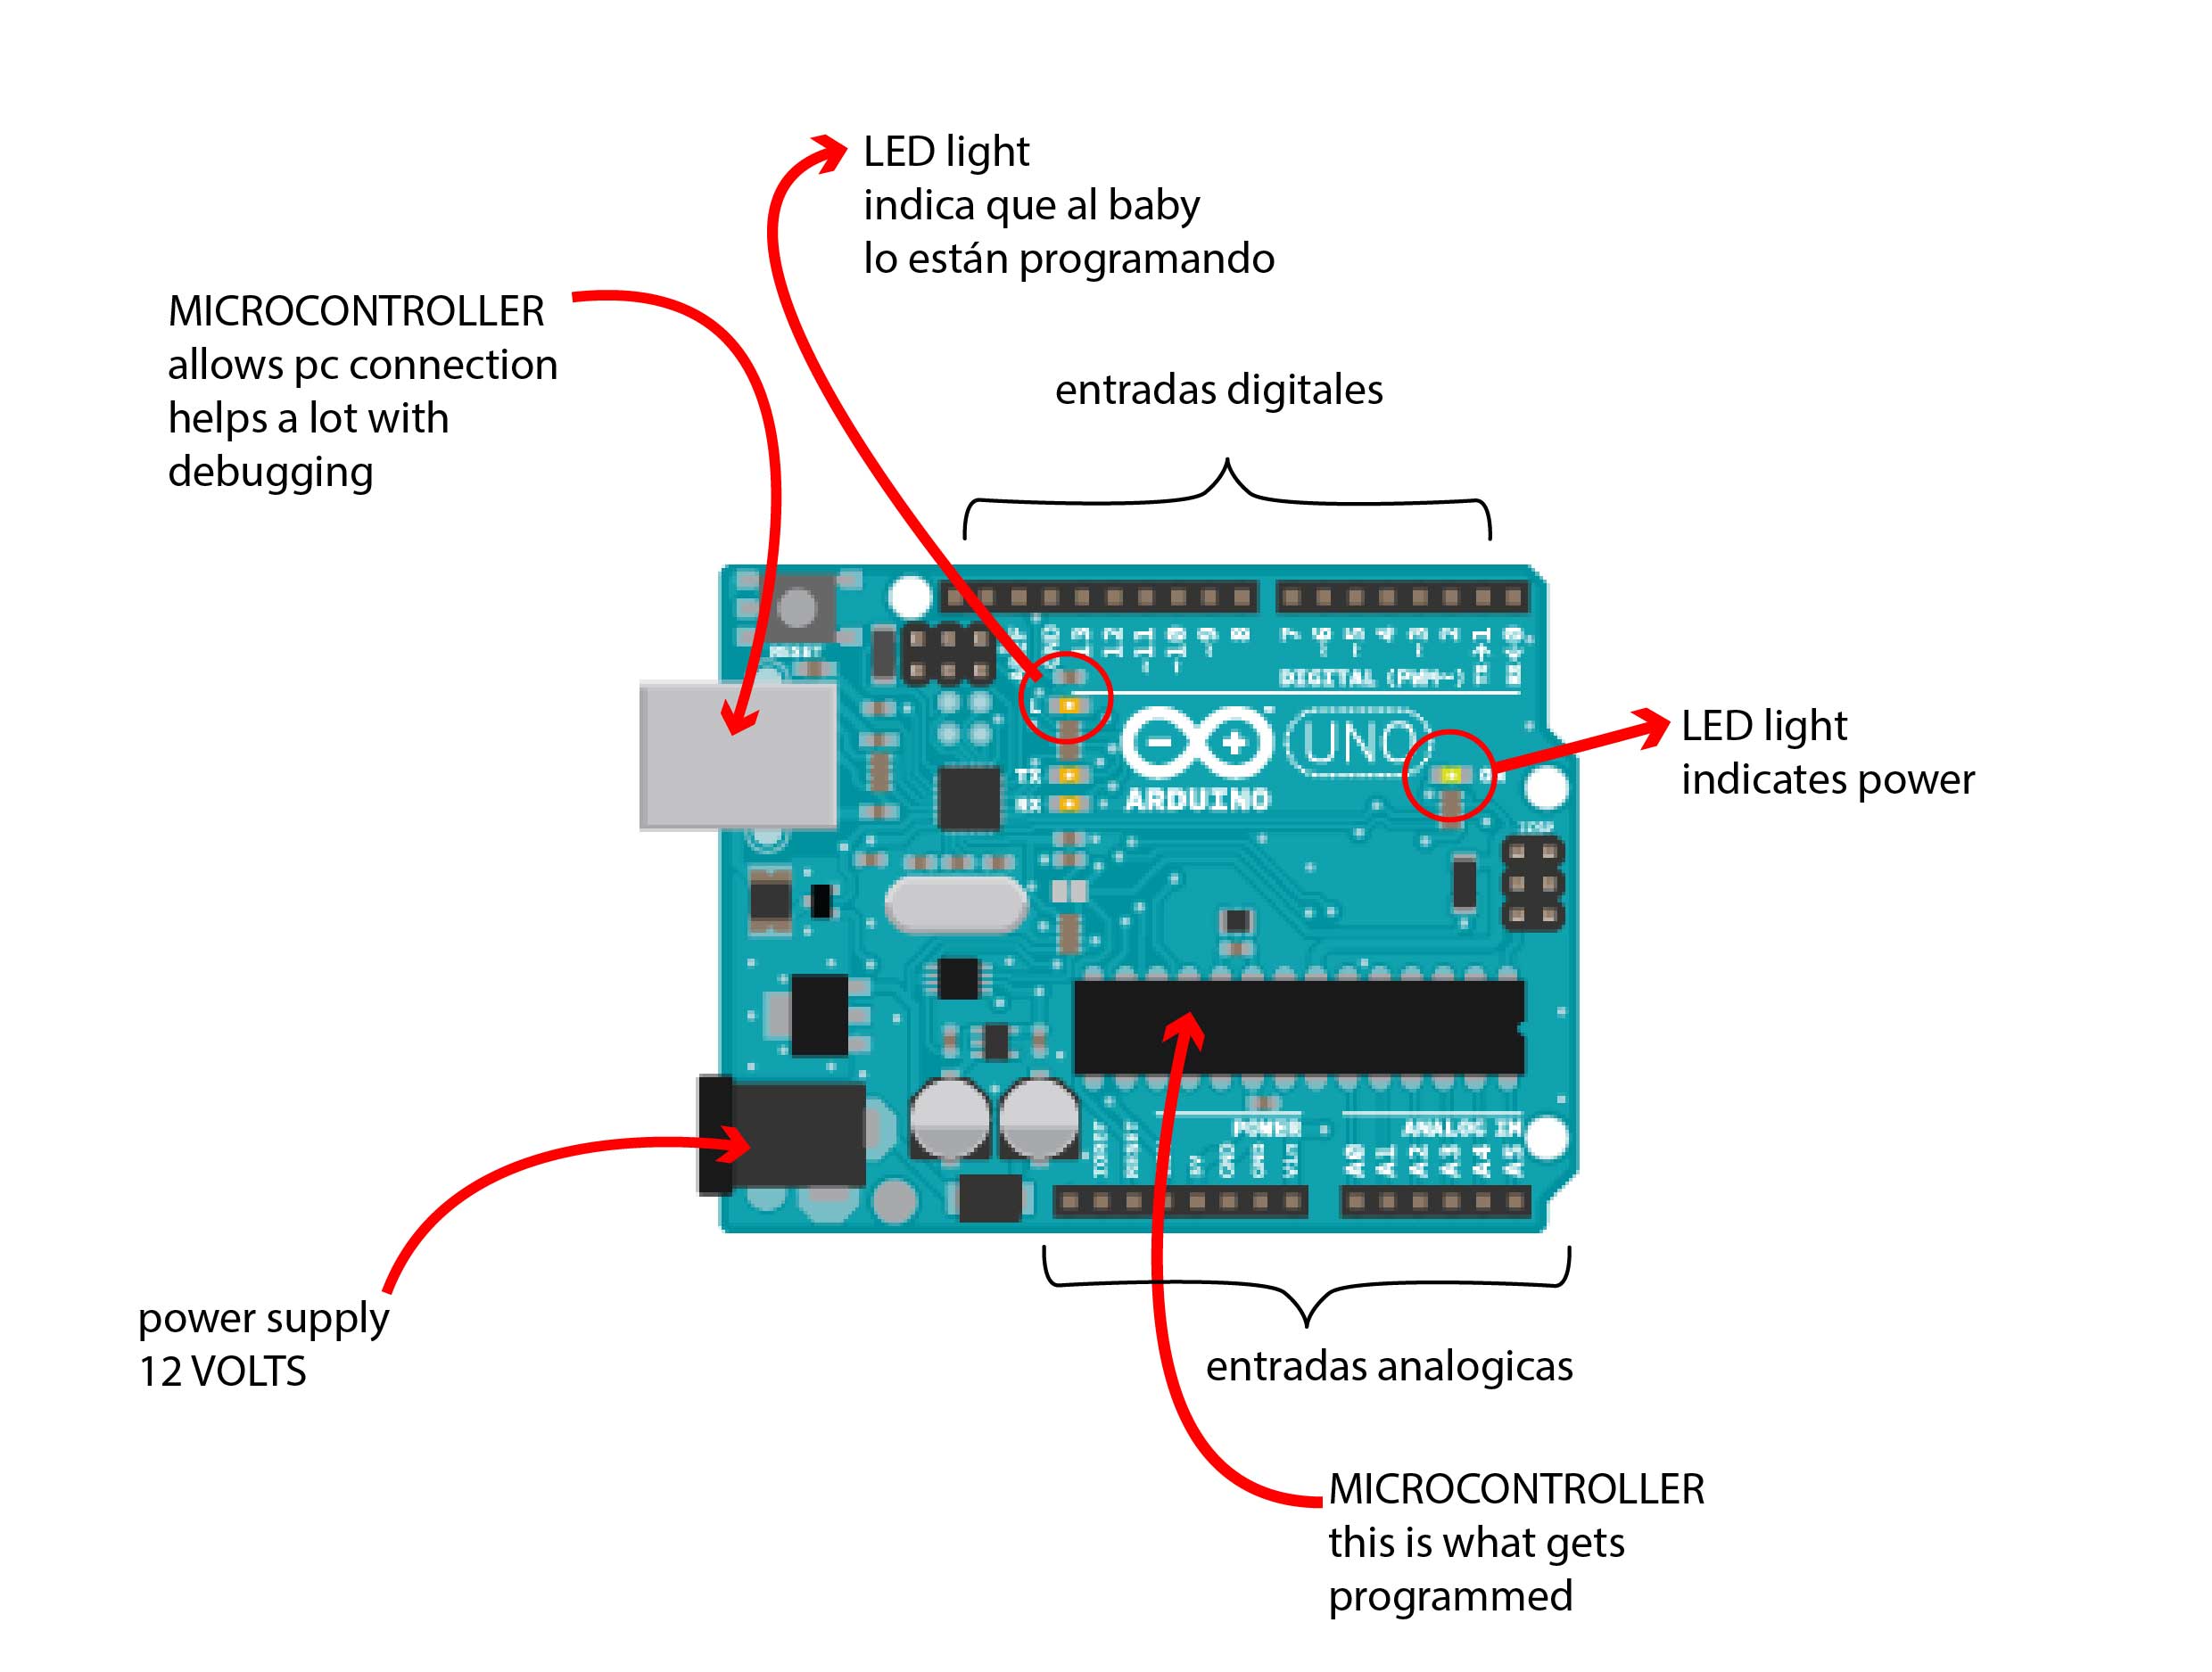
We tackled really basic concepts, I didn't event know what arduino was before getting here so it realy cleared things up.

Bollean concepts are also a must in programming (that I did know for both modeling and phython) but still, a much clearer idea of the concept remains. Thanks Pablo.
We then did a couple of short and snappy programing tests using Arduino IDC and a breadboard.
We changed a couple of parameters such as speed of blinking to see how the variables works and what every line code mean
The Attiny44 data sheet provides the info on how the microcrontoller works and what it can do. The reading is quite long for a begginer (me), still some sectins are a must. Eg: the pin configuration -Section 1-.
Thistutorial is a basic and clear step-by-step on how to program with ISP
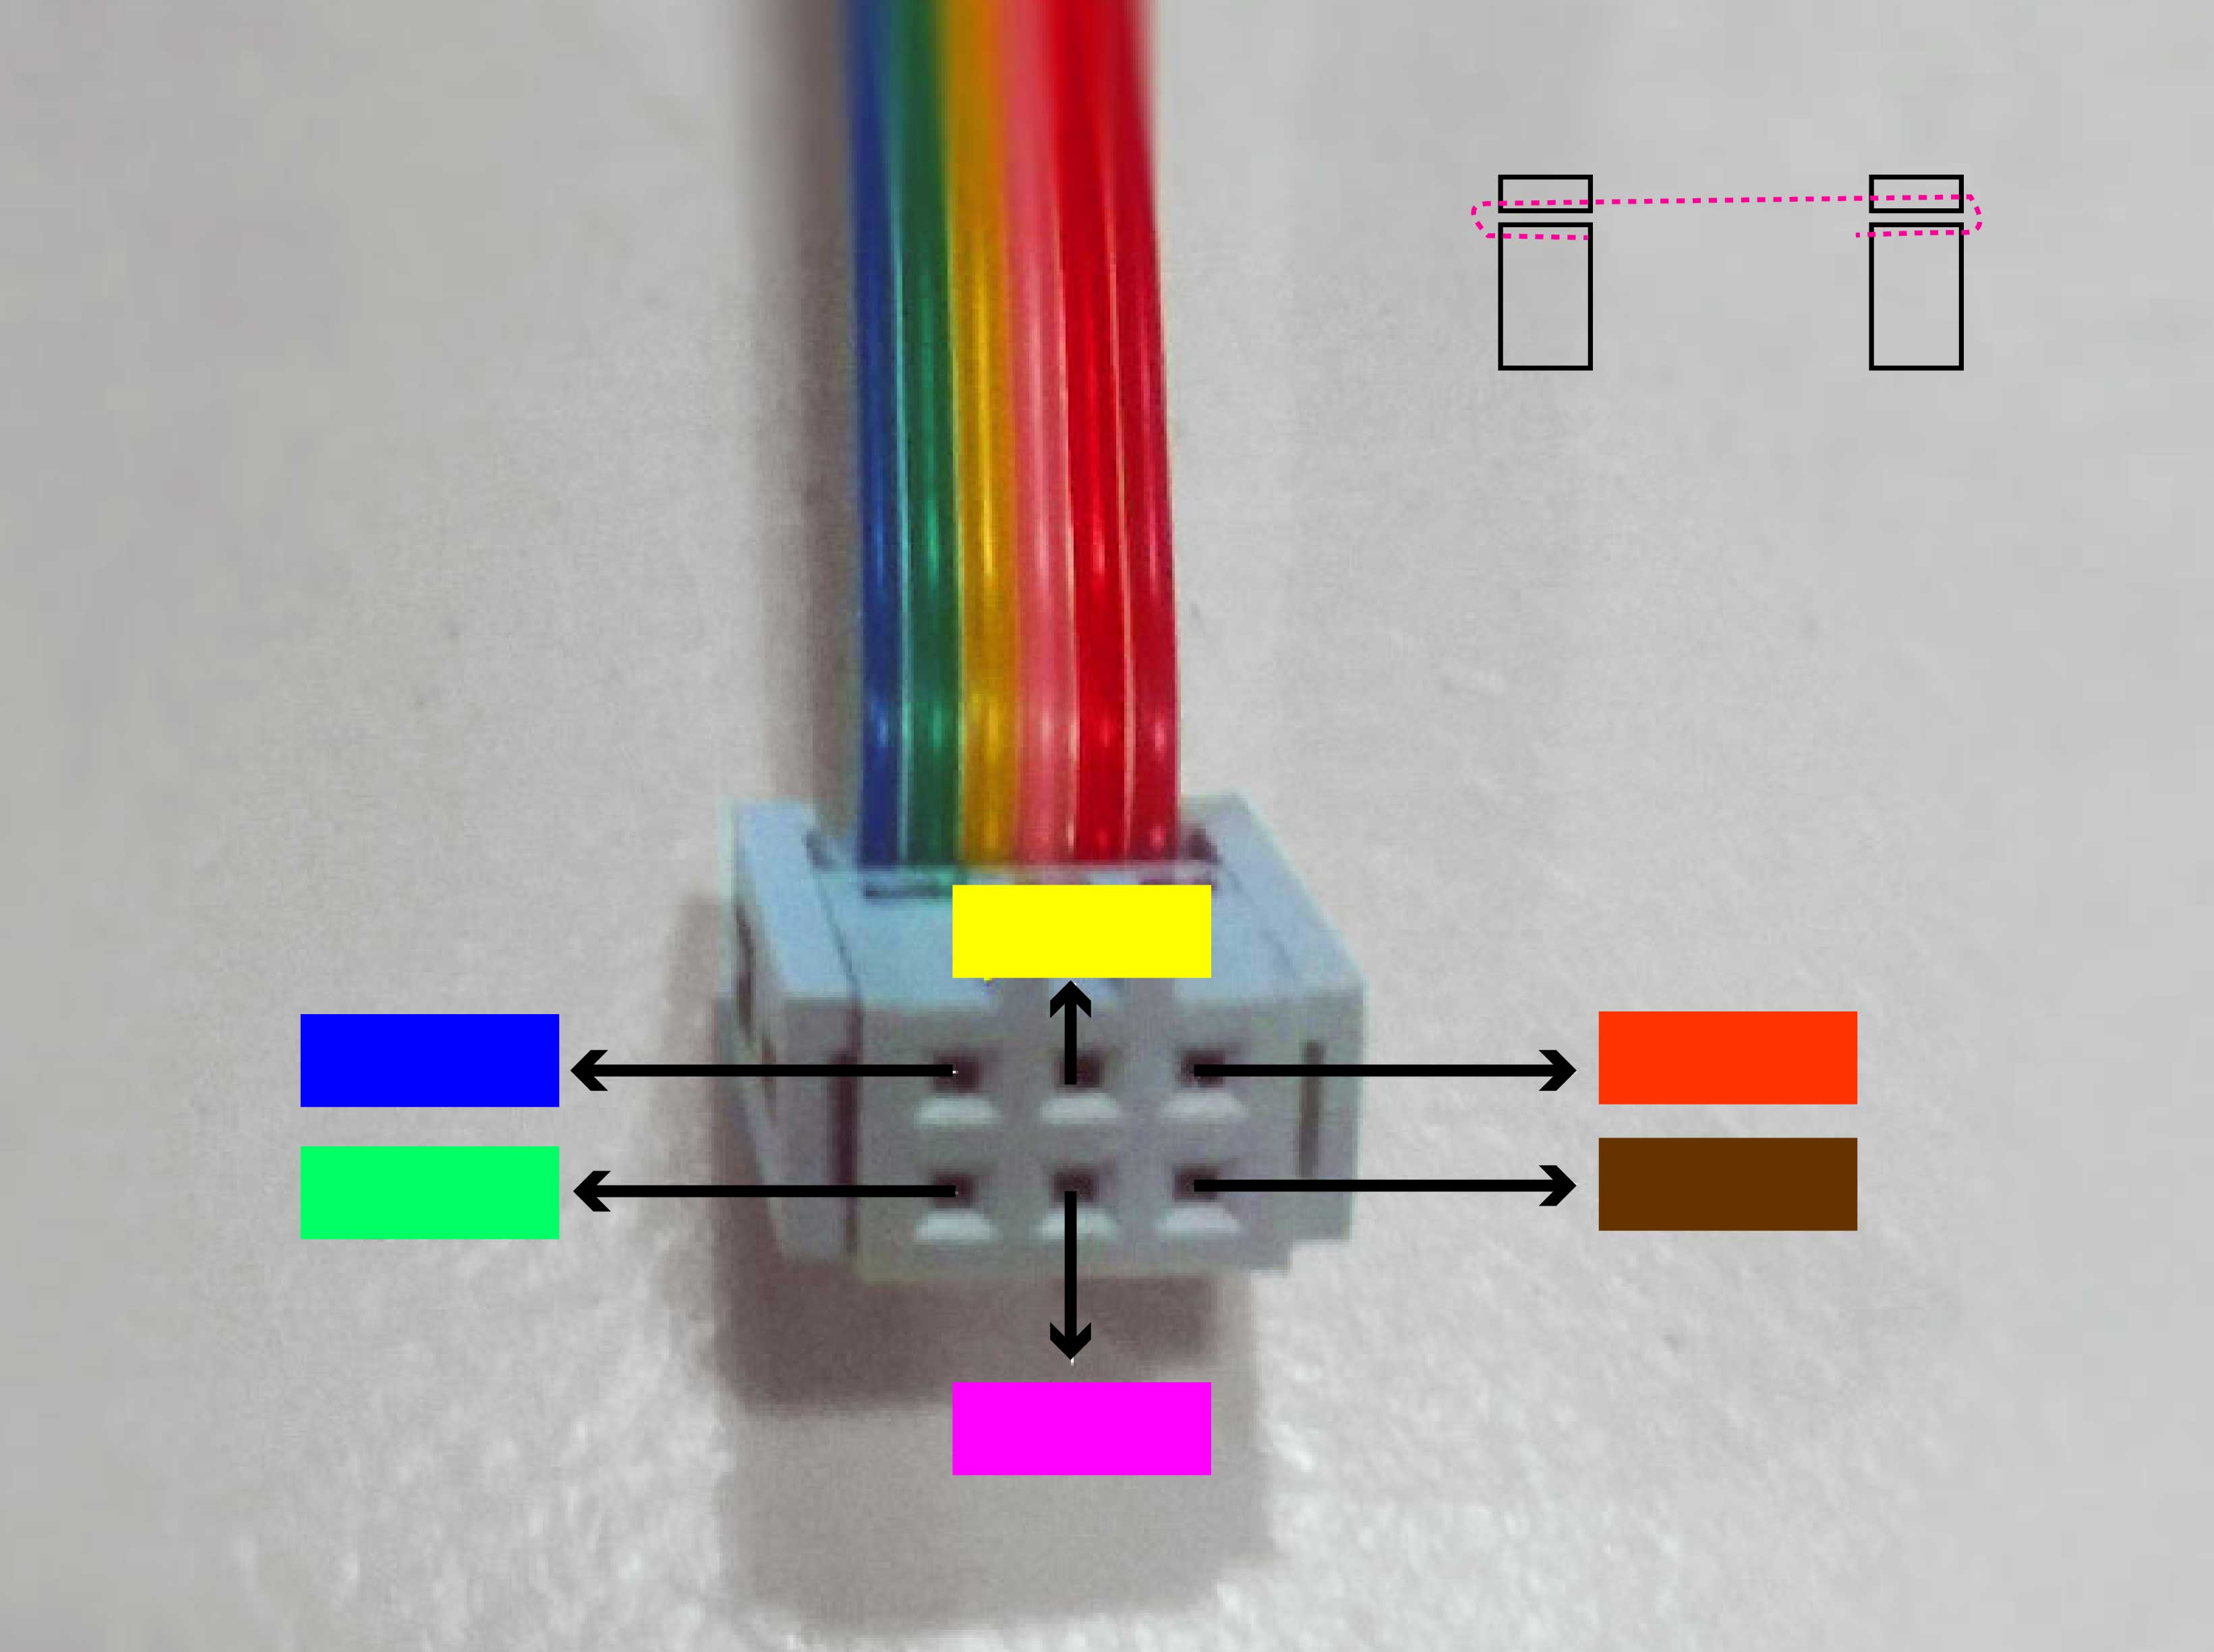
Meake sure you connect them as it follows:
I had already had downloaded the Arduino IDC because I tryed to program my ISP with an ArduinoUNO during the fourth week. Same for the AVG, XCode and dbla bla bla sofware, all was downloaded. This means I saved some time here. You can check THIStutorial for a step by spep guide. This onewas also pretty helpful.
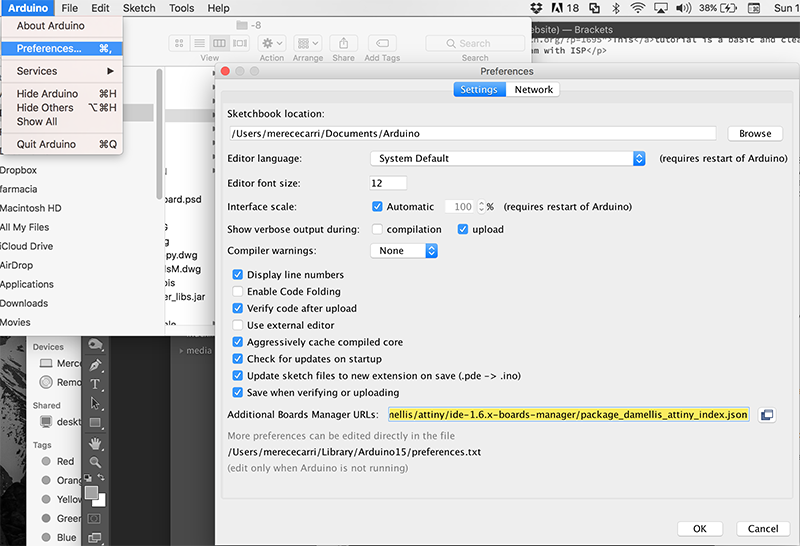
Open the Arduino preferences Dialogue and paste the following URL into the Additional Boards Manager's URL field:
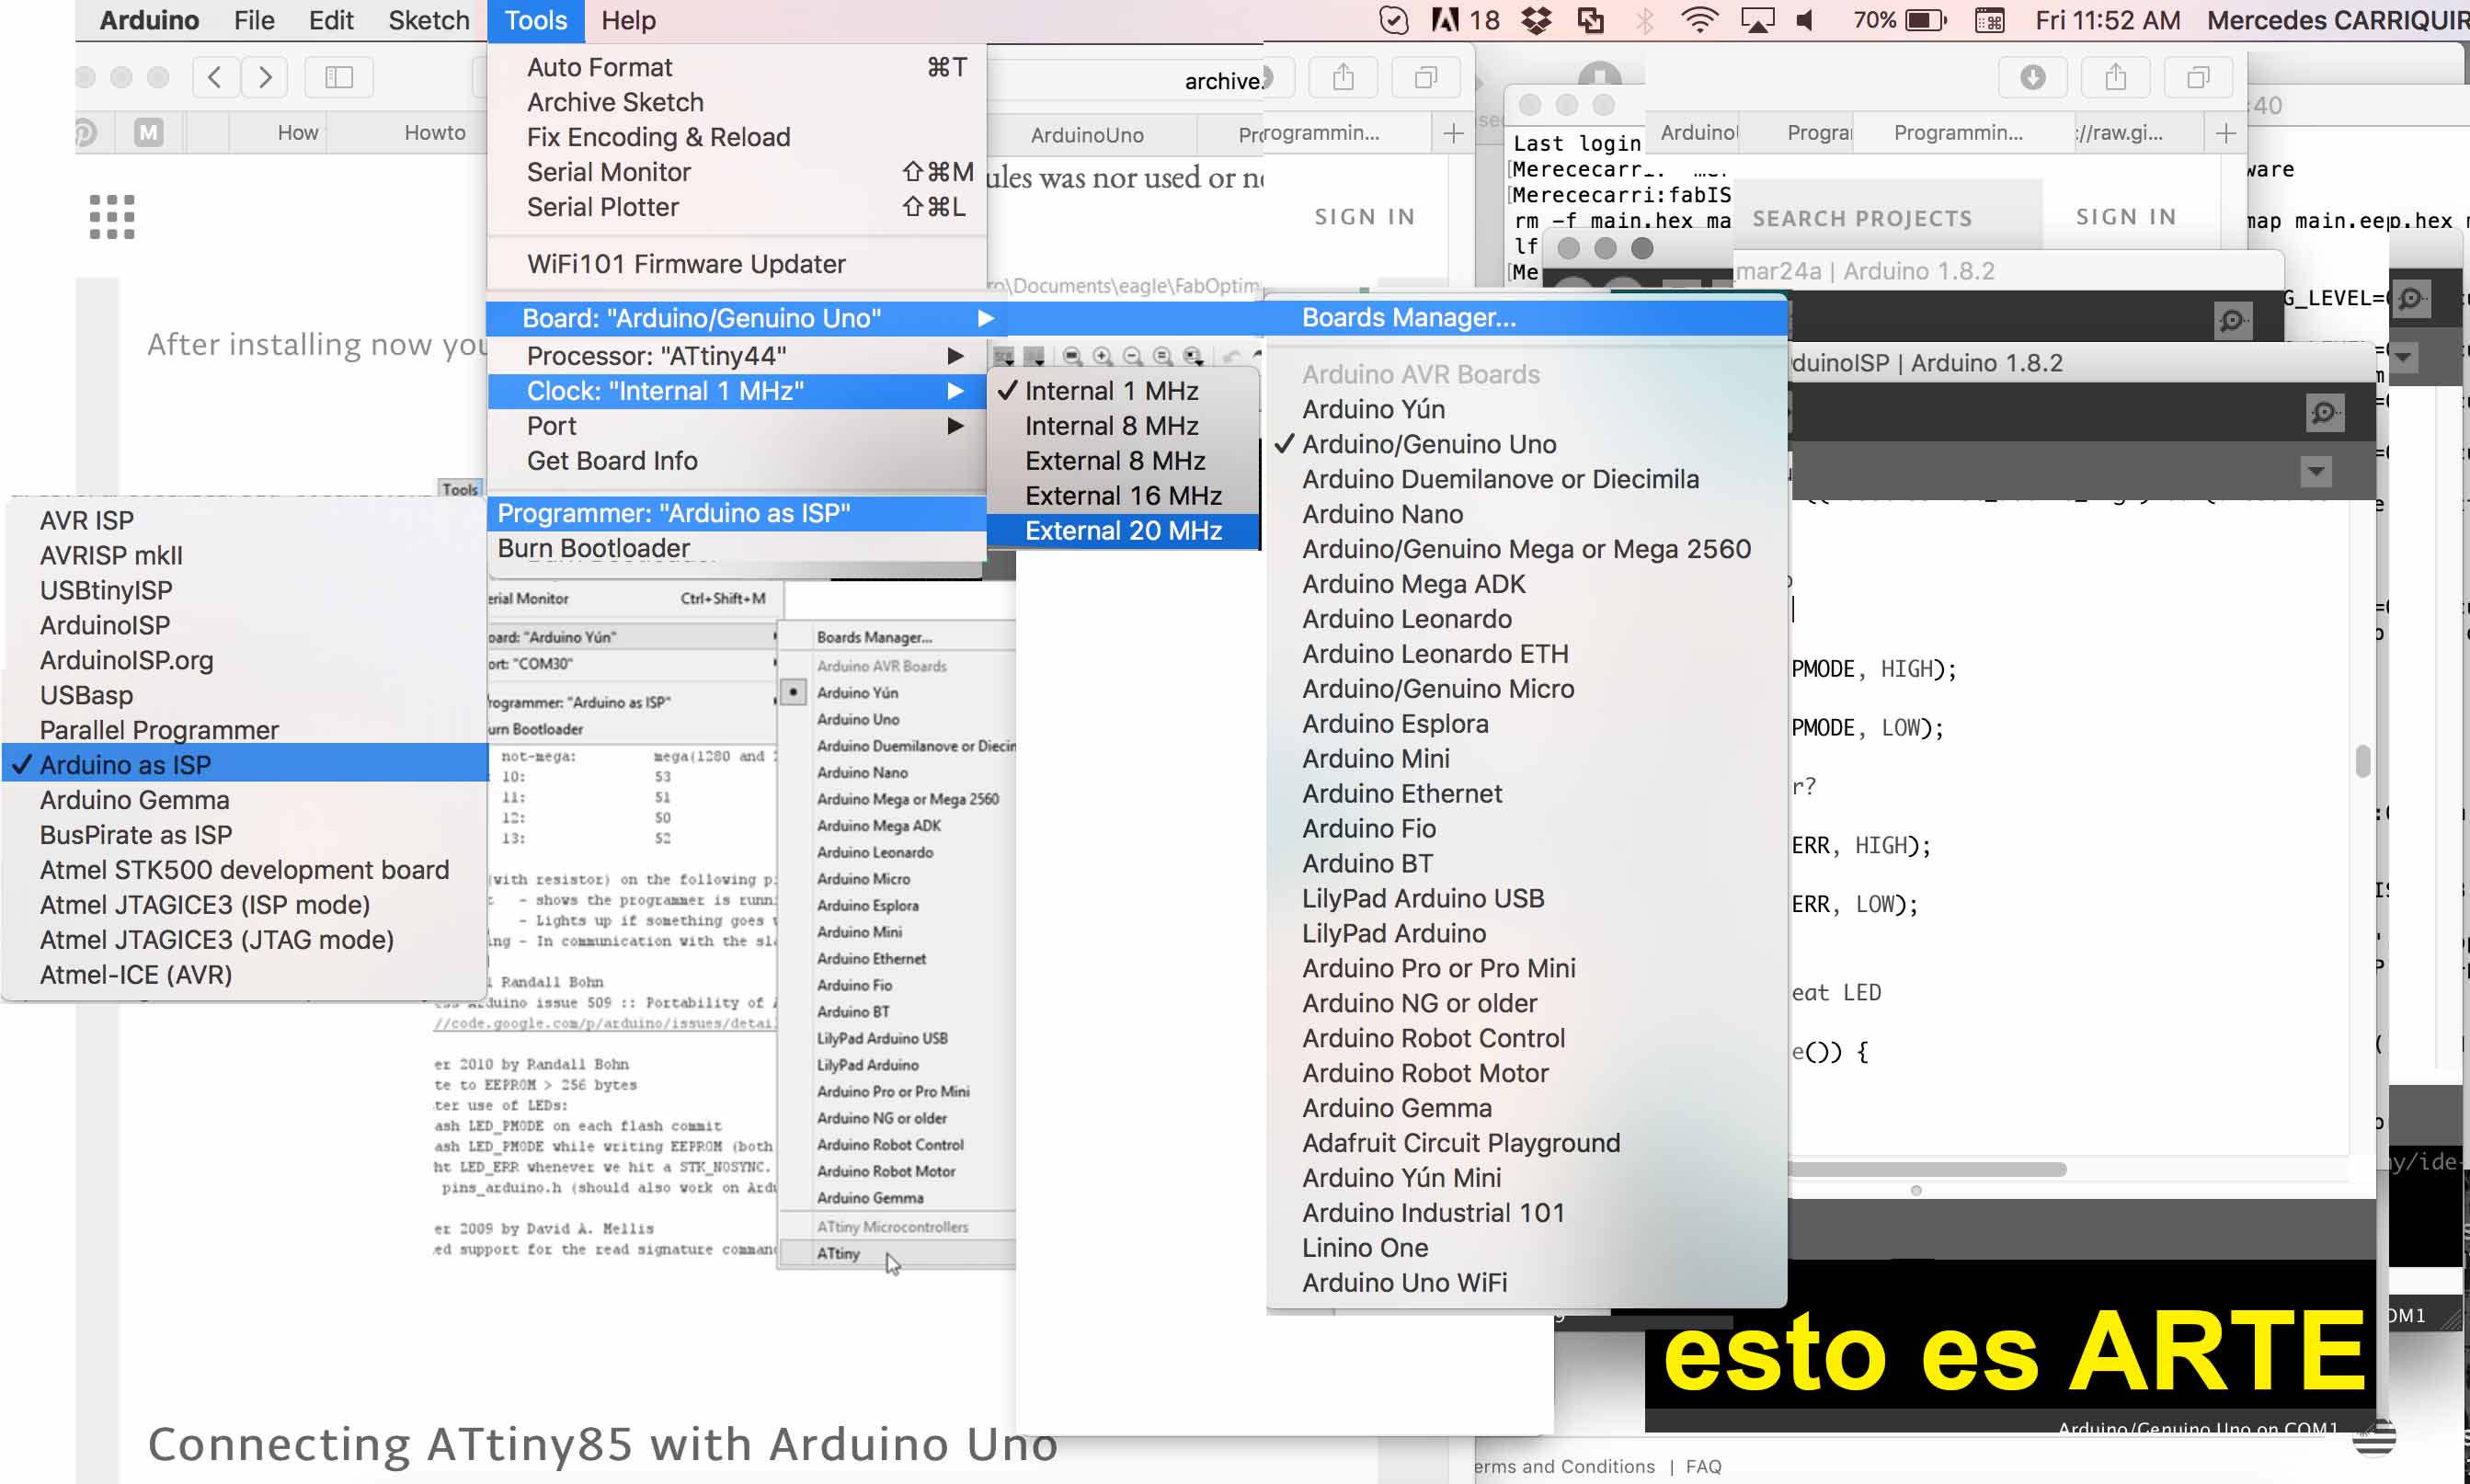
Then choose the right programmer (attiny44), speed (20), port (depending on your computer), etc
I had an error at the begginign and Arduino's troubleshootingwebsitedid help to find out it was about
I looked up mac and Attiny former assignments and loved this and thistutorial.
Back to the assignement, you have to make sure to find the right correspondance between your microcontroller pins (new board with button) and the arduino UNO microcontroller. That info is scattered online and can be easyly found, still, here's the pin correspondance:

I used basic codes (mostly blink) and did a couple of tests changing speed of blink and funtion when activating the button.
Basic blink (no button involved). See speed of blinking (delay) variation.

If delay value is reduced to a fifth blinking speed increases five times:

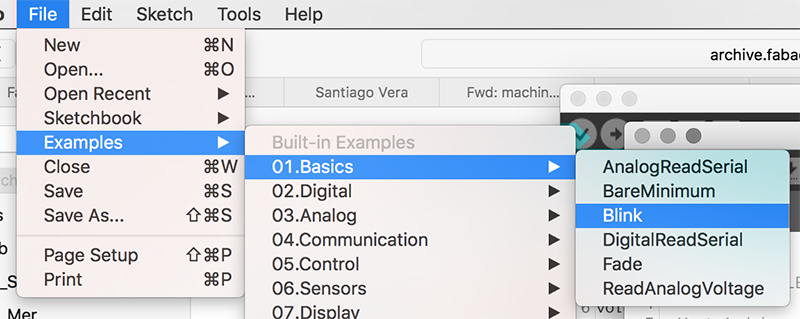
So far no button in involved for the led switch. What I tested new using the button base code (File>Examples>02.Digital>Button) is alternating the button function (wether it switches on or off the led).

Go backto the INDEXor to thefollowing WEEK?