
Feb 08: computer-controlled cutting
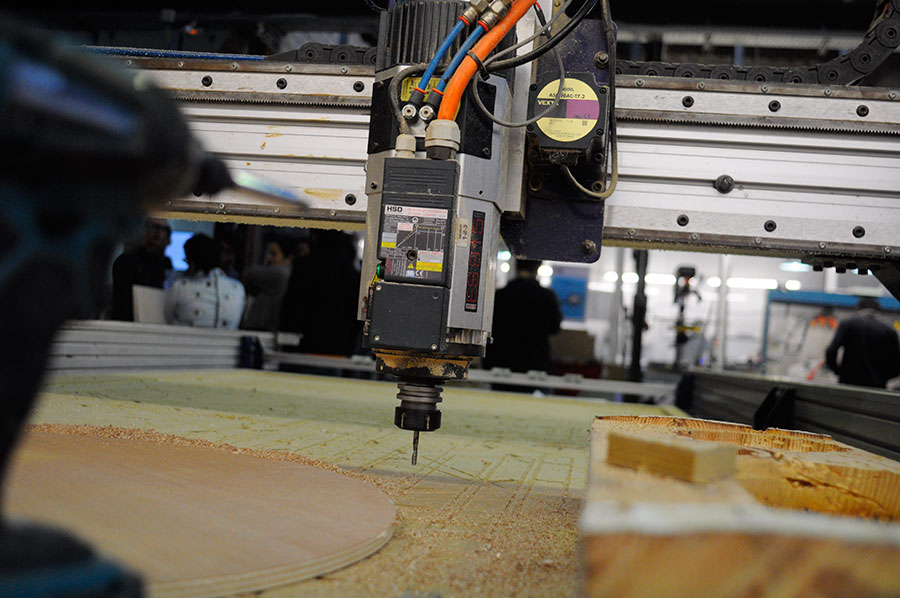
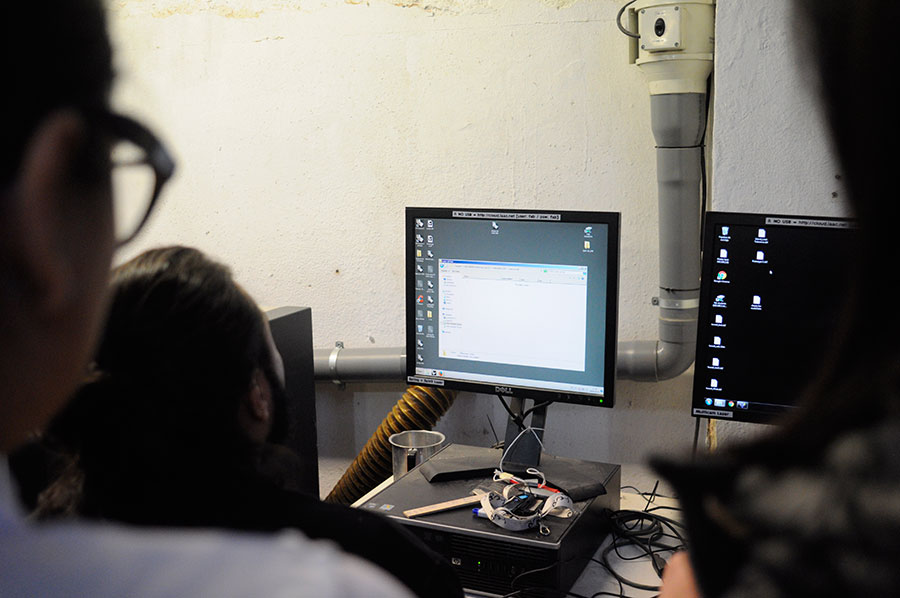
At first they showed us all the machines that where here in the fablab barcelona.
I already used laser- and vinylcutters in Switzerland so I know what expected me. But I needed to learn making parametric models, because I never did that before.
Introducing us to the machines


Group Assignment
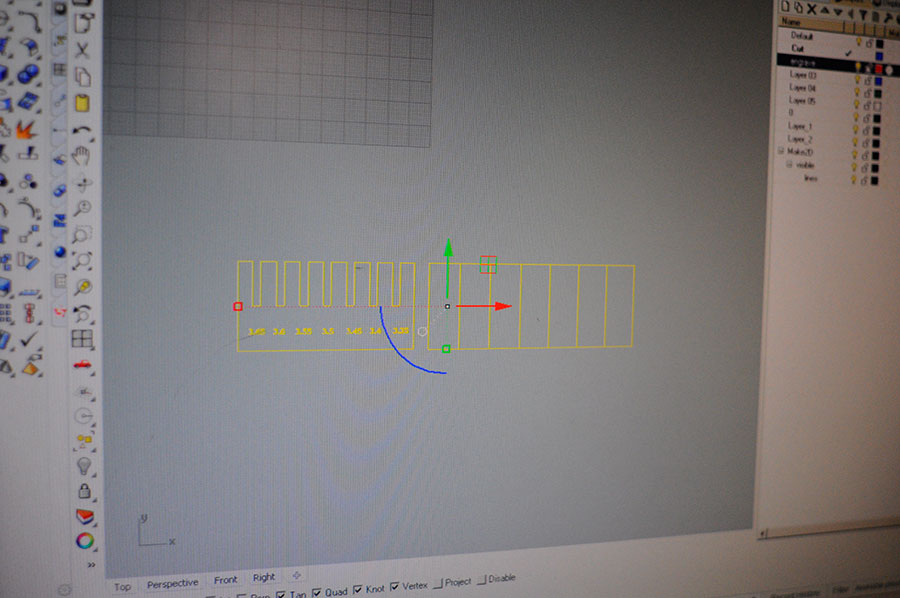
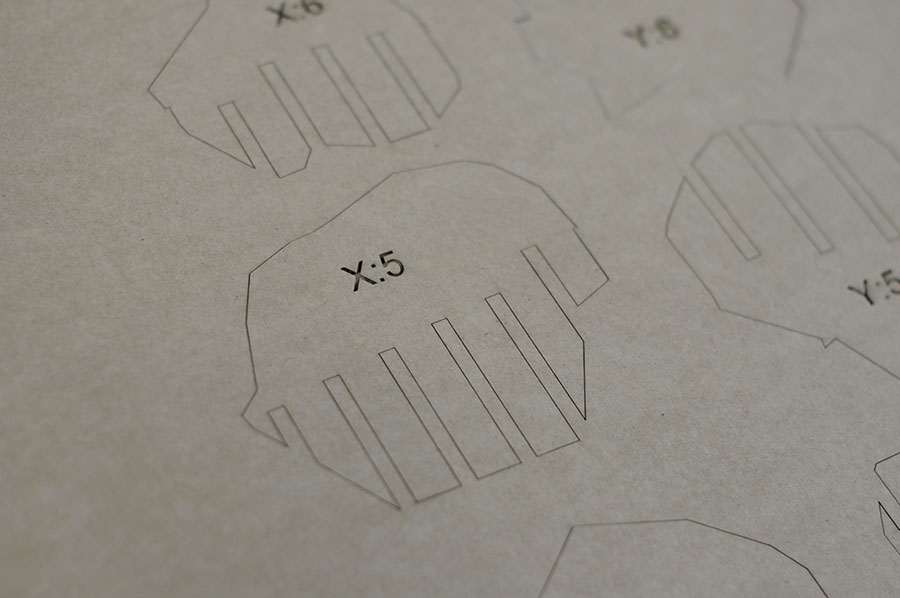
At first we started to make a group assignment to show everybody how the cutter and the software work. First, we must give actual dimensions to the file. We will work on mm, to change this setting, we go to FILE, DOCUMENT PROPERTIES. There we can change the units and the artboard size. Once we know we are working on mm, we draw a rectangle. On the top of the screen we have the description of the rectangle. In this case, we gave it a 100x45 mm dimension. Now we draw a straight line, and give it a stroke of 3.5 mm (We want to do the test with 3.5 mm cardboard). Now we copy the line a few times. To align the lines evenly, Inkscape has an Alignand Distribute Objects tool, that is very handy. Afterwards, we are going to add some text with the description of each slot. We align them with the lines we have made. Now we only need to change the stroke of the lines and update the number on the text individually for each one. This is something that would be much easier with a parametric tool, but Inkscape is not parametric so we have to change it manually on each line and text. Now we only must do a subtraction Boolean and export to Rhino. We must export to Rhino because our laser machines' software is Rhino based. Before doing the Boolean, we must transform the lines into paths, it wouldnt work otherwise. Also, we must transform the number to paths if we want Rhino to recognize them. Once we have the geometry we save it and send it to the computer controlling the laser. And after updating the settings we can send it to the laser. Our laser works with colors. We must change the color depending on the order we want the laser to do the cut. We wanted the numbers to be engraved and the rest to be cut so we only needed two colors. It is always easier to work with absolut colors. We used red and blue. After the colors are set, the important step is to set the speed and power the machine will use for each of them. This might get a couple tries to get it right. Here, we recorded a video as our mentor was teaching how to use the machine. We experienced the catching on fire Neil talked about on Monday. Apparently it is not unusual and that is why you have to be watching while the machine is doing something.
We did a test to see if it cut and engrave good. After that I tried to engrave some kind of logo which also worked. After that I was ready to start using the machines.


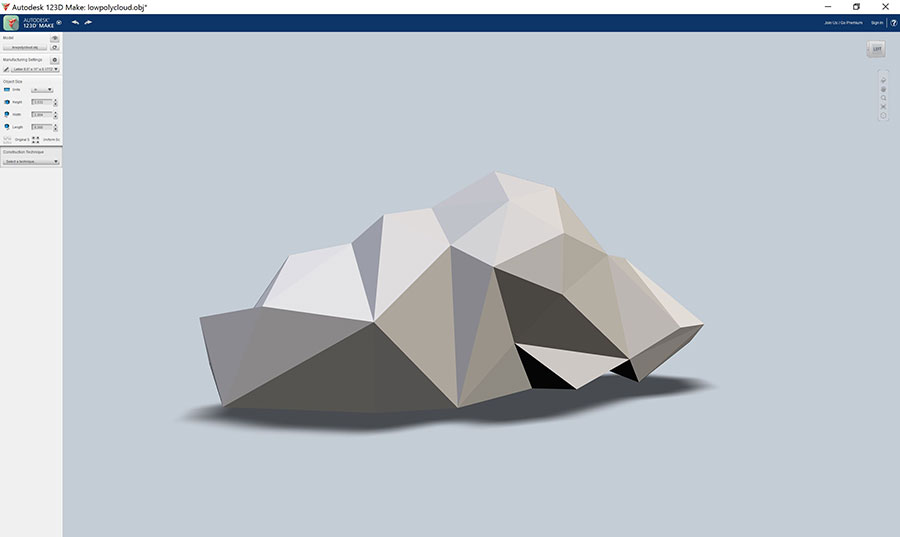
Autodesk 123d make
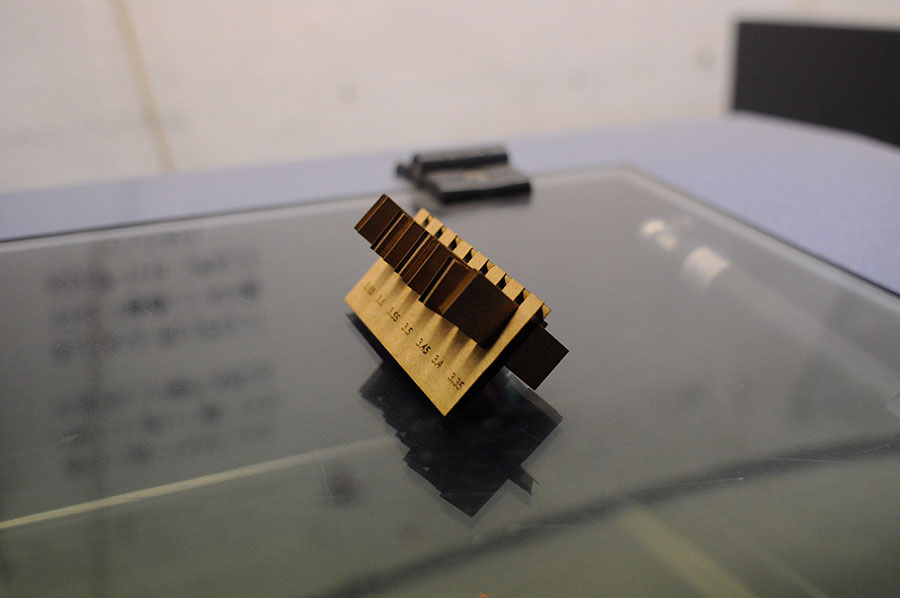
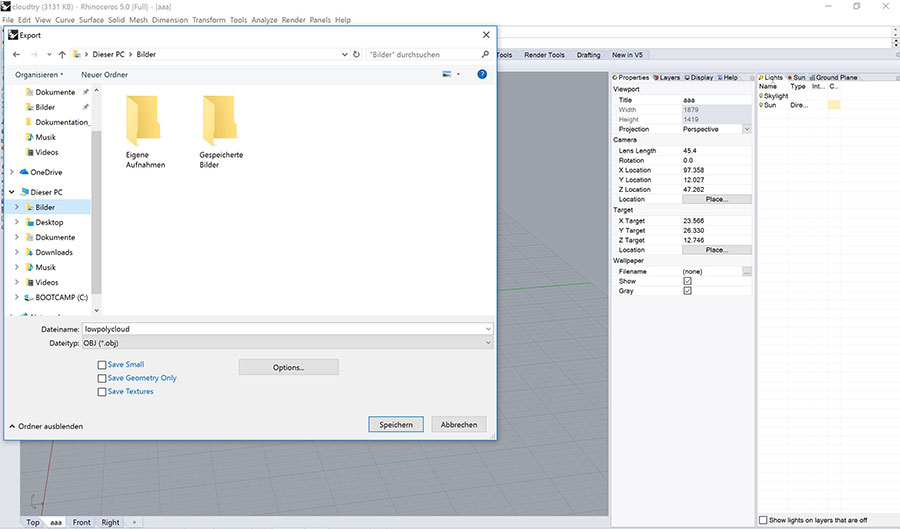
I started with 123d make because I think it is quite simple. I donwloaded it from here. I imported a ".obj" file from rhino and started to set my parametrics for thickness and the right format to put it on the cutter. I also defined how much layers I want for my pressfit model. What is really good at this programm is that you directly see and have 2D layers that you then can export and open in rhino to send it to the cutter. I used 4mm cardboard and speed: 100%, power: 100%, frq: 400. The only thing I found out when I cutted it on cardboard is that I choose too much layers which made it difficult to pressfit it together.


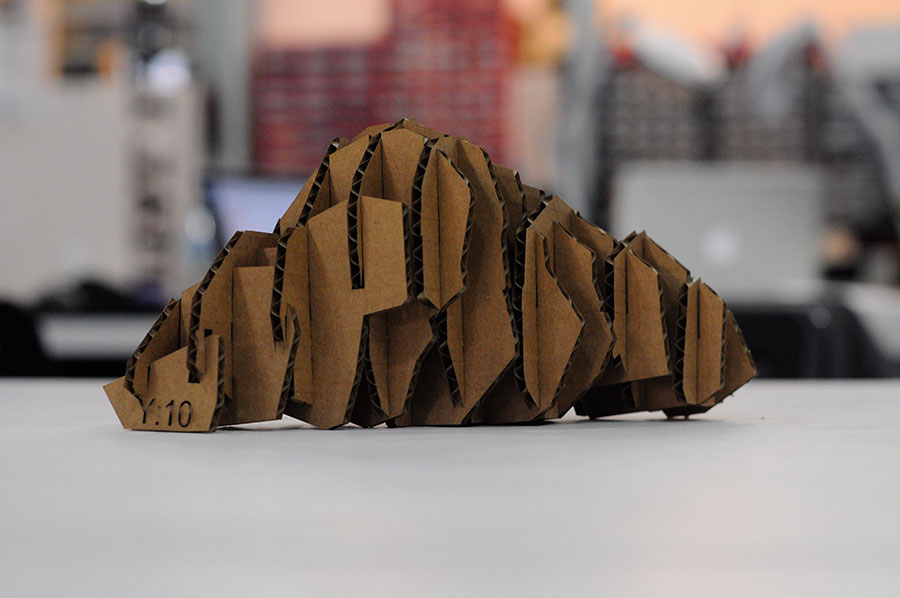
Grasshoppers
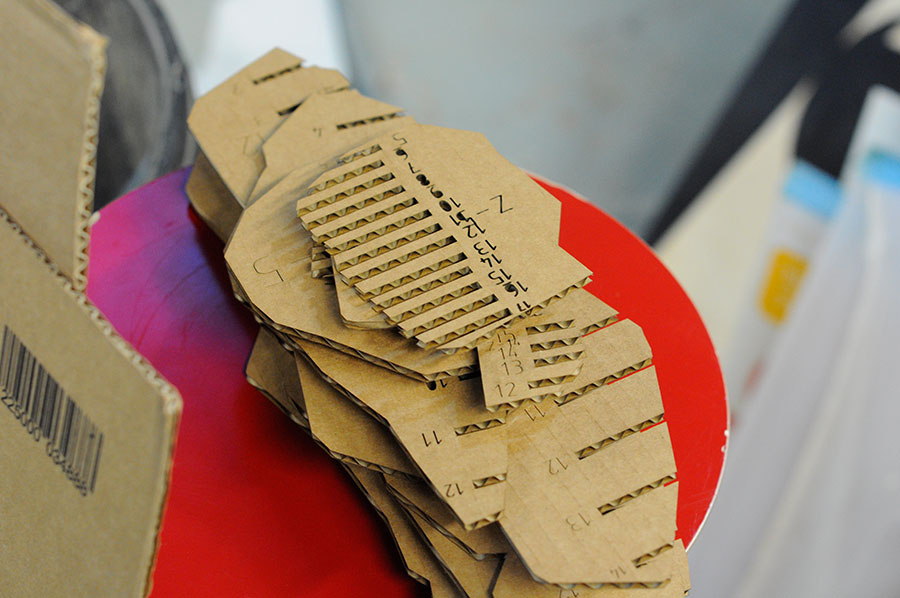
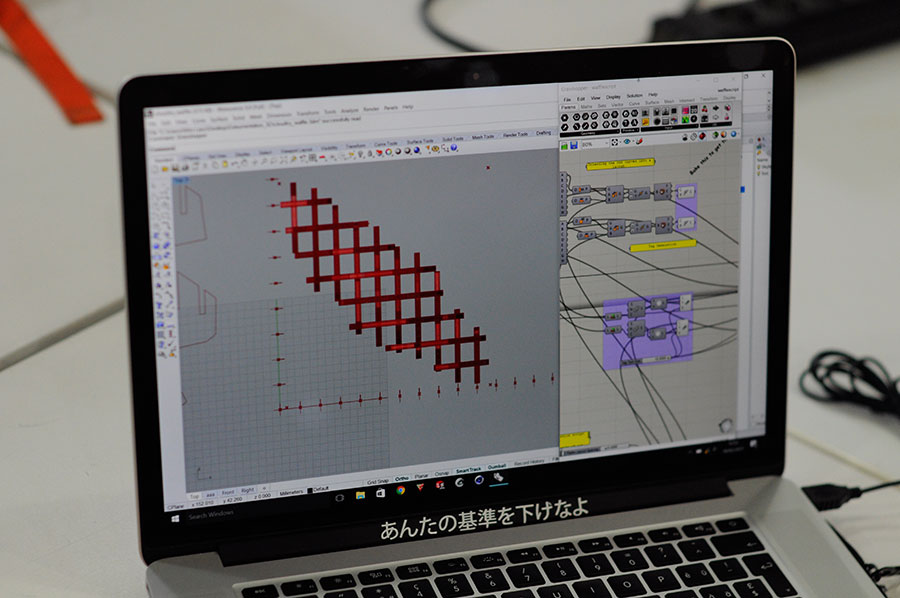
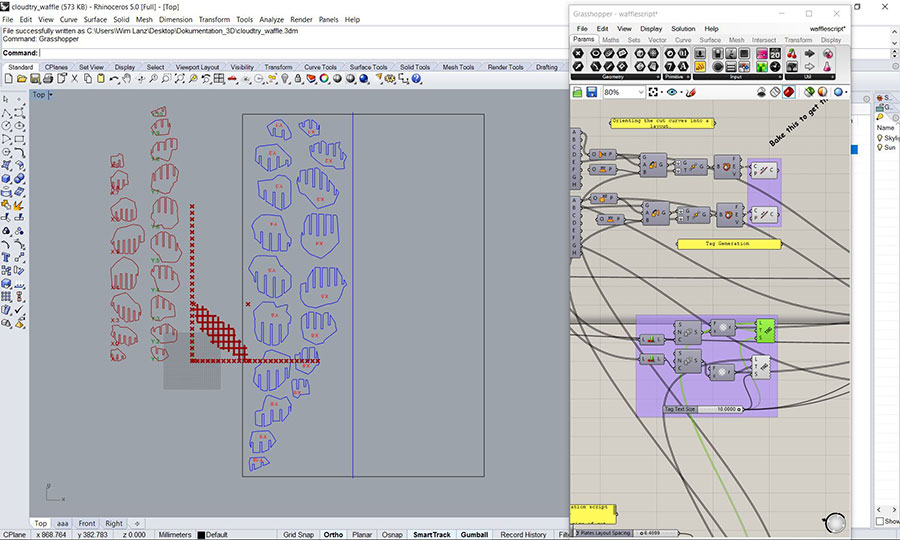
Because 123d isn't really a parametric software I started to make a second pressfit in grasshopper. Because it was really hard for me to make a parametric waffle script from scratch I found this script on the grasshoppers page and downloaded it. Needed some time to get used to it and also this tutorial was really helpful. The cool thing about this script is that it is simple to change thickness and it also directly makes you 2D Layers for laser cutting. After your happy with your model you can then "bake" it on your layers. I put then the document in the iaac cloud and put it on the lasercutter. I used 4mm cardboard and speed: 100%, power: 100%, frq: 400. It worked super and I am happy that I made a parametric press fit of my cloud.


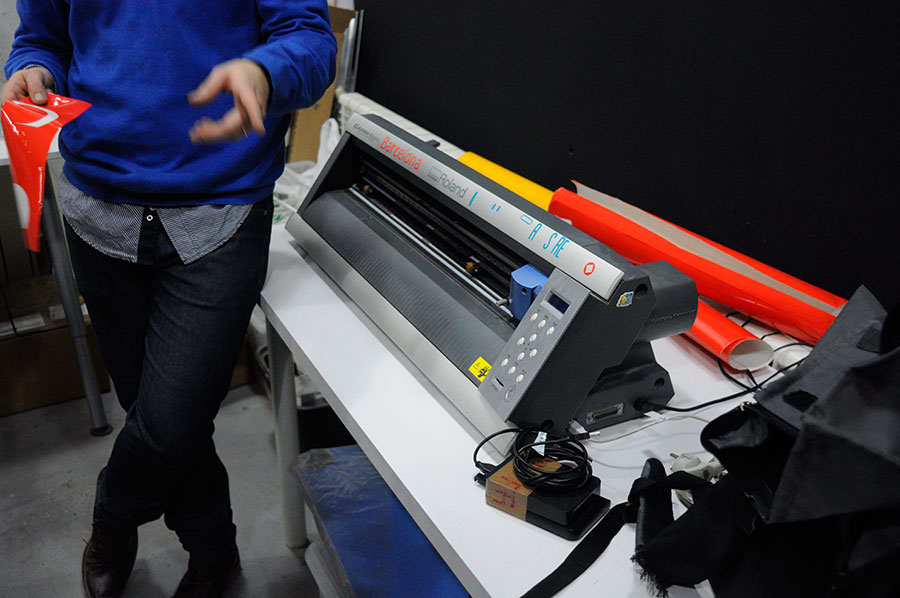
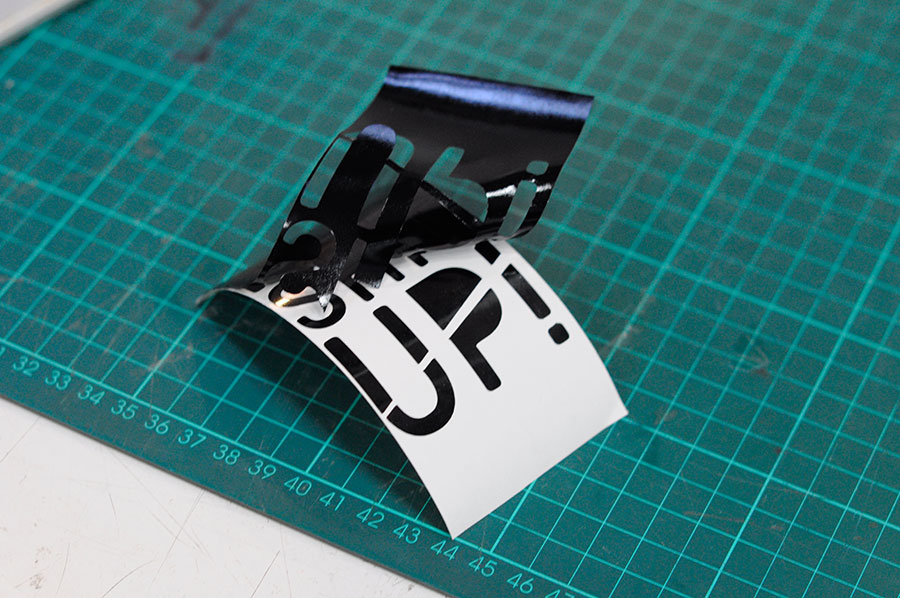
Vinyl Cutter
Like I said I know vinyl cutting so it was quite simple for me too use it. I made the design in Illustrator and send it afterwards to the iaac cloud. Then I imported it to Roland CutStudio and send it to the Cutter. Remember to make your adjustments at the start right. I mean look that the knife don't cut thru both layers and that you adjusted your foil right. After it cutted I put the foil away put the reverse tape on it and put the sticker on my new ssd hard disk.


Green Fab Lab
Last but not least I took the scenic route on my bicycle to Green Lab in Valldaura. I was really nice to work from there. Mostly because it is more calm and your really in the middle of the nature. I would definitely recommend to go there if you have time and work there.


Click here to download all the files.