Project management - Principles and practices
Week 1
Designing my first web page
Choosing a tool
Well, as suggested during the first week class, I began that journey by looking back through the last editions student’s websites. The difference between most of them is chocking and inspiring in the way that you can directly see who knows html well, or other web design tools, and who's a beginner. This begin said, it was great to see so much different kind of directions and designs. Then, I was conflicted between learning html or to take an easier way or a user-friendlier tool. All this because I'm introducing myself to that kind of work.
So, I watched many html tutorials, to see what I could do and also because I really wanted to learn.
Starting to code
Time passed and I realized that the weekend had already passed!! So, I chose to use the Fab Academy template and try no transform it. It worked very well for me, as I was a bit overwhelmed. As I had a template to follow, here are the functions I needed to learn to be functional and the very small challenges I encountered:
- 1. How to make spaces between different paragraphs: < p > < /p >
- 2. How to make multiple spaces between letters: & nbsp
- 3. How to add an hyperlink to a word or sentence: < a href="https://www.youtube.com/watch?v=UydUZLyjKTo"> Tutoriel HTML-CSS : Créer un site "One Page < /a>.
- 4. How to add an image:
- 4.1 Create an img folder in the bootstrap (so you can see the image online too).
- 4.2 Resize the image with Gimp.
- 4.3 Find a good title for my file (so it does not get a horrible mess !).
- 4.4 Put the file in the folder.
- 4.5 Right those lines of code: < p class="pic"> - < img src="bootstrap/img/about_mathieu.jpg"> < /p>
- 5. How to present code in boxes: < pre> < /pre>
- 1. Create an acount on fablabs.io.
- 2. Setup the SSH key
- 3. Install Git - I learned that on Mac, Git is already installed and ready to use by default.
- 4. Clone archive - all good
- 5. Update archive - Here I add some a small problem that could have been avoided. I just couldn’t push anything (See the image below). Well, it was just because I didn't put my files in my student number as it was clearly indicated. I guess those things happen. Thanks to Phon my instructor that remotely understood my mistake. Yay!
- 1. Trello.
- 2. Taiga.
- 3. Roadmap planner.
- 4. GanttProject.
- 5. TaskJuggler.
- 6. Project planner viewer.
- 1. Francesca Perona, Fab Lab Barcelona, 2015
- 2. Angeliki Terezaki, Fab Lab Barcelona, 2014
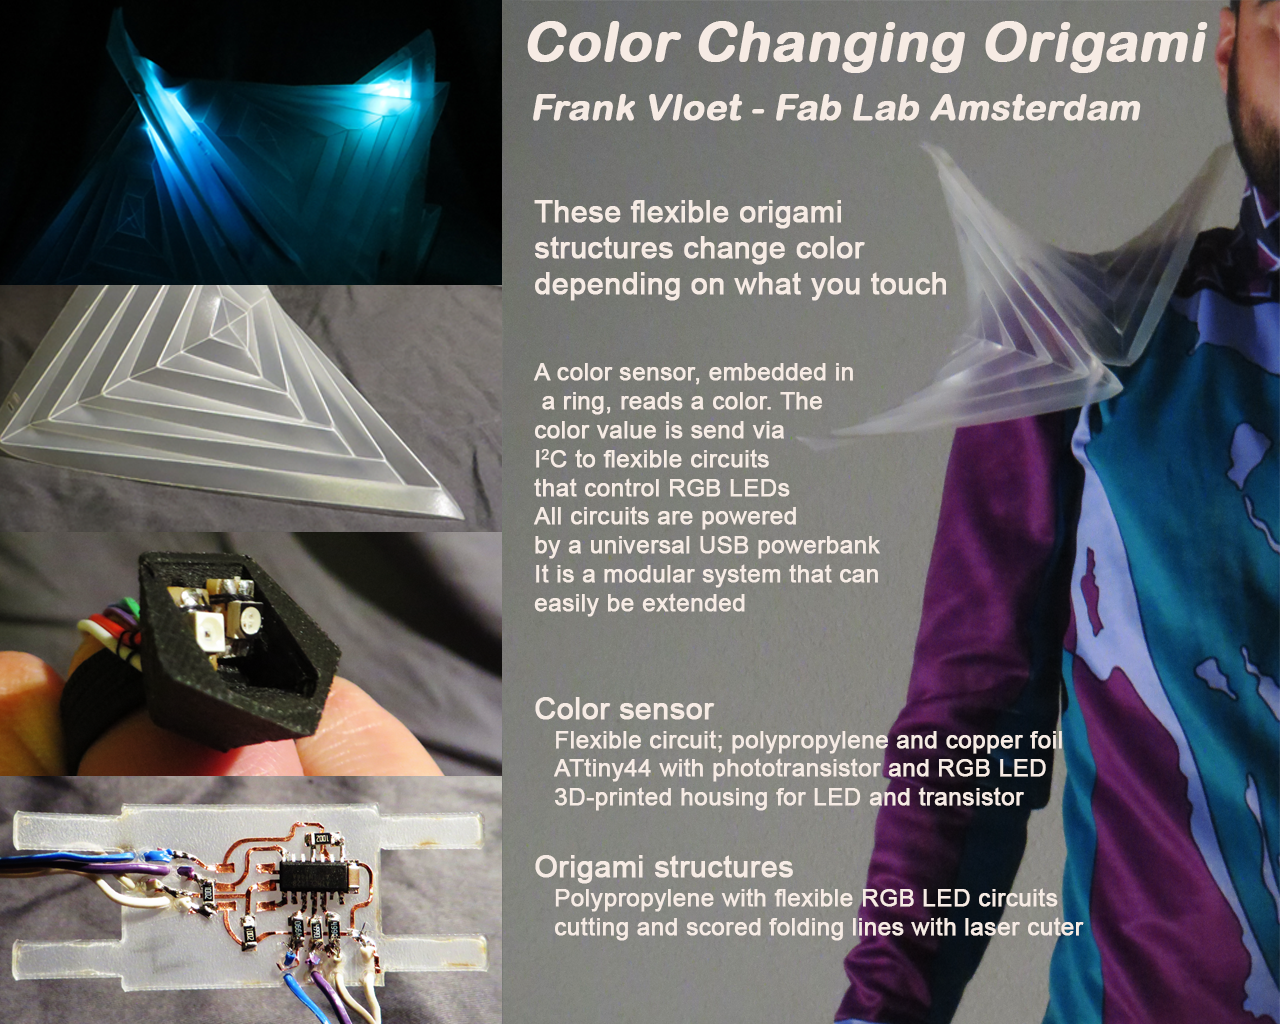
- 3. Frank Vloet, Fab Lab Amsterdam, 2015
- 4. Edward Octavio Muñoz Sandoval, Fab Lab Puebla, 2016
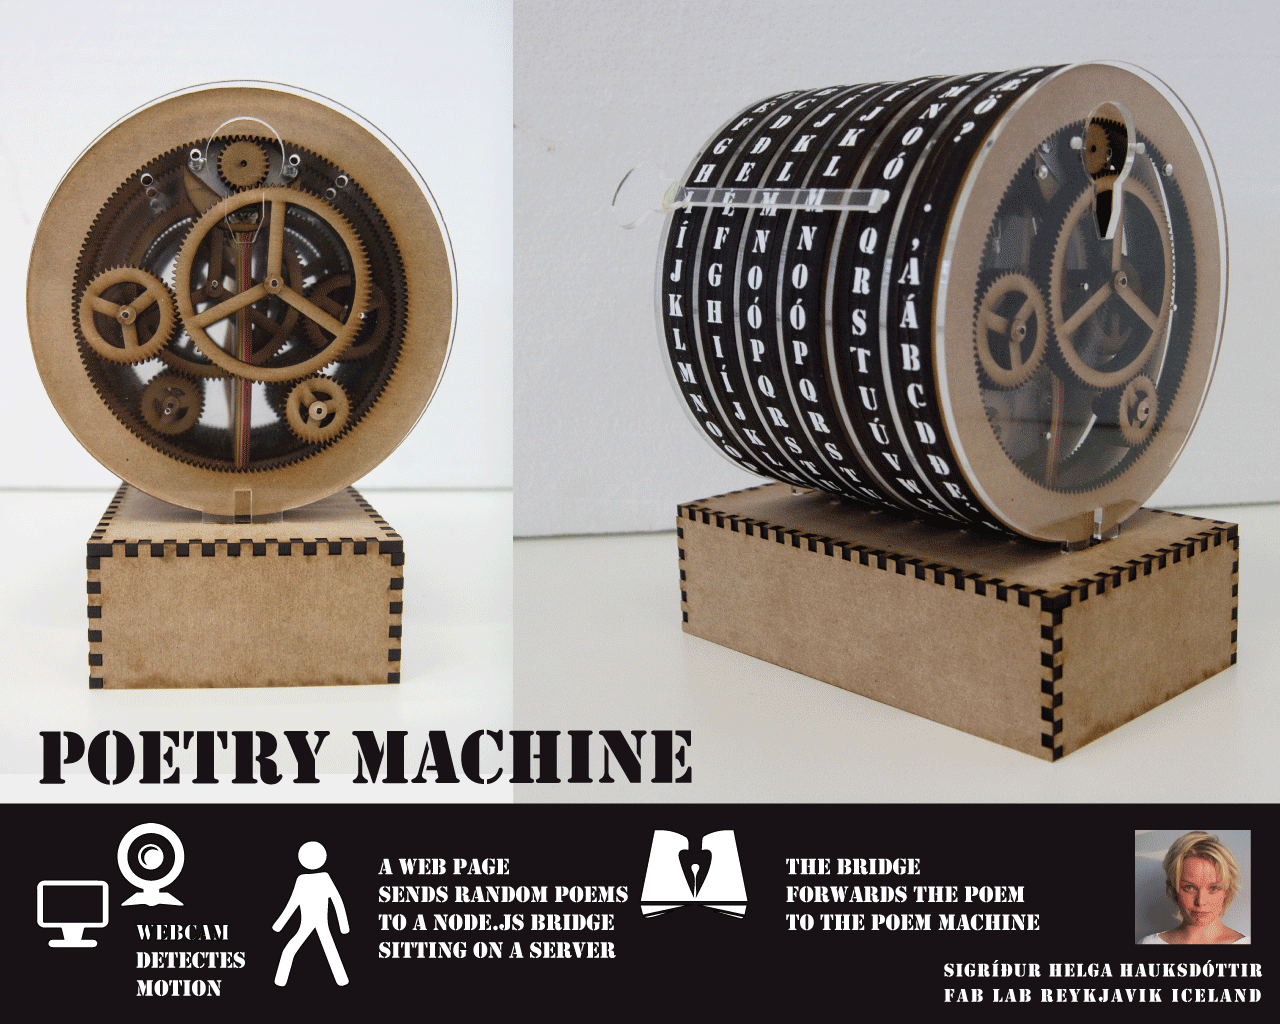
- 5. Sigrídur Helga Hauksóttir, Fab Lab Reykjavik, 2015
- How to Make a Kinetic Sculpture.
- Ultimate Kinetic Art Compilation.
- Zinnia Kinetic Sculpture.
- 10 Useless Machines That Do Nothing.
- The Most Useless Machine EVER!??!!!.
So here's where I am now, and pretty exited to see what I'll do in the next weeks to upgrade my website!
Project management
Git tutorials
My first word on Git is: Wow! This is completely new to me! What a chance, we have lots of tutorials and the help of instructors. It seemed completely alien to me. So, I looked at some tutorals again.
Git instalation process
Even after all those tutorials, it was still a bit overwhelming to begin the task for real. Sometime platforms like this one can be intimidating for a beginner. I followed the main tutorial with my college François and it went well until it didn't.


At the end, everything is working and ready for the next steps of the program !!!
Project management software
I've always used internal software or homemade files to do project management so I found that topic really interesting. Moreover, when I was studying in fashion design, our use of digital tools was really limited. It was in 2000! That was a complete other era and I stayed a bit old fashion. So here I come entering the 21st century! Here's what I looked at, they're mostly the ones that we were suggested to look at, so I downloaded them and tried to use them:
So, for the rest of Fab Academy I choose to use Trello mainly because of its user-friendly interface and basics functions. Also, the interface is really attractive and well, I'm that kind of person that is easily attracted to beautiful software.
Principles and practices
My favorite past students final projects
Inspiration
Concept
For the moment, as you probably realized I'm very inspired by kinetic art. I love the idea of creating shapes that become and evolve to other shapes and patterns. Putting into that sensors, responsive and automatic dimensions will definitely be on of my goals. The amount of planning that kinetic art implies impresses and stimulates me very much. I love art that shows rigor, precision and technic, although it's a bit old fashion.
The first idea that I had regarding a final project was to create a small "module" that could be multiplied to create some kind of robotic or automatic textile and then, in future phases, create a costume for cosplay of Syfy movies. At this point of my reflection, it's sure that I’ll have to simplify my concepts so I can execute it. I'd say I’m more in a dreamy phase of my process.
I presented links in the inspiration part of this section about useless machines. Well, this is because I want to concentrate on the appropriation of technics before everything else without that pressure of creation something related to a bigger problematic. So, even if the concept is still evolving, I surely can say that my final project WILL BE useless.
First sketch
Will follow as soon as possible.