05. 3D Scanning and Printing
Assignment
Test the design rules for your printer(s) (group project)
Design and 3D print an object (small, few cm) that could not be made subtractively
3D scan an object (and optionally print it)
Lecture
scanned me by itosinex on Sketchfab
Tools
3D Printer: Solidoodle4
3D Scanner: 3D sense
CAM: Repetier-Host

Basic Setting
Tempreture of Extruder:185℃
bed temp:50℃
Filament :PLA 1.75mm diameter
3D Printing Design Rules & Comparison
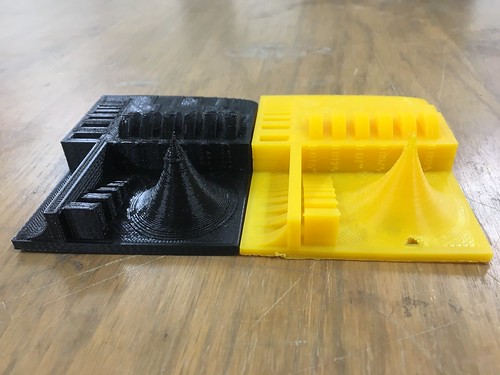
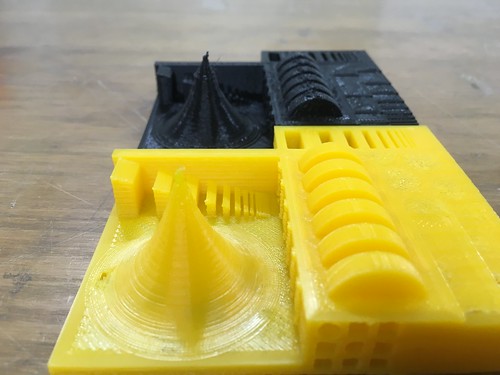
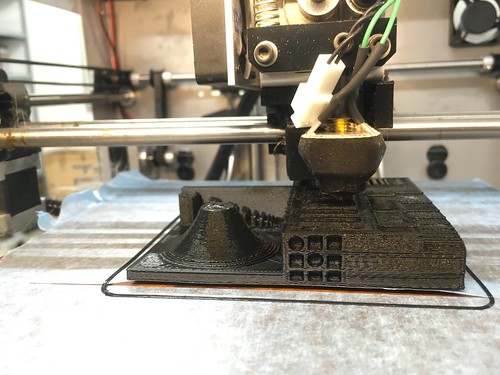
I printed 3D Printer Tolerance Test to see the constrains.
I tried different layer height: 0.3mm(Black) & 0.1mm(Yellow)
Mostly the 0.1mm one is more precise than 0.3mm one.
The major differences are:
■ 0.3mm pitch one: took about 3 hours. 0.1mm pitch one took about 6.5 hours.
■ The mountain-shape part on 0.1mm ver is smoother than 0.3mm one.
■ The CBA logo on 0.3mm is more beautiful than 0.1mm one.
■ 0.1mm one has some thin layer on the top and some of them are almost holes.

Trouble
While printing, one part was floating.
The reason might be tape on the bed. I used tape called "3M 777" and it was reccomended.
Kapton tape is recomended by Asian Review for bed tape
3D Scanning
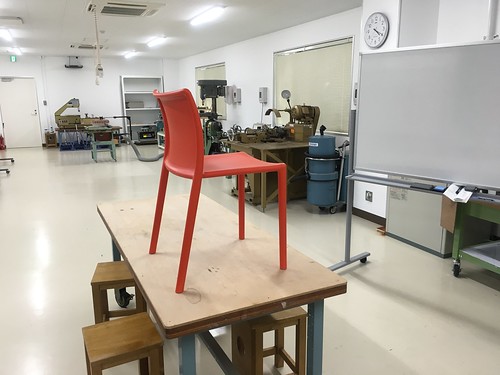
I scanned a chair called AirChair with 3D sense. The reason why I chose the chair is that the shape seemed complicated. It has a hole to handle on the seat surface.
Also I wanted to try to scan an big object.
The process of scanning is:
1) Donwload the Sense software and activate it. It needs the code on the device.
2) Choose "Object" mode, then choose middle size mode.
3) Scan the object slowly. If it's too fast it might cause "lost tracking". I scanned from many angle to take all surfaces of the body.
4) Save as .ply after scanning.
This is the output:
It looked nuch better than I expected. It showed the hole on the seat surfice clearly. That's great.
scanned Airchair by itosinex on Sketchfab
Editng Mesh
After scaning, the .ply file was needed to be converted to .stl or .obj because .ply was not suitable for 3D printing. Also, it's good to check if the 3D data has some problems such as too many meshes, has invalid mesh structure(holes or inside out mesh) and so on.
To reduce the number of meshes
To reduce the number of mesh MeshLAB was useful.
First, do "Import Mesh", then change view to "Flat Lines" to see meshes clearly.

Filters > Remeshing, Simplification and Reconstruction > Quadric Edge Collapse Decimation

set "Percentage Reduction" as 0.5, then press "Apply". The number of mesh became 50%.
Undo doesn't work on MeshLAB, so be careful not to reduce too many meshes.
To repair 3D model
Microsoft 3D Model Repair service is the easy way to fix the 3d model that has problem.
The process is: Sign in > Upload 3D model(STL, OBJ, 3MF, VRML ) > wait > download the fixed data.

To reduce meshes manually
I used Scruptris to reduce mesh manually.
Using "Reduce Brush" command:

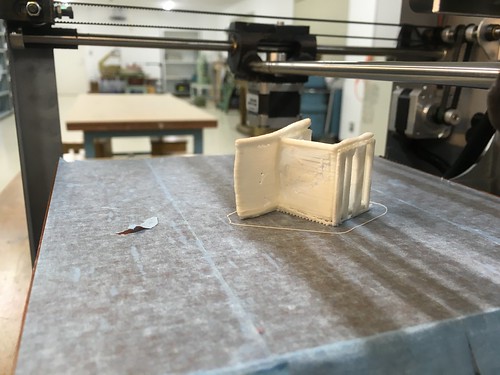
3D printing the Chair
This shape of chair has floating part, so I added suporting part. The support is generated in CAM software Repetier Host.
Choosing the angle of printing is also important. If I choose right direction, it has less support material and I can eliminate the time of printing.
Take the support parts by cutter or any hand tool after printing.
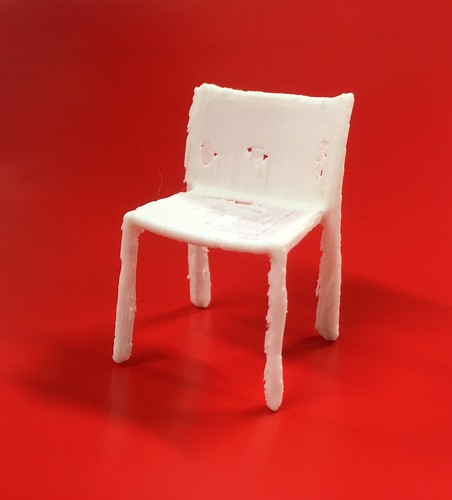
The white chair is little small so it has some holes.
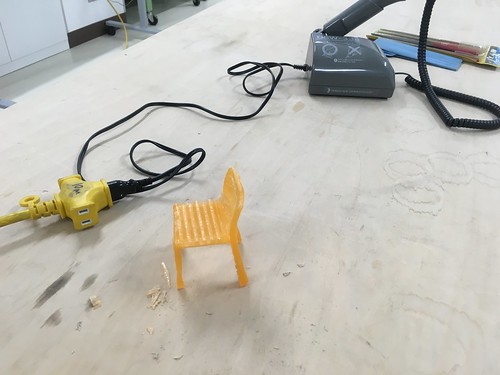
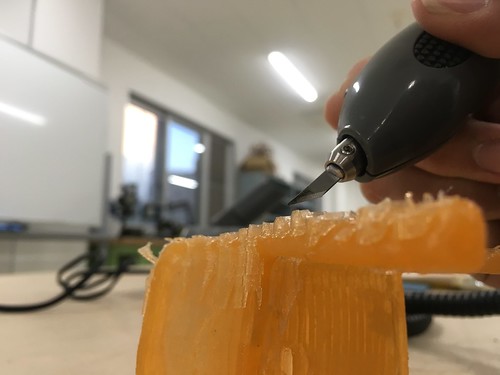
Another 3D priting the chair
I printed the same model with lager scale. This time I used yellow clear PLA.
After printing it had a lot of supporting material. I took those ssupport with Ultrasonic cutter. It took long time to remove support beautifully.
3D printing my final project
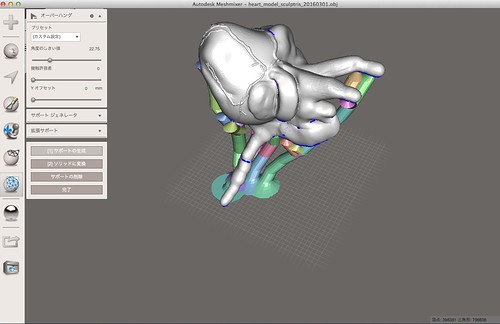
Next, I wanted 3D print the heart 3D model that I made in week2 COMPUTER-AIDED DESIGN assignment.
It needed support so I used Autodesk Meshmixer to generate the support.
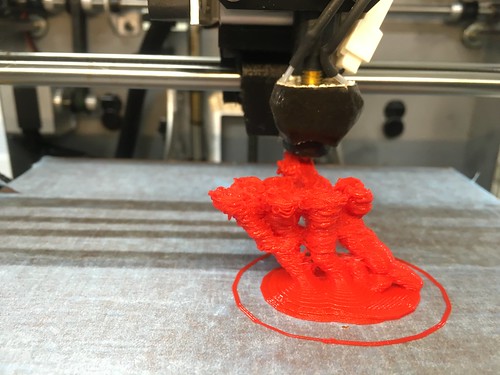
During the printing, the extruder stick into the printed object.
The cause of problem was not sure. I thought thatthe bed height might be too high. So, try to print with lower bed hight, but it didn't changed auto come. The outcome was grotesque but I kind of like this generative shape.
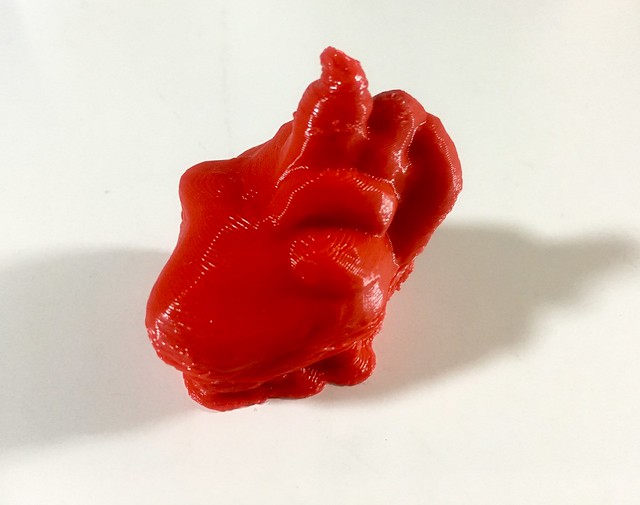
I printed the heart again with different support setting. It was success. The cause of the last problem was probably support setting.
Advantages and Iimitations of 3D printing
advantages of 3D printing
- It enable to substantialize the object that has shapes which is impossible to make by subtractive process.
- I can work in parallel during the 3D printer is working.
limitations of 3D printing
- 3D printing takes long time. Generally it tooks 2-3 hours. If the layer hight is 0.1mm pitch, it might take 5-7 hours or more. It doesn't seem "Rapid" prototyping in this sense.
- It has the possibility to get fail printing in the middle of printing, so I have to check during the 3D printing.
- machine setting is critical to get good 3D printing outcome.
- The outcome of 3D printer is not really precise
Advantages and Limitations of scanning
advantages of 3D scanning
- It enable to digitalize the 3d object roughly.
limitations of 3D scanning
- It can't get precise shape of 3D thing.
- The 3D scanned data contains a lot of tiny junk that should be taken.
Download