
E07: Computer Controlled-Machining
This weeks assignment is about big machining and we have to make something ‘big’.
-
Assignment:
- 1: Make something big. Machines/Tools:
- Easy Worker MasterPro 2513 Software:
- e(lsign CNC 4.0.1
- Rhinoceros 3D Results:


Notes from lecture + comments:
- Center-cut tools are terrible for getting the chips out but it makes a nice surface.
- Ball-endmills are good for curving surfaces.
- Cut-depth down is usually ~ tool diameter
- Step-over: ~ tool diameter/2
- Do test cuts to make sure you are cutting properly - then do the full job
- Cutting the boundary, then combine rough-cutting with continuous cutting
- „climb machining“ - puts more force on the machine (because it is climbing) but makes a cleaner cut. You usually use this for softer material or finished cuts.
- „conventional machining“ - makes the worst cut because it is grinding in the finished surface but it is better for the machine.
useful links:
http://www.woodguide.org/files/2014/07/CNCrouter_bit_basics.pdf
http://www.onsrud.com/files/pdf/LMT-Onsrud-CNC-Prod-Routing-Guide.pdf
http://woodtools.nov.ru/books/pww_ess_routers/pww_ess_routers.pdf
http://makezine.com/2014/03/21/cnc-routing-basics-toolpaths-and-feeds-n-speeds/
http://www.popularwoodworking.com/wp-content/uploads/2011/02/ICDTBookHiResJune10.pdf
http://www.cnccookbook.com/img/CNCCookbook/eBooks/CNCFeedsandSpeedsCookbook.pdf
Principal how2 for the Machine
At FabLab Kamp-Lintfort we have a CNC portal milling machine of e(sign: Easy Worker MasterPro 2513.
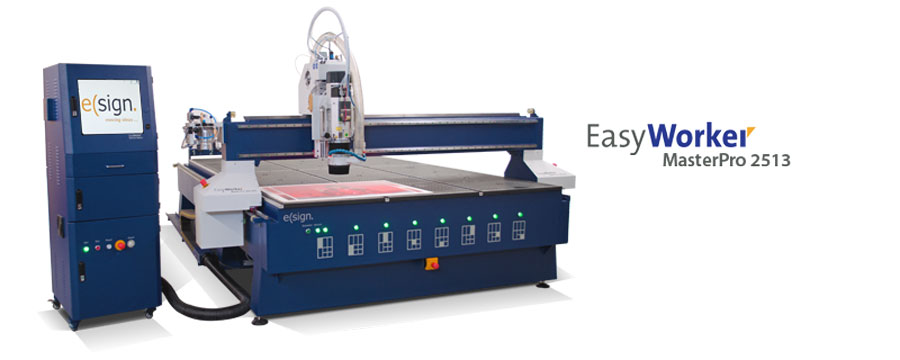 It’s working area is 2600 x 1400 x 300mm and it comes with a vacuum table. We primarily us it for wood milling but with its HSD Spindel (3.9KW; 24.000U/min) it is also capable to mill metals easily.
Following is a general description on how to operate the machine. Details about how I have made something big will follow later on.
Setup the Environment
- Supply the machine with power (16A ‘control’ cable needs to go into the special plug socket, located at the pillar at the right backend of the machine).
- Main power cable needs to go into another 16A plug socket.
- Clean the vacuum table or cover sheet. The cover sheet usually is a thin sheet of MDF (3-5mm) covering the whole vacuum table. The cover sheet prevents damage of the vacuum table’s honeycomb. Whenever you want to cut through a material you will slightly mill into the cover sheet. Because of this, you have to exchange the cover sheet from time to time, because each surface cut will have an increasing impact on the vacuum power.
- Turn on the machine at the right hand side of the terminal (if the computer does not start automatically, open the middle lid and press the computers power-on button).
- Start the CNC Software using the desktop icon, then press start icon at splash screen.
Homing, then set X,Y and Z Zero Positions
- Home the machine by press the home button in the software (or on the remote control).

- Place and adjust the material.
- Turn on the vacuum pump and activate (only) relevant sections.
SET X,Y TO 0,0:
- Position the milling head to the X and Y position you like to set as 0,0.
- You can only do this (while you are in the Tab: Automatic). To control the head use the arrow keys on the keyboard (+ shift for fast movement) or use the remote control. The remote control keys only function if you press the silver button on the right hand side, too.
- Press ZERO XY on the remote control to set X,Y to =0,0. Have a look on the current location of X and Y in the software. You should see set to 0 in the software, too.

SET Z TO 0:
- You want to set Z 0 to the surface of your work table (i.e. on top of your cover sheet).
- Place the end mill (and the machines collet) in a way next to your material so that it does not interfere.
- Place the conductive height sensor on top of the layer you want to be Z 0 (I recommend to place it on the cover sheet) just below the end mill (in-between there needs to be a short distance, e.g. 10-15 mm).

- In the software on tab „Automatic“ Press F11 for User Menu.
- Press F2 to start the automatic calibration by using the conductive height sensor. The machine now will slowly decrease Z until it touches the sensor. After that, it moves upwards again. Remove the sensor.
Prepare and measure your Material
- Mount the material. The bigger the sheet, the better the vacuum table works. Even if you want to cut smaller objects, if you have a big sheet, it will easily keep its position. If you plan to cut out a lot of your sheet you may need to fix it additionally. A way to do this is to add another sheet (support sheet) between the cover sheet and your working sheet. Then you can use wood screws to attach your working sheet to the support sheet (at places where you don’t want to mill of course). The support sheet will then be hold by the vacuum and the working sheet by its attachment. Additionally you will preserve your cover sheet.
- Measure and note the height of your material at different places - it is a natural material and because of that not uniform.
Start the CAM-Process
- Click on tab: CAM
- Load the file (dxf).
- Each tool path with different parameters needs to be on a separate layer and each layer needs to have a different layer-color. DXF needs do be in R12 format
- Press LL (lower left) to align the objects.
- Check the dimensions in X and Y. If you stand in front of the machine, X 0 (lower left) is on the very right front corner of the table. X maximum is on the very left front corner of the table. Y 0 (lower left) is also on the very right front corner of the table. Y maximum on the right backend of the table.
- Select each single layer and click on calculate to see whether the software can calculate the tool path (parameters do not matter here).
- The machine allows four alternatives for tool paths: pocket, offset (inside or outside cut), engrave (cuts centric) and drilling.
- Set the parameters according to the material and tool(s) you use.
- Following is an example, we used for cutting Multiplex using a 6mm end mill (which, at the end turned out to be very slow - see parameters section below for best practice examples:
- Material thickness is 21mm
- Secure-Height (Sicherheitshöhe): 50mm (Material thickness + ~30mm)
- Start-Z: 22mm (a little bit above the materials surface)
- End-Z (Ende-Z): -0.02 (in case you want to cut through the material; here: you will then scratch a bit of the cover sheet)
- Form feed (Geschwindigkeit des Vorschubs): 800
- Thrust speed (Eintauch Vorschub): 500
- Spindle speed (Spindeldrehzahl): 12000
- Spindelrichtung, Laserbetrieb and Werkzeugnummer dont have an effect at all.
- Tool diameter (Werkzeugdurchmesser): 6 (mm)
- Method (here: Außen CW = outside clockwise)
- Double check all parameter.
- Click on ‘calculate tool path’ (Berechne Werkzeug-Pfad).
- Save G-Code (G-Code speichern). Software then automatically changes to tab: Automatik
- If needed, return from User Menu to Main Menu (F12)
- Go to Auto(matic) Menu (F4)
Start Milling:
- Make sure: MACHINE REACHED MAXIMUM Z-HEIGHT
- Make sure vacuum works.
- Turn on the extraction system (front panel of the machine).
- The ‘Start’ button on the screen (F4) should be green (It changes to STOP after you pressed it).
- Next you have to carefully observe the machine. Sometimes it might happen that the spindle does not start (or is too slow) which will cause damage to the machine (or at least the end mill).
- Take yourself in a position that you can see the tip of the end mill - and, that you can reach the (F4) key as well as the emergency button.
- (F4) will start the spindle (you should hear it) and start spinning the end mill (very fast). In case it is too slow or even does not turn, press F4 immediately. It takes a second for the machine to realize the user input via keyboard. If it doesn’t, don’t hesitate to press the emergency button. If you press the emergency button you may need to reset X,Y and Z. This might cause trouble if you had already milled parts of your object. However, even better to waste some material than to crash the machine. If you press (F4) the settings will be unchanged - BUT you need to be very fast.
- If you need to stop an on-going process, you can press (F4) but after doing that, immediately press
+ as long as the spindle is still turning. This will prevent the end mill to stick in the material at its position. - After each process (independently of whether you stopped it manually or after finishing) SET THE MACHINE TO MAXIMUM Z-HEIGHT.
Important Tips & known problems
- Sometimes it might happen that the spindle does not start (or is too slow) which will cause damage to the machine (or at least the end mill). See „Start Milling.
- There might be problems reading the dxf. Check all layers before you start milling one of them. Therefore (in tab: CAM), select ALL Layers and click on calculate to see whether the file works. Parameter do not matter here. I recommend to to this test in Offset-Modus.
- The bigger the sheet, the better the vacuum table works. Even if you want to cut smaller objects, if you have a big sheet, it will easily keep its position. If you plan to cut out a lot of your sheet you may need to fix it additionally. A way to do this is to add another sheet (support sheet) between the cover sheet and your working sheet. Then you can use wood screws to attach your working sheet to the support sheet (at places where you don’t want to mill of course). The support sheet will then be hold by the vacuum and the working sheet by its attachment. Additionally you will preserve your cover sheet.
- In case you make a pocket, you do not need to have a very thin first layer cut (to protect the surface from fraying) because at the tool path will be first an inside cut of full depth followed by a final 1mm cut along the line.
Best practices: Material & Settings:
Multiplex, 6mm end mill:
Speed (Geschwindigkeit): 2500
Eintauch Vorschub: 500
Spindeldrehzahl: 20000
MDF (small parts which might break), 6mm end mill:
Speed (Geschwindigkeit): up to 2000
Eintauch Vorschub: 500
Spindeldrehzahl: 20000
MDF (fast), 6mm end mill:
Speed (Geschwindigkeit): 3000-3500
Eintauch Vorschub: 500
Spindeldrehzahl: 24000
How to MAKE it
Following pictures show details about how to make a string bass (two of them). It was not supposed to be a working version but rather a knock-off for carnival and theatre (stage design). Thus, it has to look quite real but did not need to function. Thats also why I did not use the adequate material required for a functioning musical instrument.
However, I wanted to MAKE it by using the CNC router and in a advances way. I wanted to use bendable ply wood and wanted to create notches to the bass' body so that it precisely fits together.
I used Rhino to create the design. First, I searched for pictures of string basses in the web and used these fotos as the basis. I also looked up its dimensions to create it in proper scale. I then planned the design of it.
In my design the bass consists of:
- Two body layers (top and bottom), whereas the top layer consists of two so called "f-holes",
- the bended side parts (for which I need to create a mold, to hold it in place while glueing it),
- and the arm of the bass (of which I knew was difficult to make it look like original using the CNC because I would need 3D milling skills or manual rework).
I used the "BackgroundBitmap" to place a foto in the proper scale as blueprint for the design. Based on this I used the command "Curve point curve" to retrace the foto. I traced just half of it and used the "Mirror" command to create an exact copy if it. By using join I made it a closed curve.
I did the same procedure with the f-holes: retraced a picture; mirrored the curve and placed it at its final position.
Because I wanted to use bending ply wood for the side parts of the body, I decided to make a notch 3mm width and 6mm depths (whereas the top and bottom layer should be made of 12mm ply wood). Therefore I selected the curve and used the "Offset" command. You have to point through the center of the curce and enter 3mm.
To prepare the file for toolpathing you have to move each curve (or the set of curves with same tool path characteristics) onto a different layer.
After that I exported the file as .dxf wir R12 as parameter as this is the format readable by the machine.


I placed a proper sheet of wood onto the vacuum table and set up the machine as mentioned in the tutorial above. I checked each layers tool path to figure out if the machine can handle each.
You should always start milling from insinde to outside. So did I, and started with the f-holes. I used folltowing parameters for that:
- Material thickness is 12mm
- Secure-Height (Sicherheitshöhe): 45mm (Material thickness + ~30mm)
- Start-Z: 12mm
- End-Z (Ende-Z): -0.02 (in case you want to cut through the material; here: you will then scratch a bit of the cover sheet)
- Form feed (Geschwindigkeit des Vorschubs): 800
- Thrust speed (Eintauch Vorschub): 500
- Spindle speed (Spindeldrehzahl): 12000
- Spindelrichtung, Laserbetrieb and Werkzeugnummer dont have an effect at all.
- Tool diameter (Werkzeugdurchmesser): 6 (mm)
- Method (here: Innen CW = inside clockwise)


After that, I did the notch:
- Material thickness is 12mm
- Secure-Height (Sicherheitshöhe): 45mm (Material thickness + ~30mm)
- Start-Z: 12mm
- End-Z (Ende-Z): 6 (because here, I just wanted to cut through half of the material)
- Z Increment: 4.5
- Form feed (Geschwindigkeit des Vorschubs): 800
- Thrust speed (Eintauch Vorschub): 500
- Spindle speed (Spindeldrehzahl): 12000
- Spindelrichtung, Laserbetrieb and Werkzeugnummer don't have an effect at all.
- Tool diameter (Werkzeugdurchmesser): 6 (mm)
- Method (here: Außen CW = outside clockwise)


Then, I did the outside cut:
- Material thickness is 12mm
- Secure-Height (Sicherheitshöhe): 45mm (Material thickness + ~30mm)
- Start-Z: 12mm
- End-Z (Ende-Z): 6 (becasue here, I just wanted to cut through half of the material)
- Z Increment: 4.5
- Form feed (Geschwindigkeit des Vorschubs): 800
- Thrust speed (Eintauch Vorschub): 500
- Spindle speed (Spindeldrehzahl): 12000
- Spindelrichtung, Laserbetrieb and Werkzeugnummer don't have an effect at all.
- Tool diameter (Werkzeugdurchmesser): 6 (mm)
- Method (here: Außen CW = outside clockwise)
While being facinated by the machine working I somehow realized that I made a mistake. I made f-holes in each layer but in the bottom layer, they are not needed. Even though, it sould not become a working instument I wanted it to be as real as possible. To not waste material and also to play with the machines setting I created two f-hole pieces and milled them. I used the same settings except for method, which I set to "Aussen CW". Becasue the design was the same as in the original file it turned out that the inserts did not fit. They needed to be a litle bit smaller. Because I don't wanted to change the file I changed the tool size to 5.5 mm (instead of 6mm). This caused the effect that the machine calculates a lower offset for the tool path and therewith makes the objects a little smaller.
By using white glue and a hammer, they perfectly fit in.


Next, I created a mold (inside cut of the outer curve of the bottom layer) out of 30mm thick press-wood, so that I could place the bottom layer into the mold. I taped the border to avoid glueing pieces together.
I cutted two pieces of bending ply wood and stuck them into the notch (with white glue inserted beforehand).


Now I had to make the arm. therefore I cutted 3 pieces (method: Aussen CW) to glue them together afterwards. They contain holes that I milled first (method: Innen CW) and two pieces contain a notch (left and right) that I engraved (using the engrave modus of the machine) wit a depth of 3 mm.


The arm was finished with sand paper and attached to the front of the body. I inserted a thicker lumb of wood at the lower end because later on, there needs to be a tail-piece added to it.
The top layer was added and the bass was painted with wood stain.


The two basses were attached to the float of "Young princess Hannah I. of Kamp-Lintfort".


Finally, the carnival parade with its floats and people in costumes took place on 13th of March 2016.


Maybe it was becasue of the string basses - maybe not. But the "something big" made it into the newspaper :)
Download
Take Away's
- I love the big cnc :). However, due to the missing link of CAD and CAM it is not easy to operate the machine. (update 2016-06: We received an automatic tool changer and at the same time, installed the post-processor for Fusion360. Now, all is PERFECT)
- Be super careful. The machine is powerful and can not just damage material, it can also harm your body!