
Tapan
Betai

2016
Week- 7 Computer-controlled machining
Make Something BIG!!!!!!!!
Thought a lot about it and finally decided to make a big wall mounting.
We have shopbot full size in our fablab.
You will need partworks, partworks 3D, shopbot software in you computer to run the machine and for milling on this machine.
You can do drilling, milling and cutting operations on this machine.
you can find specification on:

Let's start with taking a look on the bits used for different operation and materials.
Refer link given below:
http://www.tinkerandfutz.com/a-guide-to-cnc-bits/
Let's Start with milling then
You will need something in .dwg format for 2d cutting and .stl or .obj format files for 3D milling.
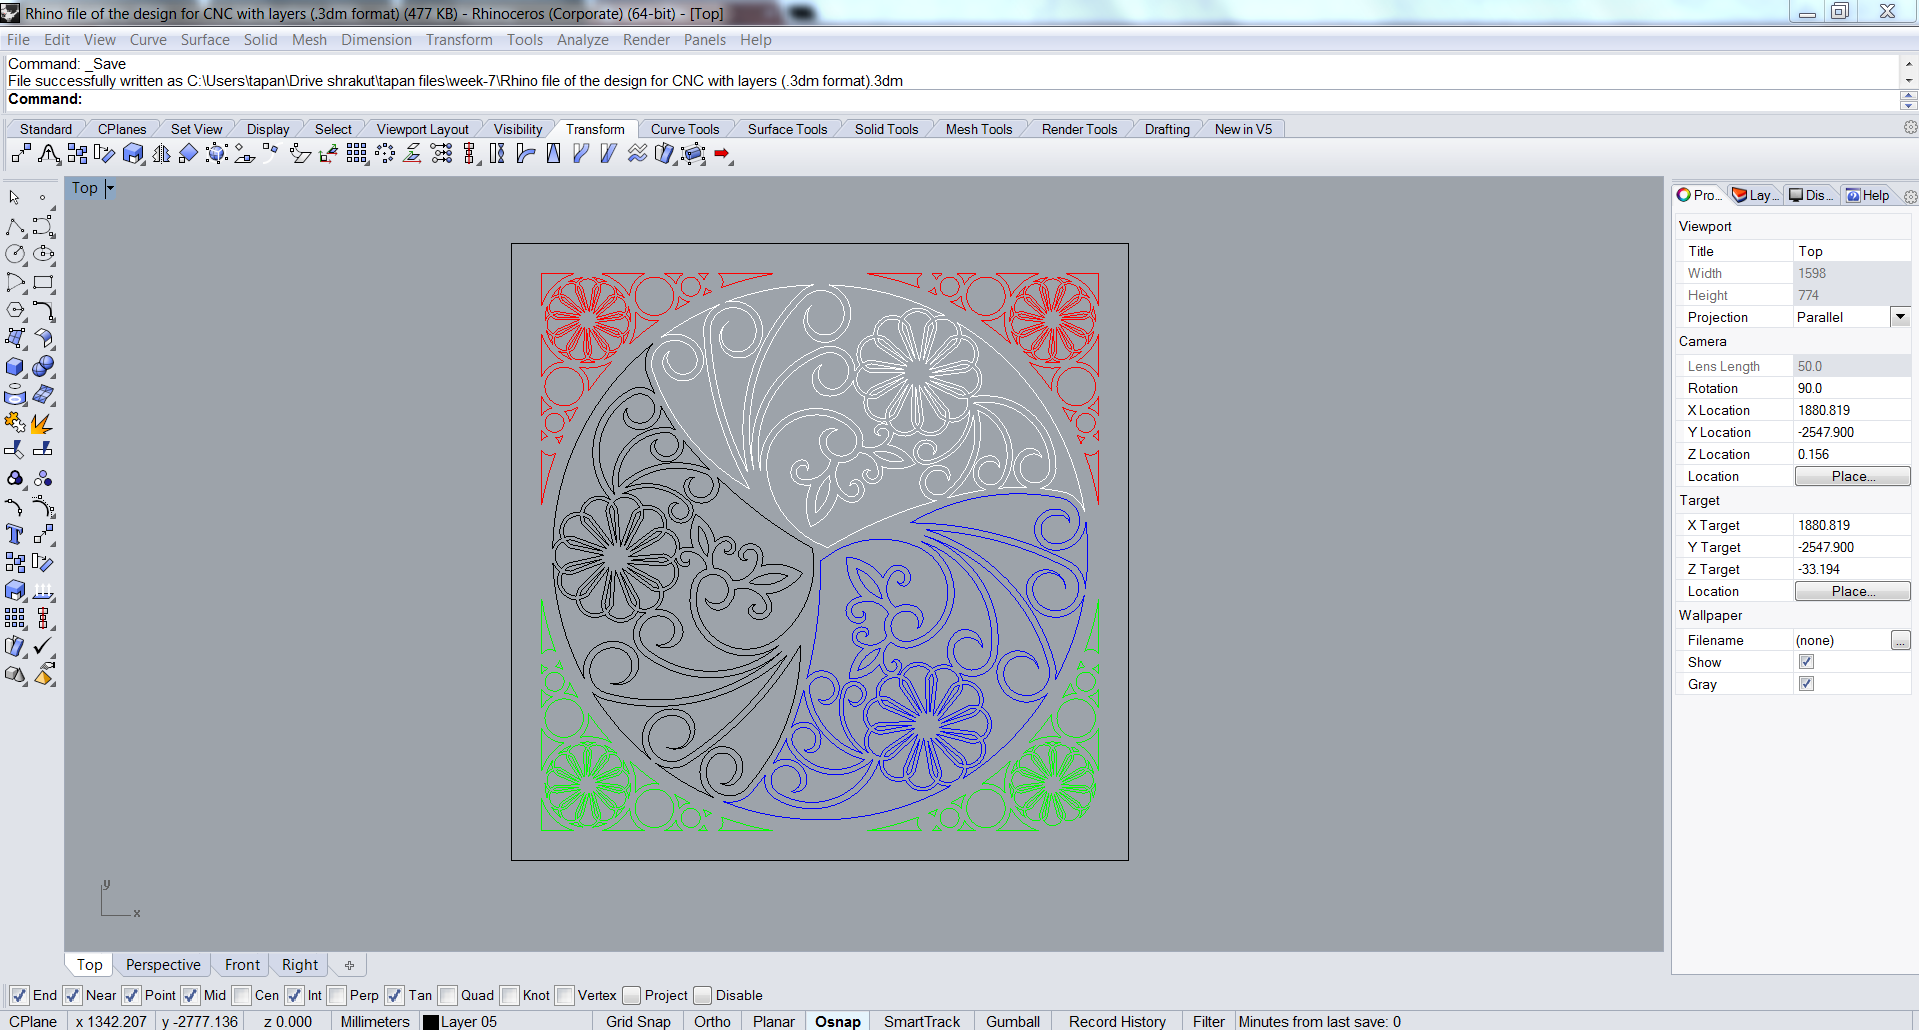
In the following picture you can see the design made in rhino
Here we have isolated the objects in different layers because this job is of almost 1 meter * 1 meter and it is going to take few hours to cut the whole piece hence as shown in the figure we will cut all the layers separately.
If you can get sheet bigger than that and if you want to scale or resize it then you can.
you can find the file from file tab on the top of the webpage and edit it according to your requirement

Step- 1 Starting with Partworks software for making G-code of the file.
- When you open your file, you will need to set-up the dimensional parameters of the workpiece such as, length, width, thickness and zero of the machine, centering the job or setting zero at some co-ordinate.
- Here in the window the drawing is divided in different layers to avoid continuous long time cutting and to prevent from any uncertain situations like bit breakages or electricity breakdown, etc.

Step-2 setting up the basic things before making the g-code.
- You will need to delete the duplicate objects from the drawing and join all the closed path objects as one object, because for the closed objects machine will make a single path and it is not joined then machine will not be able to differentiate the path for on the line, outside or inside cutting.
- we can do cutting operations, drilling operations or pocket operations with this software. Here, for our drawing i made a cutting toolpath.
- Depending upon the material thickness and hardness we choose drill-bit size and shape, speed and feed rate.
- I am here using 7 mm MDF;
- bit: 1/8 up-cut bit because of very small objects and small radius
- speed: 7500 rpm
- feed rate: 1.5
- plunge rate: 1.5

Step-3 Setting Z-zero and doing spindle warm-up routing
- spindle warm-up routine is done before starting it first time in the day
- check motion in all the direction before starting the milling.
- workpiece can be mounted with the clamps or screws, we can use any of them in our milling.we are using screws.


Starting spindle warm-up routine and then giving prepared G-code to the machine.
Always start the spindle first and then start the cutting
Step-4 Starting the cutting
- Start cutting by pressing start button on shop-bot screen and browsing the file.
Precautions before starting the cutting:
- Use Safety glasses
- Wear Safety glows
- Wear mask

Step-5 Completion of all four corners in first two layers

Completion of next layer

Almost there to finish


Done
Post precess:
- Finishing the edges of the final piece with brushes, sand-papers, wood-files.
- Different bits gives different finishes to the edges and in most of the cases it needs to be finished by human hand after cutting.
UN-clamping the material and cleaning the bed with vacuum- cleaner.

Painting!!!
- Most fun Part of the process.
- It has been painted with plastic paint to give a protective layer.
- We can use different types of paints such as plastic paint, oil paints, etc on different materials after cutting.

Finally On the wall

Taps and ramp
- taps are used to help holding the part which has been cut.
- It is a bridge between the material and cut part.
- Ramp is inclined direction of cutting tool when it starts cutting any object to prevent the bit from high pressures and forces on the material.
Clamping of raw material is very important for safety purpose.
- It should not intersect with cutting toolpath.
Types of clamping the material.
- plastic clamps
- C clamps
- Screwing with bed
- Two side cello-tape.
Notes:
