Composites

Assignment: Experiment with making composite materials.
My personal goal: Experiment as sustainable and non-toxic as possible
Learning outcomes:
- Demonstrate workflows used in mold design and construction
- Select and apply suitable materials and processes to create a composite part
What to do with moulds and composites
There are different types of materials which can be used to create composite structures. Composites can be seen as a system in which the characteristics of two components are combined to make it typically stronger and more flexible. Molds can be used to shape a product of composite materials which can be made by the shopbot (using e.g. foam) or laser cutter (using e.g. cardboard). All my fellow fabbers used epoxy resin in combination with burlap / linnen fabrics, as this was also explained in local class. While this is a great way to create strong and lightweight products, after learning about the toxicity and safety precautions that should be taken (even more for fiber glass resins), I knew this was not the best way for me. But now, what then?
My solution: Using sugar water for stiffening (recycled) fabrics
Life is sweet
After looking at various options (e.g. glue, using starch spray, liquid starch, paper pulp) I decided to experiment most purely and naturally with the sweetest option: sugar water (in combination with fabrics and thread).
How?
- Get sugar (I used biological semi brown crystal sugar, for a semi-vintage look)
- Decide what to make. I opted for making:
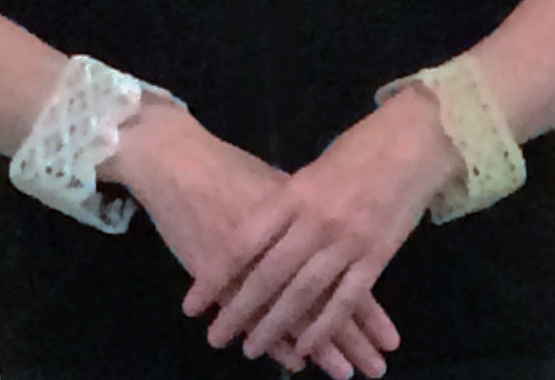
- rectangle bracelets -inspired by Joelle's composite necklace
- vase bottles <secret> for future idea< /secret>
- a two layered coater to experiment with extra thickness
- covering for the electronics of my final project
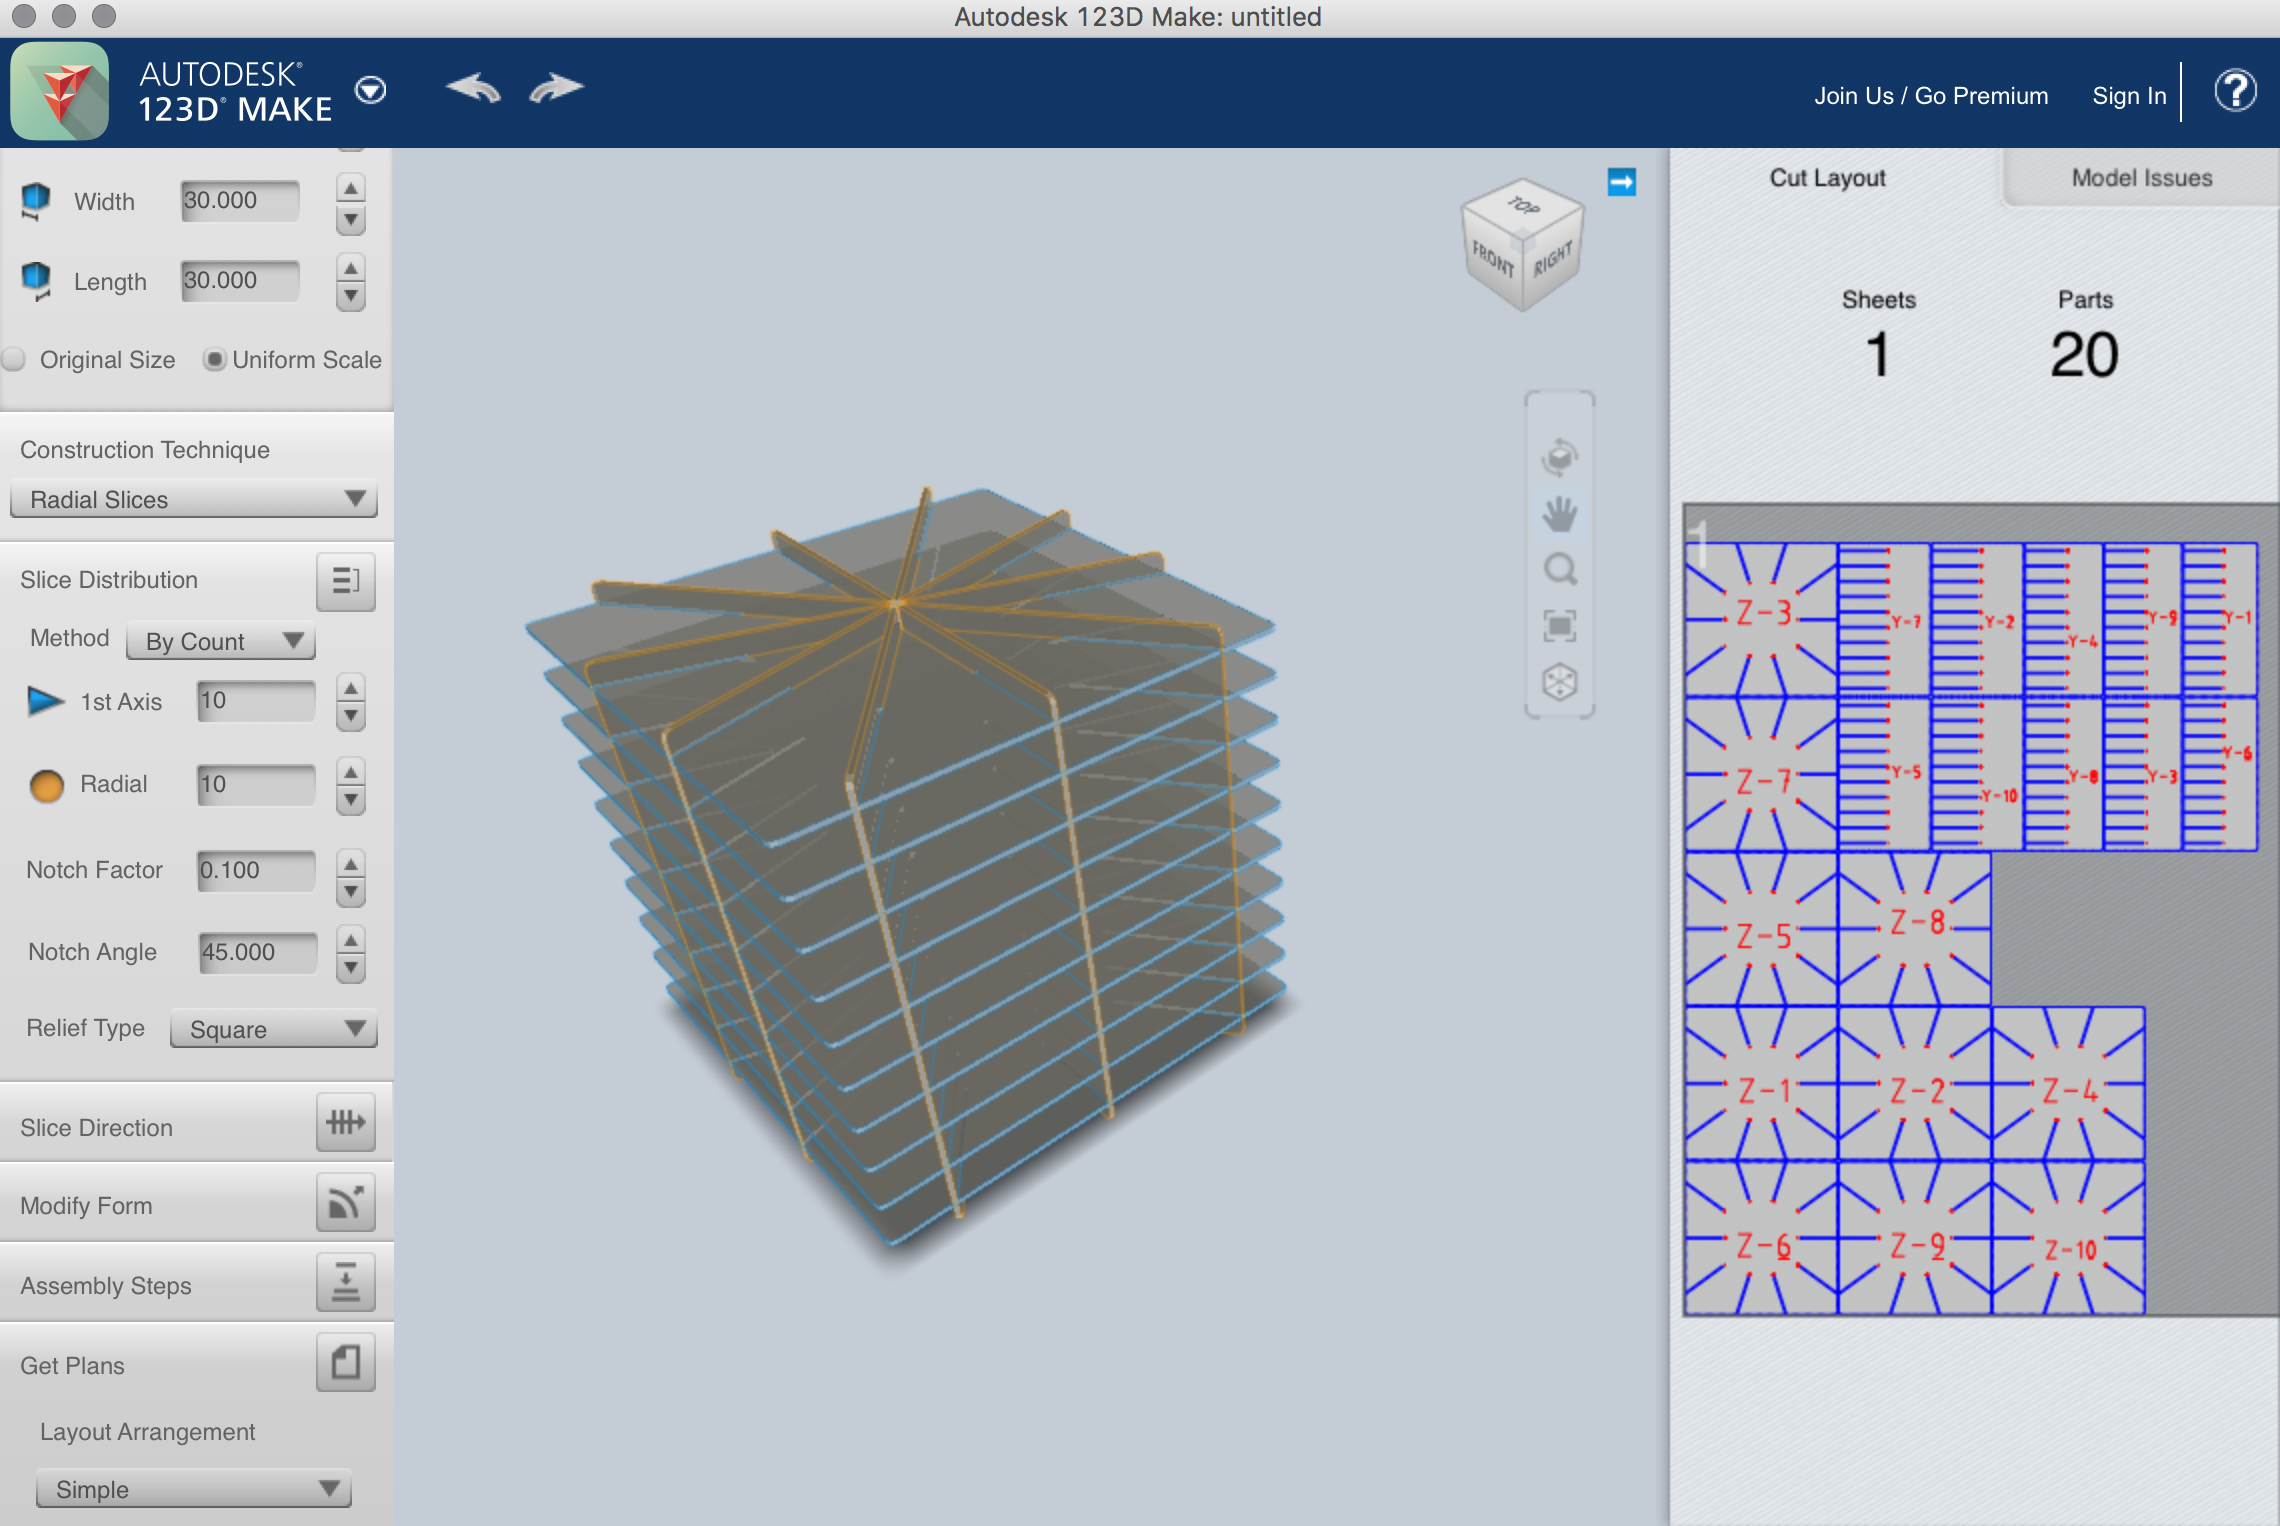
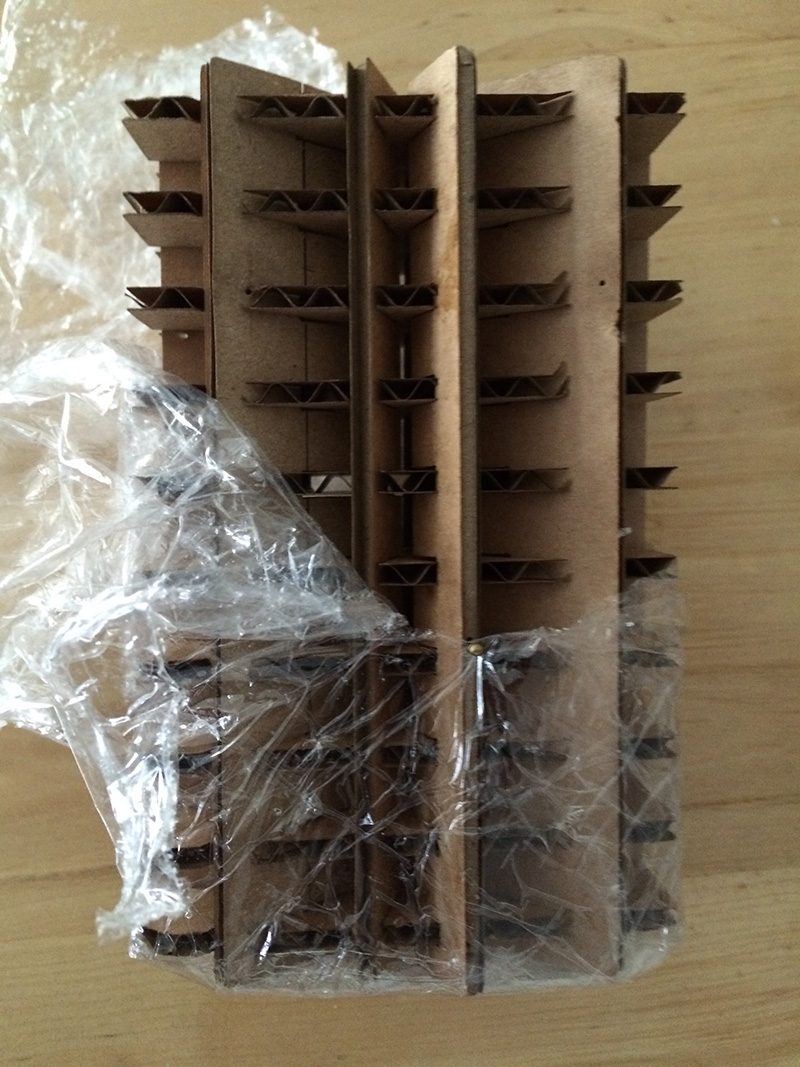
- Design the core and mold around. I used 123D Make and laser cutter for creating rectangle honey comb shapes of different sizes, also recycling laser cut files and temporarily sparse card board from Week 3. Additionaly, inspired by last week recitation, and the "How not to make" thought, I also used recycled plastic and glass bottles as a comparative core to mold around.
- Cover mold form with protective plastic layer wrapper -so to use it again (could additionally use vaseline, but not standard for this approach)
- Add water 1:1 (used two cups of sugar and two cups of water -plenty for making multiple composites)
- Let it boil for a couple of minutes (while stirring)
- Let it cool a bit
- Prepare / dry run with the cores and soft material (I used crochety type of fabric material and also ±3mm cotton thread) for molding around
- Soak the (soft, fabric) material in the sugar water
- Fix the mold around the core (I mostly used pins)
- Let it dry (could use vacuum bag to accelate the process, though most people I saw using this technique just let it be for 1-3 days)
For a sustainable future
As the textile industry is one of the most polluting in the world, I think using sugar water as a stiffener could also be an interesting and sustainable way for upcycling textiles.
Other ways for stiffening fabrics
Textile hardeners: Powertex, Waterglas (Na2O3Si), Wiltex, Paverpol, Keracoat and Pretex.
The advantage of such hardeners is that these can be used for various materials. I found that the disadvantage of these materials is that the exact (chemical?) ingredients are hard to identify.
Vlieseline: With (sticky or non-sticky) vlieseline you can give your fabric more shape and stabilize garments. Vlieseline is particularly used for in-material sewing.
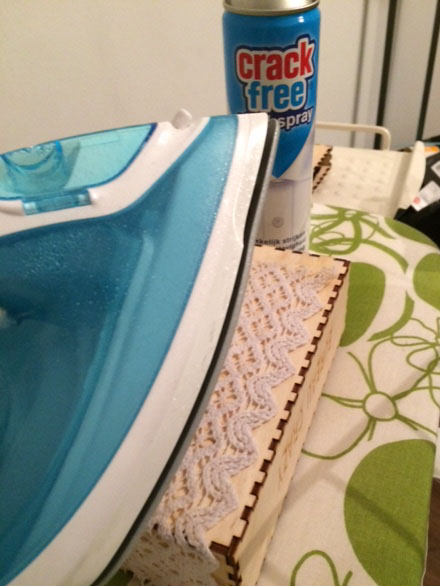
Other options: Crack Free, iron aid. It was said to be made from 100% rice starch (thus very natural) and was recommended to me by older experts. Update: After purchasing Crack Free and experimenting with it (e.g. for making a wrapper around the laser cut casing for the electronis of my final project), I unfortunately found out that it was not so natural after all (as it contained unlisted parfum and toxic kathon substance). Also, even though you could increase the dosage, I found it to be much less sturdy than the sugar water method.
Update: sweet result
The laser cut shape that I used to create the composite bracelets remained in tact, thanks to the protective transparant foil. The composites also turned out to be sturdy and nice, so now with the unaltered laser mould it is still possible to create even more fashionable pieces. I also designed more honey comb structures (with 123D make, but for these purposes, one could also easily use the on-line Maker case tool) as a core for molding bigger, 30cm³ (box) composites.
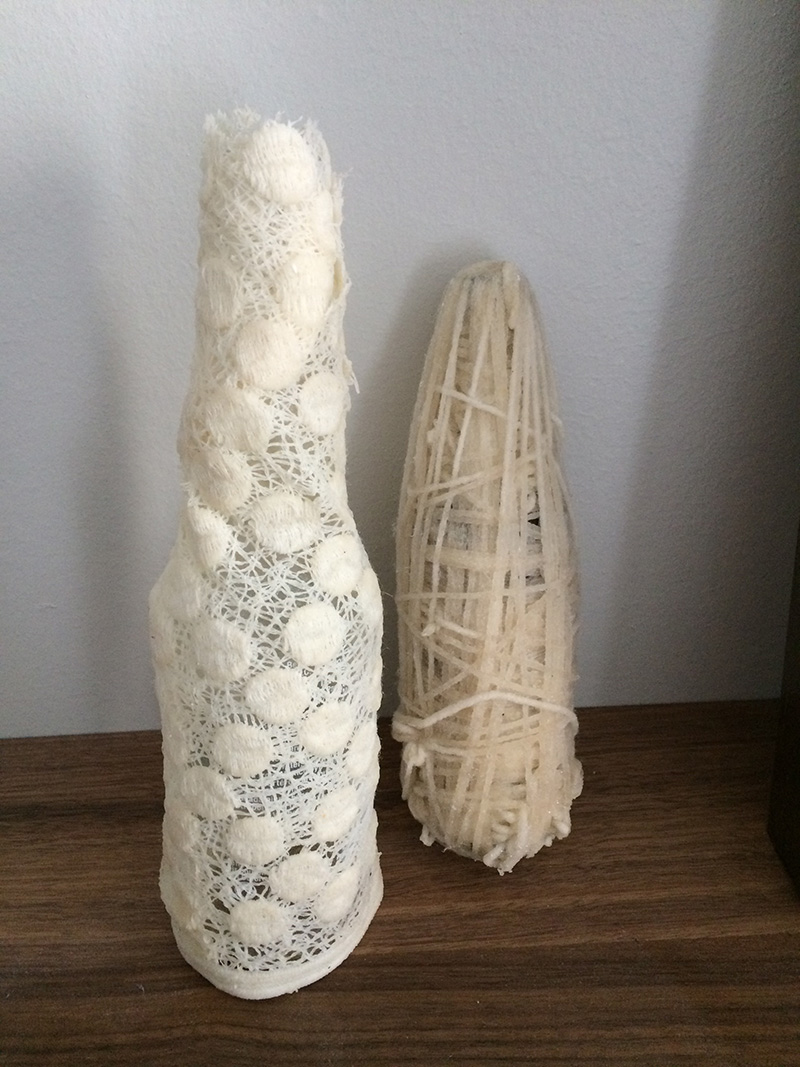
 The other, bigger composite pieces created with plastic and recycled glass (30 cm in length) bottles also turned out well and sturdy. With card board however, it is easier to fix the material to it with pins. Yet the glass also has its advantages over a cardboard laser cut form, as in this case it can be used as a recycled, solid and water tight vase. The plastic composite bottle will be easier to remove, cut and shape, but right now I like all the pieces as is.
 I made a video to show how sturdy the 'sweet' composites are now using 'knock testing'. The bracelets are strong enough to hold a car ;-)!
I have
- Shown how I made the mold and created the composites
- Described problems and how I fixed them
- Included my design files and ‘hero shot’ photos
Files
- Rectangle shape for molding composite bracelets: .ai and .3dmk files
- Larger (30x30x30cm) boxy shape* for making a huge bracelet >belt, box, bin, etc: .ai and .3dmk files
- Simpler (30x30x30 cm) shape for similar composite molding purposes*: .ai and .3dmk
*Added bonus for reviewers

 | 2. vacuum bagging")


 honey comb core")


 thick coaster composite covering LED electronics of final project")
